Master Airbrush Art – Best Guide to Using an Airbrush for Beginners
This post may contain affiliate links. We may earn a small commission from purchases made through them, at no additional cost to you.
Many artists like to experiment, and sooner or later come across the subject of airbrushing. But what exactly is airbrushing? In this airbrush tutorial, we explore everything that you need to know about the airbrush technique, the different types of airbrush guns available, and how to airbrush for beginners. We also explore the difference between single-action airbrush sets and double-action airbrushes, and help you decide on the best product for your unique artistic needs!
What Is Airbrushing?
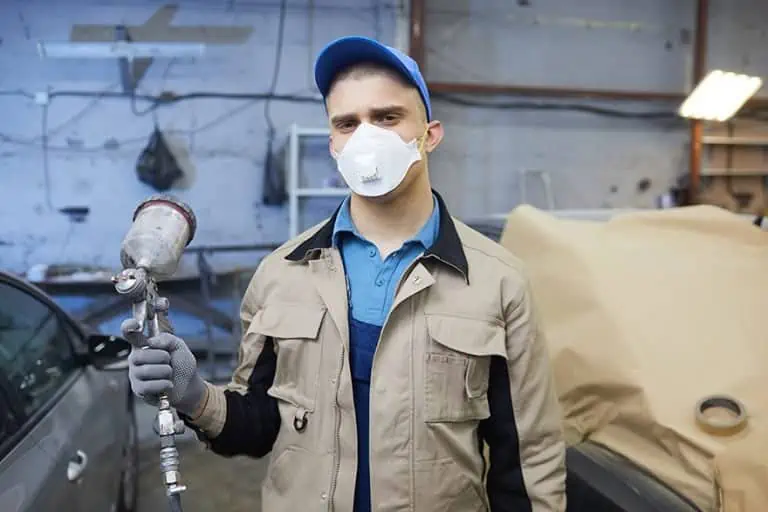
Airbrushing was originally used in the car paint shop to create particularly even and brilliant colors. However, more and more artists are using the airbrush technique, because it offers many possibilities to let your creativity run free and is not difficult to learn. All you need are the right accessories, a steady hand, and patience. But what exactly does airbrush mean?
Airbrushing involves spraying paint onto a surface with a spray gun, also called an airbrush gun. The necessary airflow is generated by a compressor. Different nozzle sizes are available for the gun so that everything imaginable can be painted, from tiny details and beautiful color gradients to covering large areas. For mastering the airbrush art, everything the artist’s heart desires is available, from single accessories to complete sets. In terms of price, there are great variations; low-budget airbrush sets, as well as real luxury airbrush kits, are available on the market.
Why Is Airbrushing so Popular?
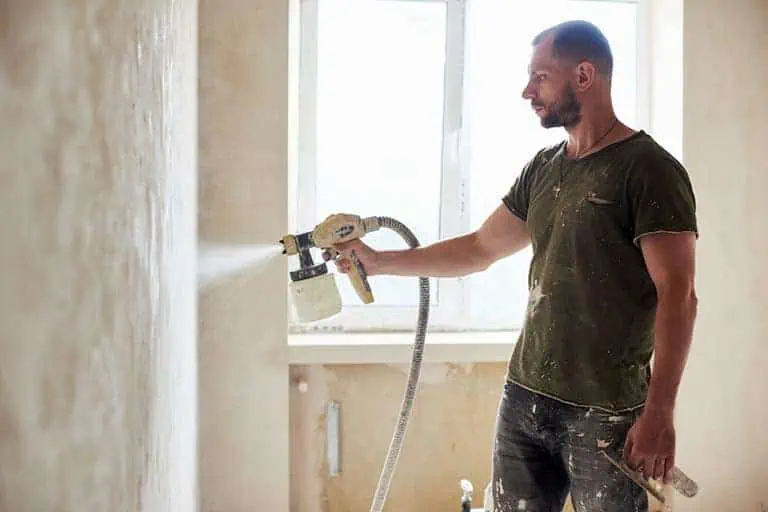
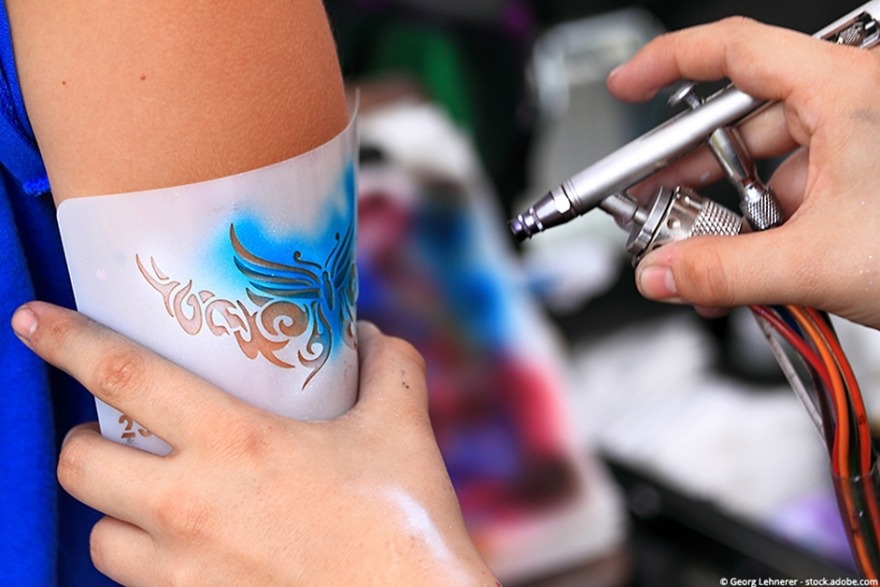
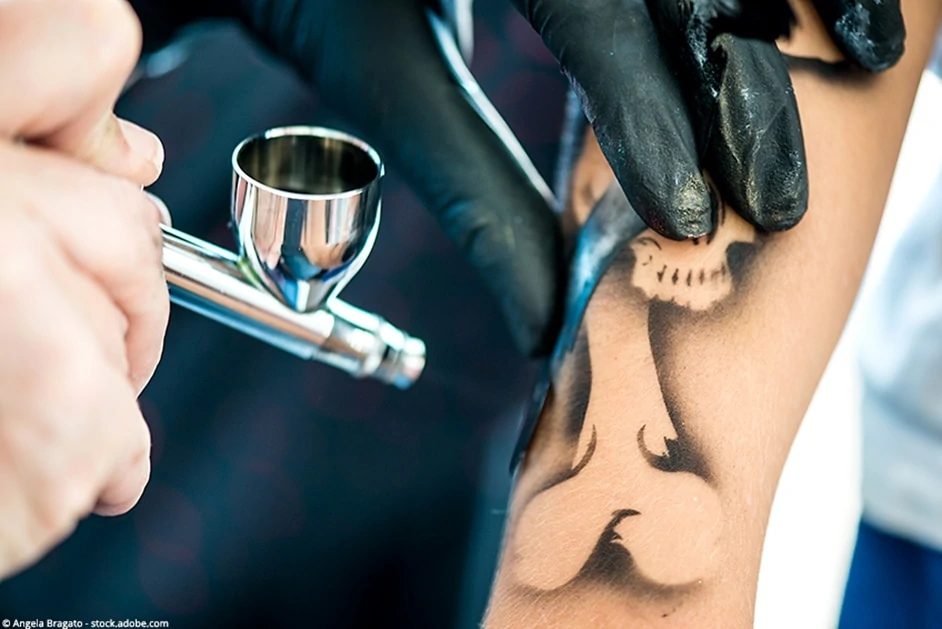
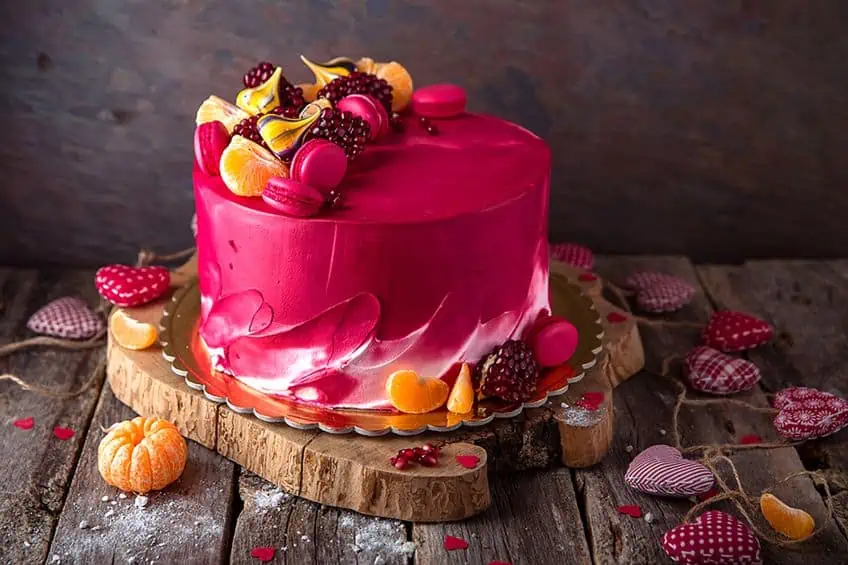
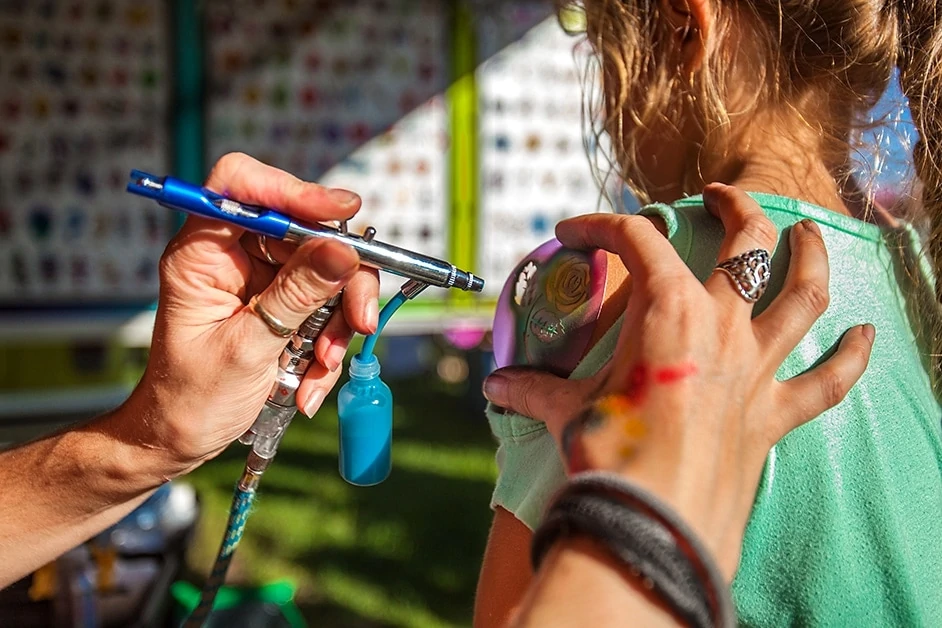
Airbrush art is enjoying growing popularity and for good reason. It offers the artist many advantages and can be used to create very interesting and unique effects. In principle, you can use airbrush techniques on almost every surface, including textiles, cars, canvas, skin, fingernails, and even foodstuffs like cakes and biscuits.
You can use different types of airbrush guns to create many varied effects, including fine details, impressive color transitions, and different opacities of color gradient.
Depending on the types of airbrush guns that you choose to use, you can get different nozzle sizes, that allows you to spray on point or quickly fill large areas with stunning color. Almost all paints are suitable for airbrush techniques so long as they are highly pigmented. With thinners and good pigmentation, you can easily mix your own unique color variations.
Applications for Airbrushing
Airbrush techniques are extremely versatile, allowing you to create beautiful designs on almost any surface. As a result, almost every artist can benefit from learning how to use different types of airbrush guns. Here are some of the most exciting and interesting applications of airbrush for beginners and professionals alike.
- Designs with airbrush on shirts and other items of clothing
- Body art, temporary tattoos, and face painting
- Food art and decoration on cakes, biscuits, and pastries
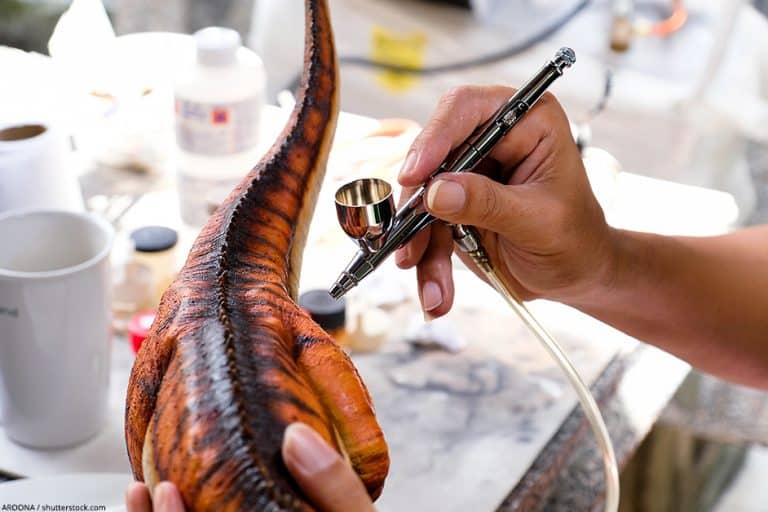
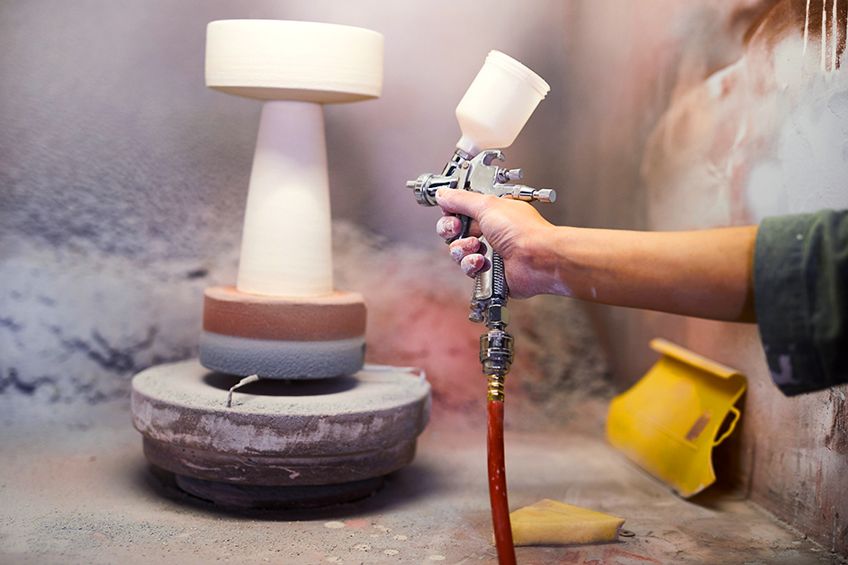
- Painting models and statues
- Custom painting on cars, motorcycles, and helmets
The Tools Needed for Airbrush for Beginners
If you want to begin exploring different airbrush techniques, there are a few peices of essential equipment that you will need. You will need an airbrush gun, the accessories like the hose and connections, and of course an airbrush compressor. It is also a great idea to begin with three to four different nozzle sizes, allowing you versatility in your artworks right from the start. Let us take a look at what you should look out for in each of these pieces of equipment, to give you the best outcome and make your airbrushing journey as easy as possible.
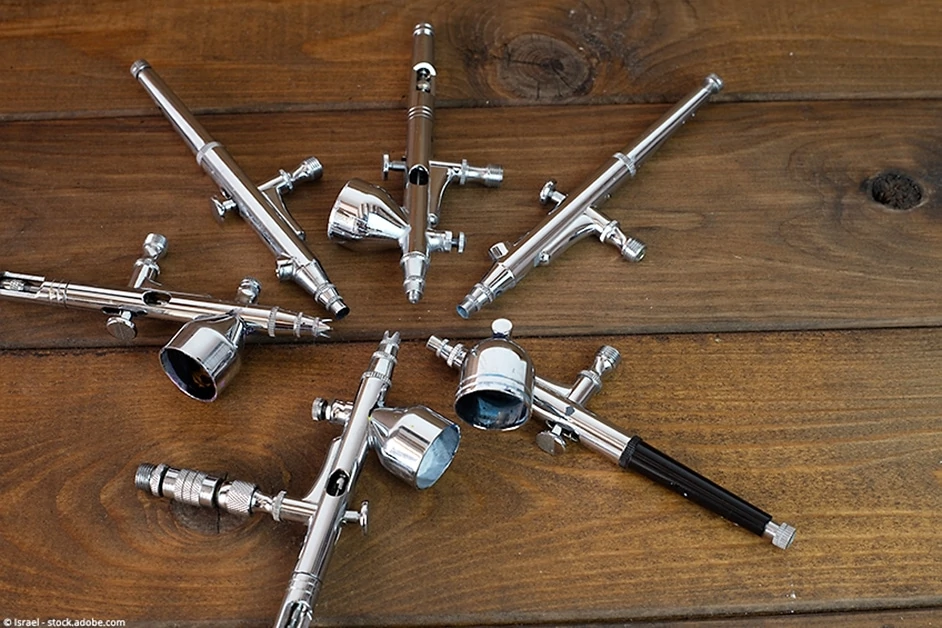
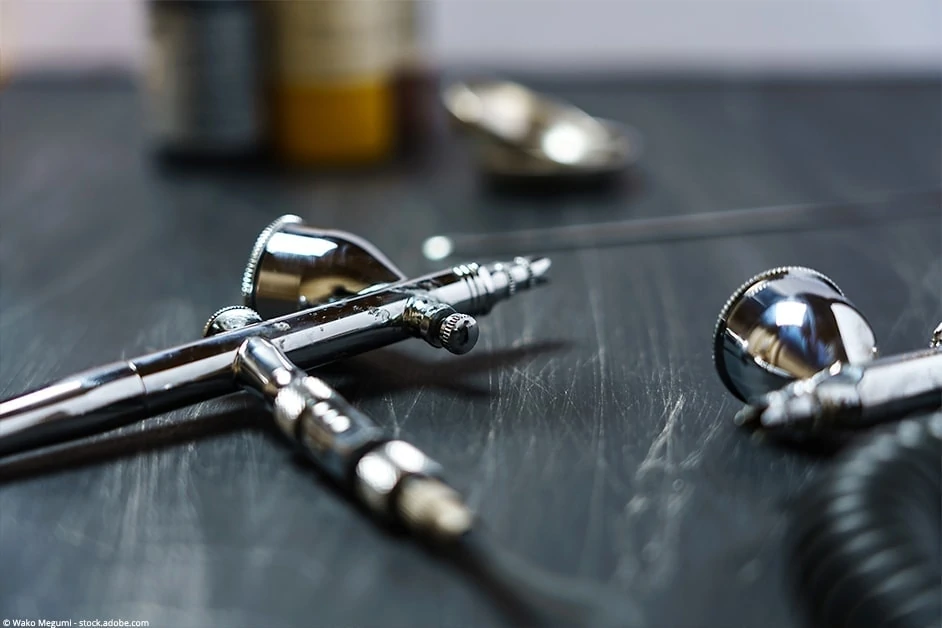
The Airbrush Gun
Generally speaking, there are two different operations of airbrush guns: Single Action and Double Action. Both have their advantages and disadvantages. The single-action airbrush has two different controls that allow you not only to control the pressure and airflow, but also ensures a constant flow of paint. This type of gun is the perfect airbrush for beginners as it is absolutely sufficient for simple work. We do not, however, recommend a single-action airbrush for airbrush artists who want to begin exploring more difficult and technical skills. On the other hand, the double-action airbrush is the best option for artists who want to develop their skills over time. It is not as easy to use as the single-action airbrush, as it only has a single button for regulating the paint and air volume.
The Double Action, on the other hand, is especially suitable for artists who want to develop their skills over time. It has only one button to regulate both air and paint volume. It is therefore not as easy to use as the Single Action, but offers the user greater possibilities for development.
The Airbrush Compressor
The name compressor basically tells you exactly what it does. A compressor compacts the air to create a strong, constant, and adjustable air pressure within your hoses. When you press the pistol button, the compressed air flows out of the pistol and pushes the paint out of the gun. Apart from choosing the right airbrush and the right paint, achieving constant air pressure is one of the most important aspects of airbrushing. You should, therefore, be a little picky when choosing your air compressor because you want it to perform well and last for a long time. The ideal pressure that you should be looking for from an air compressor should be betwee 1.5 and 2.2 bar.
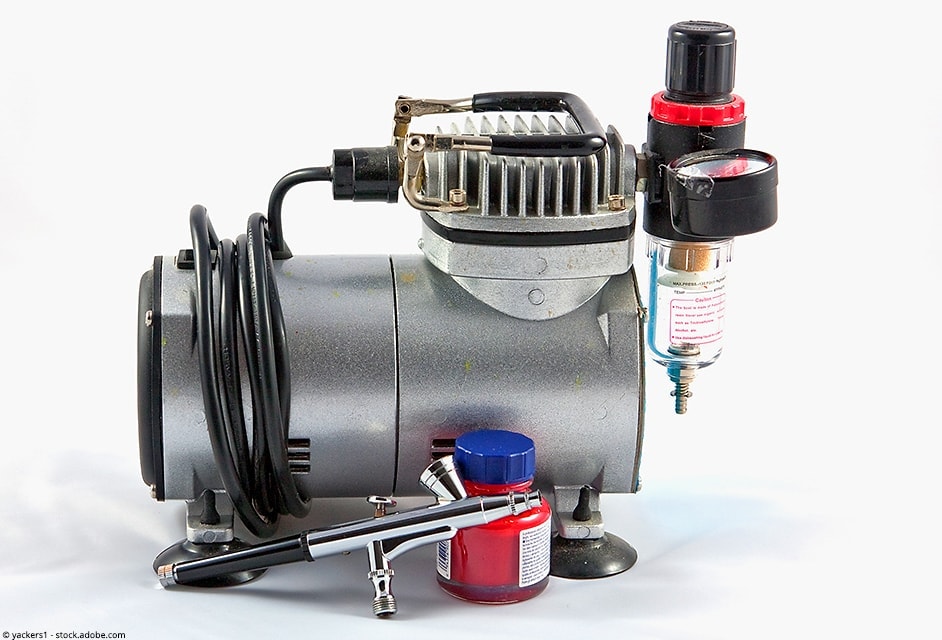
We recommend that you buy an air compressor with a built-in water separator. This component will ensure that you do not have any condensation water drops being pushed through your airbrush gun, diluting your color and creating unsightly speckles. You also want to make sure that you have a pressure guage that will help you regulate your pressure with more precision.
The Airbrush Paint
You have a wide choice of paint when it comes to airbrushing. It is essential that you choose the right airbrush paint. The paint that you choose depends on your project. If you are wanting to decorate cakes and other food items, then you need to have a food-safe paint. For military models or other statues, matt colors are your best option. One of the most important considerations for airbrush paint is high pigmentation.
There are two general types of paints that you can use for airbrushing, either water-based or lacquer-based paints.
Lacquer-based paints are potentially hazardous to your health, so you should always wear a respirator when using them. To clean lacquer-based paints from your airbrush gun you will need acetone or another suitable cleaning agent. Water-based paints, on the other hand, can easily be removed with clear water. They are not considered hazardous to your health, but you should nevertheless take care of your safety when working with these paints.
When you are deciding on a paint, you should also keep in mind the nozzle size. Paint with large pigment particles is not suitable for a very fine nozzle. The nozzle can quickly become clogged when you use it. It is therefore worth buying a relatively large range of paints, as well as using high-quality paints. If an artist goes to great lengths to create a work of art, only to find that the colors lose their brilliance after a while, which can be extremely annoying.
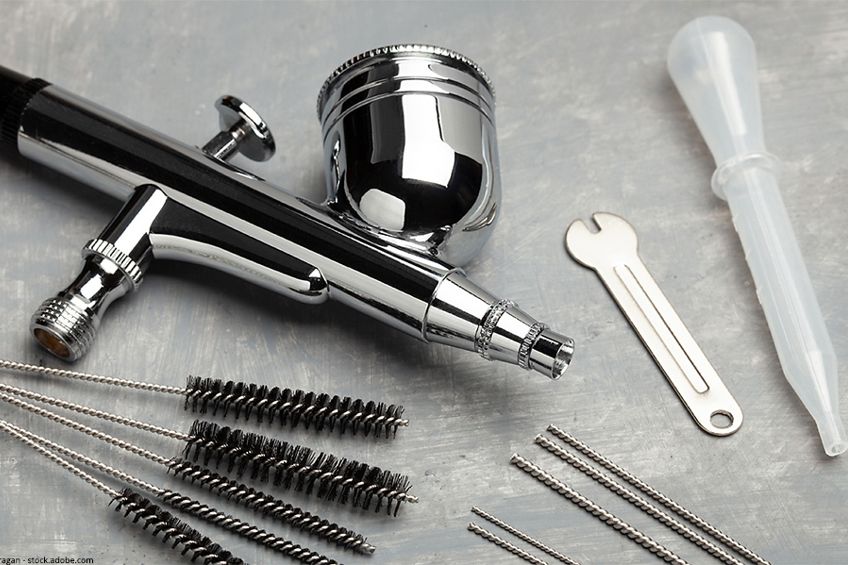
Other Useful Airbrush Tools
Apart from the paints and technical aids such as compressor and gun, there are other useful tools for airbrushing. In the following, we will introduce you to the most important of them.
- Cleaners: The type of cleaner you use after you finish your work depends on the paint you use. We recommend that you use paints and cleaners from the same manufacturer if possible.
- Masking film: Masking film, or tape, is a stable yet flexible film that is adhesive on one side and which allows you to spray on sharp corners and edges, but also various other shapes.
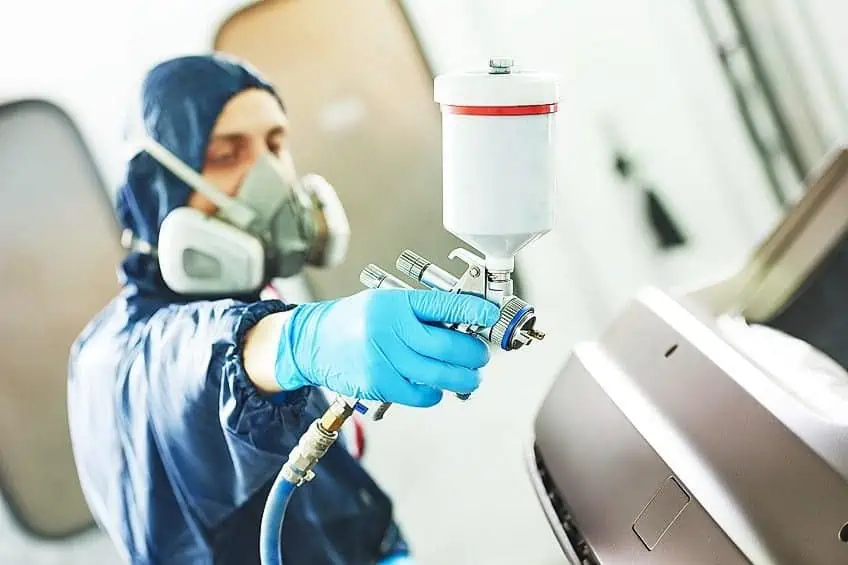
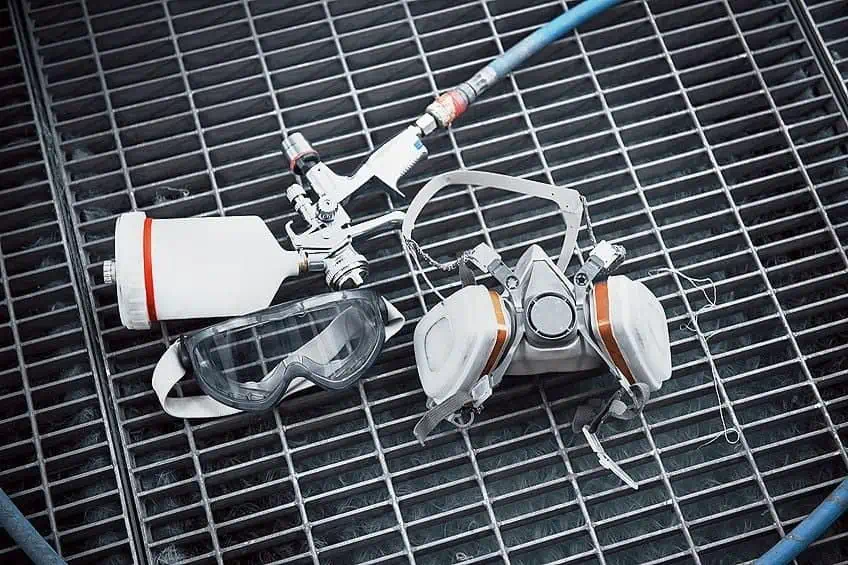
- Respirator: Always think about your safety when working with an airbrush. A respirator is a must, especially when working with lacquer-based paints. Depending on the type of paint you use, you may need a particle or gas compatible respirator with minimal leakage.
- Suction system: This is used to suck off the spray mist created during airbrushing. An airbrush suction system is not absolutely necessary, but definitely useful, as it reduces – in addition to the respirator – the health risk in artistic work.
- Various small glass containers with tightly closing lid for storing self-mixed paint.
- Airbrush paper is a thick paper used specifically for airbrushing.
- Pencils to sketch your work.
- Cutting knife for cutting the masking film.
Finding the Best Airbrush for Beginners
So, you want to buy an airbrush? As with all art supplies, there are many things to consider when choosing between the many different types of airbrush guns. From the price to performance ratio to the number of nozzles and the projects that you want the airbrush for, we will guide you through the process of finding the very best airbrush for beginners. It is typically not necessary to buy the most expensive and expansive airbrush set. Airbrush sets at the middle of the price range are the most suitable for all general applications. We do always advise steering away from the cheapest types of airbrush guns, as the needle tends to bend and the nozzles become clogged with only a few applications. You also need to consider whether you want to buy simply the airbrush gun, or the gun with a compressor. Typically, it is a good idea to have the compressor included if you are new to the airbrushing game, but if you already have the compressor and you are simply looking for a new airbrush, then we have a suggestion for you too!
How to Use an Airbrush for Beginners
Airbrushing does not require a lot of previous knowledge, only practice, time, and patience. Before you begin, prepare everything you need. Always having to rummage around for accessories not only costs you valuable time, but gets on your nerves and breaks concentration. Once you have prepared your materials, you can start.
Take Care of your Health
Before you begin airbrushing, it is essential that you take the proper steps to protect yourself. The health risks of working especially with lacquer-based paints, should not be underestimated when airbrushing. Many of the substances contained in the paints are inhalable. Therefore you should always pay attention to safety and wear an airbrush respirator. Which one you need exactly depends on the paints used. The FFP3 mask is definitely the safest, but not necessary for most paint manufacturers. A mask with less protection is usually sufficient.
If you want to be safe and take absolutely no risk, use both a respirator and an exhaust system.
The latter ensures that toxic fumes in your environment are filtered from the air. In addition, you should always ventilate your workplace well. As with all paints, if airbrush paints come into contact with your eyes or mucous membranes, wash them out well for several minutes and consult a doctor immediately. Take the packaging of the paint with you to show it to the doctor.
Setting Up Your Airbrushing Equipment
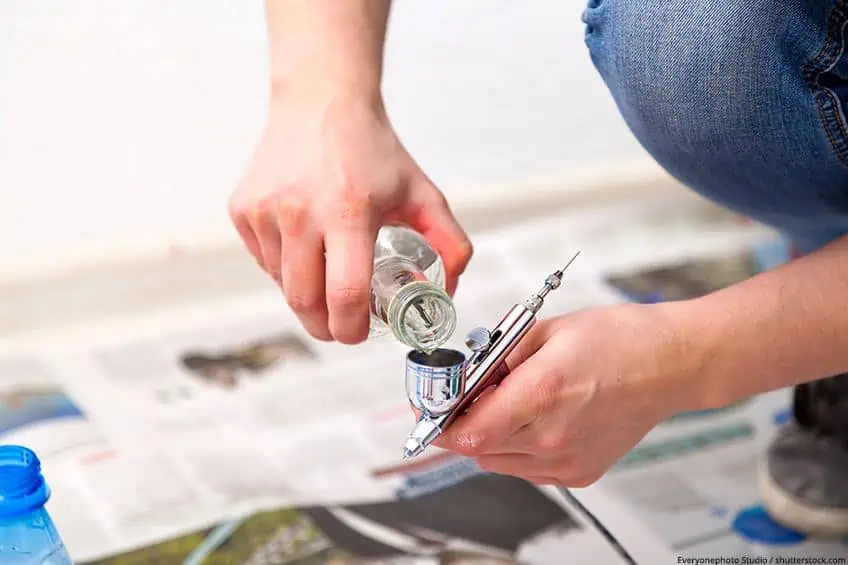
First you connect the gun and the compressor. Then connect the compressor to the power supply and fill the paint cup of the gun. You should have already mixed the paint before. It is also recommended that you dilute paint developed for airbrushing a little to achieve better paint results. In addition, the nozzle size must be used to match the paint. Low-pigmented paint should not be sprayed with a fine nozzle, otherwise it will quickly clog.
Now you can already start coloring your sketched work. With downward pressure you adjust the air through the gun. Then a gentle pull to the back takes place. In this way you regulate the amount of paint used. The more you pull and the longer the pistol stays in one place, the stronger the sprayed paint becomes. When you are finished with a spot, you must first stop the addition of paint and then stop the air flow. Otherwise, ugly splashes of paint will appear on your art object.
Step-by-Step Instructions for Airbrushing
Before you start your first real work, we recommend that you first try your hand at a few simple forms. Take a sheet of sturdy printer paper and alternatively spray thicker and finer lines and even larger areas. Spray circles, squares and triangles. Take your time and develop a solid basic feeling for your airbrush gun. Also experiment with different distances to the painting surface.
See how the intensity of the paint changes the longer you spray at a certain point and think about how you can use different shades of paint for your later work.
The more layers of paint you spray on top of each other, the more opaque and darker the colours become. We advise you to experiment without expecting too much. Let your imagination run wild and see what you can do with the paint and how different spraying techniques will work on your painting. Also try out color gradients and different mixtures. If that works out well, you can start with your first piece of art. Follow our step-by-step airbrush instructions:
- The sketch: It is best to make a pencil sketch first, or use ready-made stencils such as airbrush templates. This way you already have a good idea of what the picture would look like later. Use a hard pencil and not too much pressure. Better draw loosely from your hand.
- Masking tape: To spray the edges as sharply as possible, you can use special masking tape. This is cut to size and glued to certain areas of your picture to protect them from the sprayed paint – you “mask” the picture. You can also use masking film over the entire image and then cut out certain areas. Stick the masking film on first and then cut it to size with a sharp knife, for example a cutter knife. Be careful not to damage your image. If you want to get blurred edges, you can work without masking film, because spraying always creates a fine mist anyway, which blurs the edge. If you peel off the pieces you have cut, don’t throw them away immediately, because you might want to reuse them for further processing of the picture.
- Preparation of the tools: Now you can connect your gun to the compressor and adjust the pressure you need for the chosen nozzle and paint. It is best to follow the manufacturer’s instructions. Now fill the paint container of the gun with the paint that you have diluted with the fluid medium. Do not fill the container to the brim, otherwise the paint may drip out and spread unintentionally on your object or clothing. A few drops are enough.
- The first application of paint: Now comes the actual artistic creation, where you can be really creative – you fill your picture with color. An even application of paint is very important here. Above all it is one thing: a matter of practice. So don’t despair if this part doesn’t work very well in the beginning.
- Further masking: If you are finished with the first application of paint and want to keep some areas darker than others, you can apply masking tape again to protect parts of the picture. This way you can also apply nice shades without creating annoying speckles.
- Speaking of shading: With these you can effectively set your picture in a scene by spraying black paint lightly over certain areas at the end. Pay attention to the incidence of light: For example, if your light source is supposed to be in the upper left corner of the picture, there can be no shadow there.
Your project is finished when you are satisfied. Just try yourself and always remember that airbrushing is above all a question of experience. Don’t give up so easily; with a little practice you too will create a great piece of art.
Some Important Airbrush Techniques
In principle, airbrush techniques can be divided into three different categories. Firstly you have the creations of fine and crisp lines. Secondly, you will need to learn how to evenly fill and shade areas with color. Finally, you need to master accenting. Let us take a closer look at each of these techniques in a little more detail.

Airbrush Lines
Using an airbrush is not so easy when you just start working with an airbrush gun. An even line is applied with a steady hand. But a steady hand when airbrushing is not everything: you should also make sure that the paint supply is not too high so that the line does not run.
Pay attention to the gloss: If the sprayed paint on the picture is shiny, it is too wet and you have to regulate the paint supply.
Airbrush Areas
Achieving an even surface when airbrushing is not as easy as it sounds. With some practice, however, this challenge can be mastered well. A steady hand is also needed here so that the surface does not become stained. Your hand should not cramp. Before filling in large areas, you should think of doing a few loosening exercises.A trick that works well is the use of serpentines, or S-shapes. Spray paint evenly, first from the top left to the top right and then diagonally towards the bottom left of your painting surface. Then fill in the remaining area, also in serpentines, and always use flowing movements.
Airbrush Accents
Color accentuations need one thing above all: practice. You have to find out for yourself how you want to create the incidence of light on your painting. If you notice that your shades are getting too dark – which makes your picture look hard quickly – dilute the paint in the paint container. Water-based paints can be thinned with a little water if necessary, while lacquer-based paints require a special medium. However, never use too much water to dilute the paint, as too much could lead to the paint cracking when it dries. If you want to paint light accents, there are three different possibilities:
- Apply white paint
- Do not spray a full covering, so that the white painting ground shines through
- Use a plasticine rubber and remove a little paint afterwards
Our Top Airbrushing Tips and Tricks
As with all art forms, there are of course also tips and tricks for airbrushing, with which you can achieve a good result even as a beginner. Practice always makes perfect, but it is always nice to know what you are doing when you first begin. Our biggest tip is that you should never give up. Your first attempts may be a little sketchy, but with perseverance, you will be able to nail the airbrush technique and create beautifully smooth works of art.
- If you discover errors in thin and fine lines, remember the needle of your gun – check whether it is still intact or bent.
If your gun does not spray cleanly or you notice that air is escaping from its paint cup, the nozzle may be affected. See if it is clogged or damaged. - If you want to spray accurately drawn edges, you must use airbrush templates, otherwise, the sprayed edges will always be a little blurred.
- Your painting ground should be free of dirt, that goes without saying. But even clean fingers leave dirt behind, namely the skin’s own grease film. This can impair the paint properties. It is, therefore, best to use thin cloth gloves when handling the painting ground.
- Small models can be placed on a stand where they can stand freely so that they can be sprayed from all sides. This way, you don’t have to hold them in your hand to turn them; this leaves no fingerprints and you can work better.
- Make sure you have a steady hand and a smooth swing when working with the airbrush. This is the difficult part of this art form. But as I said: Airbrushing is mainly a matter of practice. After some time you will get the hang of it.
If you are more sensitive to noise, look for a compressor with an air tank, because it only has to fill the tank once – very loud! – and then it is quiet. So you have more peace and quiet during your work.
Airbrushing is therefore not as difficult to learn for beginners as you might think. It is, on the contrary, a great way to let off steam artistically while honing your skills. We hope we could help you with our instructions and wish you good luck with your first airbrush project!
Frequently Asked Questions and Answers
What Is the Best Airbrush for Beginners?
The airbrush set you want to buy depends on the area of application and your ambitions. If you just want to spray a little bit every now and then, a cheaper set with a few accessories is sufficient. However, if you have the ambition to develop yourself into this art form, you can invest in a higher-priced airbrush kit with some accessories.
How Often Should You Clean Your Airbrush?
Clean your airbrush thoroughly after each use and also after each paint change, otherwise the next paint will mix with the previous one used.

In 2005, Charlene completed her wellness degrees in therapeutic aromatherapy and reflexology at the International School of Reflexology and Meridian Therapy. She worked for a company offering corporate wellness programs for several years before opening her own therapy practice. In 2015, she was asked by a digital marketer friend to join her company as a content creator, and it was here that she discovered her enthusiasm for writing. Since entering the world of content creation, she has gained a lot of experience over the years writing about various topics such as beauty, health, wellness, travel, crafting, and much more. Due to various circumstances, she had to give up her therapy practice and now works as a freelance writer. Since she is a very creative person and as a balance to writing likes to be active in various areas of art and crafts, the activity at acrylgiessen.com is perfect for her to contribute their knowledge and experience in various creative topics.
Learn more about Charlene Lewis and about us.