Acrylic Pouring Guide – Acrylic Pour Painting for Beginners [Tutorial]
This post may contain affiliate links. We may earn a small commission from purchases made through them, at no additional cost to you.
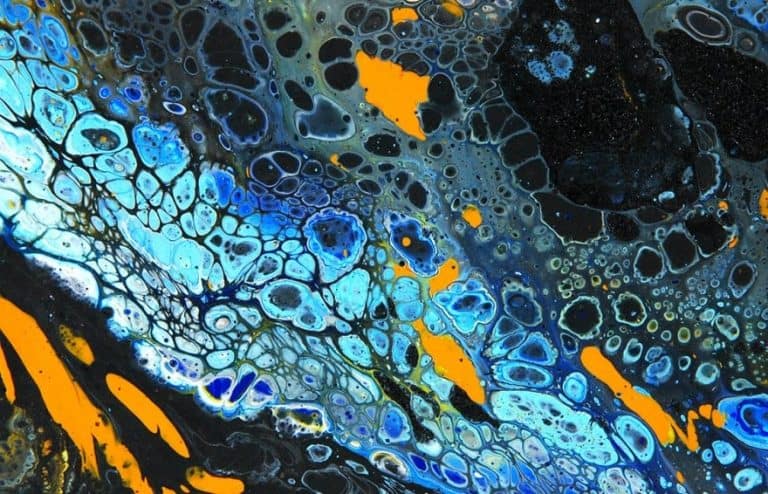
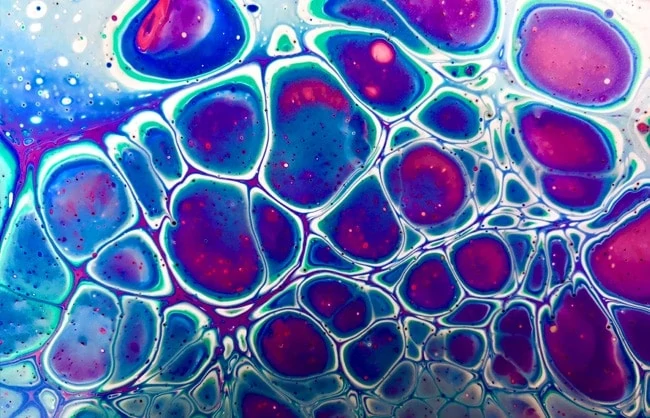
Acrylic Pouring is a fascinating fluid painting technique. It is based on acrylic paint, which can be brought into a liquid, pourable consistency with the addition of a Pouring Medium and other additives as required. Depending on the technique, this liquefied paint is then poured into each other or tilted onto the canvas and distributed by tilting the painting surface. Depending on the choice of paint, the medium, and the additives, different effects are created. In this detailed article, we show you how Acrylic Pouring works, which techniques are available, and which pouring supplies you need.
Acrylic Pouring is Simply Brilliant!
This relatively new art form, which has its origin in the USA and is also finding more and more followers in the rest of the world, is simply brilliant. And these are just some of the reasons:
- Suitable for beginners: For the acrylic flow technique you don’t need any previous drawing or painting skills. From small to large everyone can indulge in this hobby.
- Little material needed: You only need a small number of supplies to start pouring acrylic.
- Also for busy people: You don’t have to invest half a day for an acrylic pouring artwork, as you can pour a complete painting in half an hour.
- Fun without end: What acrylic pour painting offers, above all else: The high fun factor! It is simply unbelievable fun to mix the different acrylic paints and to create a small work of art without much effort.
What do you need for Pour Painting?
The main components for acrylic pour painting are, besides the acrylic paint and a Pouring Medium, of course a painting ground. Depending on your needs, you can add further additives such as silicone oil for cell formation and a few auxiliaries and tools.
How do you Pour Paint for Beginners?
The acrylic paint is mixed with the pouring medium and provided with further additives such as silicone oil. The consistency must be such that it flows well but is not too thin. Then this color mixture is poured onto the painting base, tilted or emptied.
This depends on the pouring technique and your own taste. The result is an individual work of art that can hardly be reproduced again. There are unbelievably diverse possibilities, starting from the color combinations, different acrylic paints from different manufacturers, as well as various additives and of course the techniques.
You can also use an Acrylic Pouring set, which already contains the pouring medium and the acrylic paints.
Best Acrylic Pouring Kit – U.S ART SUPPLY Acrylic Pouring Paint Set
If you are a beginner with acrylic pour painting or are looking for a complete set to get started in this technique, then the acrylic pouring paint set by U.S Art Supply would be a brilliant choice. This set features 8 dynamic ready-to-pour paint colors that already have the perfect viscosity for the pouring technique. All that is needed is to pour them straight into the mixing cup and get started.

- Pick from 8 dynamic Ready to Pour acrylic paint colors. They are ready to go straight into the mix cup, and perfectly formulated to tilt, swipe, and puddle
- Pouring Masters Silicone oil and Pouring Medium may also be added to adjust viscosity and create additional cells
- Ready to Pour colors are formulated with a viscosity (Thickness) that is ideal for ACRYLIC POURING right out of the bottle that creates exceptional cells and Color Movement
The set includes a bottle of gloss pouring medium, as well as silicone pouring oil. This means that you can achieve all sorts of different effects and pouring styles with just this single kit. The acrylic paints can be mixed easily, allowing you to achieve a versatile color range.
You may need to buy some extra bits of equipment, like wooden sticks, paint cups, or latex gloves. However, this kit has everything you need to get started on your first pouring artwork, and it offers excellent value for money considering that you get a complete ready-to-pour set.
Pros
- A complete set to get you started in pouring
- Suitable for a range of pouring techniques
- Includes vibrant, versatile colors
- The pouring paint is the right consistency
- Premixed and easy to use
Cons
- You may need more pouring medium
- The kit may require additional sticks and mixing cups
Pour Painting Tutorial
To give you an impression of how the Acrylic Pouring technique works, we give you a short introduction to the basic technique, the flip cup.
The first step for your Pour Painting
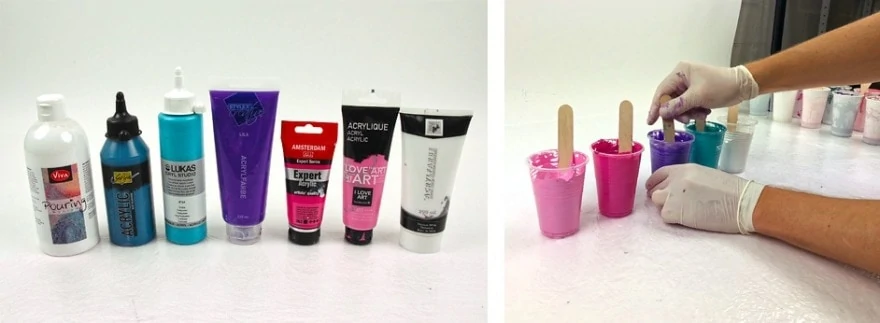
- Workplace preparation is the first step. Protect the work surface and floor with a plastic sheet or tarpaulin. Dried paint splashes and stains are difficult to remove, depending on the surface, and the acrylic flow technique often leaves traces in the form of paint off the canvas.
- Afterward, have all your equipment ready so that you always have everything at hand. Put on gloves so that you don’t have your fingers full of paint.
- Use a spirit level to check that your work surface is level. Otherwise, there is a risk that the poured liquid will run off the painting surface and ruin your painting.
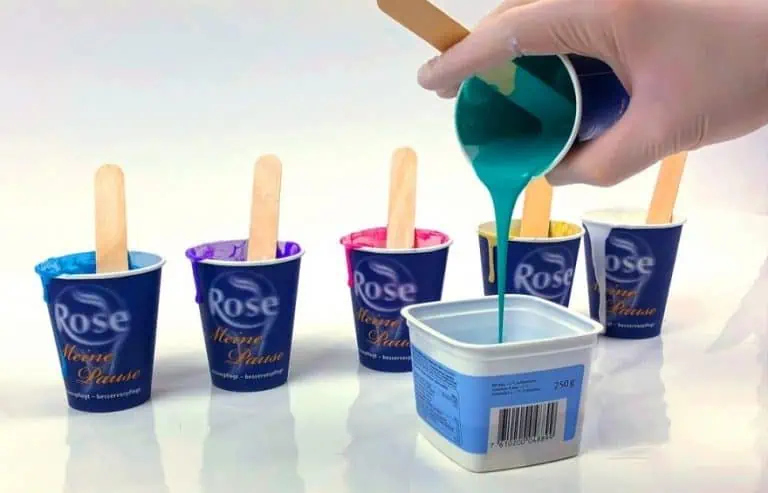
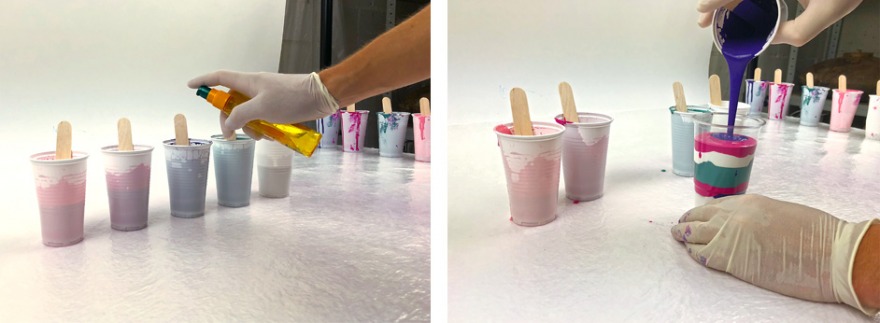
- Now you are ready to mix the paints with the Pouring Medium. Use a cup or container of your choice, put some acrylic paint in it, and then, depending on the pouring medium used, pour in the same amount or twice as much of the pouring medium. Mix everything carefully until it is a homogeneous liquid. The consistency should be like liquid honey. If the mixture is too thin, you can also add some water and mix everything again.
- If you want to have cells in your paintings, you can now add 1-2 drops of silicone oil and roughly mix it in.
- Leave these mixtures to stand for a while so that any bubbles can rise to the surface. If you start painting right away, you will have pockmarks everywhere on the surface. Some pourers make their mixtures one day before the actual pouring to avoid air bubbles.
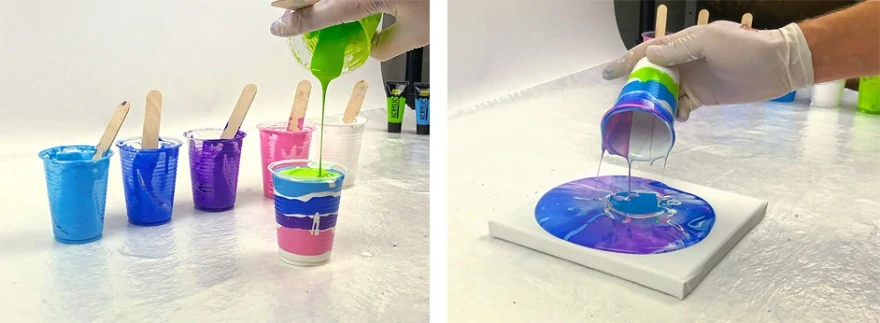
Now you can start with the actual pouring, here with the example of the Flip Cup technique:
- Take your cups with the pouring mixture and pour them alternately into a new, larger cup. The aim is that all colors form layers on top of each other
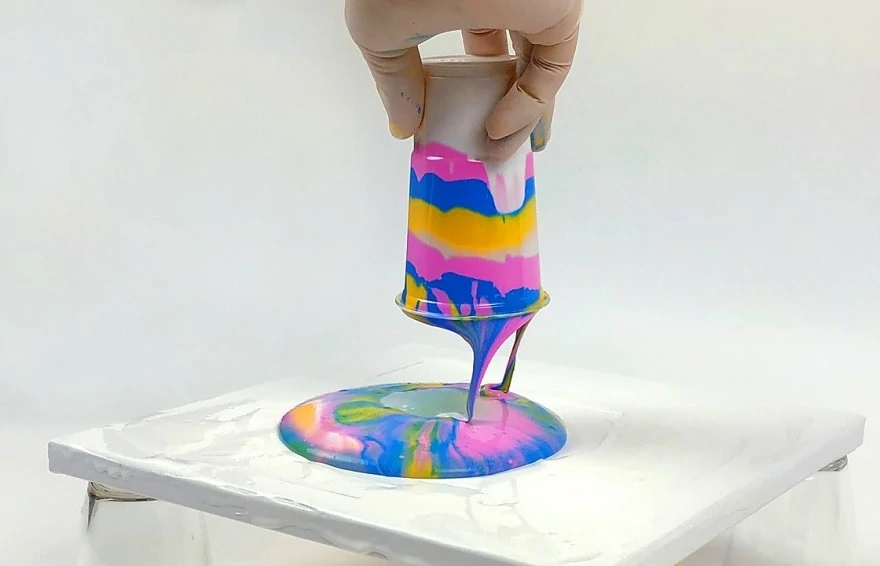
- Take your big cup and put it in the middle of the canvas without any paint spilling out.
- Lift the cup very carefully so that the paint runs out
- Move the cup back and forth in a very small circle until all the paint has run out of the cup
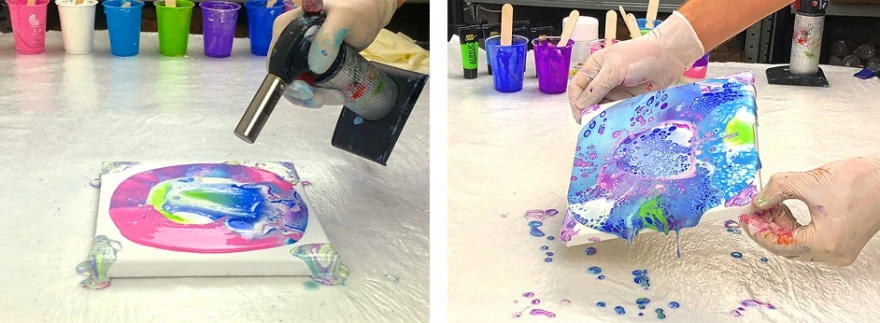
- Now you can take the canvas in your hand and spread the paint on the canvas by tilting
- Now is also the right time to blow over the canvas with a butane torch to let the cells pop up
- Also, don’t forget the sides of your canvas, these should also be covered with paint
- Make sure that the canvas lies level and let the painting dry for a few days – if possible in a room that is not too hot and dry to avoid cracks
You have created your first Acrylic Pour painting, congratulations!
The Flip Cup technique is only one of many, and we have a separate tutorial for all the other pouring techniques.
The Pouring Medium as an important factor
In Acrylic Painting, you use water to dilute your acrylic paints. This works well, but is not recommended for Acrylic Pouring. Water not only changes the consistency, but also the pigment density and the adhesion of the paint to the painting surface. This means that the colors are lightened and no longer so bright. Also, drying this diluted mixture is problematic, since cracks can appear in the paint surface due to the rapid evaporation of the water.
To avoid these negative consequences of dilution by water, there are special painting mediums, called Pouring Mediums in the technical jargon. These pouring mediums offer you some advantages:
- The adhesion on the painting surface is maintained.
- Despite dilution, the colors remain brilliant
- The flow behavior of the paint mixture is positively influenced
- Cracks during drying are all but eliminated
Therefore we strongly recommend using a professional, or alternative pouring medium.
Professional Pouring Medium
The products falling under the category Professional Pouring Medium were specially developed for use with the acrylic flow technique. In addition to the positive properties listed above, these professional products also offer the advantage that your works retain their color brilliance over many years, as the colors are not affected by acid or similar substances it contains.
Advantages and disadvantages of a professional acrylic medium:
Pros
- Long durability and color balance
- Improved flow properties
- No cracking during drying
- Brilliant colors despite thinning of acrylic paints
Cons
- Slightly higher purchase price
Best Acrylic Pouring Medium – LIQUITEX Pouring Medium
If you will be pursuing acrylic pouring, then a good quality pouring medium is necessary. This option by Liquitex is possibly the best choice out there. This is a gloss medium that helps to reach the perfect fluidity while still drying to an attractive finish. Basically, this means that it increases the paint flow while providing a high gloss finish.

- Liquitex is a high quality and proven pouring medium
- The Liquitex Pouring Medium is easy to use and dries silky shining
- Cells form relatively easily
This medium can be used in all kinds of pouring techniques and can help to achieve the perfect flowing color application. This pouring medium needs to be mixed with a soft body acrylic color in order to help with drying. With this pouring medium, you get a smooth even colored film across the paint. The pouring medium also helps the paint not to crack, craze, or hold bubbles when drying.
Pros
- A high-quality pouring medium
- Provides a glossy, smooth finish when dry
- Increases the paint flow perfectly for pouring
- Easy to mix into acrylic paints
- Can be used for a variety of pouring techniques
Cons
- A slightly more expensive pouring medium
- Serious painters may need larger quantities
Best Price/Performance Pouring Medium – DECOART Pouring Medium
Decoart offers excellent quality for a very attractive price tag. For what you pay for this pouring medium, you really get an exceptional product. The Decoart pouring medium comes in a 16 Oz jug to make fluid painting much easier.

- First-class non-yellowing pouring medium with ideal consistency
- Preserves the brilliance of the colors optimally
- Water-based, quick-drying, and flexible to prevent cracking and crazing
This medium helps to create rich and vibrant pours. It is designed to thin paint out to the perfect consistency, and it can help to create amazing cell effects in your paintings. Once the paint dries, the risk of cracking and crazing is reduced. Luckily, the pouring medium won’t change the paint color or even affect the drying time. It can also be used on a range of different surfaces.
Pros
- Available in a decent-sized quantity
- Achieves vibrant and colorful pours
- Easy to achieve the right consistency
- Helps to create great cell effects
Cons
- Does not dry glossy
- Requires quite a lot of mixing
Best Affordable Pouring Medium – U.S ART SUPPLY Pouring Effects Medium
If you are on a budget, it doesn’t mean that you necessarily have to lose out on quality. This pouring effects medium by trusted brand U.S Art Supply provides a fantastic gloss finish to any fluid art painting. The pouring medium has a good runny consistency and will help to create the perfect viscosity with acrylic paints.

- Transparent, glossy and non yellowing
- Optimal in combination with studio acrylics and mat pub colours
- Can be used alone as a brush applied gloss varnish
This pouring medium works over wood, canvas, and other art surfaces. It helps to achieve the right consistency for creating cells and avoids cracking and crazing while drying. The formula is also non-toxic, and won’t change the coloring or drying time.
Pros
- Available in large size options
- Provides a glossy finish
- Affordable quality
- Safe and non-toxic
Cons
- The adhesion qualities could be improved
The Alternative Pouring Medium
In addition to the professional products developed especially for this purpose, you can also use alternative pouring mediums. They work just as well and are often a bit cheaper. However, the durability of your paintings might not be as good. Some of these alternative painting mediums contain components such as acid, which can cause the acrylic paints to fade over time. However, there is no evidence about this at present. As such, there is currently no reason why they should not be used. Also, many other factors can affect the durability, such as UV light and environmental influences.
The advantages and disadvantages of the alternative Pouring medium:
Pros
- Often cheaper
- Partly available in larger packaging sizes, ideal for frequent users
Cons
At present, there is still no long-term information on the durability of pour paintings created with these products.
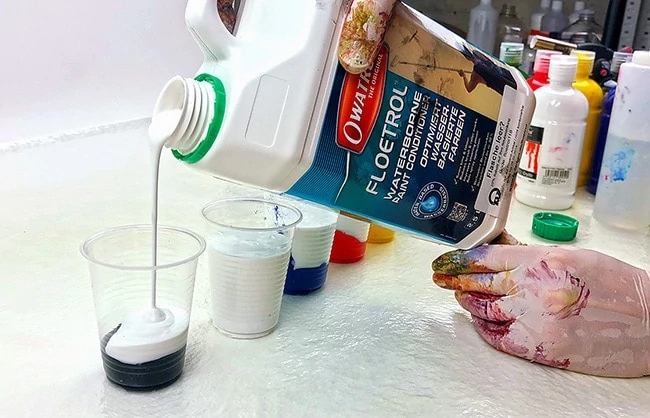
Best Alternative Pouring Medium – FLOOD Latex Paint Conditioner
This floetrol paint conditioner works slightly differently from specialized pouring medium. However, it still helps to achieve brilliant effects with fluid painting. This latex paint conditioner helps to maintain and fortify the qualities of latex paint instead of just thinning it. It also helps to improve the coverage.
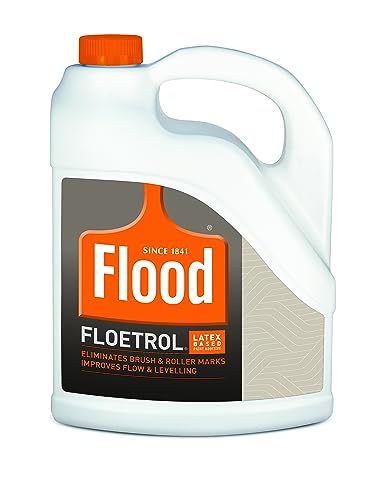
- Improves the flow properties of water-based paints
- Very popular alternative casting medium
- Matt finish, perfectly mixable with other casting media
This floetrol product by Flood works with interior or exterior latex paints and helps to extend the wet edge of the paint. Basically, it improves flow and fluidity without affecting the color or drying time. Overall, this is a great option for fluid paint artists.
Pros
- Achieves great fluidity without changing the color
- Helps to fortify the paint quality
- Provides excellent smoothness and effects
- Can help you to achieve good cell effects
Cons
- Many artists prefer the viscosity achieved by acrylic pouring mediums
What Mixing Ratio for my Pourings?
Finding the perfect ratio of Pouring Medium and Acrylic needs some practice. Also, a general statement about the mixing ratio is not possible, since it depends both on the consistency of the acrylic paint, and on that of the pouring medium.
However, we can give you a method that always works: Put one part acrylic paint and one part pouring medium in a cup. Mix both for half a minute and then look at the consistency: In the end, it should be similar to that of liquid honey. If the consistency is still too thick, you can either add some more medium, or some water will work fine. But keep in mind the limit is about 30% water for the total volume. Otherwise, you will have negative effects and we want to avoid this at all costs. You continue the whole thing until you get the desired consistency.
Viscosity is the key to successful pouring. If it is too thin, your beautiful patterns and cells will run on the canvas. If it is too thick, there are no cells and it is difficult for you to spread the paint.
But once you have found the right consistency, it will be relatively easy to get consistent results in the future. By the way, you can also combine different pouring mediums and develop your own individual recipe.
The Most Important Factor: The best Pouring Medium
The choice of a suitable pouring medium is the key factor to beautiful cells. Only if the consistency of your Pouring mixture fits, will cells develop.
If you are completely new to Acrylic Pouring, you can also use a Pouring set, which includes most of the basic materials you need for your start into the Pouring technique.

- Everything you need for your start into Paint Pouring
- Included are pouring medium, silicone oil, mixing cups, mixing stick and mini paint stands
- Just use your acrylic paint with this set and get going
Acrylic Pour Recipes
When you start to pour, it can be a challenge to get the consistency right. We have therefore developed some basic recipes for you to use as a starting point:
| Floetrol |
|
| Liquitex Pouring Medium |
|
| Vinyl Glue |
|
You should always first mix the acrylic paint with the pouring medium and then add water and silicone oil.
Acrylic Pouring Calculator
Calculating just the right amount of pouring liquid you need for your canvas can be tricky. To help you, we have created an Acrylic Pouring Calculator to help you out:
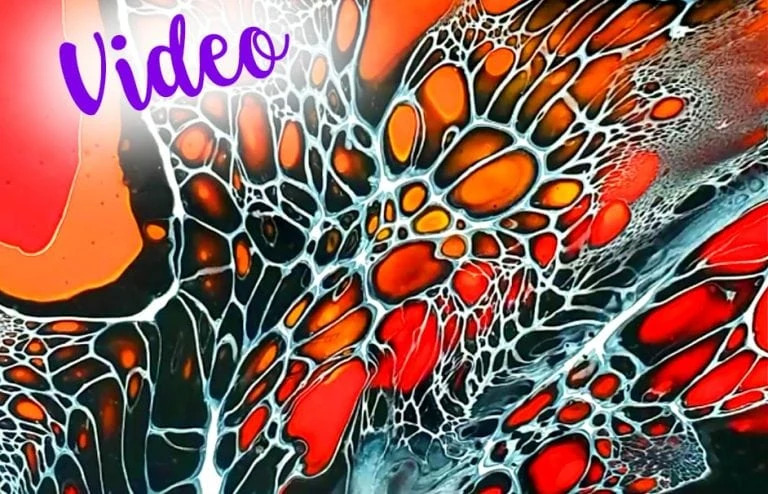
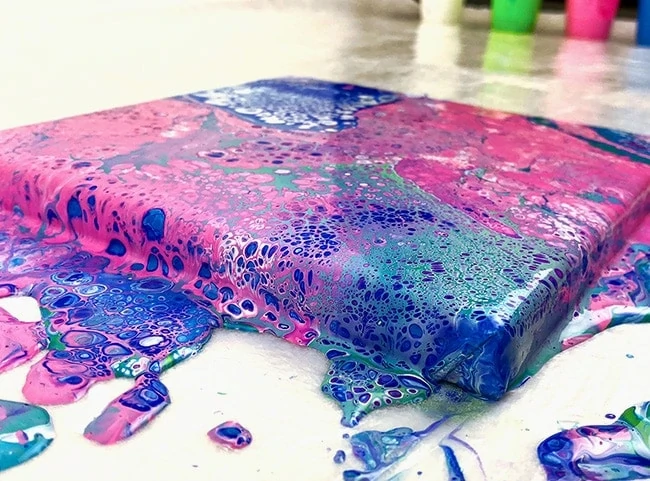
The Secret of Many, Big Cells in Your Pour Paintings
Creating cells in your pourings is one of the main goals of most pouring techniques. But how do you get these cells into your Pourings?
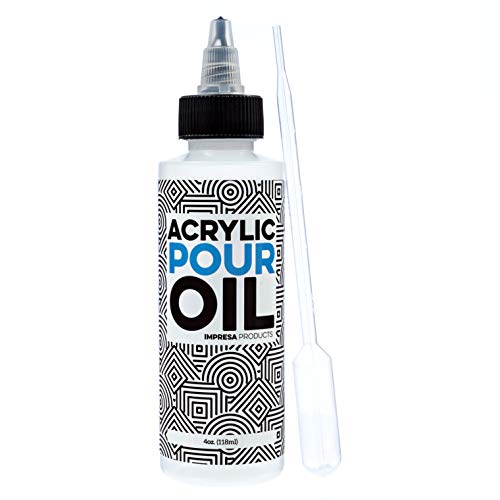
The addition of silicone oil creates the desired cells in the acrylic flow technique. But with which silicon-containing product do you get the most cells, or the largest cells?
This is not about mixing in just any silicone oil, but about knowing the properties and the connections why one oil produces small cells and the other large cells – or in the worst cases hardly any cells.
Silicone Oil with Low Viscosity:
- The lower the viscosity, the larger the cells
- The paint flows faster
- There are stronger color gradients
Silicone Oil with High Viscosity:
- High viscosity results in rather smaller, but many cells
- The color flow is slower
- There are more clearly defined cells and more color separation
We have achieved very good results with the following silicone oil:

The Best Painting Grounds for Acrylic Pouring
There are a variety of ways in which they can be poured. If you cover any surface with the first layer of acrylic binder and then a primer with Gesso, you can pour on almost any surface.
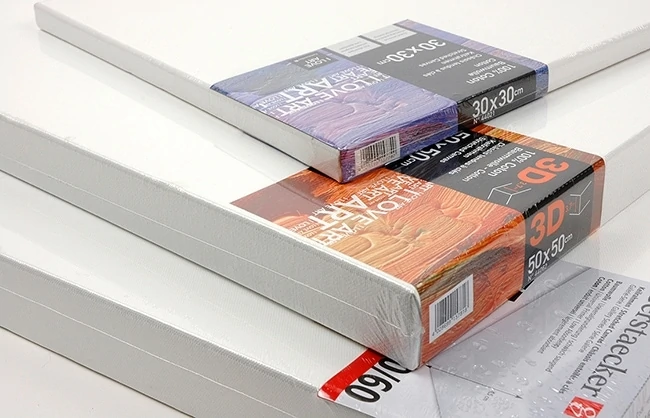
Canvas

- A canvas panel is a thin board on which a cotton cloth is applied
- Due to the solid base, the canvas board remains stable in contrast to a wedge frame
- These canvas panels are acid-free & archival quality boards
Wooden Painting Boards

Gessoboard

Preparation Work for Your Pour Painting
How to prepare your workplace
- In order to protect your workplace, you should cover it with plastic sheeting
- Wearing rubber gloves is also recommended
- You can fill squeeze bottles with required liquids such as silicone oil and distilled water for better handling and dosing
- For any paint stains or spillages, it’s worth preparing kitchen paper
- Work in a room that is as well ventilated as possible
Preparing the Painting Surface
If your painting ground is not yet primed, you should use Gesso to pre-treat it. Then the acrylic paint adheres better and does not penetrate the substrate. Place the canvas in a raised position so that the flowing paint does not stick to the underside. For this purpose, you can use used drinking glasses, cups, or pinboard pins, which you fix on the backside. Before the actual pouring, make sure that the painting ground is balanced and level. Otherwise, the paint may flow to one side and your artwork is destroyed.
Prepare Your Other Supplies
Before you start, prepare all the necessary pouring materials and aids:
- Acrylic paints
- Pouring Medium
- Cups or other containers
- wooden spatula
- silicone oil
- (Distilled) Water
- Painting knife/scraper
- Torch
Required Acrylic Pouring Supplies
We have put together for you the most important supplies which you need for the different Acrylic Pouring techniques. As a beginner, it is not so easy to distinguish between what you need and what you don’t. And with the many different products, it’s twice as difficult to keep track of. That’s why we have put together a starter set for you with which you can start pouring right away. Below you find the essential Acrylic Pouring supplies to start with:
- Floetrol Starterset: Pouring Medium, Cups and wooden mixing sticks
- Sargent Art Acrylic colors 12 piece starter Set
- Treadmill Silicone oil for a lot of cells
- White Canvas Starter Set
- Polycrylic Protection Finish
- Paintbrush to apply the protection Finish
- Gloves
You can find the full list here: Acrylic Pouring Supplies
Recommended Books for your Start into Acrylic Pouring

- Learn to Create Dazzling Abstract Art with Acrylic Pouring
- Marcy Ferro explains everything about Pouring
- Learn how to create eye-catching color combos, set up a dedicated (or a paint-proof) workspace, control your pours, and much more

Acrylic Pouring Techniques
For acrylic pour painting, there are numerous techniques to obtain breathtaking paintings. We have summarized the most important of them for you:
You can find the full list with all the pouring techniques, for beginners and advanced here: Learn how to Fluid Paint
Take a look at our paint pouring tutorial webstory here!
Frequently Asked Questions
What Paint to Use for Pour Painting?
You can use any acrylic paint for your pour paintings. Heavy body acrylics have to be thinned with a little bit more pouring medium, while already thin acrylic paint can be used with less pouring medium. The higher the pigmentation of your painting is, the more brilliant your finished pour painting will be.
How to Seal your Acrylic Pour Painting?
You can use any kind of sealant, like varnish spray or lacquer to your liking. It would be wise to choose a varnish with UV protection, so the colors will stay as brilliant as they are for years to come.
Do you need Silicone Oil for Acrylic Pouring?
You don’t have to use silicone for your pourings. But if you want to get a lot of cells, you should definitely use silicone oil to help them form.
Who started Acrylic Pouring?
The start for Acrylic Pouring could be associated with David Alfaro Siqueiros in the 1930’s. He poured colors on a painting ground and they flowed and mixed in an unforeseeable pattern. Also, the Action Painting artists used pouring techniques for their art pieces.
Does acrylic pour art sell?

In 2005, Charlene completed her wellness degrees in therapeutic aromatherapy and reflexology at the International School of Reflexology and Meridian Therapy. She worked for a company offering corporate wellness programs for several years before opening her own therapy practice. In 2015, she was asked by a digital marketer friend to join her company as a content creator, and it was here that she discovered her enthusiasm for writing. Since entering the world of content creation, she has gained a lot of experience over the years writing about various topics such as beauty, health, wellness, travel, crafting, and much more. Due to various circumstances, she had to give up her therapy practice and now works as a freelance writer. Since she is a very creative person and as a balance to writing likes to be active in various areas of art and crafts, the activity at acrylgiessen.com is perfect for her to contribute their knowledge and experience in various creative topics.
Learn more about Charlene Lewis and about us.