Blob Art – Tutorial For The Trendy 3D Technique
This post may contain affiliate links. We may earn a small commission from purchases made through them, at no additional cost to you.
In this article I present the Blob Art and show you how I create my Blob Paintings. I will show you in a manual how to use this fascinating, trendy technique and what you should pay attention to. I’ll also tell you my optimal recipe for blob mixing, so that you can create your blobs with the perfect 3D effect.
What is Blob Painting Art and how I Started?
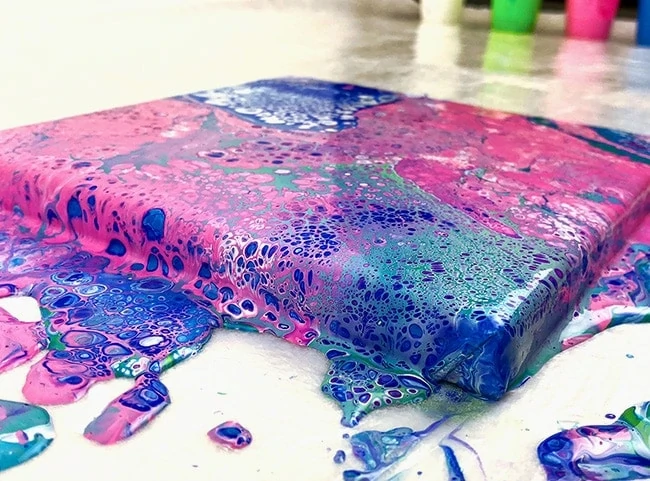
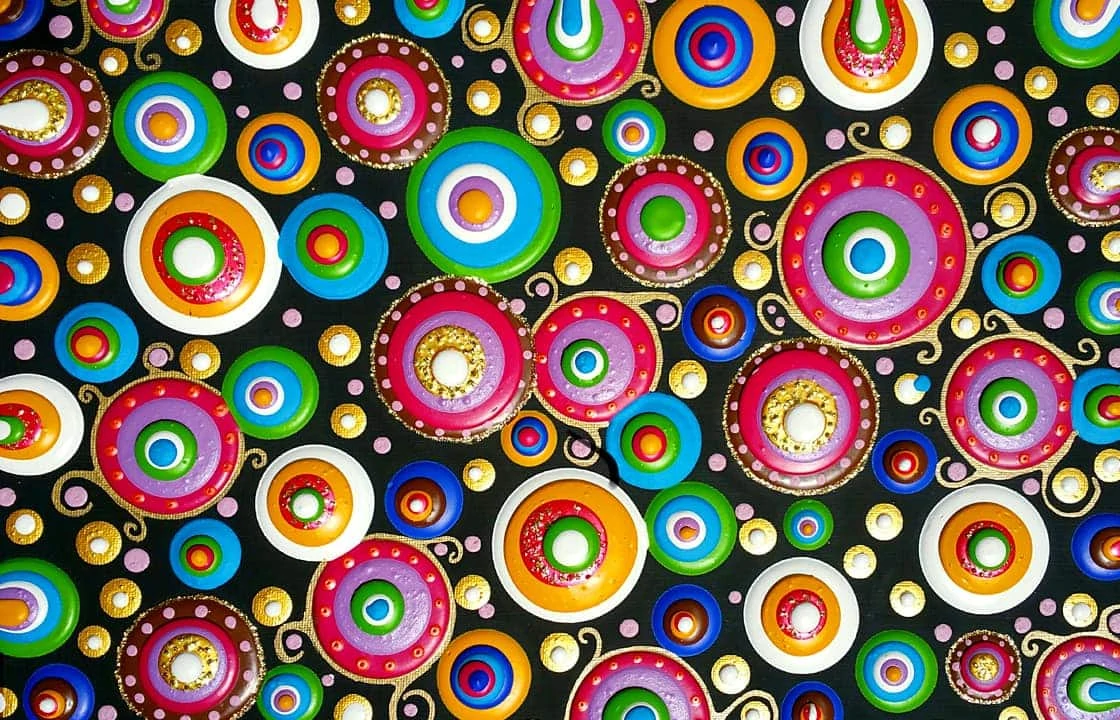
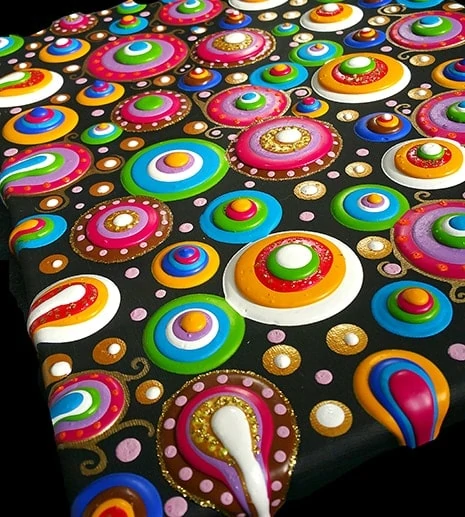
Blob Art is a still young painting technique that involves applying acrylic paint to a canvas in so-called blobs or round, even “spots of paint” and layering them on top of each other one after the other between several drying phases. A Blob Painting picture, which I came across on the Internet, attracted my attention and aroused my fascination. It had happened to me, because I absolutely had to know how this technique works. Of course there was no information about mixing colors on the internet. My questions, like: “What do I have to add to create the 3D effect, etc.” remained unanswered at first. Through intensive testing and experimentation, I have now found my optimal Blob Art recipe and technique for this art form.
The artist who revolutionized Blob Painting is called Mike Hammer, born and raised in Calgary, Toronto. He is well known in the artist scene. Now I would like to make a contribution to bring this wonderful technique a little closer to you. I will give you information about how you can create your own unique artwork step by step. It is a pleasure to see how the painting changes bit by bit. Maybe you like the painting already, if you have poured only two or three spots on the canvas? But maybe you make five or more layers? There are no limits to your imagination. I am convinced that you will create individual blob paintings. Don’t be afraid to share your own results and experiences with many other interested artists.
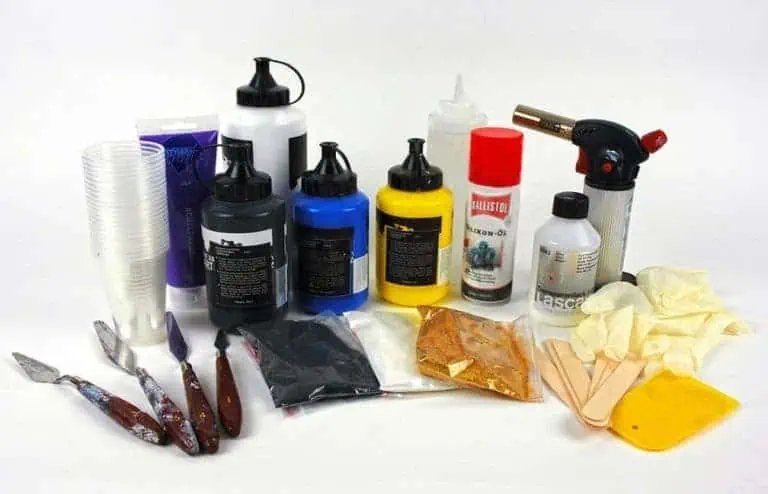
You need these Supplies for your Blob Paintings
- Acrylic Colors
- Vinyl Glue
- Deco Varnish matte
- Gloss Varnish
- Art Resin
- Gesso
- Squeeze Plastic Bottles
- Canvas
- Wooden Mixing Stick
- Plastic Cups
- Butane Torch
- Nitril Gloves
Preparations for the Blob Painting Art
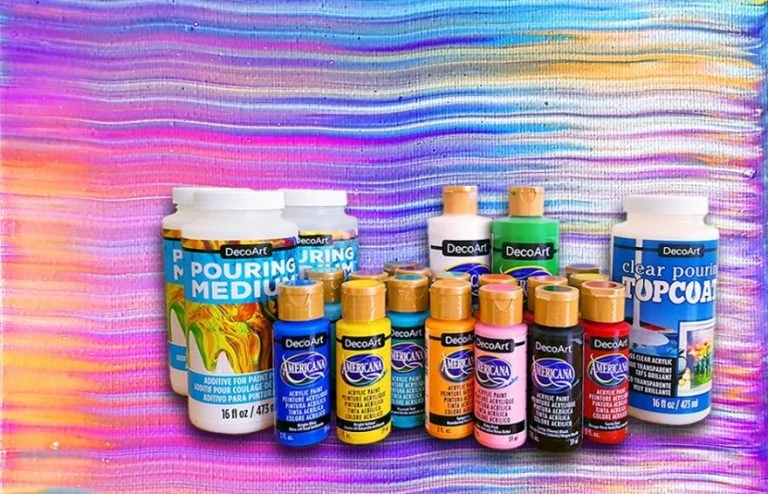
I use medium-viscosity acrylic paints, because in my opinion they are easier to process. Just make sure that the colors are not too thin or too thick. The middle way is quite suitable for Blob Painting. You need the Deco Varnish to dilute the acrylic paints.
- First, you mix the Deco Varnish and acrylic paint.
- Then add the vinyl glue.
- For these three ingredients I use a mixing ratio of 1:1:1. For a 8 oz bottle I recommend 80 g of each component.
- Stir everything well together again and then pour the mixture into the 8 oz squeeze bottles.
- After these first steps it is important to let the colours rest for 24 hours so that the remaining air bubbles can settle.
- When blob painting, it is important to always fill the bottles well, as otherwise you only squeeze air out of the bottle at the end instead of paint. This gives ugly craters and we don’t want to create a volcanic landscape on canvas, do we? 😉
- You can wet the canvas with Gesso (a canvas primer) beforehand or you simply use diluted acrylic paint and paint over the canvas twice. You can also take an already polished painting, but make sure that it is free of silicone and dirt before you put on your first blob. Otherwise, the blobs may not become round, crooked, crooked or stick to the canvas.
Step-by-Step Tutorial for the Blob Art
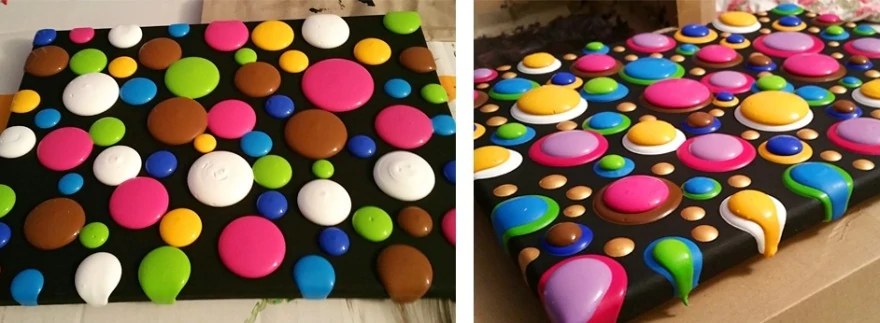
Create Blobs
- 10 to 15 minutes before I start a blob painting, I turn all filled squeeze bottles upside down to make sure the paint is in front of the nozzle.
- I hold the bottle about 1 to 2 mm above the painting ground and carefully squeeze the paint onto the canvas.
- Then press carefully until the blob has reached the desired size. The tip of the squeeze bottle should always be a few millimetres immersed in the blob.
- You can torch air bubbles with a butane torch.
Make sure to keep a sufficient distance to the adjacent blobs, because after casting they will still expand by about 5 mm. If you place the blobs too close to each other, they will probably run into each other and your artwork will be destroyed.
- Now that the first blobs have found their way onto the still rather virgin canvas, you now have two days to think about which colours you will choose for the second layer. Because that is how long it will take until the blobs have dried.
- Please do not experiment with the drying time. This technique needs time and patience. If you continue to work too early, the colours may run into each other or ugly edges and craters may form. That would be very annoying.
- I usually lay four to six layers on top of each other, depending on how big I make the blobs. The drying time of an artwork also depends on the number of blobs. The thicker the layer, the longer the drying process.
- I always leave a painting to dry well for 14 days in a dust-free place before I seal it with final varnish. Safe is safe!
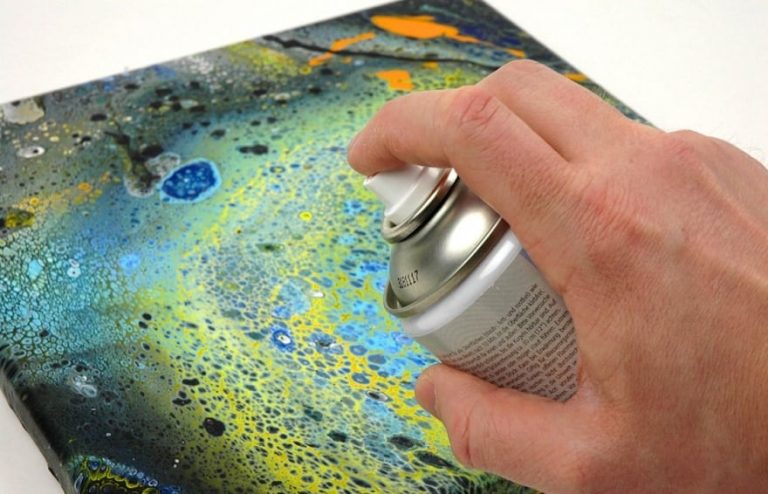
Sealing your Blob Paintings
There are several ways to now protect the image from dirt, UV radiation, and moisture. Mike Hammer seals his blob images with Art Resin. However, I find this relatively expensive and one should already have gained experience with the application. I myself have no experience with resin and therefore do not work with it.
Water-based clear varnish is cheaper and almost as beautiful. I like to use Gloss Varnish and mix it to one third with water. This makes it flow better and it doesn’t dry so quickly. I always prepare enough clear varnish. So that afterwards not too little of it is present. For this I use the resin calculator (www.artresin.com). Simply enter the dimensions of your canvas in the boxes provided. Then convert to centimeters. Now you can be sure that the quantity is sufficient for your canvas. If you are unsure, simply add 2 to 3 cm and recalculate.
Now you can either apply the varnish evenly with a soft brush or pour the varnish over the canvas like I do. Simply apply the rest with the brush. Make sure that the varnish covers every free area. Then simply let the rest of the paint run off by placing the canvas against the wall at a 45 degree angle. The varnish must not be too thick, otherwise you will get an ugly crash look when drying. When the whole artwork is painted, you can still paint the edges of the canvas. Now torch the possibly created air bubbles with the burner only very briefly. Now all you have to do is let your blob art dry in a dust-fine place and your first blob painting is ready.

Angela Schneider is 49 years old and lives with her family and her dogs in North Rhine-Westphalia, Germany. Angela’s hobbies are painting, journaling, nature, and her dogs. She loves everything that has to do with design and crafts and likes to be inspired by other artists and via the internet. Angela loves it fancy and colorful: her apartment is decorated with great attention to detail. Most of the furniture comes from bulky waste, which she has lovingly spruced up in “shabby punk style”. Angela likes to spend the evenings in front of the TV, watching mystical series. Angela works part-time in a service company as a room cleaner.
Learn more about Angela Schneider.