Acrylic Pouring Techniques – Learn how to Fluid Paint
This post may contain affiliate links. We may earn a small commission from purchases made through them, at no additional cost to you.
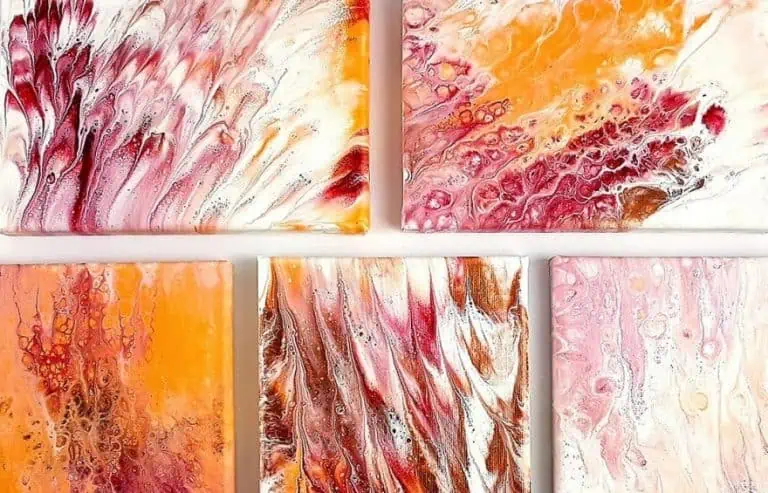
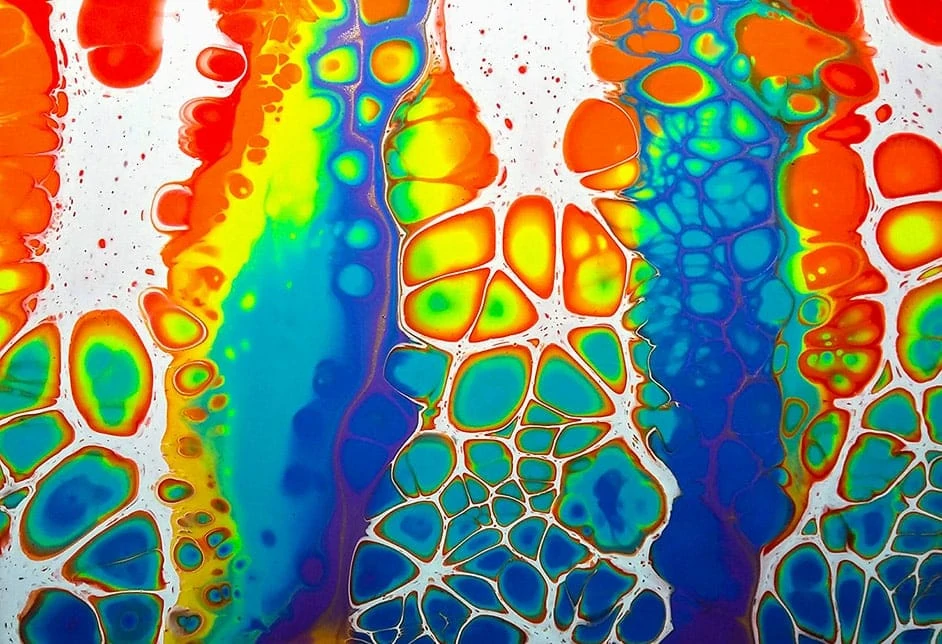
In Acrylic Pouring there are different ways how the flowable paint is applied to the painting surface. The following tutorial for all acrylic pouring techniques will give you an overview of the different pouring techniques and explain how they are applied.
What is Acrylic Pouring?
Acrylic Pouring is a Fluid Painting technique. Here, you mix different acrylic colors with a Pouring Medium and apply them to the canvas. You don’t apply the paint with a brush, but you pour them directly onto the canvas. Then you let the paint flow, change the direction of the flowing process and there you go – your first Acrylic Pouring Painting is almost done. The best about this technique is: You don’t have to be a talented artist or have great drawing skills. You just need some Acrylic Pouring supplies, a little bit of time and can enjoy creating unique art you will be satisfied about.
There are several Acrylic Pouring techniques, how you can pour your Acrylic Pouring painting, we show most of them step by step in the following article – have fun!
What do I need for Pour Painting?
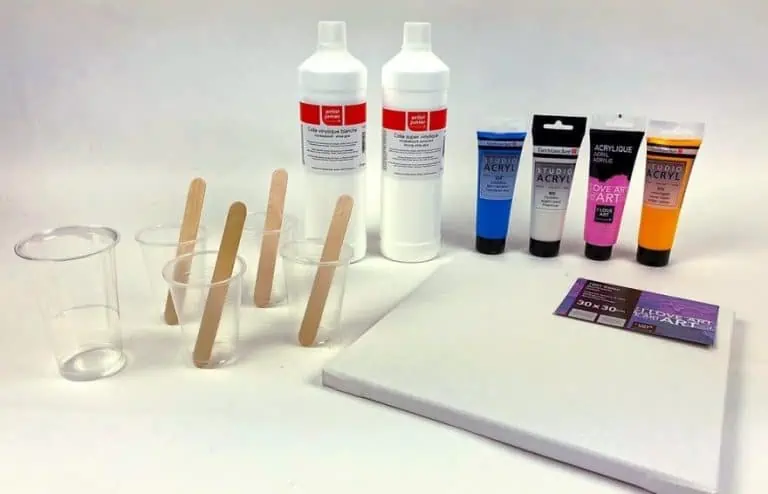
We have an in-depth article about the pouring supplies you need to start with this fascinating painting technique. You can find it on our Acrylic Pouring Guide
Most Popular Acrylic Pouring Blog Bosts
- Acrylic Pouring Guide – Pour Painting for beginners
- Acrylic Pouring Supplies – What you need for your Pour paintings
- Acrylic Pouring Medium: Market Overview and Comparison
- The Secret to Acrylic Pouring Cells in your Fluid Paintings
- Acrylic Pouring Calculator
Puddle Pour
With the Puddle Pour each color is poured individually, one after the other on the canvas picture. A color is taken as a basis, in which all other colors are poured one after the other.
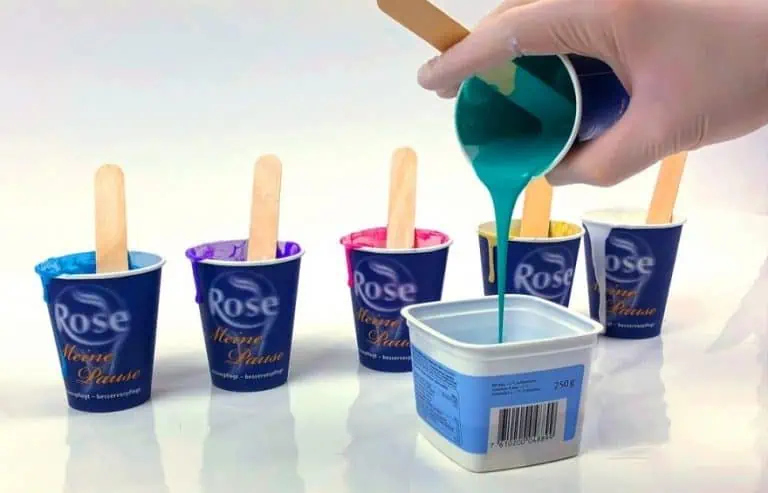
- Each color is mixed individually, together with the pouring medium (e.g. Liquitex) and water. The ratio is approx. 1:1:<1. For better cell formation, two to three drops of silicone oil can be added per color.
- The individual colors are poured one after the other onto the centre of the painting ground.
- The painting ground is moved back and forth until the paint has spread over the painting ground and the result corresponds to the ideas.
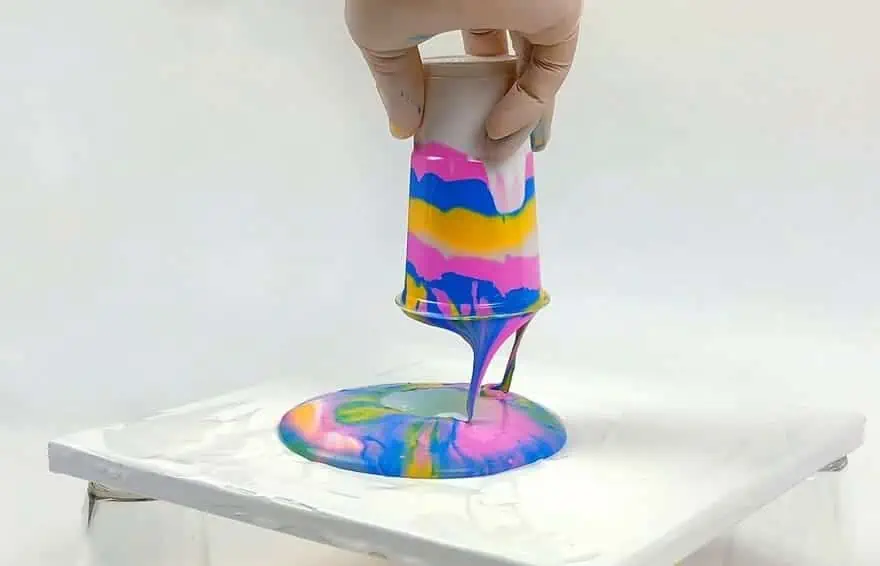
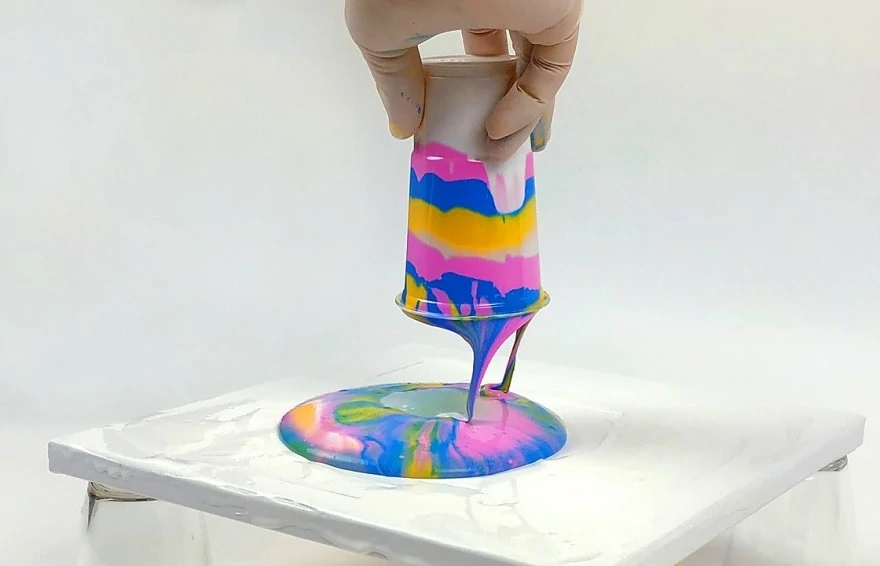
Dirty Pour
This is an acrylic pouring technique in which all colors are poured into the same cup or container and then poured onto the painting surface.
- Each color is mixed individually, together with the pouring medium (e.g. Liquitex) and water. The ratio is approx. 1:1:<1. For better cell formation, two to three drops of silicone oil can be added per color.
- The color mixtures are then stacked on top of each other in a container.
- Maybe stir just a little bit
- Then the contents of the container are carefully poured over the painting surface.
- The painting ground is moved back and forth until the paint has spread over the painting ground and the result corresponds to the ideas.
Flip Cup
The Flip Cup technique is identical to Dirty Pouring, but the container with the paint is put on the painting surface and lifted up, so that the individual layers of paint lay more on top of each other.
- All colors are mixed, together with the pouring medium (e.g. Liquitex) and water. The ratio is approx. 1:1:<1. For better cell formation, two to three drops of silicone oil can be added per color.
- The color mixtures are then stacked on top of each other in a container.
- The container is then placed vertically on the painting surface.
- The container is then carefully lifted up.
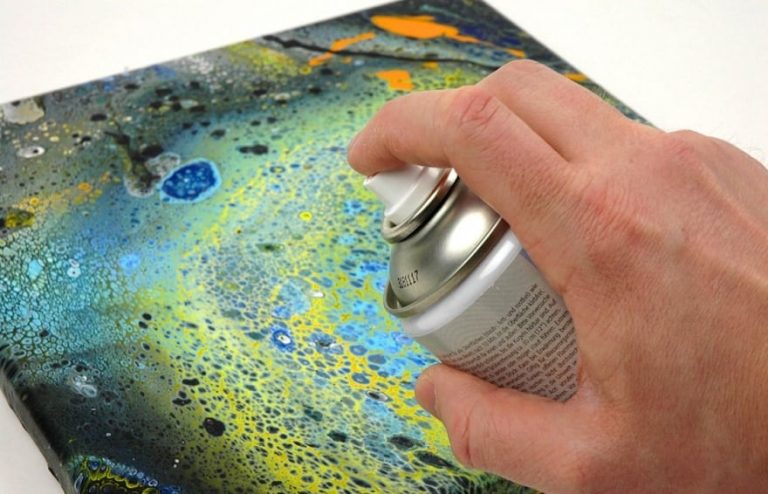
- If more cells are desired, a Bunsen burner or hot-air dryer can be used to briefly swivel over the color.
- The painting ground is moved back and forth until the paint has spread over the painting ground and the result corresponds to the ideas.
Bottle Bottom Puddle Pour / Flower Pour
- With the acrylic pouring techniques Bottle Bottom Pour, the color is applied to the painting base via a suitable, separated base of a PET bottle, where the raised areas in the base of the bottle create a pattern that resembles a flower / blossom. At the end you can change the resulting pattern according to your taste by tilting the canvas.
- Each color is mixed together with the pouring medium and water in different cups. There is no need to add silicone as we do not need cells for this technique.
- If you don’t want the flower pattern to cover the entire canvas, you can first apply a background color to the canvas. The color will also flow better on the canvas.
- It is essential that the base for the painting should be level so that the applied pattern does not run (it is best to check it in advance with a spirit level).
- Take a PET bottle and cut the bottom with scissors or a cutter knife.
- Place the bottom of the bottle on the canvas and now pour small quantities of each color one after the other onto the bottom of the bottle.
- The color now runs over the depressions onto the canvas and generates the flower pattern.
- If you like the result, carefully remove the bottom of the bottle.
Now pour some different colors into each other in a circle in the middle, so that this area is covered with color as well
With a fine artist brush you can still set accents by driving from the outside to the inside or from the middle of the flower to the outside. - If desired, the flower-like pattern can be altered or made more abstract by tilting the canvas.
- Of course, you can also apply several bottle bottom pours to the same canvas.
We have created a detailed manual for this exciting fluid painting technique, which you can read in the blog post “Acrylic Pouring Technique Explained: Bottle Botom Pour”.
Tree Ring / Swirl
With the Swirl Pouring acrylic pouring technique, the paint is carefully applied to the canvas with circular movements, creating a pattern that resembles the annual rings of a tree.
- Each color is mixed individually, together with the pouring medium (e.g. Liquitex) and water. Ratio approx. 1:1:<1
- These are then stacked on top of each other in a container
- The contents of the container are now poured very slowly onto the painting surface, a very small circular motion must be carried out in order to achieve the appearance of growth rings in the wood.
- The painting ground is then tilted back and forth until the “Tree Ring” has spread over the painting ground and the result corresponds to the ideas.
We have created a detailed manual for this pour painting technique, which you can read in the blog post “Acrylic Pouring Technique Explained – Swipe / Tree Ring Pour”.
Wing Pour
The Wing Pour is a modified form of the Swirl Pour with the aim to get two mirrored wings as a result. It is a relatively new technique that requires some experience and skill:
- Each color is mixed individually, together with the pouring medium (e.g. Liquitex Pouring Medium) and water. Ratio approx. 1:1:<1
- First the color, which should appear between the wings, is filled first into the cup
- You can carefully apply the second color to one side of the cup. This color appears on the inside of the wings.
as a contrast you can apply some of the first colors again in the second color - Then comes the most important step: pour a high-contrast color in a circle on the already filled colors, but so that the color is only at the edge of the cup
- If you wish, you can apply another color like step 3, which will be visible on the outside of the wings.
- If you have applied an additional color, add some of the first colors again
- Raise the canvas a little on your side and pour the paint in the middle quarter in a fine, constant stream onto the picture carrier. Lifting the canvas will cause the paint to run away from you, forming a long wing shape. This requires a lot of practice and feeling
- If you are the first to pour in the paint, move the cup in your direction all the way to the edge of the canvas to visually separate the two wings, if you wish
Now, with a bit of luck, you should have done your first Wing Pour. As this is a demanding technique, you will probably need a few attempts before you will be satisfied with it.
If you need further help for your Pour paintings, we recommend you to subscribe our free 3-part e-Mail course about Acrylic Pouring
Swipe Technique
The acrylic pouring technique Swipe (also called swiping technique) can be used alone or together with other fluid painting techniques. The Swipe technique is used to make the cells nicely visible or to achieve flowing patterns. To do this, wipe the applied paint with a spatula or a damp cloth.
- For wiping over the colors, you need appropriate aids. These can be, for example, painting knives or spatulas, but also a moistened paper towel.
- The colors (don’t forget silicone!) are either all applied to the canvas together with a Puddle Pour or Flip Cup.
- In addition, a mixed paint without silicone is applied next to it.
With a suitable tool, the individual color is then dragged over the remaining colors, now the cells are created at these points
AirSwipe / Dutch Pour
In the AirSwipe acrylic pouring technique, in contrast to the usual Swipe technique, the paint is not applied with a spatula, spatula or kitchen paper, but with the aid of air, for example a hairdryer. This produces the most interesting, wild and spectacular patterns, which are reminiscent of smoke in the transition to negative color.
- The colors are layered in a separate cup. Then, as usual, the canvas and the cup of the FlipCup are turned down.
- The cup is first left to stand so that the colors can settle nicely.
- Now the negative color is poured around the cup and if necessary evenly distributed over the canvas with a painting knife, also on the sides.
- Then the flip cup is lifted and lowered again and again in short movements and the color is carefully distributed over the canvas in the desired pattern until the cup is gradually empty
- Depending on your taste, the color can be placed in the desired direction by moving and tilting the canvas.
- Finally, the colors are carefully distributed from the inside out into the negative color with the help of a hairdryer. The best way is to use a cold air hairdryer or a hair dryer with cold air function and a flat top.
We also have detailed tutorial for this Fluid Painting technique, which you can read in the blog post “Fluid Painting tutorial: AirSwipe”.
Dutch Pour with Lacings / SheleeArt Bloom Technik
A special form of Dutch Pours is the so-called SheleeArt Bloom Technique. This technique is very complex and is the ultimate king class among the Pourings. It requires a lot of practice and above all the right recipe.
With this technique, the color is also moved over the painting ground with the aid of an air stream – usually with a straw. The difference to the “normal” Dutch Pour is the way the paint is applied to the canvas and the type of cells that are to be reached. These lacings, can only be achieved by a sophisticated recipe and the use of different media on the same painting.
Since this is a relatively complex technique with a somewhat higher level of difficulty, we recommend that you read our separate blogpost and watch the accompanying video: Tutorial and Recipe SheleeArt Style: Dutch Pour Bloom Technique
String Technique
This is not a pour painting technique in the actual sense. The string technique is nevertheless often used to create fluid paintings.
- Each color is mixed individually, together with the pouring medium (e.g. Liquitex) and water. Ratio approx. 1:1:<1
Before layering the colors, put several pieces of sisal cord, about 20 to 30 cm long, loosely rolled up into the empty container so that they can absorb as much of the color mixture as possible. - Then the color mixtures are stacked on top of each other as usual in the container.
- As an alternative, you can also mix the colors in individual cups and apply them separately to the thread using a wooden spatula. This makes it easier to later decide which colors should be placed where on the picture, but it’s harder to create large color gradients.
- A large amount of a high-contrast paint is now distributed onto the canvas.
- Then the threads sucked with paint are draped on the picture in such a way that they wiggle back and forth.
- At the end you can pull the threads one after the other over the canvas. The windings of the cords create interesting patterns which can be influenced according to taste during the process of pulling away.
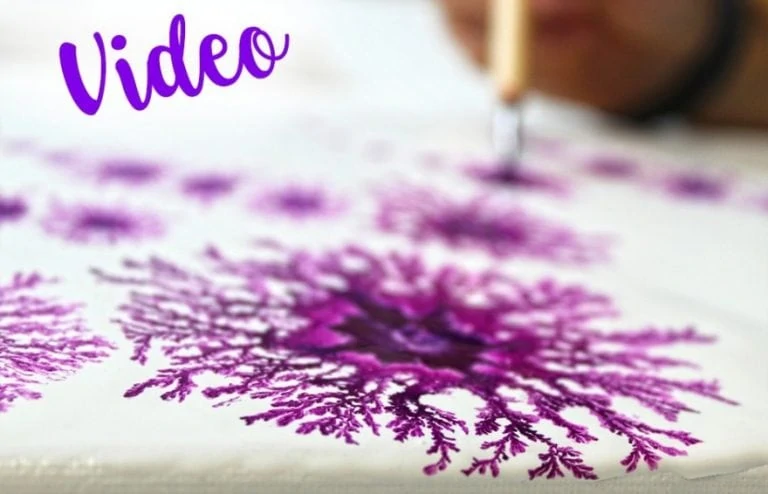
Fractal Dendrites
Fractal dendrites are structures reminiscent of flowers or blossoms, which can be created with this special technique. Small drops of a color mixture with alcohol are applied to a color film, which are distributed from the centre to the outside and create a unique effect. This technique is not difficult at all. A detailed tutorial with video can be found in our article Fractal Dendrites Tutorial.
Ghost Pour
The Ghost Pour is a variation of the Swipe technique and is stroked from the middle
- First you spread a relatively thinly mixed color as background over the entire canvas
- In a horizontal arrangement, you then apply various coordinated colors to the surface
- Using a spatula or wet kitchen paper, the paint is now pulled up and down from the centre
- Alternatively, you can also pour some of the thin background color horizontally into the middle before you swip and then swipe
- The ghostly Pour is shown to its best advantage if you use wide canvases
- With some additional silicone oil there are very nice cells
Acrylic Pouring Techniques: Combination of different Fluid Painting Techniques
We hope that you were able to achieve good results with this acrylic pouring techniques guide. Each of the Pouring techniques presented here can also be combined very well with each other to achieve even better and more interesting results. Be courageous and try it out – each painting is guaranteed to be unique.
You will need different materials for each of the pouring techniques listed in this Fluid Painting manual. We have summarized these in our article Acrylic Pouring supplies.

In 2005, Charlene completed her wellness degrees in therapeutic aromatherapy and reflexology at the International School of Reflexology and Meridian Therapy. She worked for a company offering corporate wellness programs for several years before opening her own therapy practice. In 2015, she was asked by a digital marketer friend to join her company as a content creator, and it was here that she discovered her enthusiasm for writing. Since entering the world of content creation, she has gained a lot of experience over the years writing about various topics such as beauty, health, wellness, travel, crafting, and much more. Due to various circumstances, she had to give up her therapy practice and now works as a freelance writer. Since she is a very creative person and as a balance to writing likes to be active in various areas of art and crafts, the activity at acrylgiessen.com is perfect for her to contribute their knowledge and experience in various creative topics.
Learn more about Charlene Lewis and about us.