Tutorial and Recipe SheleeArt Style: Dutch Pour Painting
This post may contain affiliate links. We may earn a small commission from purchases made through them, at no additional cost to you.
In this tutorial, I present my method for the Dutch Pour with lacings in SheleeArt style. The preparation is a bit more complicated than for other pouring techniques, but the effort is worth it. There are different (more or less secret) recipes for this method, but most use products that are not available in the United States. Therefore I have developed my own recipe for this technique, using products you can easily source. In this step-by-step tutorial including YouTube video I’ll tell you all about it.
What is the SheleeArt Style / SheleeArt Stretching Bloom Technique?
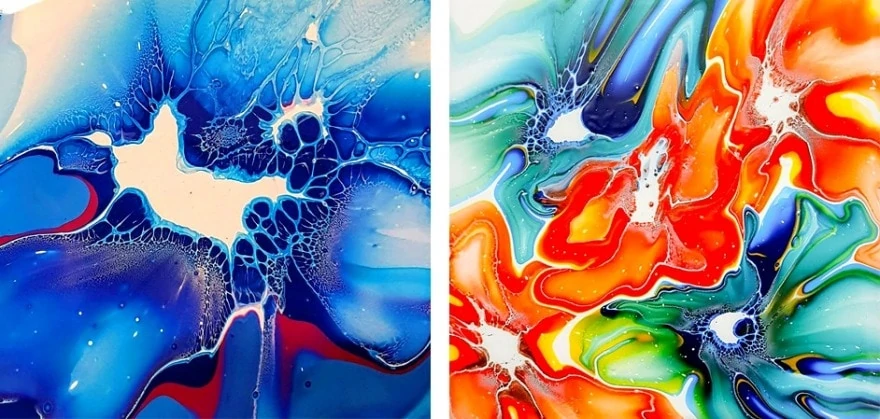
The term “SheleeArt Style” or “SheleeArt Stretching Blooms” is a synonym for a Dutch Pour which is characterized by special lacing cells. The term “SheleeArt Style” was coined by an Australian artist of the same name who created such Dutch Pours.
But this term is not really correct for this technique, because this artist is neither the inventor nor the originator of this technique. There are a number of other US and Australian artists who have been creating Dutch Pours with lacings for a long time. However, since this technique is currently quite hyped and is best known under the name SheleeArt Style, I will also use this term in this article for the sake of simplicity.
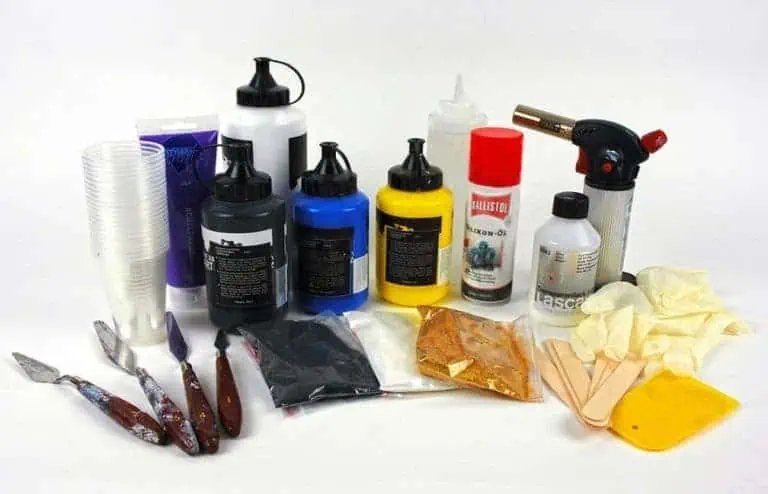
Supplies you Need for the Dutch Pour Painting technique

- Bond materials like paper, wood, fabric, leather, ceramics and more
- Quick drying formula, safe and non toxic
- Perfect for crafts, repairs, and projects for use in the kitchen, workshop, den, and garage

- Optimizes the flow behavior of acrylic paints while retaining color brilliance
- Water-based and can be mixed in any ratio with acrylic paint
- Can be used pure as transparent, high-gloss varnish
- Made in Germany
- Improves ink flow by breaking the water tension
- Improves the miscibility of water-based paints, inks or dyes
- Minimizes brush strokes and improves the brushability of glazes

- Clear Satin Finish and Water clean-up
- Low odor, non-yellowing and Fast drying
- Available in Matte, Satin, Semi-Gloss and Gloss
Other materials required
- Artist Junior Glue (used in Tutorial)
- Acrylic Paint Titanium White
- Acrylic Paint Primary Yellow
- Acrylic Paint Cadmium Orange
- Acrylic Paint True Red
- Acrylic Paint Payne’s Grey
- Nitrile Gloves
- Plastic Drop Cloth
- Small Stir Cups
- Plastic Cups
- Wooden Mixing Sticks
- Painting Knives
- Butane Torch
- Tile or small canvas

Structure of the Painting and Terminology
This painting is worked in three layers, whereby the lowest layer – in our painting white – is the supporting surface and is called “cushion”. The paint is dripped onto it and covered with the paint for the cells / lacings. In order to achieve the desired effect, it is extremely important that all three layers move simultaneously.
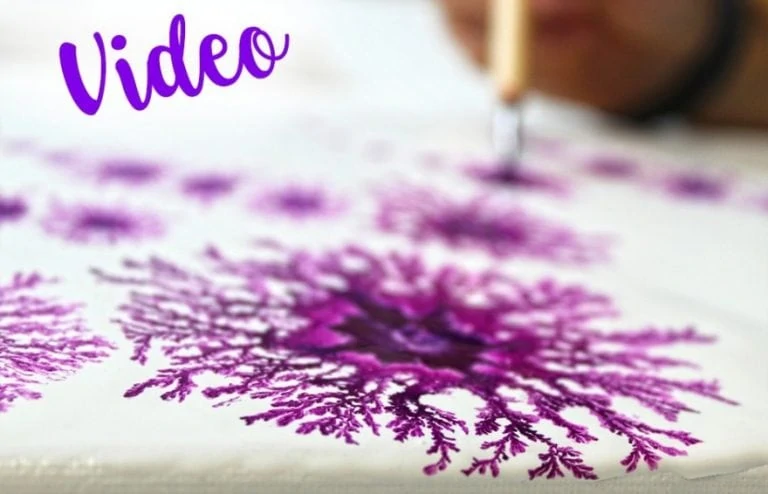
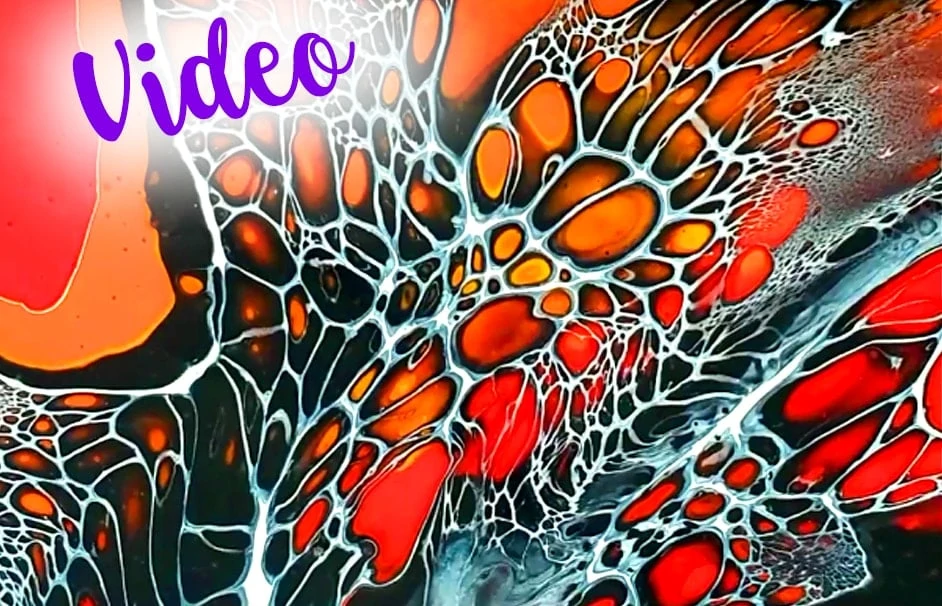
Video Tutorial Dutch Pour with Lacings in SheleeArt Style
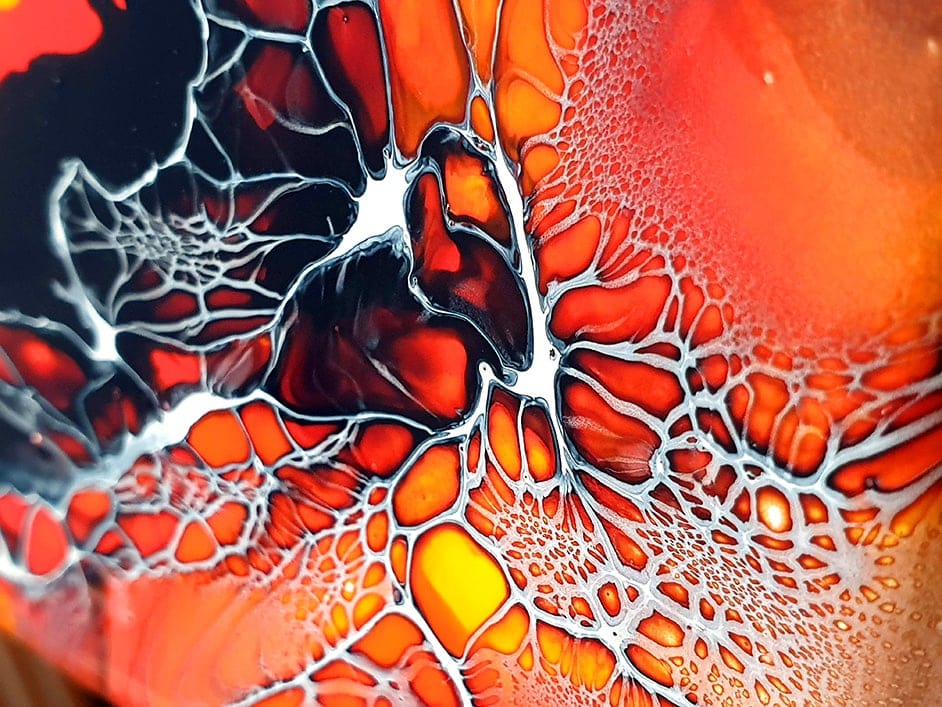
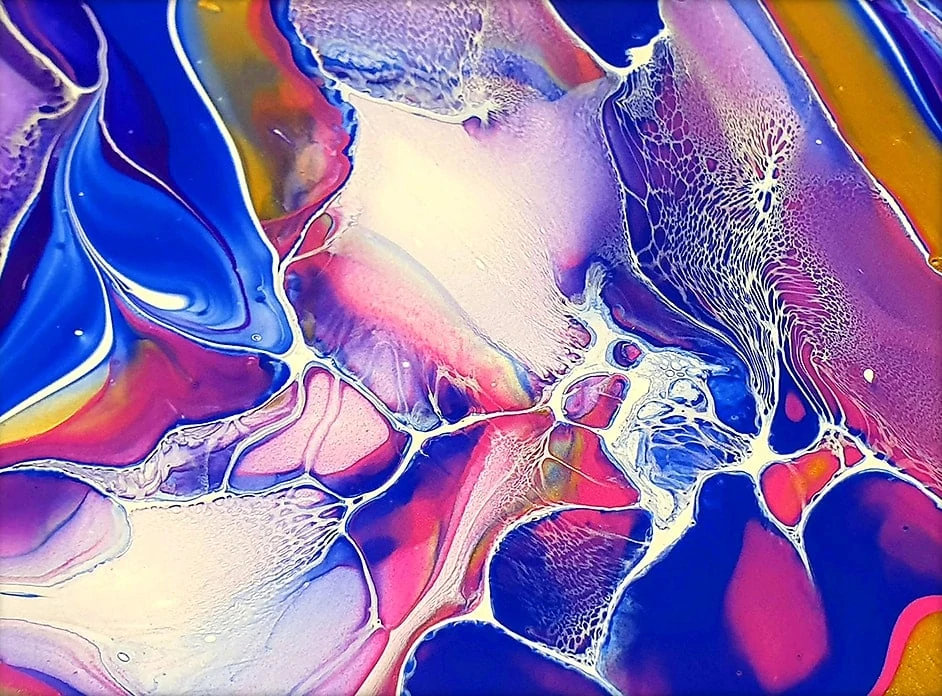
In this Video you can see how a painting with beautiful lacings in SheleeArt style is created.
Step by Step Tutorial for a Dutch Pour with Lacings
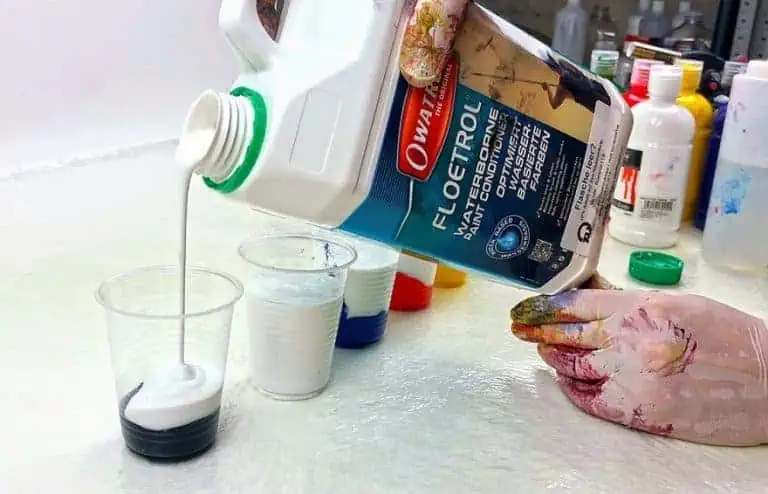
My own Recipe for all Media or Mixtures
Cushion
Mix Acrylic Paint Titanium White with Artist Junior Vinyl Glue or Elmer’s Glue-All at a ratio of 1 : 1 and dilute with a little water. The paint mixture must be quite viscous so that it remains in a thick layer on the tile or painting surface. This mixture can be kept well covered for several weeks.
Pouring Medium
Mix 100 ml of wood varnish Minwax Polycrylic Protective Finish with 100 ml Solo Goya Pouring Medium 1 : 1. This mixture will thicken a little. This mixture can be kept for a few days in a well sealable container.
Color Mixture
Stir 5 ml of Acrylic Paint with 15 ml of the Pouring Medium mixed above. This mixture should have a creamy liquid consistency and should just flow from the spatula. However, it should be more viscous than conventional pouring. You can leave it well covered for 2 to 3 days, possibly add some water.
Color Mixtures for Lacings / Cells
Dilute a little Titanium White with Liquitex Flow Aid until the paint drips rather viscously from the spatula and the drop flattens in 1 to 2 seconds. This mixture should not be too thin, but not too viscous. Otherwise the formation of the lacing cells is more difficult later. Finding the right consistency is a bit tricky here.
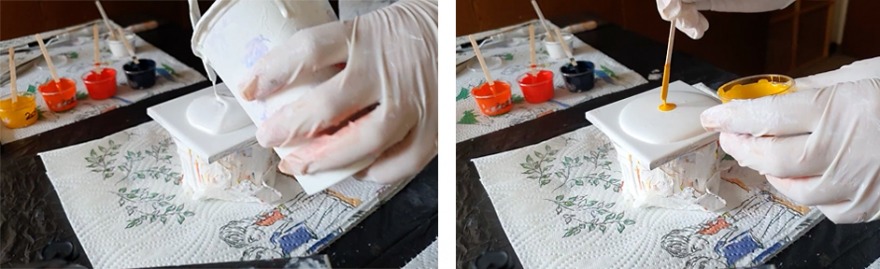
Apply the Cushion
Pour about 80 ml of the mixture centrally onto a 10 x 10 cm tile. (For a 15 x 15 cm you need about 100 ml) The cushion should remain in a thick layer, so that you can swing or move your pouring later optimally in form. If the mixture is too thin, the later lacing cells will melt too much. Possible air bubbles do not play a role at this point. If they bother you, you can remove them by knocking or scoring.
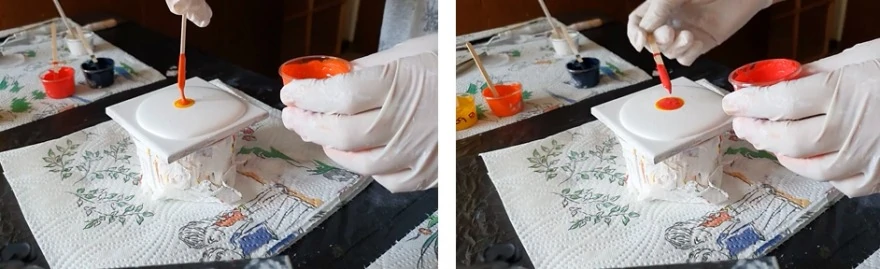
Layers of Paint
Now you should work quickly so that the Colors do not settle on the ground of the painting ground or are absorbed by it. This is especially true if you use this technique on a canvas.
Apply 1 to 2 drops per Color in any order. Pay attention to the opacity of the paints so that different Colored cells are created. The top color should not be too bright, as in my case, so that the lacing cells contrast nicely.
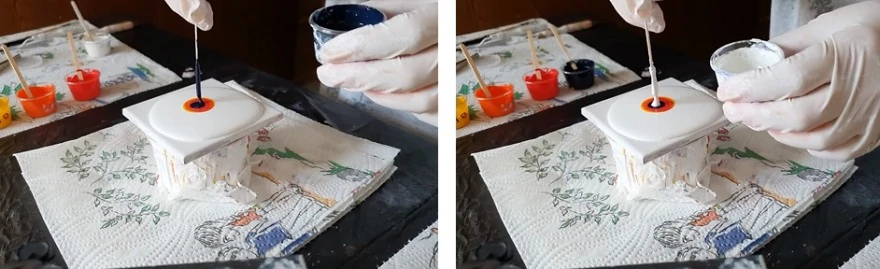
Now add 1 to 2 drops of the paint for lacings. You can easily swivel the tile to distribute the colors better. Then push the cushion back together again from all sides with the painting knife.
You can also use a ring shape (kitchen ?) in a suitable size to hold a thicker cushion in place.
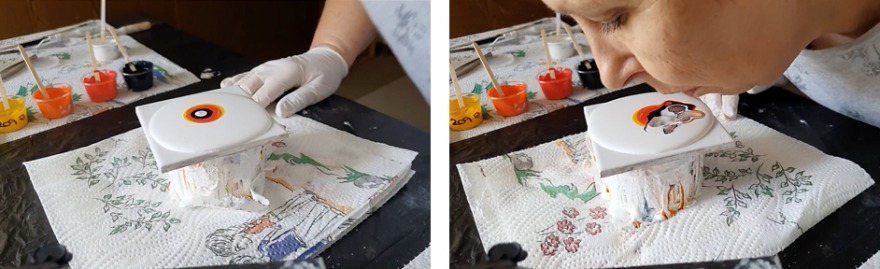
Finishing the Dutch Pour
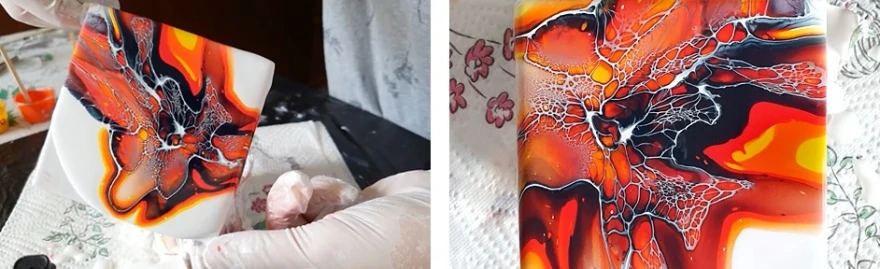
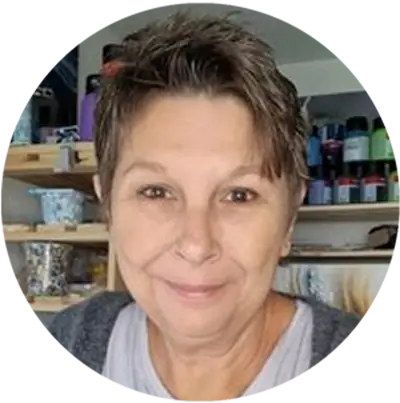
Now we come to the most challenging part, the blowing. It takes practice and you have to find out for yourself what works best for you. Some blow from above into the middle of the lacing color, the others from the side. I can control the color better if I blow sideways into the middle of the lacing color and let it slide thinly over the other colors. As with a Swipe, the upper layer of paint must be thin enough to allow the lower layer to rise in the form of cells. You can practice this part on a tile in advance. A blob of cushion with one Color and the lacing Color is sufficient. You can also use a straw to spread the paint in a flowery pattern.
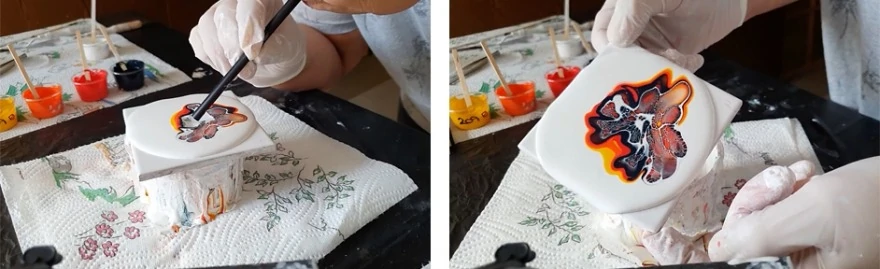
But now back to our example painting: Be careful not to blow too hard, otherwise the colors will mix with the cushion. Let the Colors flow back into the middle again and again. You can promote cell formation by tapping or torching. When you are satisfied with the cell formation, you can start moving the pattern. Decide which parts you absolutely want to keep and swivel your painting ground in this direction first. These cells will also be the largest at the end because they are drawn most in all directions.
Final Words
As mentioned above, this is a possible recipe for this technique. There are several other recipe variants that can be used to achieve similar results. I continue to test in order to do without wood varnish if possible. Now I wish you a lot of fun with this technique and look forward to reading about your experiences in our Facebook Group and of course to your finished artworks 🙂
Would you like to try another Acrylic Pouring Technique? Then you should check out the article Acrylic Pouring Techniques.
Edith Lüssi lives with her husband and daughter in Eastern Switzerland. Since her youth, she has been engaged in painting. A few years after completing her training as a chemical laboratory assistant, she learned how to make porcelain dolls. Together with her husband, who dedicated himself to mold making, she ran a manufactory for porcelain dolls and ceramics in Johannesburg / South Africa for over ten years. After her return to Switzerland, Edith began to paint again in acrylic in her spare time. To reconcile family, job, and hobby, she took part in a two-year correspondence course for drawing and painting at Hamburg Academy for Distance Learning. Further online courses in different painting styles followed. Today she focuses mainly on her great passion for fluid art and also gives workshops.
Learn more about Edith Lüssi.