Tutorial: How to create Fractal Dendrites
This post may contain affiliate links. We may earn a small commission from purchases made through them, at no additional cost to you.
I will present you the Fractal Dendrites Technique. I will show you step by step how to use this filigree technique and what you should pay attention to. To make the whole thing a little more vivid, I have also created a video tutorial.
What is the Fractal Dendrites Technique?
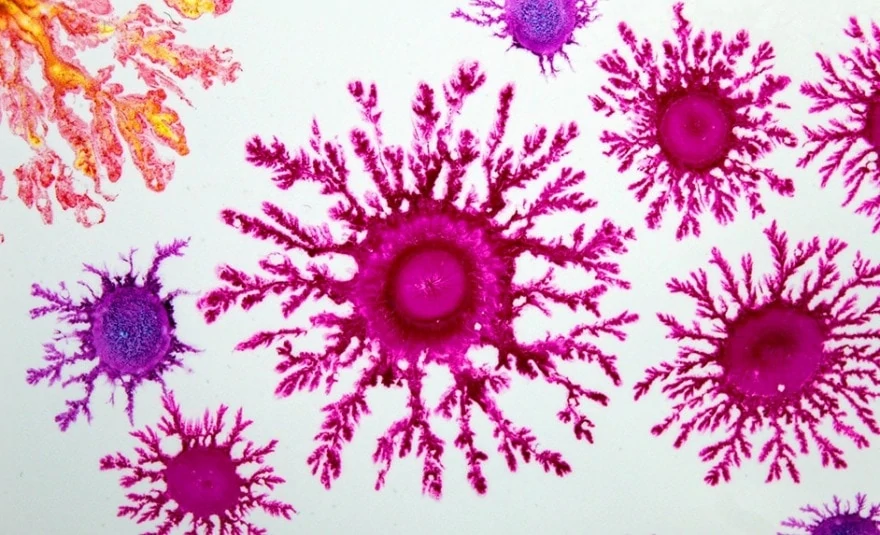
Fractal dendrites/fractal flowers are structures that look like flowers. Smaller drops of colour/alcohol mixture are applied again and again to create these unique fractal paintings.
The alcohol is drawn out over the colour film and forms small outgrowths, which you also know from a snowflake. Depending on the size of the stylus and the amount of colour/alcohol mixture, you can influence the size of the flowers very well. With this blog post I show you how you can have a lot of fun and experience the wonder of physics and chemistry.
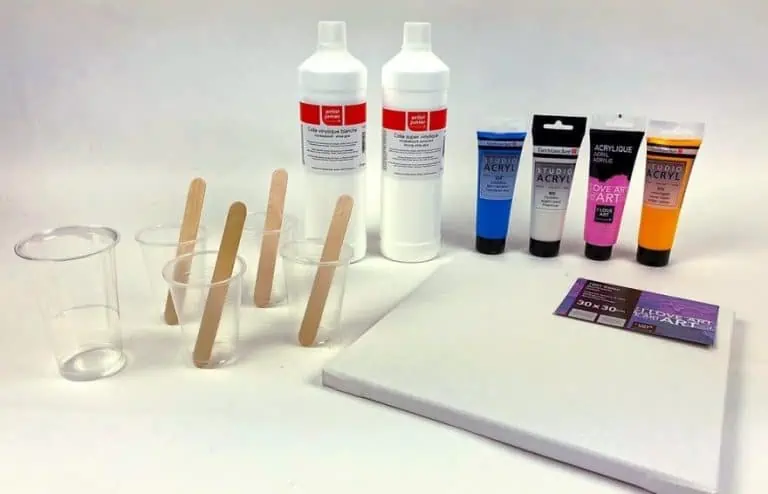
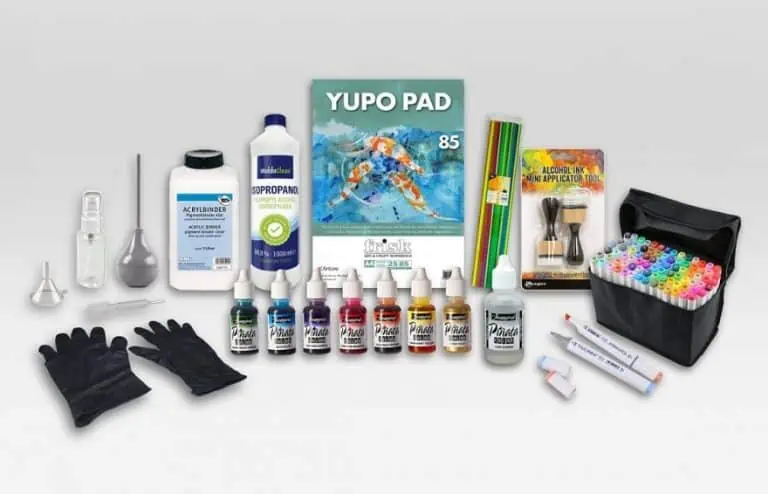
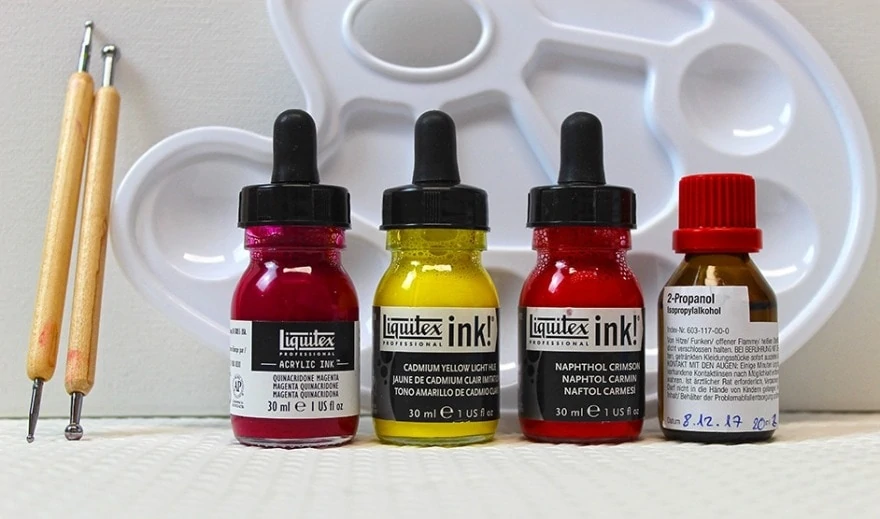
This Supplies you need for Fractal Dendrites
- Acrylic Paint Titanium White
- Floetrol
- Liquitex Ink! (also suitable: Jacquard Pinata Ink, Winsor and Newton Drawing Ink, Dr. Ph. Martins´s Bombay India Inks)
- Embossing Pens / Stylus Clay Tools
- Stretched Canvas (tile, Yupo paper, Wood panel, etc. are also possible)
- Isopropyl Alcohol 91%
- Comb / Artist Silicone Brush
- Paint Tray Palettes
- Pipette for larger Dendrites (optional)
Prep for Dendrite Fractals Technique
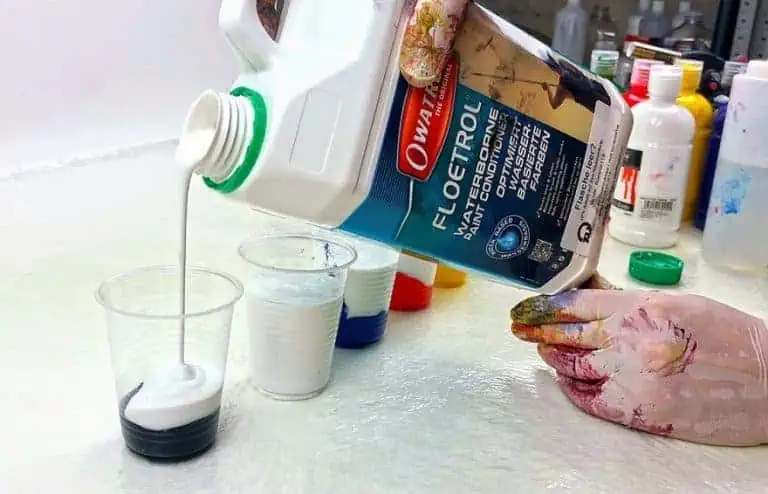
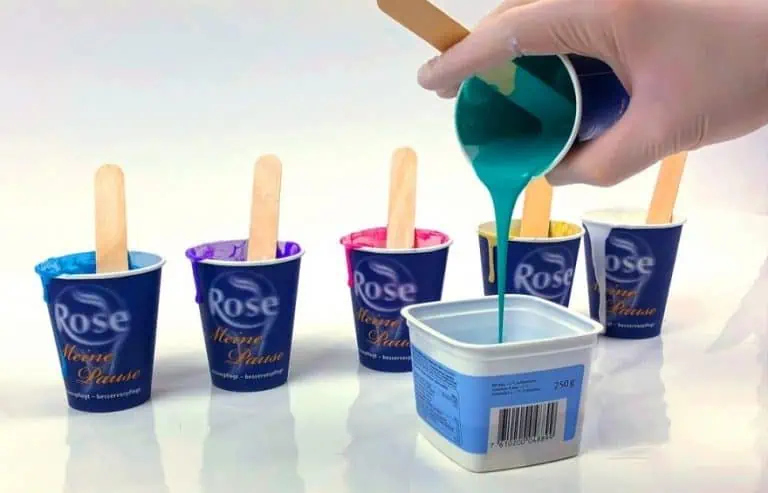
Prepare your workplace and then mix the white Acrylic Paint with the Floetrol in a ratio of 1 to 2 parts paint to 4 parts Floetrol. Depending on which brand you use, you may need to add some more water. However, please make sure that it is not over 50% water to make it work. It is better to do without the water completely, because it makes the fractals more “blurred”. Depending on which brand you have your acrylic paint from, you should first carry out a small test to be able to judge the flow and drying behavior.
Step-by-Step-Tutorial to create Fractal Dendrites
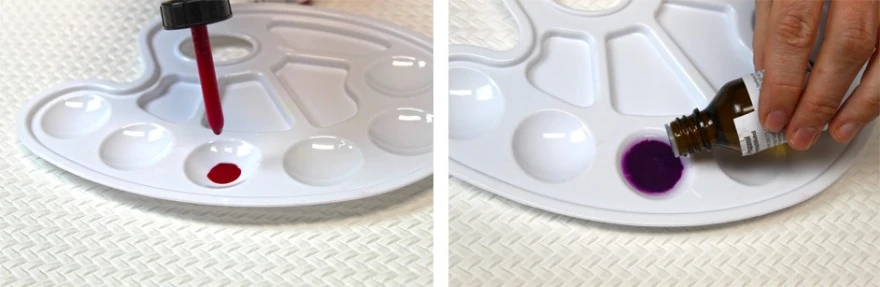
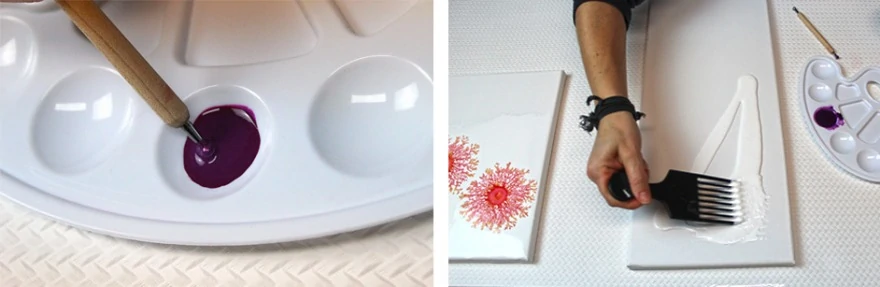
- I put 1 drop of Liquitex Ink! and 2 to 3 drops of Isopropyl Alcohol into the Paint Tray. I mix these well with the Embossing Pen.
- I put the white mixed paint on my surface and then use the Comb to spread it very evenly on the surface. With a spatula or a spatula you would still have thick and thin spots. It is very important that everything is very flat so that the dendrites are beautiful, otherwise you will see that later and the dendrites would not spread round and even. The comb acts like a squeegee and spreads the background colour perfectly without wasting much colour.
- Of course you can also use it as pouring material or other auxiliary materials according to your wish to spread the paint.
- It is recommended to work in parts on larger surfaces, otherwise the white paint will start to dry.
Attention: Fire hazard!
Only torch if there are NO dendrites in your picture. Since you are working with high percentage alcohol, you can only use the gas burner before painting, otherwise there is a risk of fire! The hot-air dryer is also only suitable at the beginning. The dendrites are extremely fragile and would break if they came into contact with the hot air stream.
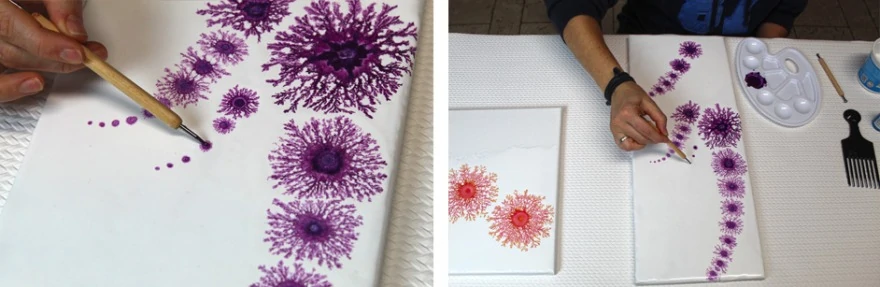
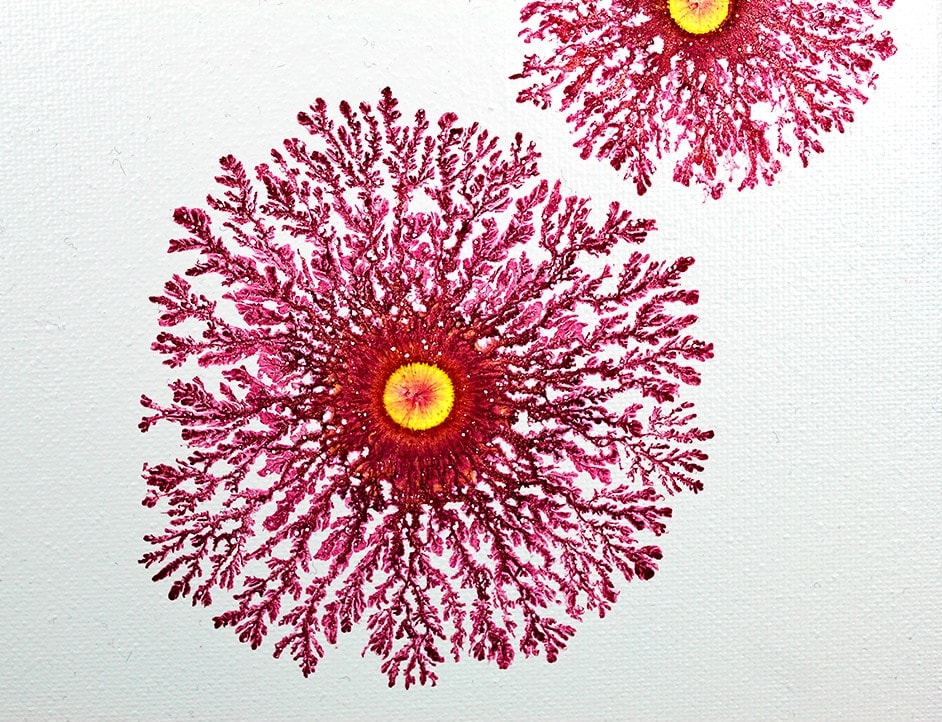
- Now you always take a little color mixture on your embossing pen and tap on the surface. Depending on the size of the pen you can create large and small dendrites. Always try to tap in the middle, the alcohol will automatically pull out.
- Stay with one dendrite until it is ready or work quickly on several dendrites. Experience has shown that you can’t change much about the dendrite once it hasn’t got a drop for a while. You can also mix the colours to achieve great effects.
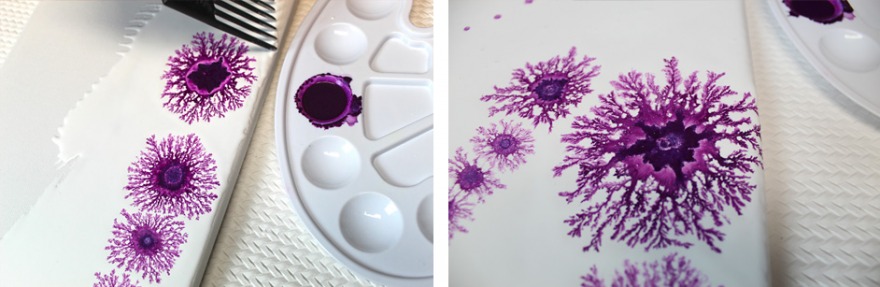
- Since the rest of the unprocessed part dries up naturally over time, it is important that you always work on the next part with the comb or the embossing pen and thus break up this surface film. This is important because the drying process creates a thin layer that inhibits the formation of fractals, i.e. the alcohol cannot “flow” and the effect remains.
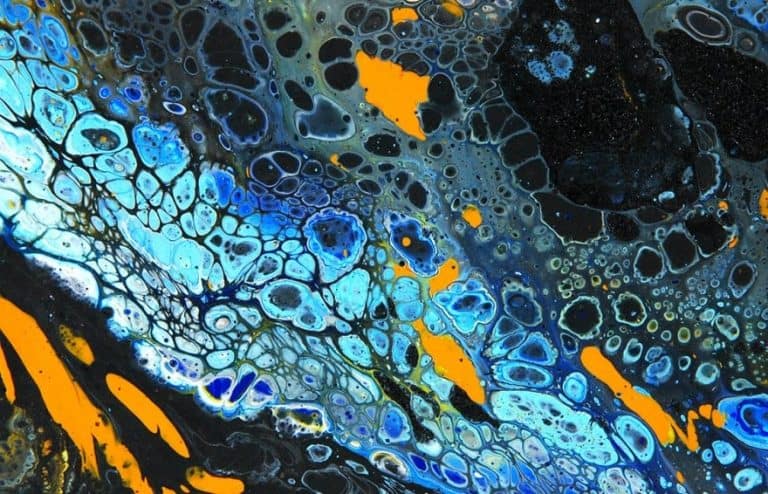
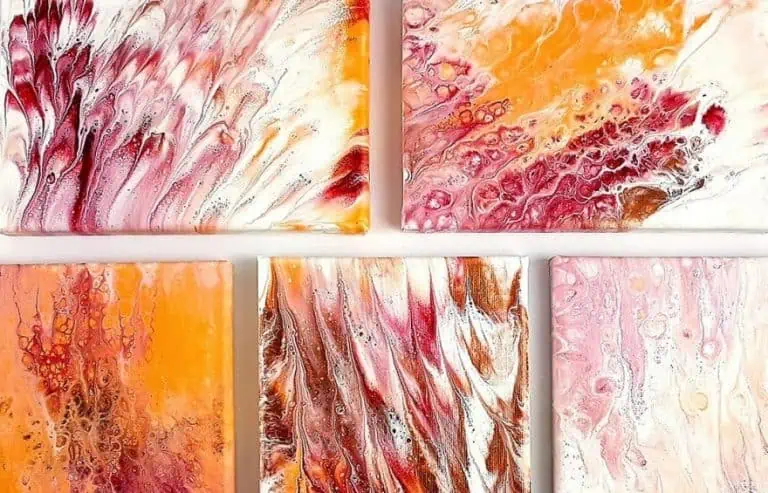
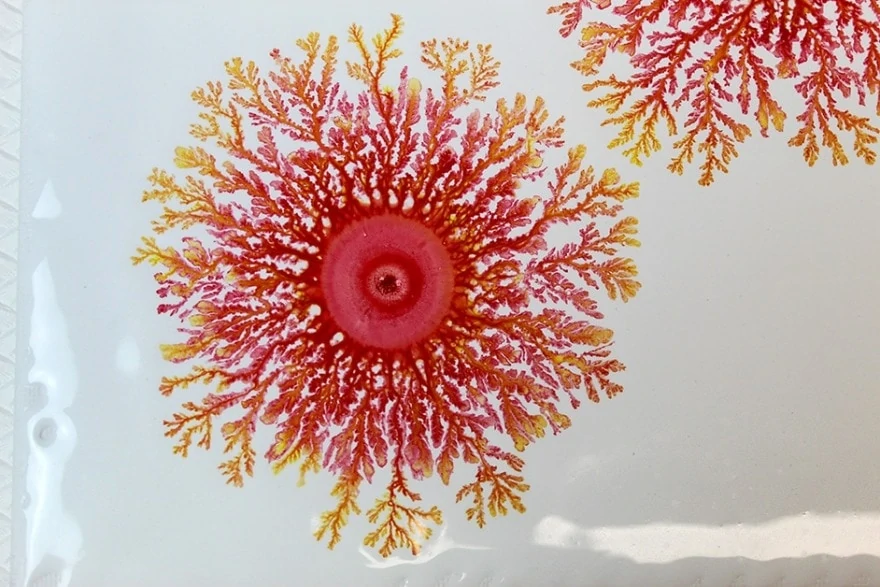 Here I first worked with red until the flower was nice and big, then 2 to 3 drops of yellow and finally 1 to 2 drops of red. The fascinating effect that the yellow pulls all the way to the outside is simply fabulous and makes every artist’s heart beat faster.
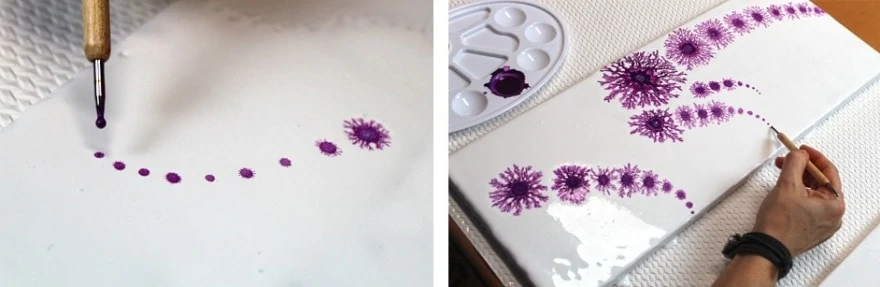
- It is also very interesting if you put several drops in a row with one swing. So I created the purple lavender from fractal flowers/dendrites. You only take up color once and then type out the complete line. You can do the whole thing 2 to 6 times depending on how big you want to have the “lavender”.
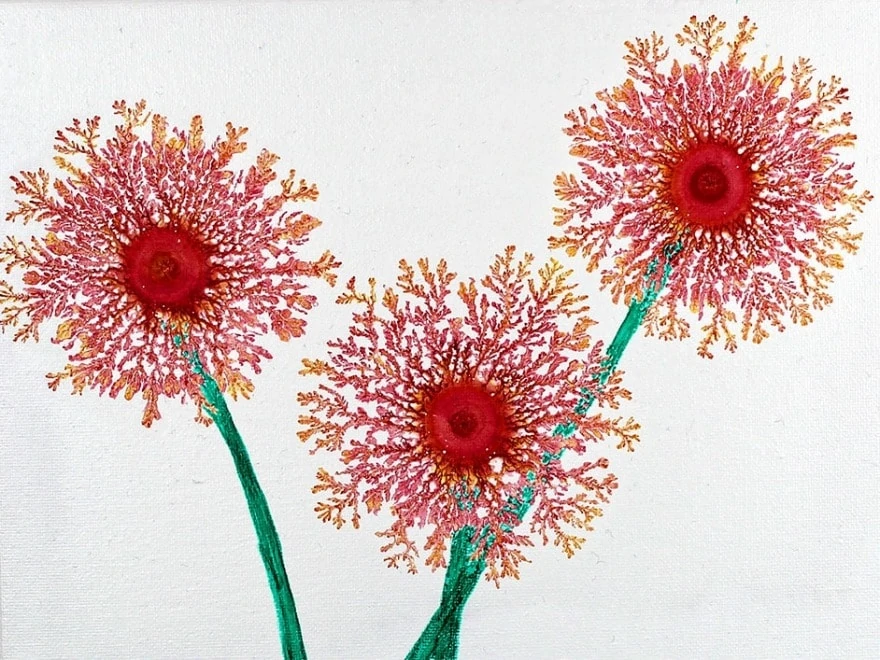
 After drying, you can then draw the flower stems with ink and, depending on your taste, further decorate them.
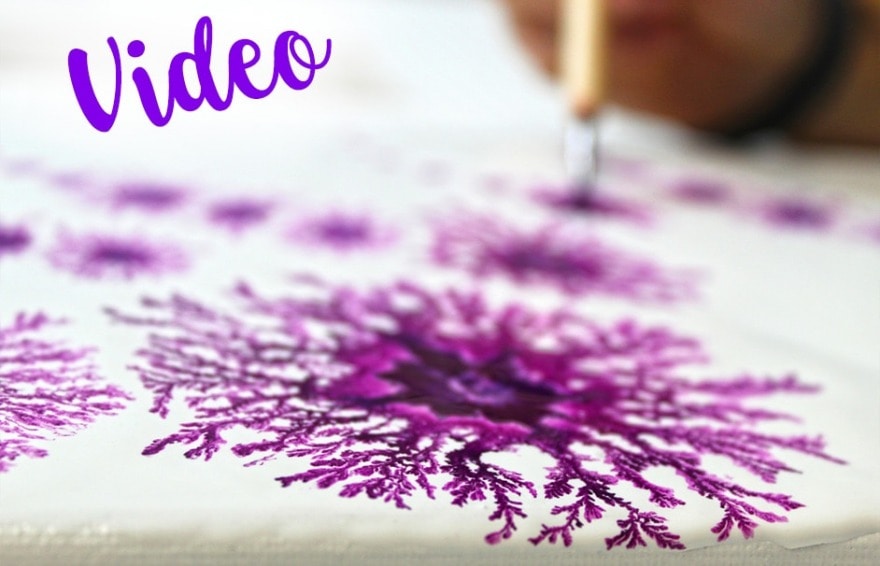
Video Tutorial Fractal Dendrites / Flowers
In the following YouTube Video you can see how the fractal dendrites are created and how differently they develop.
Bottom Line
With this technique you definitely always have unique paintings and so much fun! Each time it is fascinating to see how different the flowers/dendrites are. With the different colours you can also achieve really great effects. Get inspired with this tutorial and try it out for yourself. Since you can work in a small space, you don’t need much space to work or dry. A meditatively calming activity that always amazes and is well suited for children, teenagers and adults.
Idea: you can create the dendrites on a smooth tile and then carefully peel them off when they are dry. You can then continue working with this “skin”. When cut out, the fractal dendrites can be applied to other surfaces, for example with the napkin technique. Again, there are no limits to your imagination a d you can continue working here with Julia Knoll’s blog post “Acrylic Skin Stickers Tutorial“. Have fun with this great technique!
Would you like to try another acrylic pouring technique? Then you should check out the article “Acrylic Pouring Techniques – Learn how to Fluid Paint“.

Karin Zimmer lives in Baden-Württemberg, Germany. Already from childhood on she has been working as a craftswoman, artistic/creative and very close to nature. She likes to try out different painting and creative techniques again and again. The constant thirst for knowledge is her inner drive. After almost 20 years in the IT department of a bank as an administrator and coach, she now works independently as a wild herb pedagogue and freelance artist. She gives herbal tours, individual and group courses, and (intuitive) workshops in both areas. At the end of 2016, she discovered Acrylic and lets each of her paintings flow intuitively and with feeling. She sees her task in imparting knowledge and in triggering the pure joy of colors and structures in the viewer.
Learn more about Karin Zimmer.