Acrylic Skin Stickers Tutorial – DIY self-adhesive Acrylic Skins
This post may contain affiliate links. We may earn a small commission from purchases made through them, at no additional cost to you.
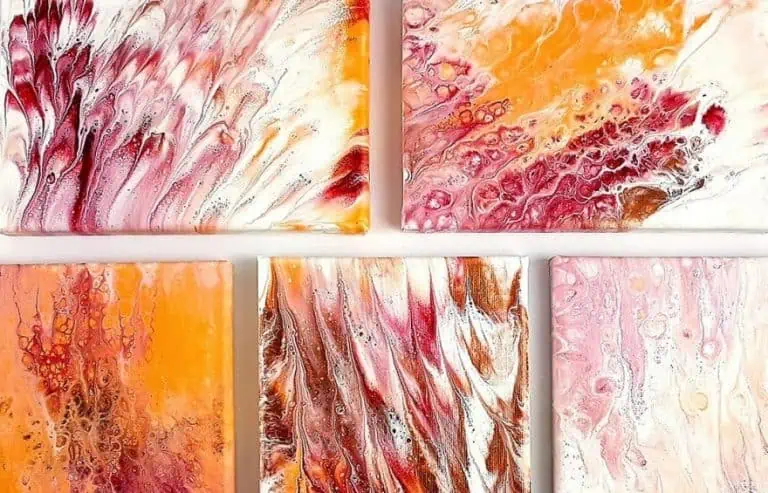
In this article I’m going to share the new technique “Acrylic Skin Stickers” with you. It’s all about this techinque and how you can easily make these stickers out of acrylic skins. I’ll show you some valuable tips and tricks and I will also tell you which supplies you need for creating the Acrylic Skin Stickers.
What are Acrylic Skin Stickers and how did I get them?
Who hasn’t tried it before? Pouring acrylic paint over objects such as boxes, picture frames or your husband’s smartphone cover… All in the hope of embellishing the objects with the acrylic pouring look. What always frustrated me was the paint that dripped down on the edges. Often the result looked messy. Now you can of course cover objects with acrylic skins – but then there’s always the question how to stick them on. With this method you can’t remove the paint without damage. For this reason, I experimented a bit and found a new technique that makes covering objects with the acrylic pouring design extremely easy. I call them “Acrylic Skin Sticker”.
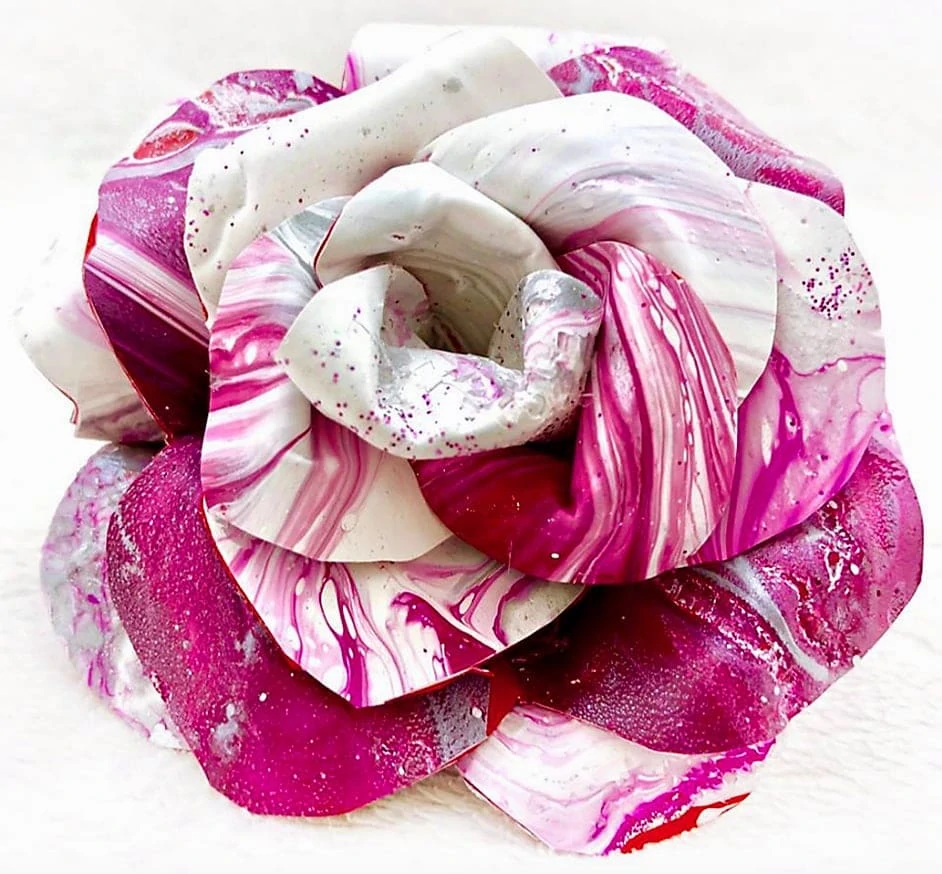
3D Rose for Valentine’s Day made of self-adhesive acrylic skins. For the marbled look I usesd the string technique.
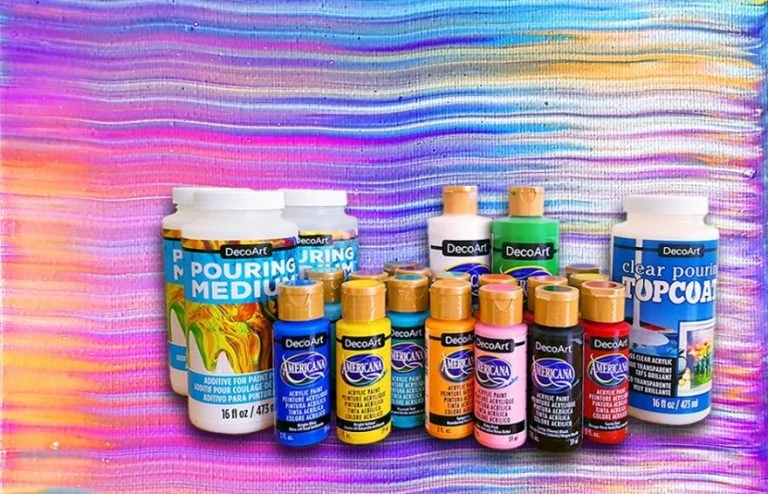
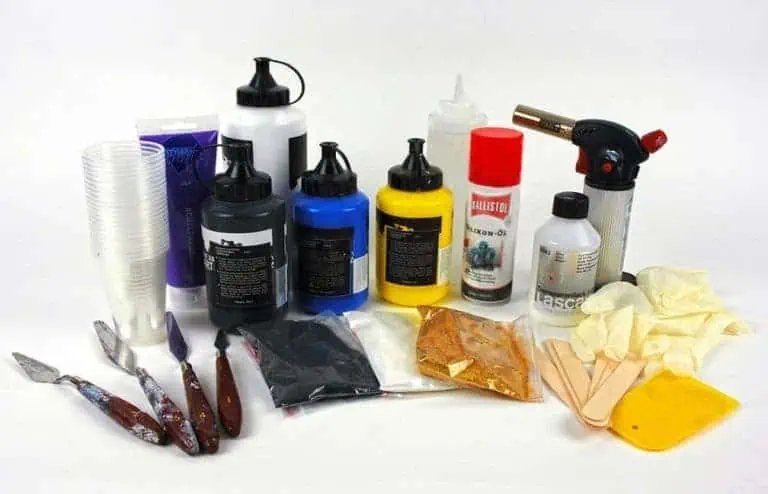
This Supplies I use for Acrylic Skin Stickers
- Clear Contact Paper
- Sandpaper
- Acrylic Paint
- Liquitex Pouring Medium
- Floetrol
- Silicone Oil
- Plastic Cups
- Wooden mixing Sticks
- Big Paint Brush
- Butane Torch
- Craft Knife oder Scissors
- Plastic Drop Cloth
Step by Step Tutorial for Acrylic Skin Stickers
Preparation of the Self-Adhesive Foil
I have tried many self-adhesive films and contact papers. The result was always the same: the paint didn’t stick to the smooth plastic surface or cracked after drying. I found this method to solve the problem:
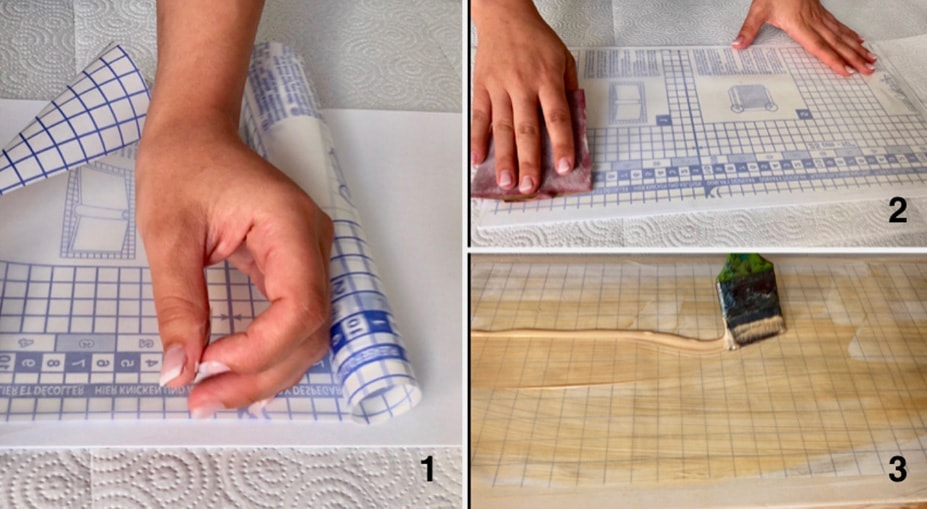
- Tape the edges of a Clear Contact Paper onto a rigid substrate (wooden board or cardboard). The glossy side should be on top.
- Treat the surface with Sandpaper so the surface doesn’t reflect the light any more.
- Mix your pouring medium and an acrylic paint of your choice 1:1 and prime the surface with it. For best results, apply two coats. Allow to dry.
These are the three steps to preparing your sticker. Now you can use the surface like a canvas. Acrylic pouring on a clear contact paper also saves a lot of money that you would otherwise spend on canvas. It also saves storage space!
Acrylic Pouring on the Sticker Surface
Any pouring technique is possible on your prepared surface. Torching the paint is also possible, but don’t torch too long. Otherwise you will damage your sticker. Since you have taped the clear contact paper to a rigid base, you can influence the flow direction and the formation of cells in your colour by lifting the base.
My Acrylic Pouring Recipe
I usually mix a part of Liquitex Pouring Medium with a part of Floetrol in a separate container. Then I mix two parts of this mixture with one part Acrylic Paint. Stir well and then add some drops of Silicone Oil. You can use the pouring technique of your choice to apply the paint to the surface. Then you should let your Acrylic Skin Sticker dry for about two days. After that you can remove the silicone oil with a sponge, water and some dishwashing liquid.

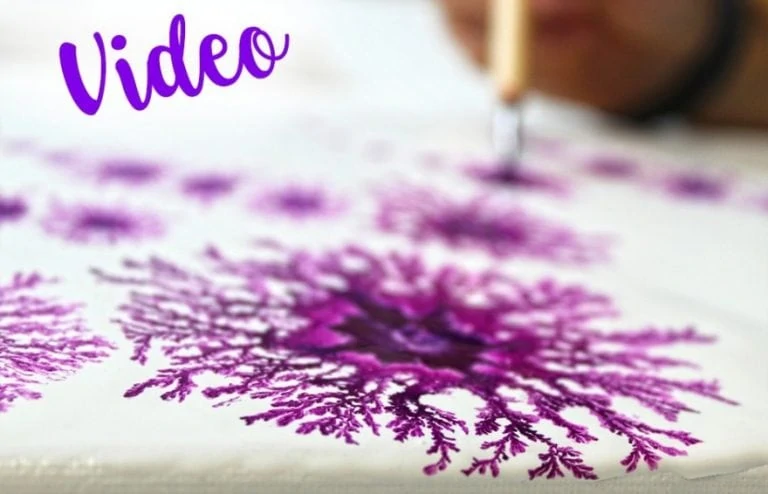
The contact paper with acrylic skin can be used in many different ways: You can even transfer the Acrylic Skin Stickers to your nails. You can find the video on my Youtube-Channel.
Decoration of Objects
The possibilities to embellish objects with the Acrylic Skin Stickers are almost limitless. The only thing to keep in mind: the surface of the object should be smooth and clean. Here are two examples of how you can use your own stickers.
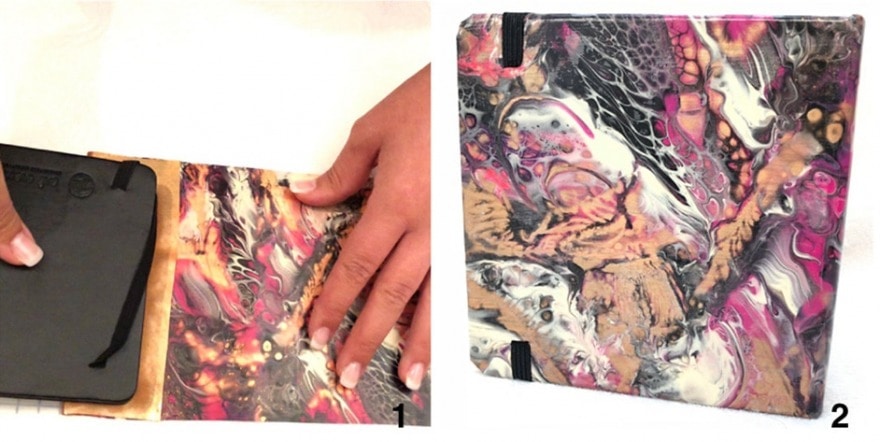
Book Cover
Take a book you want to embellish with your design and use it as a template. Simply place the book on the sticker and cut it out around the book. Leave some space at the edges so that you can bend the sticker around the book afterwards. Then remove the protective paper on the back of your sticker and cover your book. (1) If you put an extra layer of clear contact paper, the whole thing is better protected against mechanical stress and moisture. (2)
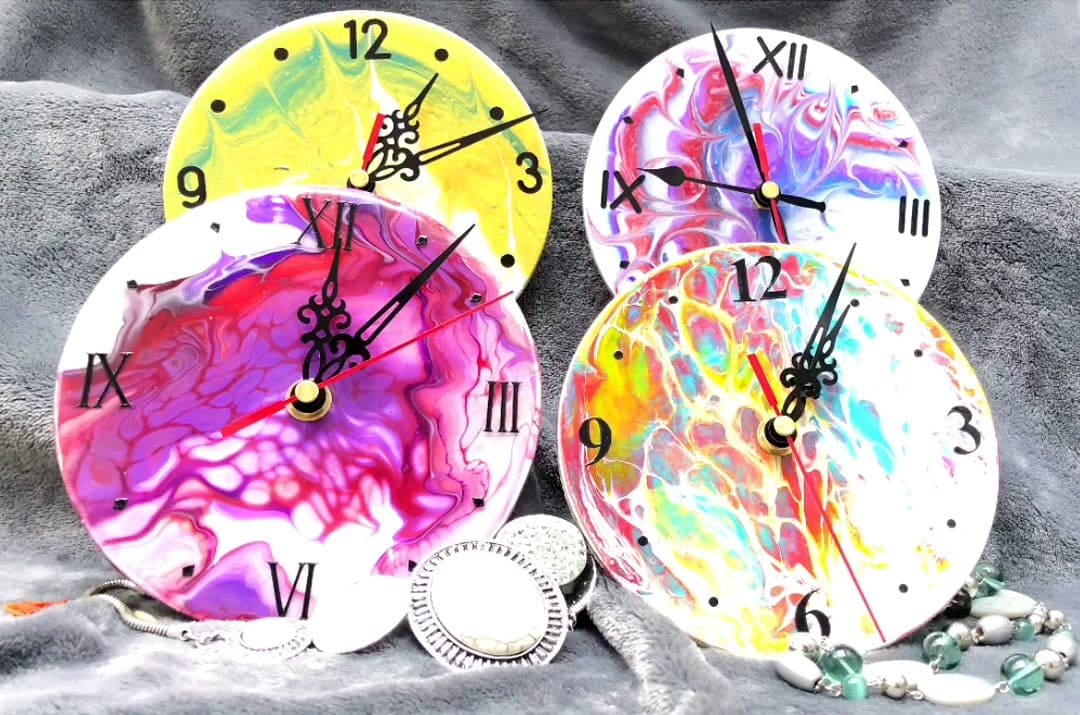
Picture Frame
Here you should make sure that your poured painting is large enough to cover the long sides of your frame. (1) Cut the sticker into four long strips and remove the protective paper on the back. (2) Stick the strips onto the surface of the frame. Then bend the adhesive strips around the edges of the frame. With a craft knife you can cut the Acrylic Skin Sticker perfectly at the corners. (3) With this method you can create a frame design that perfectly matches to the painting inside. (4)

Tips and Tricks
- In my experience, the swipe technique leads to the best results. With this technique you can make an extremely thin Acrylic Skin Sticker. This makes it much easier to decorate objects afterwards.
- Don’t mix too many colors together. This is a general tip for all your pourings. Using too many and complementary colors leads to a muddy looking, dull painting.
- Let your Acrylic Skin Stickers dry on a level surface. Otherwise the paint will flow in an unwanted direction and the cells will be destroyed.
- Let your stickers dry at room temperature or cooler. Heat can create cracks in your painting.
- If your sticker has to withstand UV light or mechanical stress afterwards, you should seal your work with Varnish or Resin.
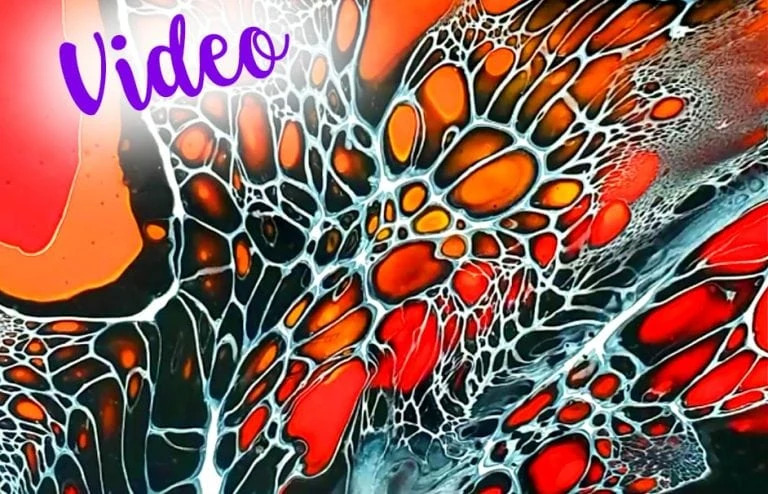
Video Tutorial for Acrylic Skin Sticker
To make it a little easier to understand, you can see one of my video tutorials here:
https://www.youtube.com/watch?v=HaGE3jrTX6k
Hopefully my instructions are helpful and you had fun with this new technique. On my YouTube channel you can find learning videos and more ideas for using the Acrylic Skin Stickers. Have a look. I also published a book / e-book about this technique:

Julia Knoll | Acrylic Skin Sticker
Julia Knoll is an ophthalmologist from Ulm, currently on parental leave with her 6-month-old daughter and her 2-year-old son. In addition to her profession, she has been working as an artist for many years with oil and watercolour paintings and portraits. Until she discovered acrylic pouring about two years ago. Since then she has devoted herself to the fluid techniques with acrylic, alcohol paints and resin. As the inventor of Acrylic Skin Stickers, she teaches her method on YouTube. In her videos you can see the great variety of possibilities of this technique – from now on there is almost nothing more that you can’t embellish with your design! This self-adhesive design makes covering surfaces and objects extremely easy and allows for countless applications. Julia also recently wrote a book on the subject: “Acrylic Skin Sticker: Oberflächen gestalten mit der Acrylic Pouring Technik”. In this book you get all information about this method and about Acrylic Pouring in general.

In 2005, Charlene completed her wellness degrees in therapeutic aromatherapy and reflexology at the International School of Reflexology and Meridian Therapy. She worked for a company offering corporate wellness programs for several years before opening her own therapy practice. In 2015, she was asked by a digital marketer friend to join her company as a content creator, and it was here that she discovered her enthusiasm for writing. Since entering the world of content creation, she has gained a lot of experience over the years writing about various topics such as beauty, health, wellness, travel, crafting, and much more. Due to various circumstances, she had to give up her therapy practice and now works as a freelance writer. Since she is a very creative person and as a balance to writing likes to be active in various areas of art and crafts, the activity at acrylgiessen.com is perfect for her to contribute their knowledge and experience in various creative topics.
Learn more about Charlene Lewis and about us.