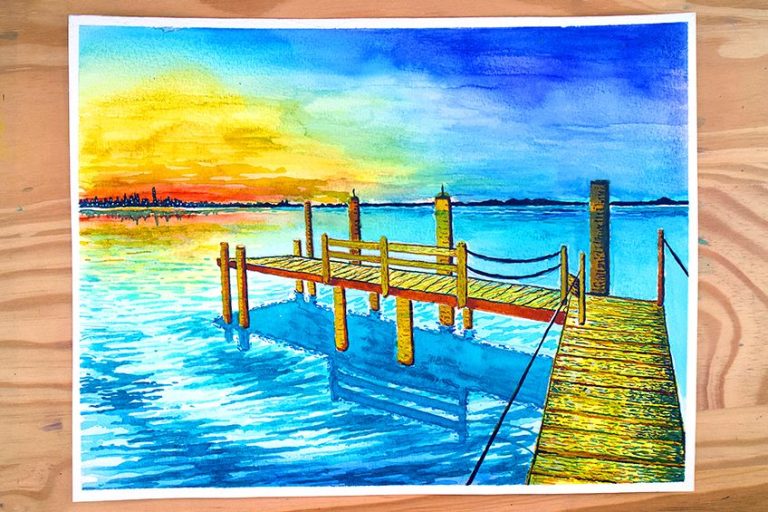
How to Paint Cups – Tea-riffic Transformations
This post may contain affiliate links. We may earn a small commission from purchases made through them, at no additional cost to you.
Welcome to the colorful world of cup painting, where ordinary ceramic cups transform into personalized works of art! Whether you’re a seasoned artist or just dipping your brush into the world of crafts, painting cups is a delightful way to add a touch of creativity and flair to your daily coffee or tea routine. From whimsical patterns to intricate designs, the possibilities are endless, and the process is as enjoyable as the final masterpiece. So, grab your paints, unleash your imagination, and let’s dive into the art of painting cups!
Key Takeaways
- Acrylic paint is suitable for cup decoration due to its adherence and ease of use.
- Prepping the surface is essential for a lasting paint job.
- Sealing and proper aftercare are necessary to maintain the integrity of the painted cups.

Preparing Your Cups
Painting cups can be a rewarding and creative endeavor for both beginners and experienced crafters alike. Whether you’re looking to add a personal touch to your morning coffee routine or create a handmade gift, understanding the right materials and methods is key. Durable acrylic paint is often the best choice for decorating cups, as they can adhere to various surfaces and are relatively easy to work with. The process of painting cups requires some preparation to ensure the finish is both attractive and long-lasting.
Surface cleaning and priming are crucial steps to prevent paint from peeling off.
After admiring your work, it’s important to seal the paint properly. This ensures the painted design will withstand the test of time and frequent use. Cups, once painted, also require specific aftercare for lasting durability which can include hand washing or avoiding the dishwasher. When one decides to paint cups, proper preparation is crucial for ensuring the paint adheres well and the final product is both aesthetically pleasing and durable. The process begins with cup selection and is followed by thorough cleaning.
Selecting the Right Cups
The ideal cups for painting should have a smooth, non-porous surface. Ceramic and porcelain cups are typically the best choices for painting projects as they can handle paint better after curing. It is also important to consider if the cup needs to be dishwasher safe after painting, which may influence the type of paint and the sealing technique used later.

Cleaning the Surface
Before painting, the surface of the cups must be free from oils, dust, and any residues. One should use rubbing alcohol or white vinegar and a soft cloth or Q-tip to clean the surface thoroughly.
- Degreasing: Wipe the cups with rubbing alcohol to degrease the surface. This step is essential since any leftover oils or residues could prevent proper paint adhesion.
- Sanding: If one is working with a slightly textured cup, lightly sanding the surface with fine-grit sandpaper will help create a surface that the paint can grip to. However, this step is optional and dependent on the cup’s material and the desired painting techniques.
Once the cups are clean and dry, they are ready for the application of paint using the chosen painting techniques.
Painting Process
In the process of painting cups, the artist selects suitable paints, applies base coatings and designs, and employs various techniques for intricate details, ensuring a personalized and durable finish.

Choosing Your Paint
The first step is selecting an appropriate type of paint. Acrylic paints are favored for their quick-drying nature and durability once sealed. For line work and lettering, paint pens offer precision and ease of use. It’s crucial to choose non-toxic paints that are safe for items that come into contact with food or drink if the cup is intended for such use.
Applying Base Coats and Designs
Once the paint is chosen, one must apply a base coat. Acrylic paints work well for this purpose, providing a solid foundation for additional layers. When the base coat is dry, the artist can move on to applying designs. This can be done freehand, or with the help of stenciling for more uniform shapes and patterns.

Example of Base Coat Application
To begin painting your cups, it’s crucial to start with a clean canvas. Thoroughly clean the cup, ensuring it’s free from any dust or residue that could affect the paint’s adhesion. Once the cup is clean and dry, apply a thin and even base coat of paint. This base coat provides a smooth surface for your design and enhances the durability of the final artwork. Allow the base coat to dry completely before proceeding with your design.
When it comes to creating designs on your cups, there are several techniques to consider. You can start by lightly sketching your design with a pencil, allowing you to plan and refine your ideas before committing them to paint.
Alternatively, use stencils to outline shapes or patterns for a more structured approach. When applying paint for your design, work in thin layers, building up the color gradually to achieve the desired intensity and depth. This method allows for greater control and precision, resulting in a beautifully detailed and cohesive design on your painted cups.
Techniques for Detailing
Fine details can bring a painted cup to life. Stippling creates texture and shading, while stenciling can be used to add crisp, uniform patterns. Artists often use a toothpick or the end of a paintbrush to draw straight lines and clean up edges. Practicing these techniques beforehand can help ensure they are executed confidently on the actual cup.

Detailing Techniques
To add texture and detail to your painted cups, consider incorporating different painting techniques. Stippling is a technique where you use the tip of a brush to create dots, adding a textured and tactile feel to your design. This method is great for creating patterns or adding depth to your artwork.
For straight lines or precise details, you can use a toothpick or the tip of a paint pen to carefully drag across the surface, creating clean and sharp lines.
Experiment with various brush sizes to achieve different levels of detail and intricacy in your cup painting, allowing you to unleash your creativity and enhance the visual appeal of your finished masterpiece. By methodically preparing and applying paint, artists can transform a plain cup into a bespoke piece of functional art.
Drying and Sealing
Proper drying and sealing are crucial for a long-lasting finish on painted cups. Ensuring that paint cures correctly and applying a suitable sealant can protect the artwork and make the cup more durable.

Curing the Paint
Once an individual has applied acrylic enamel paint to their cup, it requires adequate drying time before it is sealed. The drying process typically takes 24 hours at room temperature. However, to further solidify the paint, the cup can be placed in a cold oven. The temperature should then be set to 300°F (149°C) and the cup should be baked for approximately 35 minutes. It’s important that the cup heats up gradually with the oven to prevent cracking or breakage.
Afterward, the oven can be turned off, allowing the cup to cool down within it, which can take several hours.
Applying Sealant
Once the painted cup is fully cured, a clear sealant can be applied to provide a protective coating. This sealant should be non-toxic if the cup is intended for use with food or drink. The sealant can take the form of a spray or a brush-on variety, each providing the finishing touches to the newly painted cup. Instructions for the sealant should be followed carefully, and adequate ventilation is necessary during application. Sealants usually require another period of drying, typically at least 24 hours, before the cup is ready for use or handling.

Aftercare and Usage
Proper aftercare ensures longevity and safety of hand-painted cups. This section focuses on making cups secure for dishwasher usage, an important aspect for maintaining the cups’ usability and appearance.
Making Your Cups Dishwasher Safe
Once a DIY project is completed, the creator often wants the cup to be dishwasher safe for easier cleaning and durability. The application of Dishwasher Safe Mod Podge is a common solution to this problem. However, users must follow the instructions carefully to achieve the best results. Here’s a concise guide to using dishwasher-safe Mod Podge:
- Clean the cup: Ensure that the cup is thoroughly cleaned and dried before applying any sealer.
- Application of Mod Podge: Apply a thin coat of dishwasher safe Mod Podge using a soft-bristled brush. Pay special attention to the painted area, covering it smoothly to avoid brush marks.
- Curing time: After application, the cup should cure for 28 days before using or washing. Altering the curing time can significantly affect the dishwasher safety of the cup.
- Dishwasher use: Once cured, the cup can be washed on the top rack of a dishwasher, making it a safer option for regular use.

By following these specific steps, one secures their painted cup for routine cleaning, ensuring that the artwork remains intact and the item functional. The use of Dishwasher Safe Mod Podge is integral to this process, providing an efficient way to enjoy one’s DIY project without the added worry of hand washing.
As you put the finishing touches on your painted cups, remember that crafting is not just about the final product—it’s about the joy of creating something unique and meaningful. Each stroke of paint is a reflection of your creativity and personality, making every cup a one-of-a-kind treasure. Whether you’ve adorned your cups with vibrant colors, intricate designs, or playful motifs, they are now ready to brighten your day and add a touch of artistic charm to your home. So, sip your favorite beverage in style and continue exploring the endless possibilities of cup painting. Cheers to your artistic journey!
Frequently Asked Questions
What Type of Paint Should Be Used for Painting Cups to Ensure Longevity?
For painting cups, it is advisable to use paints that are formulated for ceramics. These specialty paints are designed to adhere to ceramic surfaces more effectively and can withstand washing and daily use. Regular acrylic paint can be used but may require a sealant for durability.
How Can You Seal a Painted Cup to Make It Dishwasher-Safe?
Once the paint has dried, applying a food-safe sealant designed for ceramics will make a painted cup more resistant to water and heat, thus dishwasher safe. Sealing is typically done by baking the cup in an oven at a recommended temperature, often around 350°F (175°C) for about 30 minutes. This process ensures the longevity of the paint job.
What Steps Are Involved in Painting a Cup for the First Time?
Before painting a cup, start by thoroughly cleaning the surface to remove any dirt or oils. Gather necessary materials including food-safe ceramic paint, paintbrushes, and a clean cloth. Apply thin coats of paint to the cup, allowing each layer to dry completely. If needed, use painter’s tape to create clean lines or patterns. After painting, seal the design by baking in the oven if required by the paint manufacturer’s instructions.

In 2005, Charlene completed her wellness degrees in therapeutic aromatherapy and reflexology at the International School of Reflexology and Meridian Therapy. She worked for a company offering corporate wellness programs for several years before opening her own therapy practice. In 2015, she was asked by a digital marketer friend to join her company as a content creator, and it was here that she discovered her enthusiasm for writing. Since entering the world of content creation, she has gained a lot of experience over the years writing about various topics such as beauty, health, wellness, travel, crafting, and much more. Due to various circumstances, she had to give up her therapy practice and now works as a freelance writer. Since she is a very creative person and as a balance to writing likes to be active in various areas of art and crafts, the activity at acrylgiessen.com is perfect for her to contribute their knowledge and experience in various creative topics.
Learn more about Charlene Lewis and about us.