Human Heart Drawing – Draw a Realistic Anatomical Heart
This post may contain affiliate links. We may earn a small commission from purchases made through them, at no additional cost to you.
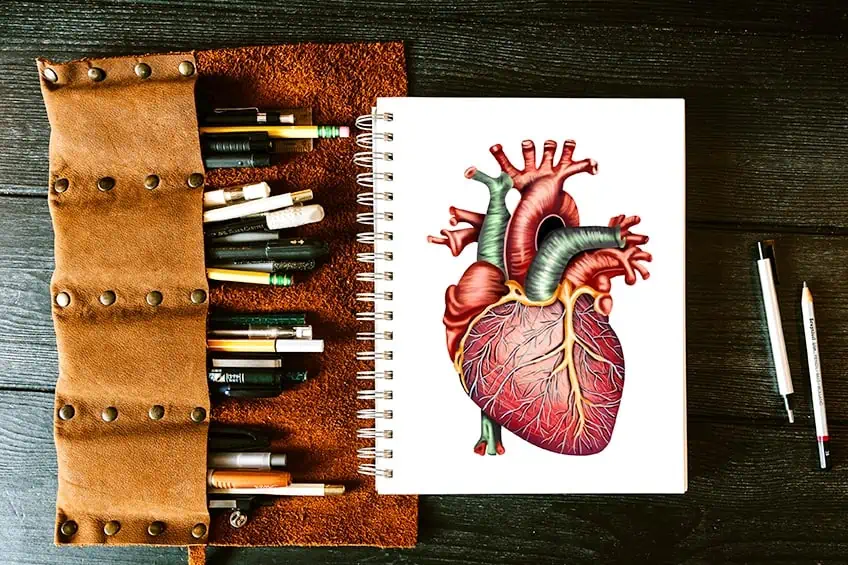
The human heart is an extraordinary organ that beats approximately 100,000 times a day and pumps about 2,000 gallons of blood throughout the body. It’s the size of a fist but its power is immense, delivering oxygen and vital nutrients to every cell and tissue in the body. Not only is the heart essential for our physical well-being but it’s also associated with love and emotions, making it a symbol of affection and devotion. So, take care of your heart and listen to its beat, for it’s the rhythm of life.
How to Draw a Human Heart With a Step-by-Step Guide
If you’re about to start drawing a human heart, there are a few things to keep in mind that will help you create an accurate and realistic representation. First, pay attention to the proportions and details of the heart, such as the size and shape of the ventricles, the location of the arteries and veins, and the texture of the tissue. Don’t forget to also consider the colors and shading of the heart, as this can add depth and dimension to your drawing. If you are unsure of how to do this, don’t fret as our drawing tutorial on how to draw a human heart with take you step-by-step to achieve a realistic heart drawing!
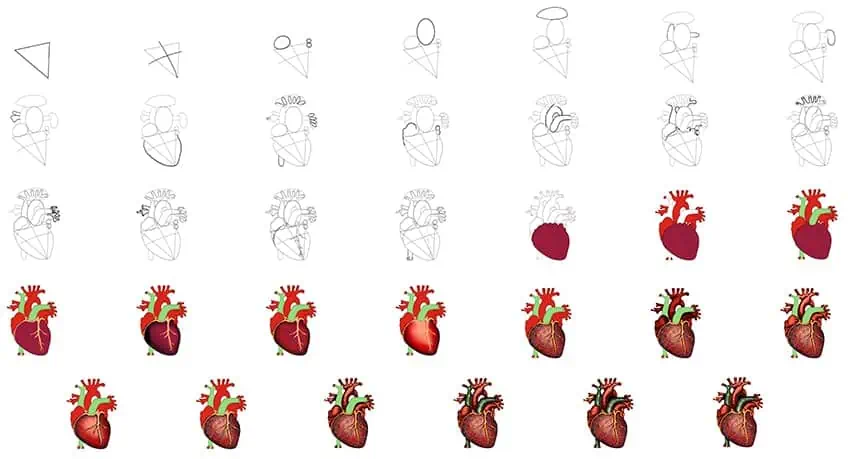
With some practice and attention to detail, you’ll be able to create a beautiful and accurate depiction of the human heart. The below collage demonstrates each step you will take to draw an anatomical heart!
Step 1: Draw the Main Shape of Your Human Heart Drawing
Begin this tutorial, by drawing the main shape of the human heart represented by a tilted triangle.

Step 2: Add the Guidelines
Within the triangle, draw a horizontal and vertical centerline to split the triangle into four pieces.

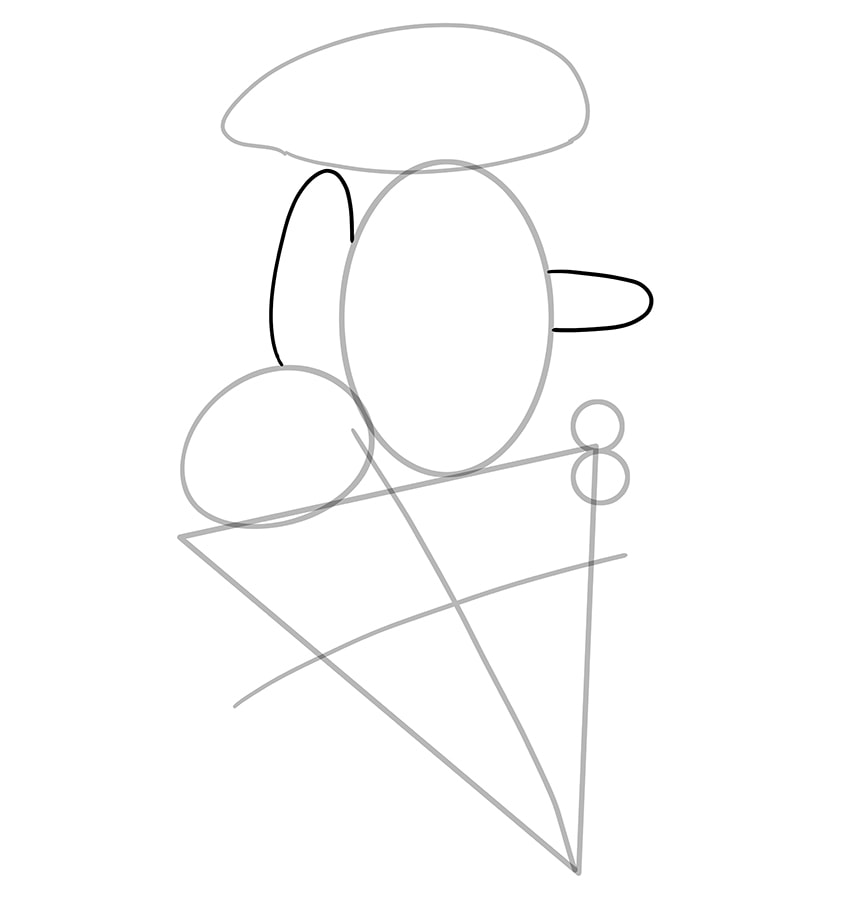
Step 3: Draw the First Construction Lines
Above the triangle and positioned on the top left, draw a large oval shape. To the right side of the triangle on the edge, draw the small circles with one above the other.

Step 4: Add the Aorta Construction Lines
On the right half, above the triangle, draw a large oval shape to represent the aorta of the heart.

Step 5: Continue the Aorta Construction Lines
Above the previously drawn oval shape, draw a horizontal oval shape to represent the veins of the aorta.

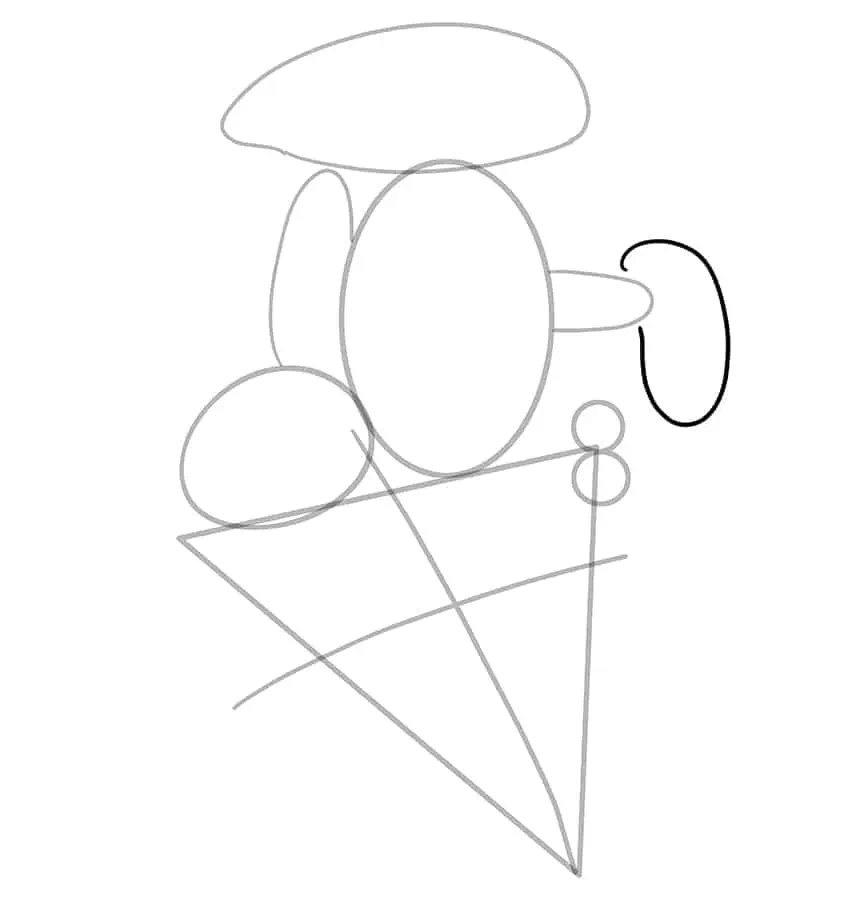
Step 6: Draw the Secondary Vein Construction
Draw an additional vertical oval attached to the left side of the aorta. On the right side, draw a horizontal oval shape.
Step 7: Draw the Edge Veins Construction Shape
On the edge of your drawing of a human heart, draw a final oval shape to represent the veins.
Note! These veins will later be added to the edge of the heart.
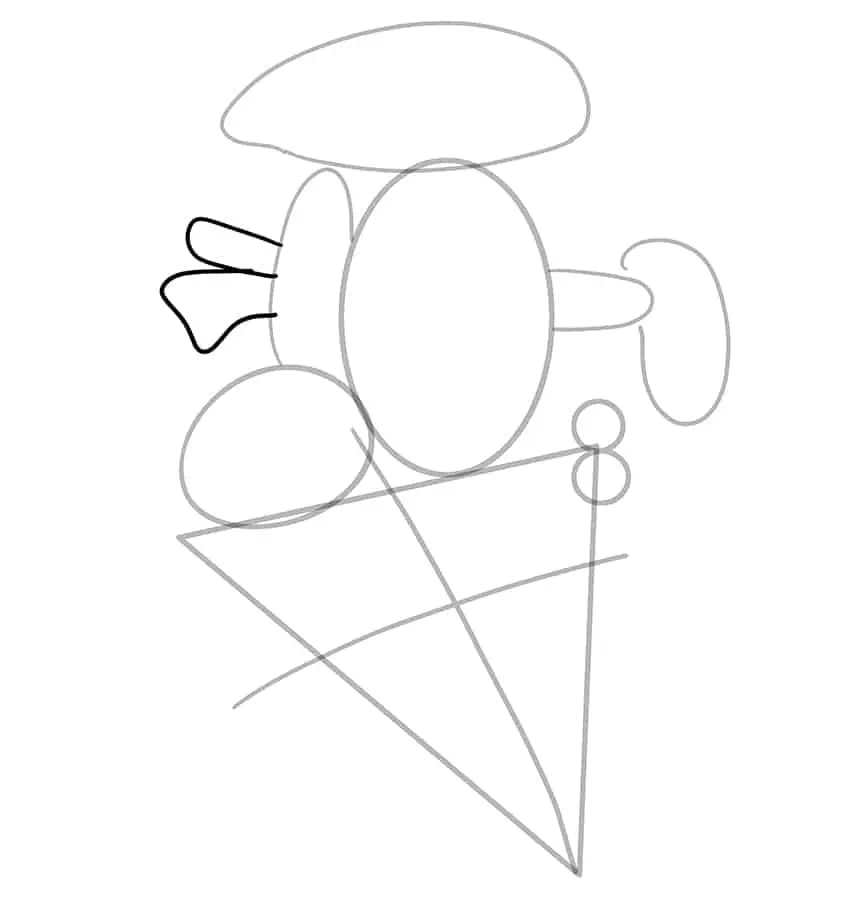
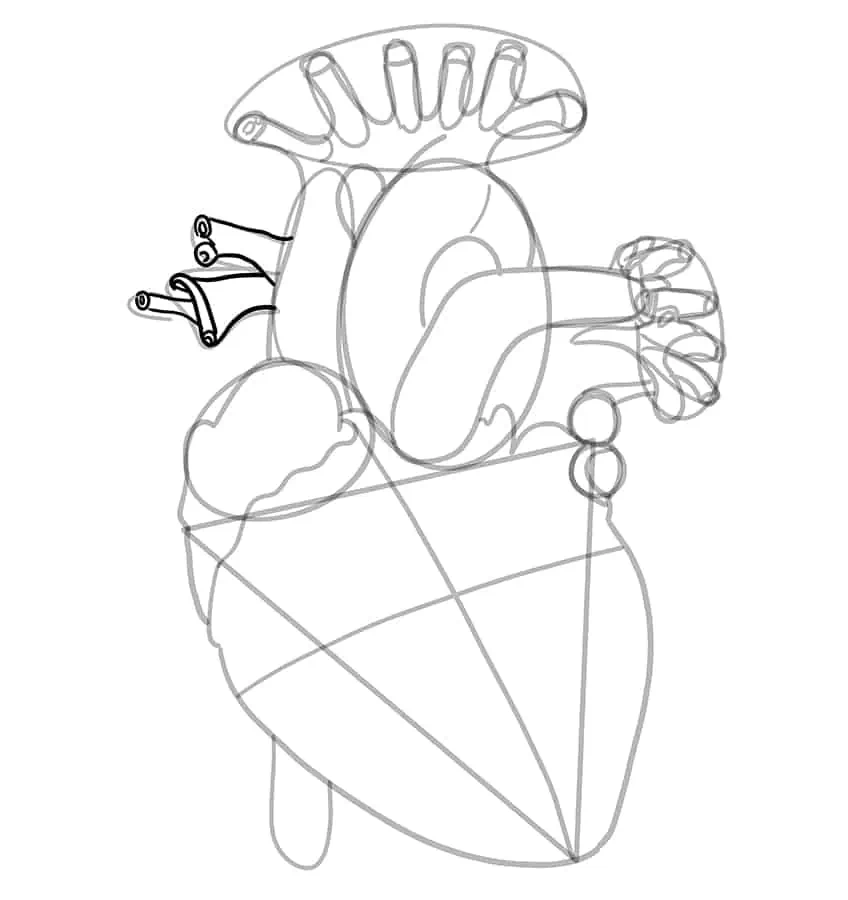
Step 8: Add the Pulmonary Veins
To the left of the heart, draw two abstract shapes representing the pulmonary veins. These should be attached to the oval shape drawn in step six.
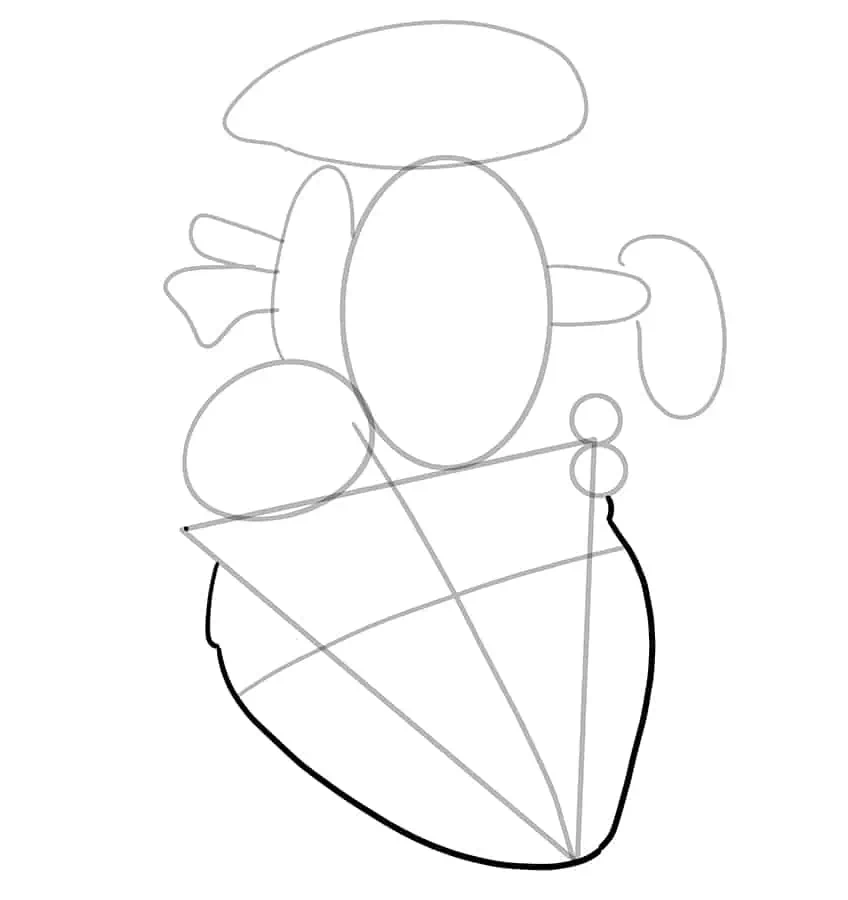
Step 9: Outline the Pericardium
Use the previously drawn triangle, drawn in step one, to aid you in outlining and shaping the pericardium of your human heart drawing.
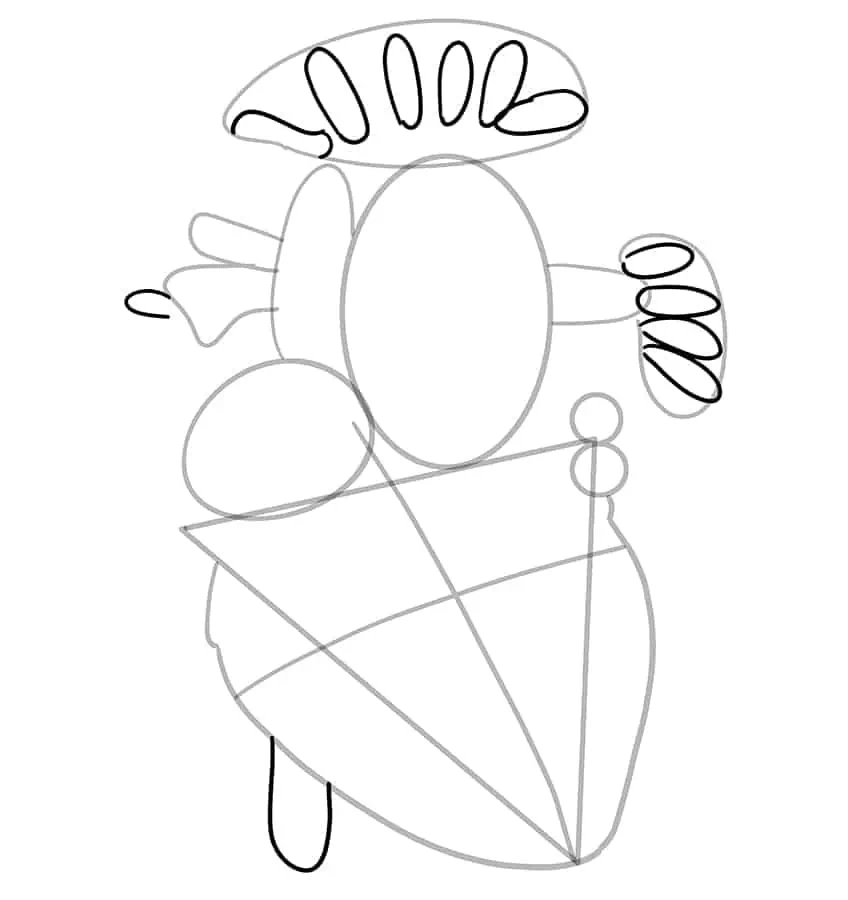
Step 10: Add the Vein Tubes
Within the previously drawn ovals, drawn in steps five and seven, draw the vein tubes as stretched-out oval shapes.
Step 11: Outline the Left Atrium
Begin to outline the left atrium using the construction line drawn in step three. Complete the step by outlining the right side of the heart.
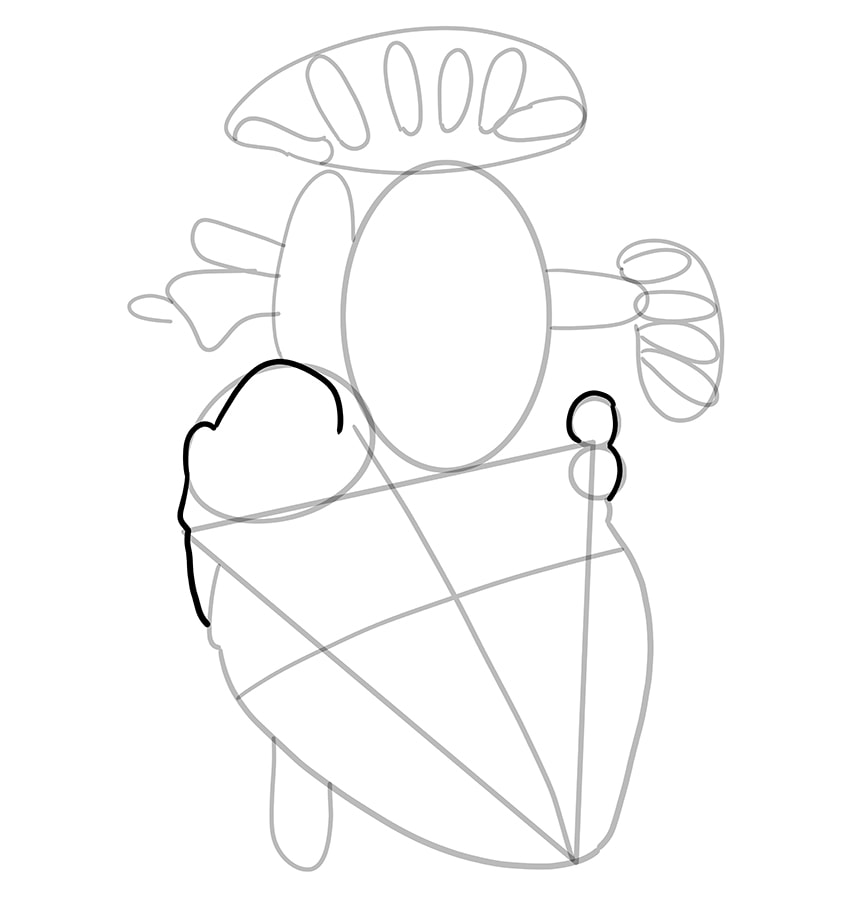
Step 12: Outline the Pulmonary Artery
Use the previously constructed oval drawn in step four, to aid you in outlining the pulmonary artery in your human heart drawing.

Step 13: Continue to Outline the Drawing of a Human Heart
In this step, you will outline the superior vena cava leading to the vein tubes, using the previously constructed oval shapes. Finish this step by outlining the top area of the heart’s body.
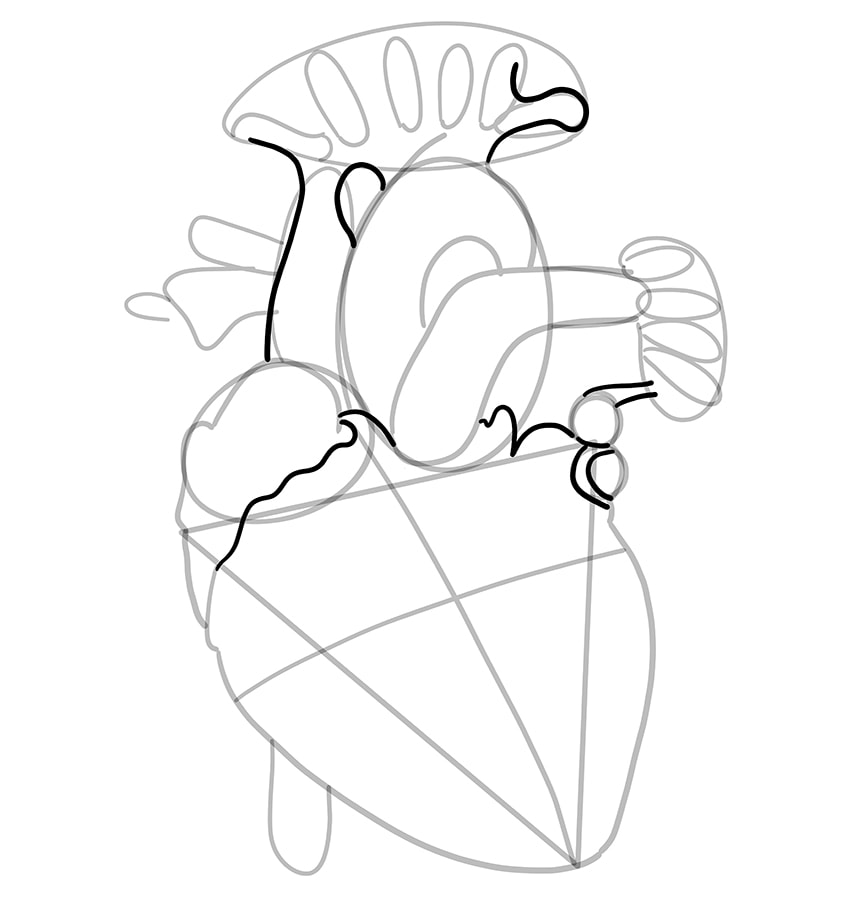
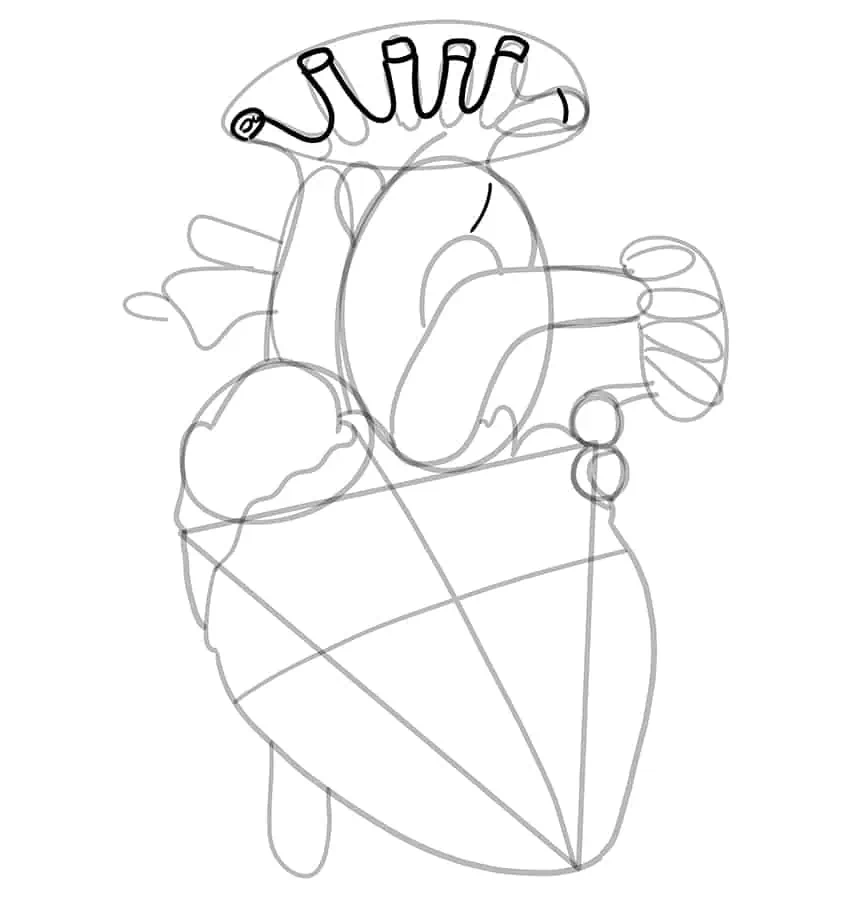
Step 14: Outline the Aorta Tubes
Begin to outline the aorta tubes above the heart, using the vein tubes drawn in step 10.
Step 15: Continue to Outline the Realistic Heart Drawing
Outline the pulmonary vein tubes, to the right of the heart, using the constructions lines for the vein tubes drawn in step 10.
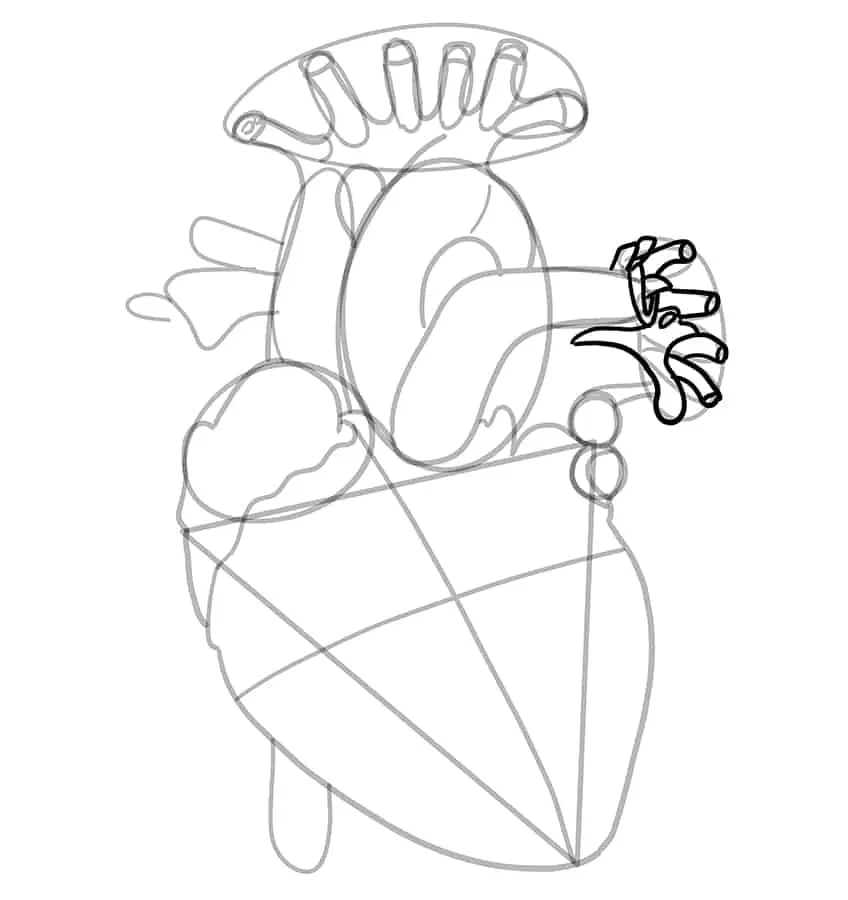
Step 16: Outline the Left Pulmonary Veins
Repeat the previous step, however, outline the pulmonary veins on the left side of the human heart drawing.
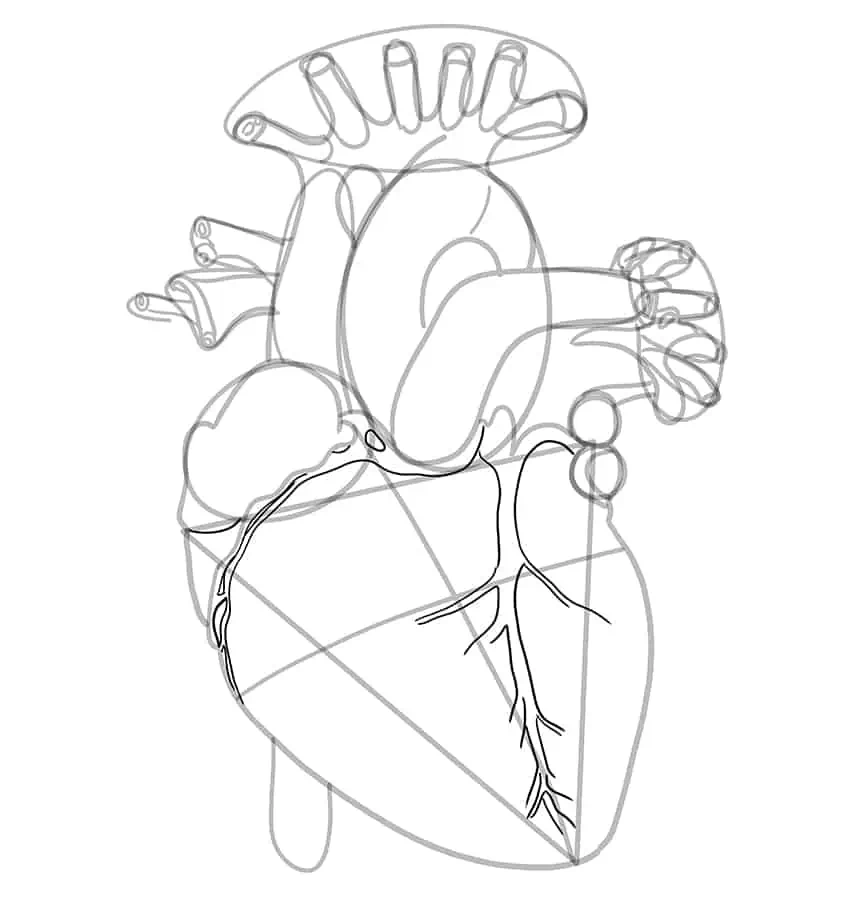
Step 17: Draw the Veins Within the Heart
Within the heart’s body, draw fine root-like veins leading from wide to narrow sharp root lines.
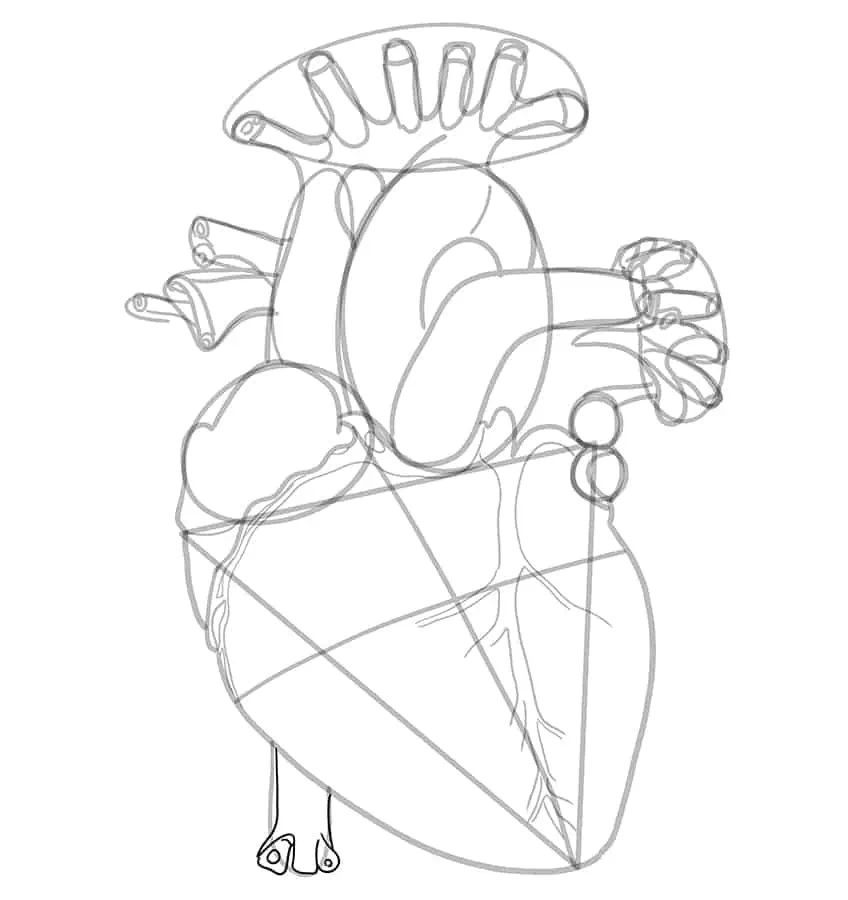
Step 18: Outline the Inferior Vena Cava
At the bottom left of the heart, outline the inferior vena cava tube.
You have finished outing your realistic heart drawing. You can now erase any still visible construction lines.
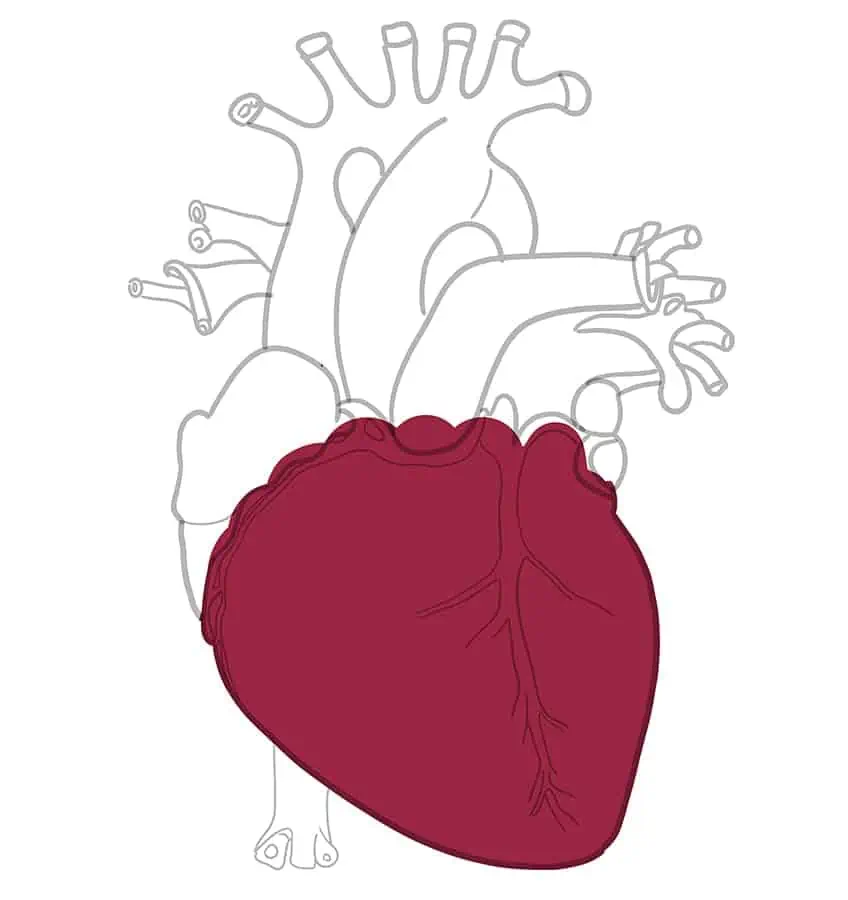
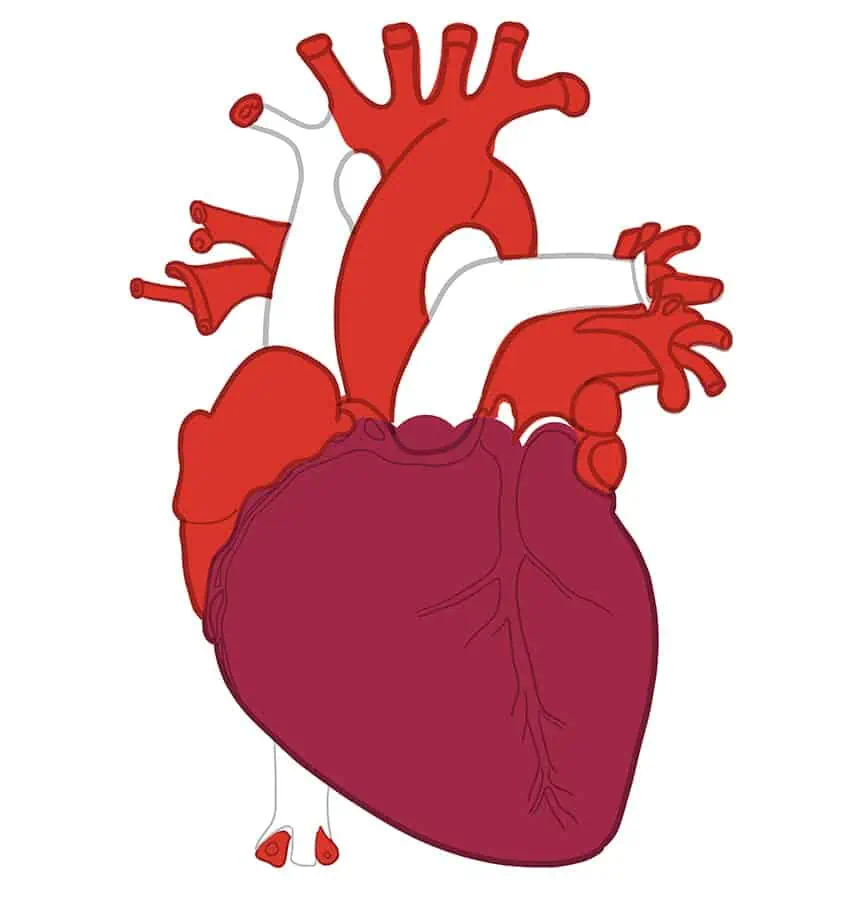
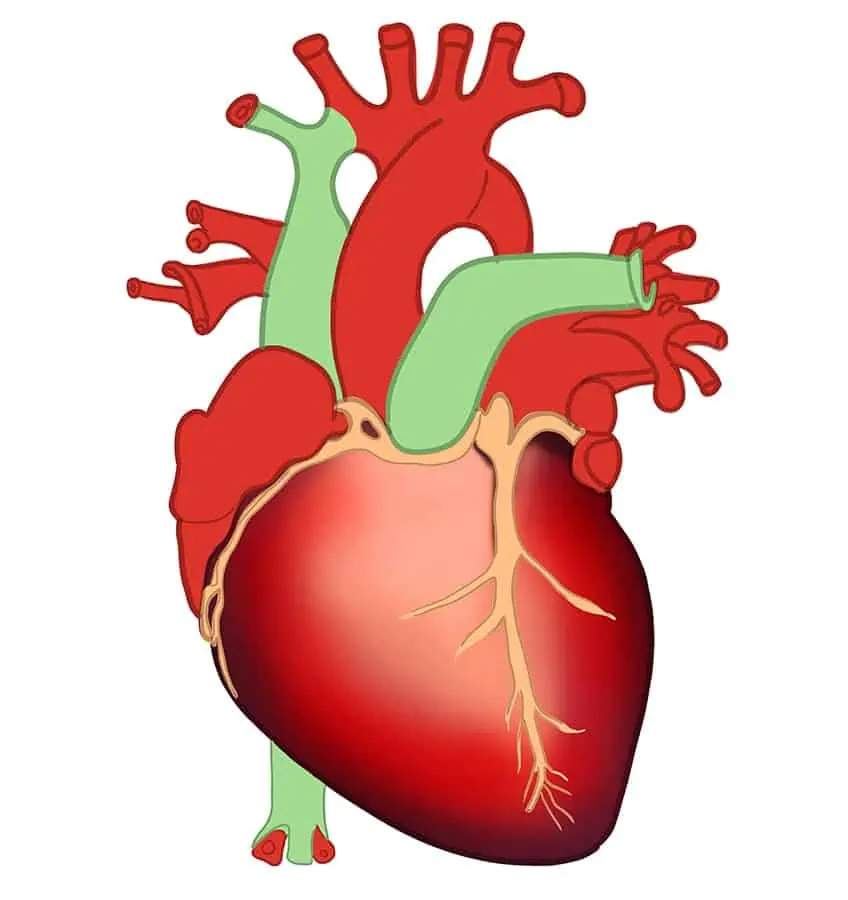
Step 19: Add the First Color Coat
Select a regular brush and a shade of maroon paint, and evenly coat the heart.
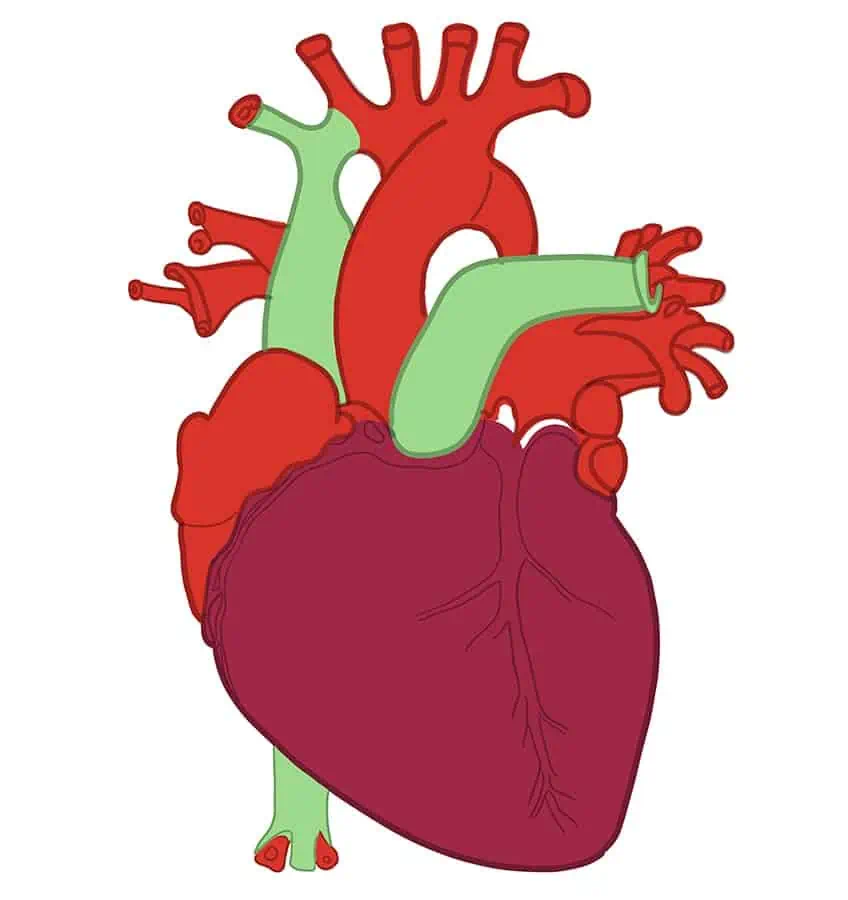
Step 20: Add the Second Color Coat
With a fine, sharp brush and red paint, evenly coat the main arteries and vein tubes.
Step 21: Continue to Color Your Human Heart Drawing
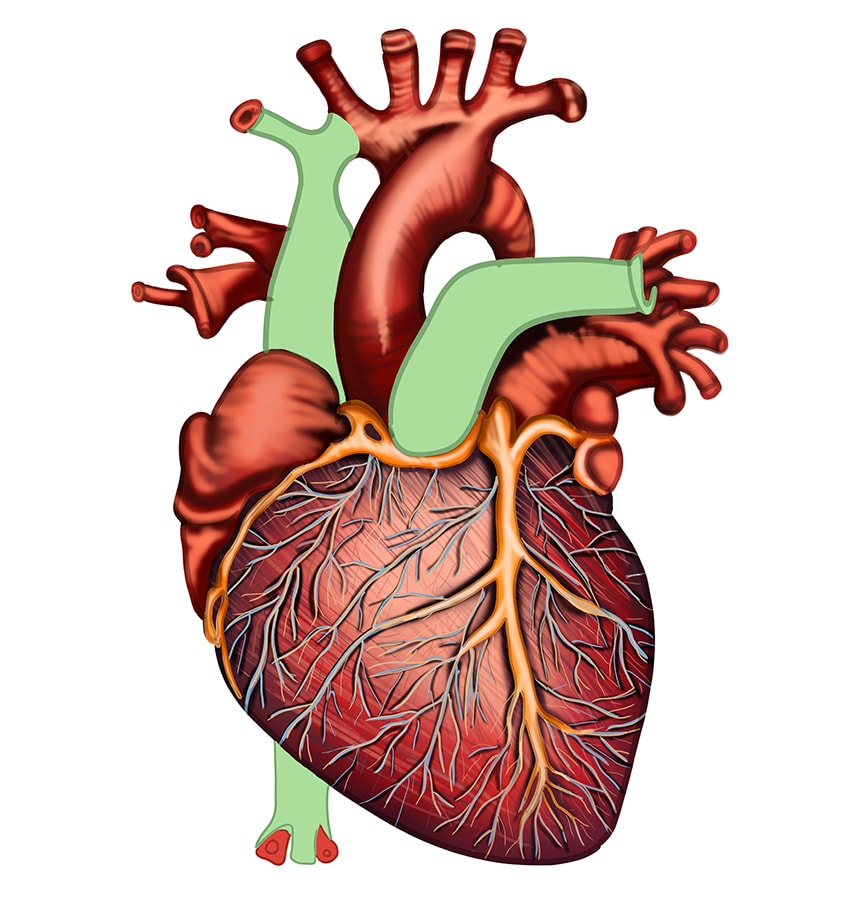
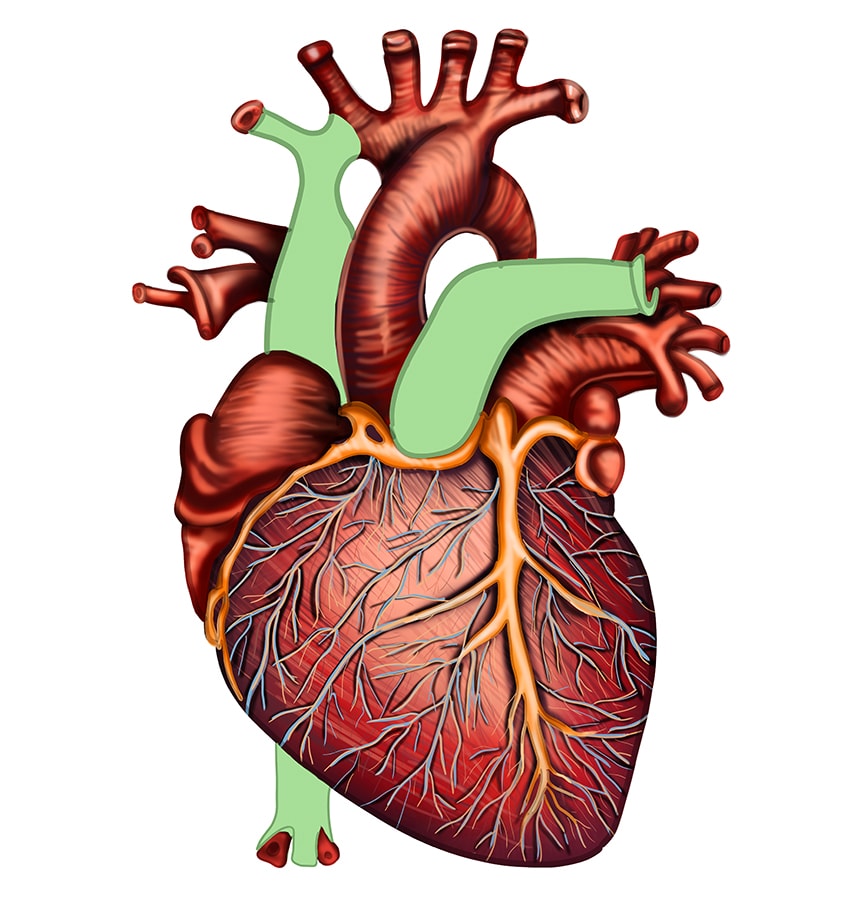
On the remaining blank areas, use a fine, sharp brush and green paint, and color these tubes.
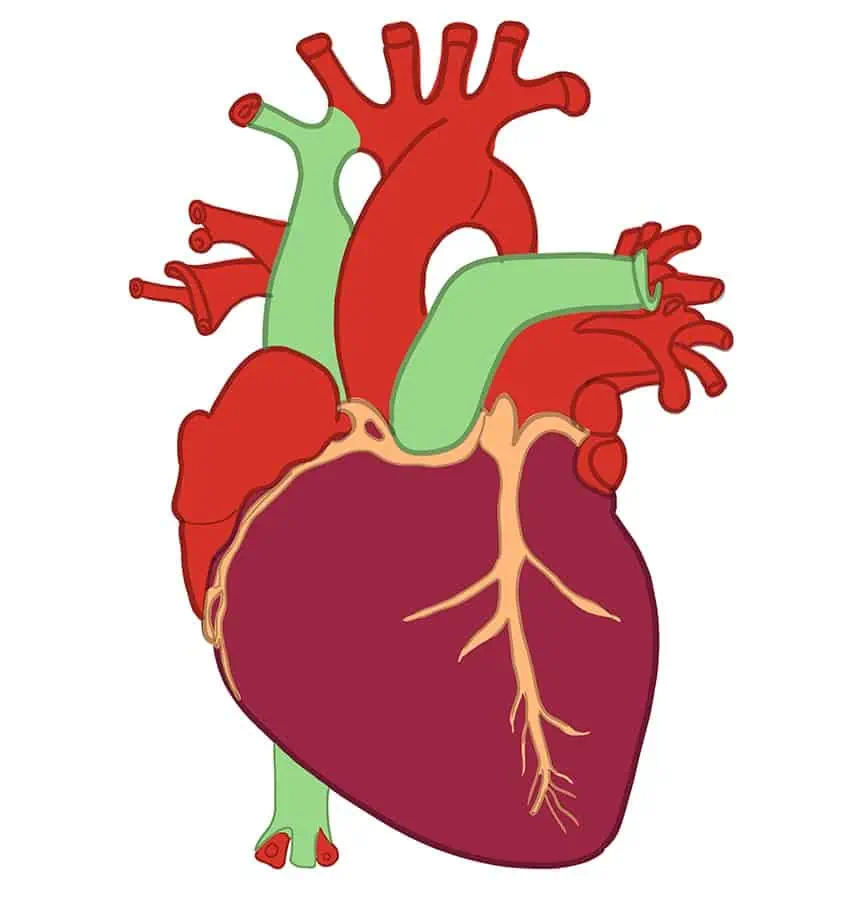
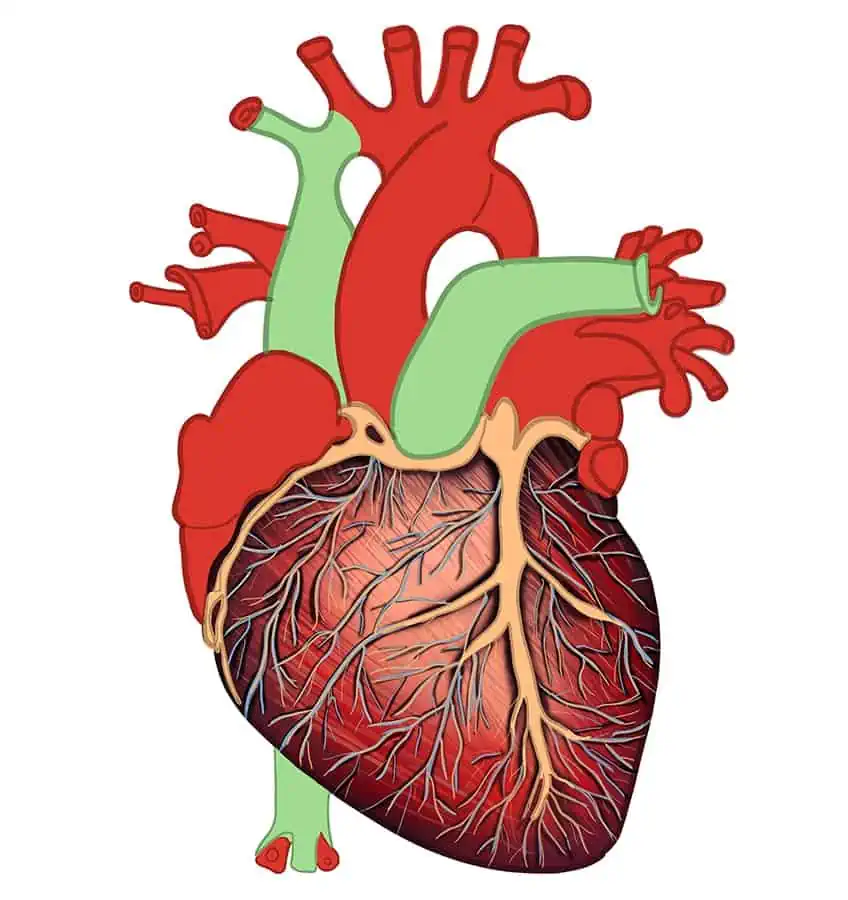
Step 22: Add Color to the Veins
Use the same brush as previously and switch to light peach paint, and evenly coat the veins within the heart.
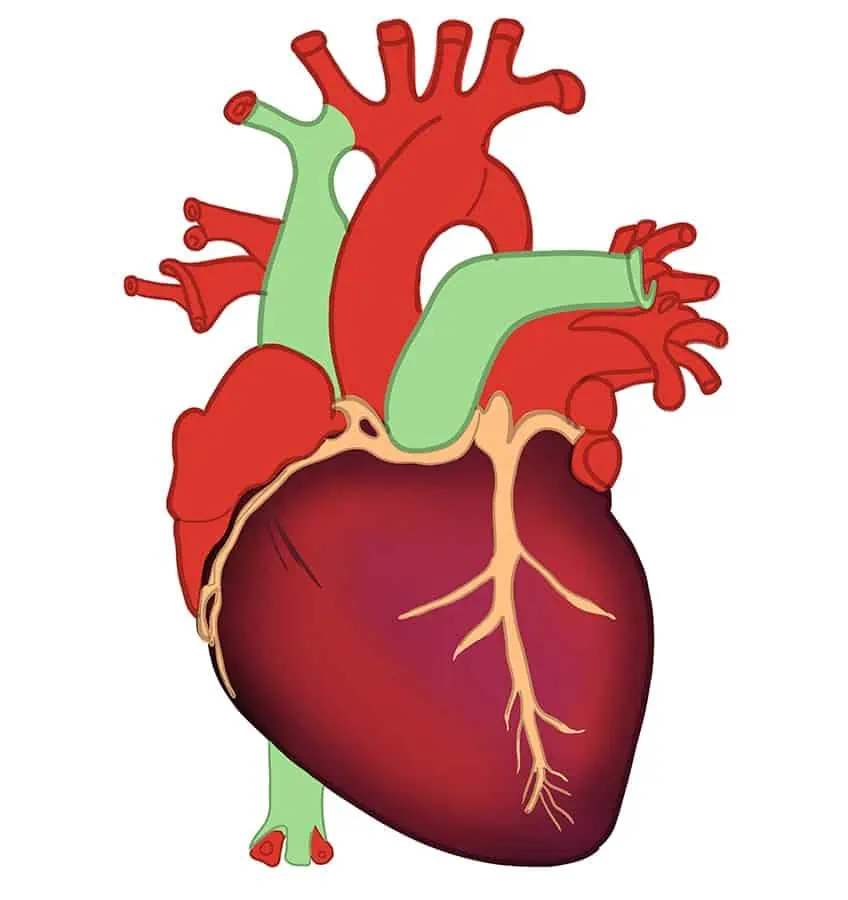
Step 23: Shade the Heart
Sketching a heart and making it look realistic requires shading and texturing. In this step, you will add subtle shading along the edges of the heart, using a soft brush and black paint. For the finger edges, switch to a fine brush.

Step 24: Color Blend the Heart
With a small, soft brush and red paint, softly add a color blend to the heart. Continue using a blending brush to soften and spread the color coat.
Note! The center should still have the first color coat visible.
Step 25: Highlight Your Drawing of a Human Heart
Begin to add soft highlights within the center area of the heart, using a soft brush and a shade of peach paint.
Step 26: Texture the Heart
Use a thin brush and black paint to trace the outline of the veins. Continue to soften the shading along the veins using a blending brush. Complete this step with a thin brush, and add fine diagonal brushstrokes. Repeat this step using white paint.

Step 27: Add Additional Veins
Use the same brush as previously and black paint, and paint additional fine root-like veins within the heart. These veins should stem from the main root. Repeat this step using peach and blue paint.
Step 28: Highlight the Main Vein
In this step, you will paint the edges of the main vein, using a soft brush and dark orange paint. Repeat once more using white paint to add highlights.
Complete the step using a blending brush to spread and soften the highlights within the vein only.
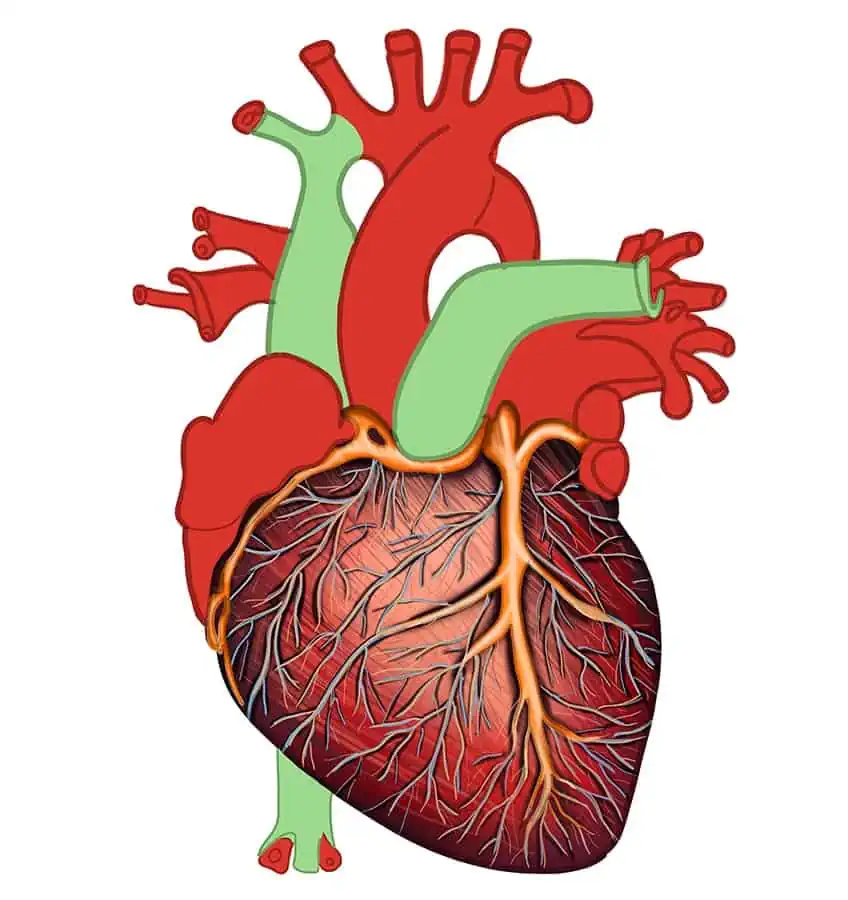
Step 29: Shade the Main Arteries and Tubes
Begin to shade your realistic heart drawing, by adding soft texture lines using a thin brush and black paint. Switch to a soft brush, and add shading along the edges of the main arteries and vein tubes.
Note! The first color coat should still be somewhat visible. Complete this step, using a blending brush to soften and spread the shading.
Step 30: Highlight the Main Arteries and Tubes
With a small, soft brush and a combination of peach and white paint, lightly highlight the center areas of the main arteries and tubes. Repeat using a fine brush to add finer brushstrokes.
Step 31: Texture the Main Arteries and Tubes
Add fine curving brushstrokes, that wrap around each of the main arteries and tubes, using a thin brush and black paint. Continue using white paint to lighten the textures.
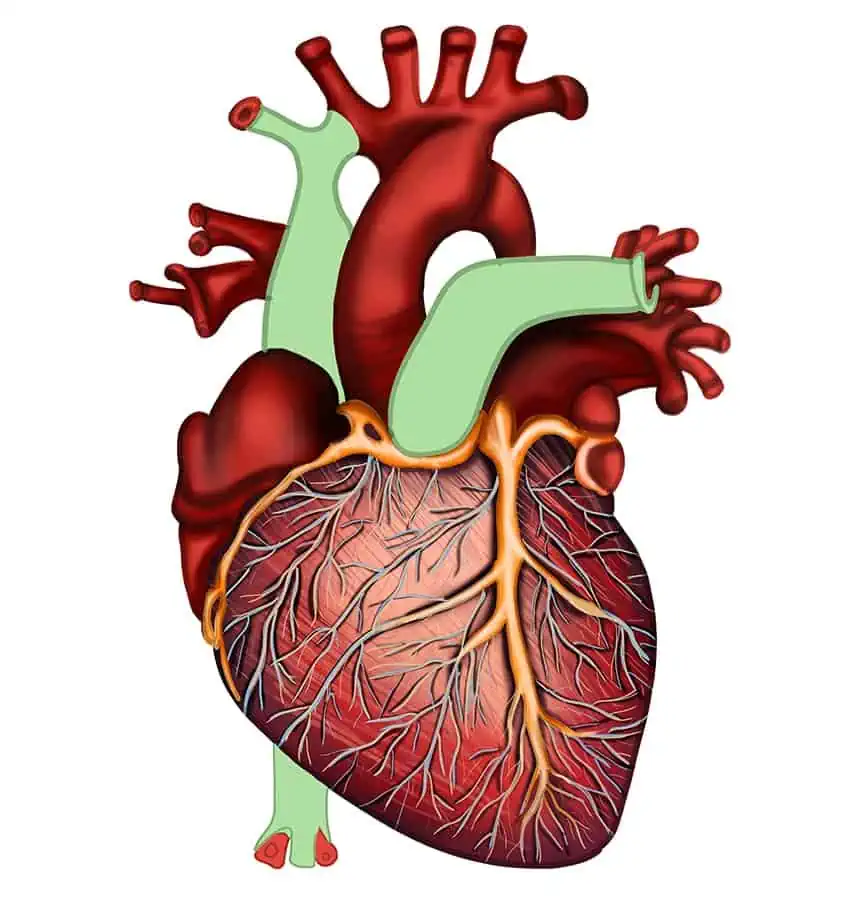
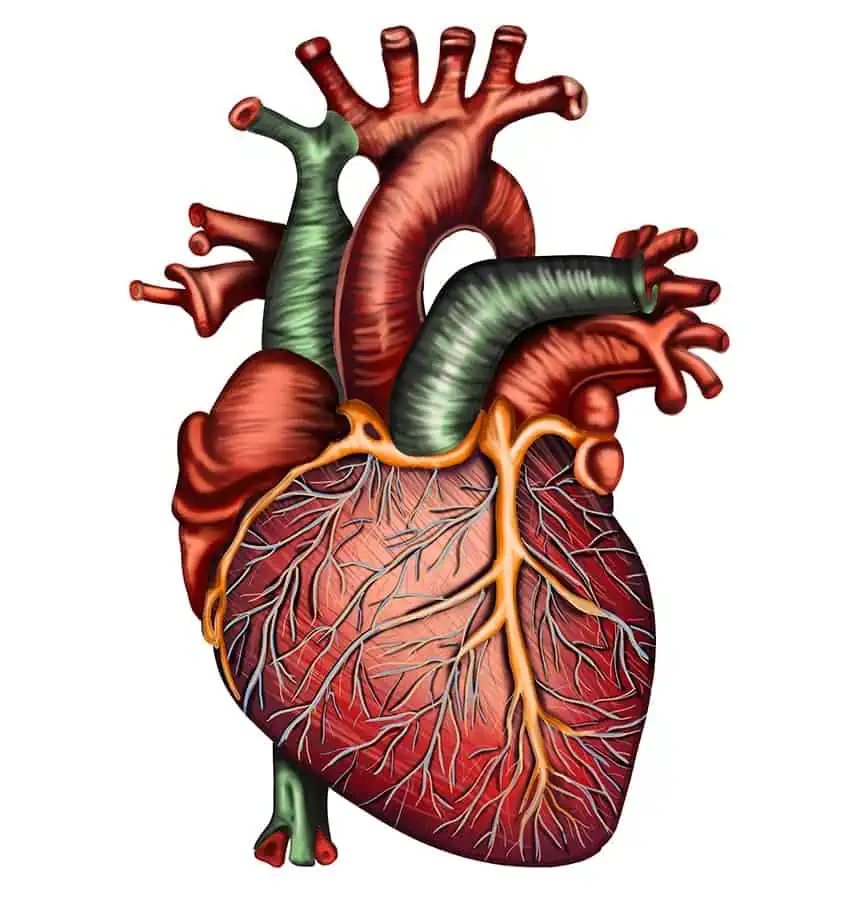
Step 32: Shade and Highlight the Second Tubes
On the green-painted tubes, use a small brush and black paint, and add shading to the edges of each tube. Continue using white paint to add subtle highlights on the centerline of each of the tubes. Switch to a thin brush and a combination of black and white paint, and add fine hairlines brushstrokes wrapping around each tube.
Step 33: Paint the Background
Fill in the background on the main artery with a thin brush and black paint.
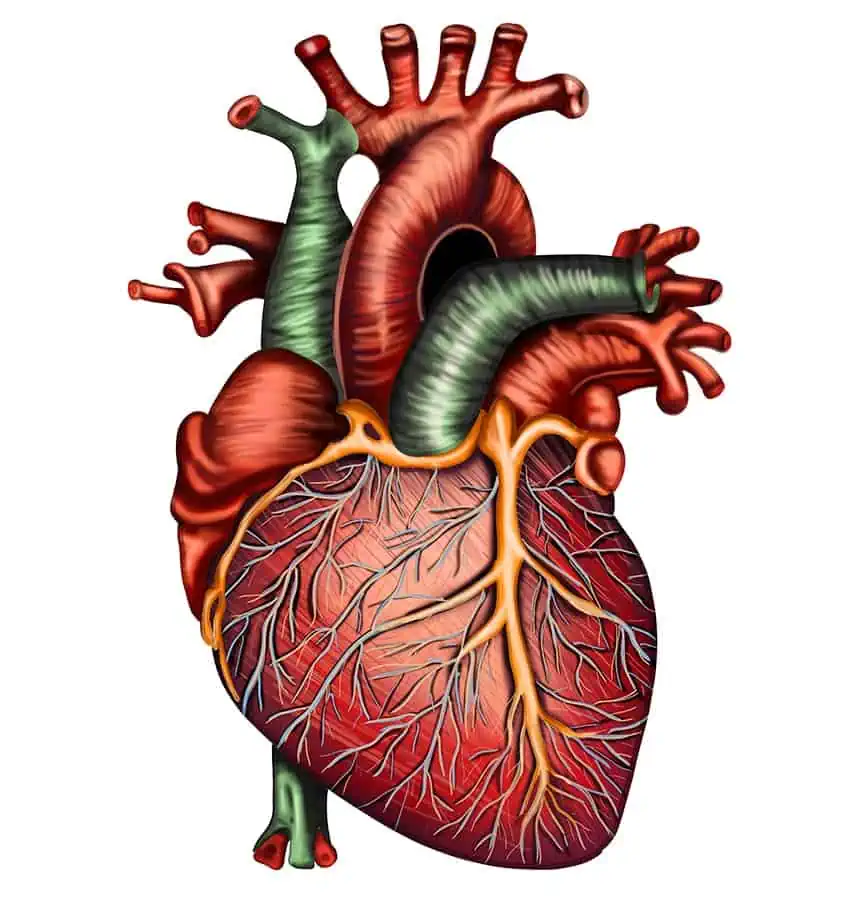
Step 34: Finalize Your Drawing of a Human Heart
Just one more step to go and you are finished sketching a heart! To finish your drawing, select a fine, sharp brush and the corresponding colors to trace any harsh outlines that are still visible. This will help you to achieve a final realistic heart drawing with seamless lines!
Shew! You have finally reached the end of our tutorial on how to draw a human heart. Drawing the heart anatomy can seem daunting and tricky at first, but when you take the drawing step-by-step, it is easily achievable! Your attention to detail and focus on the anatomy of the heart have resulted in a beautiful and accurate representation of this complex organ. Your use of shading and color has added depth and dimension to the drawing, making it truly impressive. Keep up the great work and continue to challenge yourself to learn and grow as an artist. With your dedication and passion, you are sure to achieve great things in your artistic pursuits!
Frequently Asked Questions
How to Draw an Anatomical Heart Realistically?
To draw an anatomical heart realistically, pay attention to the proportions and positioning of the different parts of the heart, as well as their texture and color. Sketch out a basic outline of the heart, using our tutorial as a guide. Next, begin to add details, such as the veins and arteries, and shade the different parts of the heart to create depth and realism. Don’t forget to focus on the lighting and shadowing, as this can bring the drawing to life. Finally, take your time and practice regularly to improve your skills and develop your unique style.
Is It Easy to Draw the Heart Anatomy?
Drawing the heart anatomy can be challenging, but with practice and dedication, it can become easier over time! The human heart is a complex organ with many parts and intricate details, which can make it difficult to draw accurately. It requires a good understanding of proportions and shading to create a realistic depiction. However, with the help of our tutorial with a step-by-step approach to drawing, it’s possible to improve your skills and create a more accurate representation!

Matthew Matthysen is a multidisciplinary artist. He completed his fine art degree, majoring in History of Art and Contemporary Drawing Practice at the University of Witwatersrand, South Africa. Before joining acrylgiessen In 2020, Matthew worked part-time as an art teacher at Reddford Blue Hills High school. Matthew creates drawing and painting tutorials for acrylgiessen and captures them not only photographically and in written form. He also records the creation of his works in his own creative studio as in video format, from which later with a voiceover and a video editor also drawing tutorials for the Youtube channel of acrylgiessen are created.
Learn more about Matthew Matthysen and about acrylgiessen.