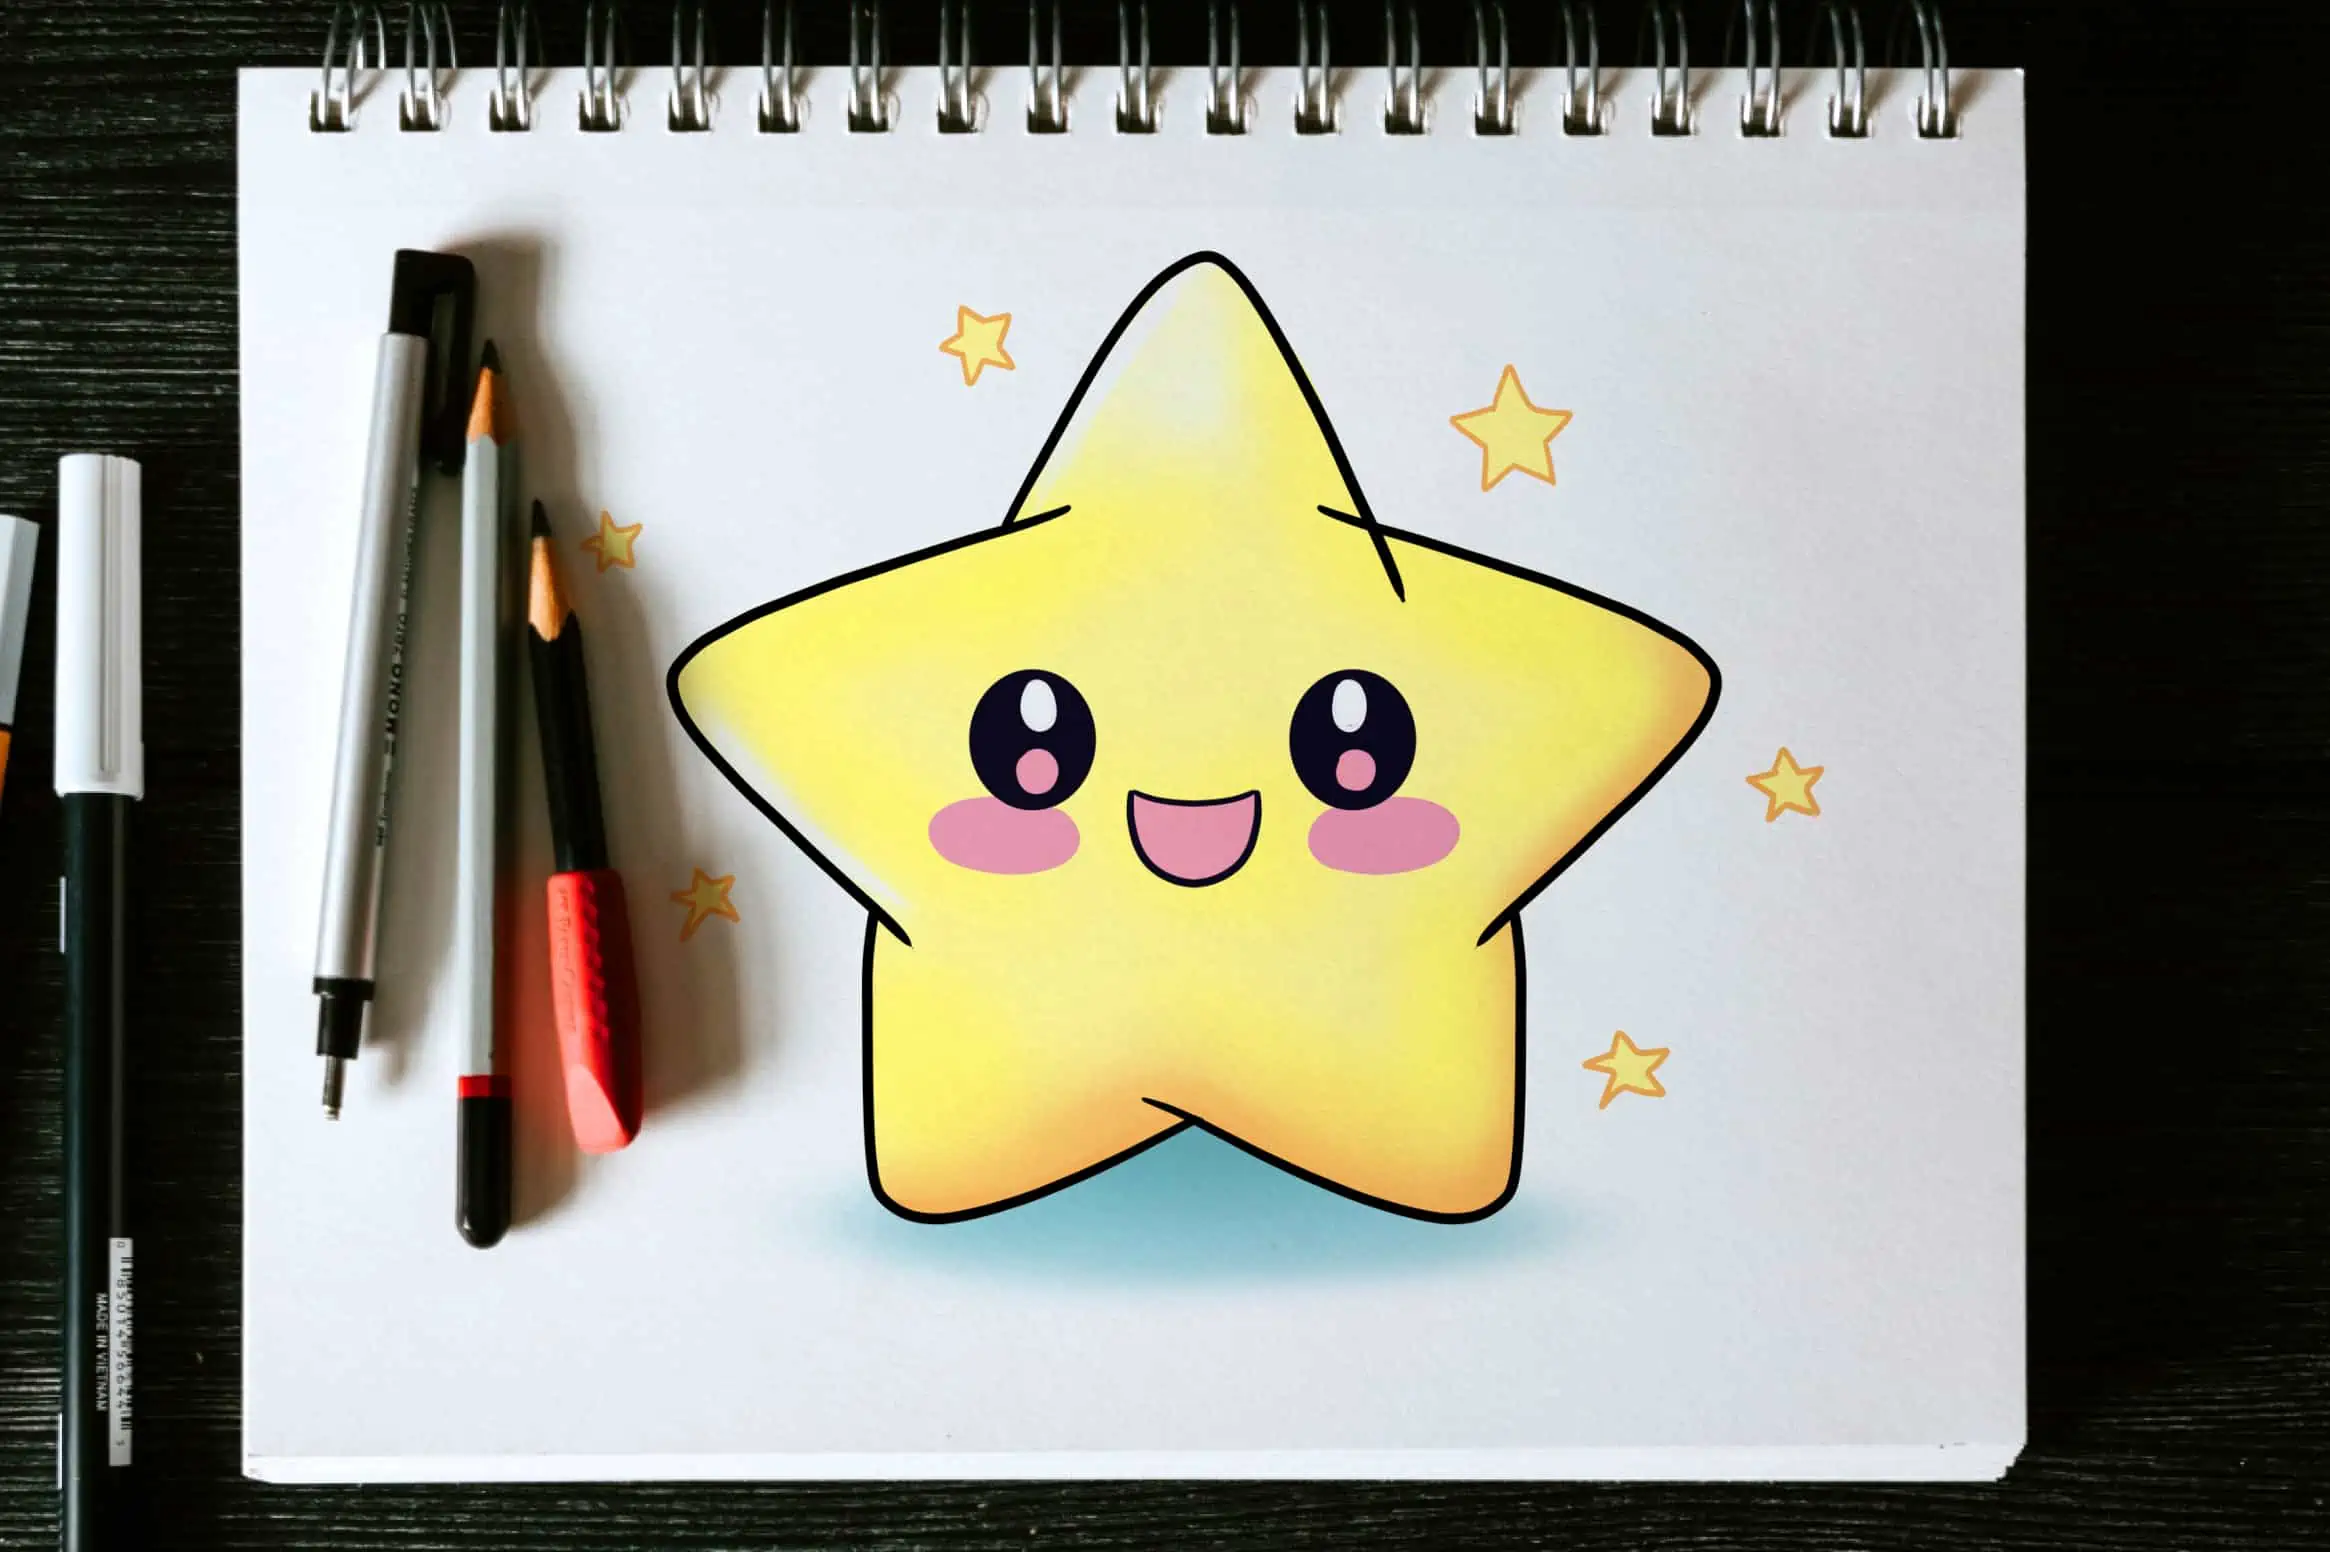
Star Drawing – Create a Shinning Hand-Drawn Star
This post may contain affiliate links. We may earn a small commission from purchases made through them, at no additional cost to you.
Stars, the celestial bodies that have fascinated humans for centuries, are a stunning display of nature’s grandeur. These glowing orbs of gas and plasma are not only responsible for the twinkling lights that adorn the night sky, but they also serve as beacons of hope and inspiration for many. From the massive, bright stars that light up the entire galaxy, to the small, faint ones that barely shine, each star has a unique story to tell. Whether you are an astronomer or a casual stargazer, the majesty of stars is sure to captivate you and leave you in awe of the vastness and beauty of the universe. So, grab your drawing kit, and get started on our easy step-by-step tutorial on how to draw a star!
Learn How to Draw a Star Step-by-Step
If you’re about to learn how to draw a star, get ready to embark on a fun and rewarding journey! Drawing stars may seem daunting at first, but with a few simple techniques, you’ll be able to create beautiful and intricate designs. To begin, start by sketching a pentagon or a five-point star shape. Next, draw a line from one point of the pentagon to the second point that is opposite it.
Then, repeat this step for all the points of the pentagon. Finally, connect the lines to form a star shape. Once you get the hang of this basic technique, you can experiment with different shapes, sizes, and styles to create unique and stunning stars. Don’t be afraid to make mistakes and keep practicing, and soon enough, you’ll be drawing stars like a pro!
The below collage shows each step taken to achieve the final result. Follow along and you too will be able to draw a cute star sketch!
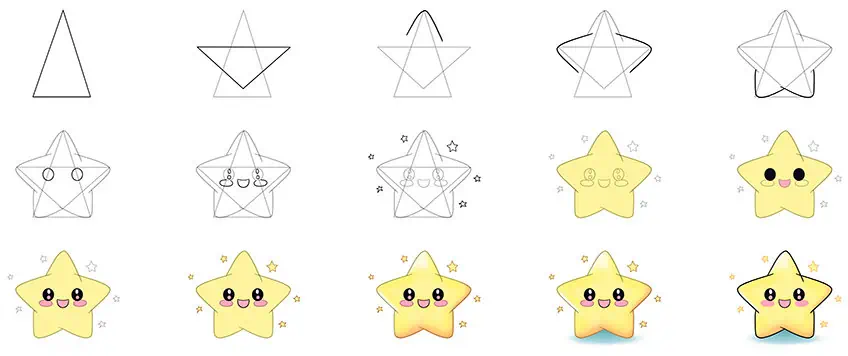
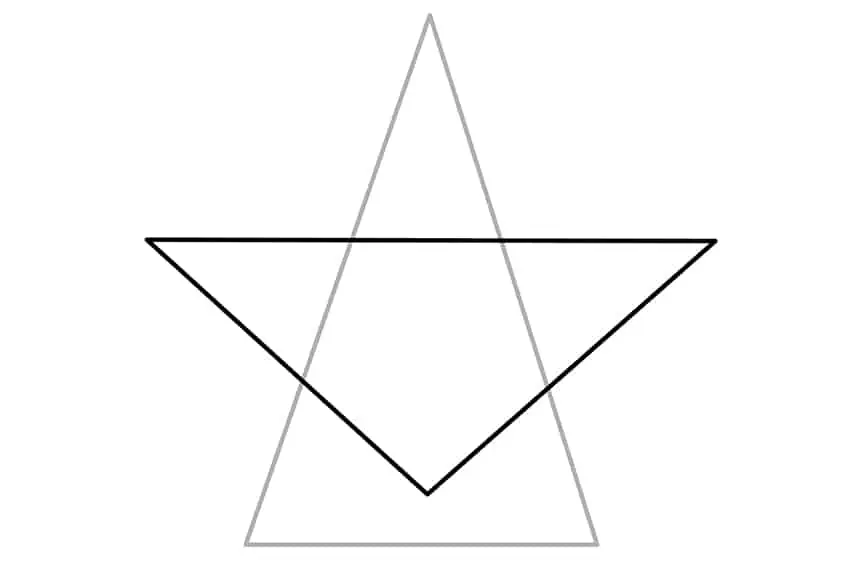
Step 1: Draw the Main Shape
Begin your stars sketch, by drawing a large, center triangle.

Step 2: Complete the Star Shape
Draw a second, wider triangle facing downwards and overlapping the first triangle. This will give you the general star shape you are aiming for.
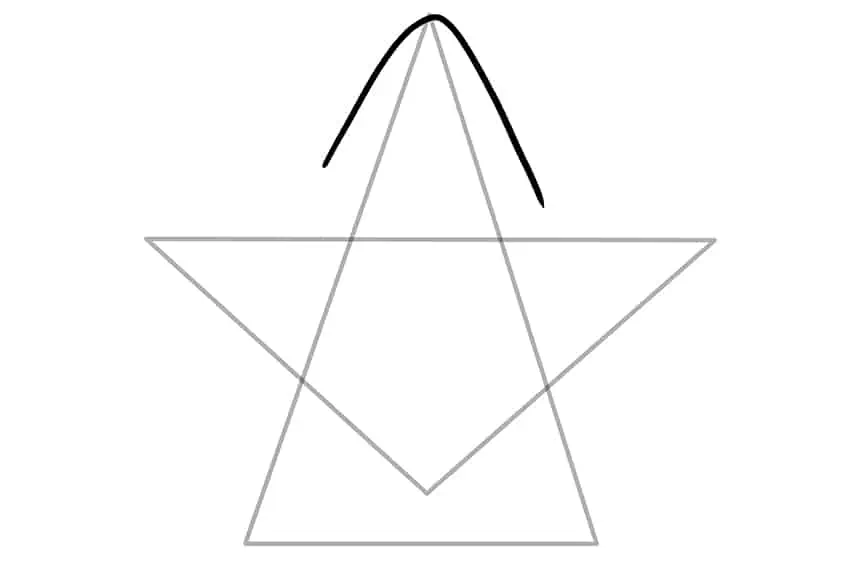
Step 3: Begin Outlining the Star Drawing
Star by using the previously drawn construction lines in step one, to aid you in outlining a more curved top star point.
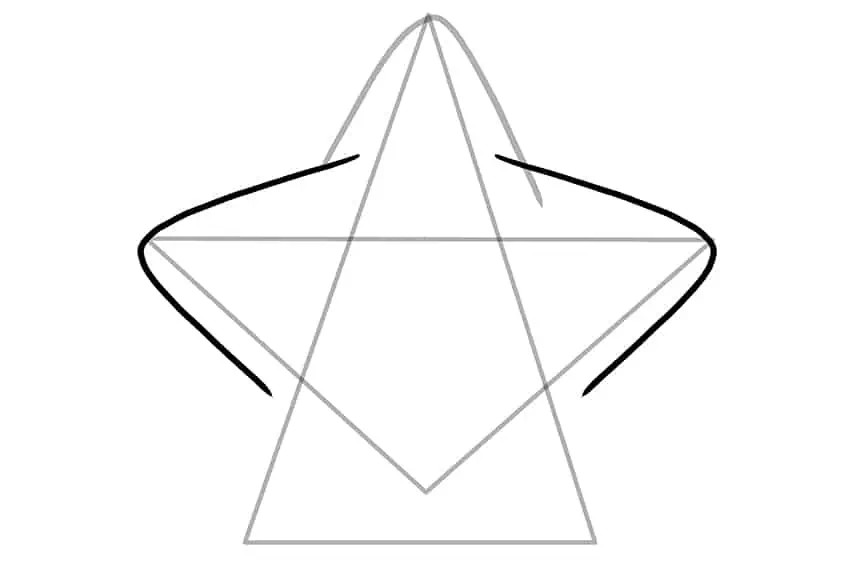
Step 4: Outline the Side Points
Still using the previously drawn construction lines to aid you, outline the two side points of your hand-drawn star.
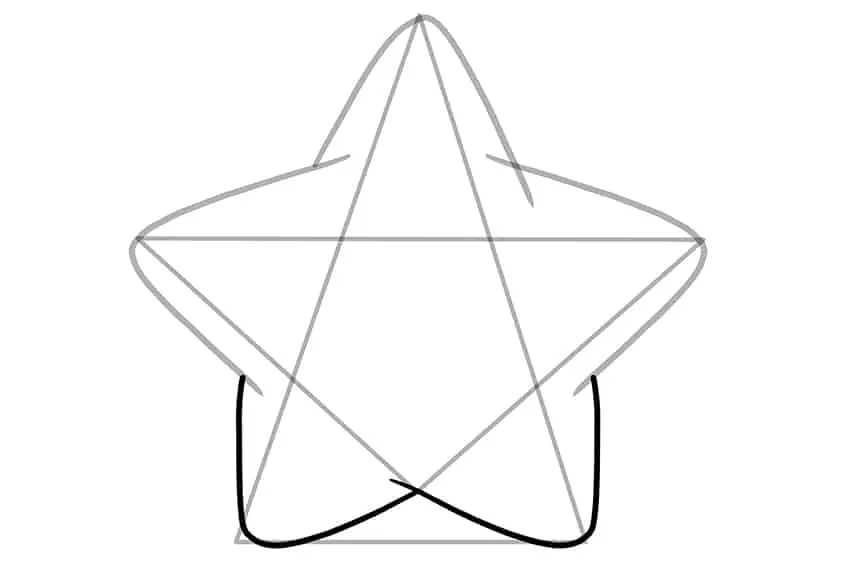
Step 5: Complete the Star Outline
Complete the bottom star points outline and connect the star as one.
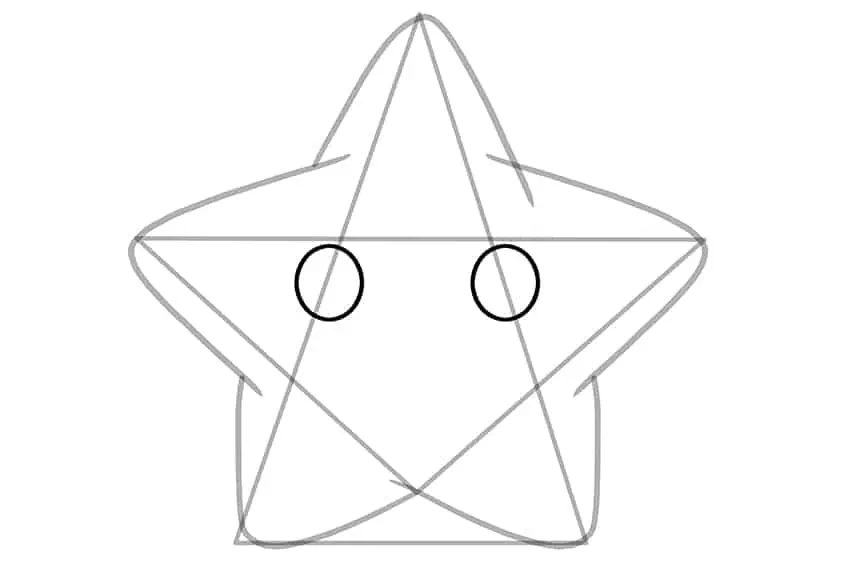
Step 6: Draw the Eyes on Your Stars Sketch
Since you are aiming to draw an adorable star, you will need to add a pair of large oval eyes. To do this, draw a single oval shape on each of the first triangle’s vertical lines as a guideline.
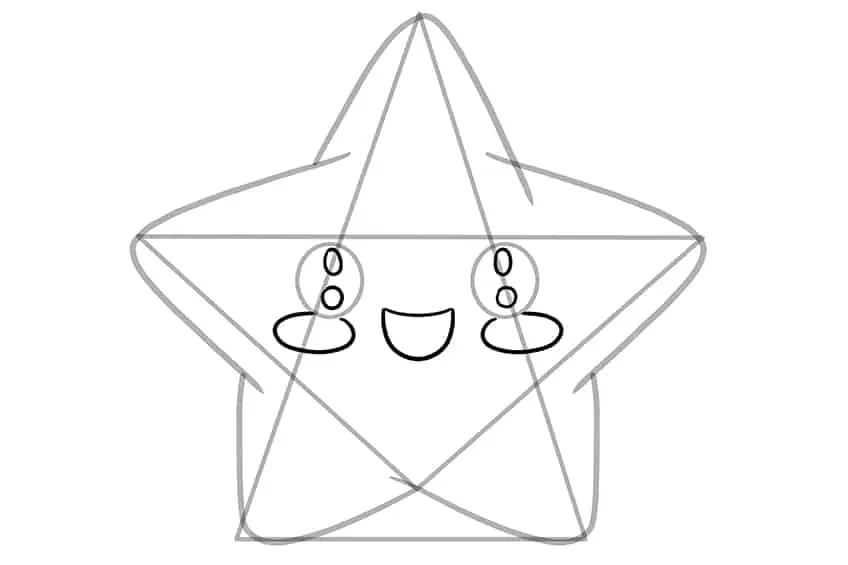
Step 7: Add the Mouth to Your Hand Drawn Star
Between the two eyes previously drawn, draw a half-moon to represent the smiley mouth. Beneath each eye, draw a horizontal oval shape to represent the cheek blush marks.
Finish this step, by drawing two small oval shapes, above one another and within each eye. This will represent the twinkle in each of the eyes.
Step 8: Draw the Additional Stars
Surrounding the main star, draw five small stars at random positions. Once you have completed this, begin to erase any overlapping or construction lines that are still visible.

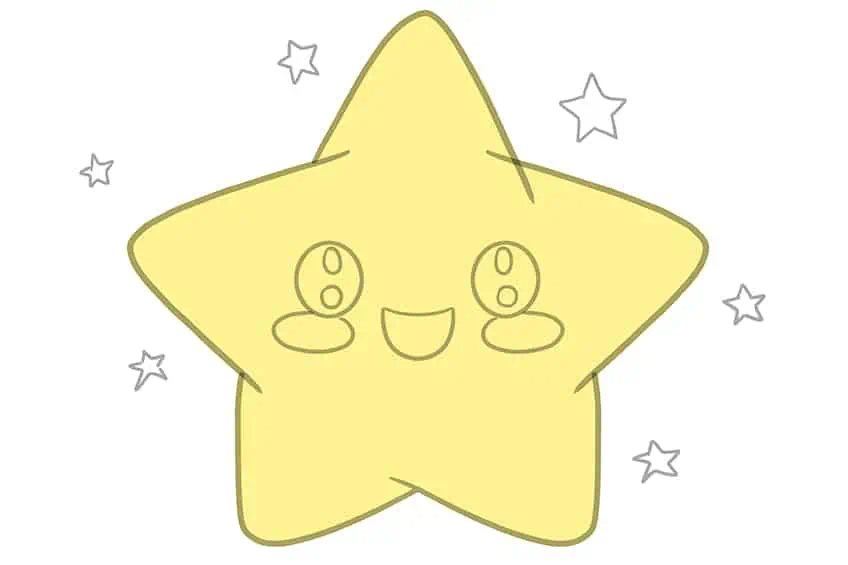
Step 9: Apply the First Color Coat
Select a fine, sharp brush and a light shade of yellow paint, and evenly coat your star drawing.
Step 10: Color the Eyes and the Mouth
Use the same brush as previously and switch to black paint, and evenly coat the eyes. Continue using light pink paint, and evenly coat the mouth.

Step 11: Add Color to the Cheeks
In this step, evenly coat the blushing cheek spots using a thin brush and light pink paint. Continue to color the bottom sparkle of each eye. Switch to white paint for the top oval within each eye.
Complete the step using a fine, sharp brush and black paint, and outline the mouth on your five-point star drawing.
Step 12: Color the Surrounding Stars
Use a light shade of yellow paint and a thin brush, and color in each of the five surrounding stars.
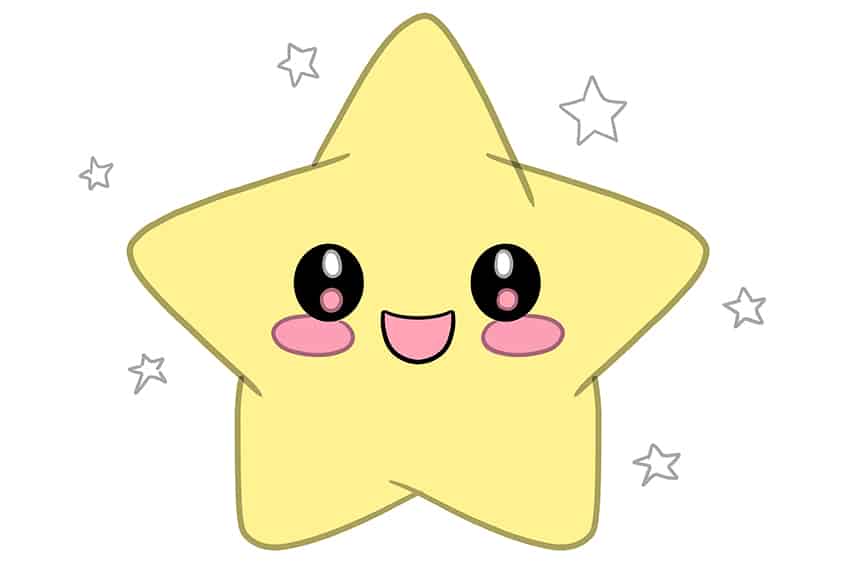
Step 13: Shade and Highlight the Star
Begin by using a small, soft brush and orange paint, and softly apply shading on the right star point and the two bottom star points. Complete the transition using a blending brush to soften and spread the color coats. Continue using white paint to add a soft highlight glow to the top star point and the left star point. Repeat using a blending brush to spread and soften the highlights.

Step 14: Add a Ground Shadow
In this step, apply soft shading beneath the star using a soft brush and blue paint. Switch to a blending brush to softly smoothen and spread the ground shadow.

Step 15: Finalize Your Five-Point Star
Select a fine, sharp brush and black paint, and evenly trace the star outline. Once this is complete, begin to trace over any unnecessary construction lines with the corresponding colors. Switch to a fine, sharp brush and orange paint, and trace the smaller additional star outlines.
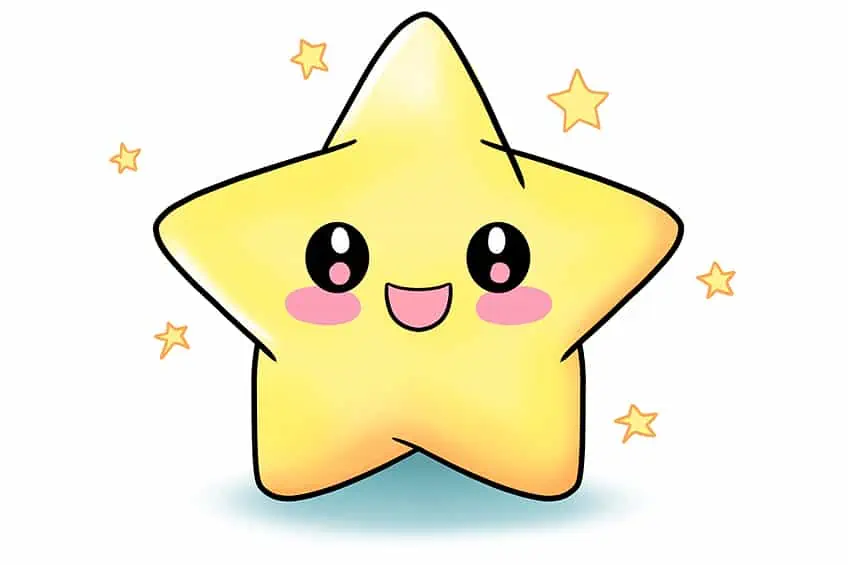
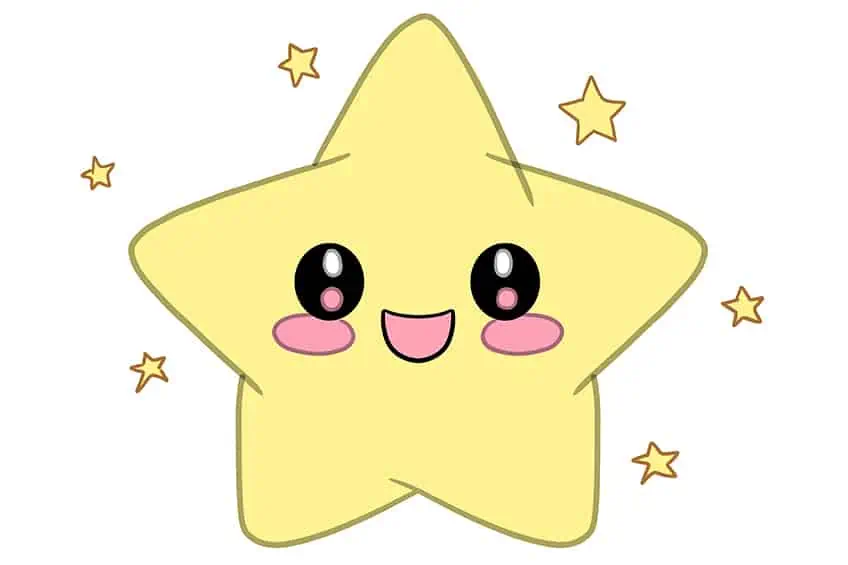
Congratulations on drawing your very own star! It’s a great feeling to see your efforts come to fruition and create something beautiful. Drawing a five-point star is a great way to tap into your creativity and practice your skills, and your accomplishment is proof that you can achieve great things with a little bit of patience and practice. Take a moment to appreciate your creativity and reflect on the process that got you here. What did you enjoy about it? What did you find challenging? What would you like to improve upon? Use this experience to inspire you to continue drawing and exploring your artistic talents. And who knows? Maybe your star will be the first of many incredible works of art!
Frequently Asked Questions
What Are Some Techniques for Drawing a Symmetrical Star?
One technique for drawing a symmetrical star is to start by drawing a vertical line down the center of your paper. Then, draw a horizontal line across the center of the vertical line. Next, draw two diagonal lines from the top and bottom of the vertical line to the left and right of the horizontal line. This will create an “X” shape on your paper. Finally, draw lines connecting the points of the “X” to create your star shape. If you are unsure of how to do it, follow along with our drawing tutorial on how to draw a star. We take you step-by-step to create a stunning star drawing!
What Are Some Ways to Incorporate Stars into a Larger Artwork?
Stars can be incorporated into larger artworks in many ways! One way is to use them as a background element, creating a starry sky or galaxy effect. They can also be used as a decorative element, such as in a border or frame around a central image. Another idea is to use stars to create a focal point, such as by drawing a large, intricate star in the center of a piece. Stars can also be used to represent a theme, such as in a space-themed artwork. Overall, the possibilities are endless, and the key is to experiment and find a way to make the stars work with your larger artistic vision.

IzzyBll is a digital artist and content creator from Israel and currently residing in South Africa. Originally coming from videography, Izzy then turned to digital graphic art. He specialized in using digital drawing software such as Photoshop and Procreate. Drawing and photo editing has always been a sort of second nature for Izzy. In doing so, he can now look back on 5 years of experience in the industry, completing commissions for various well-known brands such as Audi.
Learn more about IzzyBll and about us.