Mushroom Drawing – How to Draw a Mushroom Step-by-Step
This post may contain affiliate links. We may earn a small commission from purchases made through them, at no additional cost to you.
Drawing mushrooms is really fun because of how weird and alien-like they seem, which makes for a great visual addition to different types of artwork. Learning how to draw a mushroom is also a great exercise to explore a variety of textures, and how to recreate these qualities within a fungus drawing. Mushroom sketches and fungus drawings come in all shapes and sizes, which can be an amazing visual in various genres of art, specifically within fantasy-related artworks. The fairy-like qualities of mushrooms make them an interesting setting for strange and fantastical creatures. However, mushroom drawings are so beautiful that they can be the focal point for artwork and be drawn as a subject matter on their own.
An Easy Guide to Mushroom Drawing
In this tutorial on how to draw a mushroom, We will learn to draw a few different mushrooms in a few easy steps. Mushrooms can seem quite complicated because of how strange they seem, however, mushrooms are quite simple to draw. We will learn how to develop simple shapes into more refined and beautiful mushroom drawings. As we go through this tutorial, we will find that mushrooms are not only easy to draw but also quick to draw, making them a great addition to various artwork ideas.
Necessary Materials
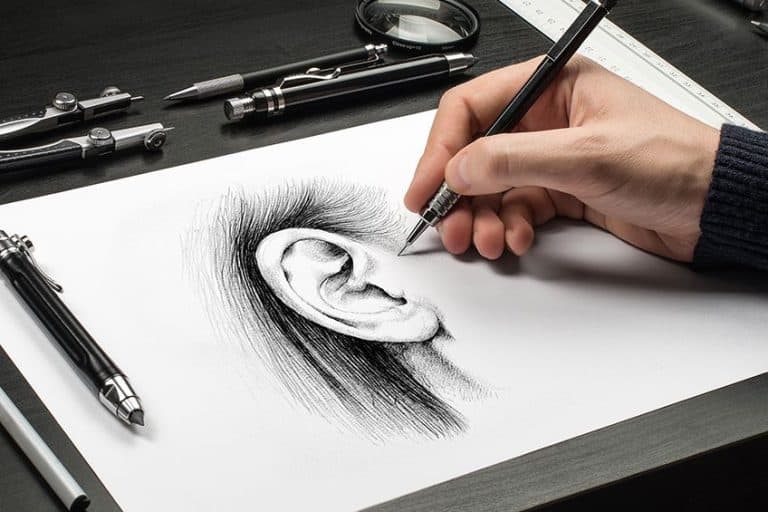
This tutorial demonstrates a mushroom sketching process on a digital drawing device, however, the process is applicable to traditional mediums and requires only a few simple tools. Because we will be sketching mushrooms, we will only need a few tools. We will want to have some pencils, ballpoint pens, micron pens, and some paper. We can also use an eraser and sharpener for the early sketching stages of creating our mushroom drawings.
All materials can be found through the links below:
- Ballpoint pen
- Micron pens
- Pencil
- Eraser
- Sharpener
- Paper
Drawing Different Mushrooms
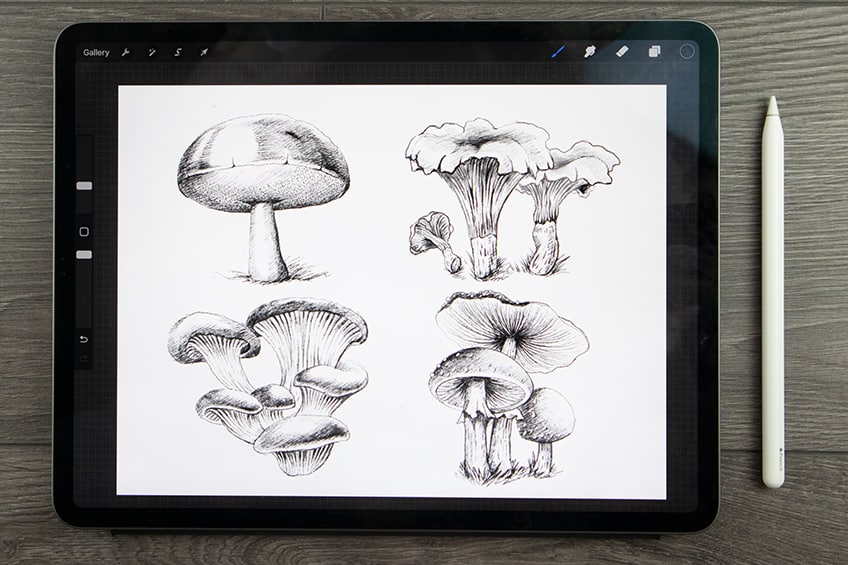
In this tutorial on how to draw mushrooms, we will learn to draw four different mushrooms, some common, and some less common. We will break down the process of drawing mushrooms into a few digestible steps for each one and how to develop a simple mushroom sketch into a realistic fungus drawing. We will be looking at how to draw a chanterelle mushroom, the classic amanita mushroom, an oyster mushroom, and a boletus mushroom.
These different fungus drawings are interesting and different in visual qualities, giving you a good variety of mushroom drawings, easy and simple to do.
How to Draw a Chanterelle Mushroom
Chanterelle mushrooms are such a beautiful species of mushrooms as they have a very floral appearance. Their features are very soft and subtle and give a delicate feel as the cap of the mushroom coils as it sprouts from the center to produce a flower-like aesthetic. Let us see how we can draw this beautiful mushroom drawing.
Step 1: Sketching the Form of the Mushroom
We want to start with a simple sketch of the mushroom, we can do this by sketching the outline of the mushroom at first. The form of the mushroom is quite similar to broccoli, where its stem gets slightly larger as it moves to the cap.
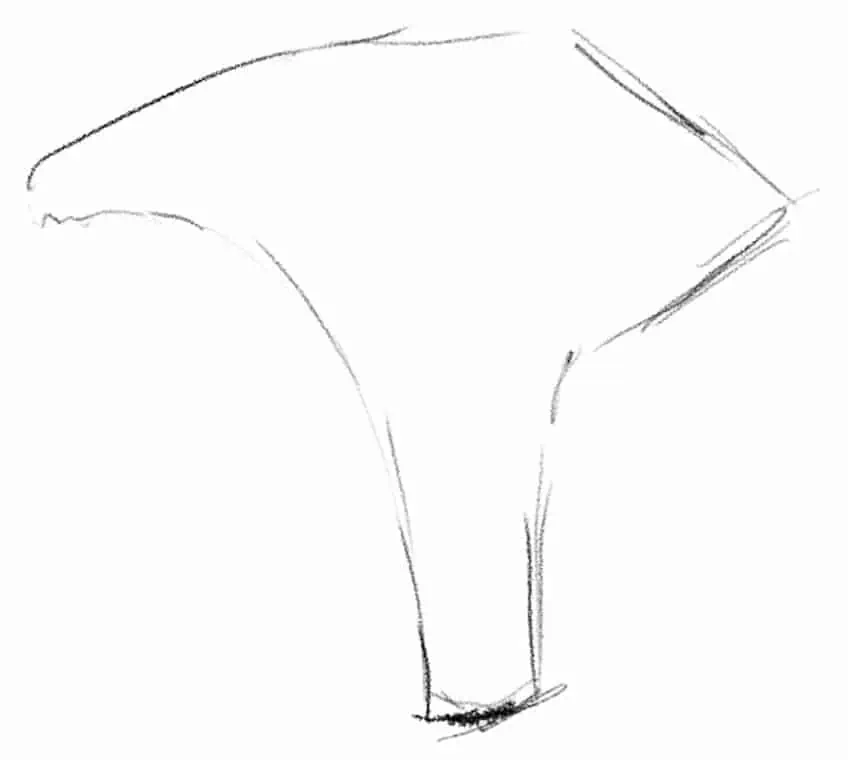
At the top of the mushroom is the coiled fleshy cap, which can be quite wavy at its edges. We can draw this as cloud-like shapes that sit on top of the mushroom stem. The caps sprout out from the center of the mushroom and coil outward on itself with curvy edges.
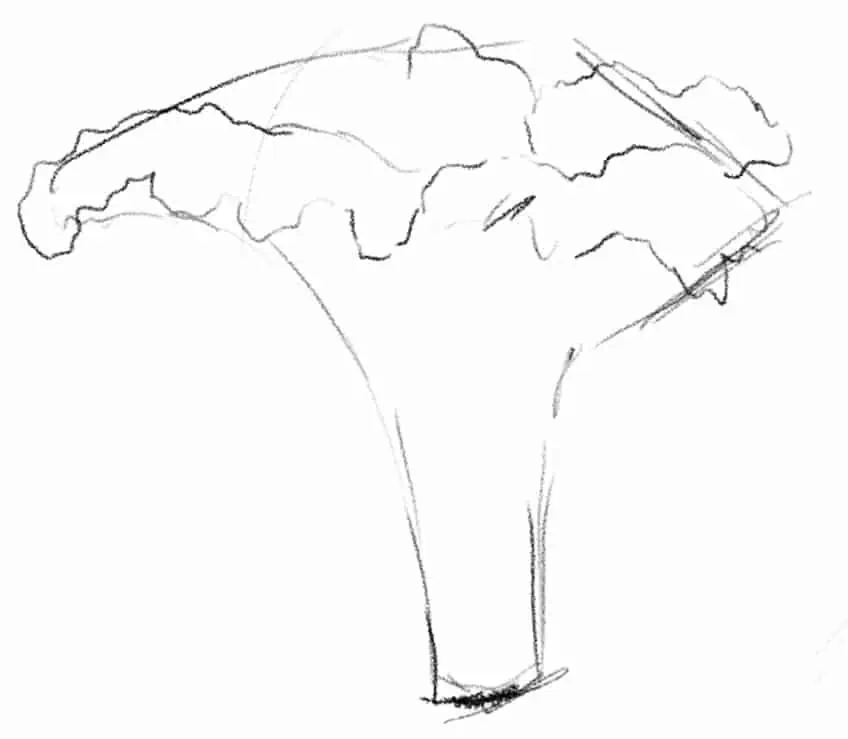
Once we have established the shape of the cap and stem we can start to add in some ridges that form along the stem near the top of the mushroom. As the mushroom curves into the cap, its texture changes from a smooth to a ridged surface.
Step 2: Sketching a Few Mushrooms
Once we have the basic form of the mushroom, we want to lightly sketch a few of the chanterelle mushrooms to create variety. We can also play around with adding these mushrooms in the background.
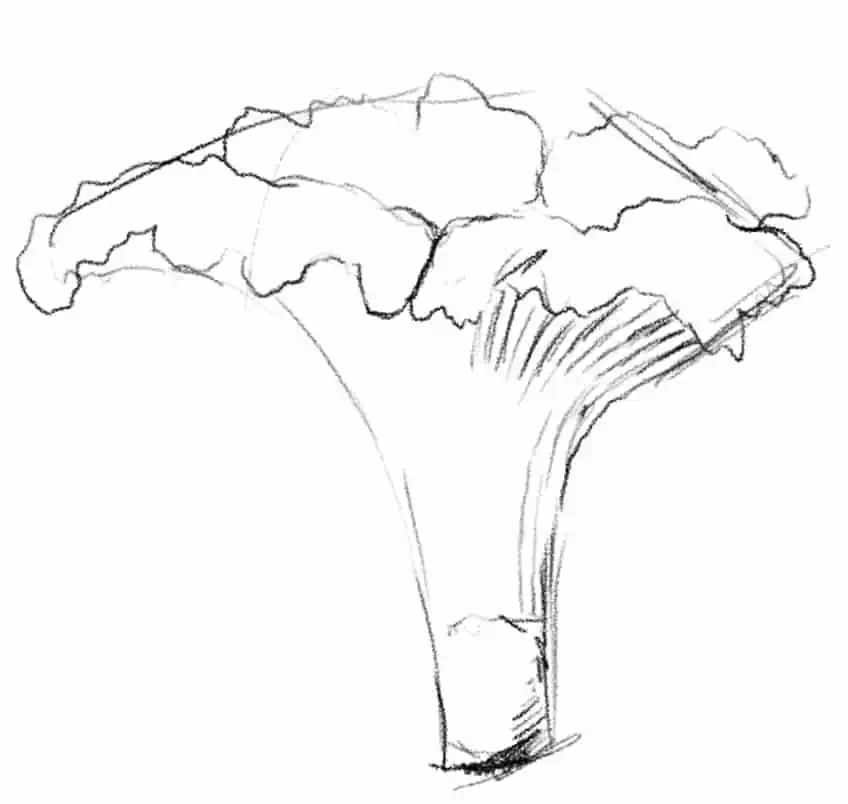
Step 3: Erasing and Refining the Mushroom Sketch
Now that we have established the basic form of the mushrooms, we want to lightly erase them. We then went to sketch over the ghost lines, slowly refining the mushroom drawing.
This is where we can start adding in some details, giving more contrast to the ridges on the stem and in the center of the mushroom. We can also create a distinction between the smooth and rigid surfaces in the stem.
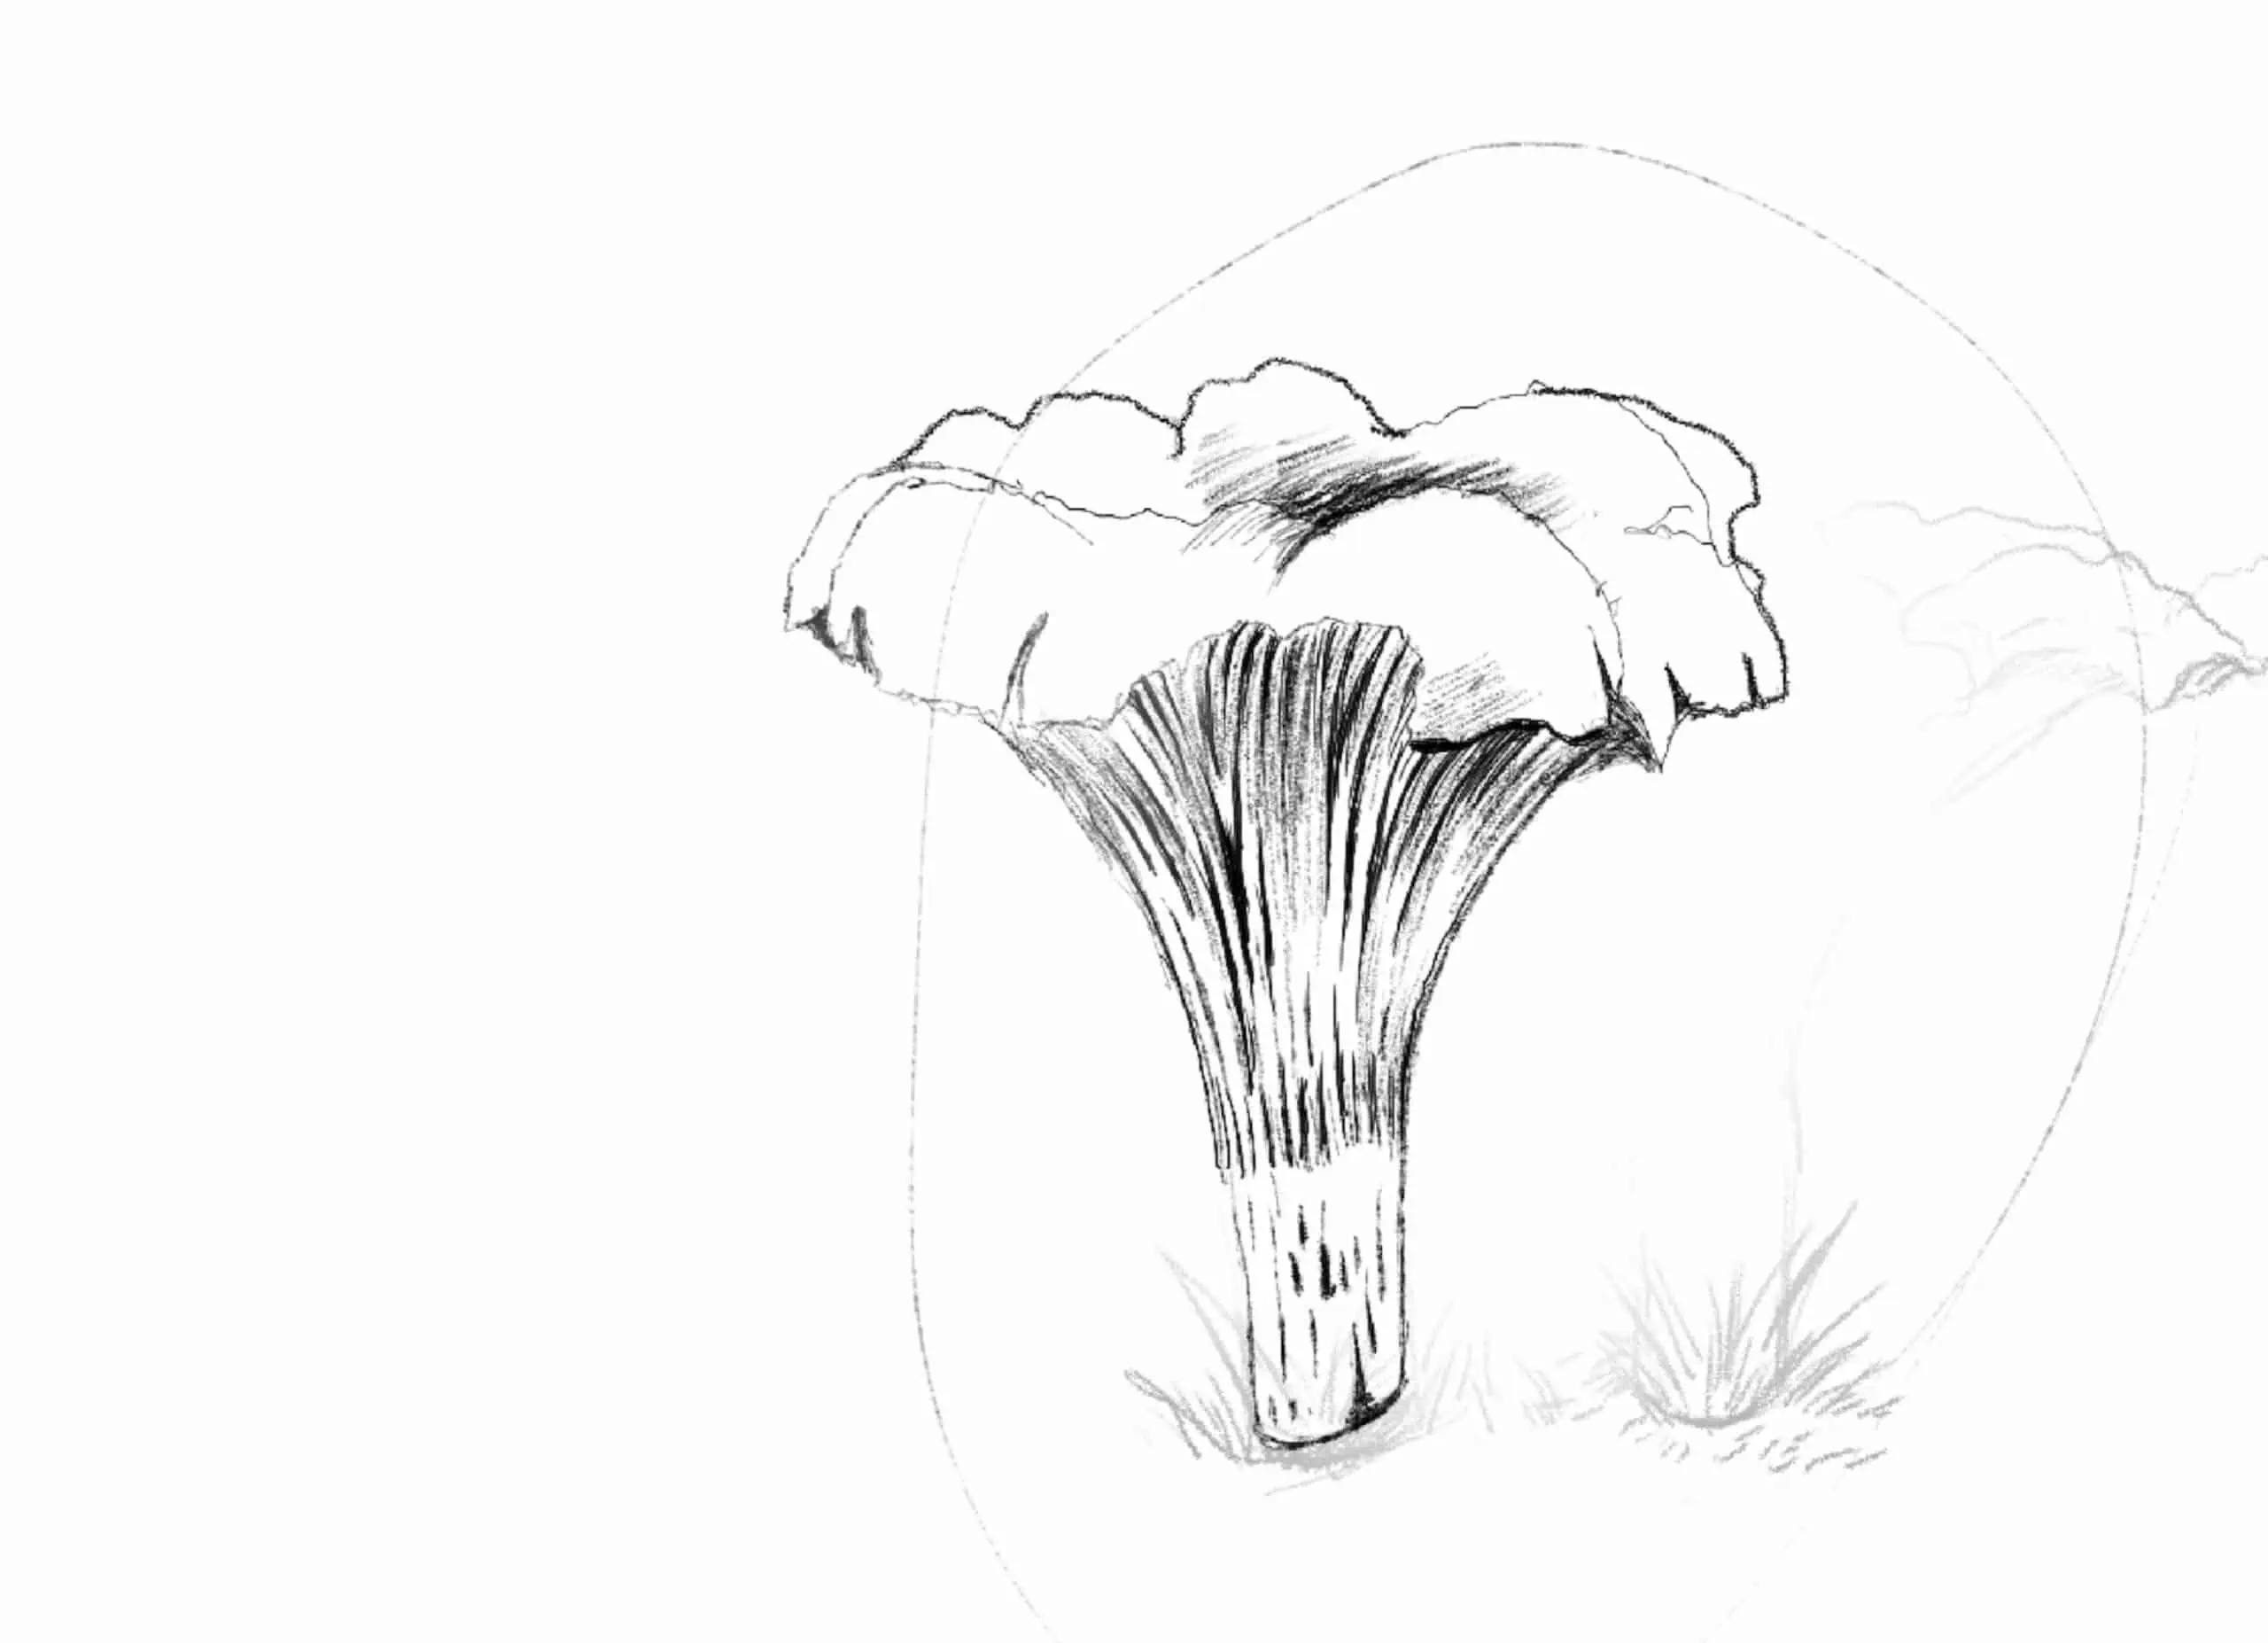
We can add some shading along the top section of the stem that falls just underneath the coiled fleshy cap. This is going to create more three-dimensionality in the structure, we can add some shading to the surface of the fleshy caps as well.
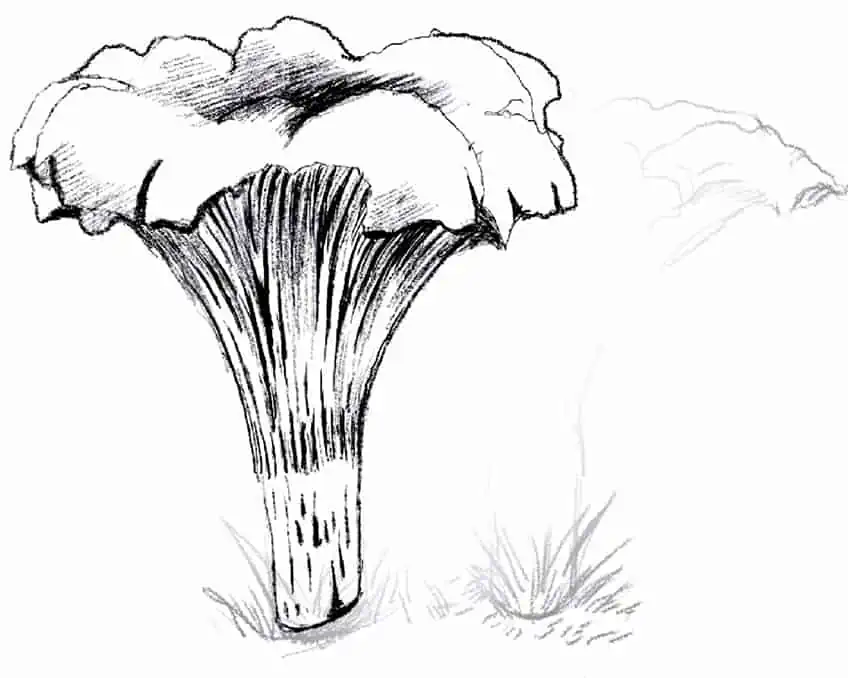
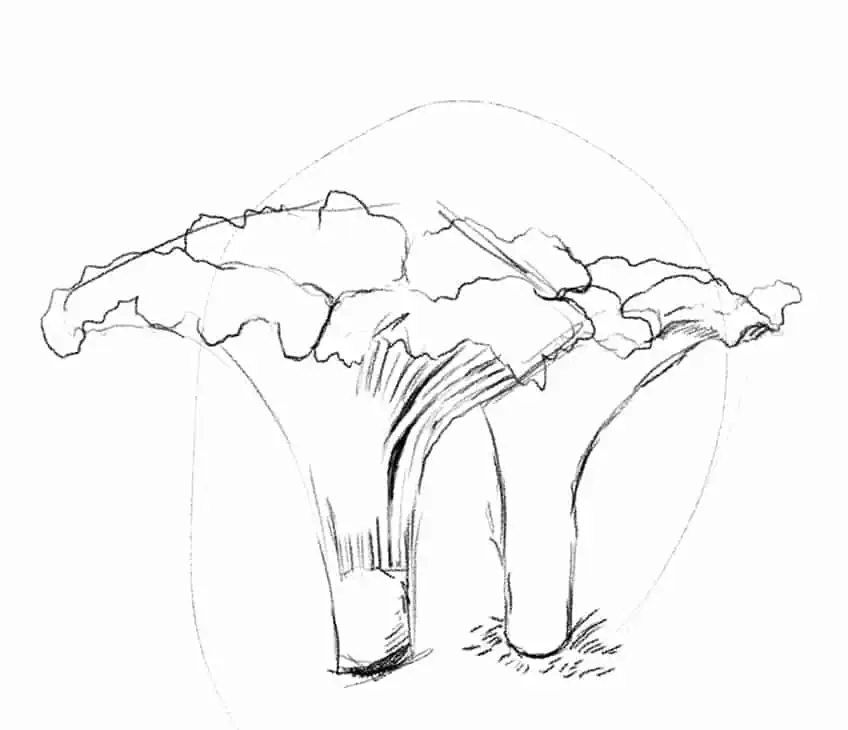
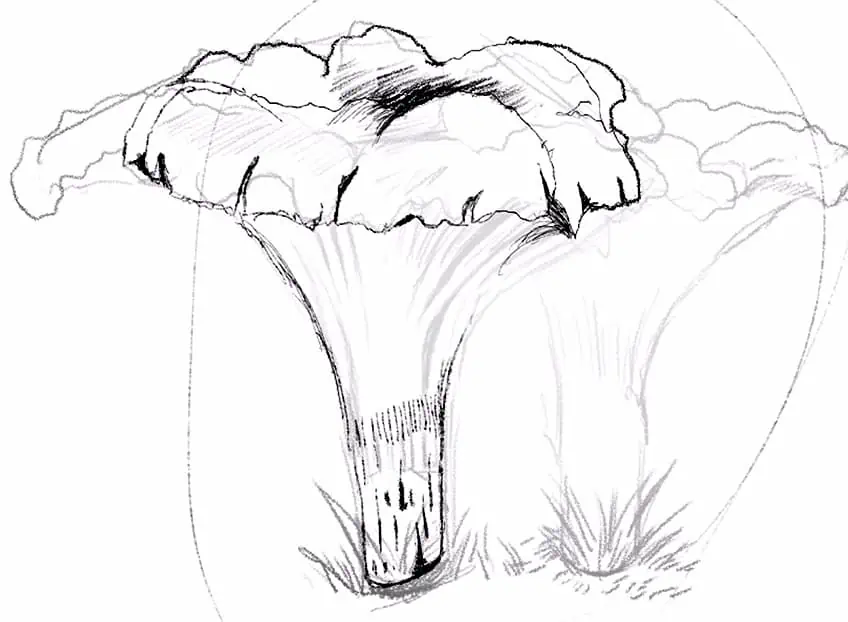
Step 4: Drawing Duplicates of the Chanterelle Mushroom
Now that we know how to draw the mushroom we can start to draw a few of them to create some variety. We can also play around with sizes and how they fall along the surface.

We want to make sure we have the distinctions of surfaces in the stem, as well as the coiled cap. This is going to make the mushroom identifiable as a chanterelle mushroom.
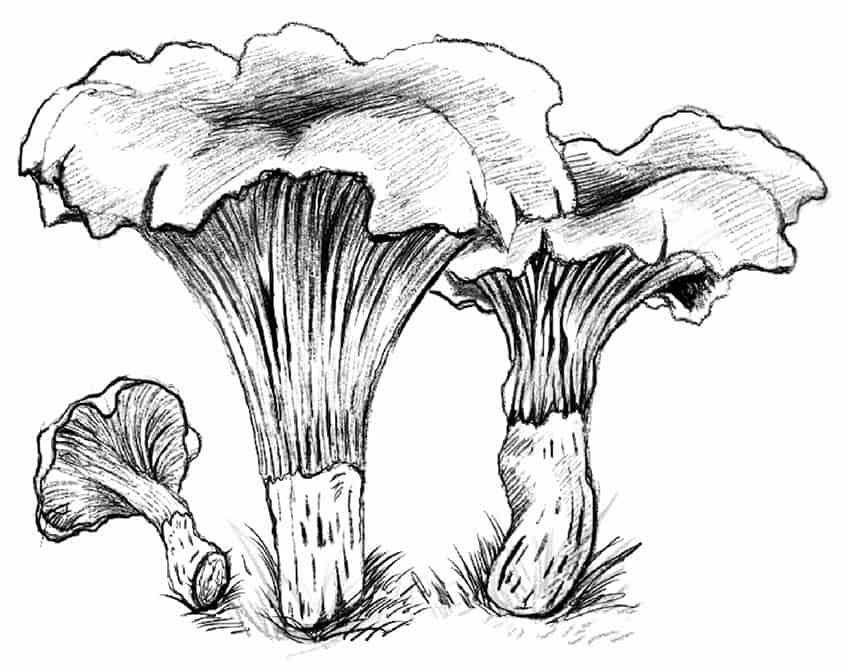
You can also add some foliage or grass around the mushrooms to contextualize them further. This way it seems as if they are sitting on an identifiable surface.

How to Draw an Amanita Mushroom
Amanita mushrooms are perhaps the most identifiable mushroom as they have been used in pop culture, video games, and fantasy-based artworks. Amanita mushrooms seem magical as if they house little fairies. The process of this mushroom drawing, easy and simple as it may be, comes with a variety of shapes and forms.
Let’s see how we can draw these interesting mushrooms.
Step 1: Sketching the Form of the Mushroom
We want to start by drawing the stem of the mushroom, which could be identified as a normal stem that has a skirt near the middle of its stream. This skirt or annulus is unique to the Amanita.
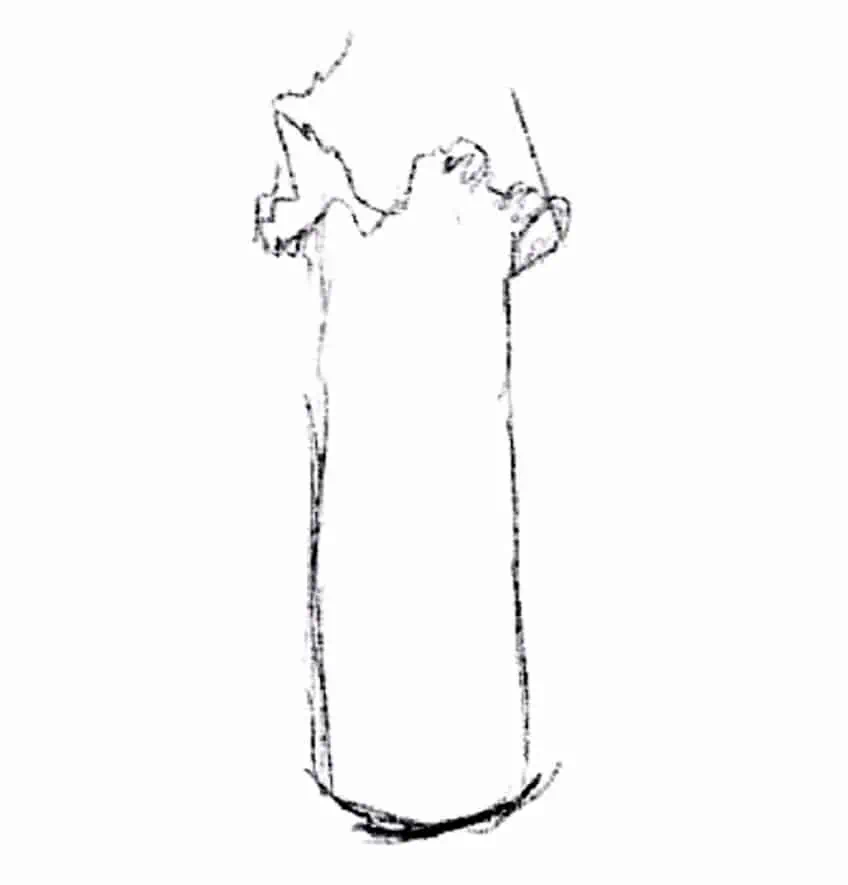
The stem then continues with the same width until it meets the bottom of the cap. We can draw the cap as a dome shape, where it curves over the stem, which appears to move out of sight as it moves into the cap.
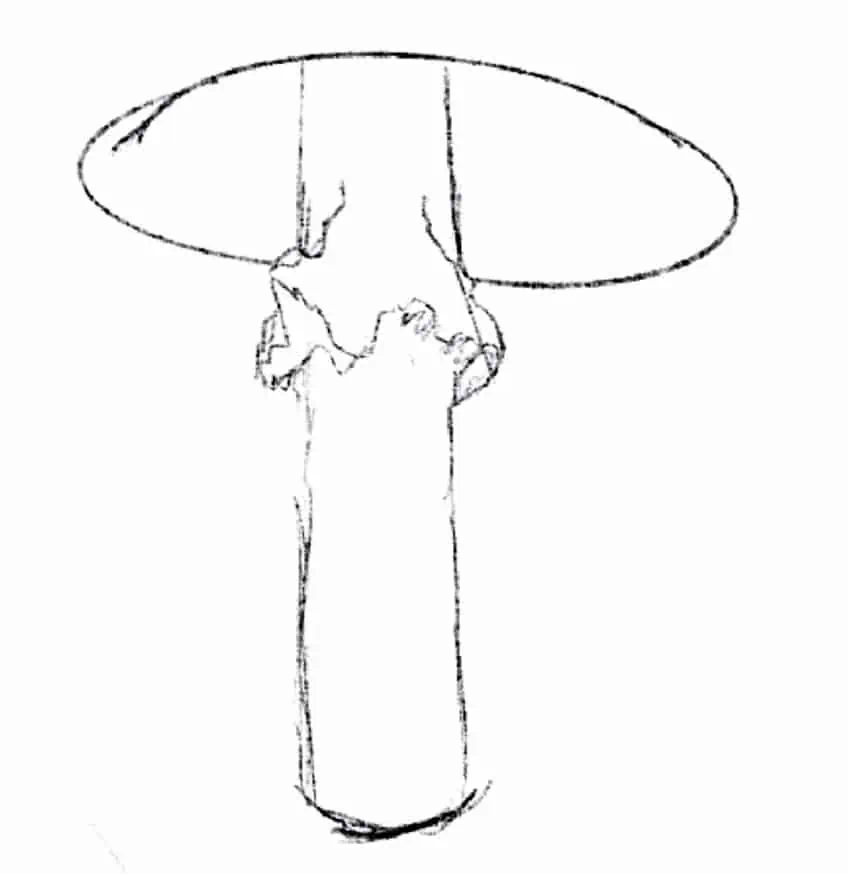
We then can add the dome on top of the mushroom, which is a classical dome shape. That being said, the Amanita can shift in its form.

Step 2: Drawing Different Shapes of the Amanita Mushroom
Another way of drawing the Amanita is with the same stem, however, this time we can draw it in the background and slightly larger.
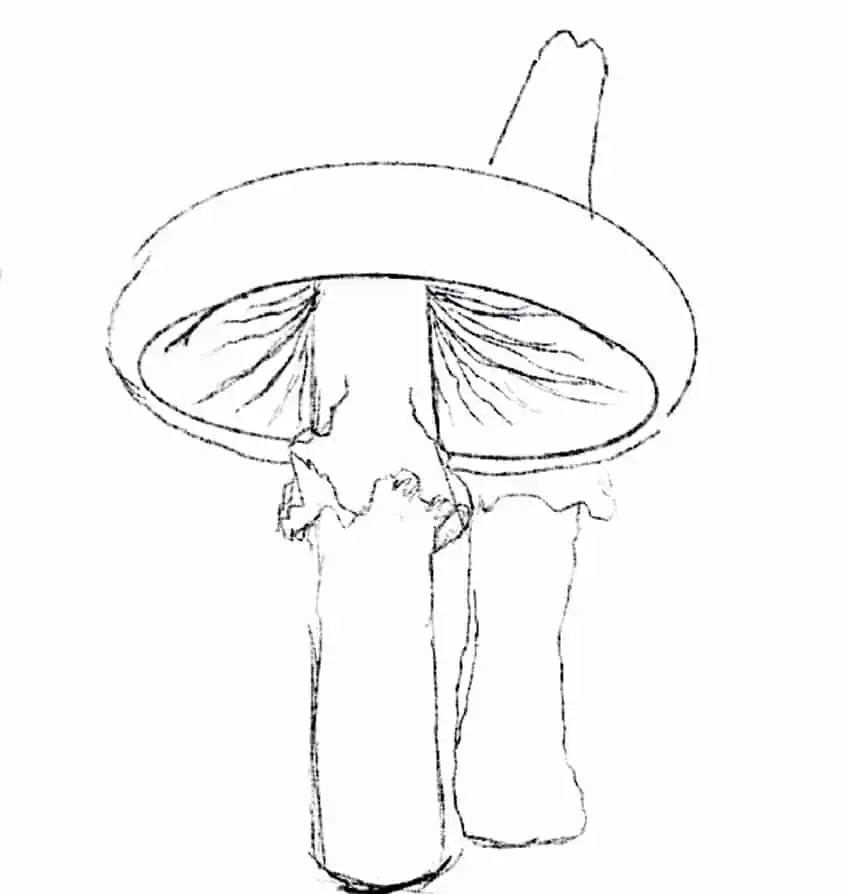
When the cap gets slightly larger it starts to have a slight bulging curve under the cap, this will expose its ridges that run from the edges of the cap to the center of the cap where the stem connects.
Then when an Amanita is slightly smaller than the regular size, its cap is curved quite compactly. This gives it a more bullet-head shape, where the dome’s curve is slightly more aggressive.

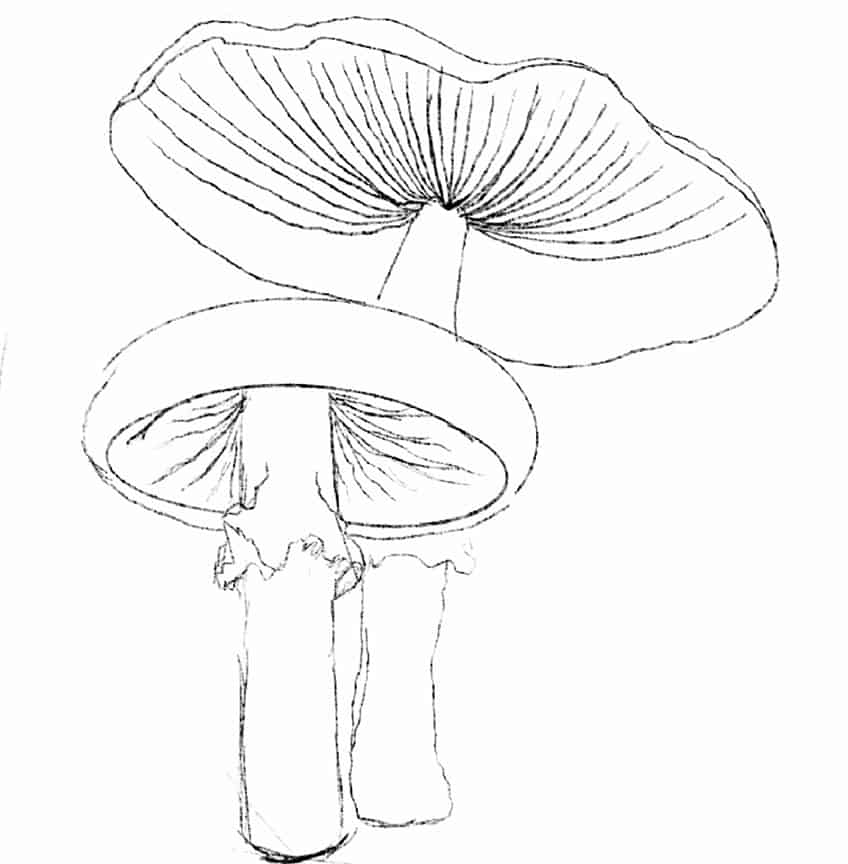
Step 3: Erasing and Refining the Mushroom Sketch
We now can slightly erase the mushroom drawings, by doing this we want to work with the ghost lines to now refine each of the Amanita mushrooms. This is where we can add some shading and detail to give more three-dimensionality to the mushroom.

We want to make sure that we create variety in size and shapes within each Amanita mushroom. We also want to make sure that we make the caps slightly darker in the sketch to distinguish the coloration in the features of the mushroom.
Make sure you work on each mushroom, slowly refining their shapes, and outlines and adding in some details. We also want to make sure we add shading under the skirt or annulus in the middle of the stems.
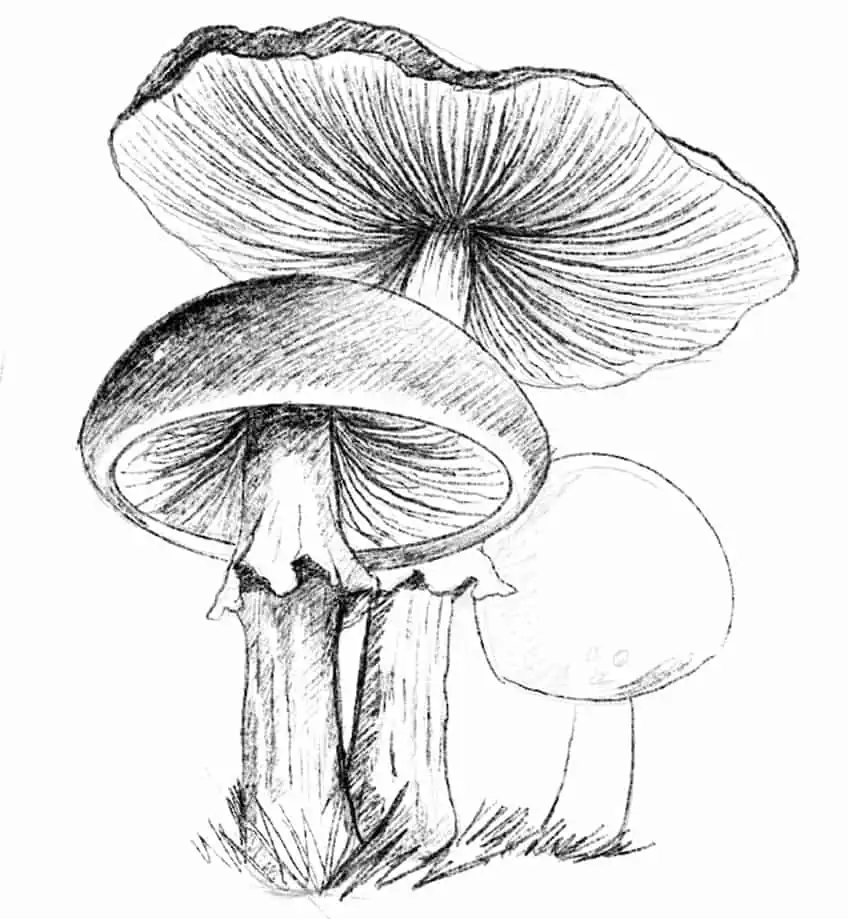
Take your time drawing the rides under the caps of the mushrooms, making sure they flow along the inside of the mushroom. We want to make sure that the ridges move around the mushroom’s cap, and connect to the center of the mushroom.

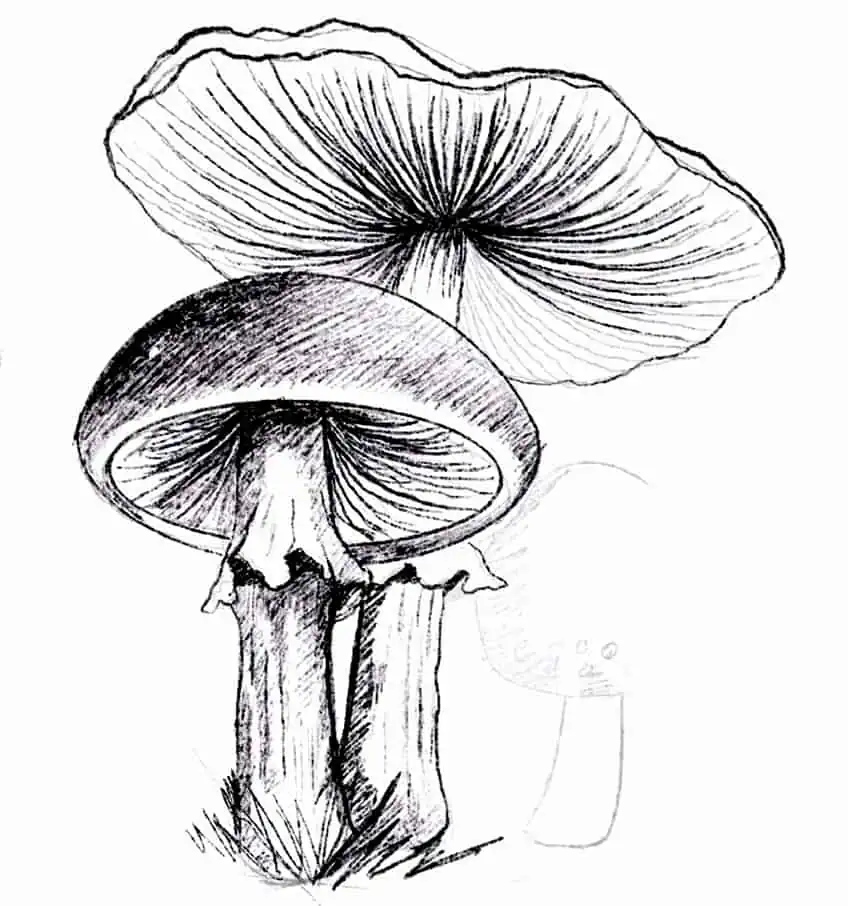
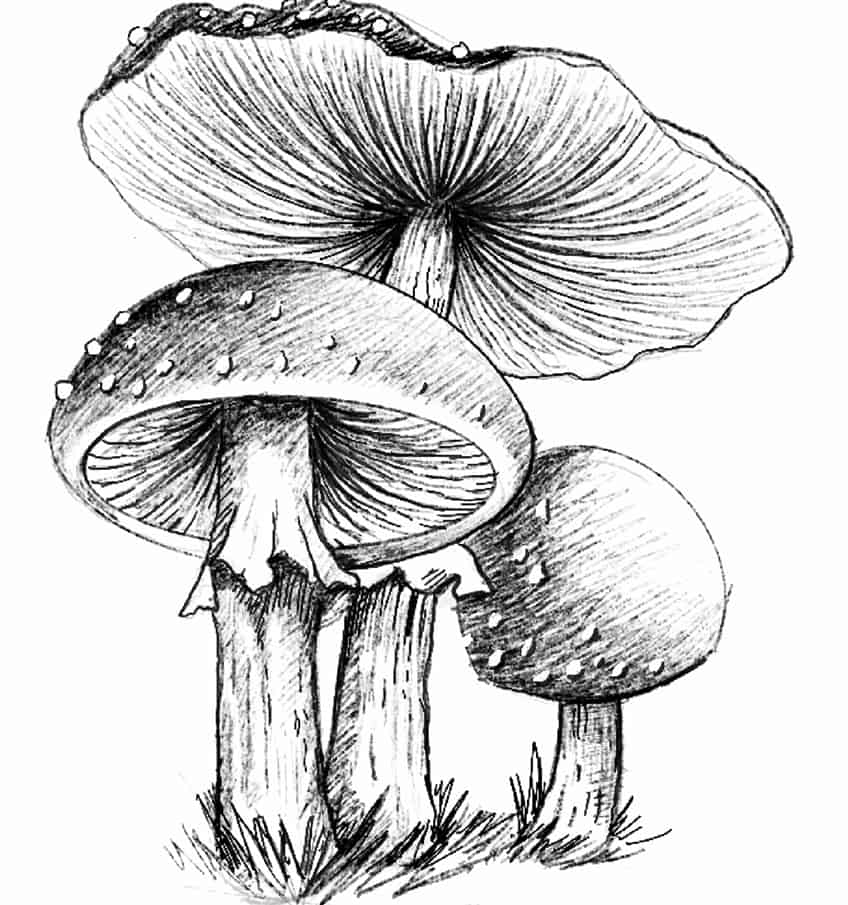
Step 4: Adding Little Details to the Cap
Lastly, we want to work with our erasers and add in little spores along the caps of the mushroom. These are iconic of the Amanita mushroom, which we can enhance by adding a dark outline to each little spore.
And that’s how you draw the Amanita mushroom.
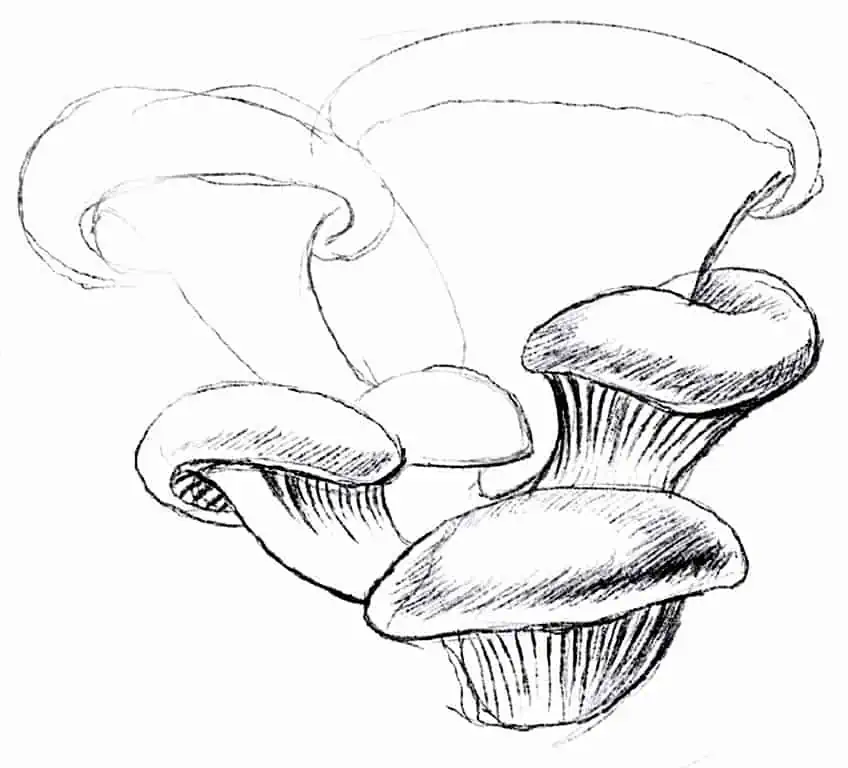
How to Draw an Oyster Mushroom
Oyster mushrooms seem quite alive because of how they grow in groups, this gives them a very distinct aesthetic. Oyster mushrooms also have a beautiful shape, because of how they curve in their stalks.
Let’s take a look at how we can draw this strange mushroom.
Step 1: Sketching the Form of the Mushroom
We want to start by drawing a few of the dome-shaped caps spread out, we also want to make them different sizes. These caps have quite a flat and slightly-domed shape.
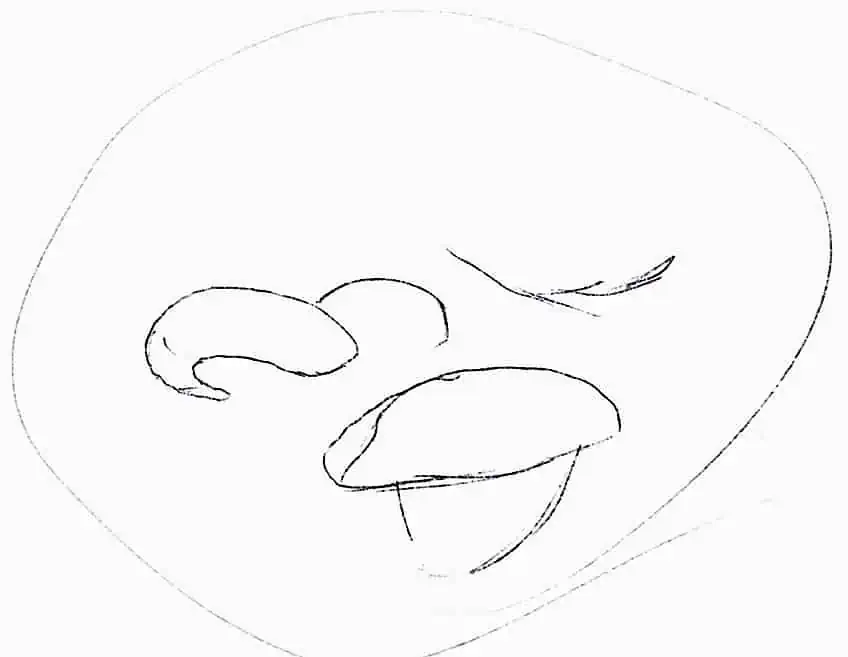
From there we want to continue by drawing the stalks of the mushrooms, which will curve from the cap into a central point. We want to make sure that some mushrooms higher up will have a stalk that falls behind mushrooms in the foreground.
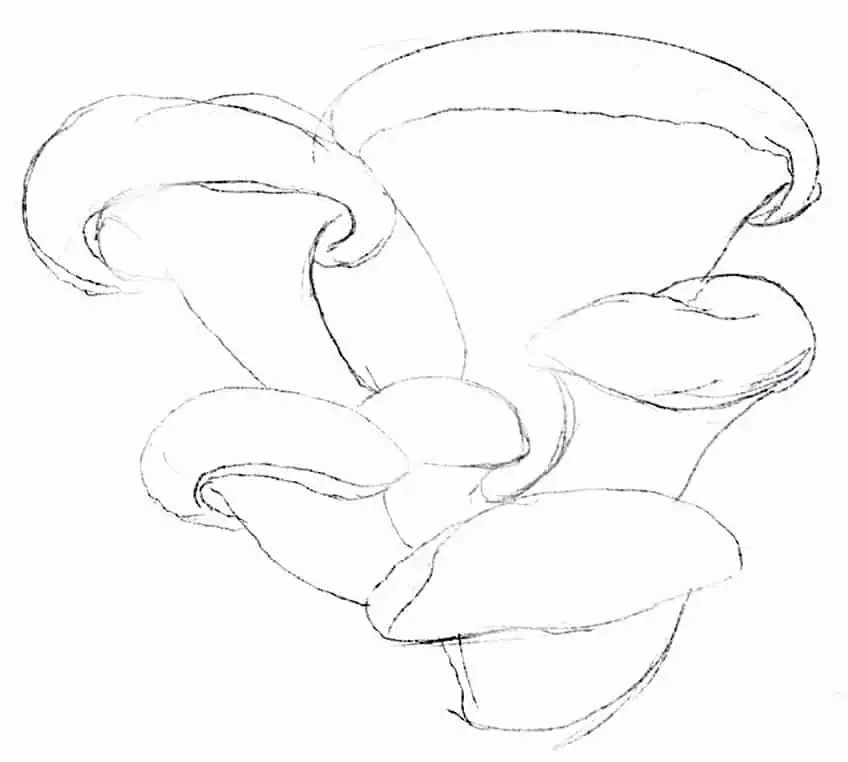
Step 2: Erasing and Refining the Mushroom Sketch
Once we have established the basic outline of the oyster mushrooms, we then want to move on by lightly erasing the shape. From here we can start working on some more detailed drawings. This is where we add in the gills, refined caps, and some shading.
As we work in detail on the mushrooms, we want to make sure that the gills or ridges flow along the stalk shape of each mushroom. We can also add some darkened shading to the caps of the mushrooms, with a slight highlight on each to suggest light reflections.
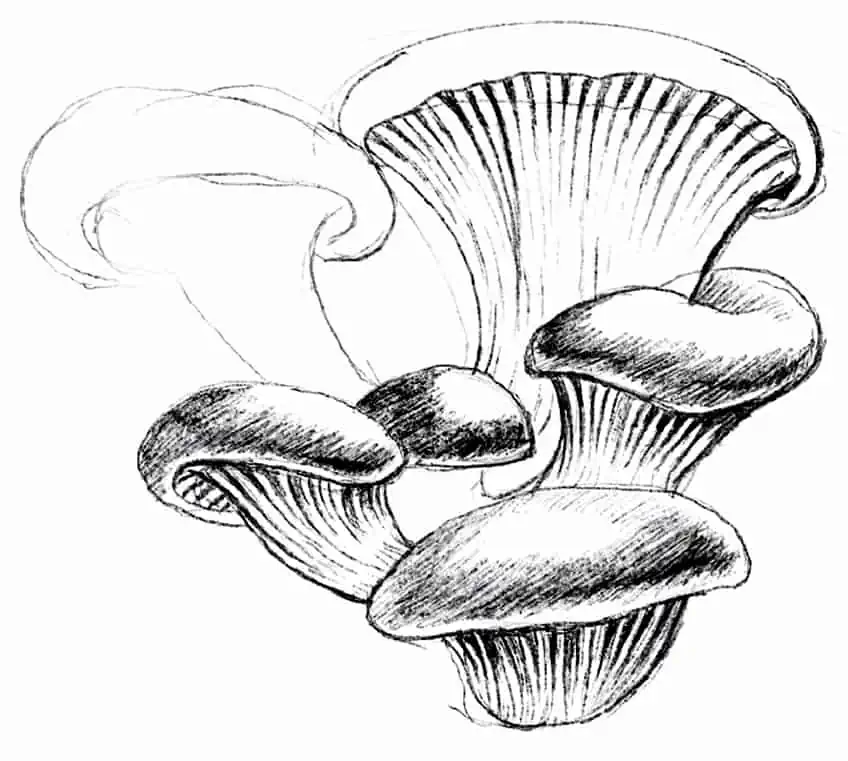
The smooth cap of the oyster mushrooms allows for a slight reflection of light, so we want to make sure that we shade in the caps with a few highlights. We can also darken the ridges slightly near the caps of each mushroom.
And that is it, simple and easy for the oyster mushroom sketch.

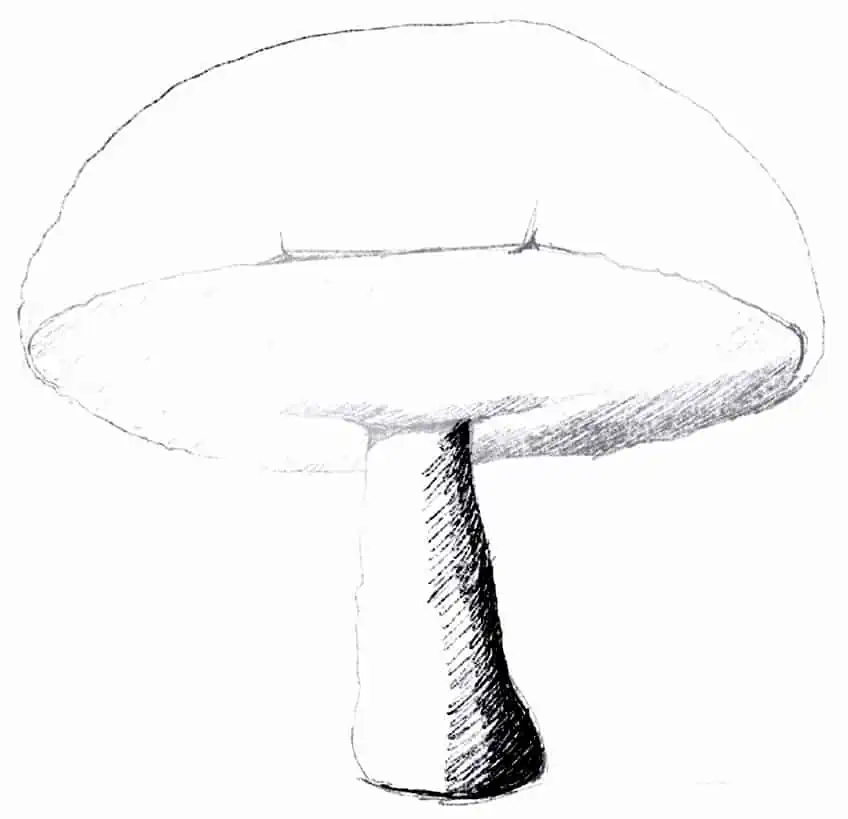
How to Draw a Boletus Mushroom
Then lastly, we will be drawing the classic boletus mushroom. This mushroom is the more classic and iconic aesthetic of a mushroom that people normally associate the appearance of mushrooms with. It’s also a very beautiful and simple-looking mushroom with subtle features.
Let’s see how we can draw this iconic mushroom.
Step 1: Sketching the Form of the Mushroom
We want to start with a simple outline of the form, which we can do so by drawing a stalk and cap. The stalk is quite normal and narrow, whereas the cap is quite fat and dome-shaped in comparison.

Step 2: Erasing and Refining the Mushroom Sketch
Once we have this basic form of the mushroom established, we can then proceed to light erase the mushroom. We now want to work over these ghost lines with refined sketching, adding some details to the features.
We can add some shading along the stalk to create some curvature in its structure. We also want to make sure that the underside of the cap has a slightly bludgeoned curve to its body.
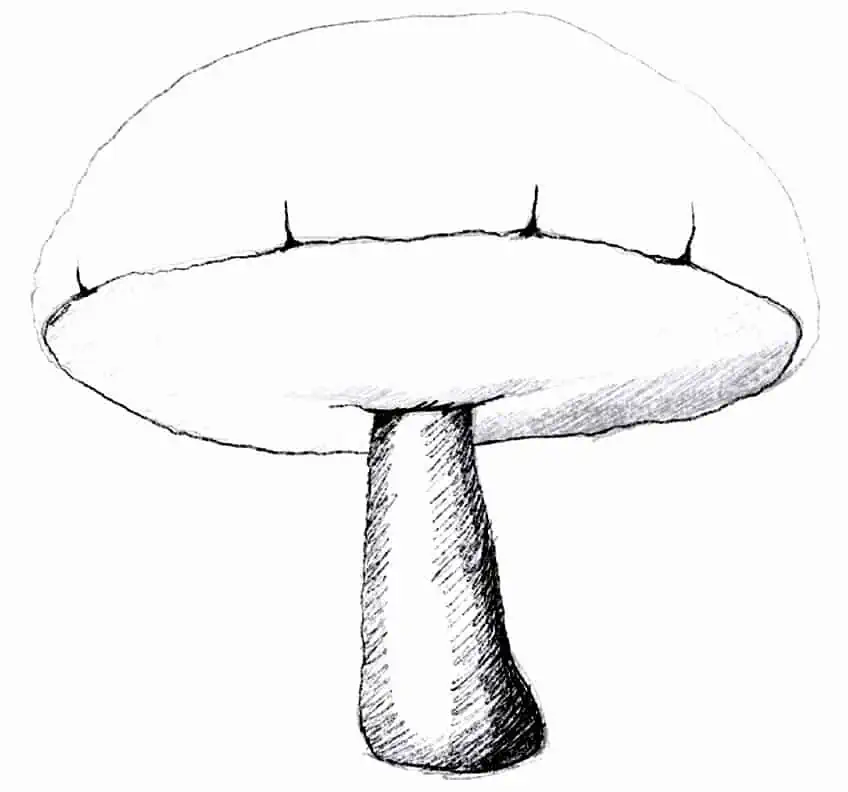
We want to add some shading to the underside of the cap to give textural qualities to this feature. We can also start adding shading to the top dome part of the cap, we can also add a little dent to give a few unique attributes to the mushroom.

Step 3: Adding Unique Details to the Mushroom
We want to make sure that the top dome cap is slightly darker in tone, which is unique to the appearance of the boletus species. We also want to start adding in some little dots on the underside of the cap to suggest pores.
Take your time adding some dots to the underside of the cap, this will give a more realistic texture to the mushroom, which is unique to the boletus mushroom. We can also make sure the shading along the top dome is slightly darker.

And there you have it! A few simple mushroom drawings are easy and simple to draw. Make sure you erase any ghost lines and unwanted marks before finishing off.

Remember to take your time with each mushroom drawing. Mushroom drawing, easy and simple as it may be, comes with slight differences to distinguish them from one another. Once you know the differences, you then can play around with drawing different species.
Tips and Tricks to Remember
- Make sure you capture the unique shape. Once you have the basic shape, you can then work on the details.
- Shading creates a tonal difference. This is important for distinguishing colors in a black-and-white sketch.
- Explore drawing various mushrooms together. Once you know how to draw one mushroom, try to draw them in a variety of ways to give a more interesting aesthetic to your mushroom drawing.
- Have fun! Play around with how you can use these mushroom drawings in different artworks.
Drawing mushrooms, easy and simple as it may seem, does require some attention to detail. In many ways, mushroom species can share similar visual qualities with only subtle differences. As you learn how to draw mushrooms, a good suggestion is to roam the internet and see how different mushroom species vary when creating your drawing.
Frequently Asked Questions
How Can You Use a Mushroom Drawing?
When learning how to draw a mushroom, we will find that some mushrooms are very ambiguous looking due to their fungal nature. This means that they exist in the space between organism and plant. This gives them a very unique aesthetic that is often contextualized by surrounding features. Due to fungus and mushrooms’ alien-like aesthetic, they tend to work well as a background to more strange and fantastical drawing explorations. In many ways, they can also seem ambiguous in scale, which makes them great for scaling up to a large size that sets the landscape for strange drawings. In another sense, they are so beautiful that they can be drawn in isolation and function as a focal point alone. Their abstract qualities provide enough visual richness to work as an artwork itself.
How Do You Shade in a Mushroom Drawing?
Shading mushrooms should be done in layers, as the idea is to first establish the form and structure of the object. From there, it’s about working with a light source and how you can add shading to emphasize the form and structure. Different mushrooms also have different colorations, and these can be high or low in contrast. The way in which we replicate these qualities in a mushroom sketch is by making the highly-pigmented parts slightly darker than the lesser-pigmented parts. With mushroom drawing, easy and simple ways to shade are to establish the form, refine the structure, then work in shading to emphasize that structure. Basically, make sure that you have a well-drawn outline before adding in shading, as this way your shading process will be more effective. Lastly, make sure your shading is consistent with the light source present in your fungus drawing.

Matthew Matthysen is a multidisciplinary artist. He completed his fine art degree, majoring in History of Art and Contemporary Drawing Practice at the University of Witwatersrand, South Africa. Before joining acrylgiessen In 2020, Matthew worked part-time as an art teacher at Reddford Blue Hills High school. Matthew creates drawing and painting tutorials for acrylgiessen and captures them not only photographically and in written form. He also records the creation of his works in his own creative studio as in video format, from which later with a voiceover and a video editor also drawing tutorials for the Youtube channel of acrylgiessen are created.
Learn more about Matthew Matthysen and about acrylgiessen.