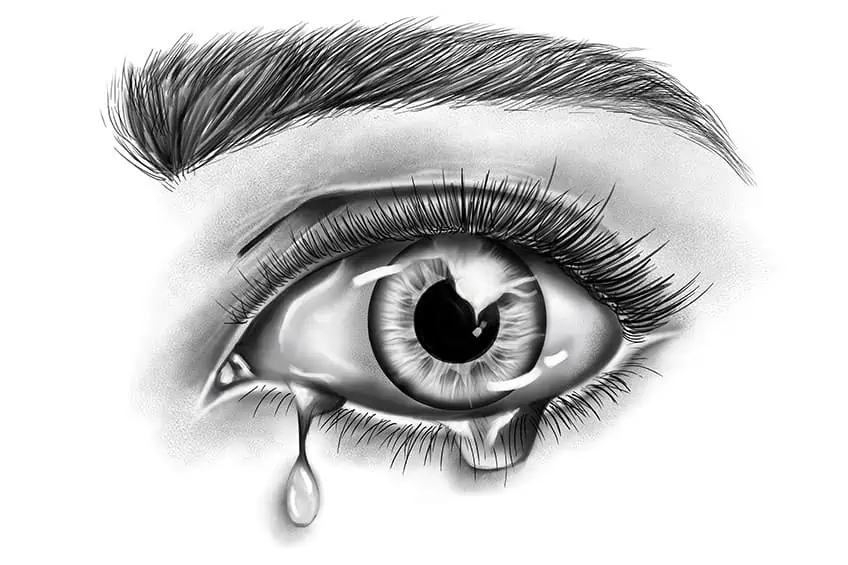
Tears Drawing – Create a Realistic Teardrop Drawing
This post may contain affiliate links. We may earn a small commission from purchases made through them, at no additional cost to you.
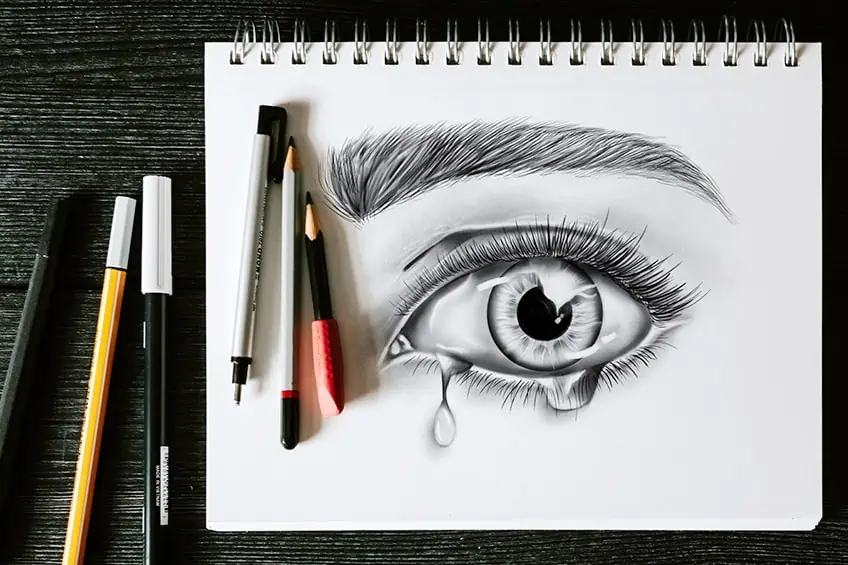
Drawing tears is a skill that can evoke powerful emotions in art. Whether it’s a single tear rolling down a character’s cheek or a torrential downpour of tears, each drawing captures a unique moment of vulnerability, sadness, or even joy. Tears can connect us to the deeper parts of our humanity, and artists who can convey this through their drawings are truly gifted. So, if you want to create a truly impactful piece of art, consider honing your skills in drawing tears.
How to Draw Realistic Tears Step-by-Step
Follow along and learn how to draw tears step-by-step. This tutorial will cover the basic elements of drawing tears, to adding more complex detailing such as shading and highlighting. After today’s tutorial on how to draw tears, you will be able to create a perfect and realistic teardrop!
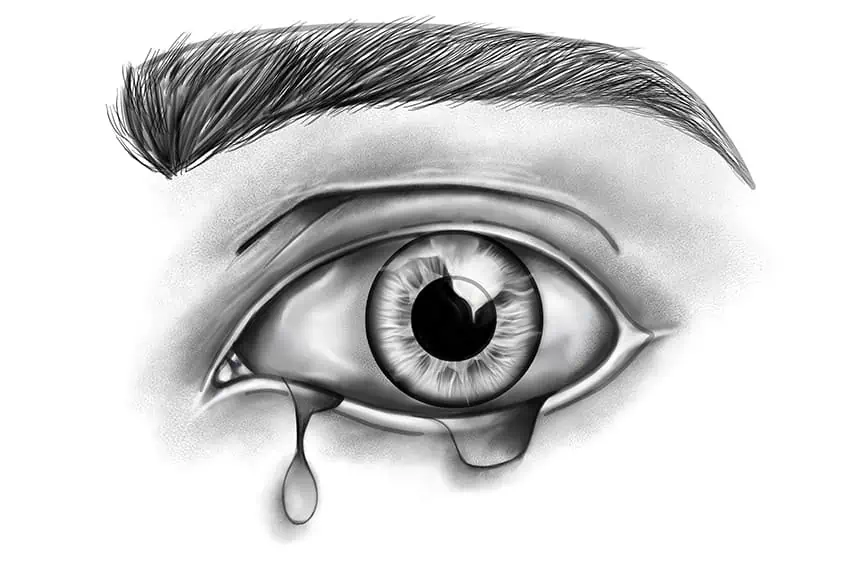
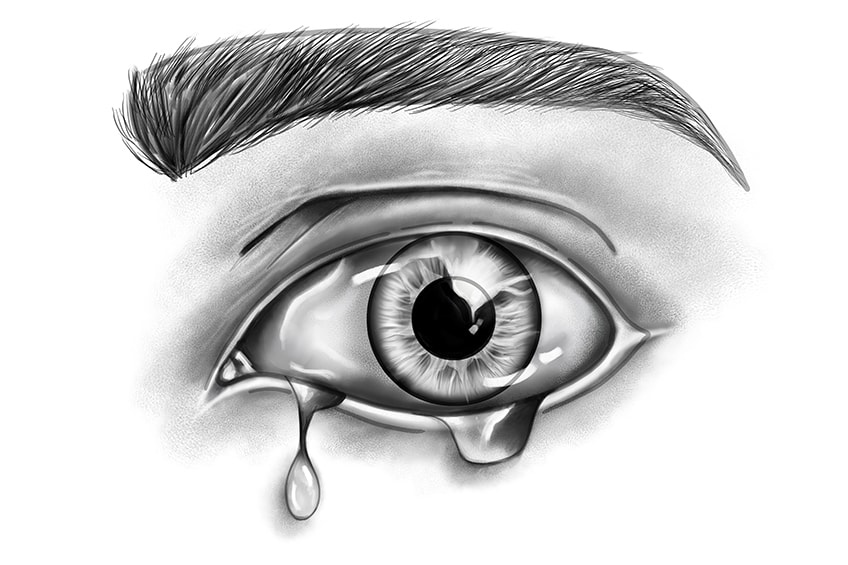
The below teardrop drawing collage shows each step taken to achieve the final result. Follow along and you too will be able to draw and paint a realistic teardrop drawing!
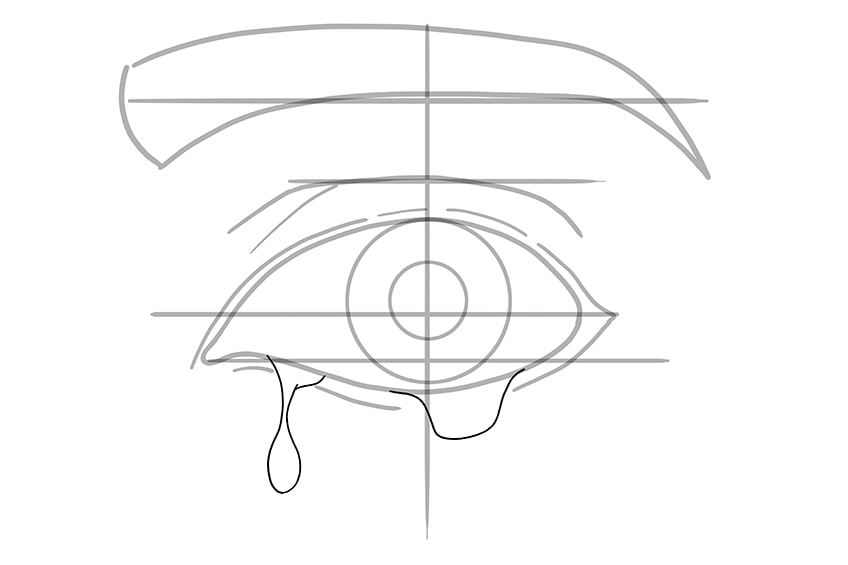
Step 1: Draw the Eyeball to Your TearDrop Drawing
Begin today’s tutorial on how to draw a teardrop by drawing a medium-sized circle in the center of your drawing area. This circle will represent the eyeball of your tears drawing.

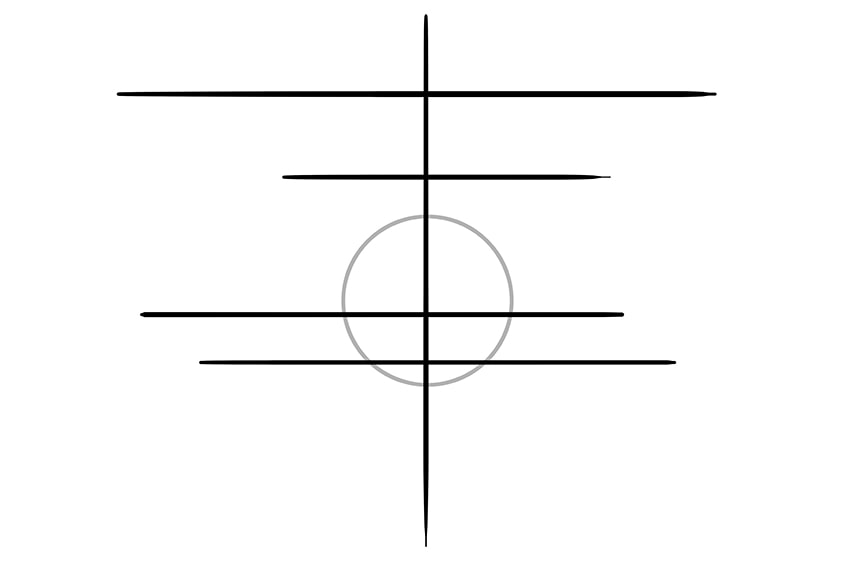
Step 2: Add the Center Lines
Draw a center vertical line down the middle of the eyeball, splitting it in half. Draw the first horizontal line overlapping the vertical line at the very top. Repeat this step and draw the second horizontal line below. This line should be shorter. Continue and draw the third horizontal line slightly below the center point of the eyeball.
Repeat once more, with a shorter horizontal line slightly lower than the previously drawn line.
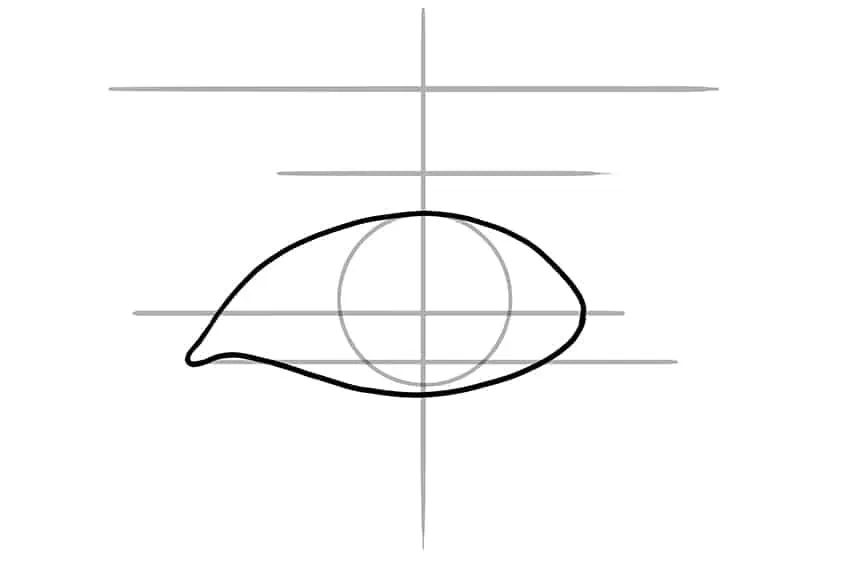
Step 3: Outline the Eye of Your Tears Drawing
Use the previously drawn lines to aid you in outlining a more realistic shape for your eye drawing. The outline should wrap around the top of the eyeball and should overlap the bottom last two horizontal lines.
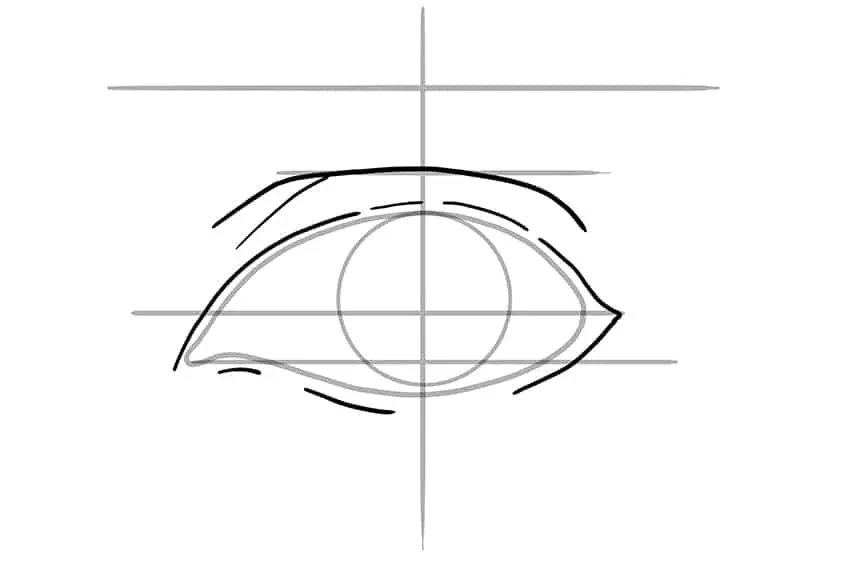
Step 4: Draw the Outer Skin
Surrounding the previously drawn outline, draw the top and bottom skin layers. Make use of the second horizontal line, from the top, to aid you in outlining the top eyelid.
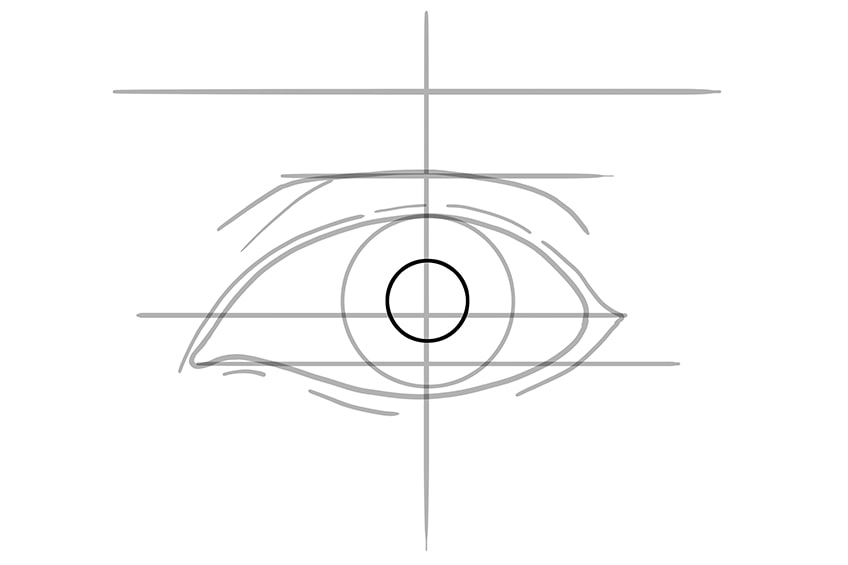
Step 5: Draw the Pupil on Your Tears Drawing
In the center of the eye, draw a smaller circle to represent the pupil.
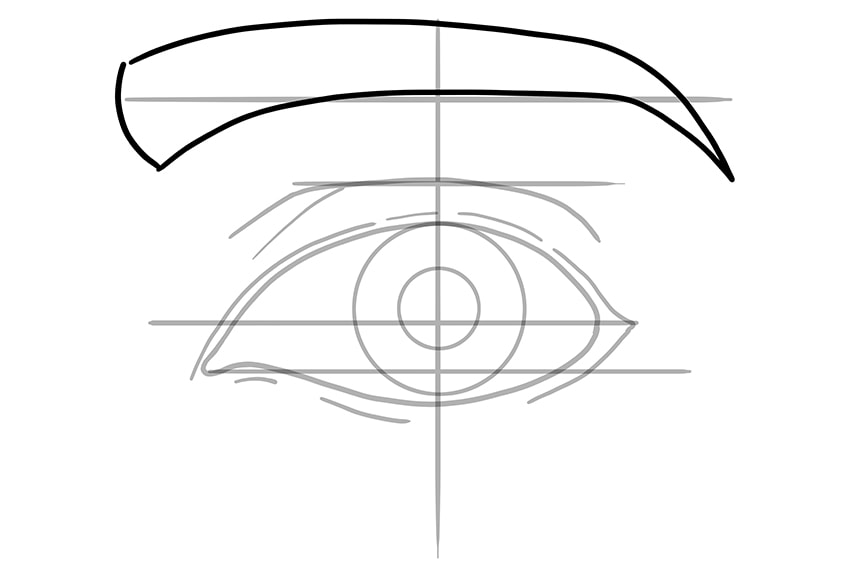
Step 6: Add in the Eyebrow
Make use of the top horizontal line to aid you in the positioning of the eyebrow. Using the width between the top horizontal line and the top of the vertical line, outline a thick eyebrow that ends in a sharp point.
Step 7: Draw the Tears
In this step, you are beginning to add tears to your teardrop drawing. Draw two teardrops along the bottom open spaces between the eye and the eye skin line. Once complete, erase any unnecessary construction lines.
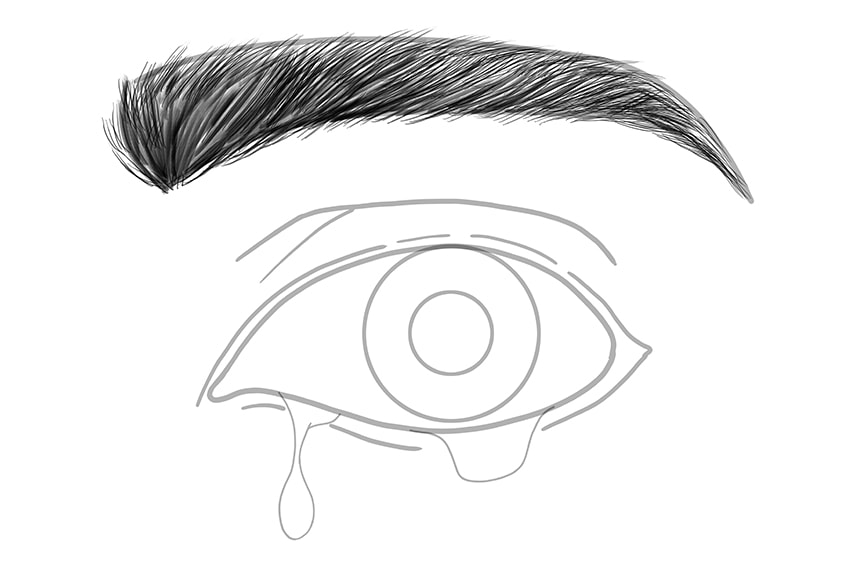
Step 8: Texture the Eyebrow
Select a fine, sharp brush and black paint, and add fine hairline brushstrokes within the frame of the eyebrow. Repeat this step several times to create a full and thick-looking eyebrow.
Note! When painting the brushstrokes, be sure to follow the curvature of the eyebrow outline. This will create a more realistic look.
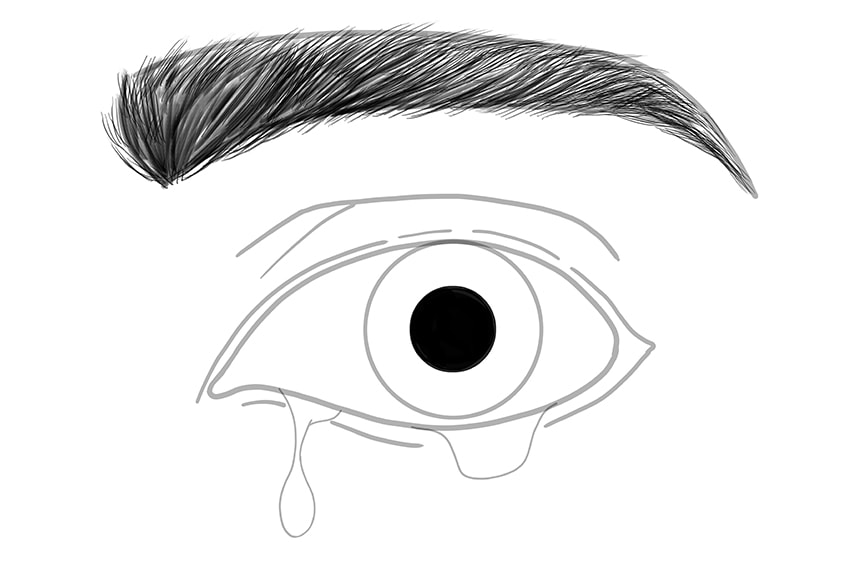
Step 9: Color the Pupil to Your Tears Drawing
Use the same paintbrush and paint color as previously, and evenly coat the pupil of the eye.
Step 10: Add Texture to the Iris
Begin by using black paint and a thin brush, and paint fine hairline brushstrokes surrounding the pupil and flowing outwards. These lines should not touch the outline of the iris. Repeat using white paint.
Continue with a soft brush and black paint, and add fine shading around the edge of the iris. Repeat with white paint, and add a soft highlight around the iris.
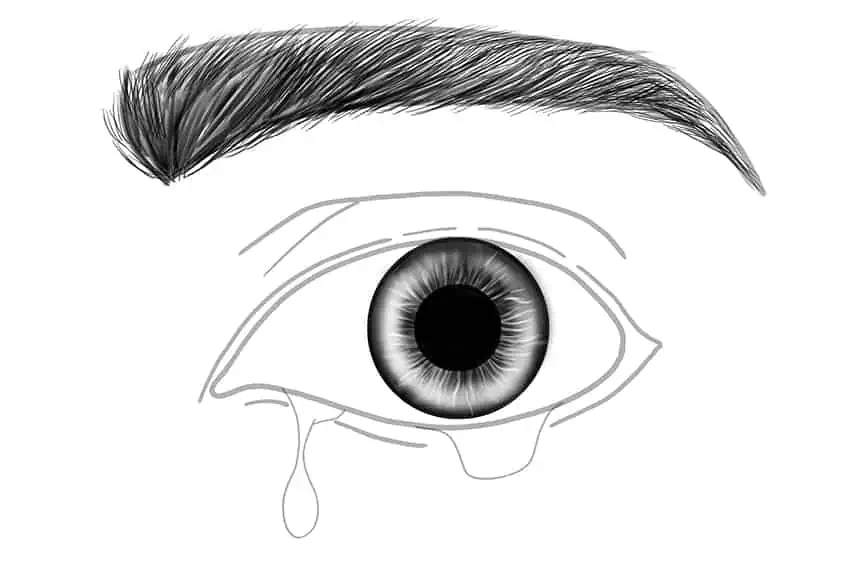
Step 11: Highlight the Iris
Select a fine brush and white paint, and add fine streaks that wrap around the iris and surround the pupil.
Step 12: Add a Corna to Your Realistic Teardrop Drawing
For those who don’t know, the cornea is the clear lens that covers the iris and pupil of the eye. To draw the cornea, select a fine brush and white paint, and add fine hairline brushstrokes that spread onto the shaded areas near the edge of the iris. Switch to a soft brush and apply a contrasted glow reaching within the pupil.
Complete this step with a thin, sharp brush and gray paint, and add fine streaks leading inwards from the edge of the iris towards the pupil.
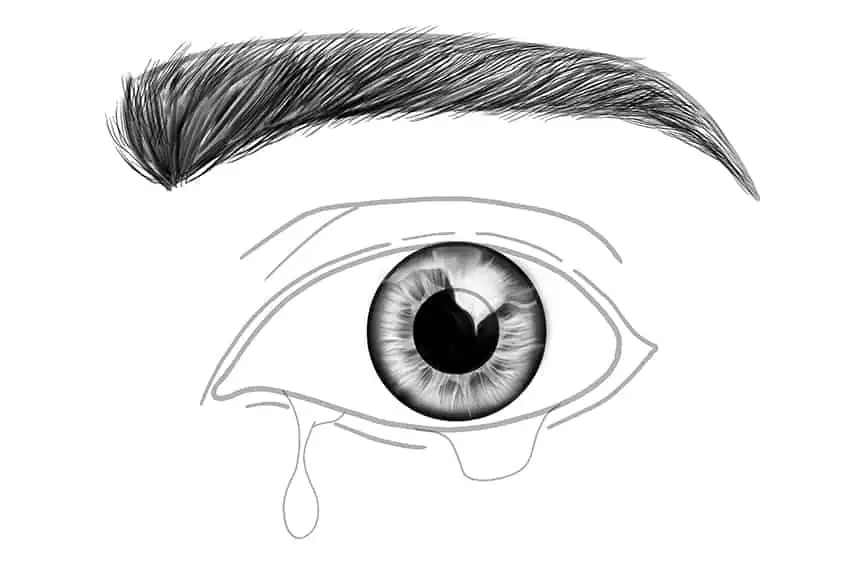
Step 13: Shade the Sclera
The sclera is the white layer of the eye that covers most of the outside of the eyeball. To achieve a shading effect, select a soft brush and black paint, and add a surrounding shadow within the outline of the eye. Switch to a rough, textured brush and white paint, and dab textured dots along the edges of the eye outline. Complete this step with a small eraser to create realistic vein-like streaks.
Step 14: Detail the Top Eyelid
Use a fine, sharp brush and black paint, and trace over the eyelid lines. Spread out this shading with a soft brush or a blending brush. Continue with a rough textured brush, and begin dabbing black spots around the top eye area. Complete this step with a fine brush and white paint, and add a fine highlight around the eye outline to create a realistic texture.
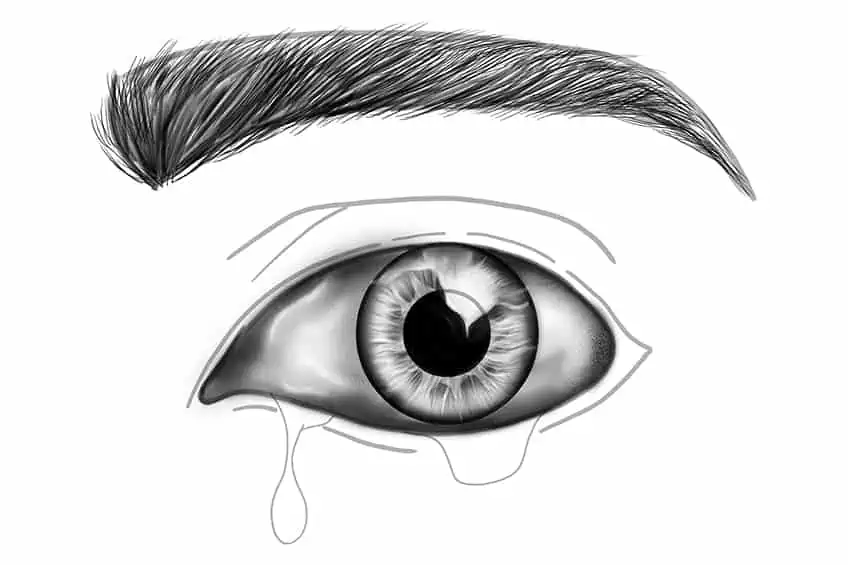
Step 15: Add the Lacrimal Caruncle
The Lacrimal caruncle is the tissue spot in the corner of the eye (in our case the left corner of the eye). Select a fine, sharp brush and black paint, and create a separation between the lacrimal caruncle and the rest of the eye sclera. Repeat within the lacrimal caruncle using white paint to add a ‘wet’ highlight look.
Using a small, soft brush and black paint, add a light shadow surrounding the eye outline. Repeat using a fine, sharp brush and white paint to add the final highlights around and within the eye shape.
Complete the step using a blending brush to soften and spread the coats.
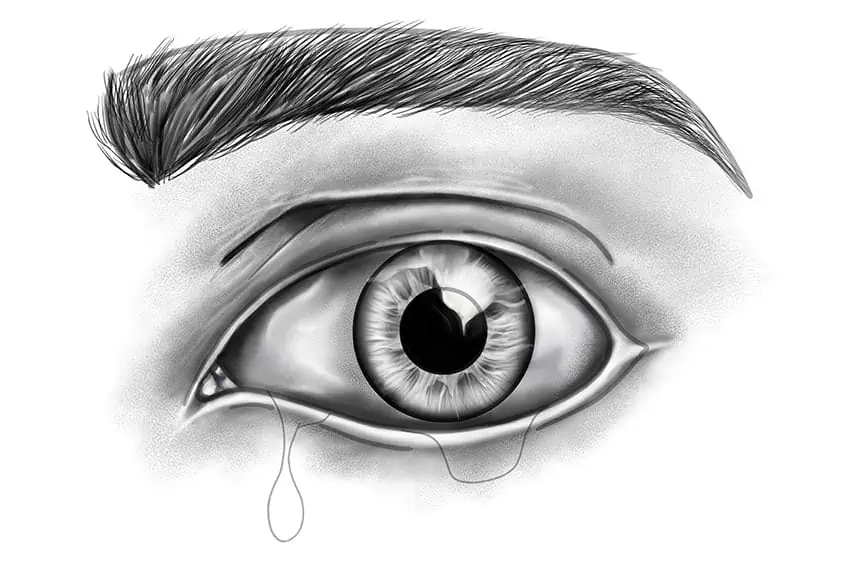
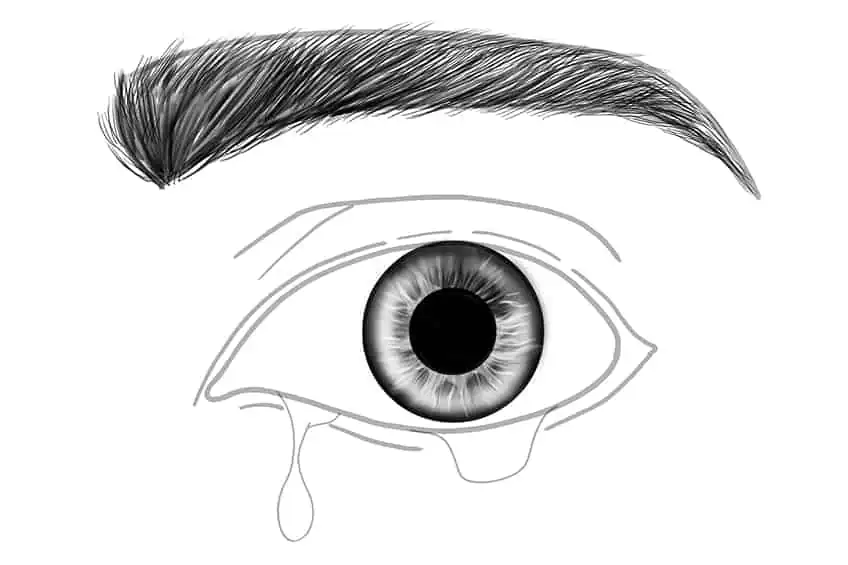
Step 16: Shade the Tears to Your Tears Drawing
Using a small, soft brush and black paint, apply soft shading within the edges of the teardrops. The first color coat should still be somewhat visible.
Step 17: Add Highlights to the Eye
Use the same brush as previously and switch to white paint, and begin to fill the rest of the area within the tears. Continue by using a fine, sharp brush and white paint to add sharp glossy highlights within the tears and the eye.
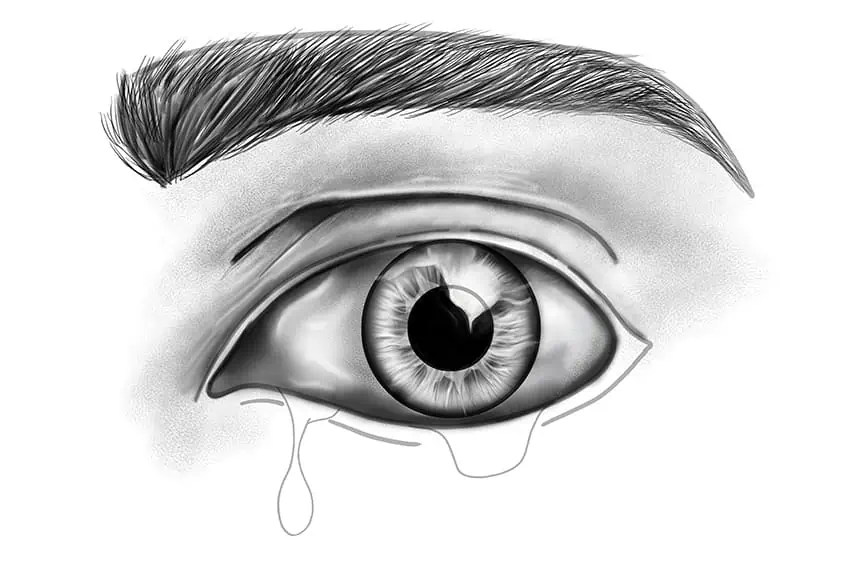
Step 18: Add the Eyelashes
Select a fine sharp brush and black paint, and draw fine, slightly curving hairlines along the entire outline of the top and bottom eye lines. The eyelashes should have a curve corresponding to the curvature of the eye line. Apply an additional layer of fine hairline brushstrokes to the eyebrow.
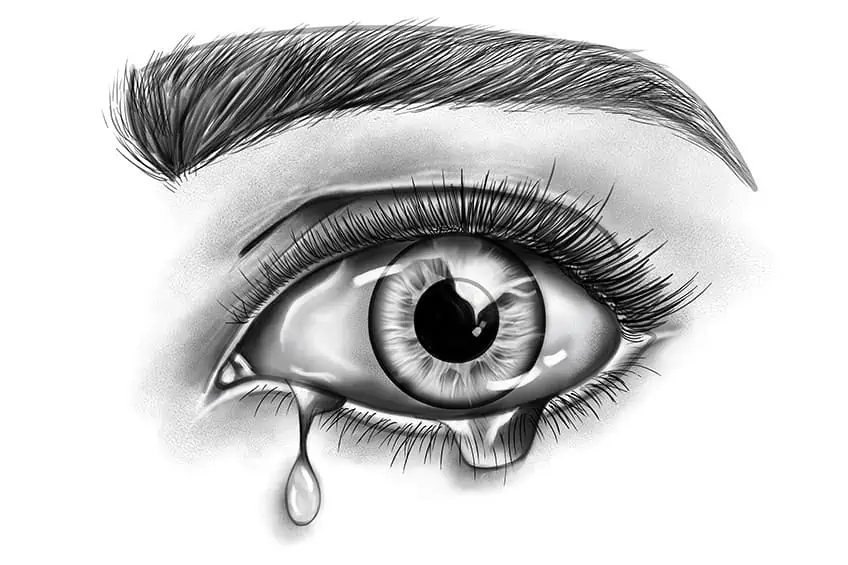
Step 19: Finalize Your Realistic Teardrop Drawing
You are one step closer to finishing our tutorial on drawing tears! Begin by erasing any visible or harsh outlines. This will create a seamless look to your tears drawing.
Well done on finishing our tutorial on how to draw realistic tears! You have just created a beautiful and memorizing teardrop drawing. We hope you will be walking away from this tutorial having gained skills on how to draw a teardrop. Learning how to draw a realistic teardrop drawing may seem daunting at first but with a proper guide, you can achieve the result you want! The skills you have acquired from this drawing tutorial can be applied to any other artwork you wish to draw.
Frequently Asked Questions
How to Draw a Teardrop?
Drawing a teardrop is a simple and easy process. Our tutorial on how to draw tears will take you through the entire drawing process. We will also show you how to add shading or highlights to give the teardrop a realistic appearance. With a little practice and patience, anyone can draw a teardrop and use it to convey powerful emotions in their artwork. So, grab your art kit, and start exploring the power of teardrops in your drawings today!
Is It Easy to Create a Realistic Teardrop Drawing?
Yes! It is easy to create a realistic teardrop drawing with a bit of practice and patience. The key is to pay attention to the shape and proportion of the teardrop, as well as the shading and highlights that give it a 3D appearance. Start by sketching the basic shape of the teardrop with light lines, then gradually build up the shading and details to create a realistic effect. With some experimentation and observation of real tears, you can create stunning teardrop drawings that convey deep emotions and add an extra layer of realism to your artwork.

Matthew Matthysen is a multidisciplinary artist. He completed his fine art degree, majoring in History of Art and Contemporary Drawing Practice at the University of Witwatersrand, South Africa. Before joining acrylgiessen In 2020, Matthew worked part-time as an art teacher at Reddford Blue Hills High school. Matthew creates drawing and painting tutorials for acrylgiessen and captures them not only photographically and in written form. He also records the creation of his works in his own creative studio as in video format, from which later with a voiceover and a video editor also drawing tutorials for the Youtube channel of acrylgiessen are created.
Learn more about Matthew Matthysen and about acrylgiessen.