How to Paint Rocks – Your Guide to Creating Unique Decorated Stones
This post may contain affiliate links. We may earn a small commission from purchases made through them, at no additional cost to you.
Creating decorated stones and painted rocks is a fun activity for the whole family, being an easy project for all ages. If you have been looking for ideas for things to paint on rocks, or want to learn how to paint on rocks, you have come to the right place! Painted rocks make beautiful gifts or keepsakes and can be useful in the garden or even as decor in your home. Our guide will explain the process for easy, beginner-painted rocks, as well as fun and easy rock painting ideas for you to try yourself. We will also explain how to choose rocks to paint and which materials are best suited for this kind of art and craft project.
Decorated Stones: A Popular Arts and Crafts Project
Whether you want to learn how to make inspirational painted rocks for home decor or even decorated stones for your garden, rest assured that this is a simple and easy project for absolutely everyone. Children and adults of any age can enjoy making easy beginner-painted rocks and have lots of fun in the process! There are so many things to paint on rocks and ways to create beautifully decorated stones, it is likely you already have many of the materials needed in your home!

How to Choose the Right Rocks to Paint
Choosing the right rocks to paint is a lot more important than you may realize. We advise that when learning how to paint rocks, choose a larger stone. This is because it can be a little difficult and tricky working with smaller stones at first. The best kinds of rocks to paint have a smooth texture and a flatter surface. We also recommend lighter-colored rocks.
You may find a stone that catches your eye because of its unusual and unique shape, but we suggest keeping this rock for when you are more confident with creating decorated stones.
How to Find Smooth Stones
It is easiest to buy rocks from your garden or hardware store. You could also buy prepared rocks online or even make your very own stones with a polyurethane mixture! However, if you prefer to source your rocks to paint from a natural source, places you may find the right type of stones are on a beach, in a river bed, or on a hike. Make sure you do not collect rocks from protected areas. There are so many places to find or buy rocks to paint!

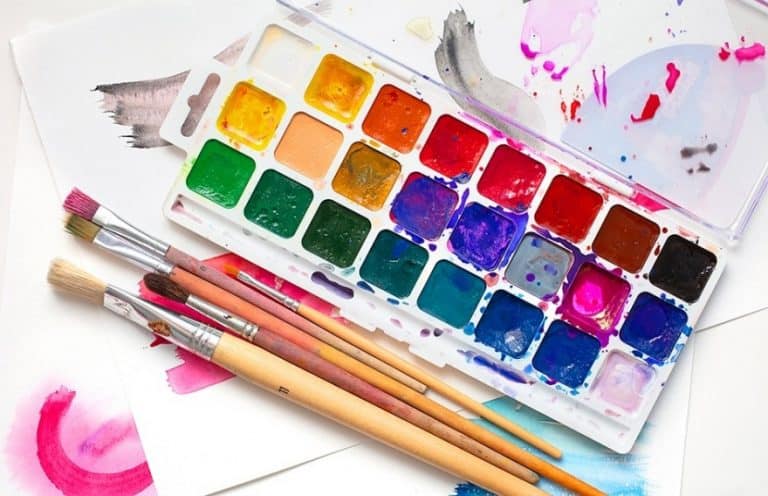
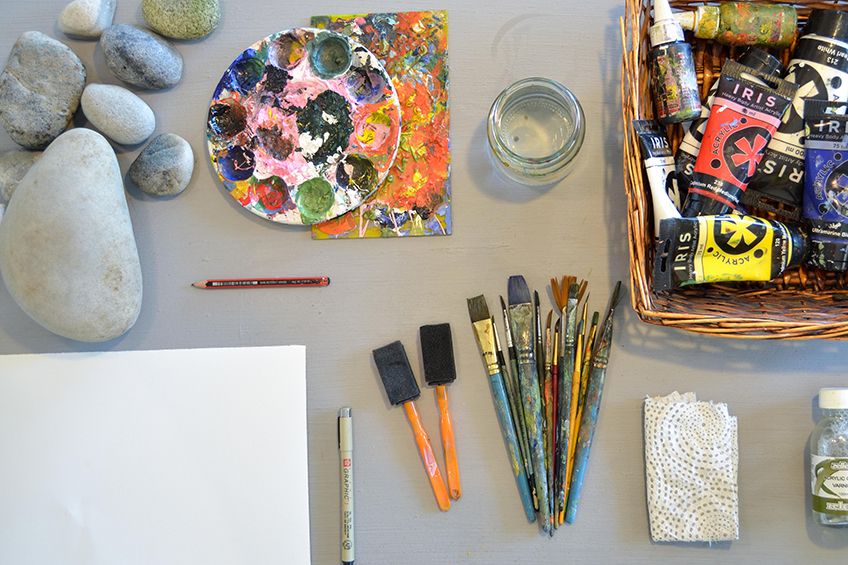
Supplies Needed for Easy Beginner Painted Rocks
Creating the prettiest and most unique painted rocks will depend on the materials you have. We have created a simple list of supplies we feel everyone who is learning how to paint rocks needs. Remember, decorated stones do not have to be decorated with paint only – you could also glue embellishments onto them!
- A good variety of rocks to paint
- An apron or an old oversized T-shirt
- Some paint primer
- Sheets of fine-grit sandpaper
- A drawing pad to plan designs
- A pencil to outline your design
- A few paintbrushes in various sizes
- An old plate or palette to mix paint on
- Container for water
- Some paper town and earbuds
- An acrylic paint set
- UV- and water-resistant varnish

Optional Supplies
- An acrylic paint pen set
- Fine liner pens
- Crayons or chalk (best suited for children)
- A White gel marker
- A few decorative stencils
Other Equipment and Tools Needed for Decorated Stones
When you are learning how to paint rocks and as you start coming up with rock painting ideas, you will be thankful for having the proper tools and equipment needed. Having the correct equipment, supplies, and tools will enable you to bring your ideas to fruition. When we mention equipment, we do not necessarily mean expensive gadgets – things like toothpicks and other objects are affordable and make for excellent tools when creating texture or painting tiny details on your decorated stones.
Other items that can be useful include earbuds, paper clips, and the like. A handy tip to remember is that while the paint is still wet, you should be able to remove it if you have made a mistake. The best part about painted rocks is that if you are not happy with your result, you can just re-prime it and start again!
Preparing Your Rocks for Paint
Now, before you leap right into painting your rocks, you will want to prepare your stones correctly. We also suggest preparing and priming more than one rock at a time otherwise you will have to wait for them to dry when you complete your first one.

Clean Your Stones
The first thing to do when preparing your rocks to paint is to rinse and wash them properly. You want to remove all the debris and dirt completely. A toothbrush is great for scrubbing them and getting them nice and clean. Be sure to get into the deep cracks and crevices if your rocks have any.
Do not use soapy water, however, as it can affect the surface of the rock, making it difficult to paint.
Priming Your Stones
When untreated, rocks are naturally porous thanks to all of the grooves and textures within them. This is why it is important to paint a coat of primer onto your stones before you start. This will help your colorful pens and paints adhere to the surface much better, as well as ensure that they stay vibrant. When you apply your primer, be it spray or paint, make sure that you get it into the gaps on the rocks. If you are impatient waiting for them to dry, you can use a hairdryer to speed the process up.

Planning Your Rock’s Design
If you have decided on ideas and things to paint on rocks already, you can start planning your design right away. If you are struggling to figure out what to put on your decorated rocks, we have some great ideas coming up later in this article. The best way to properly plan your design is to first trace around the stone on a piece of paper. You will now have the correct shape and size sketched. Now you can begin planning what you want to put on the rock. Whether you are opting for geometric patterns or you want to make a collection of inspirational painted rocks, planning your design is still important.
When you are happy with your design, you can begin mapping it onto your primed stone using a dark pencil or even some chalk.
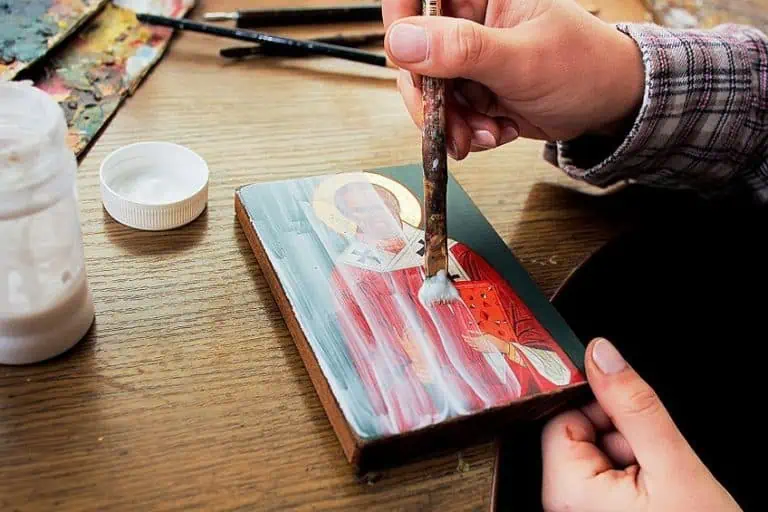
A Guide on How to Paint Rocks
Once all your rocks have a design, you can begin with the fun stuff! You will want to make sure that you have all your bits and bobs ready.
Step 1: Workspace Preparation
Make sure you are wearing old clothes or an apron so that you do not mess up your nice clothing. Ensure that the area you are working in has sufficient lighting as well as a sturdy surface, preferably covered in tarp or old newspapers.
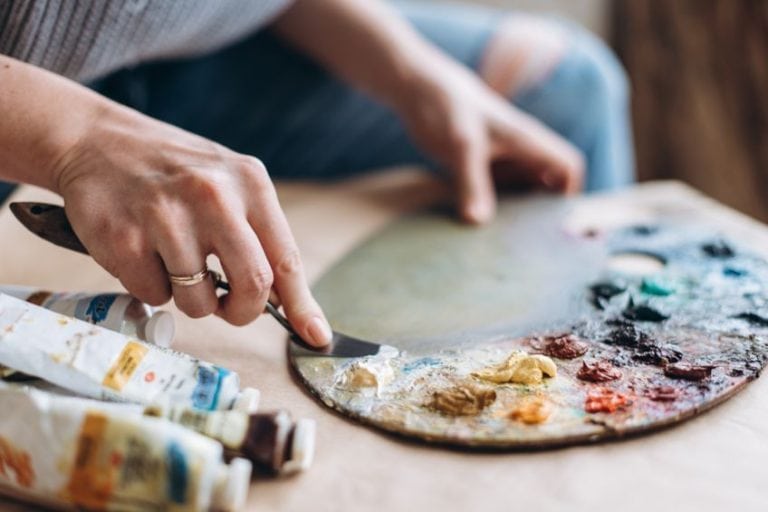
Step 2: Paint Preparation
Prepare the paints you plan on using by pouring them onto a plate or painter’s palette. You want to keep the colors separate and in order according to how you will mix them if you do plan on mixing up your own colors.
You also want to make sure that your brush is clean before dipping it into a new paint color.
Step 3: Painting Your Rock
The first layer on your rock should be done in one color only and should be allowed to dry before applying the next. This is to prevent the colors from accidentally blending with one another. Of course, if you are painting an ombre-type effect, you will use more than one color and not allow for drying time. You can also add highlights and black lining to help make the color on your rocks pop and stick out.

Step 4: Finishing Touches
It is a lovely idea to sign your rocks, so please feel free to sign the rock you have painted and created. Remember to let your rock dry fully before doing so. You will also want to seal your rock once entirely dry.
A spray-on sealant is excellent for this.
Step 5: Displaying Your Decorated Stones
When your varnish sealer has fully dried, you can now put your beautiful painted rocks on display! Some great spaces for your rocks include bookshelves, in the garden, or even given as gifts.

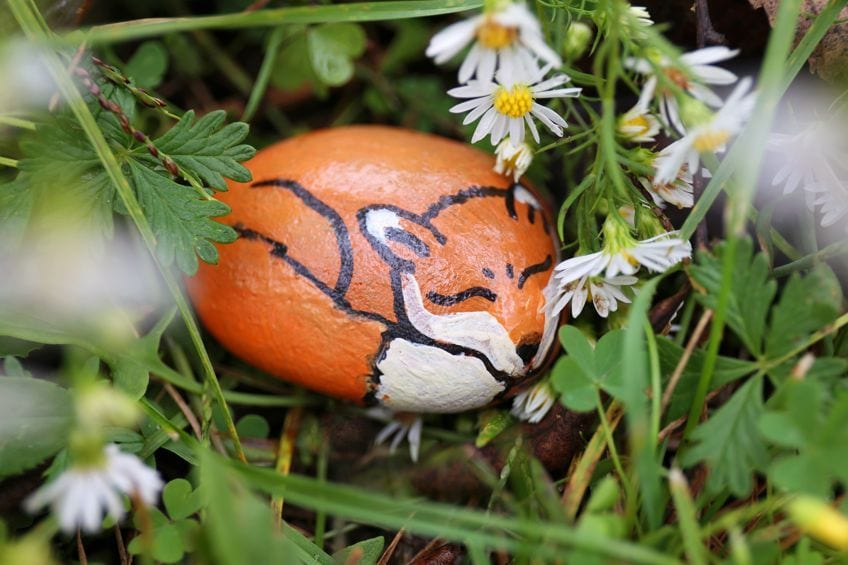
Ideas for Easy Beginner Painted Rocks
There are countless ideas and things to draw inspiration from when creating painted rocks. Your rocks could be purely for decoration or completely functional! Here are some awesome ideas if you require inspiration.
- Plant Identification: Paint herb and vegetable names on them for the garden.
- Home Decoration: Floral designs, leaves, and mandalas are always a winner.
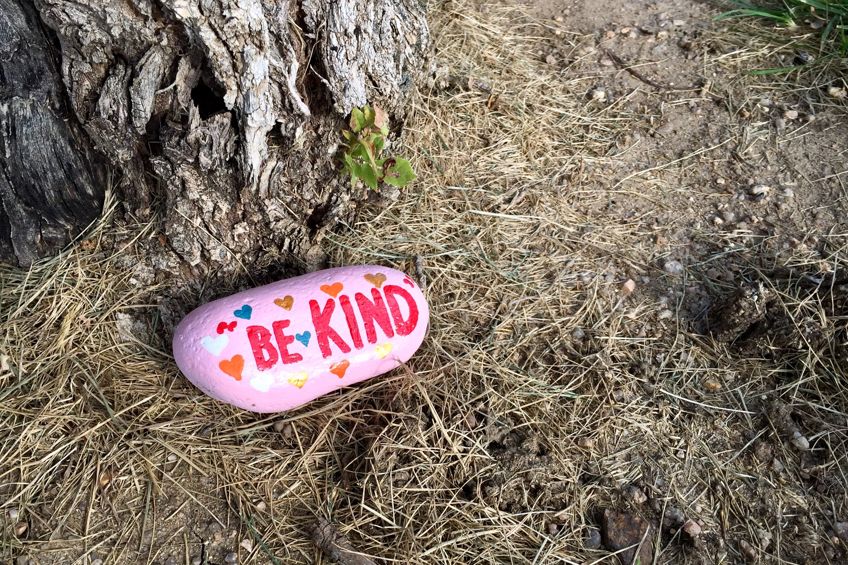
- Motivation: Inspirational painted rocks are a beautiful addition to your home.
- Kitchen Decoration: Create pretty candy and ingredient images on your rocks.
It is also possible to decoupage your rocks for beautifully decorated stones. Other nice additions include sticking on buttons as eyes, glitter for some sparkle, and even scrapbooking embellishments! Why not paint some ocean scenes on rocks you found on vacation at the sea?
You should now have all the know-how on how to paint rocks and how to create beautifully decorated stones with all sorts of exciting materials. As you start off doing easy beginner-painted rocks, you will eventually start to evolve and create more intricate patterns and designs. Before you know it, you will find yourself eyeing out every rock you find! Happy painting!
Frequently Asked Questions
Must I Use a Primer for Painted Rocks?
We always suggest that you prime the rocks you plan to paint. This will help the paint to adhere to the stone properly. It will also help the paints you use to stay vibrant. When you prime your rocks, it is advised to get the primer into all the nooks and crannies. You could use a simple wall primer or a spray-on primer – it is your choice.
Does Acrylic Paint Work for Decorated Stones?
Of course! You can most certainly use acrylic paint for your painted rocks. It is our top choice of paint for painting on stones because it is long-lasting and is available in many bright colors. It is also very easy to mix should you wish to create your own colors and shades. Remember to add a layer or two of varnish sealer to keep your rocks looking bright and beautiful, especially if you plan to put them in the garden.
Is It Possible to Use Nail Polish to Paint Rocks?
Nail polish will most certainly work for painted rocks, especially if you have a large variety of colors and finishes. Remember, however, that most nail polishes are not as easy to work with when compared to acrylic paints. That said, nail polish could provide some really interesting texture and color to your decorated stones. You are also welcome to use gel pens and glitter glue!
Which Adhesive Is Best for Decorating Stones?
There is a plethora of adhesives that suit this type of art and craft project. Our top choice of glue is the GE 11 silicone sealant because it binds so well once it is fully dry. Superglue is also a handy option. Be sure to always buy the best quality glue you can afford.

In 2005, Charlene completed her wellness degrees in therapeutic aromatherapy and reflexology at the International School of Reflexology and Meridian Therapy. She worked for a company offering corporate wellness programs for several years before opening her own therapy practice. In 2015, she was asked by a digital marketer friend to join her company as a content creator, and it was here that she discovered her enthusiasm for writing. Since entering the world of content creation, she has gained a lot of experience over the years writing about various topics such as beauty, health, wellness, travel, crafting, and much more. Due to various circumstances, she had to give up her therapy practice and now works as a freelance writer. Since she is a very creative person and as a balance to writing likes to be active in various areas of art and crafts, the activity at acrylgiessen.com is perfect for her to contribute their knowledge and experience in various creative topics.
Learn more about Charlene Lewis and about us.