Penguin Drawing – A Realistic Step-by-Step Drawing Tutorial
This post may contain affiliate links. We may earn a small commission from purchases made through them, at no additional cost to you.
Penguins are fascinating creatures that are diverse in species depending on their geographical habitat. Learning how to draw a penguin is such a fun exercise because we can choose from a group of various interesting-looking muses. However, the emperor penguin is perhaps the most iconic of all penguins and is a great exercise not only for drawing, but for color exploration as well. As you learn how to draw a penguin, you will find that the emperor penguin has a unique structure and coloration as a bird. It’s also a great way to learn the unique anatomy of the emperor penguin through your penguin sketch as you construct its various features.
Step-by-Step Guide on Drawing a Penguin
In this tutorial on how to draw a penguin, we will break up the process into a few simple steps. We will first work on the basic shapes to form the penguin sketch, which we will then move on to refining into identifiable features. We will then shape the penguin, slowly working on all features and enhancing them with some drawing marks. From there, we will start to integrate colors into our penguin drawing and then finish off the penguin with some refined details.
Step 1: Shaping the Penguin
We want to start by shaping the penguin with its basic features. The head of the penguin is generally quite circular, with a thin bill that extends from the face.
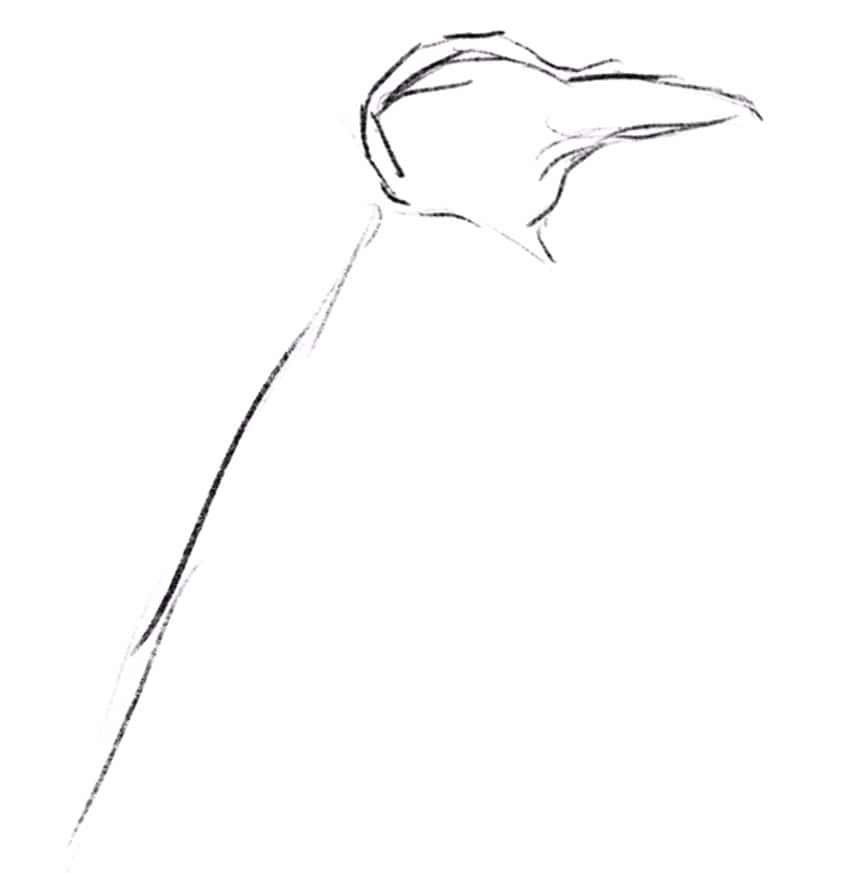
The body of the penguin is quite homogenous in shape, resembling a pear fruit. The head of the penguin is quite small in comparison, with the flippers placed along each side of the penguin.

Try to keep the sketch quite loose, making sure you capture the proportions as best you can. A good suggestion is to look at some references of emperor penguins to assist you in the drawing process.
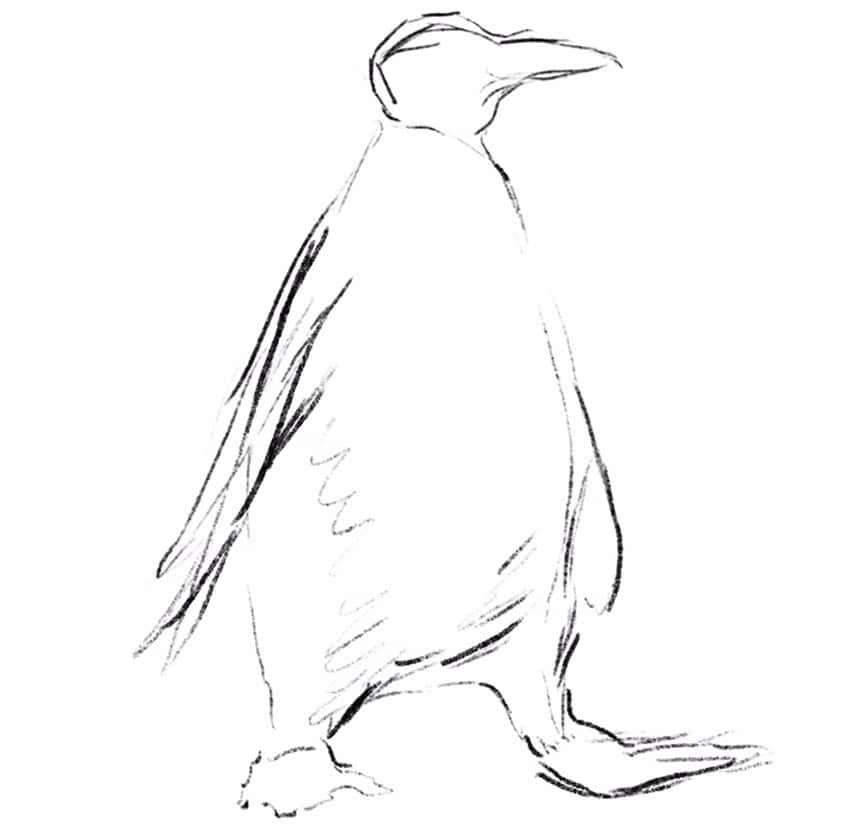
We also want to make sure that the chest area is quite rounded and proud, giving the emperor penguin its iconic shape. We also want to make sure the feet extend from the bottom of the body as if they were extending from beneath a skirt.
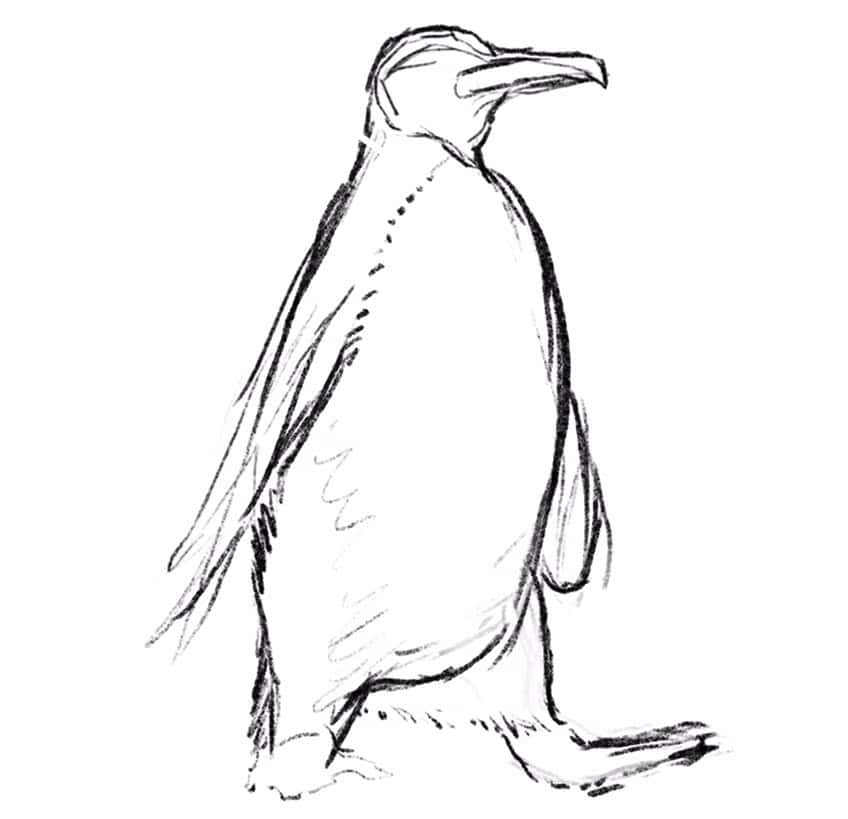
We can now lightly erase the drawing, leaving behind some light marks to use as assistance to refine the penguin drawing.
Step 2: Adding a Base Layer of Shading
We want to use the ghost lines to assist us with adding some shading and shape to the various features. This is where we want to start considering the dominant shadows and how they form along the body.
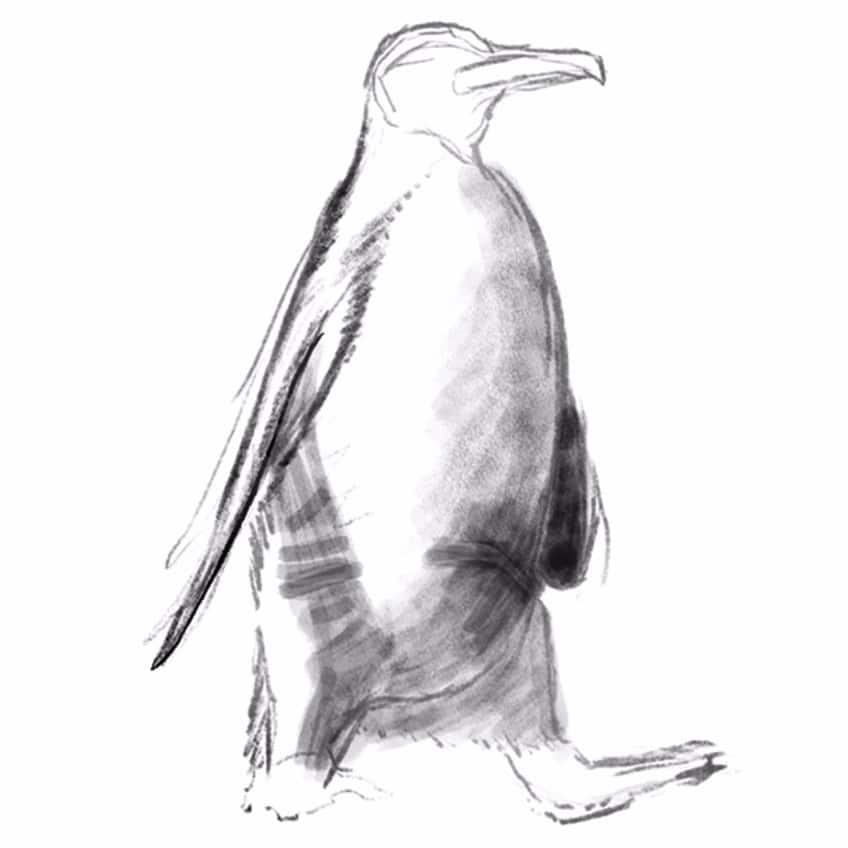
Naturally, we want to keep these marks light for now but we also want to consider a side from which the light source will be present. This will give us a sense of how we shape the penguin with shadows and how they emphasize the penguin’s shape. The penguin has a distinct line that divides the white coloration on its chest from the black coat on its back and along its sides. That being said, shadows can be present in the chest, creating moments of gray coloration.
As we continue, we can proceed to outline the features, moving from the head of the penguin down through the body. We want to be quite vague at this point with the maximum contrast between the lightest and darkest areas. Again, because the feather coat is dense, it becomes quite reflective of light, creating a distinct contrast between light and shadows.
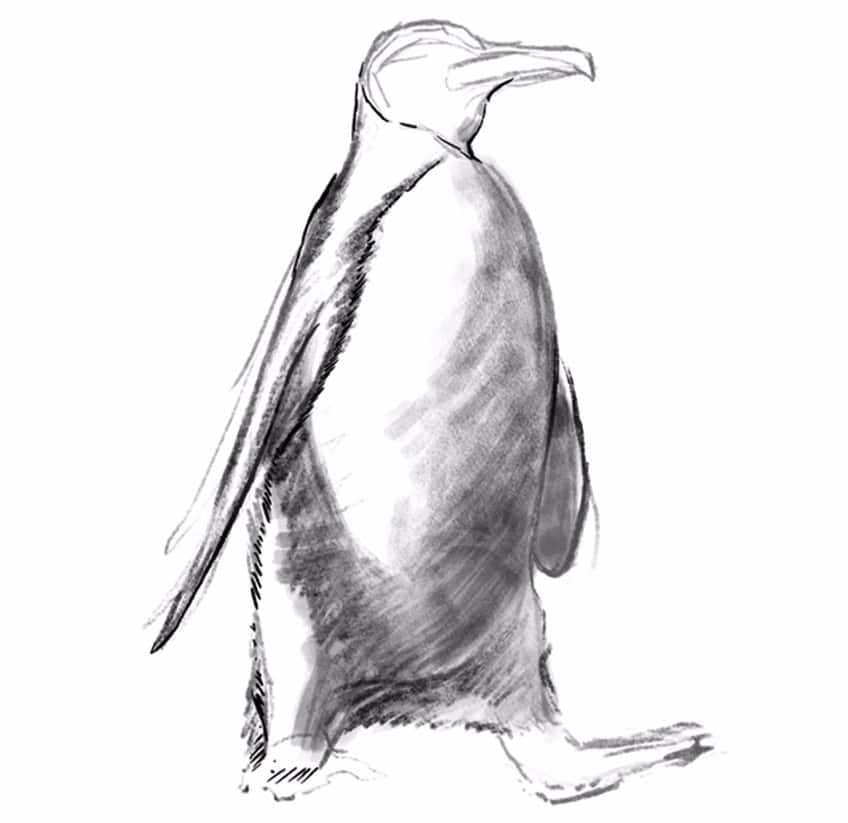
Step 3: Adding Base Layers of Color
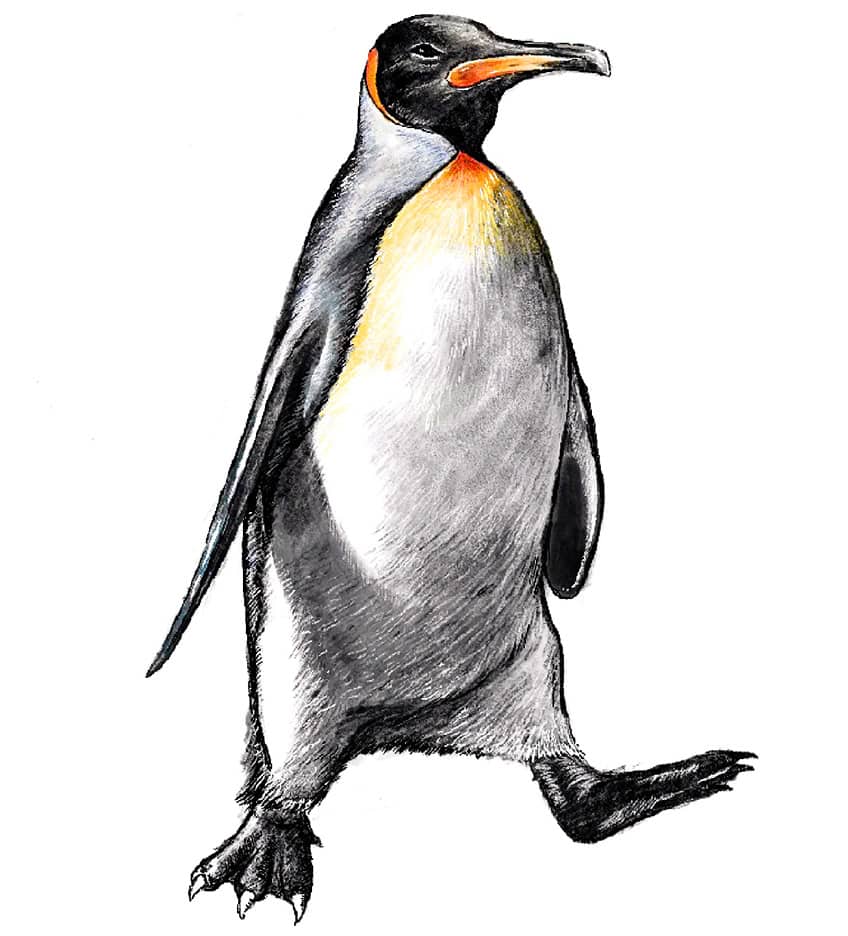
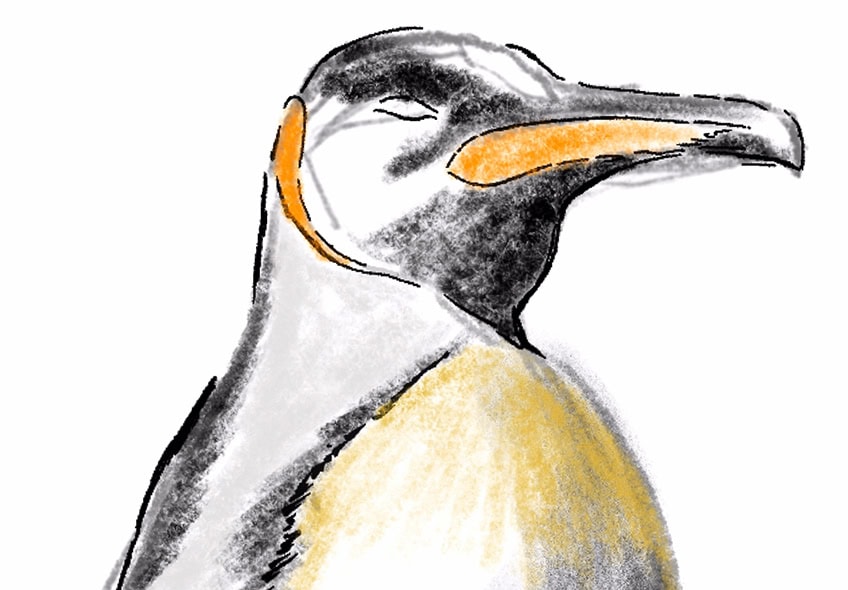
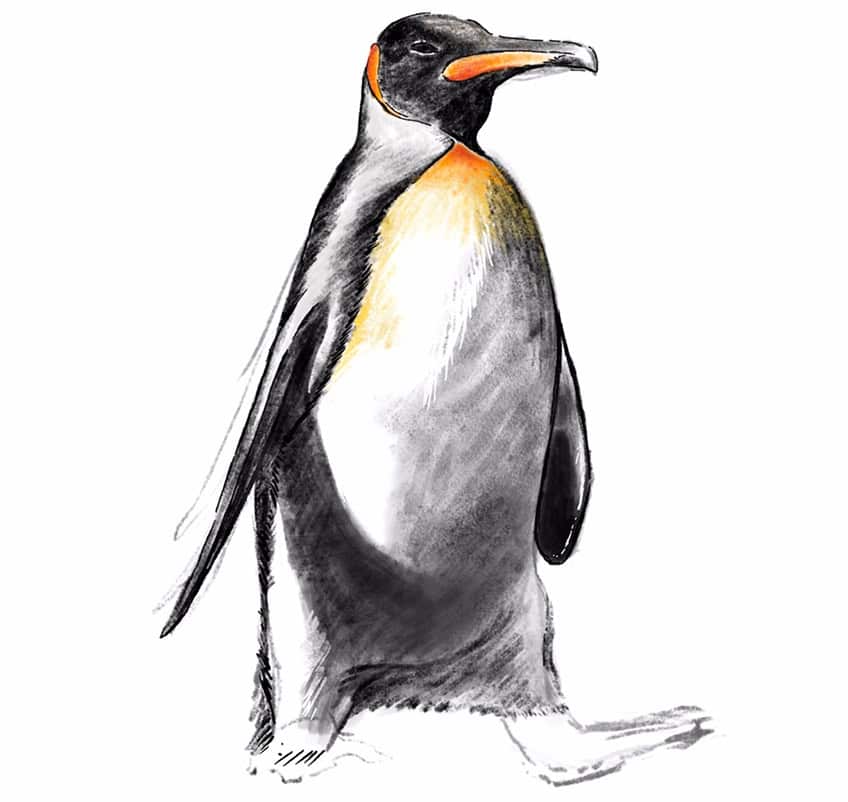
with the emperor penguin, it is predominantly monochromatic, however, there are moments when it has these hues of color. These colors can be found with the face, alongside the face, and in the feathers on the upper chest.
Try to keep your addition of color quite light at this point, with emphasis on the correct placement for now. We want to build up the color values with layering in our penguin drawing.
With well-drawn penguins, the intention is to always build in layers. This way you can control how dark and light the features within your penguin drawing should be. The flippers are quite homogenous and simple in form, which can cast a very linear shadow formation along the surface area of the penguin’s body. This is something to consider, depending on the angle at which your light source is coming from.
As we add in the shading, we want to make sure we are being considerate of the shimmering effect that the dense feathers have in response to the light. This will create highlights, even in the dark areas of the feather coat.
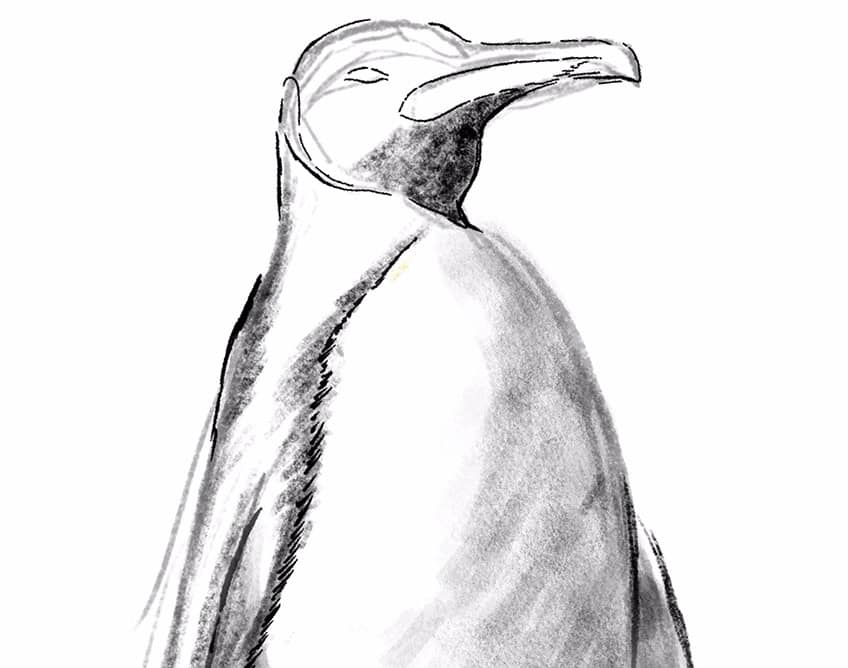
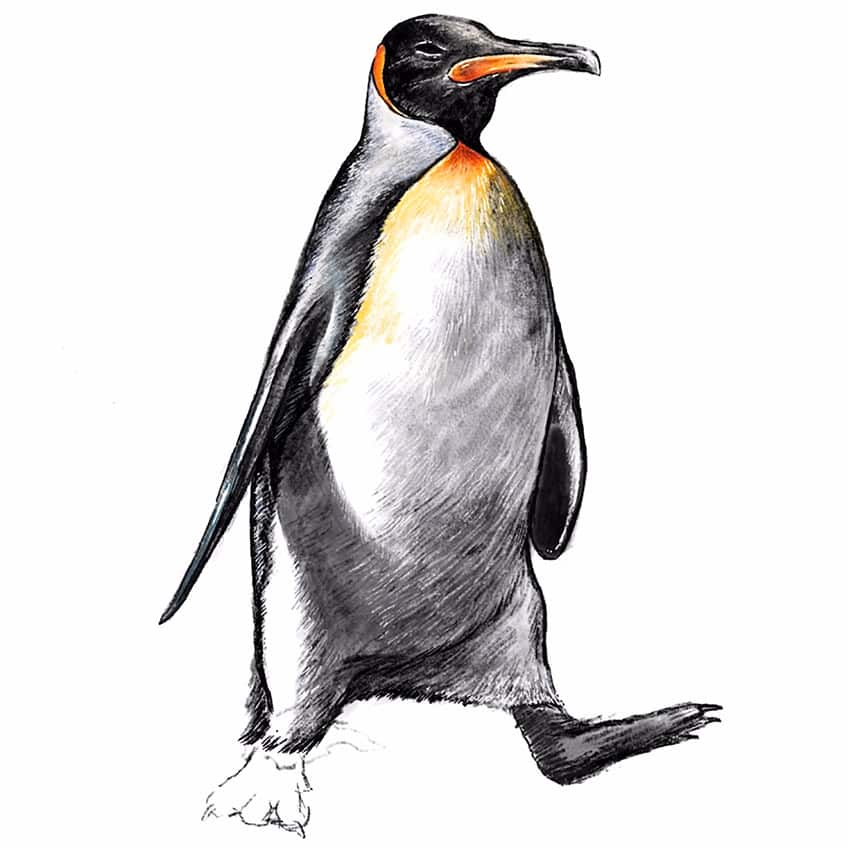
Step 4: Refining the Features
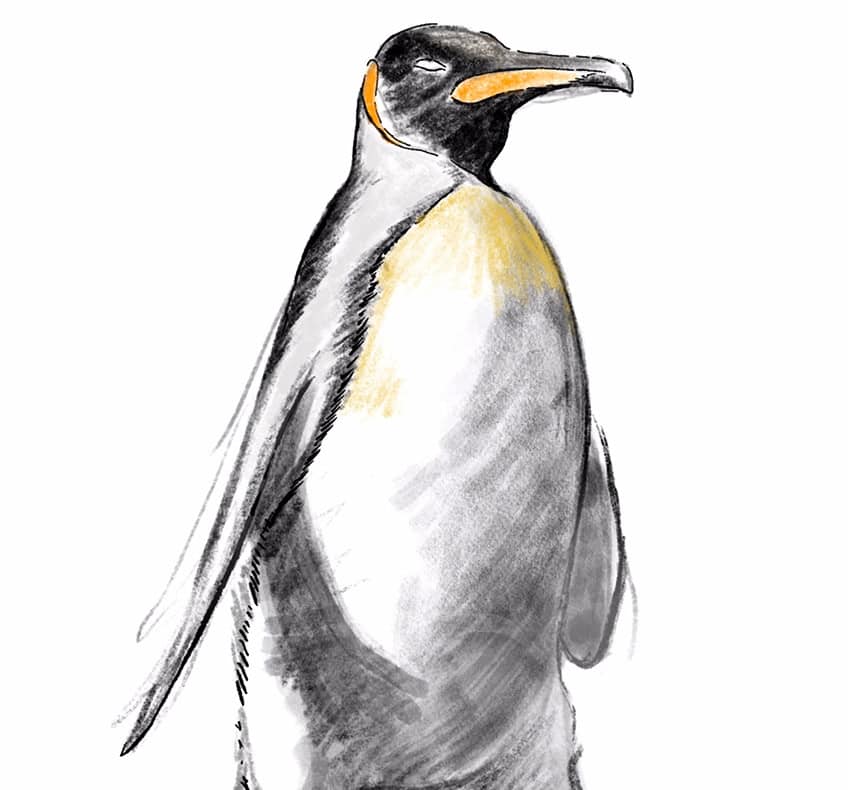
We can now start to work more strategically with our color placement, shading, and line work to bring more shape and texture to the penguin drawing.
We can start to build up layers of color to make the darker and colored features more vivid. We also want to start bringing more shape to different features by outlining them and making them distinct.
This is also where we can work strategically with highlights and line work to create seamless transitions between the dark and lighter feathers. We want to think about working with white lines that flow between the dark and light feathers in the penguin to create a connection between them.
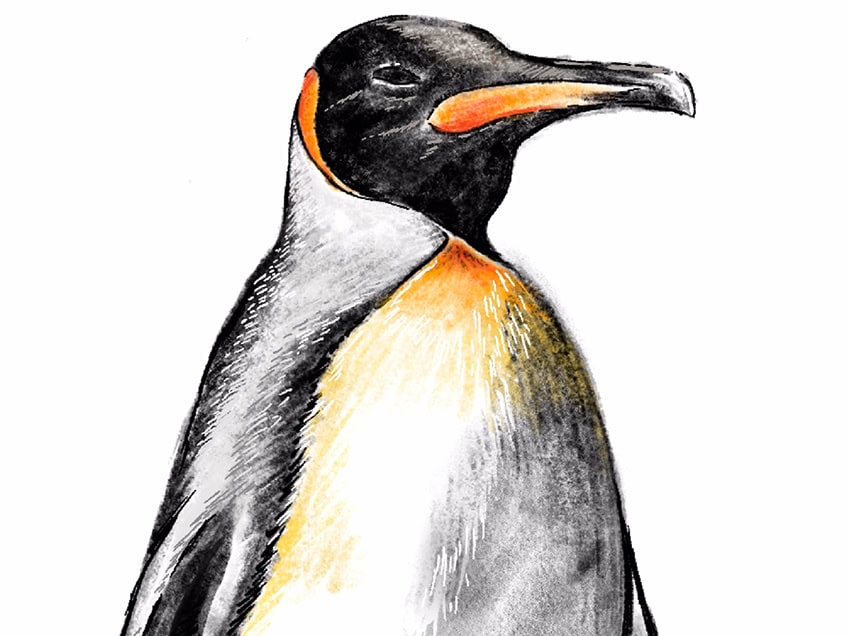
Using darker line work in the shadowed areas can also be a great way to provide a sense of texture to the coat of feathers. The intention is to have shadows and highlights seamlessly merge by integrating shading and linework between them. The head of the penguin is generally black in its feather coloration, however, we want to work with lighter grays to maintain that quality of reflection from the light. We also want to work some reds into the orange streaks on the bill for dimension in the structure.
Try to think of how certain areas of the face and its features will be illuminated by the light source, which will inevitably make some of these colors lighter in tonal value. Take your time with the shading and linework, to build texture and moments of shadows and highlights. We want to use linework to establish tonal values as well as texture.

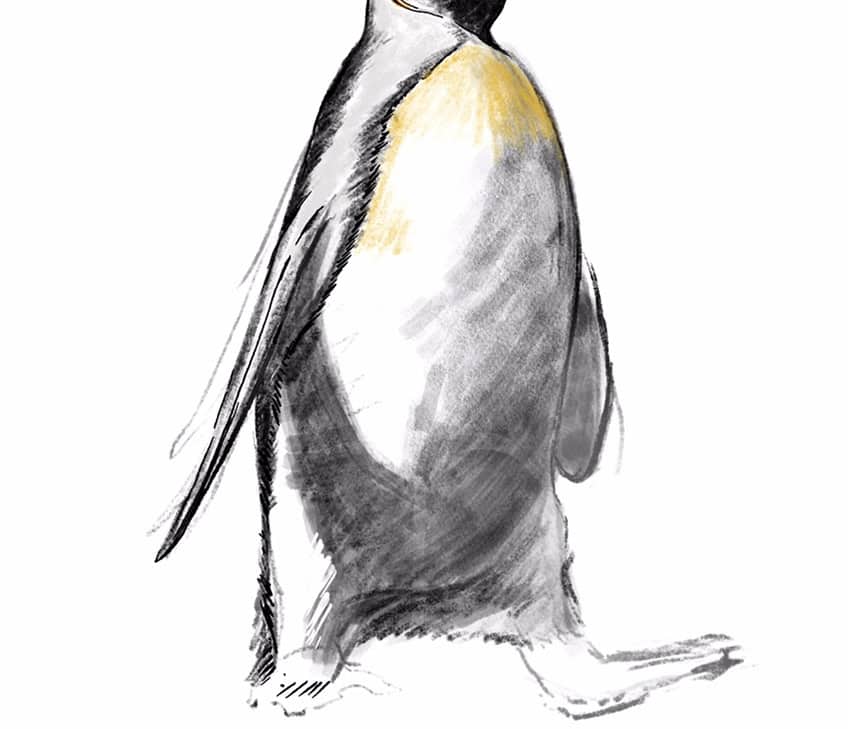
We also want to make sure that the darkest shadows will always be in the areas least exposed to a light source. This could be near the bottom of the penguin, or beneath the feathers of the penguin.
Step 5: Adding the Last Details
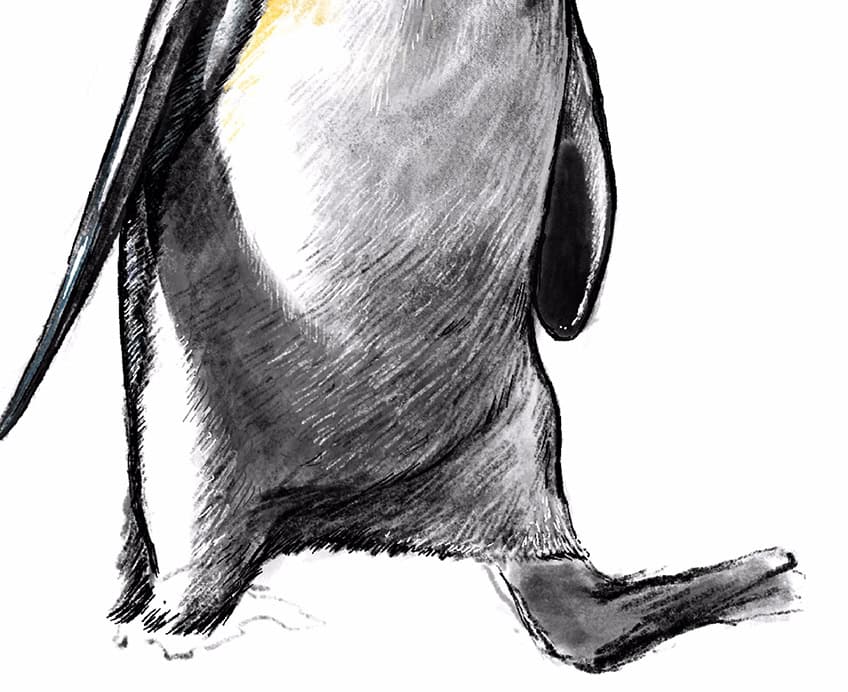
Once we have established most of the tonal variations in shadow and colors, we can now work on the feet. The fret are quite large, and are quite dark in color, being mostly gray and black. The feet ]have three large digits with talons and are quite smooth and leather-like in texture. This allows for a reflective quality of the surface area of the feet, creating moments of highlights in the feet.
This is where we want to be strategic by giving it a predominantly darker coloration, with moments of highlights to emphasize the form of the feet.
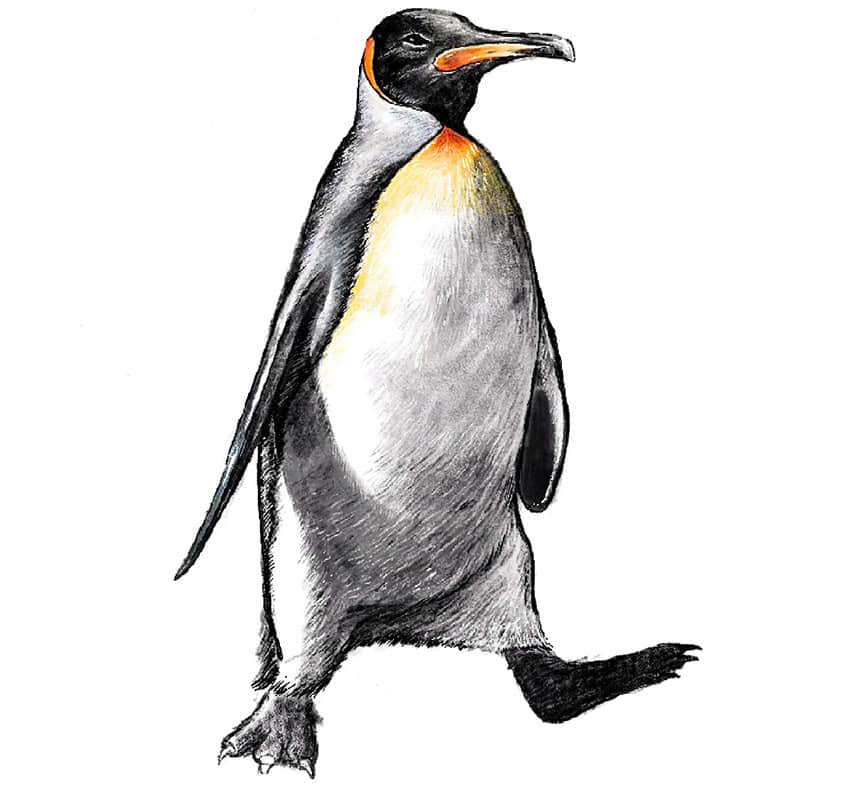
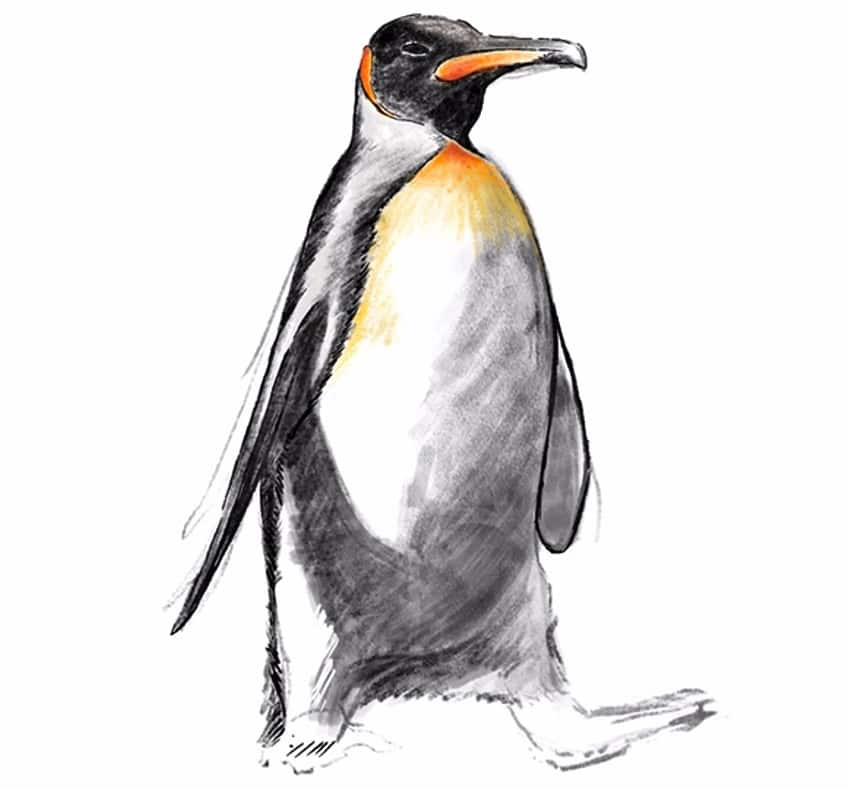
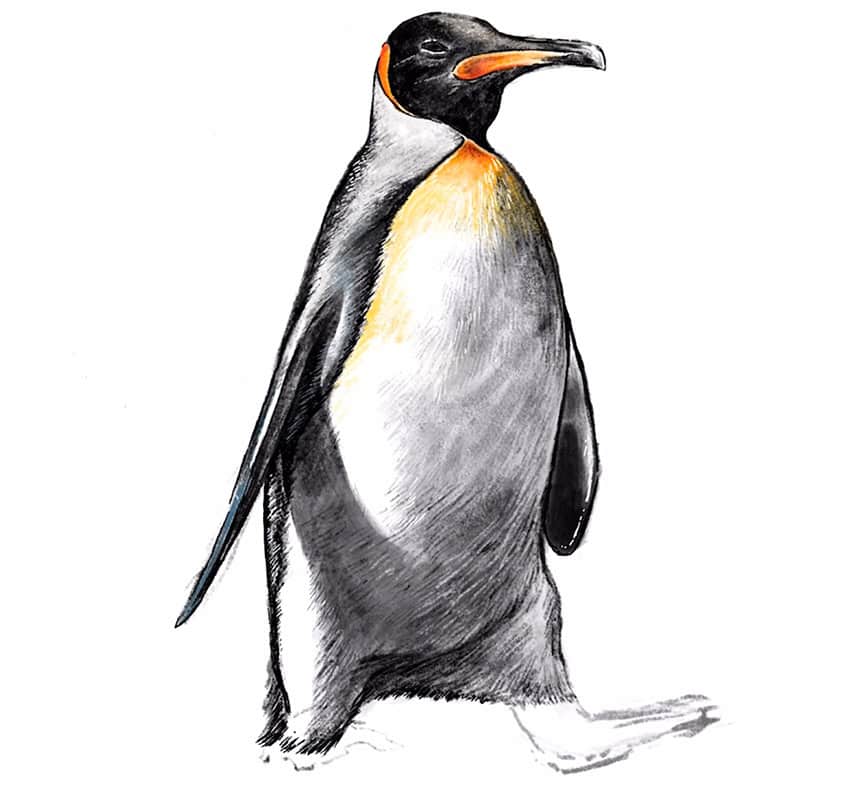
We can also take this time to go over the penguin one last time to make sure we have attended to all aspects of the penguin drawing. Try to make sure that the distinction between the colors of the feathers is clear and distinct in the drawing. Remember, the flippers are quite rigid with dense feathering, which can also develop a strong sheen of light along its surface area. This is an important recurring concept within all the features of the penguin drawing. Try to keep the feet predominantly darker in color, and use highlights to emphasize the shape of the various digits. Highlights will bring a sense of dimension within the feet of the penguin drawing.
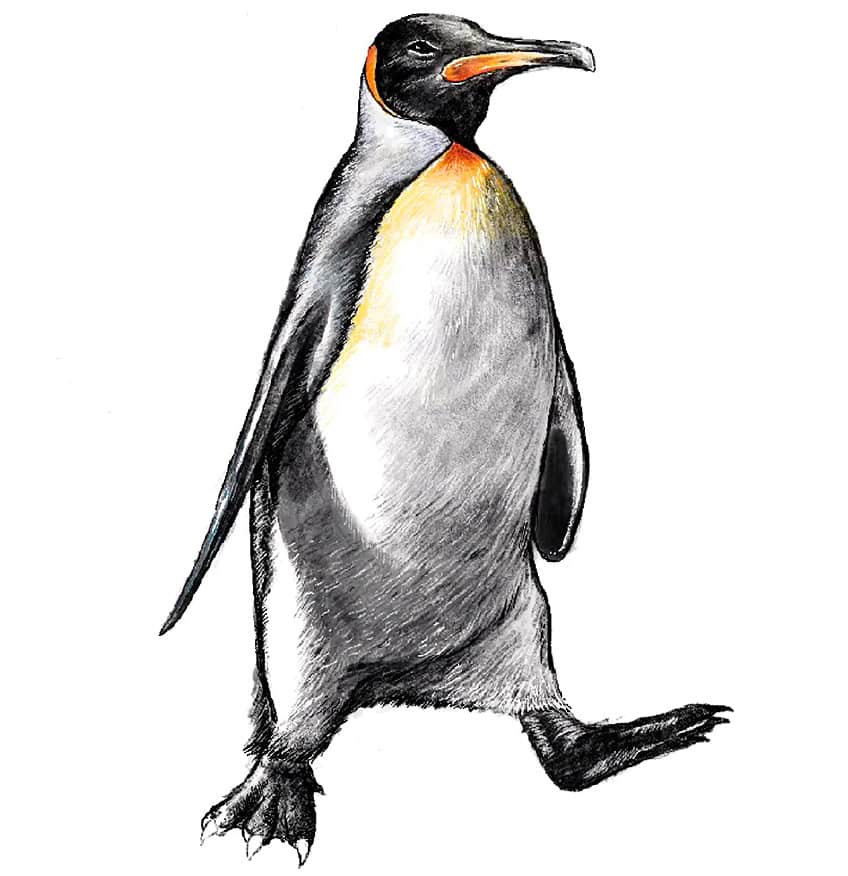
Again, take your time with the details, making sure you work through all features. perhaps revisit the eye, to add subtle highlights to create a glossy surface on the eye.
And that is the process for an easy penguin drawing done realistically through a few steps. With drawn penguins, we just want to make sure we take our time to turn a simple penguin sketch into a refined and realistic penguin drawing
Tips and Tricks to Remember
- Work with simple shapes first. Try to capture the general shape of the features in your penguin drawing.
- Refine the drawing from simple shapes. Once you have the basic proportions, you can start integrating shading and line work to refine your penguins.
- Take your time with the colors. Work with layering colors and shading from lighter tonal values to more vivid values, as this way you maintain control over the coloring process.
- Take your time with the details. Once the basic structure and shapes are established, you can then refine the penguin drawing with linework and shading.
Learning how to draw a penguin is a simple and fun task that is easy to follow when broken up into a few simple steps. In this easy penguin drawing, we take a look at the necessary process of layers and mark-making, and how they slowly come together to make your penguin drawing look more realistic.
Frequently Asked Questions
How Do You Draw the Feet of a Penguin?
The feet of penguins tend to be quite large in comparison to their bodies because they are aquatic animals. This means they have webbed feet to assist them in moving through water as swiftly as possible. The coloration of an emperor penguin’s feet is gray or black, and they are also quite leather-like. This means that they have a subtle reflective quality because their feet tend to be quite glossy on the surface area. You will want to make sure that you add highlights to create distinctions in the shadows and lighter areas along the surface of the feet. Penguins also only have three digits on their feet, with a fourth heel-like structure to ground them and provide stability.
How Do You Draw the Feathered Coat of a Penguin?
Emperor penguins are aquatic animals that live in the Antarctic, which means their feathers and coats are dense to provide warmth and insulation in extreme temperatures. This often creates a very sleek and smooth quality in their feather coat, making them appear very silky. We can achieve this quality by keeping their outline quite defined, which suggests a short-haired quality. Penguins are also generally monochromatic in color, however, the emperor penguin comes with subtle hints of yellow and orange hues throughout the face and chest. We want to make the chest predominantly white, with subtle hues of yellow and orange that flow into the area below the head. We also want to make sure that we keep the orange streak through the penguin’s bill and along the side of the head for a more realistic penguin drawing.

Matthew Matthysen is a multidisciplinary artist. He completed his fine art degree, majoring in History of Art and Contemporary Drawing Practice at the University of Witwatersrand, South Africa. Before joining acrylgiessen In 2020, Matthew worked part-time as an art teacher at Reddford Blue Hills High school. Matthew creates drawing and painting tutorials for acrylgiessen and captures them not only photographically and in written form. He also records the creation of his works in his own creative studio as in video format, from which later with a voiceover and a video editor also drawing tutorials for the Youtube channel of acrylgiessen are created.
Learn more about Matthew Matthysen and about acrylgiessen.