Elephant Drawing – Learn how to Draw a Grey Giant
This post may contain affiliate links. We may earn a small commission from purchases made through them, at no additional cost to you.
Learning how to draw an elephant is such a great exercise to work on your shading, composition, and overall sense of form and structure. The physiology of an elephant is perhaps one of the most unique within the animal kingdom, and it is a beautiful animal to draw and use within various artwork ideas. Elephants embody a beautiful balance between strength and gentleness, which makes them a great subject for many artworks. Beyond the undeniable beauty of these animals, they can also be utilized in many genres of art, such as landscape, nature, and even fantasy. A lot can be learned from an elephant drawing that will help improve your drawing skills as an artist.
An Easy Guide on How to Draw an Elephant
The seemingly complicated structure of an elephant can come across as a difficult subject for drawing. However, we will find that through the process of a few simple steps, we will learn how to slowly develop a simple elephant sketch into a realistic representation of an elephant. In this easy elephant drawing, we will work with an easy-to-follow layering process that will teach us some fundamental drawing skills and how to use them to create a beautiful elephant drawing.

Step-by-Step Guide on How to Draw an Elephant
There are many ways to approach an elephant drawing, however, in this tutorial, we will work through a process of layering. We will start with a generalized elephant sketch, shaping it and establishing it in its general form. From there, we will proceed to work in some colors through a layering process. This is where we will work out the main shadows and light areas within the elephant drawing. We will then enhance these qualities with some detailed linework and shading. We will work on the elephant head drawing process first, working through the various aspects of its facial features. we will then proceed with the same process as we work on the body until complete.
Step 1: Sketching the Elephant
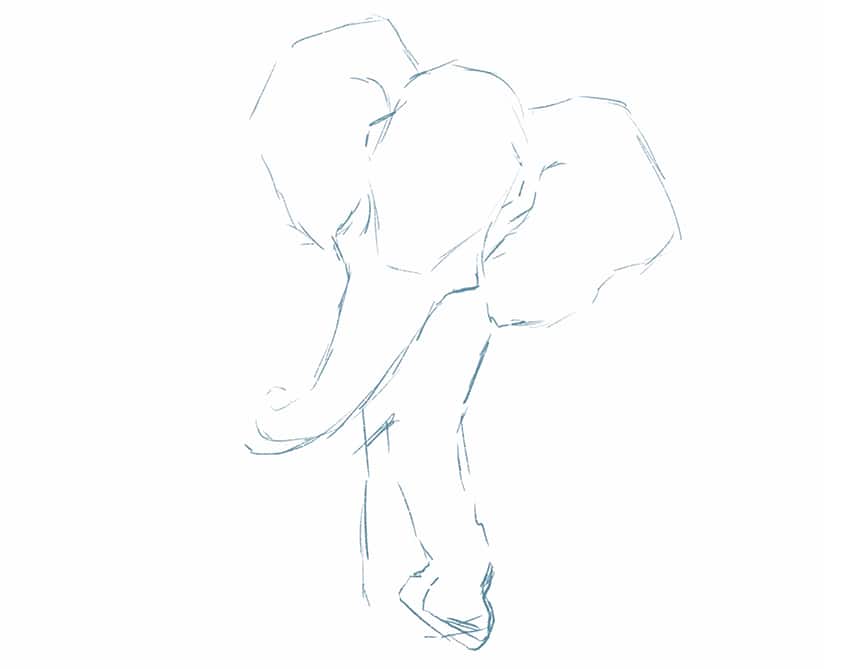
We want to begin with a very light sketch of the elephant, where we start to establish the animal in its fundamental shapes. This is where we start to see how different features resemble different shapes.

We will see that the head has an oval-like shape, where the ears connect on either side as hexagonal shapes. The ears of the elephant are quite large in proportion to that of the head and trunk.

The trunk of the elephant is an elongated cone shape that becomes more narrow as it moves towards the tip of the trunk. We can also start to form the legs of the elephant which are cylindrical in shape.
you want to think about the perspective of your elephant’s pose, and how this will have an effect on what features will be in the foreground and background. Consider using a reference image as you work with these steps.
We want to take our time, very lightly working through the shape and proportions of the elephant. This is where we capture scaler and fundamental shapes as accurately as possible.
The eyes of the elephant will generally be positioned near the top of the forehead, and are quite small in comparison to the head. The eyes also have ridges around them, which give them an indented quality.

Step 2: Refining the Elephant Sketch
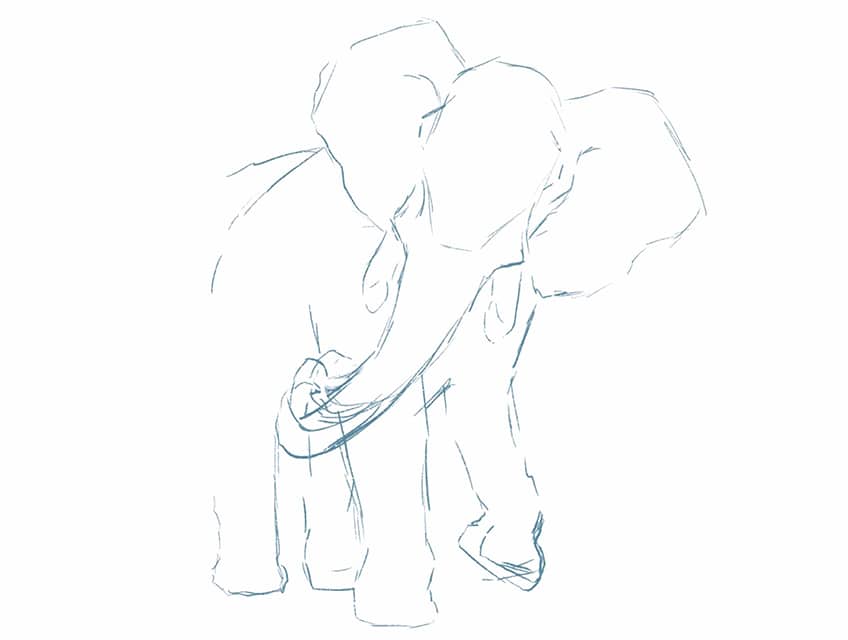
Once we have established the general shape of the various features, we can now start refining them with some detailed linework. This is where we begin to enhance the features and make them slightly more identifiable.

Start to use some linework to refine the outlines of various features. We can also use some linework to define the shape of features, by the way they curve and protrude, such as the curvature in the trunk for instance.

As we continue to refine the drawing with some linework, we can also reshape some features if necessary. By doing this, we are slowly fixing the overall form and proportions as we make various features more defined.

As we work our way through to the lower parts of the elephant, we want to also be conscious of subtle details. This includes the small curvatures within the joints that define the feet of the elephant.

make sure to keep your sketch quite light, making use of the drawing marks from the previous step to guide you as you refine the drawing.

Once you are satisfied with the overall shape and composition of the elephant drawing and its various features, lightly erase your drawing before integrating colors.

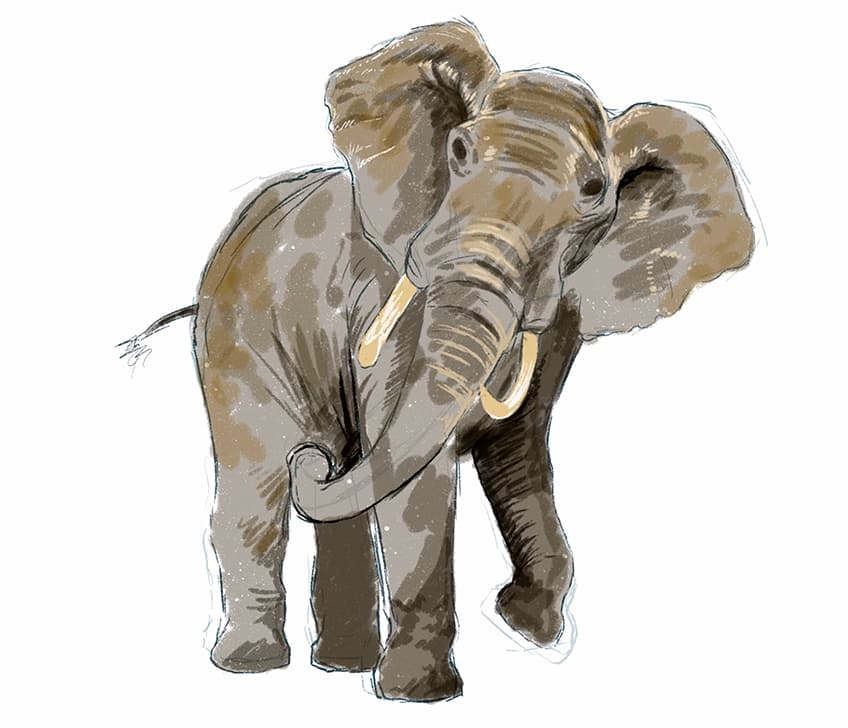
Step 3: Adding the Base Layer of Color
We now want to start incorporating color into our elephant drawing. We do this by starting with very light tones of gray. The intention is going to be that we build up the colors through layers, going from light tones to dark tones.
Continue with this process, slowly working your way through the entire elephant. We want to already be conscious of how light will also create shadow formations at this point.

Naturally, the elephant has unique wrinkled skin, which creates a lot of striations and shadows on its surface area. We can already start working on these qualities with light hues of gray throughout the body.

Continue with this process, slowly filling in the entire elephant with a light gray coloration as a base layer of color for the animal.

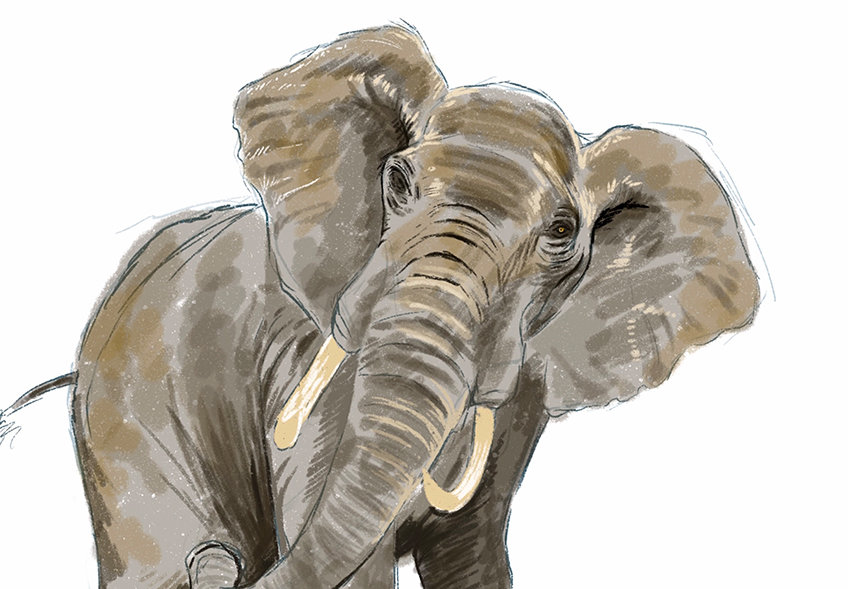
Step 4: Adding Darker and Lighter Tones of Color
We can now proceed to work in some darker tones of gray, this time using the darker tones to bring more form to the various features. This is where you want to be aware of the structure of the elephant’s various features.

Try to be strategic with your placement of marks, and consider how the structure of the elephant will develop various shadowed areas around its body.

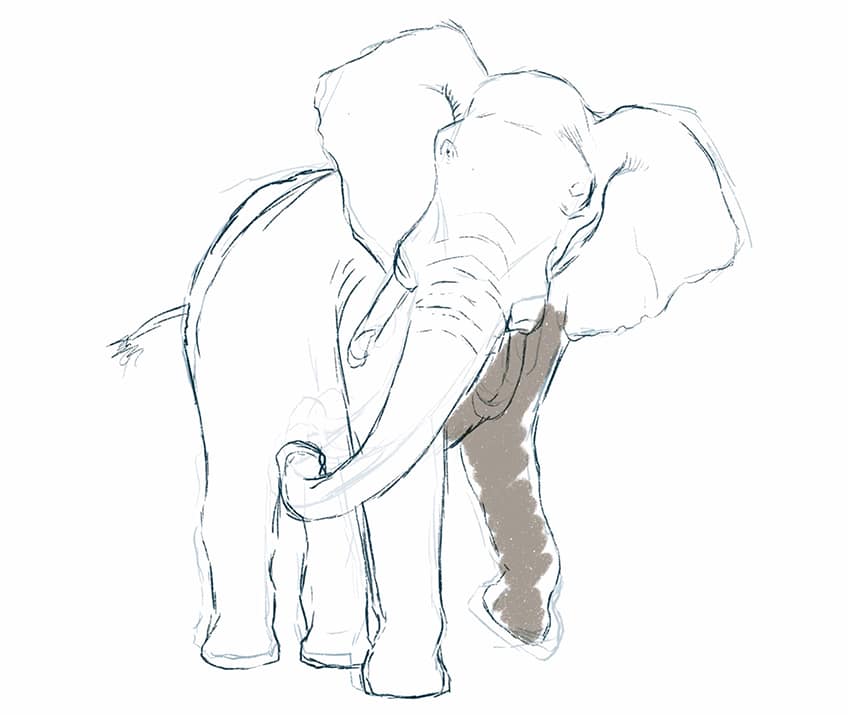
We can start working with layering both gray and brown colors at this point, slowly combining them along the elephant drawing. This is going to develop an accurate color representation of the elephant.

However, as we do this, we are still trying to use our marks to define shapes within the various features of the elephant. The darker tones can be used to represent shaded areas, whereas the lighter colors can be used to represent some highlights.
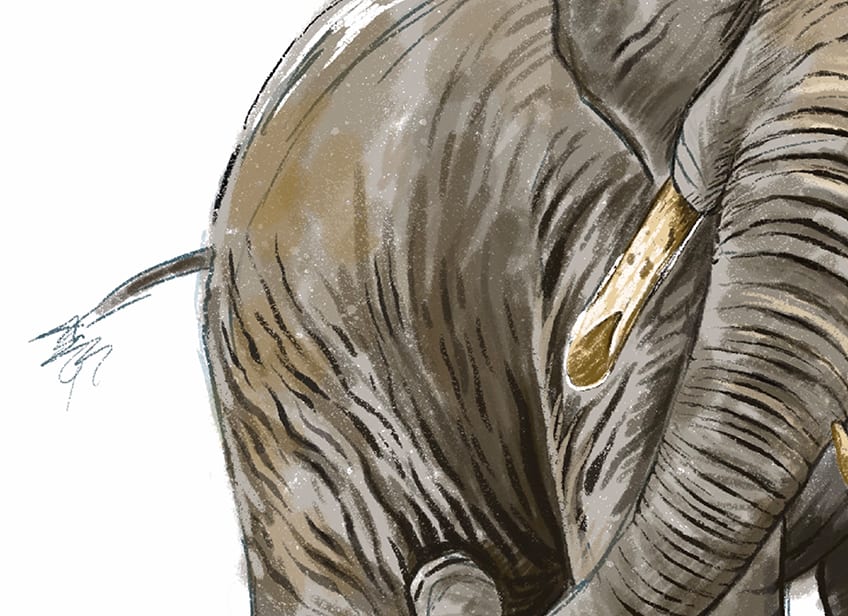
We want to think about the tonal variations of different features as well. For instance, the tusks are the lightest part of the elephant and should remain as so, in comparison to the surrounding features.

We can also use both lighter marks and darker marks in tandem to emphasize the structure of various features. For instance, darker tones are good for indentations, where features are least exposed to light. whereas the protruding features are more exposed, they then can be emphasized with highlights.

Step 5: Adding Details to the Elephant
This is where we now proceed to work over the layers of colors with some detailed linework and shading to enhance the features. A good suggestion is to start on the head.
We will find that the eyes have a haze quality and are very small, however, there is a lot of skin surrounding the eyes, which develops these wrinkles. We want to use linework to emphasize these wrinkles around the eyes.
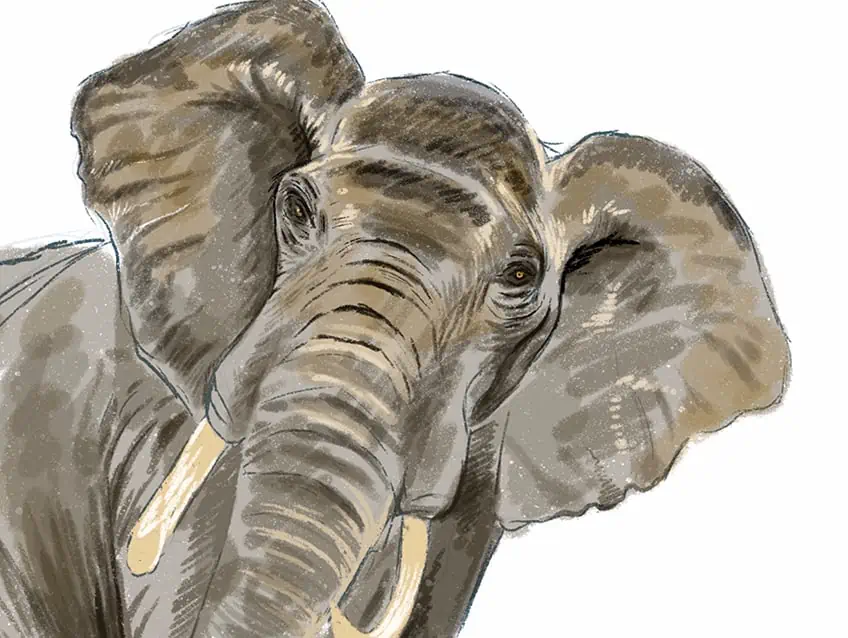
We can also start to use darker linework to emphasize the wrinkles and segments that run through the trunk of the elephant. This is where you want to be conscious of how the lines define the curvature within the trunk.

The trunk has a lot of wrinkles, which become thicker near the head of the elephant. Naturally, as they shift towards the head, we can make our lines much thicker to define these deep wrinkles.

Step 6: Defining Texture in the Elephant
As we continue, we want to now start using outline work as a way of defining the wrinkled texture of the skin. However, we will find that these textural lines flow with the form of various features in the elephant.

For instance, we can use linework to represent the subtle wrinkles that run from the tips of the ears into the base of the ears, where they connect to the head of the elephant.

We can also use linework to define the wrinkles that form around the legs or move from the underbelly into the side of the elephant. You want to work with the shape of these various features and emphasize their forms with line work.
This is also an essential aspect of representing the shape of the eyes, and how they are defined by the surrounding wrinkled skin.

Take your time with this process, slowly working your way through the entire elephant drawing. It’s imperative that you consider each shape of each feature and how the skin forms along their surface areas.

We can also consider the size of our lines and how they can be used to strategically define wrinkles that are larger or smaller in certain areas.
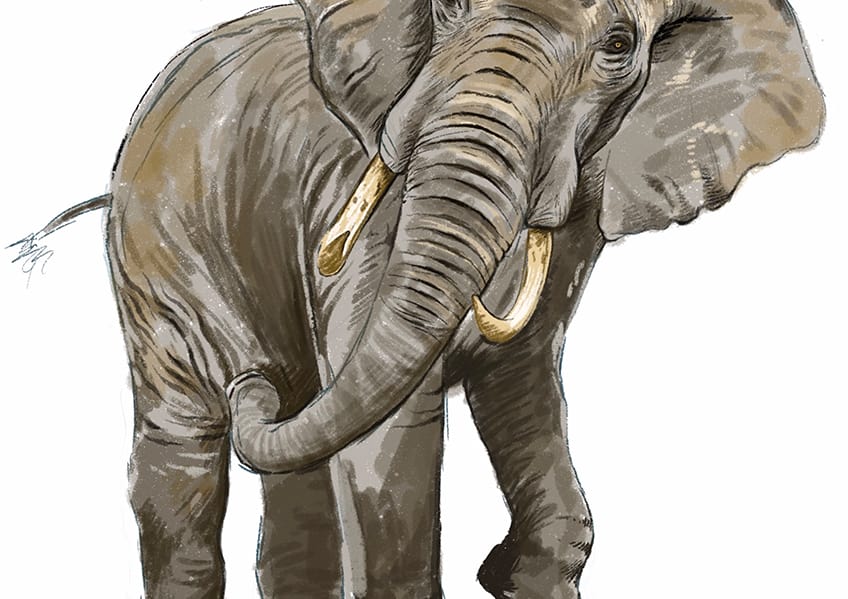
Step 7: Adding Final Details
At this point, we should have worked through the entire drawing of the elephant. We can now add in remaining features to further contextualize the elephant, such as the nails in the feet.

We can also work on some more highlights to further emphasize the protruding aspects of the elephant. This will simultaneously enhance the shadowed areas within the different features as well.

Slowly work on these last details. Go through your elephant one last time to make sure all areas have been worked out. We can also make sure we establish the brush-like tail before finishing the drawing.

Make sure the tail is quite narrow near its tip, with some feather-like linework at the end to create the unique brush-like tail in your elephant drawing.
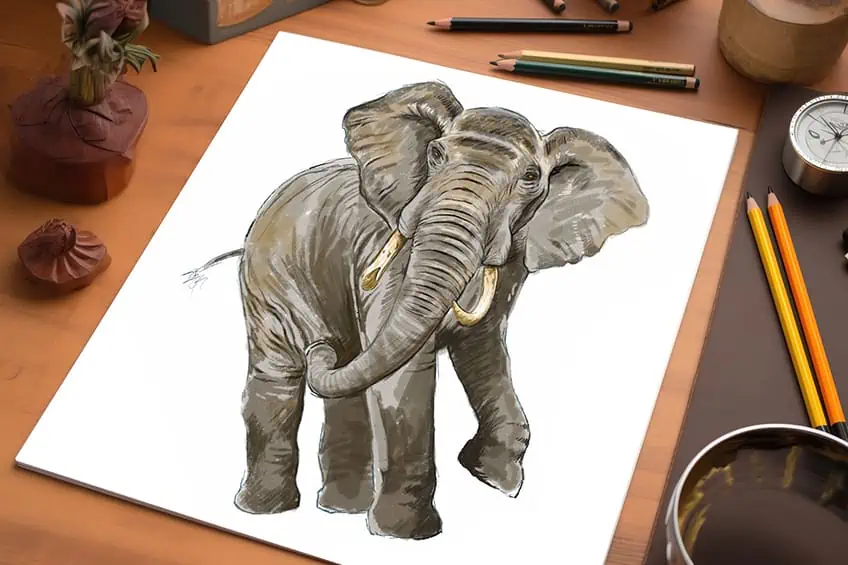
Then lastly, you can add some surrounding environment to further contextualize your elephant drawing. There you have it! how to draw an elephant through a few simple steps.
Tips and Tricks to Remember
- Work out a basic sketch. You want to make sure that you have the general shapes of your elephant before enhancing the features of the elephant drawing.
- Establish colors through layers. Work from lighter tonal values to darker tonal values in your elephant drawing.
- Spend time on each main feature. This is important for the elephant face drawing process, as there are a lot of details.
- Take your time with the details and shading. As easy as elephant drawings may seem, you will want to take your time with the details and shading for a more realistic overall quality.
Elephants have such fascinating physiology, and they make for a great drawing exercise because of it. Representing their unique set of features provides you with a great drawing challenge that can enhance your detailing and shading skills. Their rough skin creates a variety of little shadows, making it a particularly interesting feature to draw!
Frequently Asked Questions
How Do You Draw the Trunk of an Elephant?
The trunk of an elephant is quite subtle in the way it flows into the face of the elephant. The trunk basically forms from the face as a curved ridge, that then becomes more narrow as it extends out from the face. The trunk also has a set of ridges or wrinkles that flow from the tip to the base as it connects to the face. We will also find that as we draw the tip of the trunk, it has an opening that resembles a mouth with lips. However, depending on the position you are drawing the elephant from, this particular feature may not be visible. That being said, simply make sure that as you work through the elephant face drawing, you make the trunk broad near the face and more narrow as it shifts towards the tip of the trunk.
How to Draw the Tusks of an Elephant?
Depending on the position of the elephant head drawing, we will find that the tusks can be drawn in various ways. However, the general shape of the tusks can be described as elongated and narrow cone shapes that extend outwardly from either side of the trunk. The tusks are also the lightest part of the elephant and we can represent this by keeping our shading quite light. We can also shade around the edges of the tusks to represent more three-dimensionality in their structure. Lastly, we want to make sure that they curve in an upward direction as we work through the elephant face drawing.

Matthew Matthysen is a multidisciplinary artist. He completed his fine art degree, majoring in History of Art and Contemporary Drawing Practice at the University of Witwatersrand, South Africa. Before joining acrylgiessen In 2020, Matthew worked part-time as an art teacher at Reddford Blue Hills High school. Matthew creates drawing and painting tutorials for acrylgiessen and captures them not only photographically and in written form. He also records the creation of his works in his own creative studio as in video format, from which later with a voiceover and a video editor also drawing tutorials for the Youtube channel of acrylgiessen are created.
Learn more about Matthew Matthysen and about acrylgiessen.