How to Draw a Brain – Illustrate a Cross-Section of an Organ
This post may contain affiliate links. We may earn a small commission from purchases made through them, at no additional cost to you.
Discovering how to draw a brain is an intriguing activity since it improves both your drawing abilities and your knowledge of the brain. In this lesson we will be drawing a cross-section of the brain allowing us to identify the various parts of the brain. This is an exciting subject because the brain is in charge of the entire body’s functions. The practice of learning about the brain by drawing it is a terrific method to understand how the body works and is a practice that dates back all the way to the Renaissance, when Leonardo Da Vinci explored the body in this way. Analyzing the brain using a brain line drawing can also help us better grasp its complicated composition by breaking down the many components of the brain.
How to Draw a Brain Step by Step
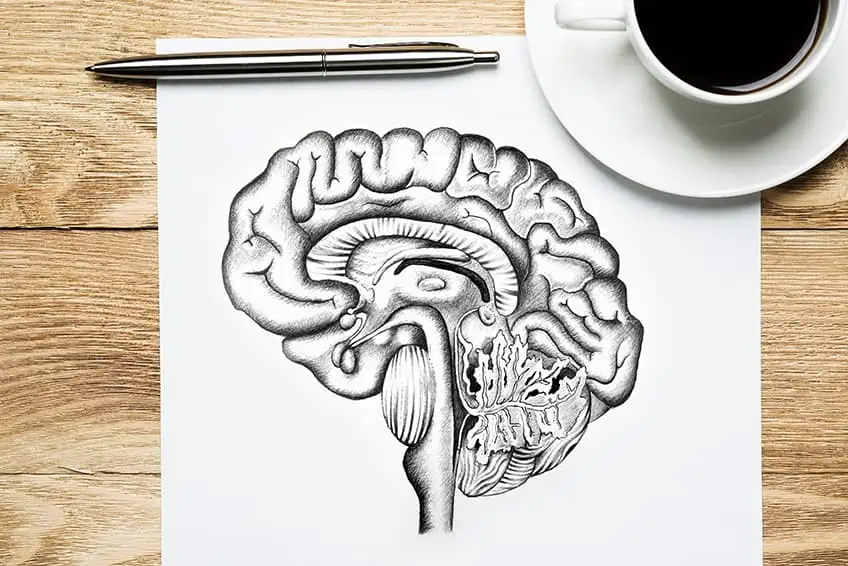
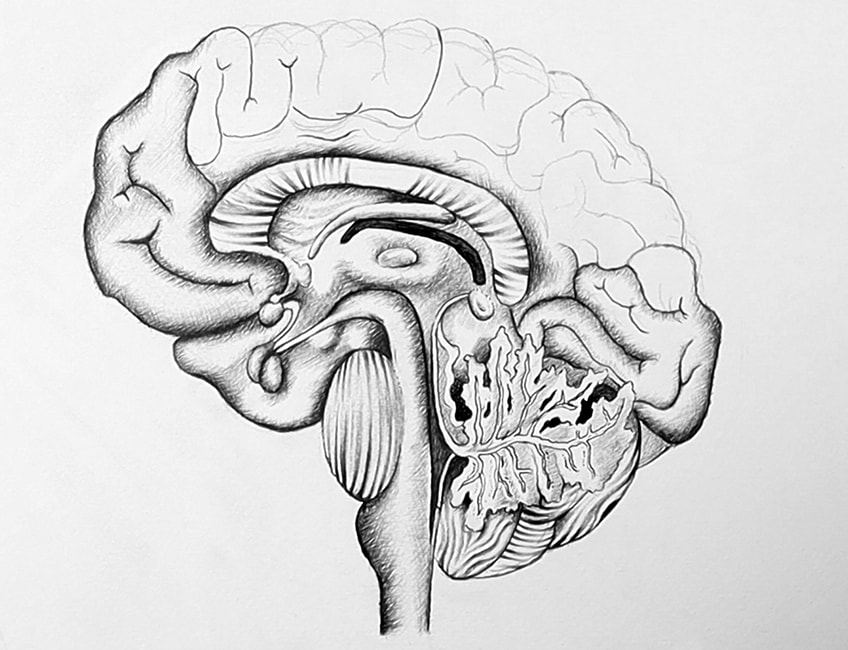
We’ll walk you through how to draw a brain step by step in this lesson. In order to fully understand the various parts that make up the brain, we shall depict one in a diagrammatic cross-section. For this brain sketch, we will be utilizing a source image to help us through the process. With our pencils, let’s first outline the shape of the brain. Then, to give contrast and depth to the picture, let’s add some shade to the brain.
Finally, we will use our pens to apply various tones the brain drawing, following the pencil lines as a reference for our easy brain drawing. So that you do not become confused by the many titles throughout the instruction, it would be an excellent idea to have another picture handy that gives you the names of each part of the brain. Now that we are prepared, let’s walk through this step-by-step instruction on how to design a brain.
Step 1: Creating the General Brain Sketch Form
Using our HB pencils, we should start by marking the dimensions of the brain picture on the page with a broad, light circle. Then, using the source image as our guide, we will begin to draw the brain lightly. Look at the image slowly to determine how the various elements are positioned adjacent to one another.
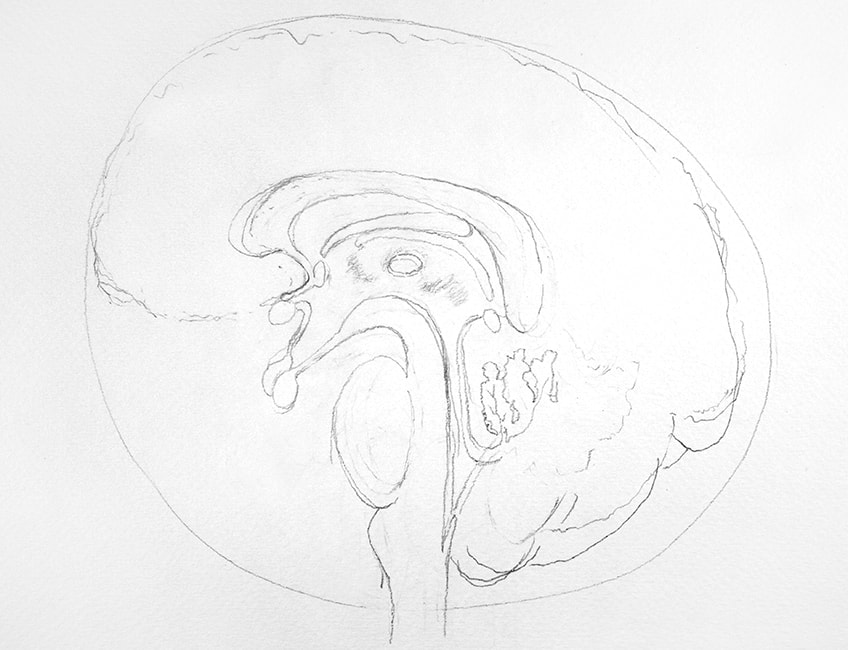
Some of the many facets of the brain may require some more time as we go through them. Therefore, keep your eraser close by since it can take some trial and error to get this section of the instruction correct. Take your time attempting to get it correct with your pencil while you repeatedly return to the original image until you are pleased, for example, the cerebellum has a tree branch-like character to it.
It’s crucial that we take our time with the tutorial’s brain line drawing section.
Close attention while drawing is required due to the complexity of the brain. We need to carefully and deliberately evaluate each component in relation to our reference image and where to position each component inside the brain. Second, these pencil lines will serve as our guide when we shade the drawing later on with pens. Therefore, let’s focus on making the pencil markings as accurately as we can.
Each part of the brain fits together perfectly in the complicated brain center. For example, the choroid plexus and the Massa intermedia are covered by the arc of the corpus callosum. It is not necessary that you are familiar with the names of these areas in order to complete the sketch, but having a labeled schematic of the brain on hand would be helpful. This will make it easier for you to understand how the many parts of the brain fit together.
The reference picture for this lesson is a diagrammatic representation of the human brain, nevertheless, it does not have labels for each part. If you’re confused by the names of the many brain components covered in this article, consider going online and print or keep a labeled brain diagram at hand. With a simple pencil brain sketch, we should gradually begin to complete the components of the brain.
We may also gently sketch out the various shapes and sizes of the elements of the brain diagram. We are not attempting to create an incredibly accurate representation of a brain cross-section. To further illustrate the shape of the brain, we do want to add a little shading, though. Think about the shape of the brain and how the parts fit with each other before we continue with the pen-shading portion of the tutorial. Look closely at the reference image to observe how the larger sections of the brain’s center enclose the smaller ones.
Before beginning the pen shading, we want to ensure that the pencil sketch of our brain is accurate.
Step 2: Outlining the Brain Line Drawing
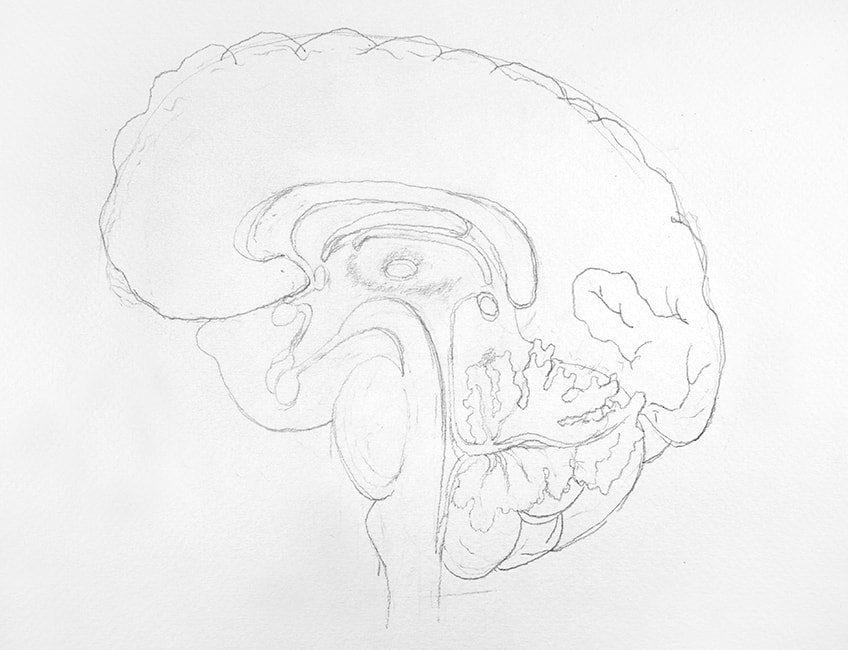
Now, we’re going to outline some areas of the brain using the pencil markings we’ve already made. The more complex and detailed parts of the brain benefit from this. Let’s start by outlining the lower portions of the brain with our Micron pen, preferably one with a 04mm-sized tip. This includes the pons, medulla oblongata, and cerebellum.
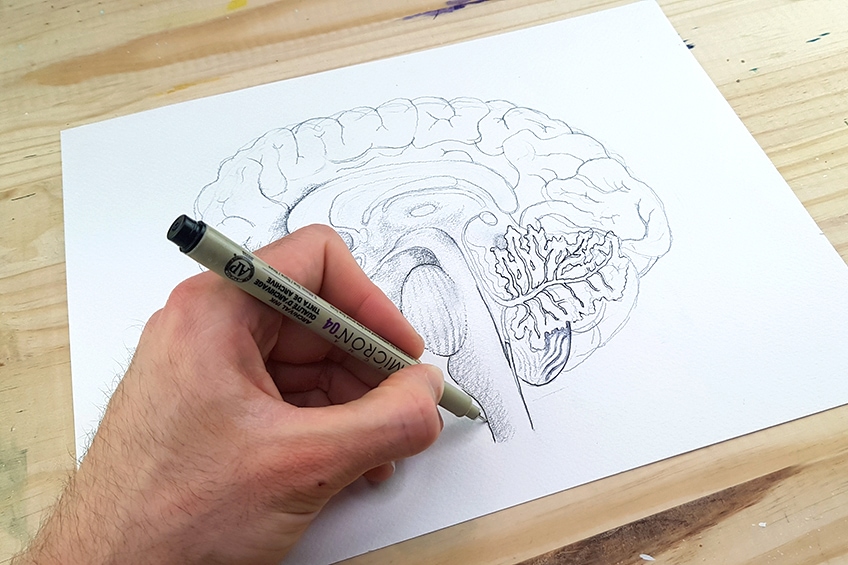
In order to more clearly define areas for shading, we will be using a pen to outline distinct elements of the brain. But let’s concentrate on the cerebellum in particular, since it has a special tree-like structure that requires clear and defining line-work to determine the shading process.

Since the remainder of the brain’s parts have a somewhat simpler structure and don’t need to be distinguished with outline markings, we wish to emphasize the cerebellum’s contour. But since we’re illustrating this brain based on a reference picture, it’s clear that the cerebellum needs a bit more focus.
Step 3: Using a Pen to Shade the Brain’s Lower Portion
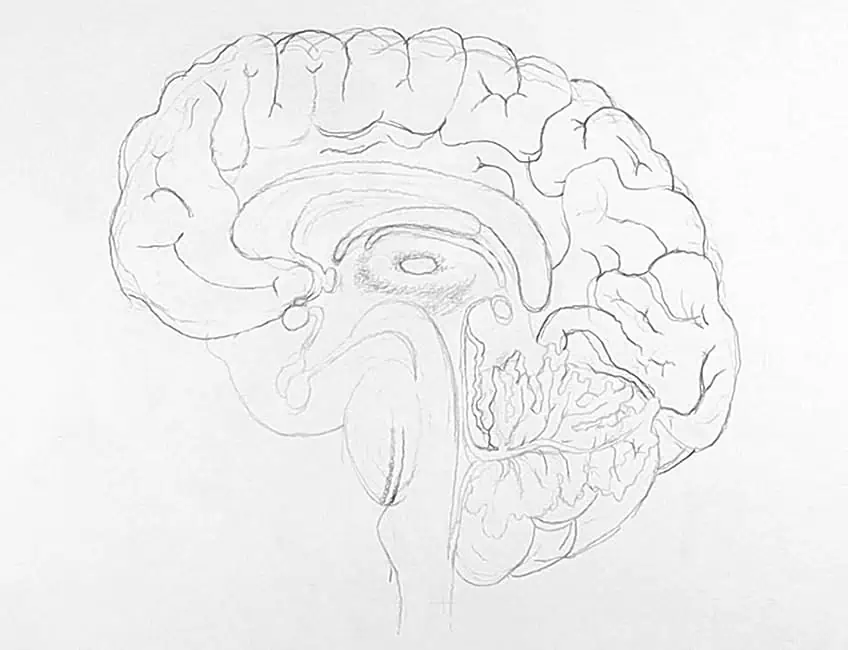
We may now begin shading our brain with a pen after finishing our sketch and clearly defining several delicate brain regions. Start by shading the regions we recently defined with outlines; while you do so, constantly refer to the original image for guidance.
For example, we may observe ripple-like characteristics around the cerebellum’s tree-like structure.
We may also use our pens around the cerebellum to add some darker characteristics within and all around the tree-like structure to highlight its shape a little bit more. Try concentrating on the odd small ripple characteristics surrounding the cerebellum while using your original image as a reference.
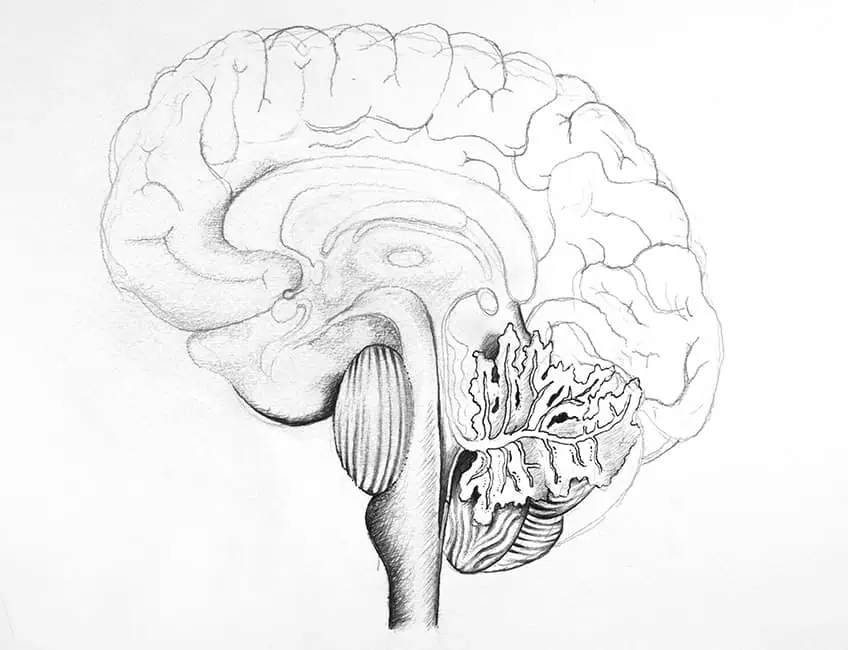
The artwork is at its most intricate around the spinal cord, pons, and cerebellum. With our ballpoint pen, we’ll initially concentrate on these elements and gradually clarify them. You will want to apply the pen strokes in a gentle, steady motion. Try to keep track of the pressure you use to make your shading marks as you proceed. Deeper pressure results in darker markings, while lesser pressure results in lighter marks.
The pons has a similar ripple-like appearance. The lines on the pons are somewhat curved because the pons has an egg-like form. In order to allow the markings to establish a curvature inside this area of the brain, let’s pay close attention to how we delineate these ripples around the form. Once more, if you don’t recognize any of the names, feel free to look them up.
Now that the lower part of the brain has been addressed, we may gradually move toward its central area. The brain’s sections, including the pituitary gland, have very straightforward shapes. With these more basic structures, shading becomes a bit easier.
Keep in mind that while shading with a pen, we want to be mindful of the pressure we apply as we proceed.
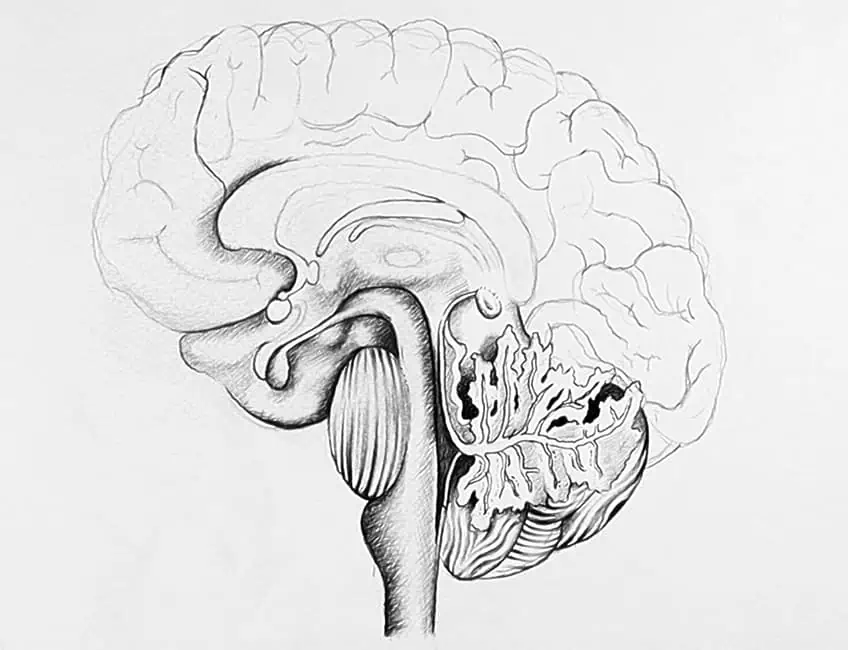
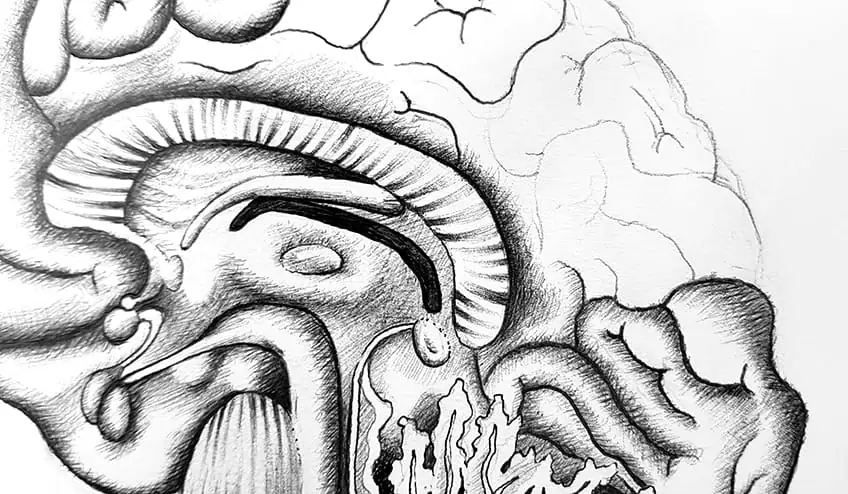
Step 4: Shading of the Brain’s Center
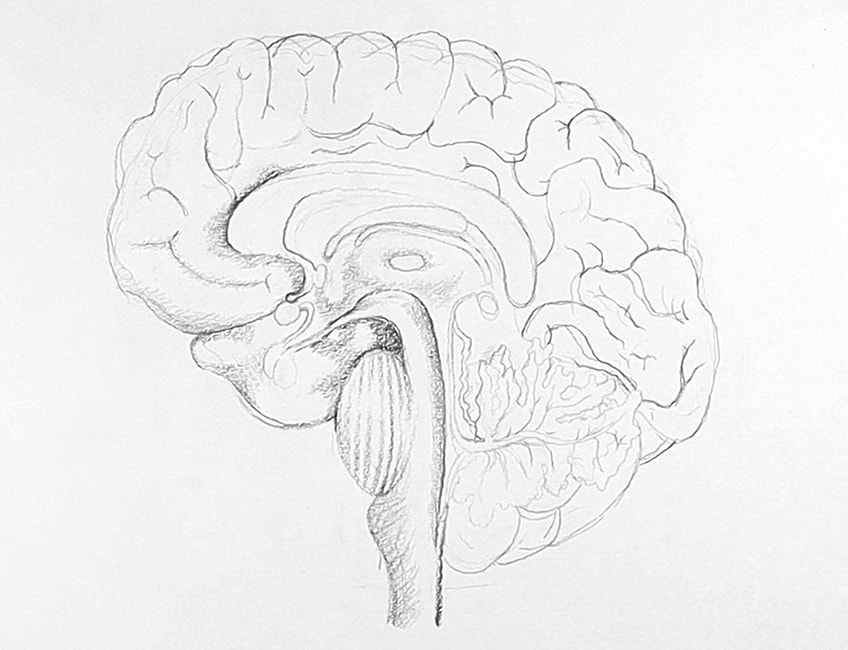
The central parts of the brain can now receive some attention. These parts need concentration because they are relatively small. We may use our reference image as a guide as we shade the pituitary gland’s wide surrounding surface area. Additionally, we can observe how this surface area begins to converge with the region of the brain’s center that encircles the thalamus.
The thalamus appears to protrude; we generate this illusion by shading the region around it, and leaving some empty space there in order to provide the protruding impression. By darkening the bottom portion of its bean-like form, we may further define it and make it appear more three-dimensional. The septum pellucidum, which possesses rib-like characteristics, is the region that surrounds the thalamus.
The corpus callosum, choroid plexus, and thalamus may all be seen as a sequence of shaded lines that encircle this region.

We want to be remain conscious of the pressure we are applying to the pen as we shade. Think about each area and how they are arranged next to one another while concentrating on the center of the brain. We can also experiment with the different contrast levels we apply to our sketch.
Spend some time exploring the center of the brain, which is made up of several components with distinctive textures and forms. Additionally, you start to shade the bigger regions of the brain that encircle the center of the brain; these regions are much easier to shade because we are just shading the brain’s periphery. You may gradually increase your gradient with overlaying layers of pen markings as you shade in your picture by utilizing cross-hatching methods.
Specific to the brain, the corpus callosum is situated above the septum pellucidum. Based on our source photograph, this component has an extremely ribbed appearance. We may achieve this property by drawing a sequence of shaded lines that move over the corpus callosum’s surface area, much like the septum pellucidum.
This part of the brain needs to take on the appearance of having ribs.
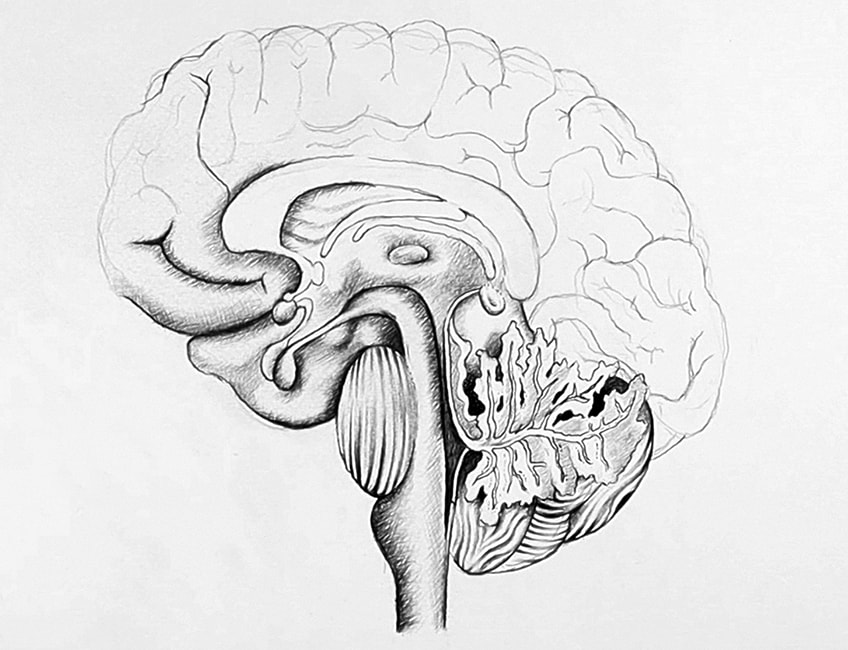
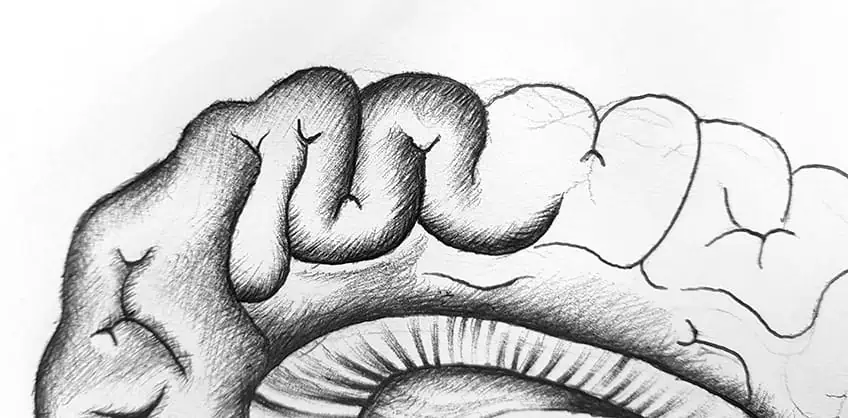
Step 5: Shading of the Brain’s Outer Sections
As you can see, the majority of the brain is made up of a membrane. According to the original image, this membrane appears to surround the brain as a single entity, but it actually consists of a number of different parts. These parts are categorized as part of the cerebrum, which is made up of the numerous lobes that surround the brain. The easiest part of this instruction is shading the cerebrum because we can just shade around the lines there.
From this point on, you have more latitude in terms of how you shade this area of the brain. Simple shading from the lines, resulting in a gradient that changes from dark to bright, is a good idea. The central regions of the tube-like structure, also known as the cerebrum, should be shaded heavily where the inner and outer lines are drawn and gradually faded where the lines meet.

Gradually apply some deeper tones to the cerebrum’s rim. You can have some fun with how you shade this area of the brain. The drawing will have a bit more depth and complexity thanks to the gradient effect, which will make it look more lifelike.
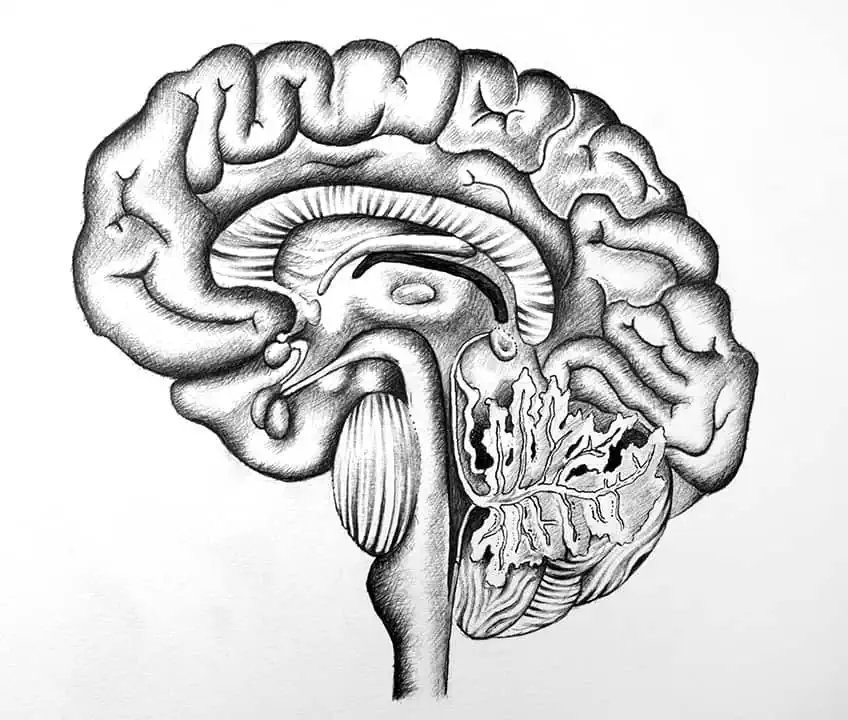
Now that we have completed the outside membrane of the brain, we can continue using the same shading method. However, this can take some time, so once more, give yourself permission to stop sometimes while you shade in the periphery of the brain. The concluding steps of the drawing process should leave us with a rather detailed diagrammatic cross-section of a brain.
Useful Tips
- Keep an eraser close by, since you’ll need it while you’re drawing.
- As we begin to get the proportions right, we want to keep your pencils sharp.
- Spend some time with a pencil to get the proportions right in the beginning. When we use a pen to shade the stages, this will make things simpler.
- Throughout the procedure, don’t forget to take breaks. This is due to how physically demanding sketching can be.
- When shading the brain, pay attention to the pressure you use to your pen.
- Most importantly, enjoy learning how to sketch the brain as well as learning about it and how it is made up of different parts.
It’s a terrific approach to improve your drawing skills and understanding of the brain to make a basic brain sketch or try to draw a full diagrammatic brain. Although this instruction on sketching the human brain is not always simple, it is easily comprehensible if approached patiently. It’s amazing to learn how to turn a line drawing of a brain into a graphical representation brain drawing that is well defined and expertly shaded. This article shows you step-by-step how to draw a brain so that you can better comprehend how it is structured and what it looks like!
Frequently Asked Questions
Is Drawing a Brain Difficult?
Brains are very complicated organs. Therefore, trying to create a brain sketch can seem like a very daunting prospect. However, with following guides on how to draw a brain step by step, the whole process can be much easier to follow.
What Are Important Tips for Creating a Brain Line Drawing?
Due to the complicated nature of the brain, it helps to use a reference. This will allow you to get to know the various sections of the brain, and the names of the parts. Using a reference will allow you to plot out the dimensions and sections before you start.

Matthew Matthysen is a multidisciplinary artist. He completed his fine art degree, majoring in History of Art and Contemporary Drawing Practice at the University of Witwatersrand, South Africa. Before joining acrylgiessen In 2020, Matthew worked part-time as an art teacher at Reddford Blue Hills High school. Matthew creates drawing and painting tutorials for acrylgiessen and captures them not only photographically and in written form. He also records the creation of his works in his own creative studio as in video format, from which later with a voiceover and a video editor also drawing tutorials for the Youtube channel of acrylgiessen are created.
Learn more about Matthew Matthysen and about acrylgiessen.