Owl Drawing – Learn to Draw a Wise and Majestic Owl
This post may contain affiliate links. We may earn a small commission from purchases made through them, at no additional cost to you.
Owls are unique-looking nocturnal birds, with their curious facial expressions and detailed feather patterns making them an interesting subject matter to illustrate. Their organic shapes and delicate feather designs should prove to be a worthwhile drawing exercise that adds to your drawing skills. The bird drawing process is similar amongst most bird species, which means that there is a lot of transferable knowledge from learning how to draw an owl. This owl drawing tutorial will provide you with a new animal that you can add to your drawing repertoire, as well as provide you with a set of new drawing skills.
An Easy Guide on How to Draw Owls
In this tutorial, we will be learning how to draw an owl in a few easy steps, and will break it down into digestible parts. From the basic form of an owl’s shape to the detailed process of shading and line work, we will find that it is quite easy to draw an owl. Learning how to draw an owl is not difficult; it is just a matter of breaking down the drawing process. As we go through this owl drawing tutorial, we will learn some new practical skills that can be added to your artistic repertoire!
Step-by-Step Guide on How to Draw an Owl
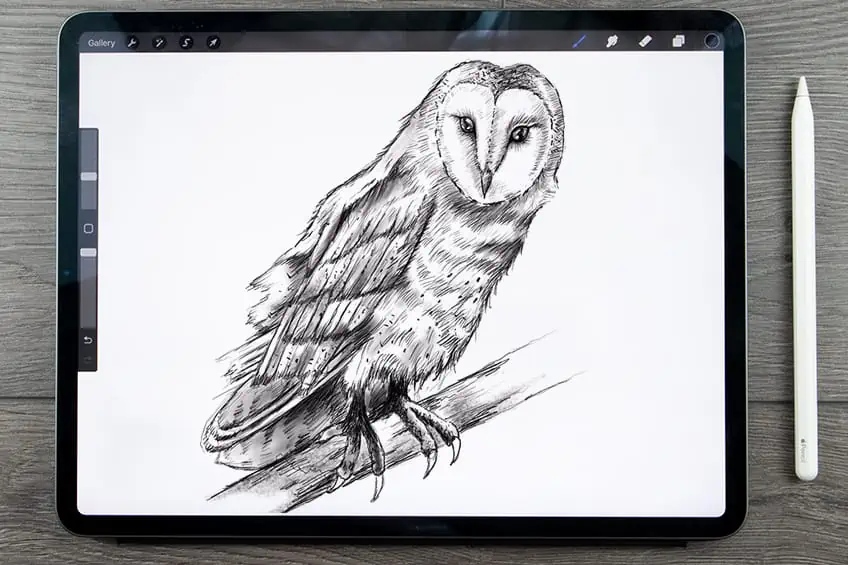
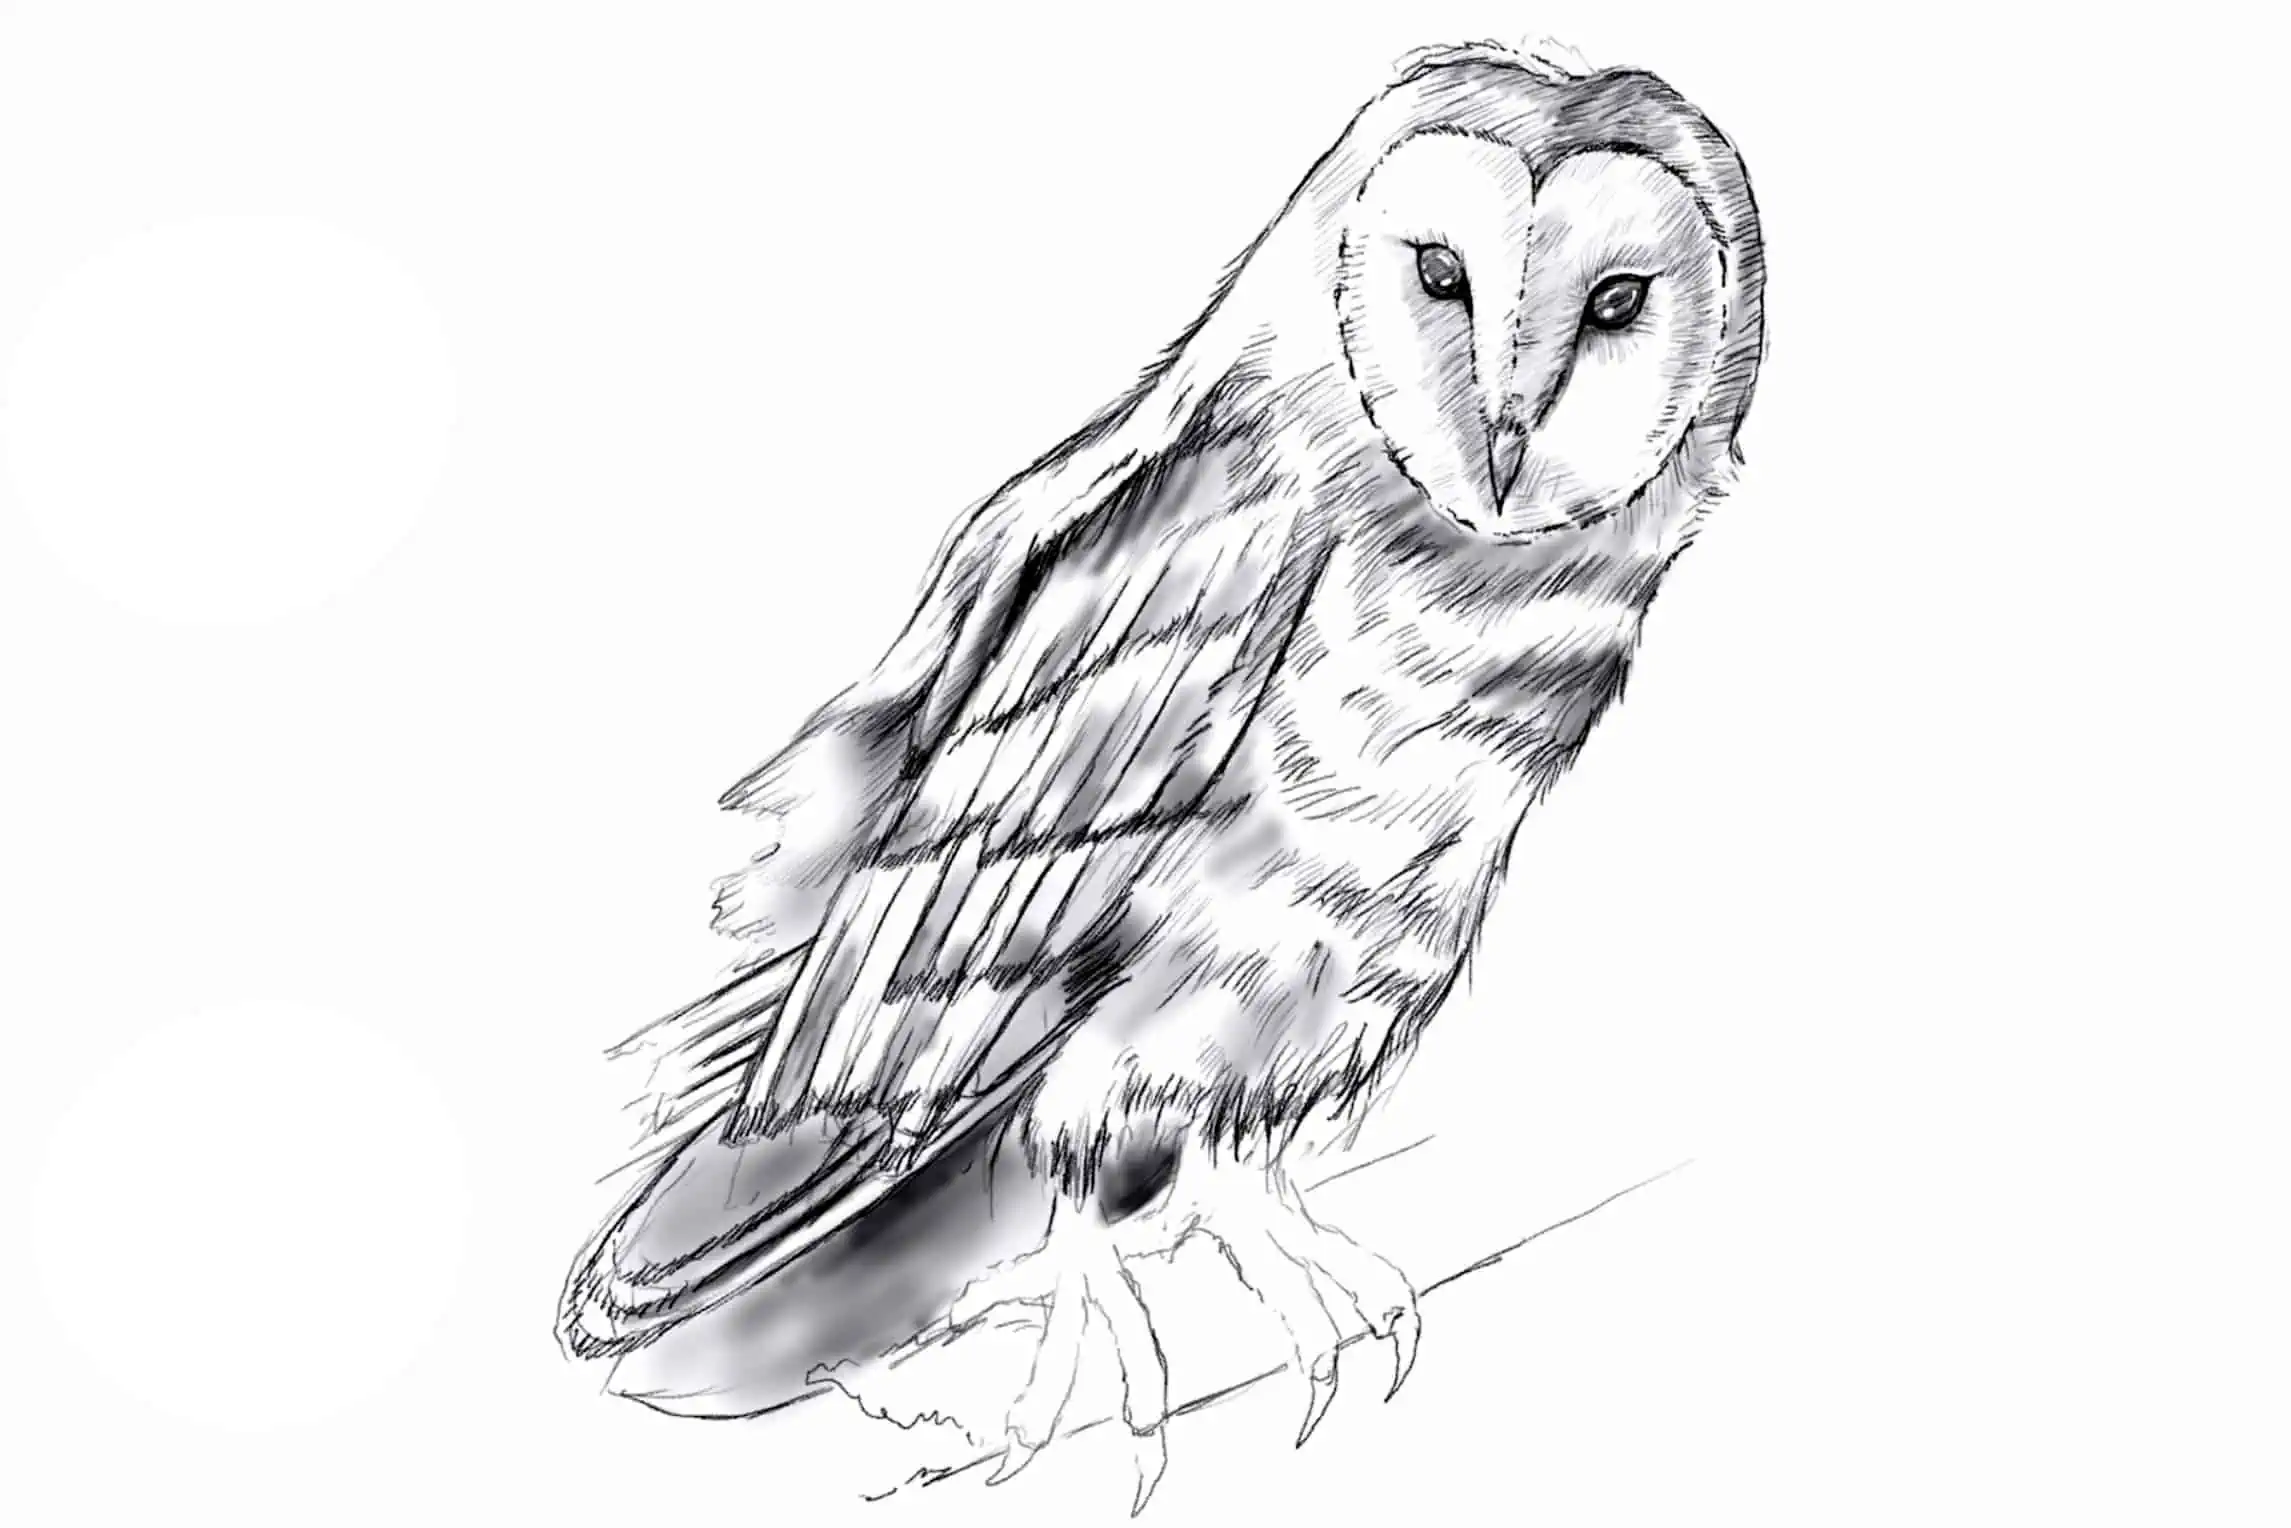
We will be learning how to draw a barn owl specifically; this type of owl is quite unique in its features making it a great drawing exercise. In this owl drawing, we will start with a simple sketching process, where we consolidate the form and structure of the owl into fundamental shapes. We will then work with our pencils to refine these shapes into identifiable features, slowly bringing out the details. We will then learn how to use shading and linework to further emphasize features within the owl, forming it into a more realistic owl drawing.
Now that we know what to expect, let’s get into this tutorial on how to draw an owl.
Step 1: Shaping the Owl
We want to start with a very simple sketch of the owl, we can begin by drawing the owl in its fundamental shapes. We can draw a circle to establish the head and connect the head to this triangular shape that will define the body of the owl.
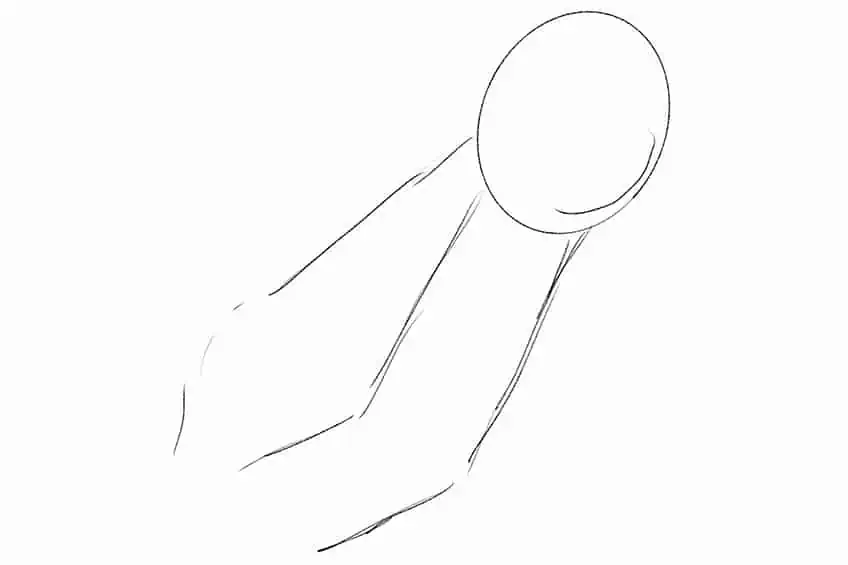
We want to basically place all the main features together in very simplistic shapes. This is helping us to slowly form the overall size and shape of the owl. At this point, we can also draw little shapes to establish the feet, as well as some vague linework to place the beak.

We can also start to add these circular shapes on both sides of the beak, to establish the placement of the eyes. Again, the intention here is to keep your drawing basic just so that we are basically positioning features in the owl drawing.

Step 2: Lightly Erasing the Owl Drawing
Once we have this vague formation of the owl, we want to lightly erase the drawing allowing for faint ghost lines to remain. These very faint ghost lines are going to function as a reference that assists us as we draw a more refined sketch of the owl. Make sure that you don’t completely erase the drawing, we want to have a very faint outline of the owl.
This faint outline is going to be used as a reference for placing features and establishing the scale of the owl.
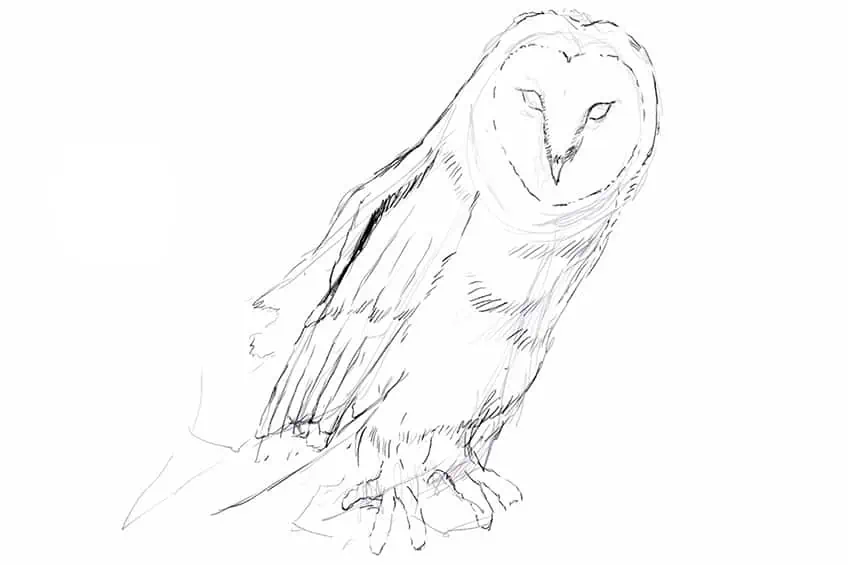
Step 3: Drawing a Refined Sketch of the Owl
Now that we have this faint outline to guide us, we can start to work more strategically with our line work. Starting with the head, proceed to draw in the beak and eyes of the owl. We want to make sure that the eyes are symmetrical and flow into the beak.
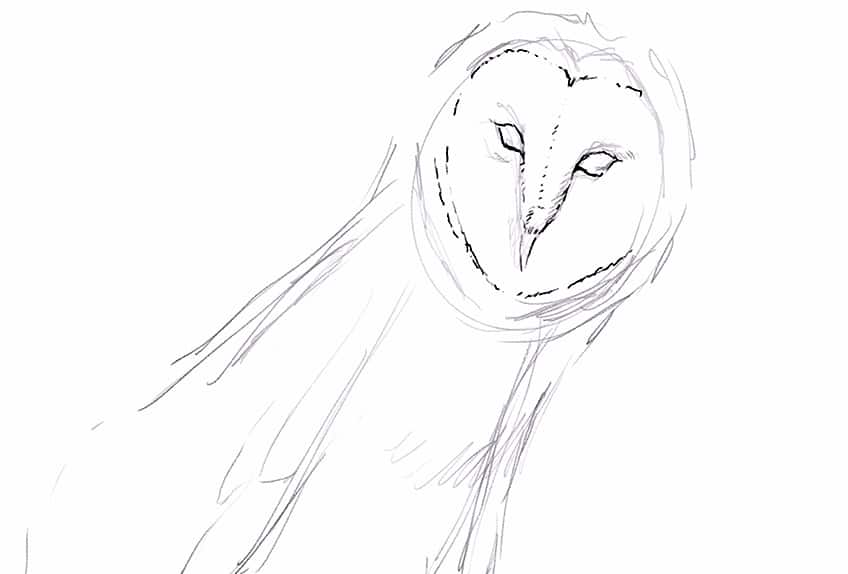
We can start to work with line work to establish a more refined outline that defines the shape of the owl in a more naturalistic way. A good suggestion would be to look at a reference of a barn owl as you proceed with this part of the tutorial.

We want to keep our sketch quite light at this point, with the aim of refining the details in the owl. The wings of the barn owl rest on the side of the owl’s body, we also want to make sure that we draw in the segments in the feathers of the owl.
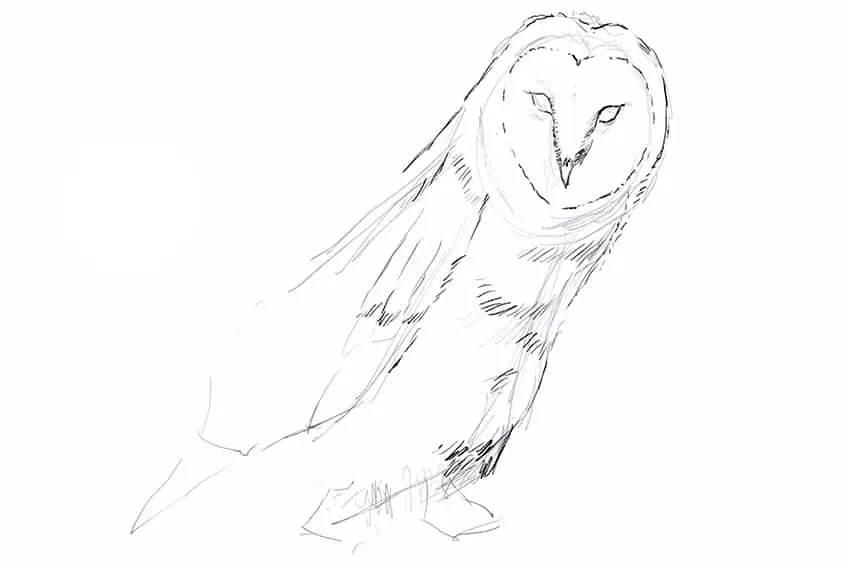
The body of the owl is quite rectangular, with the wings placed along the side of the body. Beneath this rectangular shape, are the talons, which have four digits. The talons are quite sharp as they are used for catching prey.
We want to make sure we spend time slowly refining the owl sketch by working with linework to establish a more realistic outline of the various features. We can use a set of lines to define the feathery quality in the body as well as within the wings.
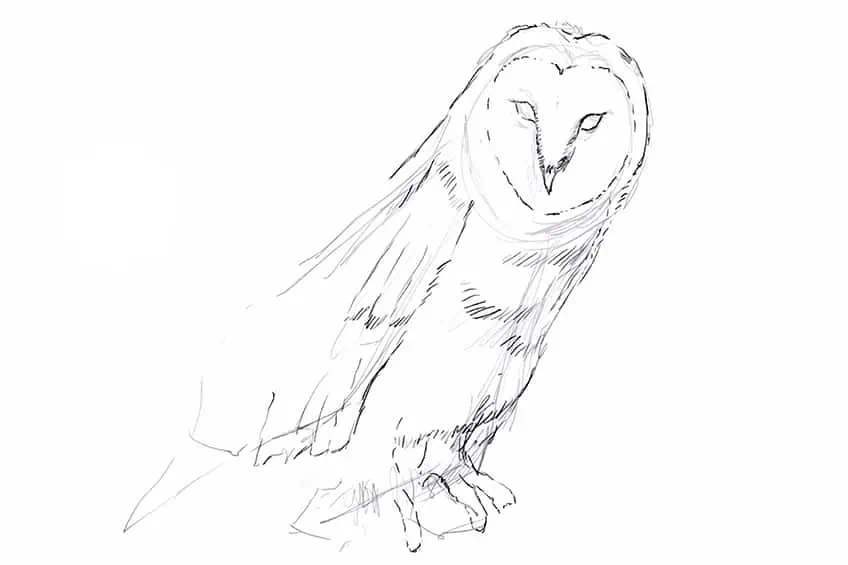
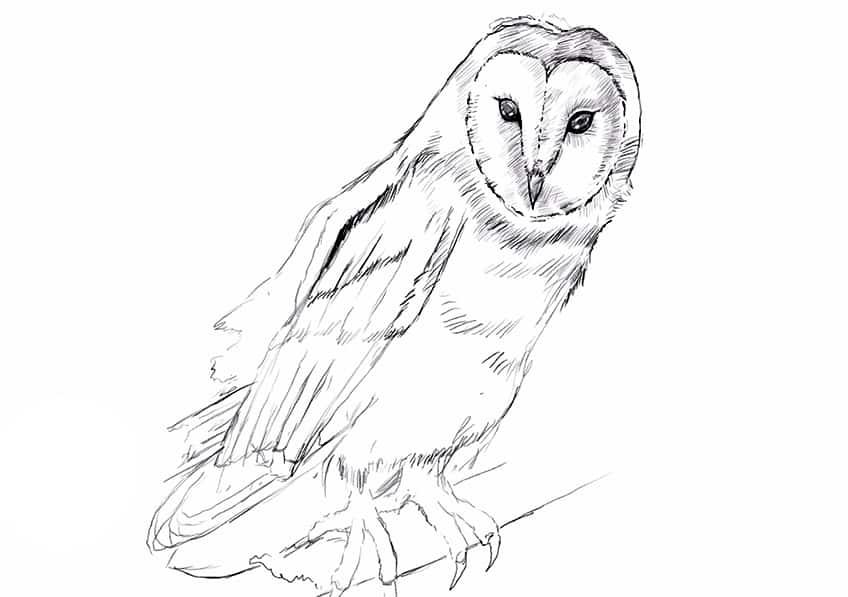
Step 4: Enhancing Details in the Owl Drawing
The Barn owl’s eyes are quite small in relation to the head of the owl, they also are perfectly symmetrical and flow into the beak. The beak is quite small with a small visible downward-facing hook shape.
We want to make sure that we capture the circular shape in the eyes with sharpened edges that flow into the beak.
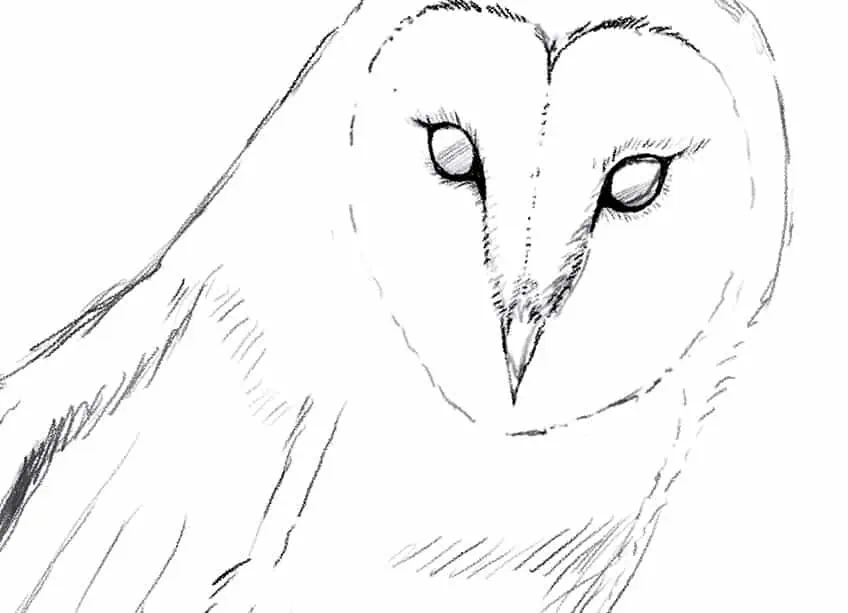
We can shade the entire eye as it is a unique feature of the barn owl. The eyes are completely blackened; however, we can leave little negative spaces in the eyes to represent moments of highlights and reflections on the eye’s glossy surface.
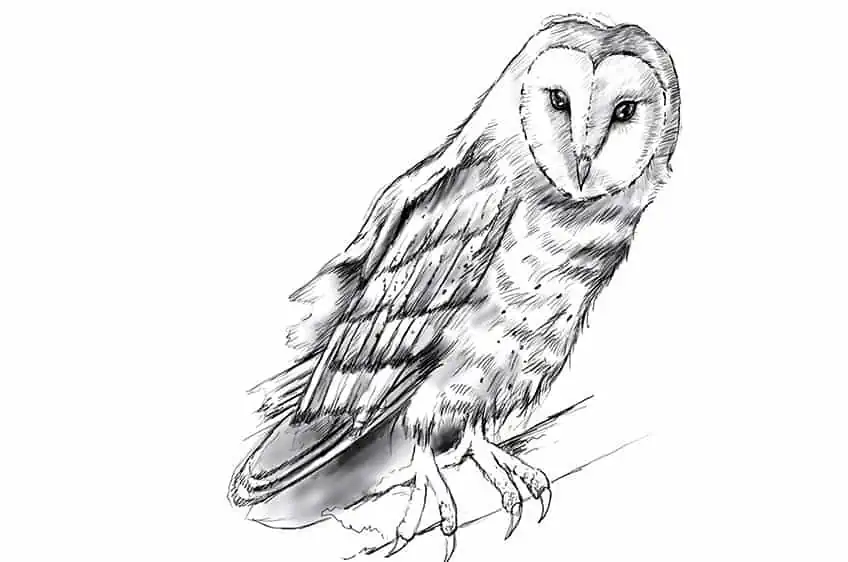
We also want to make sure that we capture the unique heart-looking shape around the face of the owl. This is also a unique feature of the barn owl and is what distinguishes the white feathery face from the surrounding feathers in the body.
Utilizing a combination of linework and shading we can start to work through the entire body of the owl, slowly adding in shading to add more three-dimensionality to the owl. We want to consider how features protrude, such as the beak, which will cause subtle shadowing in the face.
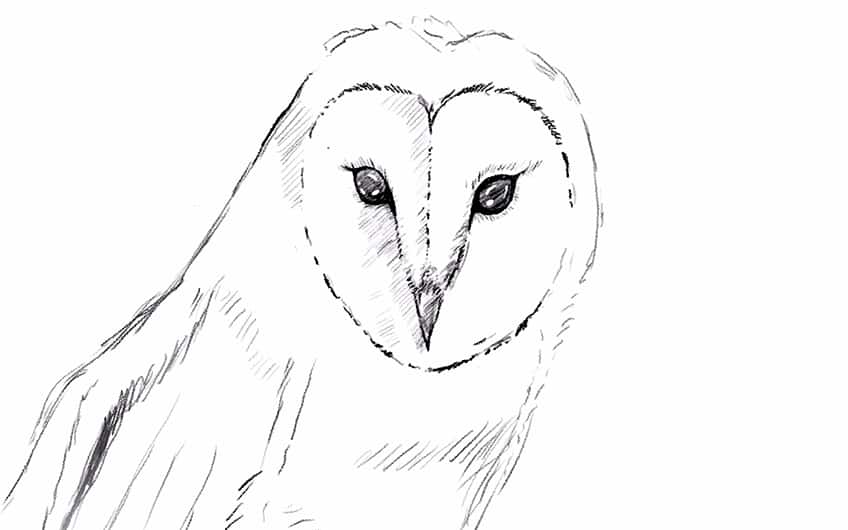
Step 5: Adding Linework and Shading
At this point we should have a decently refined owl drawing, however, to further the details we will want to work on some shading and line work throughout the entire owl drawing. This is where we can start work with both linework and shading to enhance the feathery texture throughout the entire owl drawing.
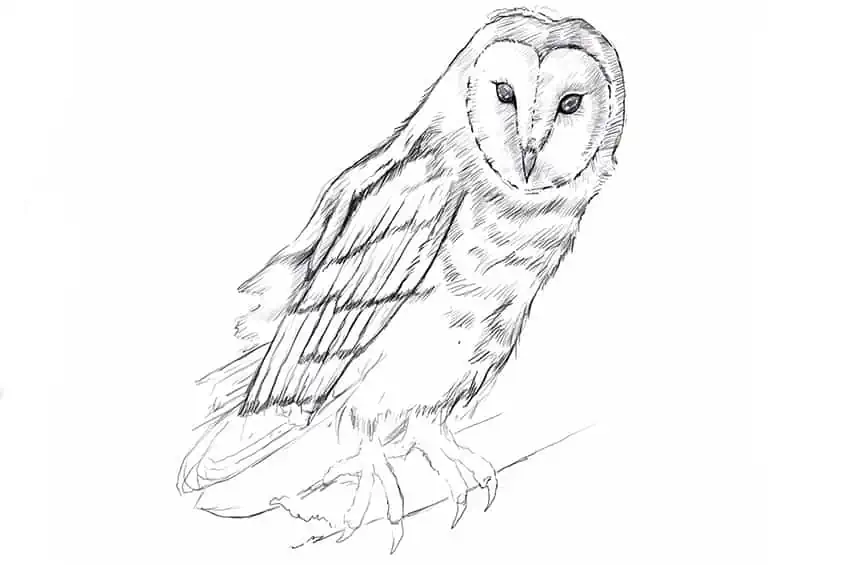
We can start to be more emphatic with our linework in the wings, where we add more distinct lines to define the segments and stacking aesthetics in the wings. The wings have a combination of short and long feathers, the short feathers are stacked on top, with longer ones coming out from beneath the upper feathers.
We want to use smooth shading in tandem with linework to establish both tonal values and texture within the owl drawing. The idea is to work in some shading and then add linework over it to give these different tonal areas some feathery texture.
We want to apply this drawing process throughout the entire owl drawing, where we create variations in tonal values throughout the entire drawing. We also want to consider how certain features will be darker than others because of shadowing caused by features stacked over others.
This is particularly true for the wings, as the wings stick outward from the body, it will cause shadowing on the bodily features beneath them.
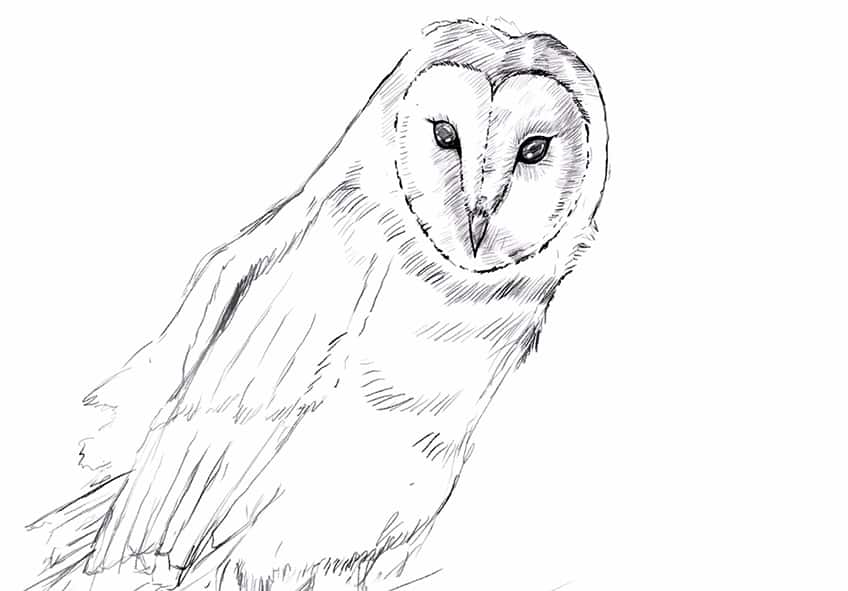
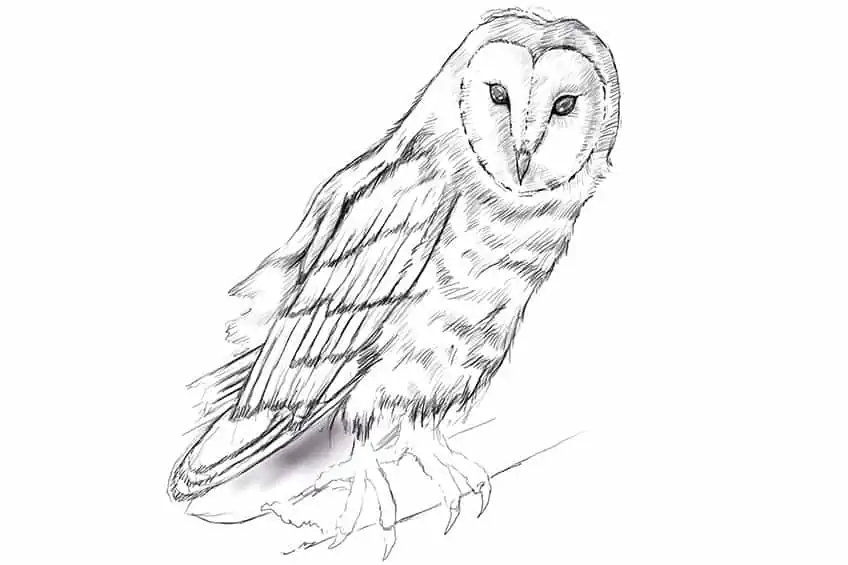
Another little detail we can add to our barn owl drawing is some spots or stippling details on the wings and body. Barn owls have a very unique feathery coat, and the way we can represent this in our drawing is by the use of dots and stipples.
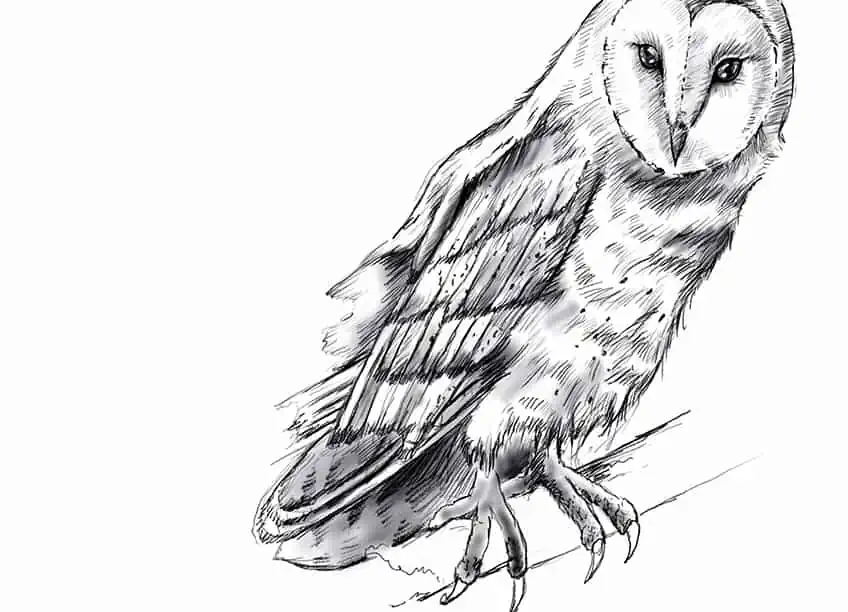
With the talons, we can slightly darken them to distinguish them from the lighter tonal values within the body of the barn owl. The talons can be drawn as these elongated digits, with small claws at the tips of each digit.
Step 6: Contextualizing the Owl Drawing
To further contextualize the owl drawing, we can draw in a branch that places the owl in a space. This gives some context to the positioning of the owl and how it’s seated on a structure

Make sure that as you draw in these talons, it makes sense in relation to the position of the owl and how it is gripping the branch. This means only a few digits would be visible and that they would be slightly curved as they grip the branch.

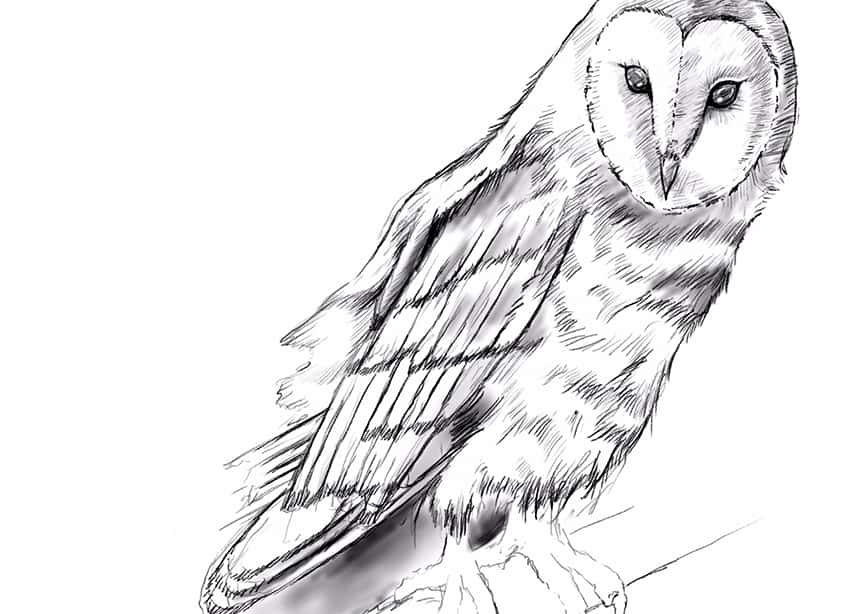
We can also work with both shading and linework to give the branch a more realistic aesthetic. Try to keep your linework flowing in a horizontal direction, or in the same form as the branch. Perhaps take some time going through your owl drawing one last time, making sure you have worked in shading, linework, and details to all the features of the owl drawing.
Darken whatever areas need to be darkened or add more detail to areas that may need some refined touches.

There you have it! How to draw an owl in a few simple steps. Now you know the basic drawing process of an owl drawing and the few simple steps to work through in order to create a beautiful realistic drawing of a barn owl.
Tips and Tricks to Remember
- Shape the owl first. Always work with vague shapes and then slowly refine them as you continue.
- Work out the placement of features. As you refine the owl drawing, utilize line work to position features correctly.
- Use both line work and shading to enhance the drawing. Using line work and shading in tandem with each other is going to give some texture and dimension to the drawing.
- Take your time on the features. Spend some good time on all the features, slowly working through them from head to talon.
Drawing an owl, like many other birds, is a great exercise due to the unique texture of feathers. Learning how to utilize drawing techniques to capture textural qualities in an animal is a great way to enhance your drawing skills. It is also a great way to improve your sense of proportions within an animal and learn how different features connect together. This process is also applicable to learning how to draw owls in general, not just the barn owl.
Frequently Asked Questions
How to Draw an Eyes on an Owl?
The barn owl has very intense eyes but not because they are particularly large. It’s more because of how starkly contrasted they are to the owl’s feather coat. The barn owl’s subtle circular shape can be described as an oval-like shape with sharp edges on either side. The eyes are placed within the center of the face, perfectly symmetrical to one another, with a black and glossy texture. This blackened eye is what enables their impressive sight at night. The glossy texture is quite smooth, which means it has a reflective quality, allowing light to bounce off the surface, and create reflections in the eye. We can represent these light reflections by the use of white marks or negative space in the eye. These are some general things to think about when drawing a barn owl.
How to Draw Feathers on an Owl?
Other than the eyes, the feather formation on a barn owl is perhaps one of the most strikingly beautiful features. The wings on the owl have a set of rows, with small and long feathers that overlap one another. This causes the segmentation effect in the feathers, as if there are little feathers in the wings stacked on one another like bricks. From there, there are long segments of feathers that extend from beneath the smaller upper feathers. The barn owl also has a unique pattern in the feathers, which creates a tonal distinction between the feathers on the head and the wings. The head is white, with very small soft feathers, whereas the feathers in the wings are long. The feathers in the wings also have spots all over them, which gives the barn owl a unique feather aesthetic.

Matthew Matthysen is a multidisciplinary artist. He completed his fine art degree, majoring in History of Art and Contemporary Drawing Practice at the University of Witwatersrand, South Africa. Before joining acrylgiessen In 2020, Matthew worked part-time as an art teacher at Reddford Blue Hills High school. Matthew creates drawing and painting tutorials for acrylgiessen and captures them not only photographically and in written form. He also records the creation of his works in his own creative studio as in video format, from which later with a voiceover and a video editor also drawing tutorials for the Youtube channel of acrylgiessen are created.
Learn more about Matthew Matthysen and about acrylgiessen.