Frog Drawing – Learn to Draw an Easy Frog Drawing
This post may contain affiliate links. We may earn a small commission from purchases made through them, at no additional cost to you.
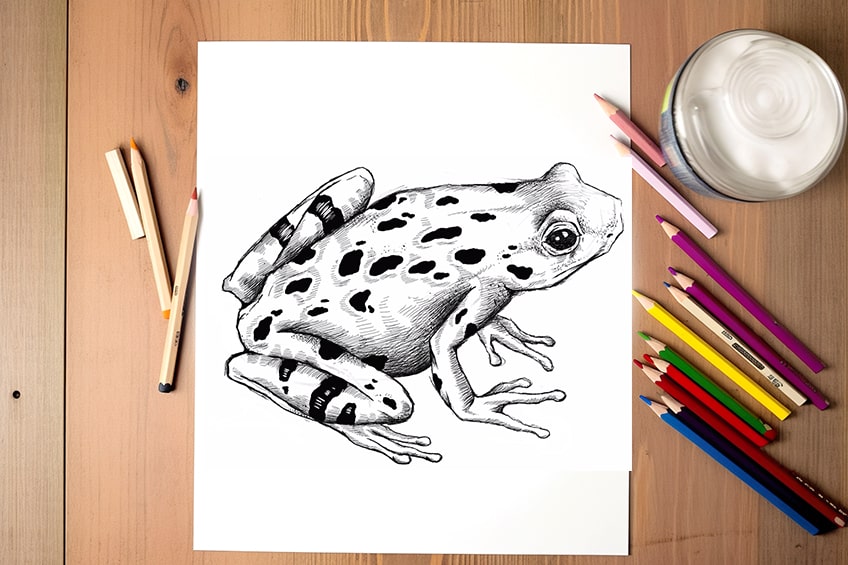
Frogs are a fascinating subject matter, as they come in all sorts of styles, shapes, and sizes. Their unique appearances, with various patterns, allow artists a significant amount of freedom when it comes to how to draw a frog. Frogs are also a great subject to know how to draw, as a frog drawing can be a great addition to many artworks. As we learn how to draw a frog, we are also simultaneously developing our drawing skills, and learning how to use shading and line work to create a unique and realistic frog drawing.
An Easy Guide To Draw Frogs
In this easy frog drawing tutorial, we will learn how drawing a frog can be made easy by breaking down the process into a few simple steps. With their strange features and unnatural movement, frogs may seem daunting to draw. However, once the process has been simplified, you will find it much easier than expected.
Starting with a sketch to block out the structure of our frog, we will look into how you can go about refining and polishing your drawing, and with a few tips, you will be well on your way to creating your unique frog drawings.
Necessary Materials
This tutorial on how to draw frogs is conducted using a digital drawing device, but with that said, the techniques used can be applied to traditional drawing methods. If you intend on drawing a frog in a traditional medium, you will need a pen or pencils, an eraser, a sharpener, and some paper. You can find the above-listed materials below.
- Ballpoint pen
- Micron pens
- Pencil
- Eraser
- Sharpener
- Paper
Step-by-Step Guide on How To Draw a Frog
In this tutorial on how to draw a frog, we will start by developing the basic shapes to establish the areas in which the features will be drawn. From here, we will work on refining the shapes a little, slowly shaping the frog into an identifiable structure. From there, we will move on to working on details as we draw a frog with unique features.
In this easy frog drawing, we will go through a series of steps that develop a simple frog sketch into a realistic frog drawing.
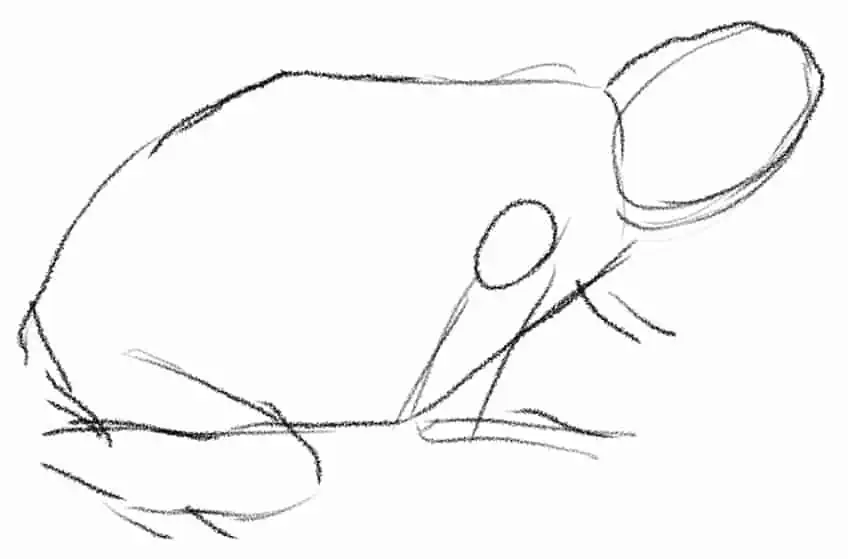
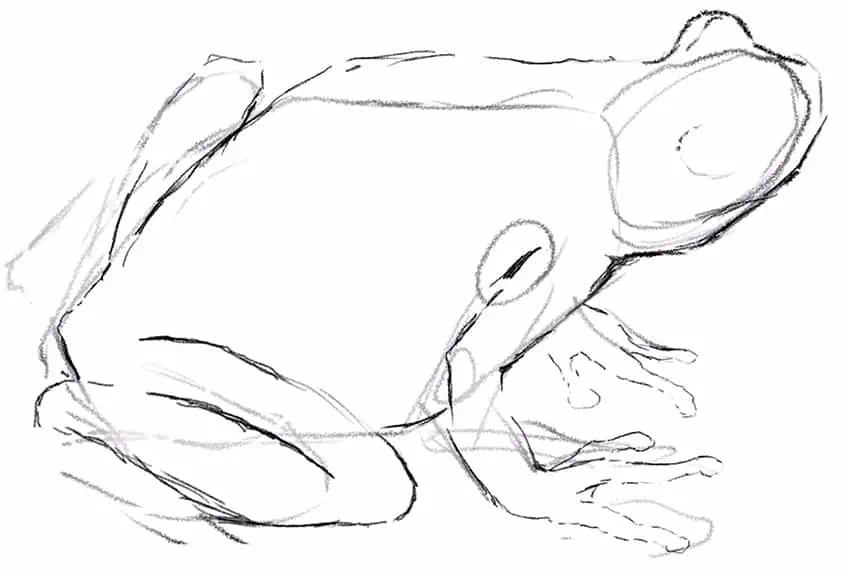
Step 1: Shaping the Frog
We want to start by establishing the basic shapes of the frog and its different features. This is where we want to draw in the basic head shape, body shape, and leg shape. The body can be drawn as an oval shape, with the head attached as a smaller circular shape.
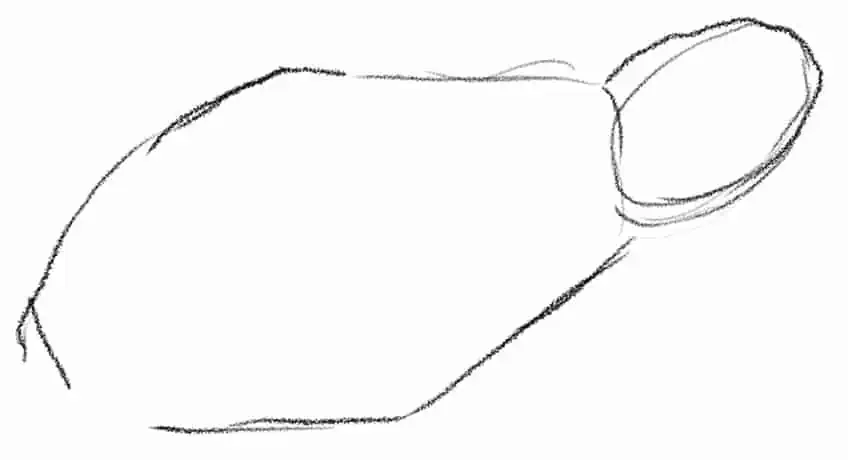
The legs are quite simple, the hind legs bend backward toward the backside of the frog and are fairly larger than the front legs. The front legs sit forward to stabilize the frog and start from the sides of the frog. The front legs also bend slightly as they move toward the front of the frog.
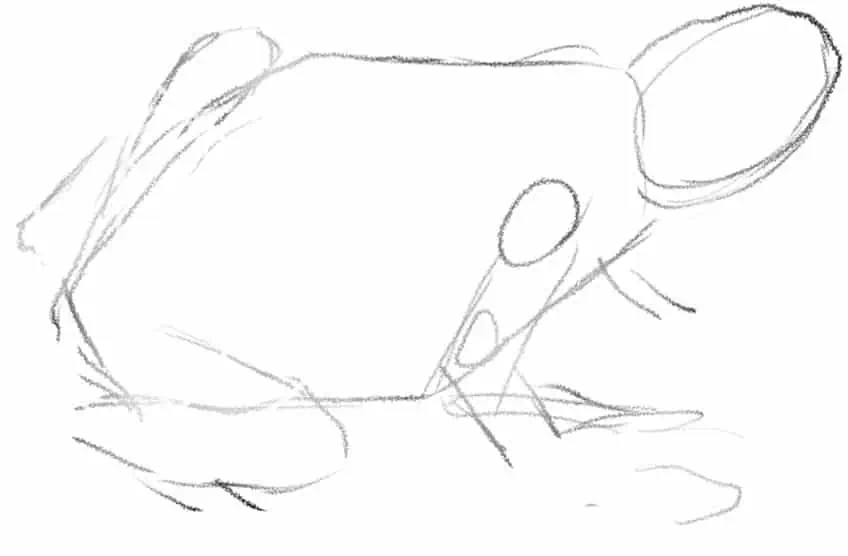
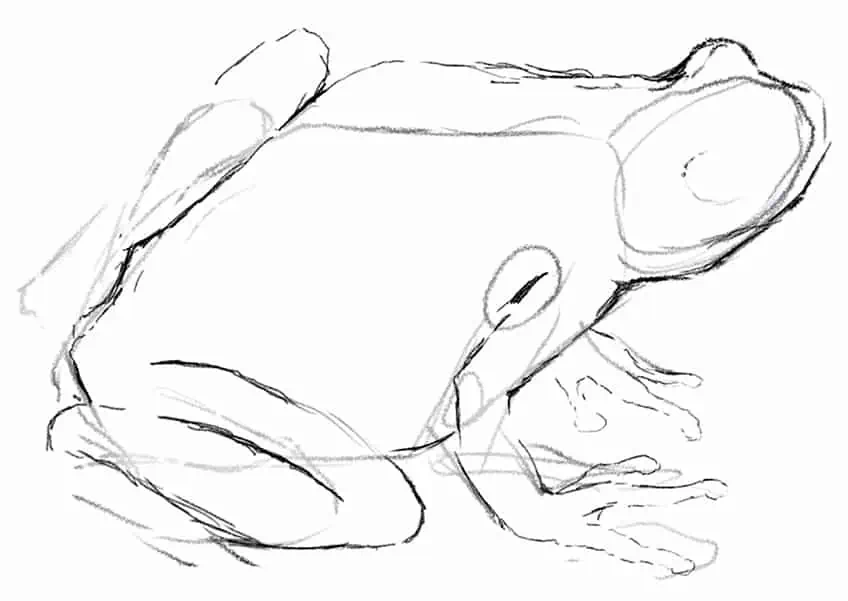
Step 2: Lightly Erasing the Frog
Once we have established these basic shapes of the frog, we now can move on lightly erasing the frog drawing. Lightly erasing the frog drawing is going to establish ghost lines that will assist us as we draw in more refined features.
Step 3: Refining the Features of the Frog
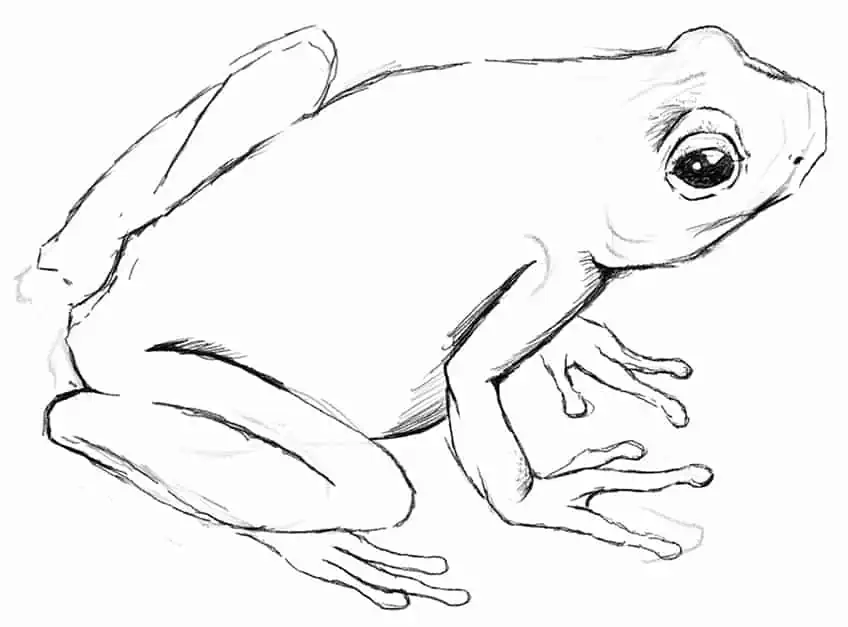
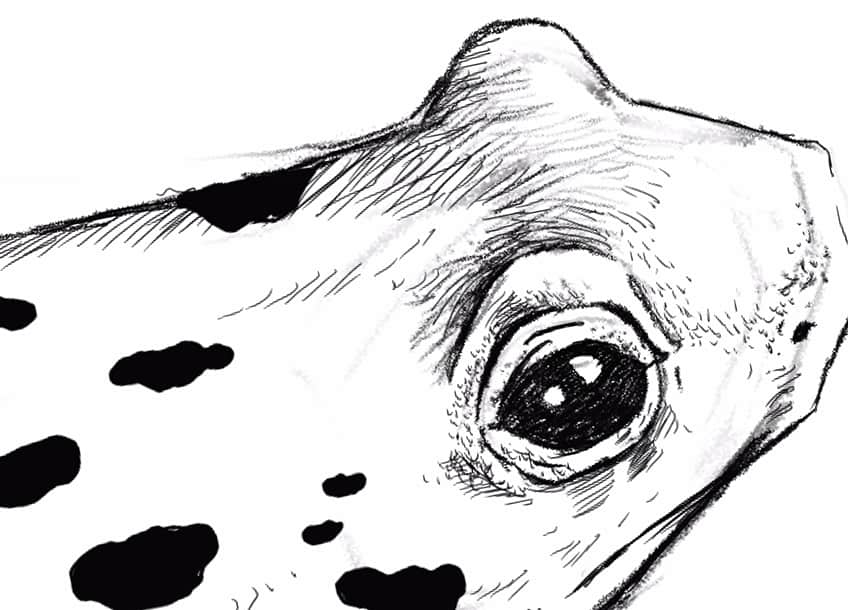
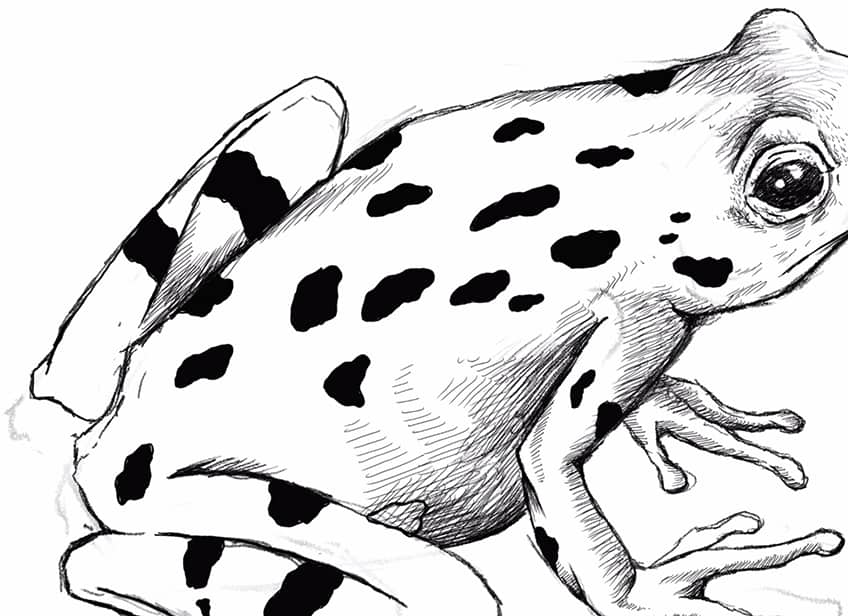
Once we have lightly erased the frog sketch, we want to start working on the outline to shape the frog into a more realistic structure. Starting with the head, we want to make sure that the eyes bulge, this is a unique characteristic of frogs.
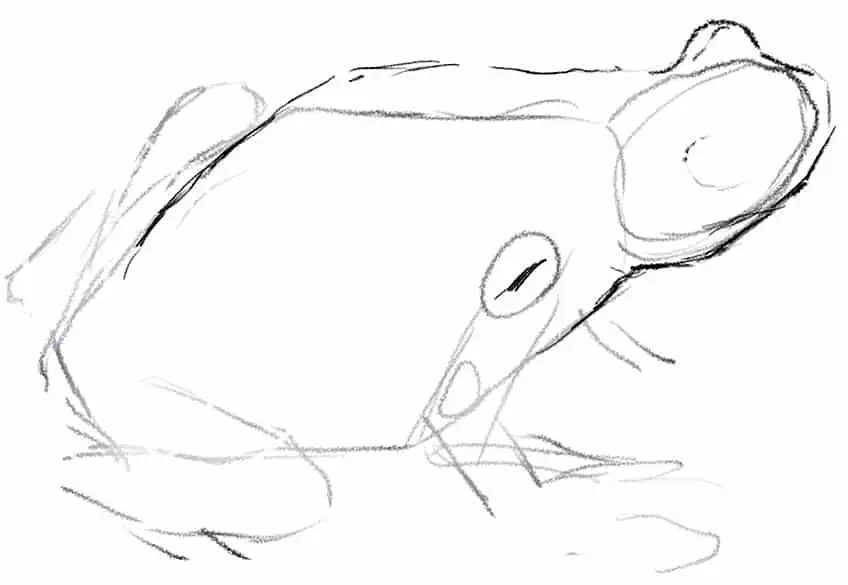
We will only need to create an eye bulge for the furthest eye as the eye in the foreground will be seen in its entirety. We can start to work the outline of the frog down towards the arms.
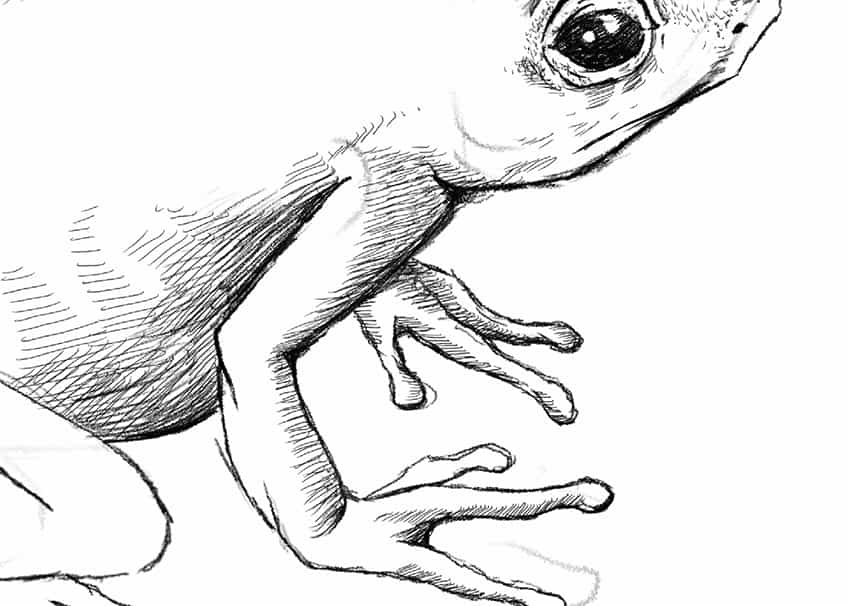
We want to start drawing the digits on the frog’s hands, these can be drawn as thin finger-like shapes. Frogs generally only have three digits in the feet and hands, at the ends of each digit, they also have a round circular structure for climbing.
As we slowly work in linework to refine the form of the frog, We want to make sure that we start to create a rounding in the back of the frog. We also want to start giving more form to the hind legs in the frog drawing.
The hind legs tend to bend so much that they rest on top of the hind feet, which means that the digits of the hind feet should only be slightly visible. We can draw the hind feet similarly to that of the front hands, with three digits.
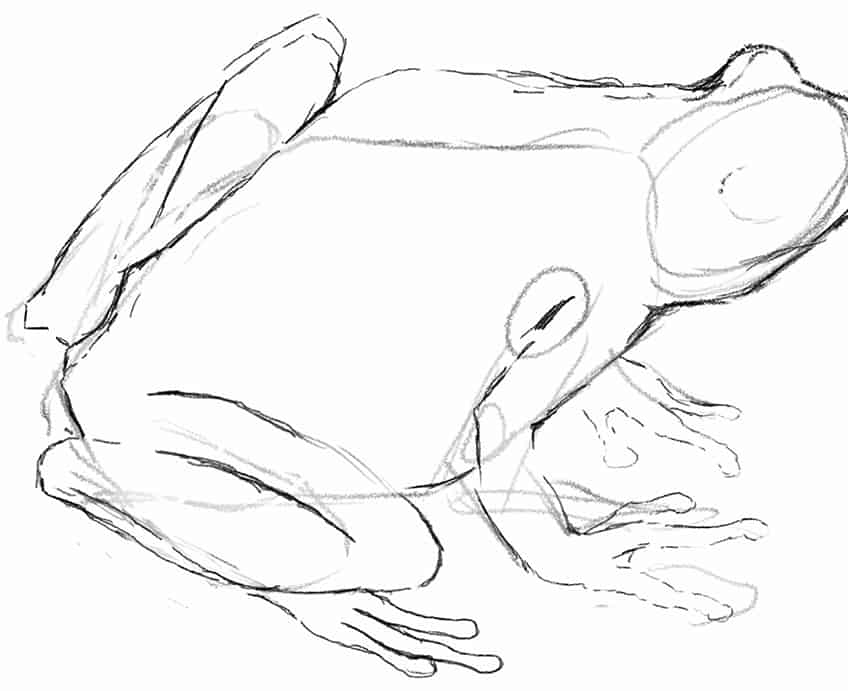
As we move through the frog drawing and come back to the eye, we want to draw the eye in a circular shape. We also want to draw eyelids around the eye, with lines around the eyelids to suggest bulging from the head of the frog.
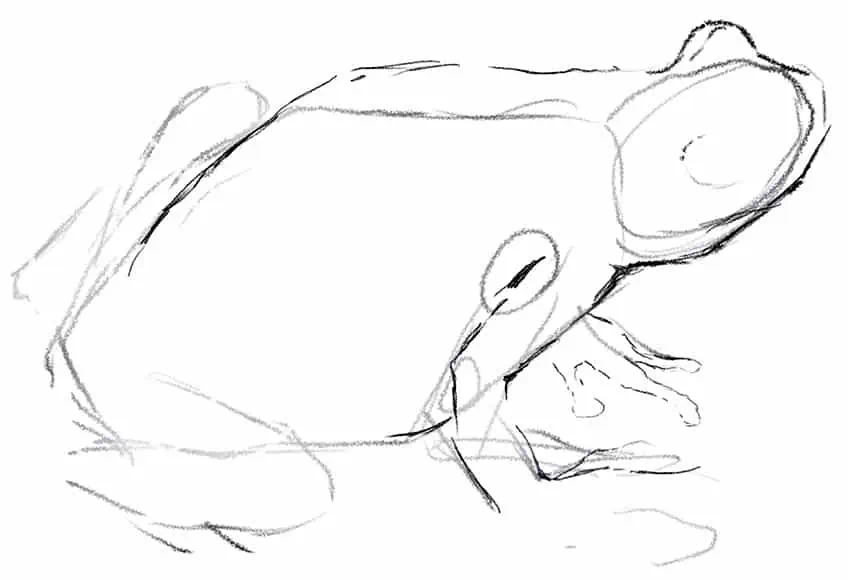
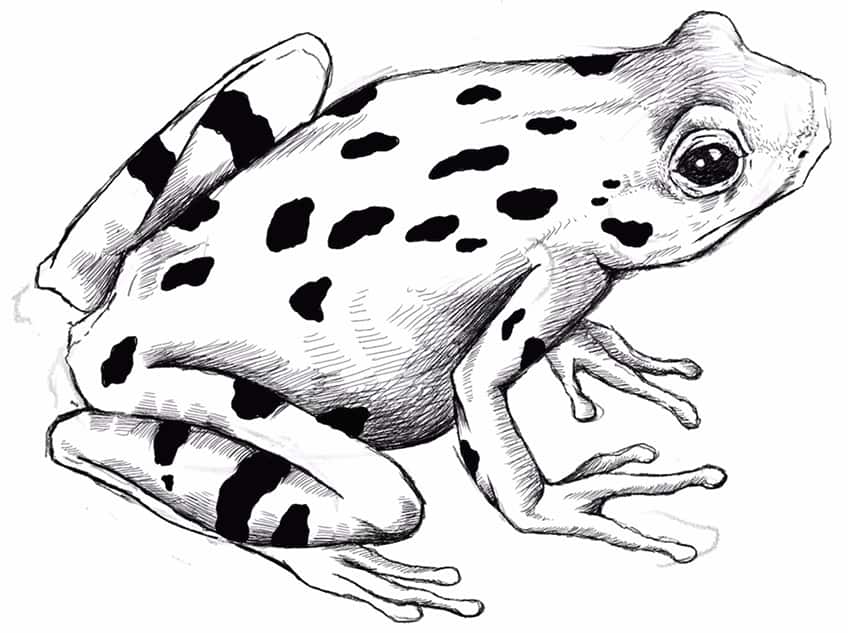
Step 4: Shading in the Frog Drawing
Once we have worked through the entire frog drawing, slowly refining the shape, we now want to add more three-dimensionality to the frog drawing. This is where we want to start working on shading to further emphasize the structure and features.
As we shade in the frog we want to consider the main areas that will be dark and light. This way we keep consistency in the shadow placement on the frog and how it defines the dark and lightest areas in the frog drawing.
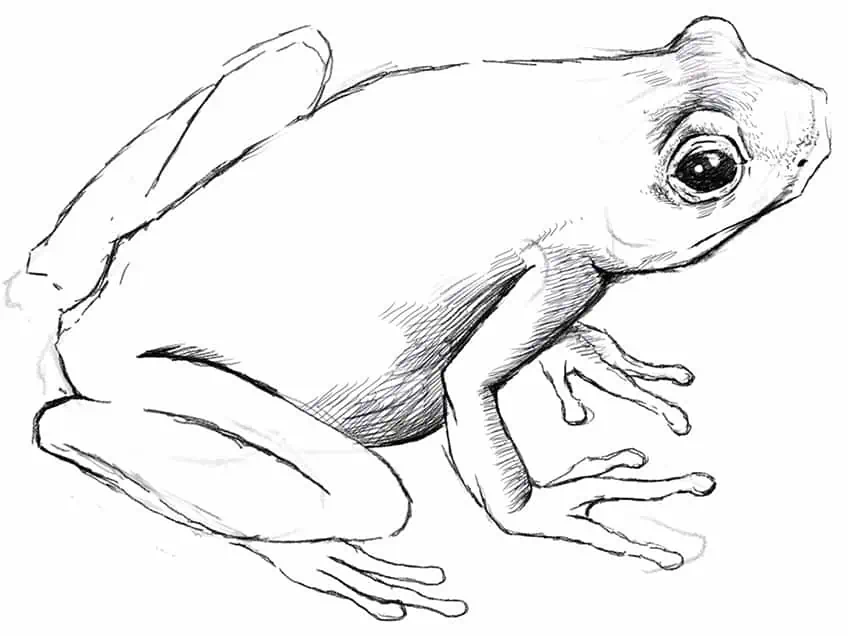
We want to use line work to create a dark-to-light gradient from the bottom area of the frog. This is going to define a subtle shift of light exposure, where the upper areas of the frog are more exposed to a light source than its underbelly area.
We want to use shading to emphasize the different features as best we can, it’s a good way to bring three-dimensionality to all the features in the frog drawing. We want to slowly work through the entire frog drawing, slowly adding shading to all the features.
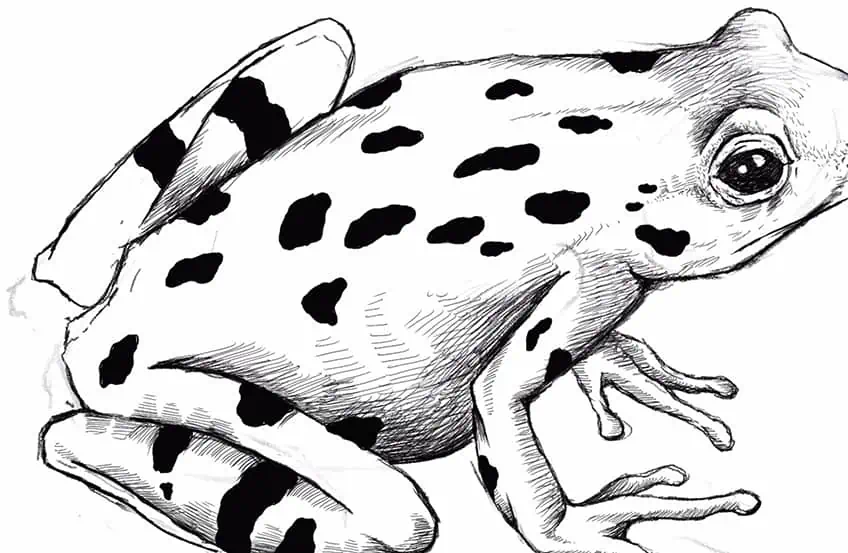
Step 5: Adding Unique Features
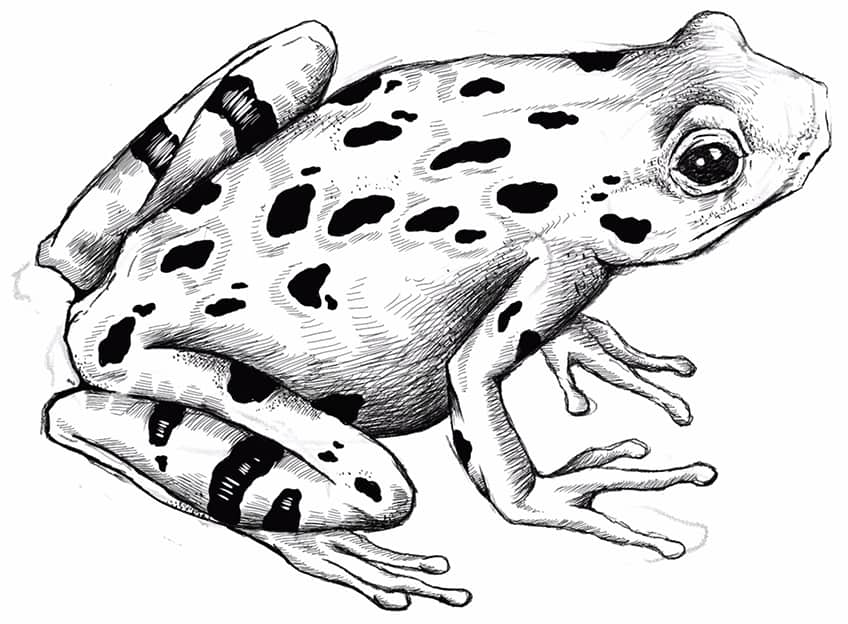
Once we understand the process of utilizing shading to create three-dimensionality, we now can move on to adding unique features to the frog drawing. This is where we add in spots, stripes, and other details that we feel might give your frog drawing a unique aesthetic.
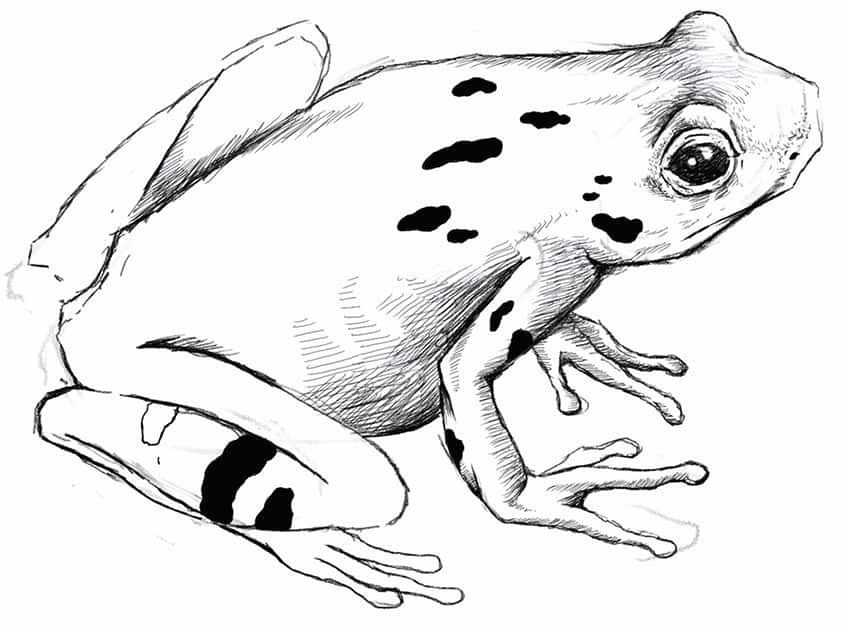
Frogs have different patterns, stripes, and details, this is where you play around with your creative interpretation of how you would like to create your frog drawing. You can also look to the internet for inspiration for your frog drawing.
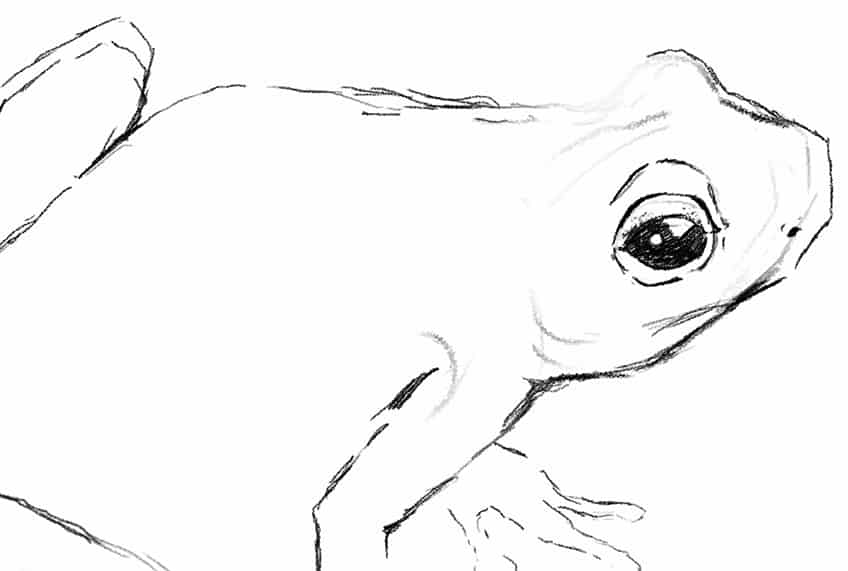
Again, you want to also work with adding distinct details to main features such as the eye. A good suggestion would be to add highlights to the eye, this way the eye has a reflective quality that represents its glossy surface.
Another good suggestion is to play around with adding stripes to the legs and spots to the body. You can also play around with the shape of each pot and the sizing of these features. Try to be conscious of how they are placed and how you wrap around features and you draw them.

Continue with adding different-sized shapes along different areas of the body. You want to make sure you are conscious of how some spots and stripes are visible on areas that curve in the body.
The spots also don’t have to be perfect shapes, you can make them slightly irregular in their shape to give the spots a more organic aesthetic. This will seem more realistic as a pattern on a frog.
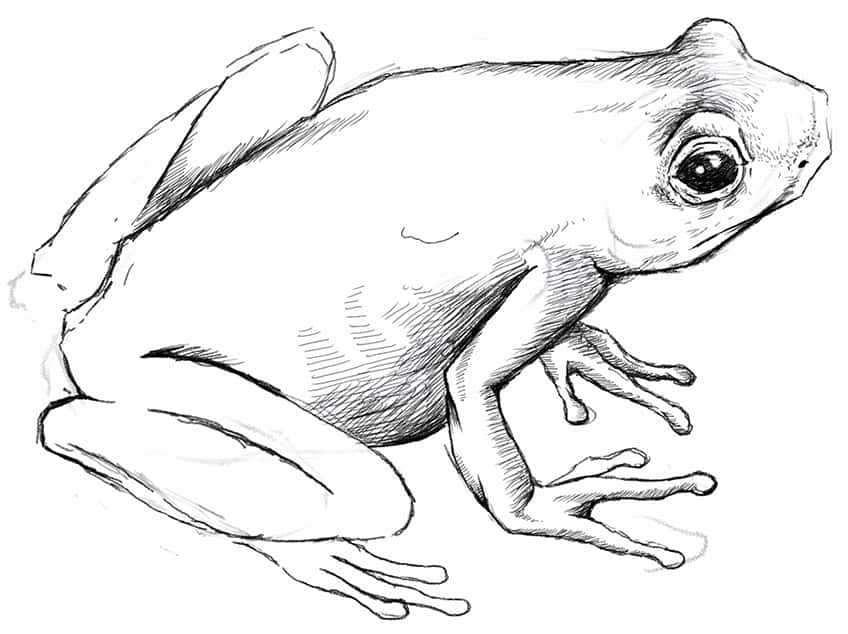
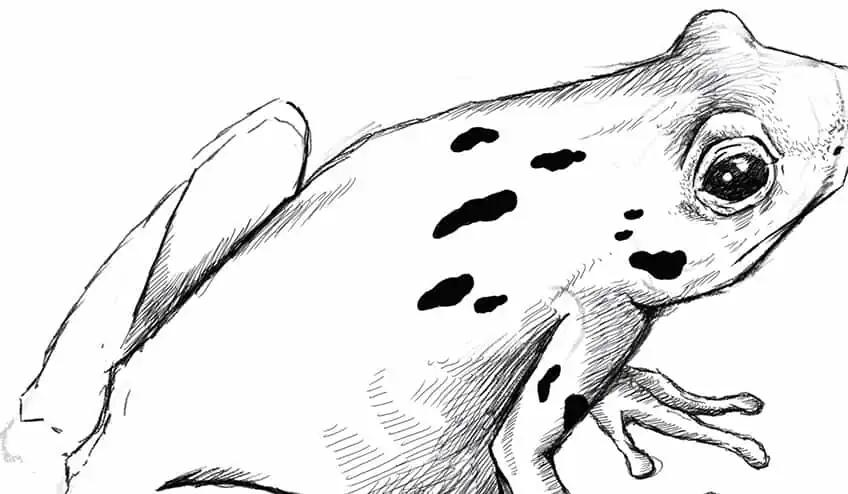
Step 6: Refining the Shading
From here, we can proceed by adding some shading to the frog, slowly working around the spots and stripes to emphasize them further.
We want to make sure that as we shade, we also shade over the patterns to create a consistency of shadow formation in the frog drawing. This way there is a realistic appearance of shadow and light on the surface area of the frog.
Another good suggestion is to work in some shading around some of the spots and stripes to emphasize these unique features. This also adds more texture to the frog drawing.

At this point, you can also start to work in different shading styles and techniques to enhance her overall textural qualities in the frog drawing. Try to work in some stippling, smooth shading, and linework to emphasize the form of the frog.
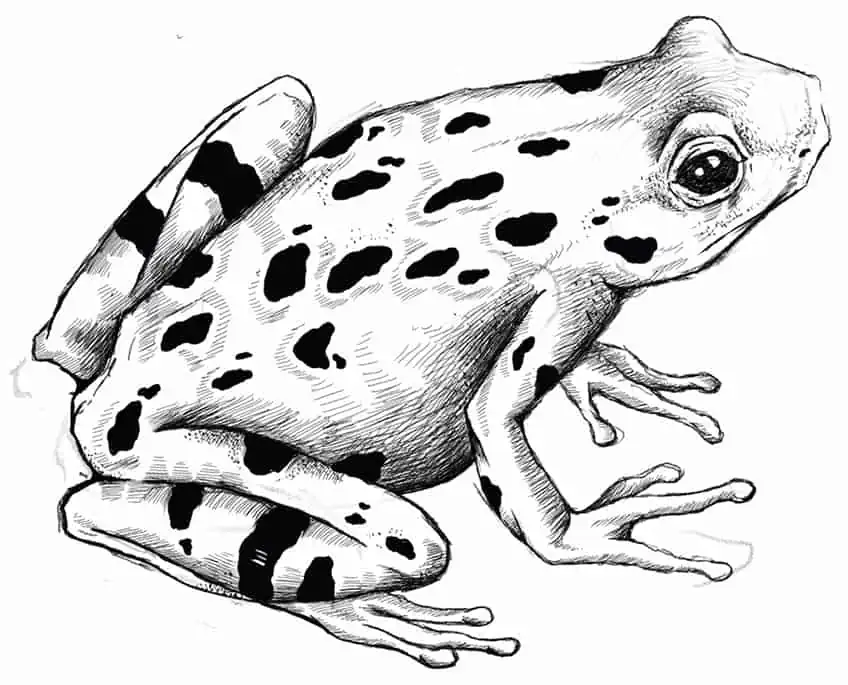
Shading is not only for establishing the areas that have a shadow but can also be used to define textures and surfaces within the frog drawing. Allow yourself to explore various shading techniques in combination.
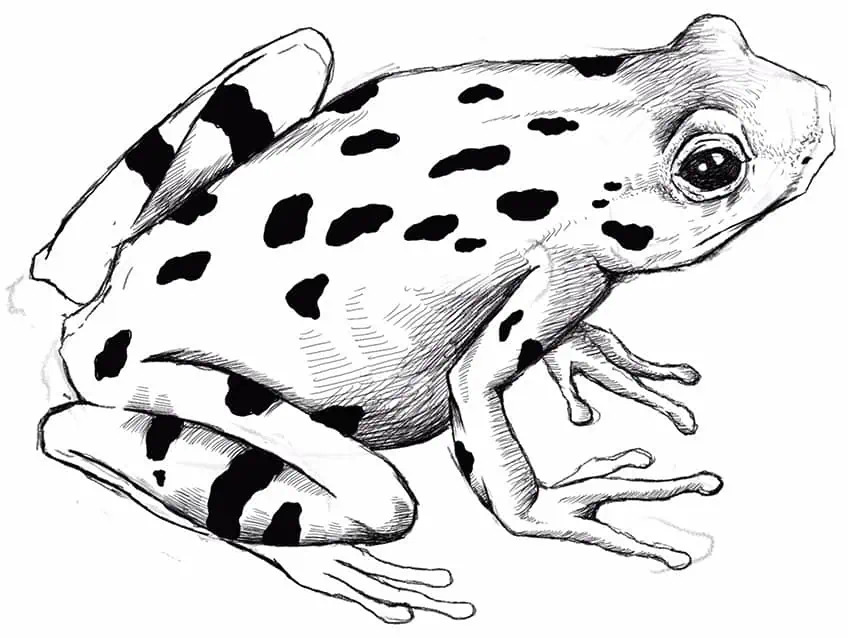
Continue with this process until you have completed your frog drawing. And there you have it! An easy frog drawing that only takes a few simple steps. Remember to take your time and enjoy the process.
Tips and Tricks To Remember
- Establish the shape of the frog. First work out the fundamental shapes that define the different features of the frog.
- Refine the frog shape with an outline. Once you have worked out the general shapes, take your time outlining the frog to establish a realistic frog structure.
- Consider the light source. As you shade, try to keep your shading in the same areas to have consistency within the shadow formations.
- Explore shading techniques for shadow and texture. You can utilize different shading techniques to create both texture and shadows in the frog drawing.
In this easy frog drawing, you are given a few simple steps that provide you with a toolkit to draw a frog realistically. Allow yourself to use these sequences of steps to create a variety of different frog drawings. This unique animal also works well as an addition to many artwork ideas, so start to explore the possibilities within your work.
Frequently Asked Questions
How Do You Draw the Legs of a Frog?
The legs of a frog are unique in their structure because of how they stabilize the body. The hind legs will bend, with the knee joint resting over the foot. The hind legs tend to be much larger, as they are used for springing the frog into the air as it moves. The front legs bend as well, starting from the shoulder area and bending towards the front area of the frog. Both hands and feet have three digits, with subtle webbing between each. The tips of the fingers and toes are rounded as they are used to help the frog stick to surfaces. This is the general process of drawing the legs and arms of a frog.
How Do You Draw the Patterns on a Frog?
Frogs differ in their patterns, Which allows for a lot of creative freedom when it comes to creating unique features on a frog. You can also draw a lot of inspiration from existing frog species to experiment with various types of patterns. You also want to consider the angles at which you draw the frog, as its three-dimensional structure will naturally distort shapes and how they wrap around the body of the frog. These are general ways to approach the process of drawing patterns on a frog.

Matthew Matthysen is a multidisciplinary artist. He completed his fine art degree, majoring in History of Art and Contemporary Drawing Practice at the University of Witwatersrand, South Africa. Before joining acrylgiessen In 2020, Matthew worked part-time as an art teacher at Reddford Blue Hills High school. Matthew creates drawing and painting tutorials for acrylgiessen and captures them not only photographically and in written form. He also records the creation of his works in his own creative studio as in video format, from which later with a voiceover and a video editor also drawing tutorials for the Youtube channel of acrylgiessen are created.
Learn more about Matthew Matthysen and about acrylgiessen.