Bridge Drawing – 17 Steps to Drawing Structural Marvels
This post may contain affiliate links. We may earn a small commission from purchases made through them, at no additional cost to you.
As the morning mist rolls off the river below, the bridge stands as a testament to human ingenuity, a graceful arc of steel and concrete connecting two worlds. Whether you’re drawn to intricate engineering or simply seeking a picturesque view, this guide will take you through 17 awe-inspiring facts about bridges, illuminating the marvels of these architectural wonders with captivating detail and insight.
Sketching Connections: Bridge Drawing
Discover the artistry of depicting the majestic beauty and structural integrity of bridges with unparalleled precision and finesse in this comprehensive guidebook. Illustrated with meticulous detail, this handbook meticulously outlines each step required to bring a bridge to life on your canvas. Through dedicated study and practice, you’ll easily learn how to draw a bridge!
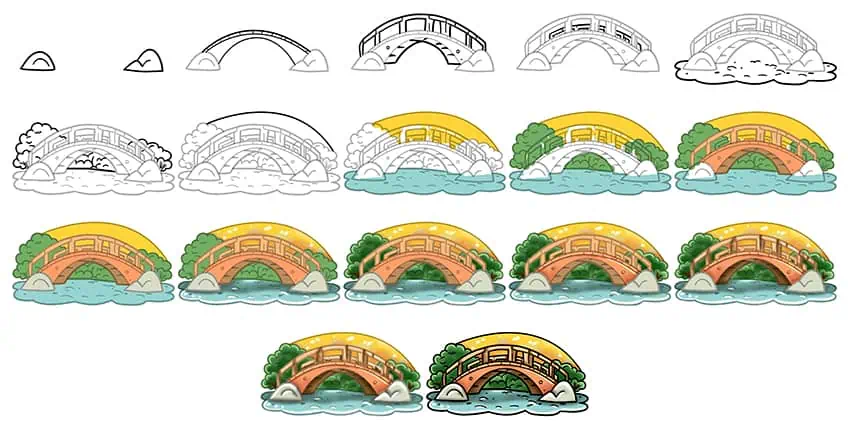
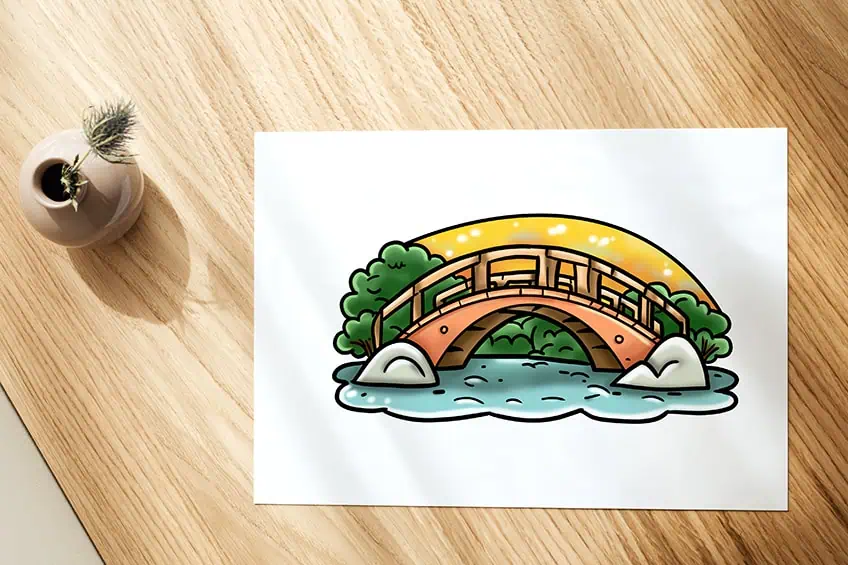
Step 1: How to Draw a Bridge
Begin our bridge drawing by sketching a small rock-like island where the bridge will begin and end.

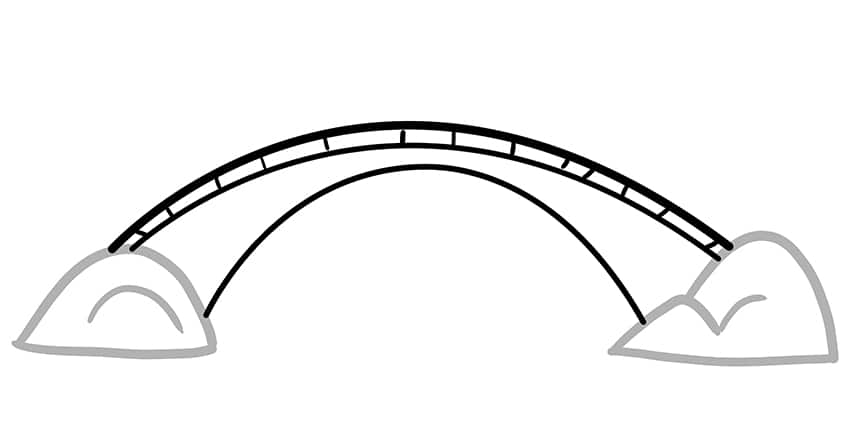
Step 2: Draw the Bridge Arch
Begin drawing by sketching a single arched line from the lower ends of one island to the next. Then, draw a second and third arched line from the top areas of each island to the next. Finally, on the top arch, draw several spaced-out vertical lines.
Step 3: Add the Bridge Railing
Begin by drawing an arching line above the previously drawn bridge. Then, draw several vertical pillars to support the railing. Continue by drawing the visible bottom area of the bridge.
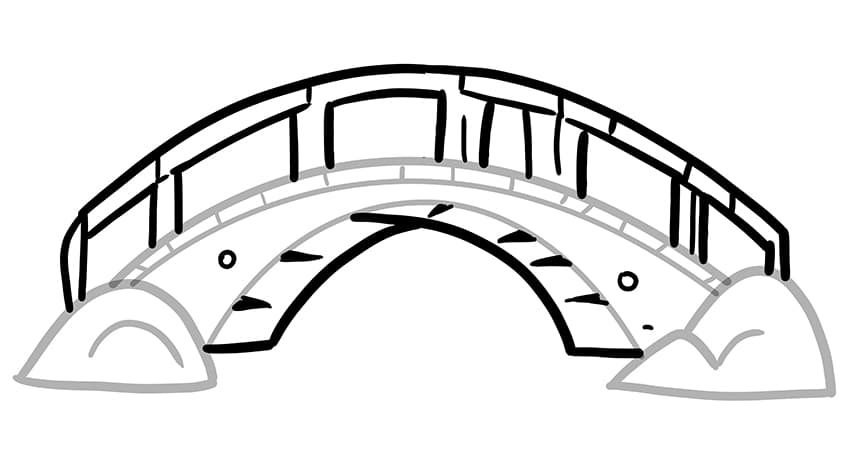
Step 4: Continue With the Bridge Railing
Similar to the previous step, draw the second railing that is partially visible in your bridge sketch.

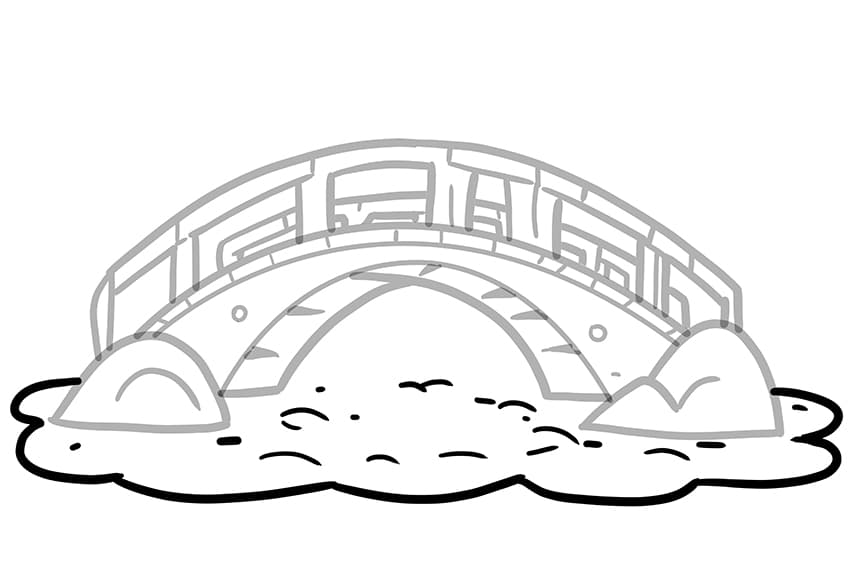
Step 5: Draw the Lake on Your Bridge Sketch
In this step, you will learn how to draw a bridge over water. Begin by drawing the water surrounding the islands and beneath the bridge using curved short lines, then unify the water as a whole.
Step 6: Add the Scenery to Your Bridge Drawing
Behind the bridge, draw several bushes and trees to fill the background and complete the scenery.
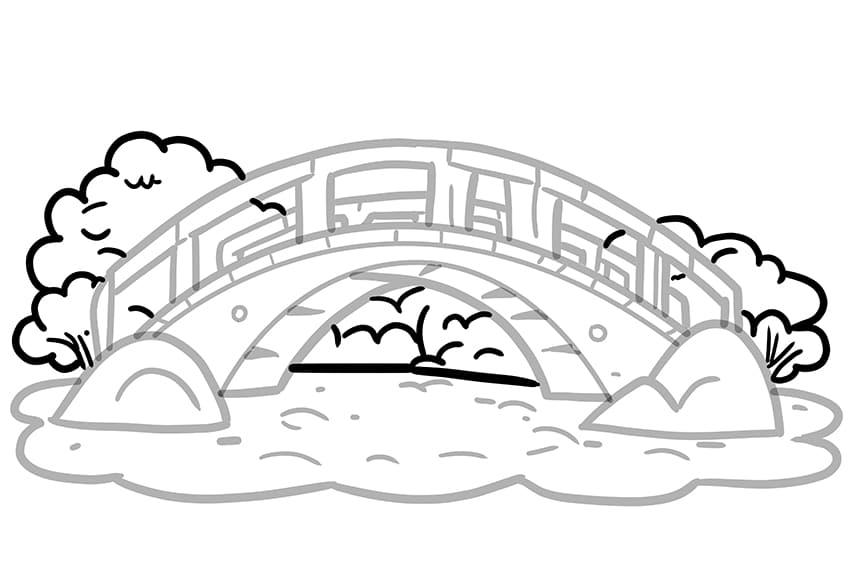
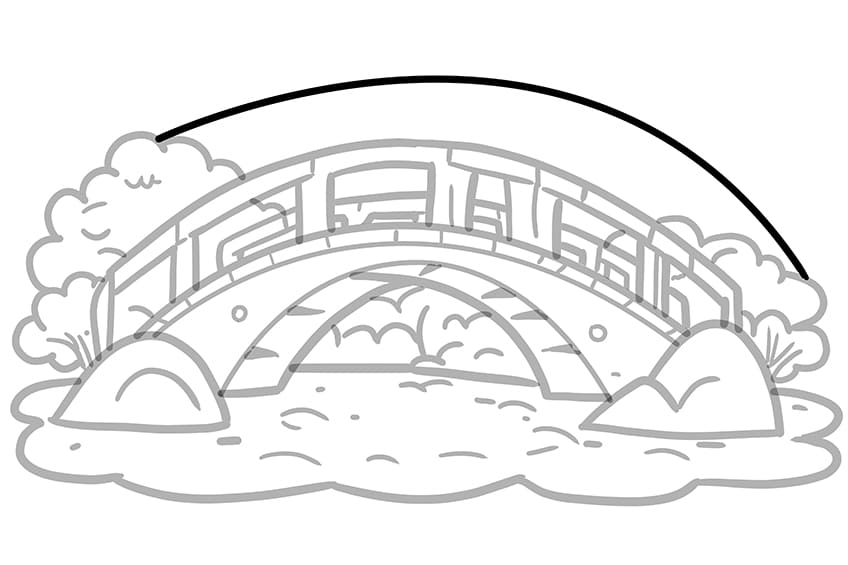
Step 7: Draw the Sun
Draw a curved line behind the bridge and scenery to represent the large sun.
Step 8: Begin to Color Your Bridge Drawing
With a fine, sharp brush and yellow paint, color in the sun. Switch to teal paint and color in the lake.

Step 9: Continue to Add Color to Your Bridge Sketch
Using the same brush and green paint, fill the trees and bushes.

Step 10: Color the Bridge
Use a fine, sharp brush and brown paint to fill beneath the bridge. Then, using orange paint, fill the side walls of the bridge, and apply a lighter shade of orange for the fully visible railing.

Step 11: Continue to Color the Islands
With the same brush and a light shade of orange paint, fill the partially visible railing. Switch to light gray paint, and color in both islands on your bridge drawing.

Step 12: Shade and Highlight the Sun and Lake
Begin with a soft brush and dark orange paint, and apply shading within the lower parts of the sun. Repeat this process using gray and white paints, this time applying smaller spots. Continue by applying shading beneath the bridge onto the water using black paint.
Finally, using a small, soft brush and white paint, apply several spots of highlights within the water.

Step 13: Move Onto the Trees in Your Bridge Drawing
Utilize a gentle brush and black paint to darken each of the bushes and trees. Then with a sharp brush and white paint, add highlights along the edges. Lastly, use a fine, sharp brush and brown paint to emphasize the tree stems.

Step 14: Add Shading and Highlights to the Bridge
Use a soft brush and black paint to softly shade along the edges. Finish off with white paint to apply soft highlights.

Step 15: Continue Onto the Railing
Utilize a small, gentle brush and brown paint to apply shading along the railing of the bridge. Apply white paint at several spots to enhance the highlights. Then with black paint, shade beneath the bridge and ensure that the first color coat remains somewhat visible.

Step 16: Proceed Onto the Islands
Select a gentle brush and black paint, and add soft and subtle shading to the islands. Repeat this process using white paint to add highlights. Complete the step by using brown paint to shade the partially visible railing, and add soft highlights using white paint.

Step 17: Finalize Your Bridge Sketch
Utilize a fine, sharp brush and black paint to trace all outlines, as well as any inner texture or detail lines, to achieve a seamless and beautiful bridge drawing!

Congratulations on mastering the intricate art of drawing a bridge in 17 steps! Your dedication and attention to detail have truly paid off, as evidenced by the stunning portrayal you’ve created. With each stroke of your pencil, you’ve captured not just the physical structure, but also the essence of connectivity and strength that bridges represent. Your newfound skill is a testament to your perseverance and passion for the arts. Keep exploring and honing your talents—you’re destined for great things in the world of artistry!
Frequently Asked Questions
What Are Some Essential Elements to Include When Drawing a Bridge?
When I approach drawing a bridge, I focus on capturing its distinctive architectural features and structural elements. This includes detailing the arches, supports, and railings, which are essential for conveying the bridge’s strength and functionality. I also pay attention to the surrounding environment, whether it’s a serene river flowing beneath or a bustling cityscape in the background, as it adds context and depth to the composition. By carefully observing the real-life bridge and understanding its design, I can recreate its essence on paper with accuracy and precision.
What Drawing Techniques Can I Use to Create Realistic Textures in a Bridge Drawing?
To create realistic textures in my bridge drawings, I employ various drawing techniques that bring out the unique characteristics of different materials. For instance, when depicting stone structures, I use cross-hatching and stippling to mimic the rough, uneven texture of the stone surface. For metal elements like railings or girders, I utilize a combination of shading and hatching to capture the reflective properties and subtle variations in tone. Additionally, I pay attention to details such as rust, weathering, and patina, which add authenticity and depth to the drawing, making it come alive with realism.
How Can I Convey a Sense of Perspective and Scale in My Bridge Drawing?
Conveying perspective and scale in a bridge drawing is crucial for creating a sense of depth and realism. To achieve this, I employ techniques such as linear perspective, where I establish vanishing points and horizon lines to create the illusion of depth and distance. Additionally, I carefully consider the proportions and scale of the bridge in relation to its surroundings, ensuring that elements like converging lines and overlapping shapes accurately represent spatial relationships. By incorporating atmospheric perspective, I gradually lighten and desaturate colors as objects recede into the distance, enhancing the sense of depth and immersing the viewer in the scene.

IzzyBll is a digital artist and content creator from Israel and currently residing in South Africa. Originally coming from videography, Izzy then turned to digital graphic art. He specialized in using digital drawing software such as Photoshop and Procreate. Drawing and photo editing has always been a sort of second nature for Izzy. In doing so, he can now look back on 5 years of experience in the industry, completing commissions for various well-known brands such as Audi.
Learn more about IzzyBll and about us.