Shark Drawing – Create a Powerful and Captivating Shark Sketch
This post may contain affiliate links. We may earn a small commission from purchases made through them, at no additional cost to you.
Sharks are one of the most fascinating creatures in the ocean, captivating us with their sleek, powerful bodies and mysterious, predatory behavior. With razor-sharp teeth and lightning-fast reflexes, sharks have earned a reputation as fearsome hunters, but there’s much more to these ancient creatures than meets the eye. Whether you’re an avid diver, a nature enthusiast, or just curious about the wonders of the sea, sharks are sure to capture your imagination and leave you in awe.
A Guide on How to Draw a Shark Realistically
Get ready to dive into a thrilling and rewarding experience as you learn how to draw a shark! Not only will you have fun and gain new skills, but you’ll also deepen your knowledge of these magnificent creatures and their importance to our oceans. From the iconic great white to the colorful hammerhead, you’ll capture the dynamic movement and unique characteristics of various shark species. Through your art and education, you’ll raise awareness about the need for conservation efforts to protect these amazing animals in the wild.
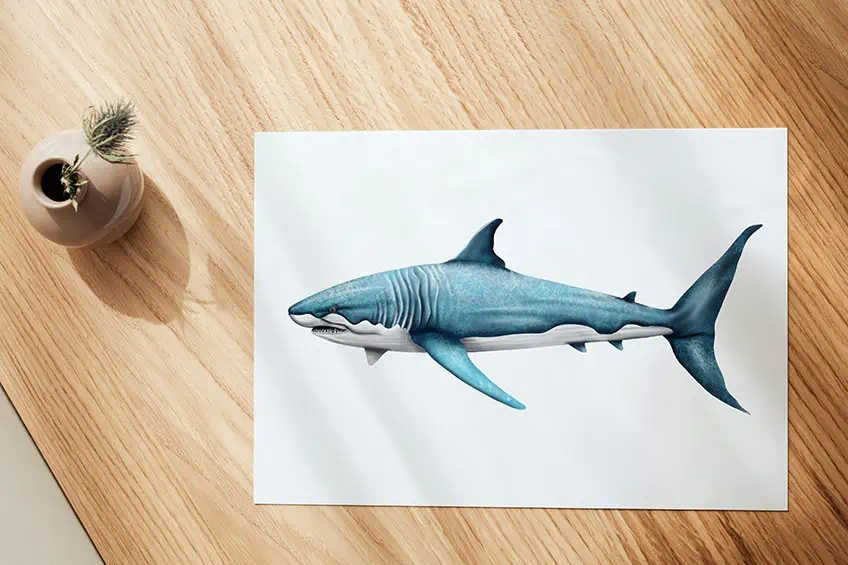
So grab your pencils and get ready for a fun and engaging journey that will sharpen your skills and ignite your creativity! The below collage shows you each step taken to achieve your final result of a realistic shark drawing.

Step 1: Draw the Main Body of Your Shark Drawing
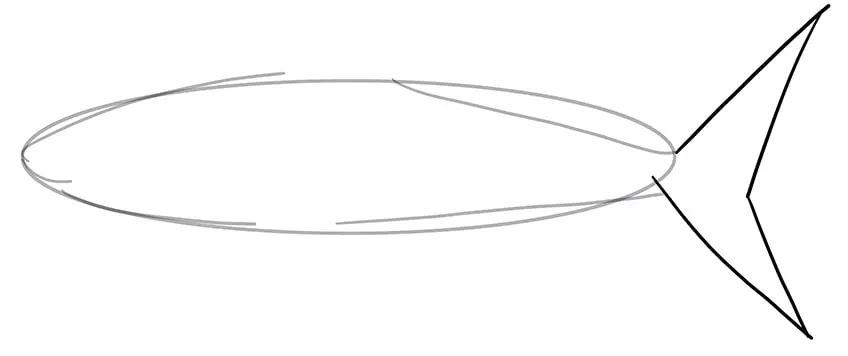
To begin your tutorial on how to draw a shark, start by drawing a wide oval shape to represent the main body of your shark drawing.

Step 2: Outline the Body
Using the previously drawn oval to guide you, outline a more realistic-looking main body by curving the nose into a cone-like shape that leads to the mouth area. The rear of the shark’s body should bend within the oval shape into a narrower end.

Step 3: Draw the Tail of Your Shark Sketch
Between the open space at the rear of the shark’s body, draw the sharp-ended tail also known as the caudal fin.
Step 4: Add the Fins
Begin by drawing the top dorsal fin, drawn between the open space at the top of the shark’s body. Continue by drawing the second large pectoral fin at the bottom of the body, and draw the second partially pectoral fin as a smaller triangle to the left end of the body.
Finally, complete the step by drawing the final smaller rear fins, one above and two below the tail.

Step 5: Draw the Facial Features of Your Easy Shark Drawing
Within the left end of the shark, continue the mouth line inwards and draw fine, sharp teeth all along the bottom jaw line. Continue the step by drawing a small circle within a larger circle to represent the eye. This should be located slightly above the mouthline. Once completed, you can erase any unnecessary construction lines.

Step 6: Add the Separation Lines
Draw a wavy freehand line leading from the nose of the shark to the end of the tail. This will be used as a two-tone color separation line once we begin the painting process.

Step 7: Outline the Fins
Use the construction lines drawn in steps three and four to aid you in outlining realistic-looking fins. These should be slightly more rounded and have fewer sharp edges.

Step 8: Add the First Color Coat
Select a fine, sharp brush and a shade of light teal paint, and evenly coat the entire shark.
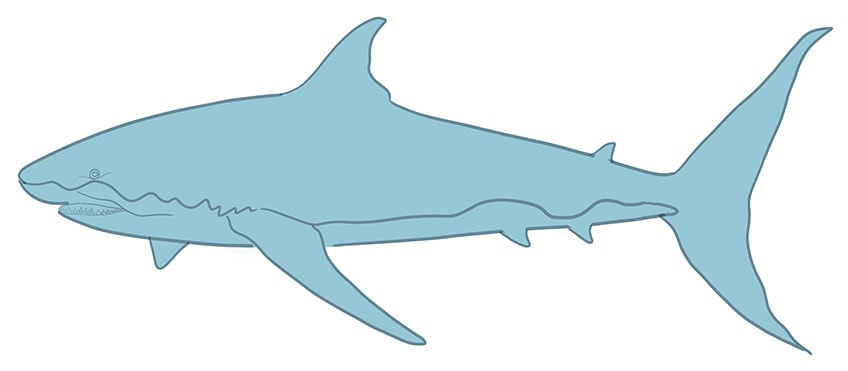
Step 9: Add the Second Coat of Color
Use the same brush as previously and switch to gray paint, and evenly coat the lower half of your shark drawing.

Step 10: Shade Your Shark Sketch
In this step, begin by selecting a small, soft brush and black paint, and softly add shading along the edges of the fins and tail including along the separation line. Switch to a blending brush to soften and spread this shading.
Note! The first color coat should still be somewhat visible.
Continue using a fine, sharp brush and black paint, and add fine streak lines drawn horizontally and vertically along the front half of the body.
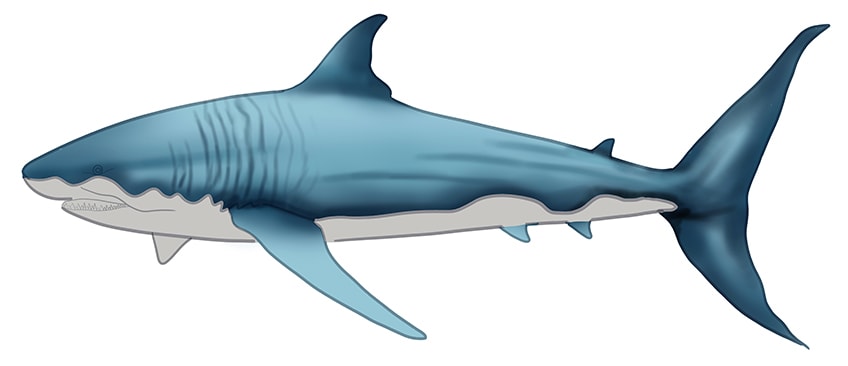
Step 11: Color Blend the Shark
Select a soft brush and turquoise paint, and add subtle brushstrokes within the fins and body of your easy shark drawing. Repeat using a blending brush to soften and spread the color coat.

Step 12: Paint the Ocean’s Reflection on Your Shark Drawing
On the skin of the shark, we will now add a realistic reflection of the water. Simply select a pattern brush or a sponge and white paint, and apply light dabs throughout the shark’s skin.
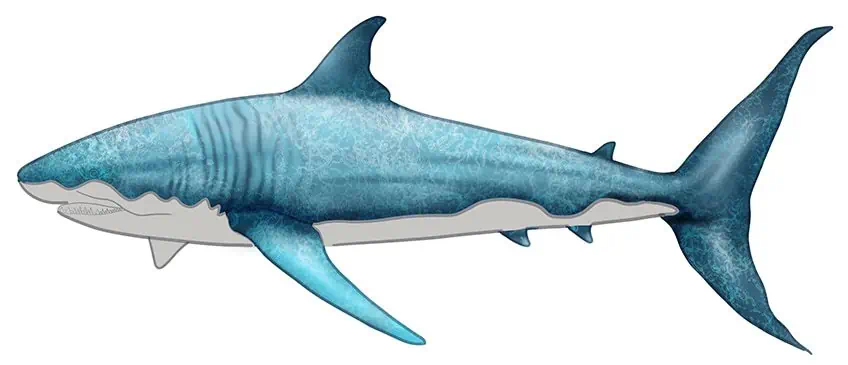
Step 13: Enhance the Highlights and Shading
With a soft brush and black paint, add shading along the shark’s body to enhance the structure. Continue onto the gills and separation line. Switch to a thin brush and white paint, and add highlights along the newly shaded areas.

Step 14: Highlight and Shade the Bottom Half
Begin to lighten the bottom half of your shark drawing, using a soft brush and white paint. Continue using a thin, sharp brush and black paint to shade the mouth and mouth line.
Complete the step using a small, soft brush and black paint, and add subtle shading between the fins.

Step 15: Color the Eye and Teeth of Your Shark Sketch
Use a thin brush and white paint to evenly color the teeth. Continue to fill the outer circle which represents the eye’s sclera. Repeat using black paint to coat the pupil of the eye. Switch to a soft brush and black paint, and add shading around the eye to create a groove-like area where the center of the eye would be.
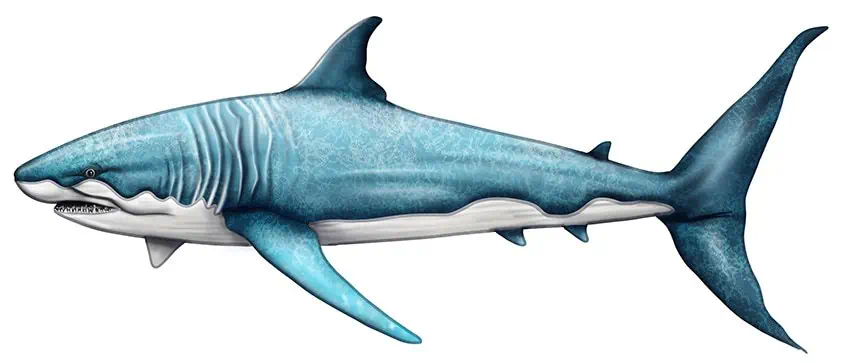
Step 16: Add the Pattern to Finalize Your Realistic Shark Drawing
You are one step closer to finalizing your realistic shark drawing! To finish your drawing, erase any still visible harsh outline. If this is not possible, select a fine brush with the corresponding colors, and trace the entire outline of your shark drawing.
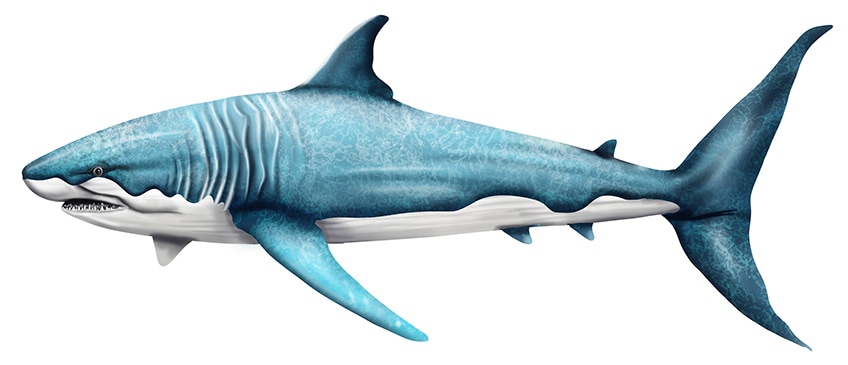
Well done on completing your easy shark drawing! You should be proud of your accomplishment, as you are growing your skills as an artist. By studying the anatomy and movement of these fascinating creatures, you’ve gained valuable drawing skills that can be applied to any subject matter. From shading and texture, to perspective and composition, you’ve honed your craft and expanded your artistic horizons. Whether you’re interested in drawing other sea creatures, animals, people, or landscapes, you now have the tools and confidence to tackle any challenge!
Frequently Asked Questions
What Are Some Techniques for Drawing the Texture of Shark Skin?
When drawing the texture of shark skin, there are several techniques to consider. Experimenting with different drawing materials such as pencils, charcoal, or pastels can achieve a realistic texture. A combination of shading techniques such as hatching, cross-hatching, stippling, or scumbling can create the appearance of rough, scaly skin. Paying attention to the direction of the skin’s ridges and lines, as well as the contrast between darker and lighter areas, can add depth to the drawing. Adding highlights and shadows can also create the illusion of dimensionality.
How Do I Create the Illusion of Depth and Movement in a Shark Drawing?
To create the illusion of depth and movement in a realistic shark drawing, several techniques can be used. Overlapping lines and shapes can be employed to create the illusion of depth and adjusting the size and positioning of objects can give a sense of distance. Using perspective techniques, such as vanishing points and converging lines, can also create a sense of depth and dimension. Additionally, curved lines can be used to convey the shark’s movement, such as the curve of its tail or the arch of its body as it swims. By incorporating these techniques, a shark drawing can be brought to life with a sense of depth and movement.

IzzyBll is a digital artist and content creator from Israel and currently residing in South Africa. Originally coming from videography, Izzy then turned to digital graphic art. He specialized in using digital drawing software such as Photoshop and Procreate. Drawing and photo editing has always been a sort of second nature for Izzy. In doing so, he can now look back on 5 years of experience in the industry, completing commissions for various well-known brands such as Audi.
Learn more about IzzyBll and about us.