Flower Drawing – Learn to Draw Exquisite Flowers
This post may contain affiliate links. We may earn a small commission from purchases made through them, at no additional cost to you.
Flowers are an essential aspect of many landscape artworks, and knowing how to draw them is a great asset to your drawing repertoire. Flowers are also a great drawing exercise to enhance your drawing skills because of how unique flower sketches can be. This is an opportunity to use simple flower drawings as a way to practice shading, line work, and various drawing techniques. Learning how to draw flowers can also profoundly impact the overall visual composition of artwork, and works as a great way to fill space. As we go through a few easy flowers to draw, we will find that this is a great skill to have for various artworks.
An Easy Guide to Drawing Flowers
There are many flowers to draw, and in this tutorial, we will learn how to draw some unique flowers in a few simple steps. We will also learn how to turn a simple flower sketch into a refined flower drawing by the use of a few drawing techniques. Flowers can seem quite difficult at first glance but are quite easy to draw. Due to their abstract nature, we can be quite playful with detailing and how we add unique features to enhance our flower drawings. As we go through this tutorial on how to draw flowers, we will learn how simple it is to make realistic and beautiful flower drawings in a few simple steps.
Necessary Materials
This tutorial on how to draw flowers is done with a digital drawing device, however, all drawing processes are transferable to traditional drawing mediums. If you do not have a digital device, you will want to make sure that you have a pencil, pen, eraser, and sharpener for the drawing process. Materials can be found through the links below.
- Ballpoint pen
- Micron pens
- Pencil
- Eraser
- Sharpener
- Paper
Step-by-Step Guide on How To Draw Flowers
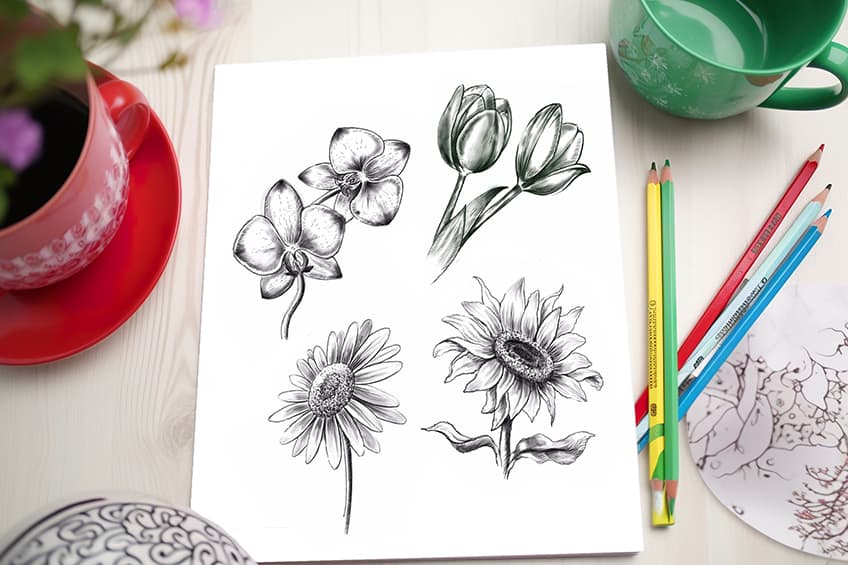
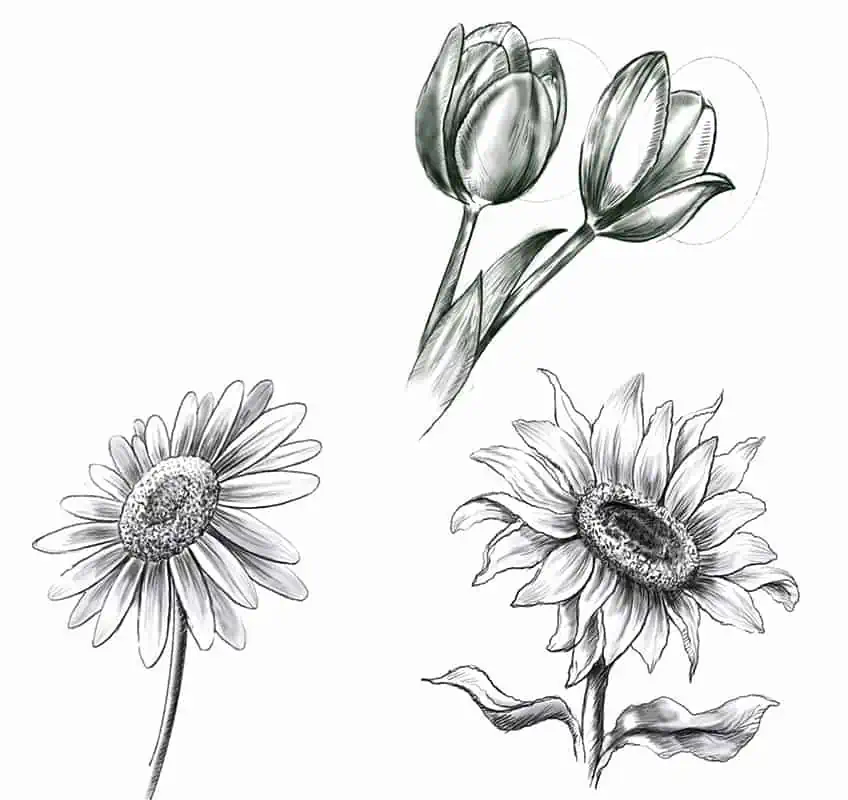
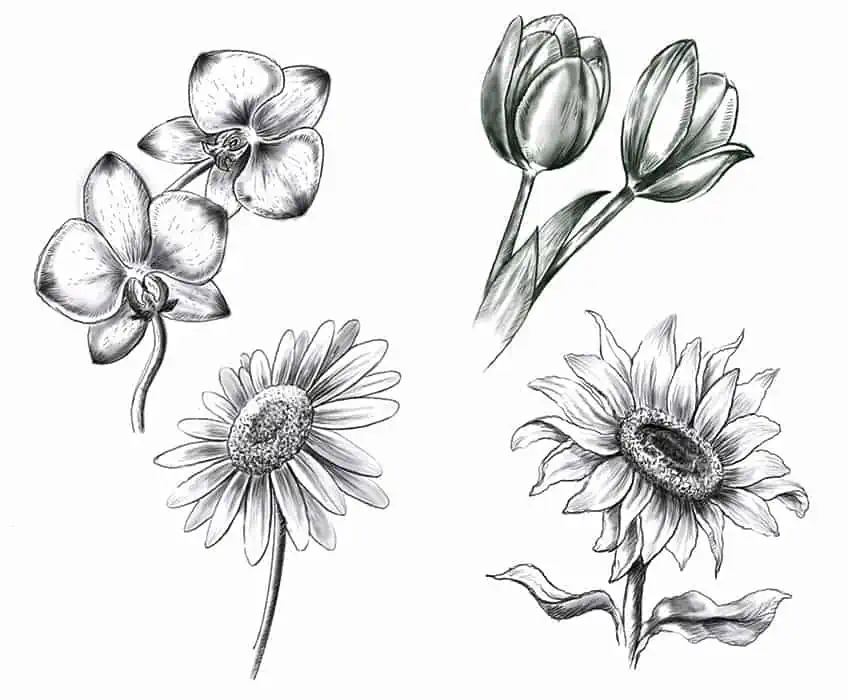
In this tutorial on how to draw flowers, we will explore a variation of a few common flowers. We will look at how we can refine a simple sketch of each flower, turning them into beautiful realistic flower drawings. We will be drawing a tulip, a sunflower, a daisy, and an orchid. Each flower drawing has its unique visual composition, however, the process of drawing each flower follows the same sequence of steps.
Now that we know what to expect, let’s find a space where we can focus and engage with this tutorial on how to draw flowers.
How To Draw Tulips
The first flower we will learn how to draw is the tulip flower. This simple-looking flower has appeared over the past few centuries within Victorian-styled artworks due to its elegant aesthetic. Learning how to draw a tulip is a great flower to have within your collection of flower drawings.
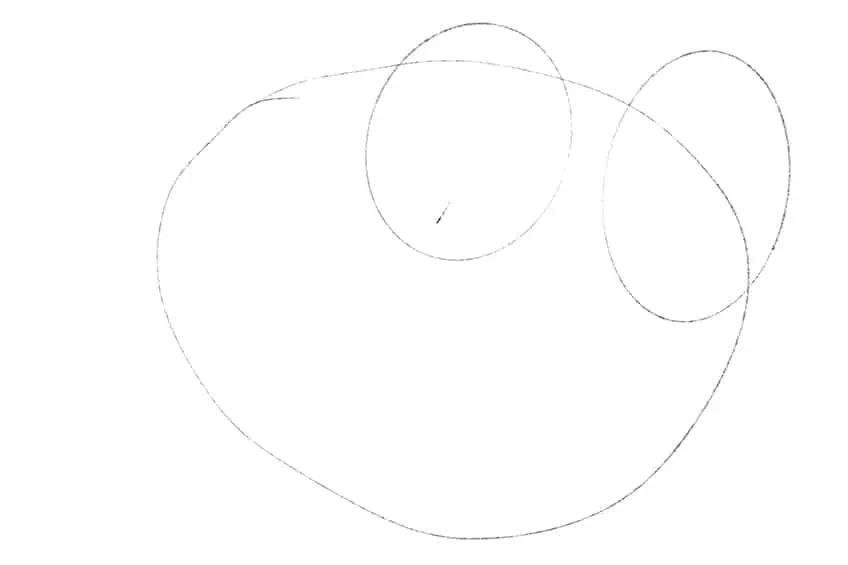
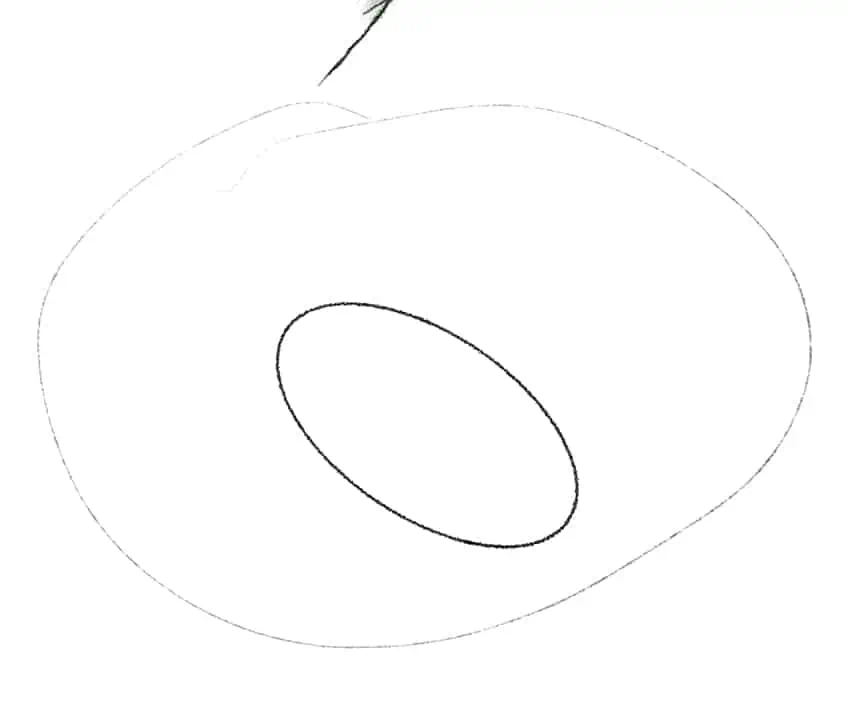
Step 1: Shaping the Tulip
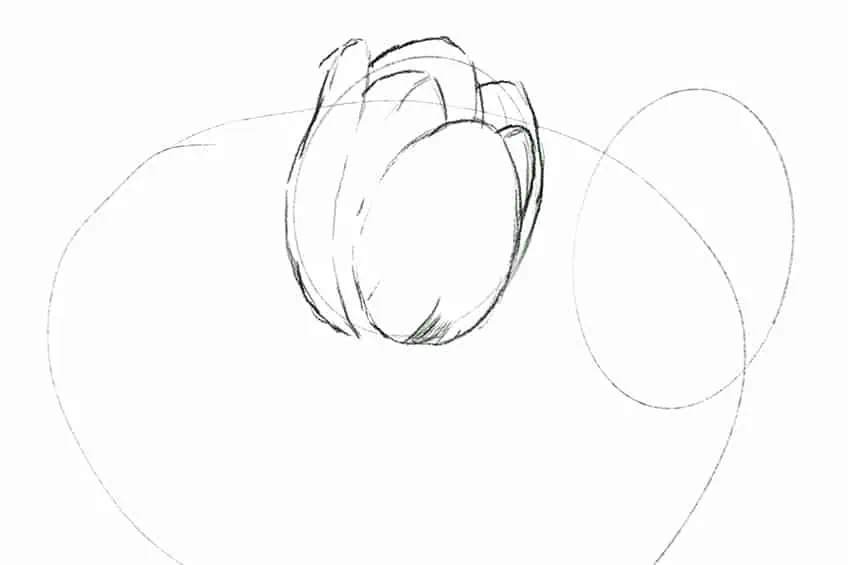
We want to start by forming the tulip flower in its most basic shapes. We do this by using a light pencil to draw two circles. These two circles will establish the area in which the petals will be drawn
Step 2: Lightly Sketching the Petals
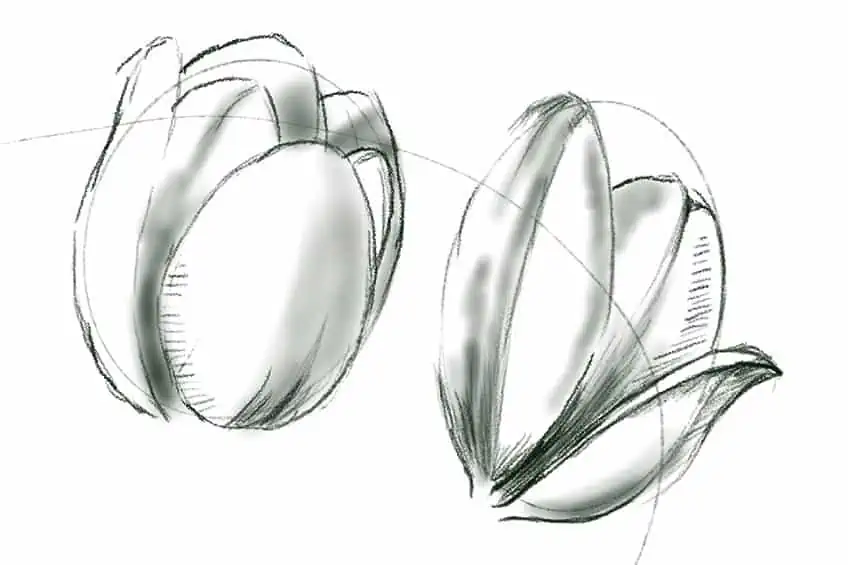
We then can proceed to lightly sketch the petals of the tulip flower. The tulip flower’s petals are quite slim and curve around each other in a ball-like shape. We draw these petals as circular shapes that get more narrow as they curve around the back end of the flower.
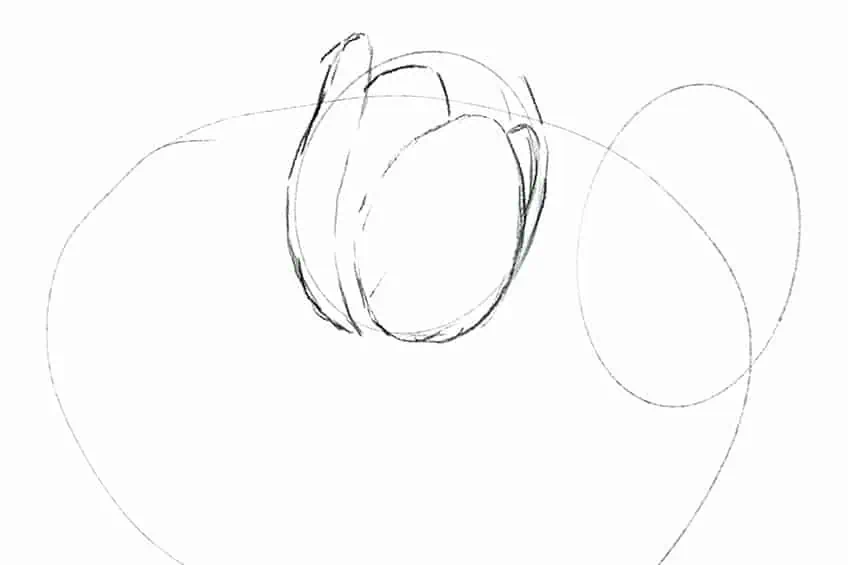
We also want to imagine these petals as being stacked on one another, which means the petals will overlap another. This will create moments where petals are in the foreground and petals are in the background.
To achieve this visual quality accurately, we want to make sure that we imagine these petals curving circularly. Tulips are very similar to roses in this way, as the petals curve around a center point.
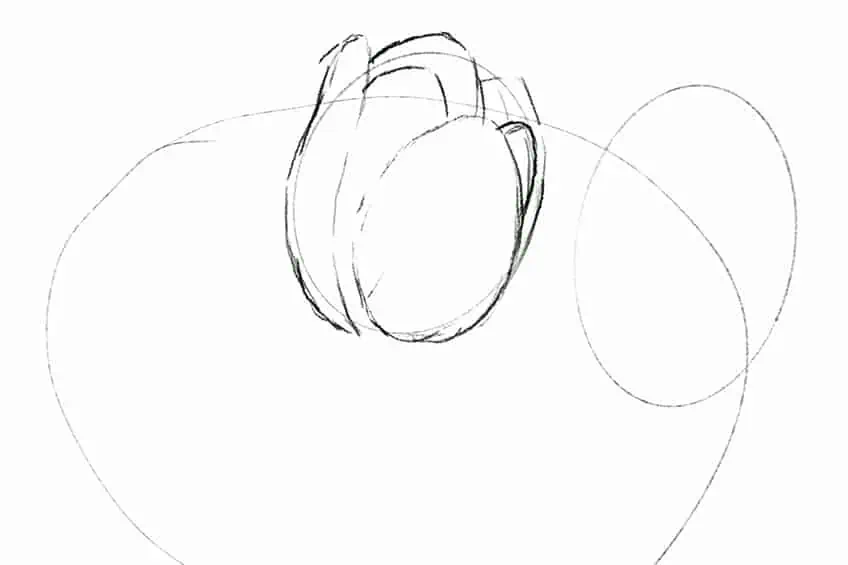
We can start doing this with the other tulip flower in the second circle that we have drawn. Again, tulips have very thin petals that are quite circular, in some instances they can also peel backward slightly away from the center.
We can proceed with the same drawing process, where we draw in the set of petals within the circle. We want to make sure, however, that these petals do curve around a center point that would technically be hidden by the petals in the foreground.
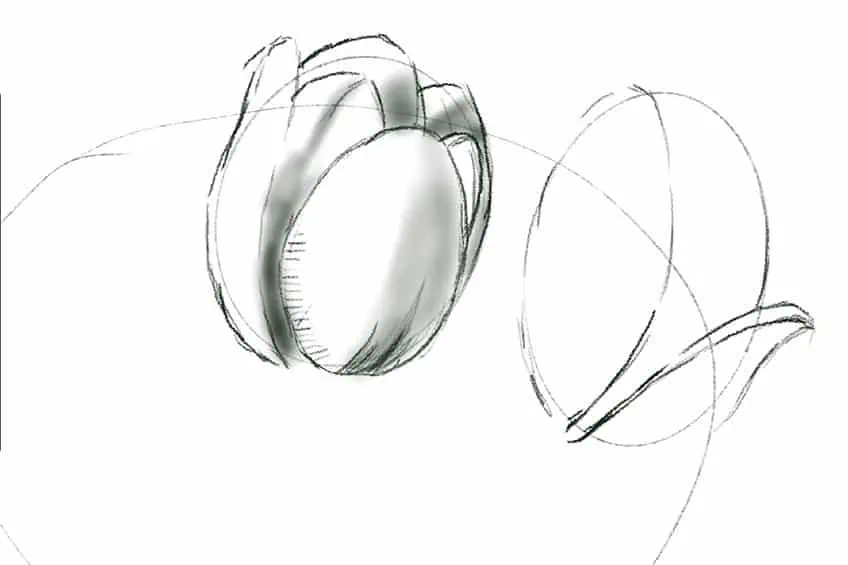
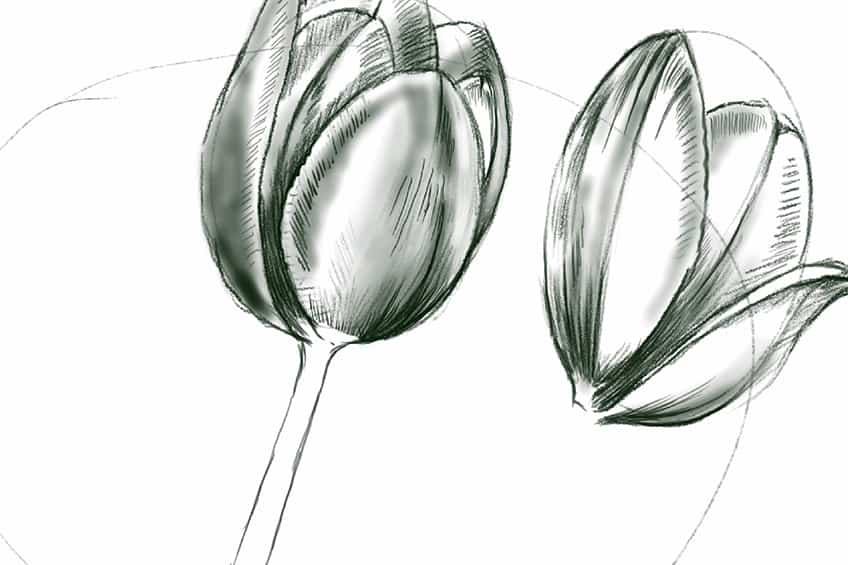
Step 3: Adding Shading and Details to the Tulip Flowers
Once we have worked on the general outline of the tulip flower’s petals, we can start to work on some shading and details. This is where we build up layers of shading to define the smooth texture within the petals.
A good suggestion would be to work in some light smooth shading that covers a single side of each petal. The smooth shading will give the petal that smooth quality, which we then can go over along the edges with linework.
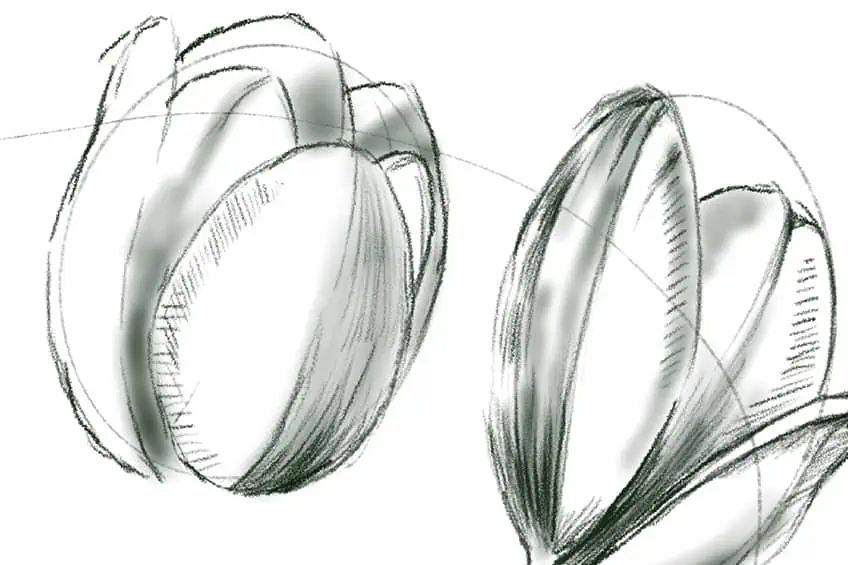
We want to establish a layer of smooth shading and then work in linework to establish some flower-like textures along the surface of the petals. We can do this by drawing lines that flow vertically from the tips to the base of each petal.
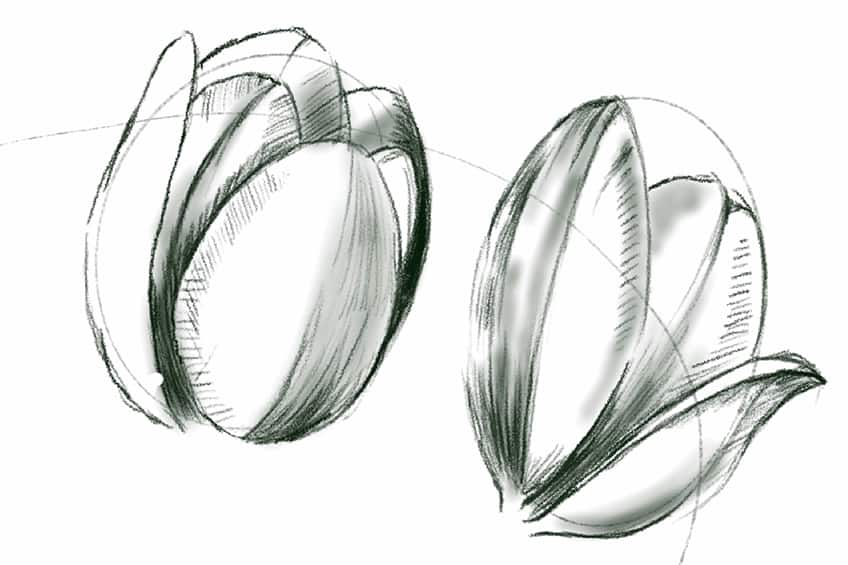
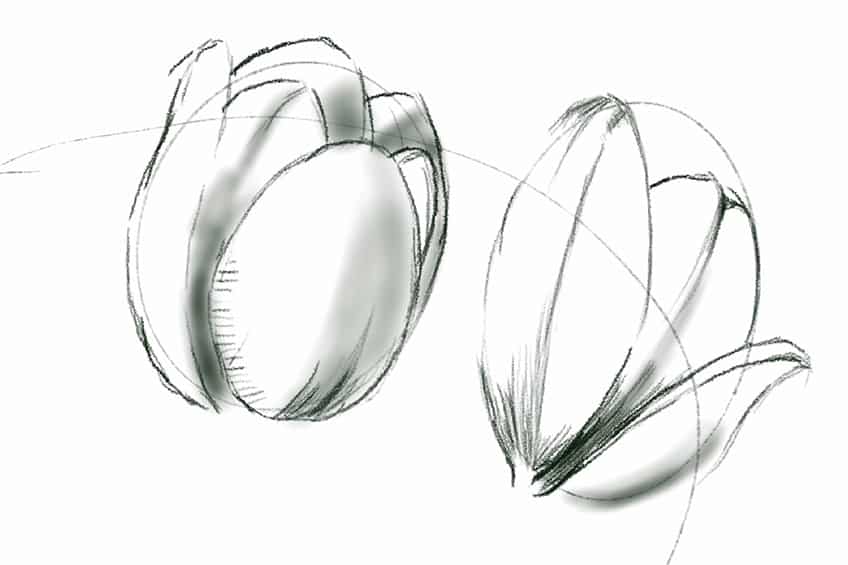
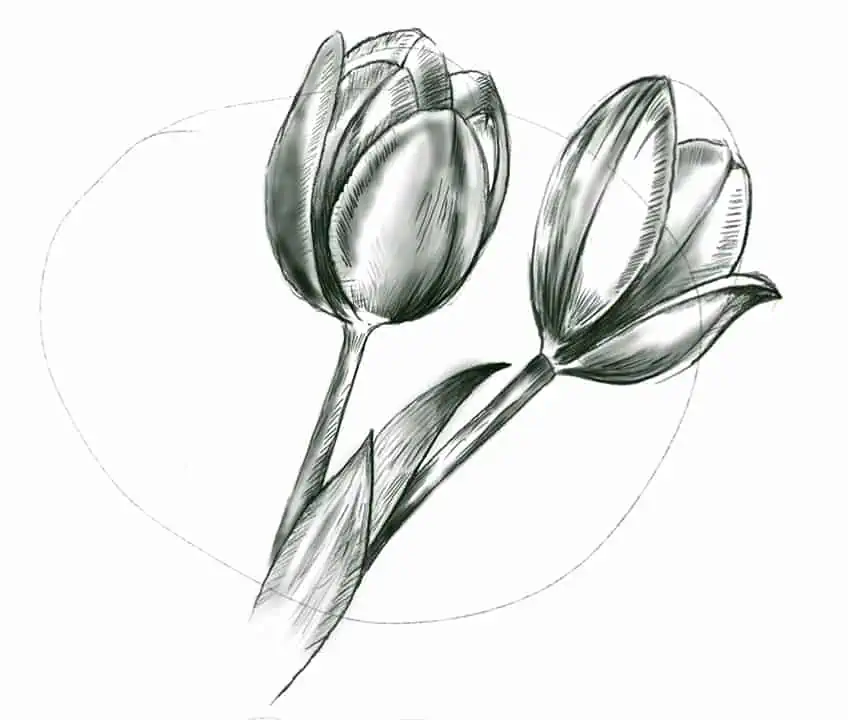
Step 4: Adding Darker Shading
We can also darken the shading in certain areas to emphasize shadowing in the petals. This is particularly helpful for defining depth, which we can do by slightly darkening the petals that fall in the background or areas that are in the center of the tulip drawing.
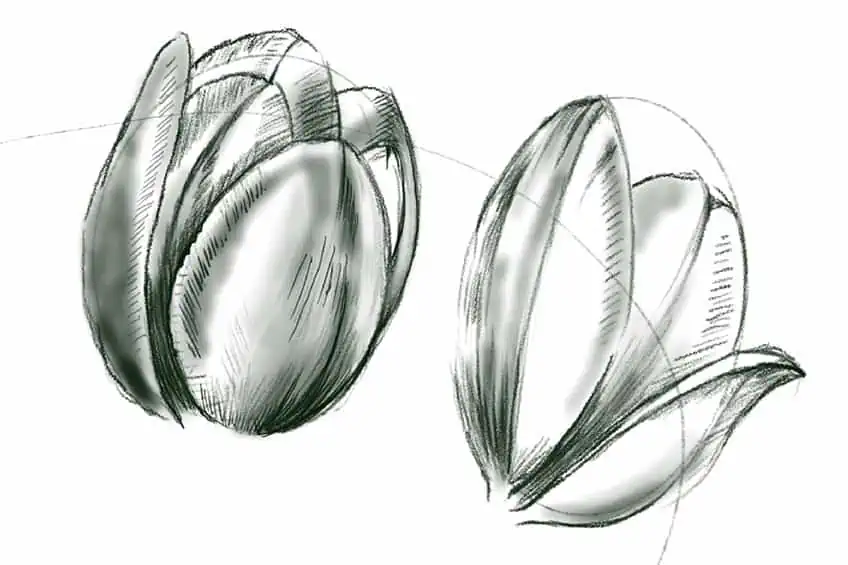
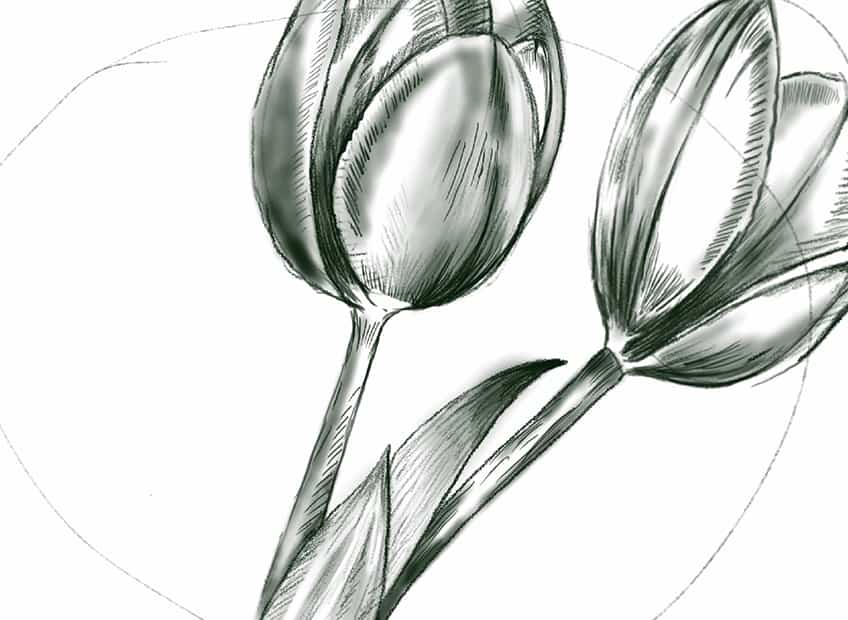
Step 5: Adding Contextualizing Features
Once we have completed the details and shadows within the petals of the flower, we can move on to drawing the stem of each flower. This is where we contextualize the tulip flower a little more, we can do so by drawing its thin them from the base of each flower.
As we draw the stems we can keep them quite thin, we can also add thick long leaves along the stem of each tulip flower. Adding the stems and leaves can be drawn in the same process as the petals, where they work in some light shading with line work.
Once we have added in the stem and leaves of the tulips, try to take your time with shading and linework to refine the shape of these features. Once you have done so you will have completed your tulip drawing.
How To Draw a Sunflower
Throughout the various easy flowers to draw, it would be incomplete without the addition of the sunflower. Sunflowers are essential when learning how to draw a flower, as these flowers have a beautiful and iconic aesthetic.
Let us take a look at how we can draw this flower in a few simple steps.
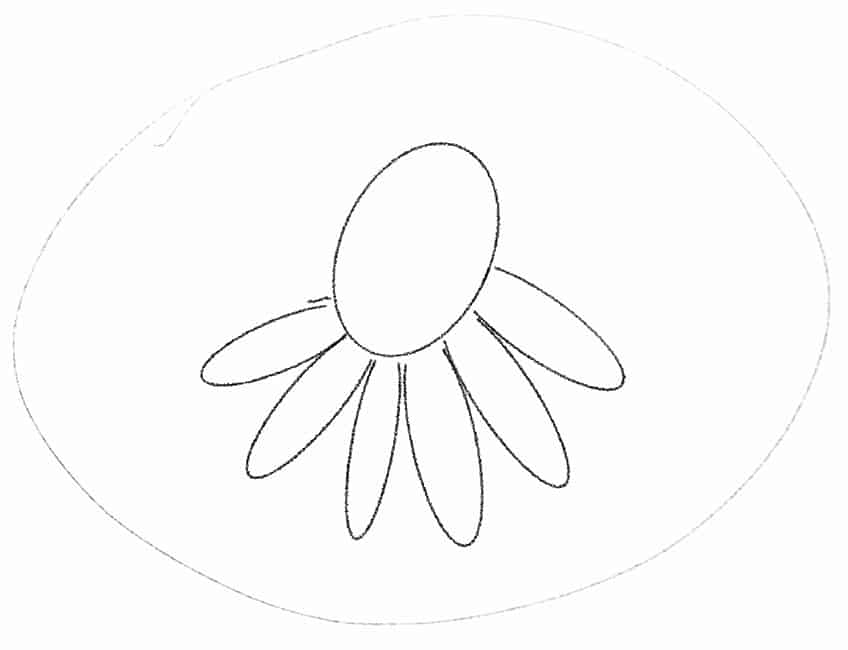
Step 1: Shaping the Sunflower
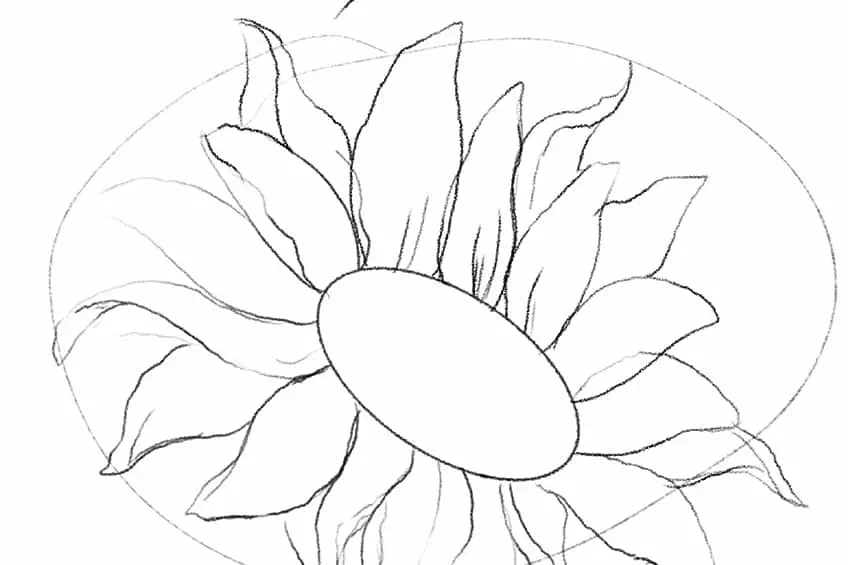
We start by drawing the basic shape of what will become the disc florets. We can do this at an angle to give the sunflower a more interesting perspective. Using your pencil, start by drawing an oval at an angle.
Step 2: Lightly Sketching the Petals
Once we have done that, we want to lightly sketch in the petals of the flower. We want to do this lightly to establish the depth and perspective of how the petals will flow around the center disc floret of the flower.

The shape of sunflower petals is quite disheveled and often looks like spearheads, which means they narrow to a point. They are also light and flimsy as they age, which means we can draw some that are slightly twisting or flopping over to suggest a more realistic quality.
Step 3: Lightly Erasing the Sunflower
Once we have sketched out the general form of the flower we want to lightly erase the flower. We do this to establish light ghost lines in the flower sketch which is going to help us refine the sketch by going over the ghost lines.
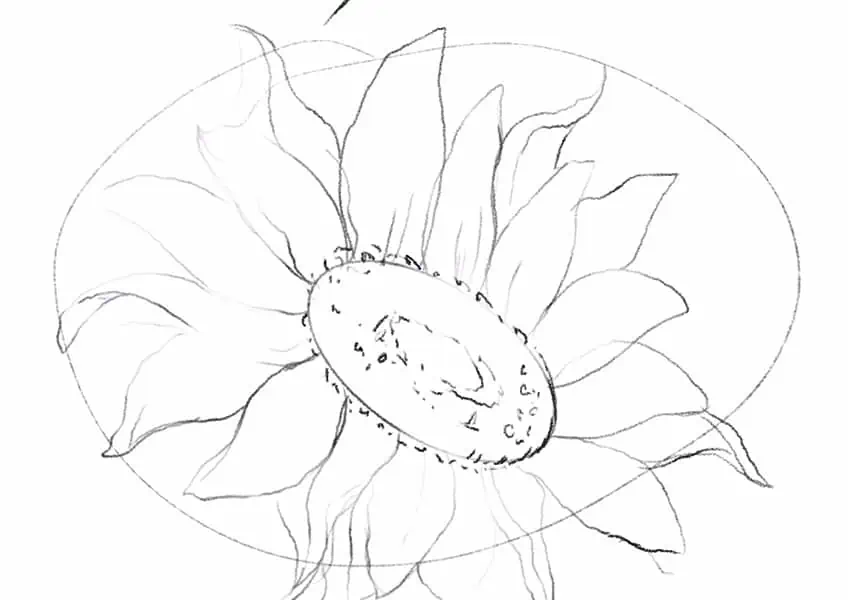
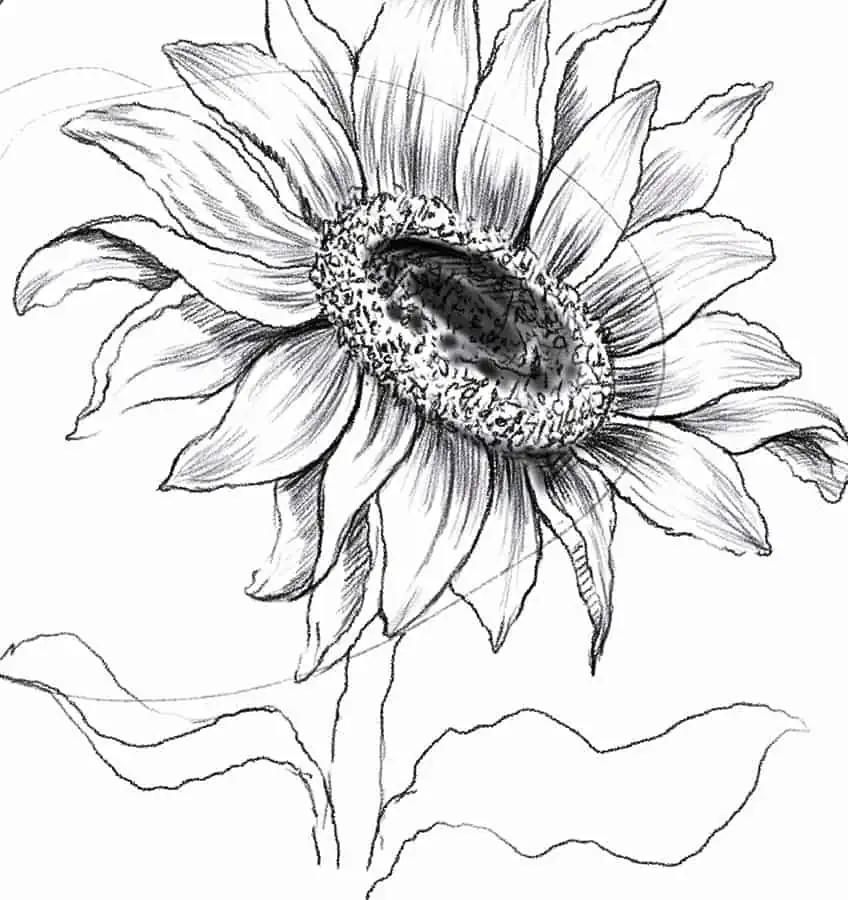
Step 4: Refining the Sunflower Sketch
Using the ghost lines, we now want to spend time going over the petals making sure their shapes are consistent. At this point, we also want to start adding some shading into the petals and disc floret as we go.
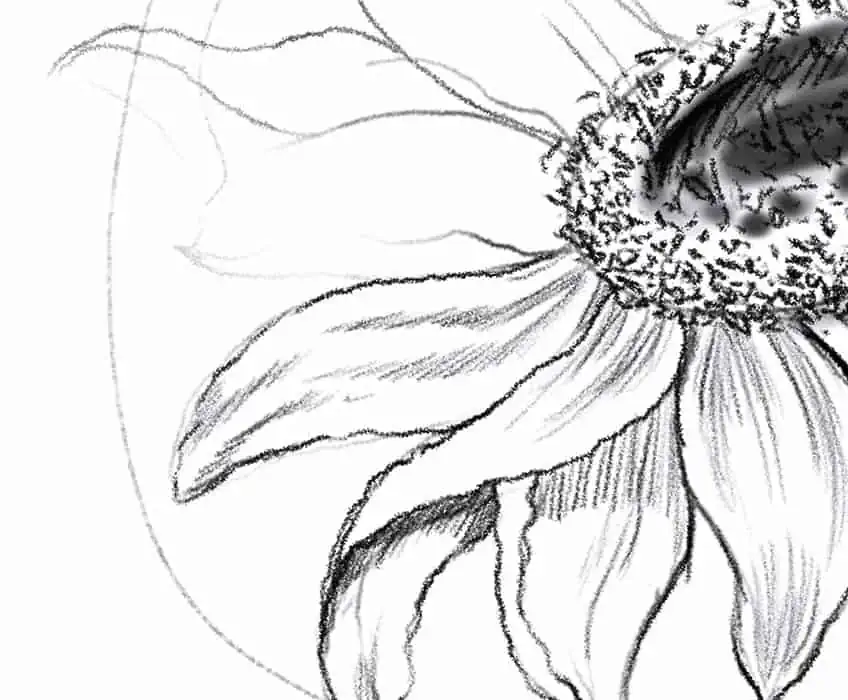
As we add details to the disc florets, we can do so with a stippling action to suggest a granular detailing in the flower. We want to also make sure that the center part of the disc floret is dark, which is unique to the sunflower aesthetic.

with the petals, we want to work in a line work that flows along the form of each petal, starting at the base near the disc floret. by adding in these lines, we give the petals a more realistic texture.
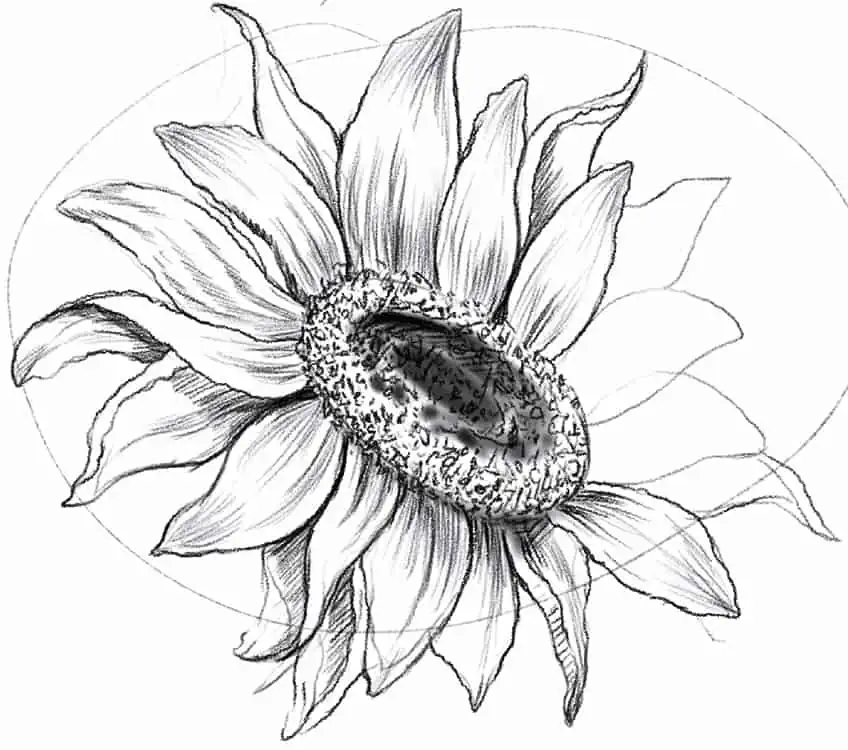
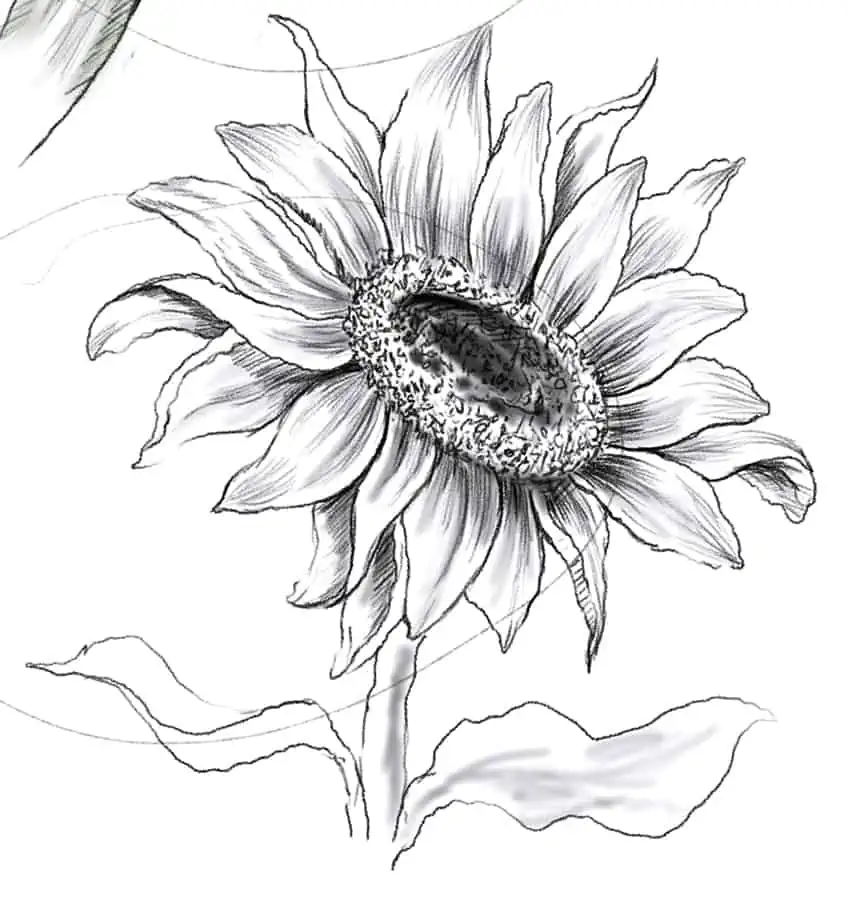
Step 5: Adding in a Stem and Leaves
Once we have finished the disc florets and the petals, we can start to draw the stem and leaves of the flower. The stem of the sunflower is quite thick, and the leaves are quite long and floppy, which means they will have slight twisting in their form.
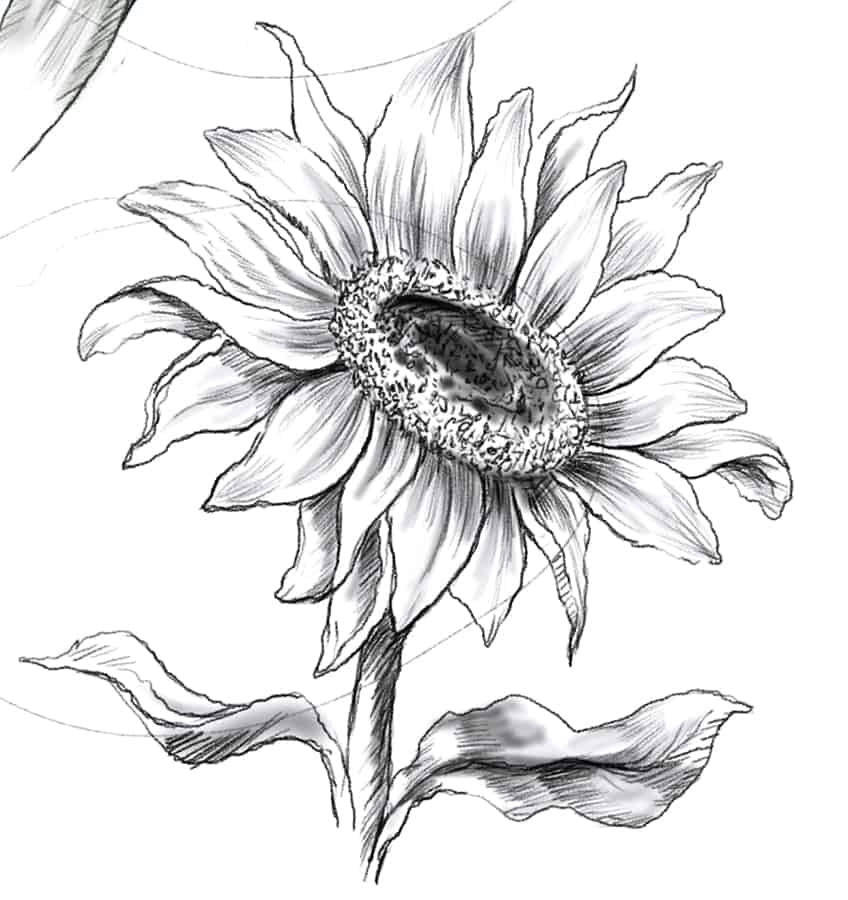
with the stem and leaves, we want to first add a layer of light shading. By doing so we give a base layer of shading to work over with darker shading and detailing. You want to make sure you go over the stem, flower, and leaves one last time.
We want to try to keep all of our shadings and detailing on a singular side of the flower to keep consistency within the light source and how the shadows are represented in the flower. take your time with the stem and flower until completed, and there you have it, how to draw a sunflower.
How To Draw a Daisy
Another classic flower that is essential to know is the daisy. The daisy is a common flower and its simplicity makes it a very beautiful organic structure. The daisy is very simple to draw as well due to its simple structure.
However, this flower is beautiful in its simplicity and is a great addition to your flower drawing repertoire.
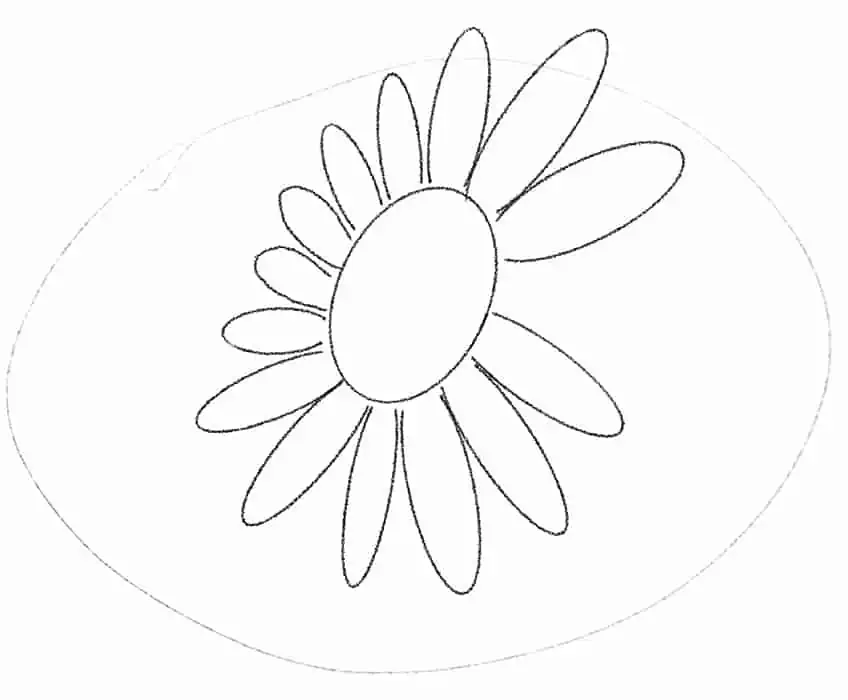
Step 1: Shaping the Daisy
The daisy is very simple to draw, we can start by drawing an oval shape at a diagonal angle to establish the disc florets. from there we can start to sketch in the petals along the disc floret, we do this by drawing elongated shapes similar to that of a surfboard shape.
As we draw in the petals we want to make sure that they get slightly shorter as they curve around the furthest part of the disc floret. This is going to define the depth of field within the flower drawing.
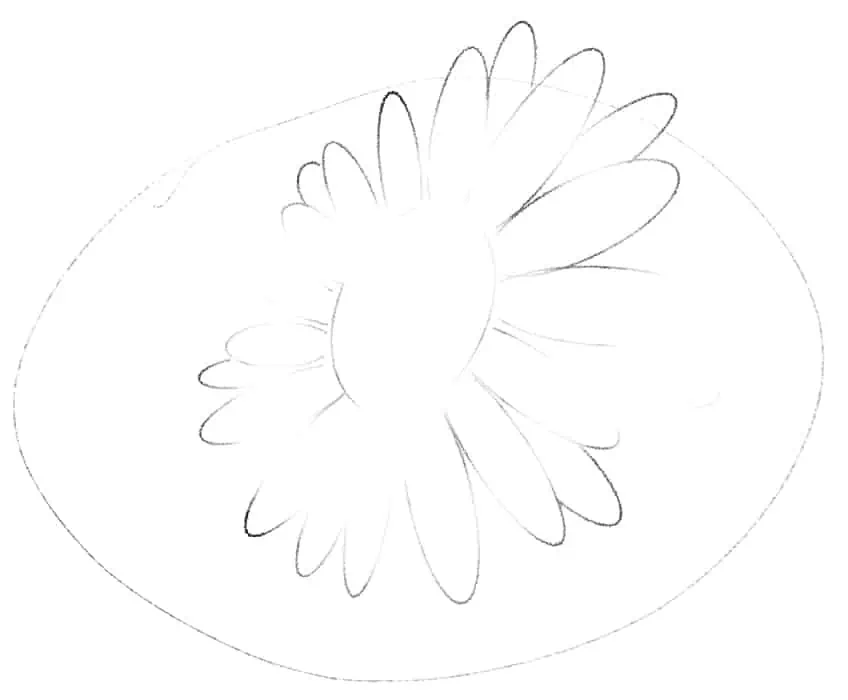
Step 2: Lightly Erasing the Daisy Flower
Once we have lightly sketched the basic shape of the flower we want to then proceed by erasing the flower. This is going to establish some ghost lines, which we will work on to refine the flower sketch.
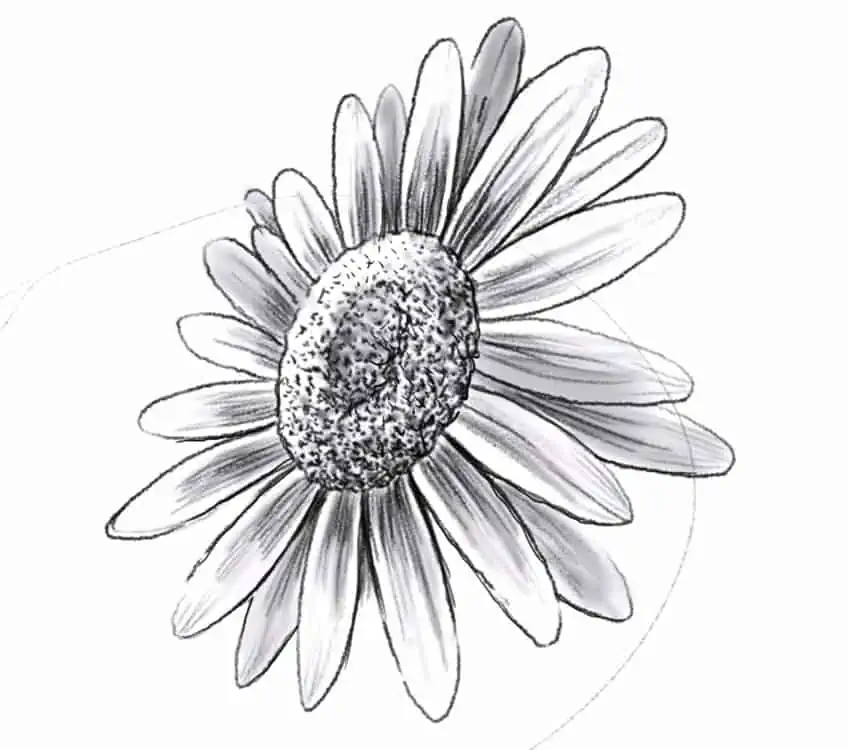
Step 3: Refining the Daisy Drawing
We now want to work over the ghost lines, slowly refining the daily drawing. Starting with the disc florets, we want to add some jagged linework to the outline of the disc florets.
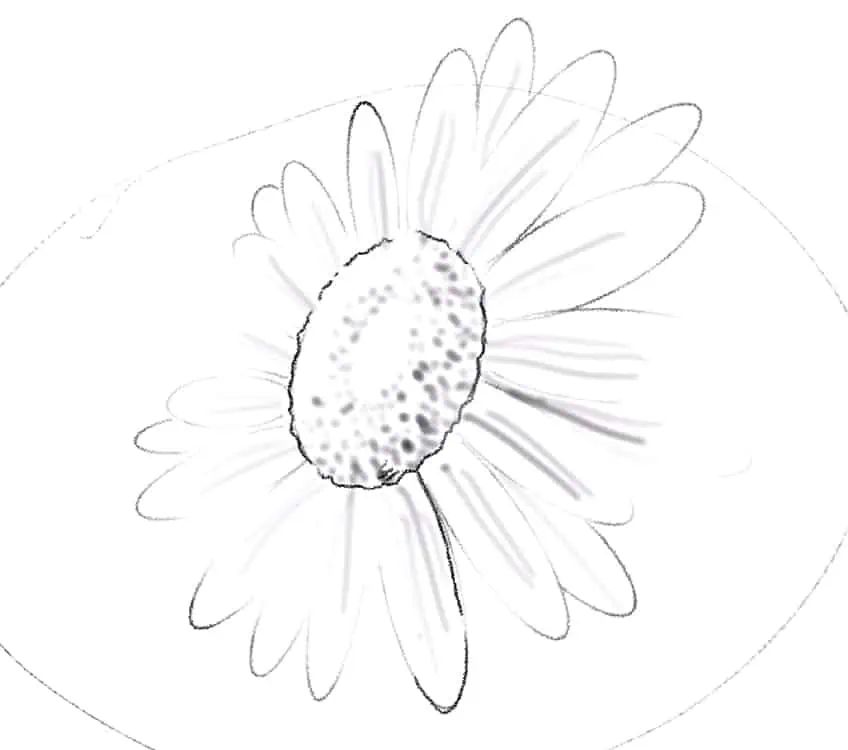
As we draw the disc floret, we want to make sure we add in some stippling marks, this is going to give the disc florets that granular texture that is unique to flowers. We can also start going over the petals and adding in some shading linework.
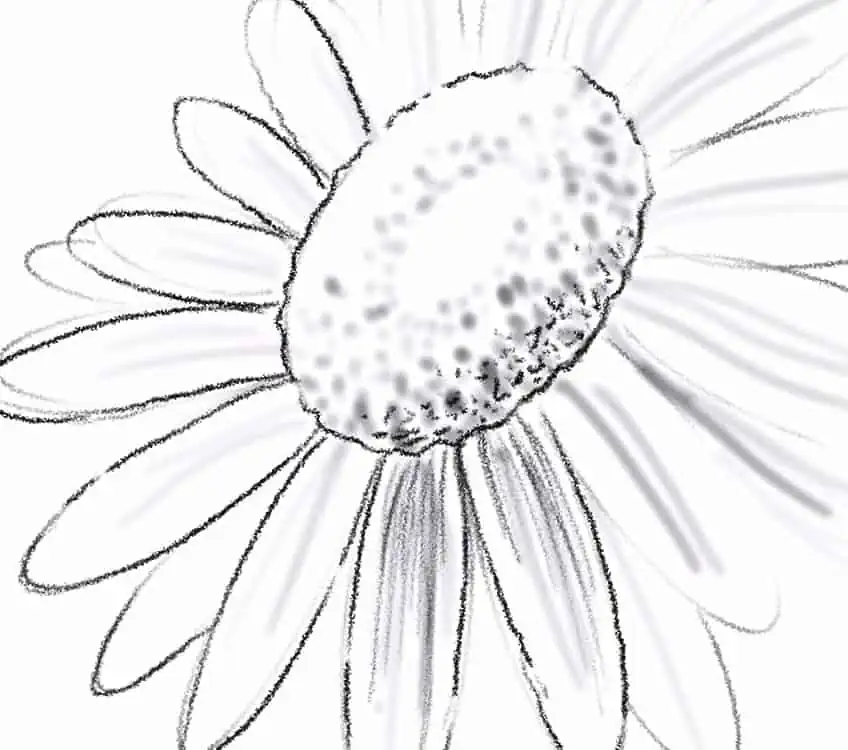
Take your time adding in some shading and stippling marks to the disc floret of the flower, this is going to give it a realistic texture. We want to do the same with the petals, where we add linework to establish texture in the petals.
Step 4: Contextualizing the Daisy
Once we have completed the head of the flower we want to proceed with drawing in the stem of the flower. The stem of the daisy is really simple as it’s quite thin.
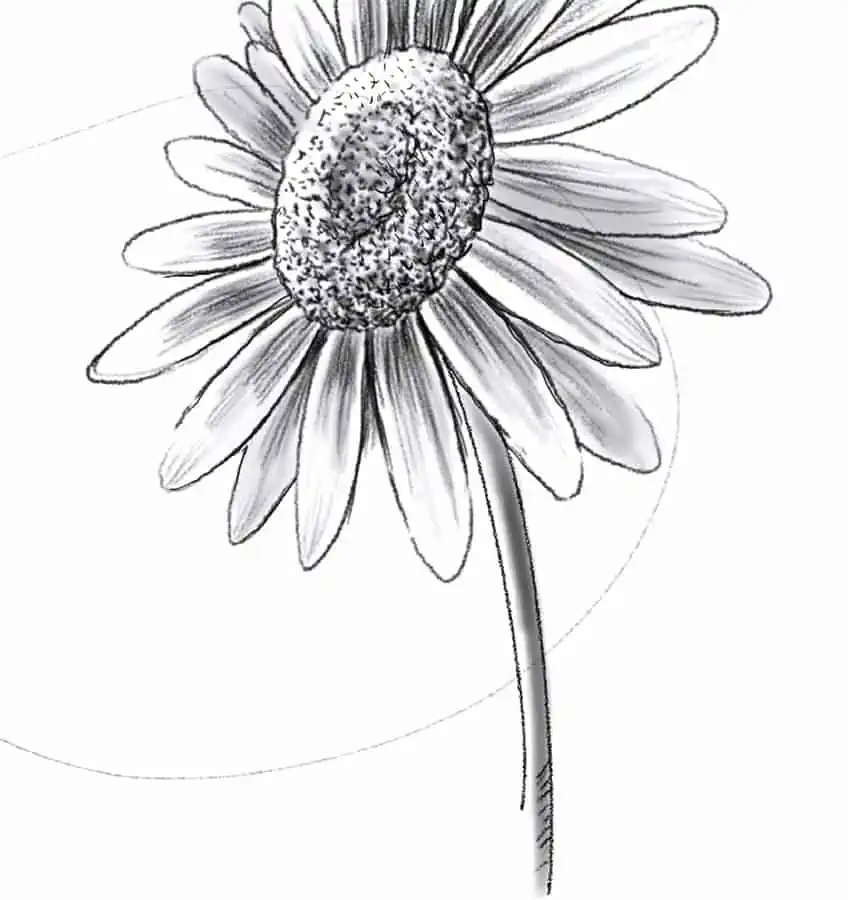
You can add some shading and linework to a single side of the stem to suggest dimension within the stem’s structure.

make sure you go over your details and shading in the flower one last time to make sure that you have worked out all the features as best you can. and there you have it, how to draw a daisy in a few simple steps.
How To Draw an Orchid
Orchids are perhaps the most alien-looking flower, their distinct aesthetic is easily identifiable and distinguishes them from most other flowers. however complicated they seem, they are quite simple to draw.
Let’s take a look at the few simple steps needed to draw an orchid.
Step 1: Understanding the Orchid Shape
Firstly, let’s understand the shape of the orchid to make the drawing process much easier. The shape of the orchid could be described as a butterfly, as it has an inner petal section extending outward like wings from a butterfly. These petals are connected to a center point called the column.
From that point, a couple of petals form around the flower creating a star-like shape in the flower’s structure.
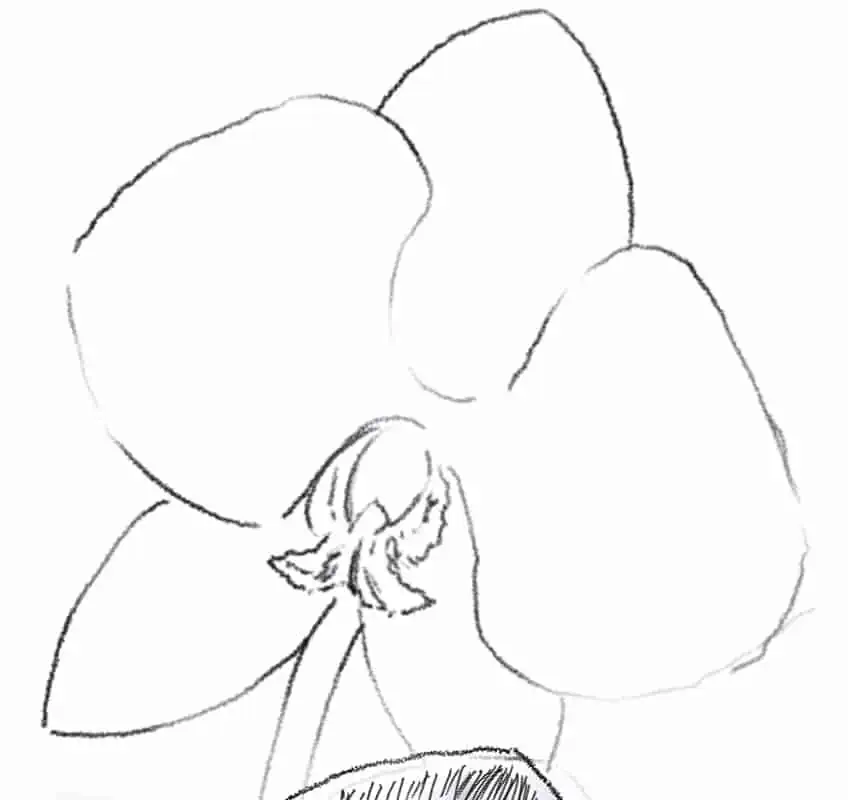
Step 2: Shaping the Orchid
We want to begin our orchid sketch by drawing the inner petals connected to the column in the center of the flower. We then can draw petals that stick out from behind the inner petals, one from the top and two from the bottom of the flower.
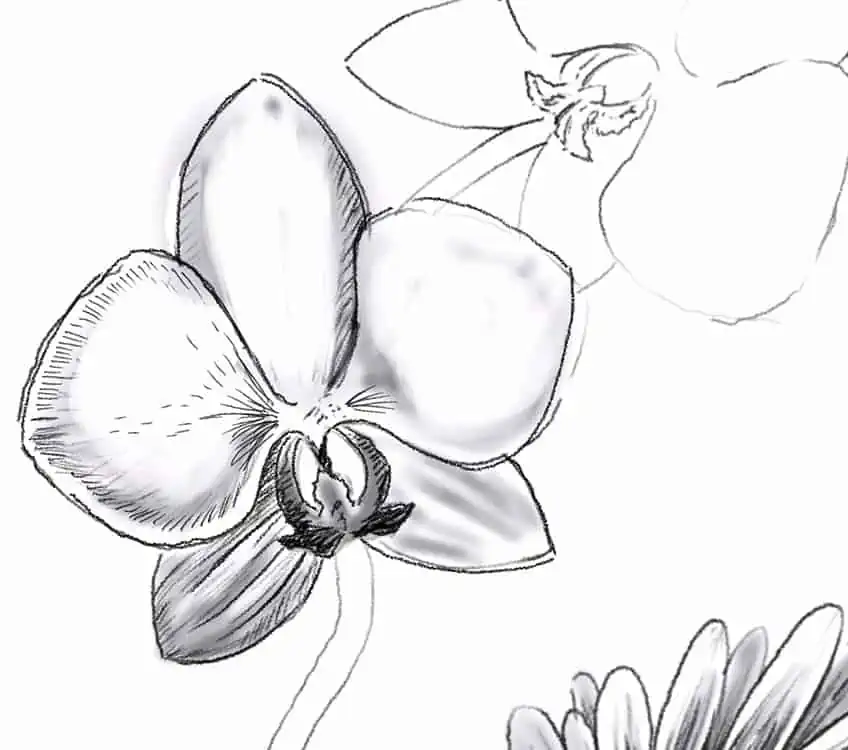
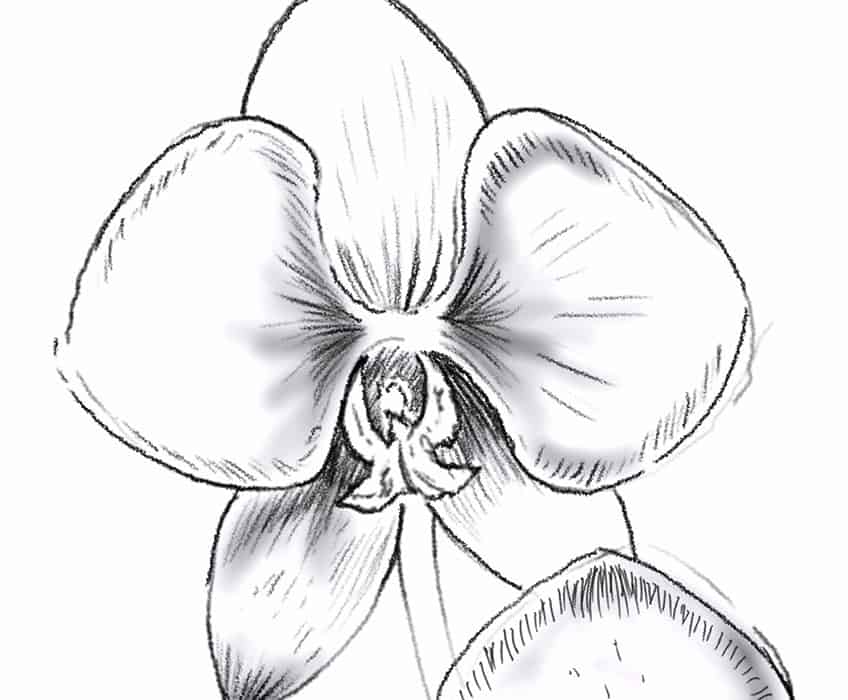
Step 3: Adding Details to the Flower
Once we have the basic shape of the orchid, we then can start adding some linework near the base of each petal. The petals are quite light in the center with darkened edges.
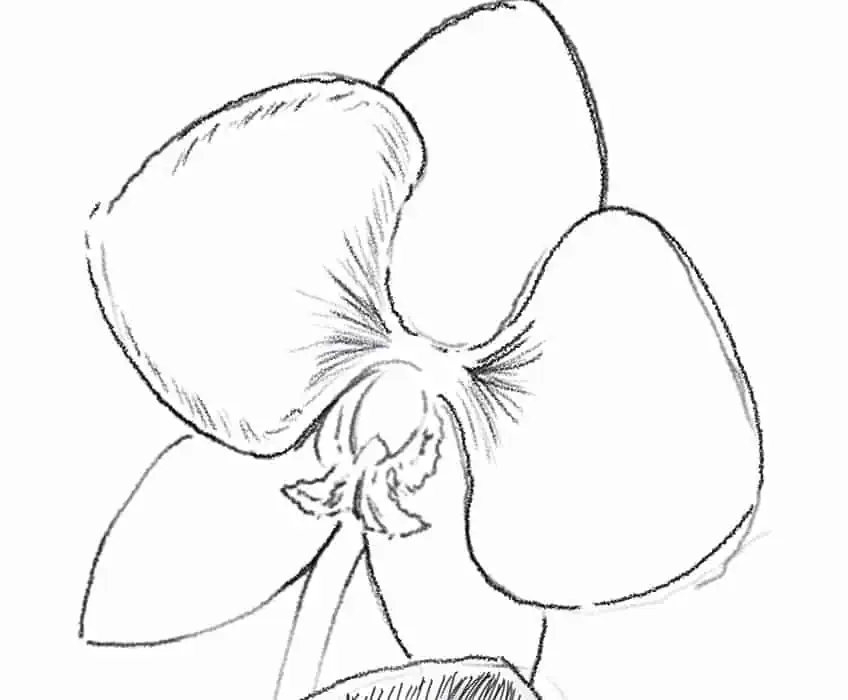
try to build up layers of smooth shading, which you then can work linework over to give more texture to the flower drawing. try to keep your shading along the edges of each petal in the flower drawing.
A good suggestion is to add smooth shading along the edges of each petal, and then work some light line work over the smooth shading. You can also add some small linework details to the surface area of each petal, this is going to give a bit more texture along the surface of the petals.
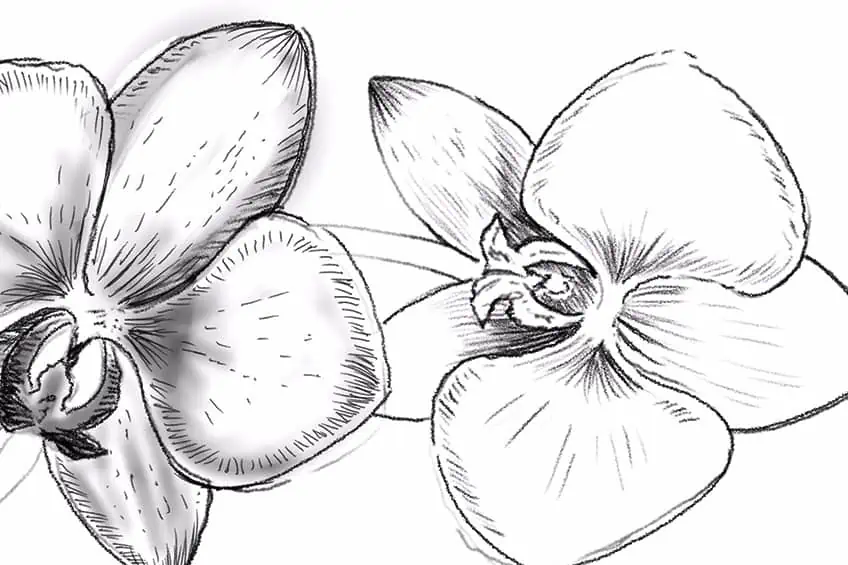
Step 4: Replicating the Orchids
Once you have the formula for creating one orchid, you then can replicate the drawing process to create a set of orchids. This is essential for creating a realistic orchid flower, as the orchid flower often has a set of flower heads on a single stem.

From there you can take your time to create a set of orchid flower heads on a single stem. Also, spend some time adding shading and linework to the different features of the orchid flower. And there you have it, how to draw an orchid in a few simple steps.
Now you know how to draw a few interesting and beautiful flowers in a few simple steps. Each of these flowers is simple to draw if you take your time and work with the steps.
Tips and Tricks To Remember
- Work out the basic shapes first. It’s always good to work out the basic shapes of flowers, and then start working with details and line work.
- Take your time with adding in details. Work with layering details to give your drawings a more enriching quality of texture.
- Try to keep a consistent light source. Keeping your shadows predominantly to a single side in the features of the flower drawing gives it a more realistic three-dimensional quality.
- Try experimenting with how you can use your flower drawing process. Once you have learned the process of drawing flowers, try to apply it to different drawings of flowers.
Learning how to draw flowers can be so useful because they can be used in so many ways. This is why it’s good to know a variety of different drawings of flowers, which provides you with more options for enriching your artwork. These simple flower drawings can be a great way to enhance various artworks. Remember to come back to this flower drawing tutorial when you want to add realistic and beautiful drawings of flowers to your work.
Frequently Asked Questions
How Do You Shade in Flowers?
Shading flowers is quite easy, as it’s all about creating layers to represent different textures within different flowers. In the case of most flower drawings, working with smooth shading as a base layer of shading, and then working linework on top of that, will give the flower much more dimension and texture. In the case of petals, most of them have long fibrous grains, and we will want to replicate this quality with line work. Line work is a great way to define long fibrous details in the petals, which gives the flower a more realistic aesthetic overall.
What Are the Basic Steps of Drawing Flowers?
You first want to work out the basic structure of the flower. This is where you develop a light sketch of the flower and draw it in its most basic shape. From there, you will work with an eraser and pencil to slowly refine the shape. This is where we start to make the flower slightly more identifiable by shaping the petals, stem, leaves, and other features of the flower. From there, you will do one last light erase of the drawing and proceed to add more refined details to the flower drawing. This is where we can work on shading and line work, and take our time to make the flower drawing as realistic as possible.

Matthew Matthysen is a multidisciplinary artist. He completed his fine art degree, majoring in History of Art and Contemporary Drawing Practice at the University of Witwatersrand, South Africa. Before joining acrylgiessen In 2020, Matthew worked part-time as an art teacher at Reddford Blue Hills High school. Matthew creates drawing and painting tutorials for acrylgiessen and captures them not only photographically and in written form. He also records the creation of his works in his own creative studio as in video format, from which later with a voiceover and a video editor also drawing tutorials for the Youtube channel of acrylgiessen are created.
Learn more about Matthew Matthysen and about acrylgiessen.