Wings Drawing – Create a Graceful and Angelic Wings Sketch
This post may contain affiliate links. We may earn a small commission from purchases made through them, at no additional cost to you.
The ability to draw wings is a good tool all artists should hold within their artistic repertoire. Wings are a very versatile subject that can be used in an abundance of different ways, be it in mystical, fantasy, or natural-related genres of art. Not only will the skill of learning how to draw wings diversify the subject matter you can draw, but it will also improve some basic artistic fundamentals, such as your ability to understand shape, and how this shape interacts with light, therefore improving your ability to shade organic shapes. Whatever your reason for learning how to draw wings, this is an essential skill that can be applied in a variety of ways to your artistic practice.
An Easy Guide to Drawing Wings
Wings drawing initially may seem like a challenging feature to draw, due to its seemingly complex shape. However, with a few simple tips and tricks, you can turn simple wings sketches into refined, well-shaded, and fully-developed drawings. This step-by-step tutorial on drawing wings should make the query of “how to draw wings” easy to understand, and easy to implement into your artistic practice.
Necessary Materials
This tutorial is conducted using a digital drawing device. That being said, all drawing techniques used can be applied to traditional drawing tools. Feel free to follow along using either a digital device or some basic drawing tools. If you are using traditional tools, you will need a pencil, some pens, a sharpener, and an eraser. Links to all these materials can be found below.
Once you have all your materials in order, find somewhere comfortable, and let’s get started.
- Ballpoint pen
- Micron pens
- Pencil
- Eraser
- Sharpener
- Paper
Step-by-Step Guide on How to Draw Wings
In this tutorial on how to draw wings, we will be learning how to draw angelic wings. We will start with a basic wings sketch, where we work out the fundamental shapes and forms of the wings. From there, we will move on to adding in some light sketching of the feathers, where we start to refine the shapes into an identifiable drawing of wings. Then we will spend some time refining the drawing with some shading and line work.
In this tutorial on how to draw wings, we will slowly develop our simple wings sketch into realistic wings drawing.
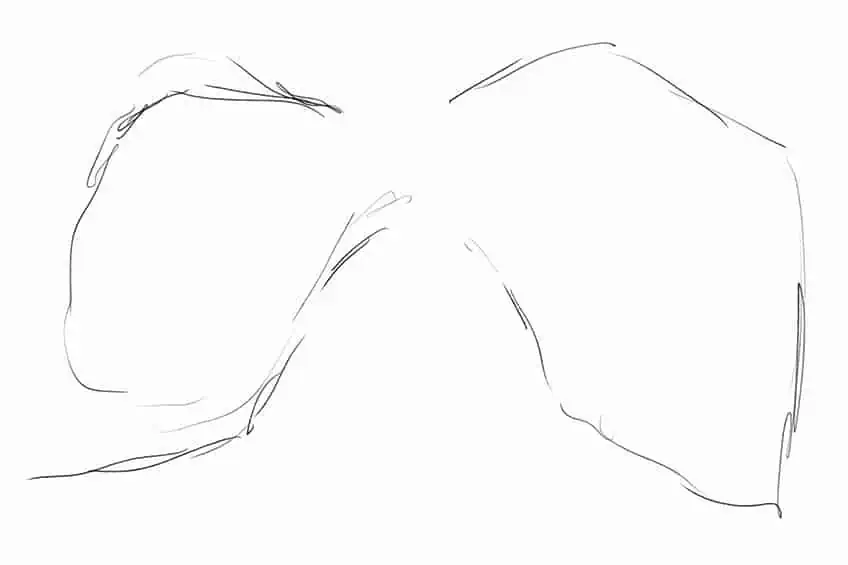
Step 1: Drawing the Basic Outline of the Wings
We want to start by drawing the basic shape and outline of the wings in their triangular shape. We want to make sure that there is symmetry within our wings drawing by keeping the shape of the wings mirrored opposite of one another.
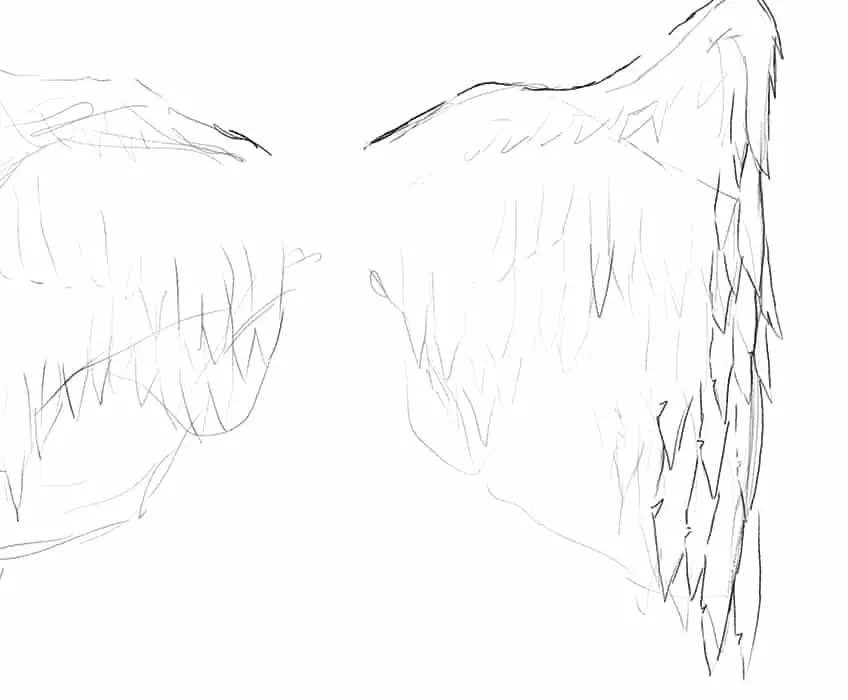
Step 2: Lightly Sketching Details into the Wings
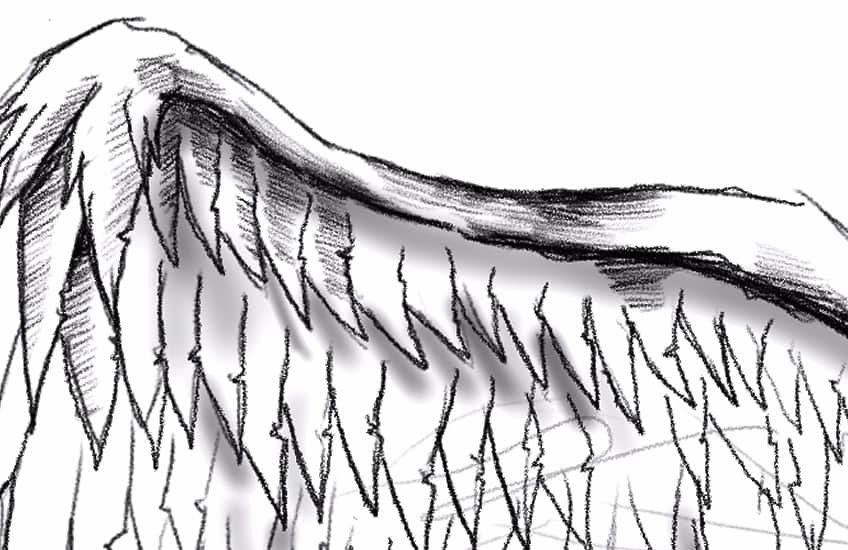
This is where we can lightly erase the basic shape and begin to work on some refined sketching, starting to form the main features of the wings. We want to start with the bone-like structure that defines the shape of the wings. This structure is quite rigid and often geometric in shape.
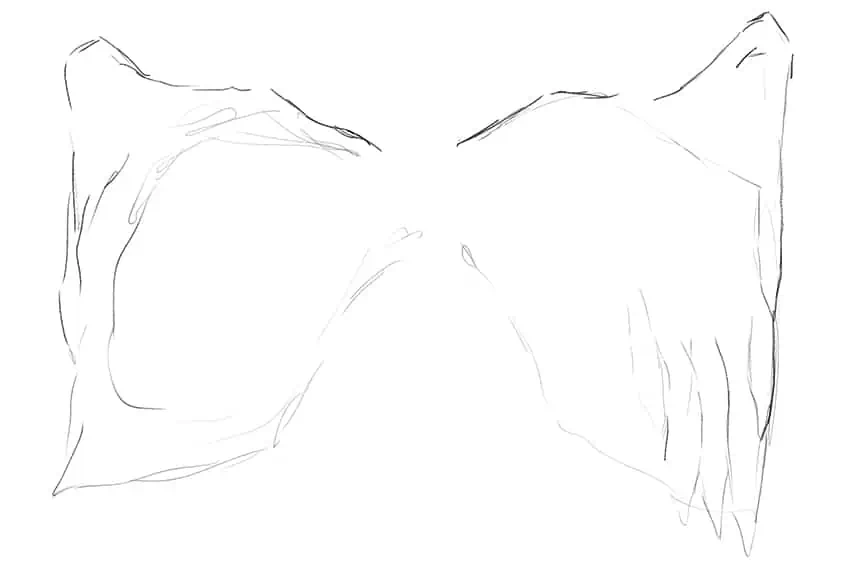
We can also use our pencils to add in some light sketching of the feathers, making sure that we work in long feathers along the outer edges of the wings. As we draw in the feathers we want to keep in mind that the wings have an elongated area near their bottom edges, which gets shorter in length as the wings connect to a structure or body.
This means that we want to make sure we are conscious of the feather lengths as we draw them in. The feathers are a spearhead shape that is quite long near the outer edges of the wings and shorter near the middle and inner area of the wings.

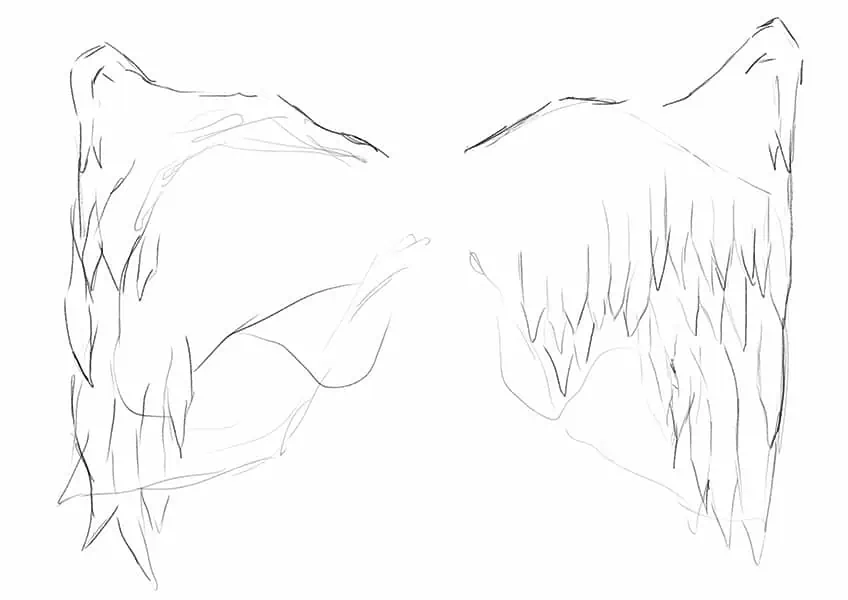
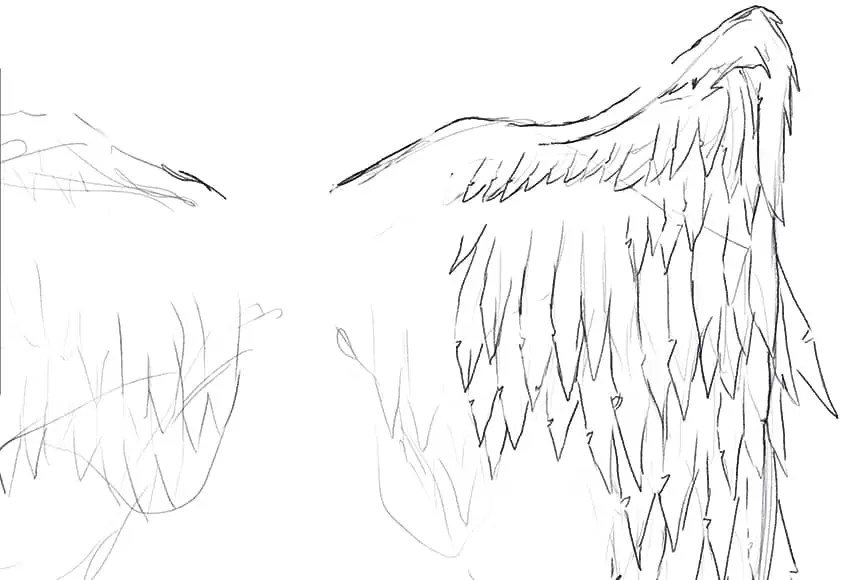
Step 3: Refining the Sketch of the Wings
Once we have established a basic shape and outline of the wings drawing we want to make sure that we give the sketch a light erasing. Once we have done so, we will now start to refine the details, starting with the feathers.
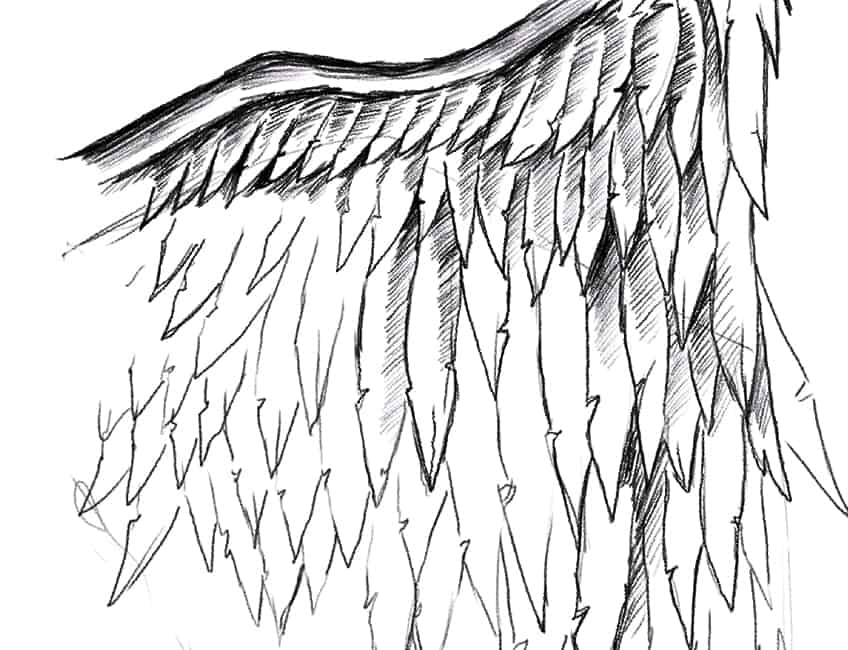
We want to give the feathers a slightly pointed spearhead shape.
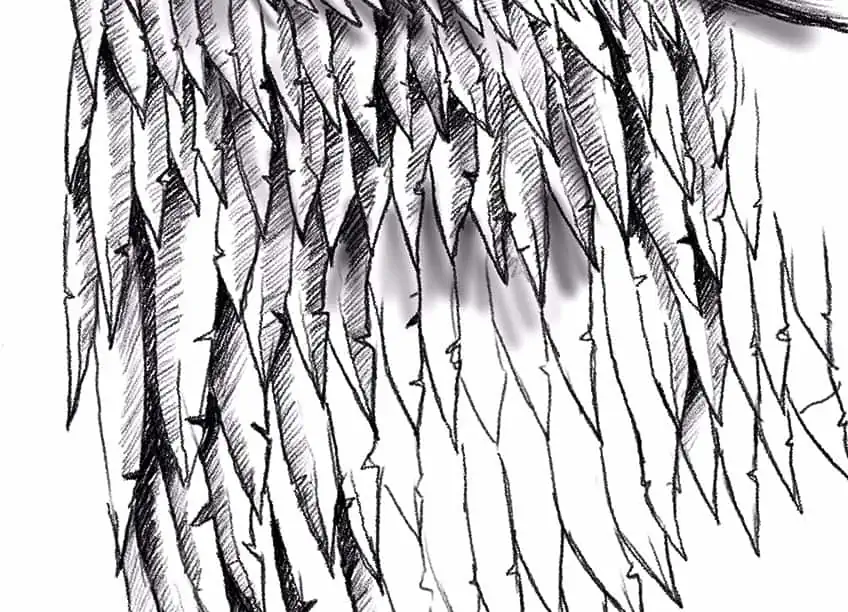
As we draw in the wings we want to draw them in rows, making sure that they overlap one another. We can do this by drawing the feathers from top to bottom in each wing. We want to create a layering effect, which is what will make the feathers seem more realistic.
As we draw in the feathers and create a stacking effect, we want to make sure that each upper section of the feathers seems to be on top of the feathers below. If we continue with this process from bottom to top, we should have feathers that seem layered on top of one another.

We will continue this process for both wings, slowly taking our time to stack feathers. It is also important that as we stack the feathers for each wing, we make sure that they get smaller near the upper bone structure.
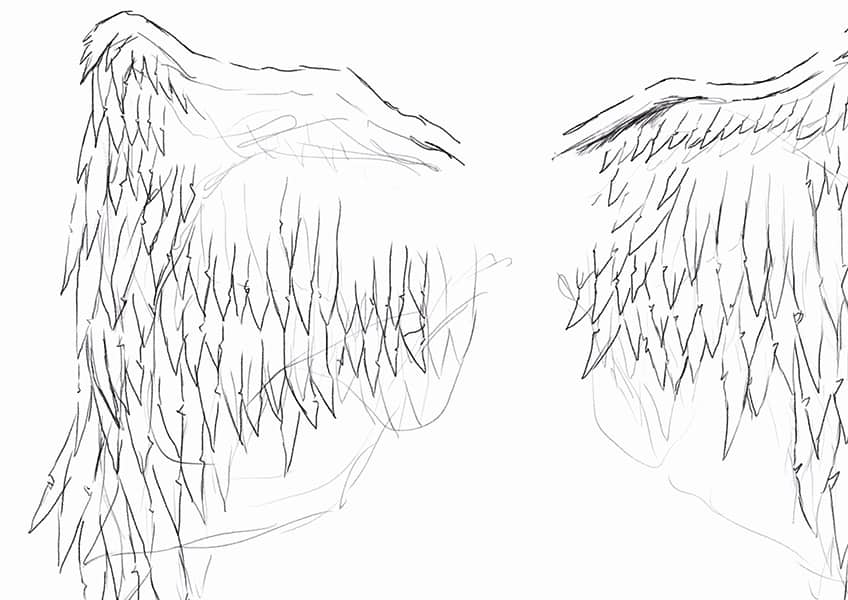
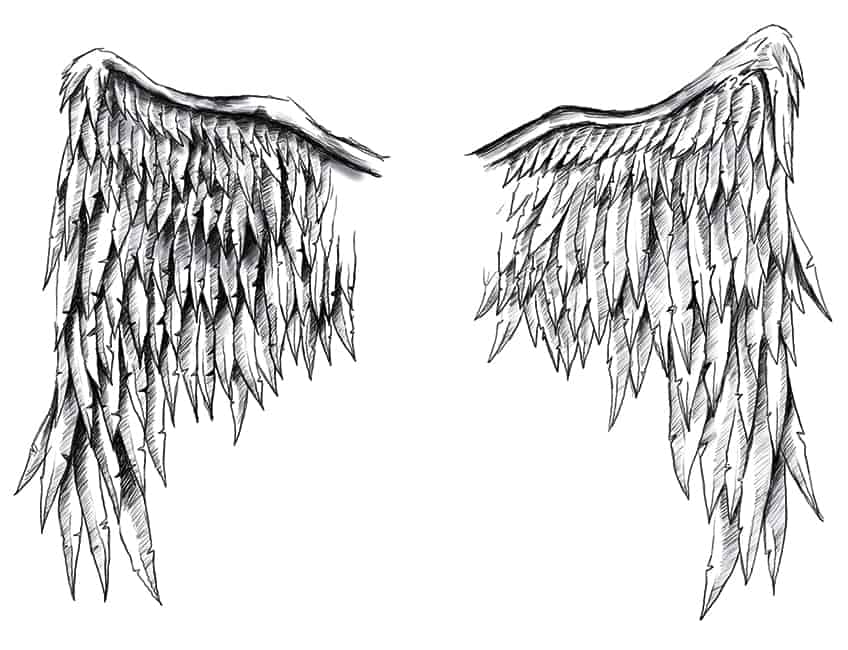
We also want to make sure that the feathers near the outer edges of the bone structure poke out a bit, this is going to give a unique vulture-like aesthetic to the wings. Take your time drawing in the feathers, making sure each feather has this spearhead shape.

Step 4: Adding Shading to the Wings
We now want to work with a darker pencil to add some shading to the wings. We want to slowly work through the wings, this time from top to bottom, slowly adding in some shading near the overlapping areas.
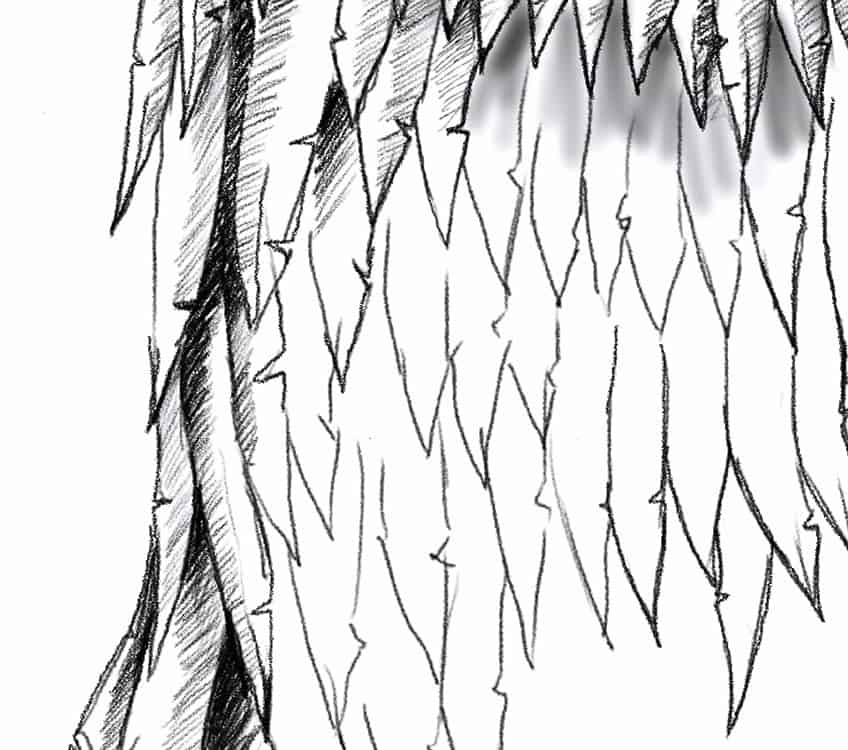
We can also start adding some shading to the bone structure, making sure there is a darkened shading near the bottom of the bone structure to suggest that it protrudes and has three-dimensionality to it.
The bone structure on the top section of the wings should be defined as a hardened shape that protrudes slightly, this is why we want to shade beneath this structure to suggest that it is casting a shadow on the feathers beneath it.

This is a unique quality of the wings and it is important that we apply this shading to the bone structures on each wing. Take your time with darkening the lower section of this bone and making sure there is shading beneath it.
With the feathers, we simply want to take our time with shading in each feather from the areas that overlap towards the tip of each spearhead feather shape. This is going to give a more realistic quality of light and shadow in the structure of the wings.
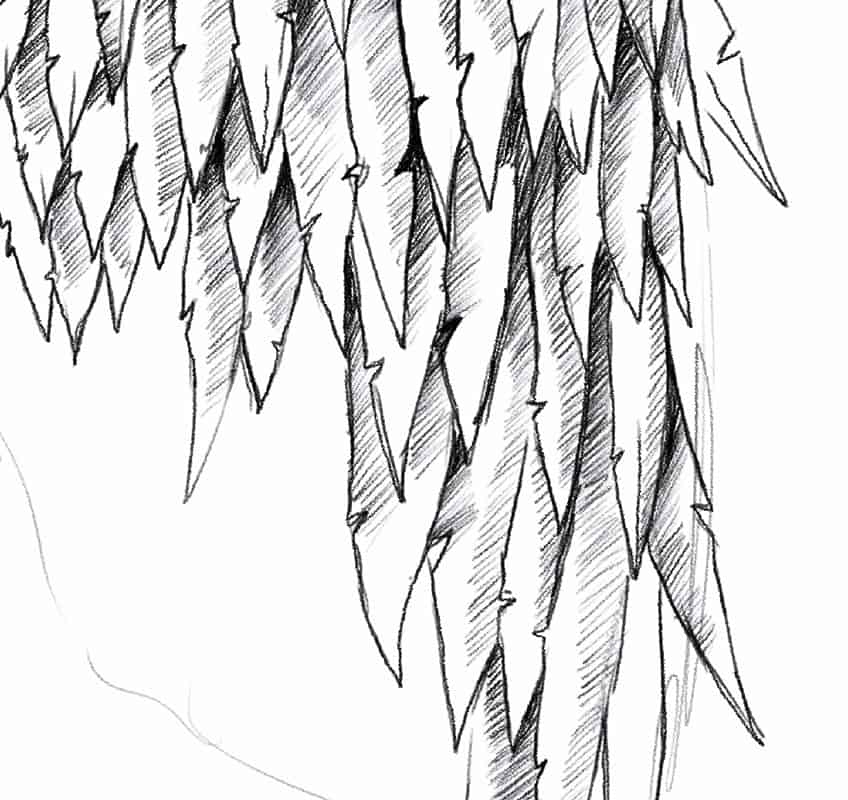
This process of shading in the overlapping sections of each feather will take some time. We also want to make sure that the shading has a gradient that lightens as it shifts from the overlapping sections to the exposed area of each feather.
We will continue with this process for both wings, making sure we take our time and keep consistency within the shading. If you feel fatigued as you shade in the feathers, take a break and come back to the drawing process.

As we continue this process we should start to see how the wings start to form into a more realistic and three-dimensional structure. As long as you add shading to each overlapping section in the wings, you will find that the wings will start to look more realistic.
Continue with this shading process until you feel your wings drawing is complete. You can also add in more random disheveled feathers near the outer edges to give your wings drawing a more disheveled appearance.
And there you have it! How to Draw wings in a few simple steps.

Tips and Tricks to Remember
- Establish the shape of the wings first. The shape is fundamentally important, which means we want to make sure that the size and structure of the wings are as accurate as possible.
- Consider the light source. When shading each feather, really try to create that gradient in each feather to give it a three-dimensional quality.
- Take your time with details. Use a combination of smooth shading and linework to give the feathers shadow and texture.
- Experiment with how you can apply this to your own work. Now that you know how to create a wings sketch, try using it for different artworks.
Drawing wings can be a great drawing exercise since they are so unique in structure. They can also be drawn in different ways, and applied to various characters, creatures, and animals. The formation of drawing wings is quite similar amongst various animals, which means this drawing process can be used for various winged creatures. Once you are satisfied with your basic frame, you can work on the details as described in this tutorial. This format makes the seemingly intimidating question of “how to draw wings” easy to understand and implement into any of your drawings.
Frequently Asked Questions
How Do You Draw a Wing?
You want to first work out the basic shape of the wings and how you would like them to look. You can then make a symmetrical mirrored shape for each wing. From there, you can start to refine the wings sketch by working on basic features, such as the bone structure and the feather shapes within each wing. As you proceed, you then can start to work on more refined shaping of the feathers and some shading to give the wings more three-dimensionality. From there, it is a matter of patience when working on shading the overall structure of the drawing of wings.
How Can I Use Wings in a Drawing?
Wings are such a versatile feature and can be applied to so many different mystical, natural, and surreal creatures. Anything from angelic beings to bird-like animals, wings can be used in various ways. The process of drawing wings is also very similar, regardless of what type of wings you draw, as you will always use the same sequence of steps. This makes the learning process very useful, as it can be applied to various styles of wing sketches. Wings can be used in many ways;, it is simply a matter of creative exploration.

Matthew Matthysen is a multidisciplinary artist. He completed his fine art degree, majoring in History of Art and Contemporary Drawing Practice at the University of Witwatersrand, South Africa. Before joining acrylgiessen In 2020, Matthew worked part-time as an art teacher at Reddford Blue Hills High school. Matthew creates drawing and painting tutorials for acrylgiessen and captures them not only photographically and in written form. He also records the creation of his works in his own creative studio as in video format, from which later with a voiceover and a video editor also drawing tutorials for the Youtube channel of acrylgiessen are created.
Learn more about Matthew Matthysen and about acrylgiessen.