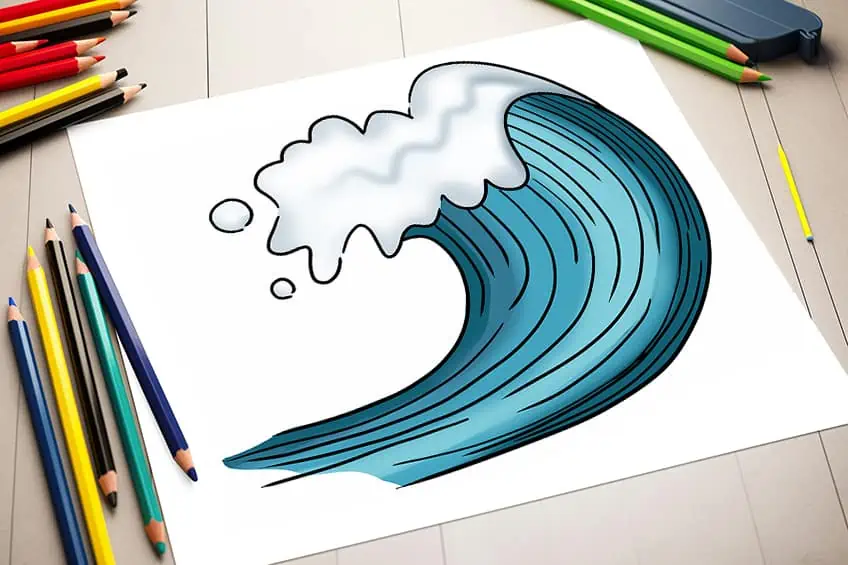
Wave Drawing – Learn to Create Mighty Ocean Waves Drawings
This post may contain affiliate links. We may earn a small commission from purchases made through them, at no additional cost to you.
Waves are one of the most fascinating and ubiquitous phenomena in the natural world, with the power to captivate our attention and stir our imagination. From the mesmerizing ripples on a tranquil lake to the thundering breakers of the ocean, waves can take on a dizzying variety of forms and behaviors. They are found everywhere, from the tiniest subatomic particles to the largest structures in the universe, and they play a crucial role in shaping the physical and biological systems that make up our world. Whether you’re a surfer catching a perfect swell, a scientist studying the properties of the ocean, or simply a curious observer of the world around you, waves offer endless possibilities for exploration and wonder! So, get ready for an easy drawing tutorial where you will learn how to draw waves in just 10 easy steps.
How to Draw Waves in 10 Easy Steps
If you’re about to learn how to draw a wave, congratulations on taking the first step toward mastering this beautiful art form! Drawing waves can seem daunting at first, but with just 10 easy steps, you’ll soon be creating stunning images that capture the beauty and power of the ocean. Start by sketching the basic shape of the wave, then add details like the foam, spray, and the curve of the wave itself. Don’t worry if your first attempts aren’t perfect – like any skill, drawing takes practice and patience. As you work through each step, pay attention to the details that make each wave unique, from the way the light reflects off the water to the subtle shifts in color and texture.
With a little practice and perseverance, you’ll soon be creating waves that are as beautiful and captivating as the real thing. Follow the step-by-step process depicted in the below collage and you will soon be able to create an easy wave drawing!
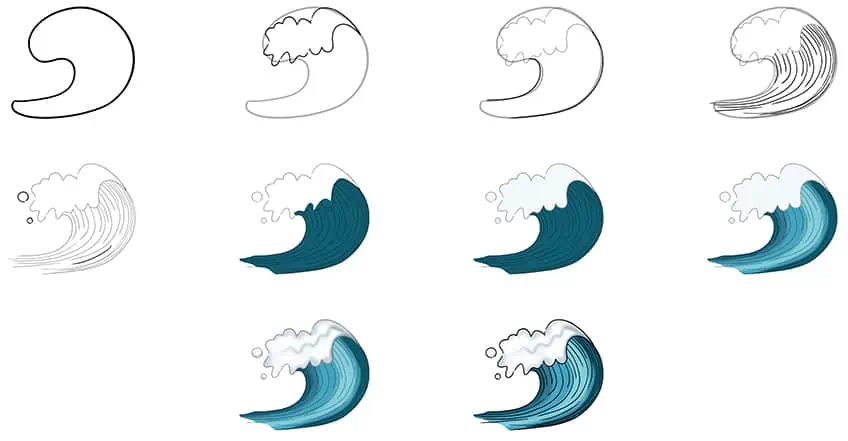
Step 1: Draw the Main Shape
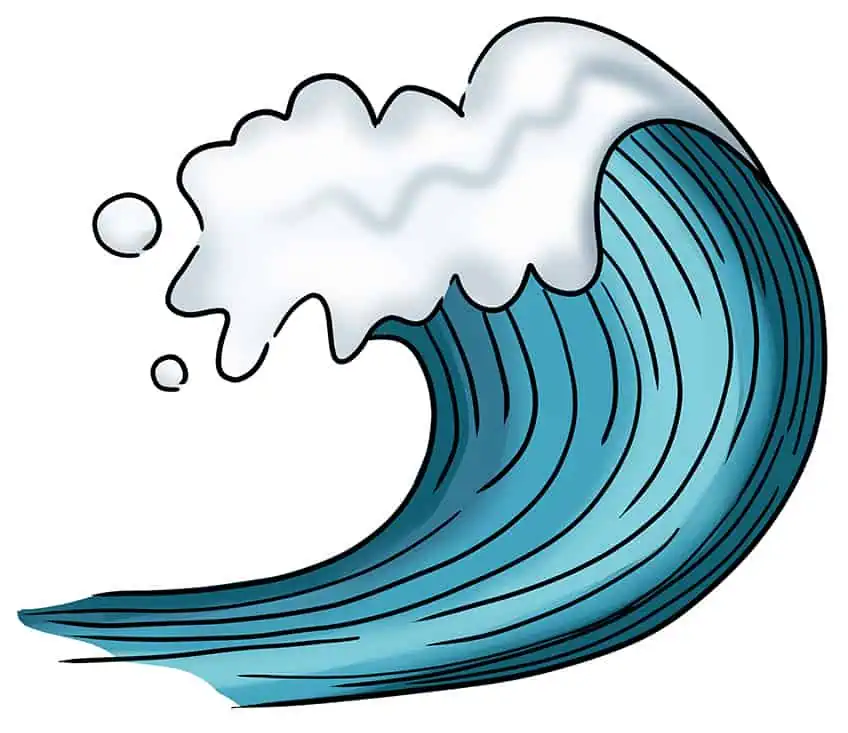
To begin your easy wave drawing, start by drawing the main shape of the wave. In this case, we opted for a large, curved wave shape.

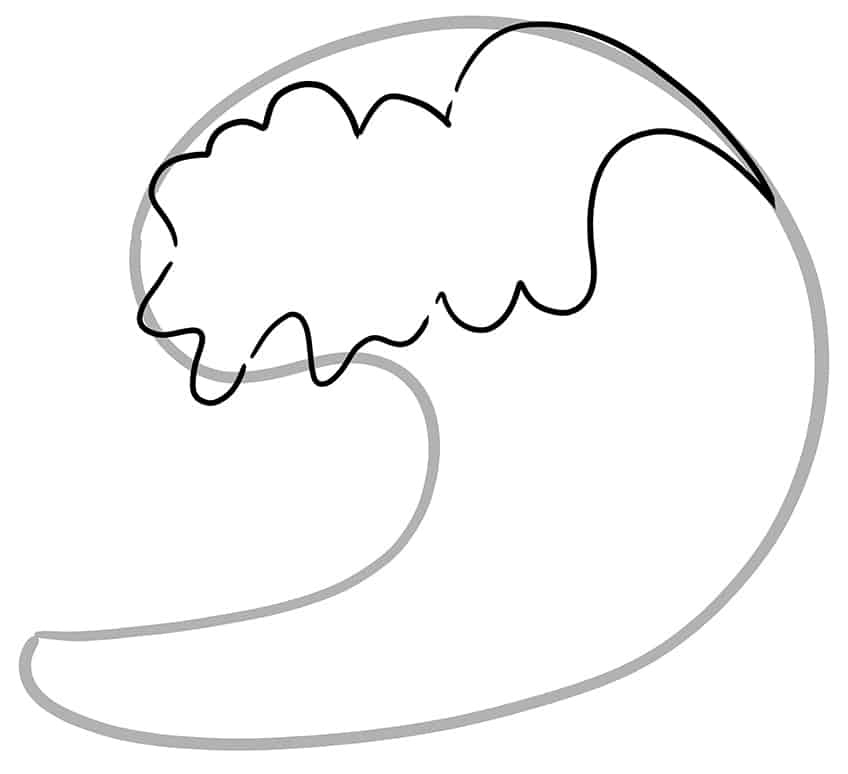
Step 2: Outline the Top of the Wave Sketch
Within the drawing of the wave, begin by outlining the top area of the wave also called the crest. This particular area is where the water will begin falling back down. To resemble this more realistically, draw uneven curves and splash-like shapes.
Step 3: Outline the Lower Wave
Use the previously drawn construction lines to aid you in outlining the lower curving wave shape, also called the trough.
Note! This should be attached to the top wave crest.

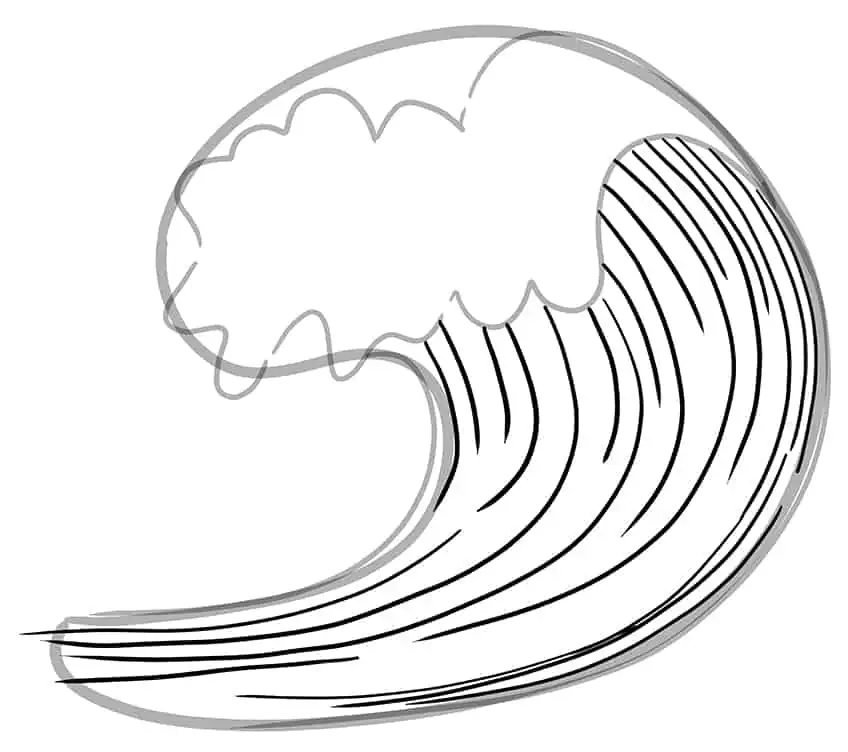
Step 4: Draw the Texture Lines on Your Wave Drawing
Within the curving wave, draw individual, curving texture lines following the curvature of the wave. Once this step is completed, you may erase any visible construction lines that are no longer needed.
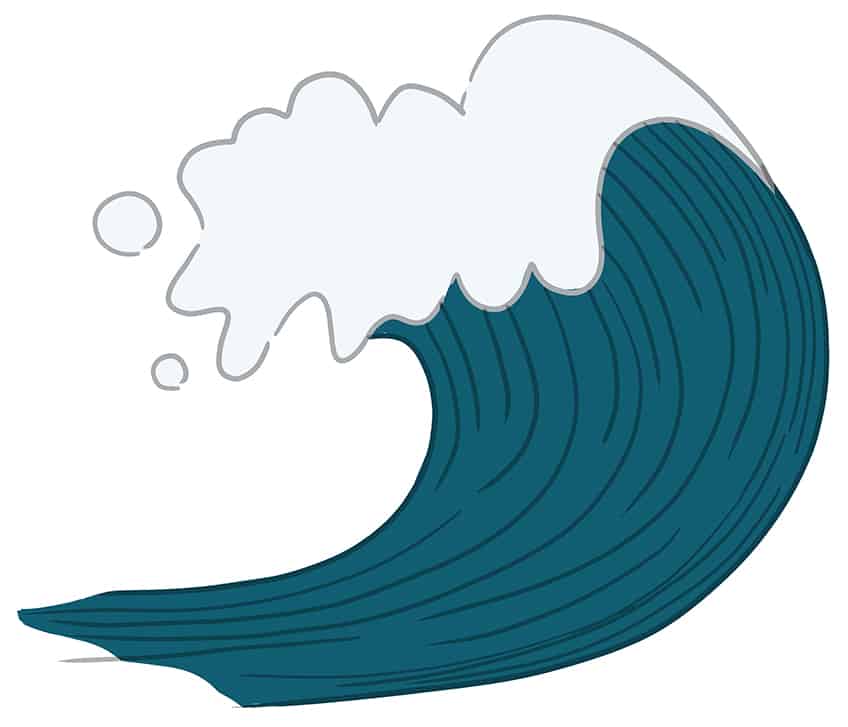
Step 5: Draw the Additional Details on Your Wave Sketch
On the right side of your drawing of a wave, draw two small circles and a final texture line within the wave shape.

Step 6: Apply the First Color Coat
In this step, you are going to start adding color to your wave drawing. To do this, select a fine, sharp brush and navy blue paint, and evenly coat the wave.
Note! Make sure the top crest area is left blank.

Step 7: Continue to Color Your Ocean Waves Drawing
Use the same brush as previously and switch to light teal or light blue paint, and evenly coat the top crest area of your wave sketch.
Step 8: Color Blend Your Wave Drawing
In this step, being up selecting a soft brush and teal paint, and lightly coat the main area of the wave. Repeat this step using white paint. Following the curvature of the wave, repeat once more with a blending brush to smooth and soften the coats of paint.

Step 9: Structure the Top Wave
Continue to use a soft brush but switch to gray paint, and lightly coat the edges of the top crest area. Make sure you paint along the center area to enhance the structure of the wave. Switch to a blending brush to soften and spread the shaded parts.

Step 10: Finalize Your Ocean Waves Drawing
You have reached the last step of our wave drawing tutorial! To complete your drawing, select a fine, sharp brush and black paint, and trace the entire outline and inner texture lines of your wave to complete your artwork!
Congratulations on finishing your drawing of a wave! Capturing the essence of a wave on paper is no small feat, and you should be proud of your achievement. Take a moment to step back and appreciate your work – notice the intricate details you’ve added, the way the lines and shading work together to create depth and dimensionality, and the sense of movement and energy that emanates from the page. It’s amazing how much can be conveyed through a single image of a wave – the power and majesty of the ocean, the feeling of being immersed in nature, and the sense of awe and wonder that comes with witnessing something so beautiful and dynamic. Whether you’re an experienced artist or a beginner just starting out, this is a great accomplishment, and one that you can build on as you continue to explore the world of art!
Frequently Asked Questions
How to Achieve the Realistic Look of a Wave?
To achieve a realistic look in a wave drawing, pay close attention to the details that make each wave unique, such as the way the light reflects off the water, the movement of the waves, and the subtle shifts in color and texture. Also use different techniques to create depth and dimensionality, such as varying the thickness and direction of my lines, using shading and highlighting to create contrast, and layering different colors to create a sense of complexity. Additionally, try to capture the energy and movement of the waves, which can be challenging but also incredibly rewarding when done successfully!
What Color Palette Should You Use for a Wave Sketch?
When deciding on a color palette for your wave drawing, try to draw inspiration from the natural world, such as the colors of the ocean, the sky, and the surrounding landscape. Take into account the mood or feeling that you want to convey in the drawing, as different colors can evoke different emotions. For example, you might choose cool blues and greens to create a sense of calm and tranquility, or warm oranges and yellows to convey energy and excitement. Finally, experiment with different color combinations until you find a palette that feels harmonious and balanced, and that complements the other elements of the drawing.

IzzyBll is a digital artist and content creator from Israel and currently residing in South Africa. Originally coming from videography, Izzy then turned to digital graphic art. He specialized in using digital drawing software such as Photoshop and Procreate. Drawing and photo editing has always been a sort of second nature for Izzy. In doing so, he can now look back on 5 years of experience in the industry, completing commissions for various well-known brands such as Audi.
Learn more about IzzyBll and about us.