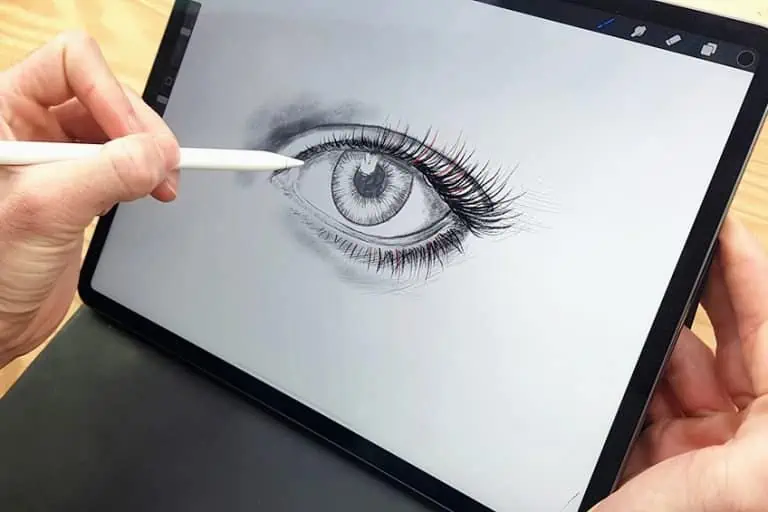
How to Draw Eyes – An Easy Realistic Eye Drawing Tutorial
This post may contain affiliate links. We may earn a small commission from purchases made through them, at no additional cost to you.
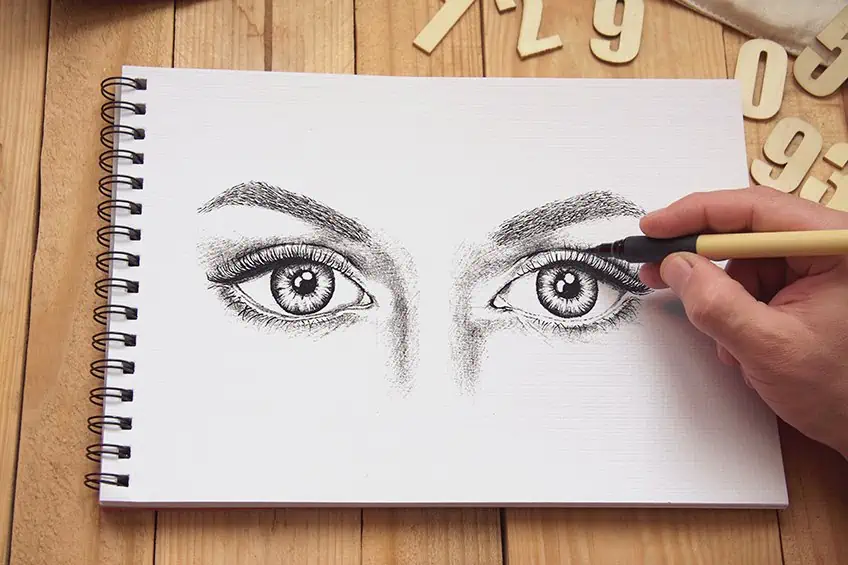
Mastering how to draw eyes is incredibly difficult since they have highly special anatomy and are challenging to depict. It might be much more difficult to accurately depict a specific set of eyes in an eye drawing. Nevertheless, the process of drawing eyes becomes a lot easier if we divide it up into a number of manageable phases. A realistic eye drawing is genuinely easy to create because of all the small details. We will be more likely to get the best outcomes in this eye sketch tutorial if we approach it with patience and attention. We will practice drawing female eyes in this tutorial.
Take Note Before Attempting Your Drawn Eyes
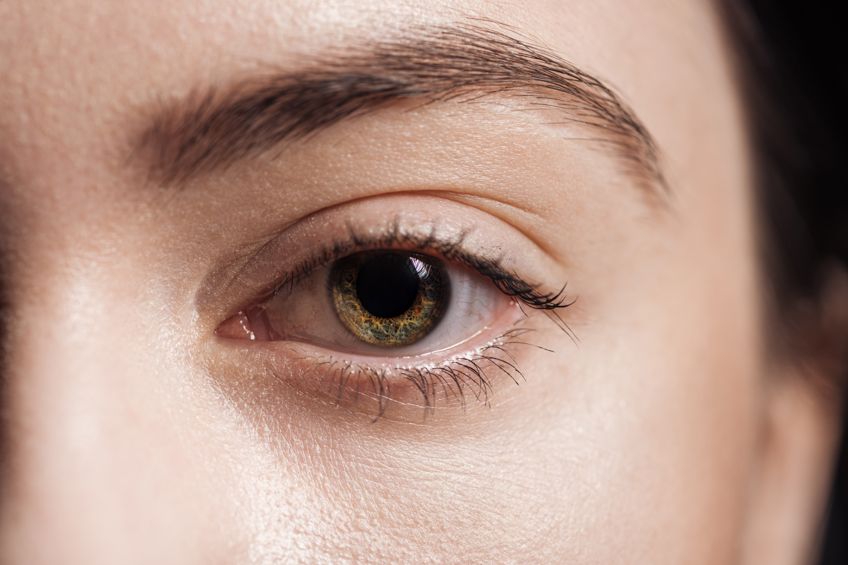
Take a minute to examine your own eyes in a mirror while you explore how to draw eyes. Think about how various elements are stacked on top of one another. Consider how other elements are placed over the first element in the eye sketch. That ought to be the guiding premise of this eye drawing tutorial.
Up until the eyes are finished, different aspects are layered on top of the other, creating coherently drawn eyes from seemingly disconnected shapes.
Step-by-Step Instructions on How to Draw Eyes
So with that said, it’s time to start drawing. Since each component is necessary for the process of drawing eyes, we should have them all ready to go. With all of our resources ready and your reference image placed conveniently in front of you on your workstation, let’s get started on our realistic eye drawing.
Step 1: Measurements and Grid Lines
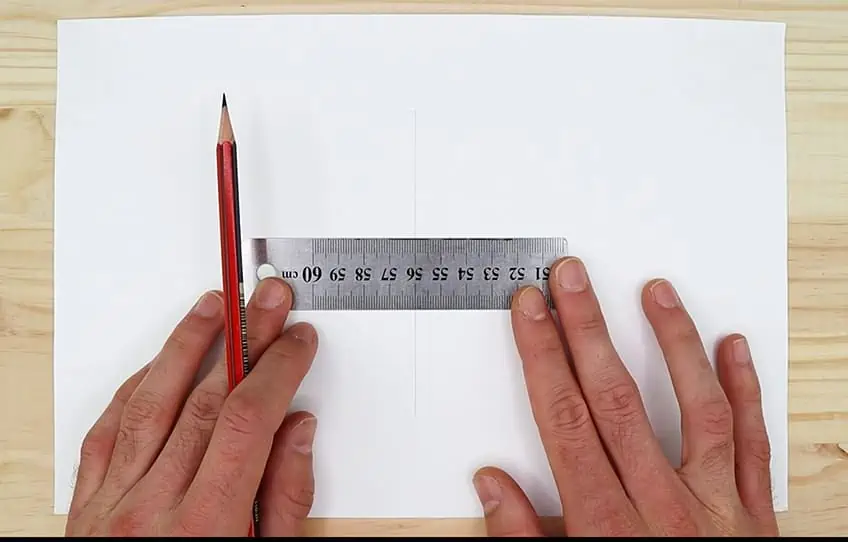
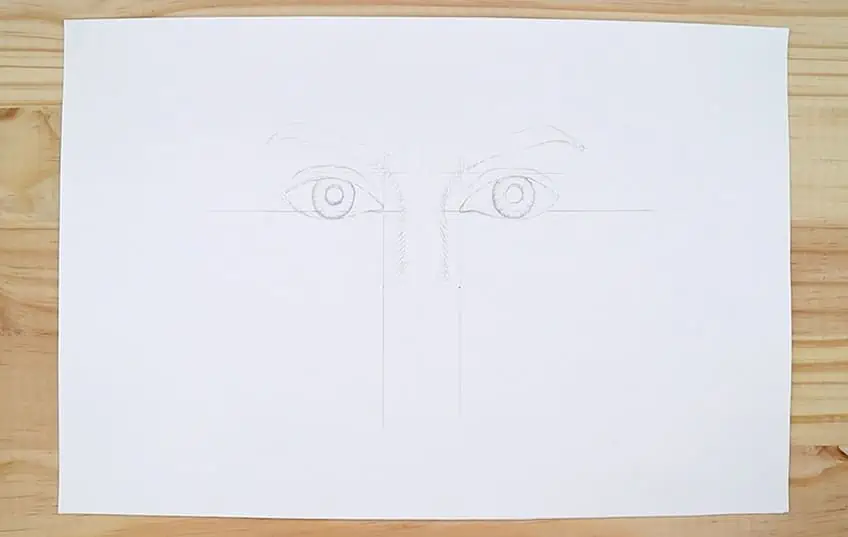
Let’s start by locating the page’s center. To accomplish this, measure the page both horizontally and vertically. After measuring it vertically, split the reading in half and repeat for the horizontal value. Find their intersections by doing this, and our page’s center should be the result. Once you’ve located the middle of the page, start drawing a perfect vertical line through it. Any length will do, but for the purposes of this lesson, let’s choose 15 cm.
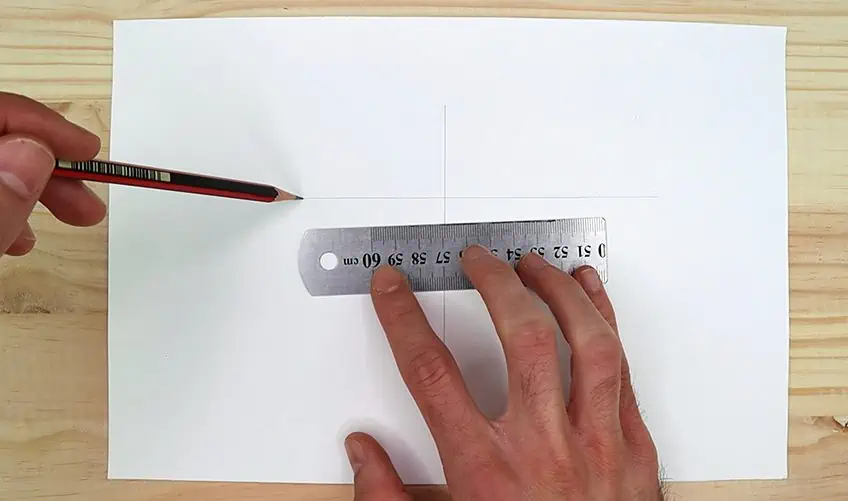
Then, we wish to designate a point at a distance of 5 cm from the upper part of that line.
In order to create two equal lengths of 7.5 cm on each side, we will construct a horizontal line across our vertical line at this point. This should resemble a cross on our pages. The very next thing we should do is to create lines that are 1.5 cm wide on either side of our vertical line, parallel to it. Regardless of what length they are, you can still extend them down our pages.
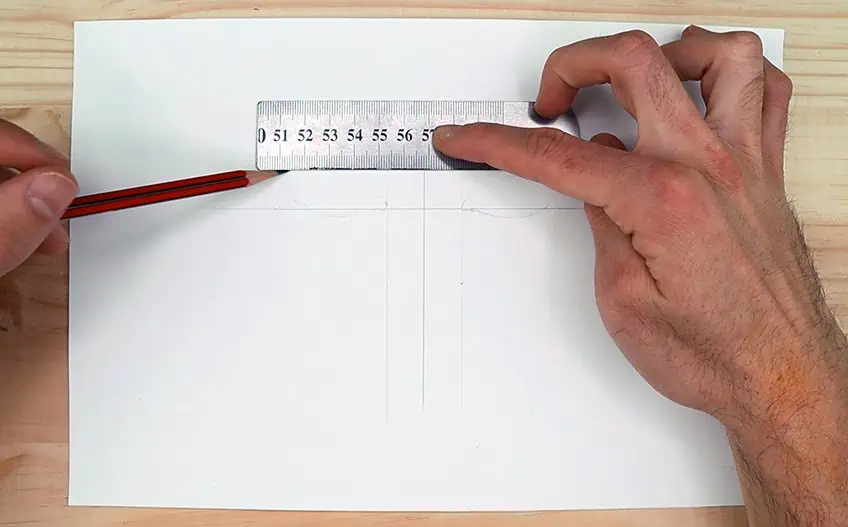
The same thing applies to our horizontal line right now. Add a line over your horizontal line that is parallel to your horizontal line at a distance of 1.5 cm. It doesn’t matter how big you want your eyes to be while sketching them. The measurements will always be properly aligned if you can set them up. Use this measuring ratio to enlarge or reduce the eye drawing.
It’s okay if you wish to adhere to the proportions in this instruction too.
Step 2: Creating the Shape of the Eyes
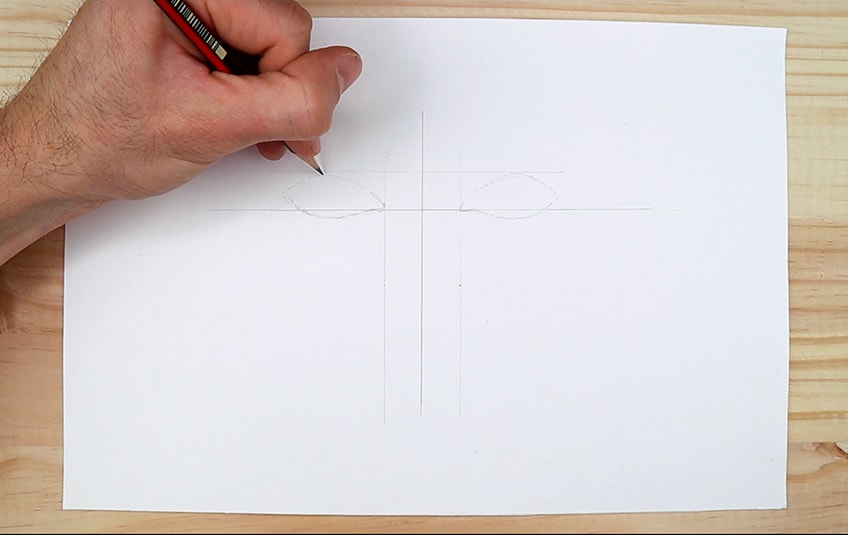
We’ll now begin to transform an eye drawing into a lifelike image of an eye. We will start outlining the anatomy of our eyes with our H pencils from the ends where the outermost vertical lines meet the lowest horizontal line. At this point, the inner portion of the eye sketch will begin to take shape. Examine your original image and note how the eyes look like a football or, more accurately, two ovals.
The drawn eyes should depict a soft curve that curves at the inner corner. As you can see, they veer slightly to the left of the horizontal line, similar to upside-down arches. After that, they make a little diagonal movement across the horizontal line. The eye sketch’s outermost points are situated nearer to the lowest horizontal line.
Once the top of the eyeballs meets the upper horizontal line, they fully bend.
The curvature starts to descend again as it approaches the uppermost horizontal line and continues to do so until it once more reaches the inner portion of the eye. Keep in mind that the eye drawing should resemble a distorted football by being more bent on the outside and narrower on the inside.
Use this guide and your reference image repeatedly until you succeed via trial and error. Correcting the form and dimensions now will make the remainder of this drawing female eyes tutorial much simpler for us later on. To ensure that your eyes appear to be the same width, it’s a good idea to measure their breadth as well.
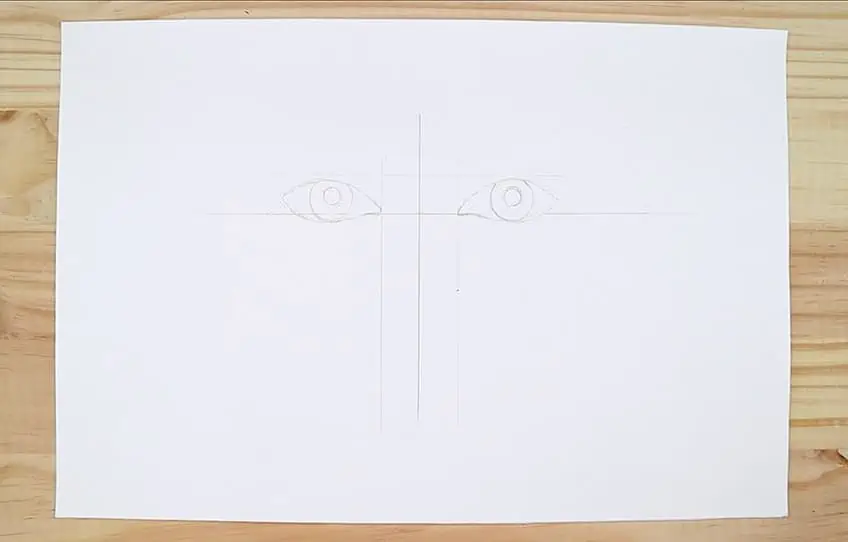
The pupils and irises should be added when we are pleased with the contour of the drawn eyes.
We will use the pupils and irises as the main points that we sketch around, thus this is the area where we need to pay close attention. Start by drawing a circle in the center of your eye with your H pencil. You can draw freehand or with a compass, although free-handing is better to practice.
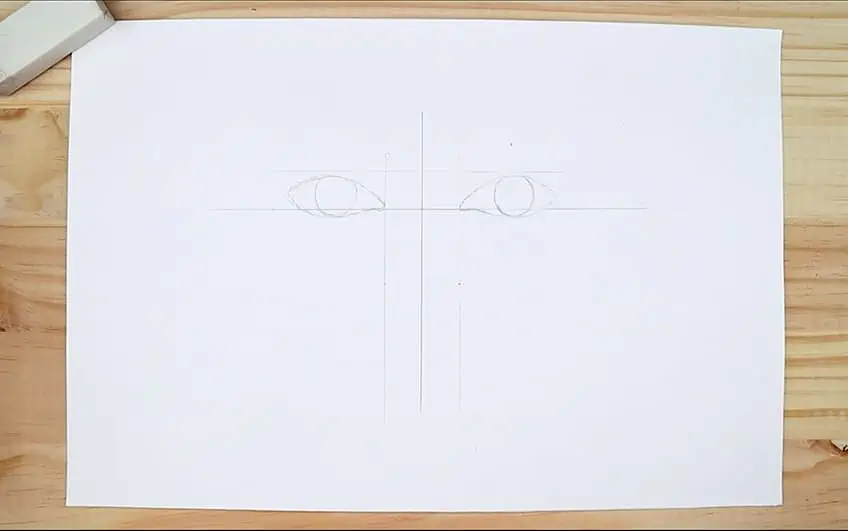
The circle should be just reaching the lowest part of the eye and somewhat beneath the top of the eye. Drawing a circle that crosses over the peak of the eye and only slightly touches the bottom of the eye is an excellent idea. After that, you may remove the part that extends above the top of the eye. This illustrates how the eyelid will really fall a bit over the iris.
We can now create the pupil inside the iris after we have the iris image in the eye as accurately proportioned as feasible. Keep in mind that the pupil is located in the exact middle of the iris and that the amount of light it receives can affect how big it is.
As we can see in this drawing eyes tutorial, the pupil seems to be rather tiny in the original image. To start drawing the pupil, study the reference image as you go.
Last but not least, if you see the white portions of the eye in your reference image, try focusing on it with a zoom to observe the faint shadowing that the eyelashes throw on it. On the eyeball, close to the iris, one can very dimly sketch these tiny shadows.
Typically, these shadows develop around the borders of the eyes.
Step 3: Features Surrounding the Eyes
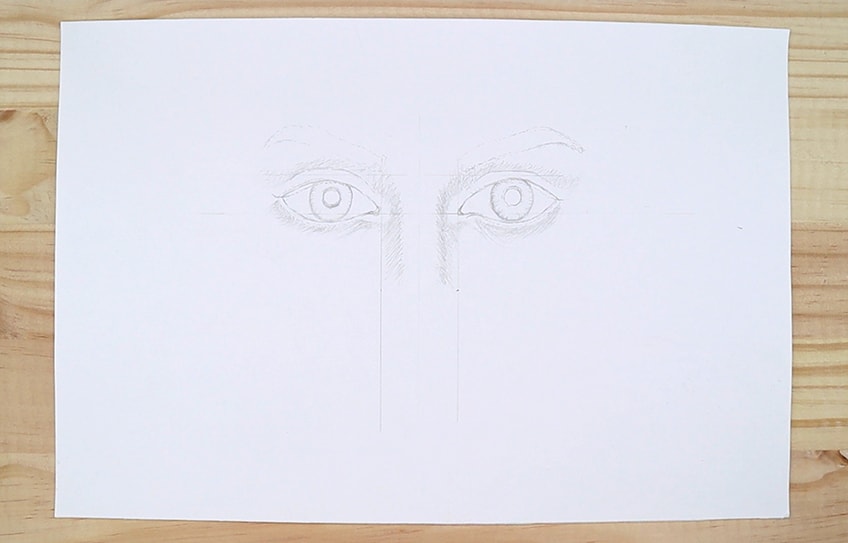
The indentations should now be placed on the sketched eye’s top halves. Notice how the little indentations in the top eye may be seen through the eyelashes when you study the original image and our drawn eyeballs. As noted previously, we are overlaying each component. First, we need to make these markings.
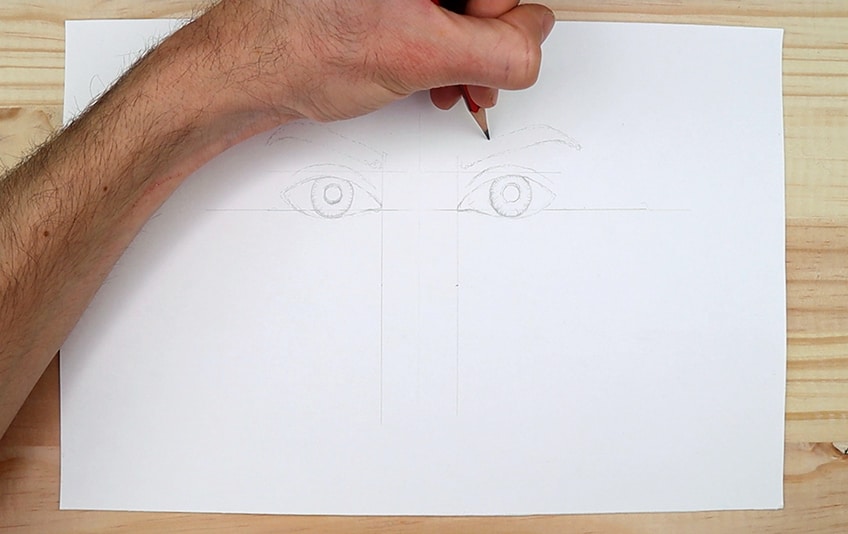
Draw the wrinkles over the eyes as delicately as you can with your H pencil. These properties are not specifically measured in this stage. Analyzing your original image and sketching as correctly as you can are the only options.
However, by comparing the breadth of the line to that of the eye, you may get a broad judgment of its breadth and size.
See how they cross the top horizontal line when you apply these wrinkles over the sketched eye. As you create all of these markers, refer to your grid marks for guidance. For this reason, we create a grid that we may use to scale and properly position the characteristics of the eyes.
Starting with your grid, start placing the eyebrows. The original image’s well-groomed eyebrows are fairly linear because of this. The intersection of the top horizontal line and the outside vertical lines forms the inner portions of the eyebrows. Start by drawing the eyebrows from these spots.
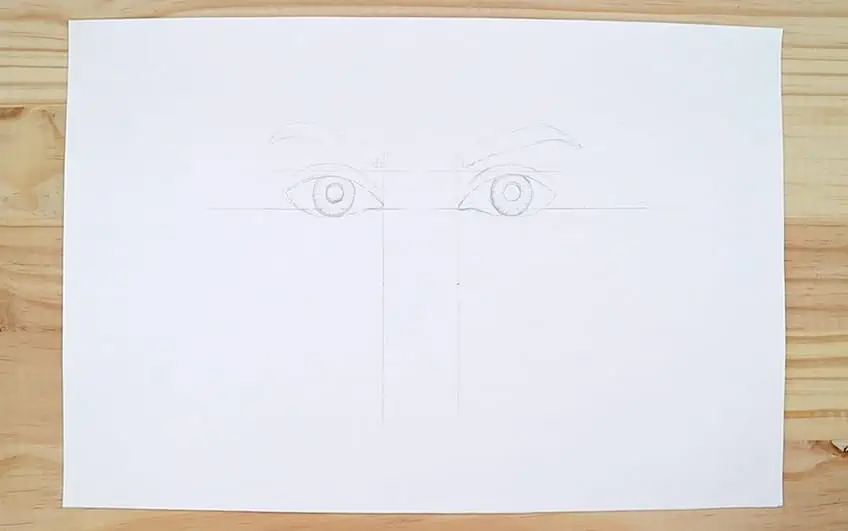
Check the size of the brows in relation to the size of the eye using your reference image.
Spend some time studying the breadth and length of the eyebrows as you draw them since they are neither too thick nor too lengthy. Remember that we are not creating an exact reproduction of our original image, so if you really need to delete something, that is acceptable. We’re merely following the lead of the original image.
Observe how the distance between the eyebrow, the depression above the eye, and the top of the eye is often identical. Their breadth is comparable only in the vicinity of the eye’s interior. The breadth varies as the features go outward; the eyebrows, which rise upwards and outwards from the inner corner of the eye, are a prime example of this.
Step 4: Shading Lightly Around the Eye
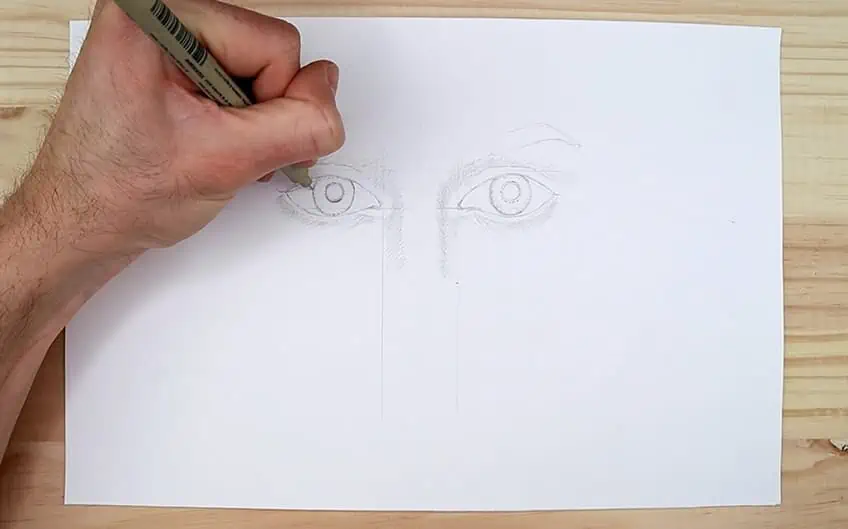
We may start softly shading the shadows of the nose’s ridge once we have created the contours of the eyebrows and the depression of the upper eye region. A nose’s ridge creates a little shadow on either side of it. These shadows diminish from its ridge in the direction of the eyes.
They expand around the eye and go vertically down the face at the inner corner of the eyes.
With an H pencil, continue to sketch these shadows as gently as you can. Apply these shadows as vertically down the face as you can, close to the inner corner of the eyes. Usually, these lines start at the inner corners of the eyebrows and extend down the face.
The light shadow markings will then be applied above the upper-eye creases and beneath the eyebrows. The shadows that develop around the top and bottom of the eyes converge with the shadows near the nose’s ridge. Yet, there are times when the original image’s lighting has an impact on the face. This implies that there are spots that are bright and jump out from the shadows surrounding the eyes.
Consider your reference picture as you loosely sketch these shadows to ensure their proper placement.
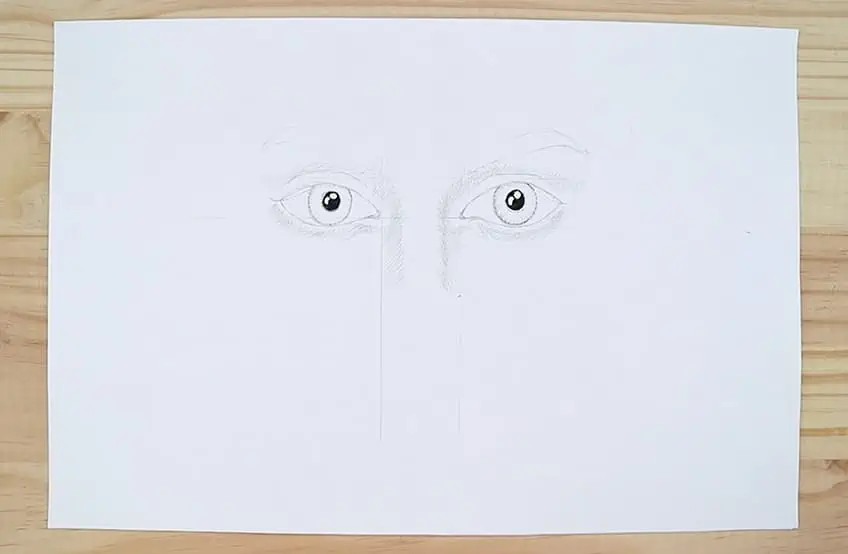
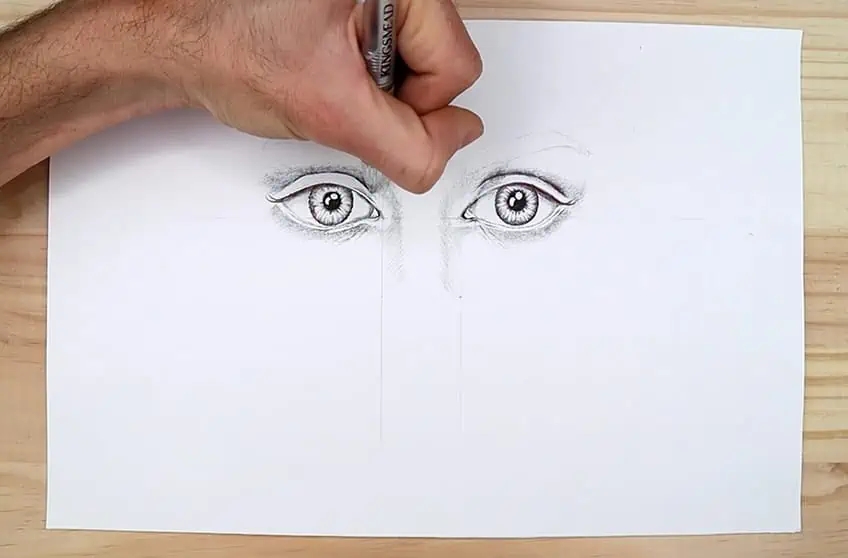
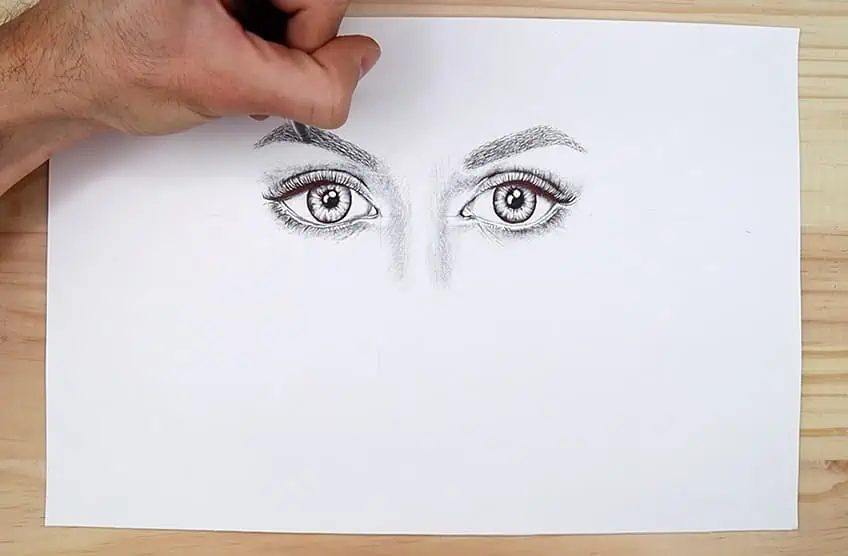
Step 5: Creating the Pupil and Iris
The pupils and irises are what distinguish a realistic eye drawing. We must use the utmost caution when utilizing our pens. We need to be really careful because there aren’t many techniques to correct pen markings. markings made by an excellent underlayer of pencil that may be drawn over with a pen. We take a lot of time making sure our pencil markings are accurate because of this.
The iris and pupils will be the drawing’s main focal areas, so we’ll start with them. We want to ensure that they are at their best. Start by dotting around the pencil iris markings with your Micron pen, ideally the 0.2 mm. These markings should be applied softly. After that, examine the pupils in your original image. You will observe a mirror of the students. Two elliptical forms can be shown in the pupil as these reflections. Continue to design these with a pencil, then once you’ve finished, draw over them with a 0.2 mm Micron pen.
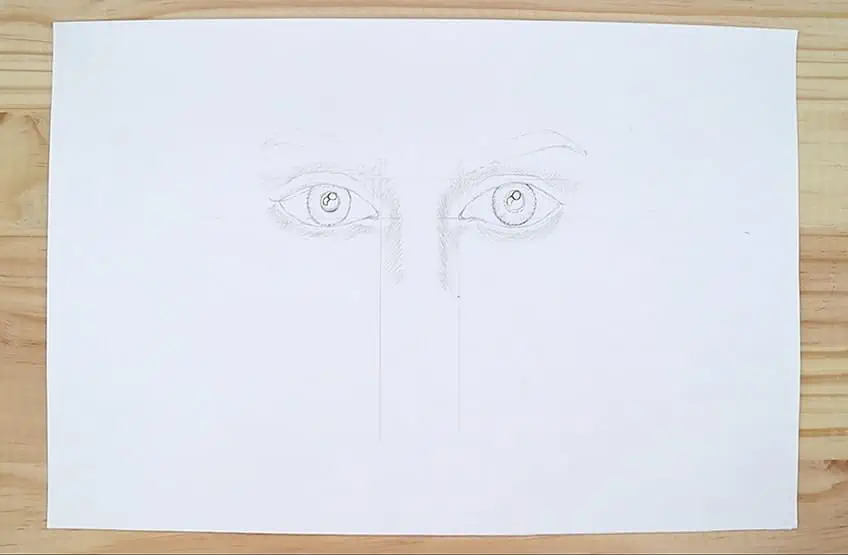
The pupil may now be totally blackened using your 0.2 mm Micron pen. Take care not to color in the tiny reflections in your pupil, though. When coloring around the reflections, exercise extreme caution. We’ll now start drawing the iris. Examine the irises in your reference image for a moment. In essence, the iris is showing a sequence of inward-moving lines from the iris’ rim towards the pupil.
From the place of origin, these thin lines disappear With an H pencil, we can now start to create these tiny lines.
Concentrate on your reference image and give the iris and pupils plenty of attention. These are the most challenging features of the eyes and call for focus. We should let the reference image lead us as we concentrate on its eyes and examine its irises.
It’s a good idea to work your way around the iris clockwise, beginning at the bottom.
We may now start going over it in pen once you have completed both eyes in pencil. Now, a ballpoint pen is used. We use ballpoint pens since the ink is less powerful and the pen’s ball-like tip allows for sparing ink application. This means that we can now shade with this pen more effectively.
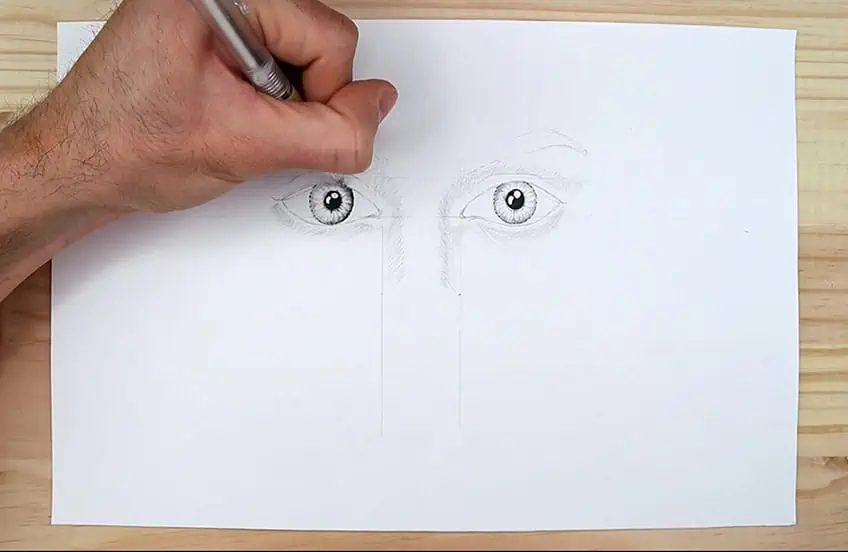
Let your pencil markings serve as your direction as you begin with one eye. Keep in mind that the iris is the darkest around its borders, so pay attention to the pressure you use on the pen as you make these lines. Dark lines can be seen on the iris that gets fainter as they approach the pupil. As the lines extend to the margins of the iris, the same statement is made about the pupils.
As a general rule, the area around the iris should get the most pressure for the darkest markings.
Then, when you draw each little line inner, your lines will fade as you stroke inward. The action of the pen should be a tiny, hard-to-soft flick as you create the lines from the iris rim inward toward the pupil. Naturally, you should apply these markings how you feel most comfortable doing so, but it’s a good idea to keep this in mind while you work to do so. At the conclusion of this stage, we should have eyes with pupils and irises that contrast sharply with the rest of the image. These are the areas of the eyes that need to be treated with extreme caution and attention, therefore we want to make absolutely sure of it.
Irises and pupils will serve as the drawing’s focal points.
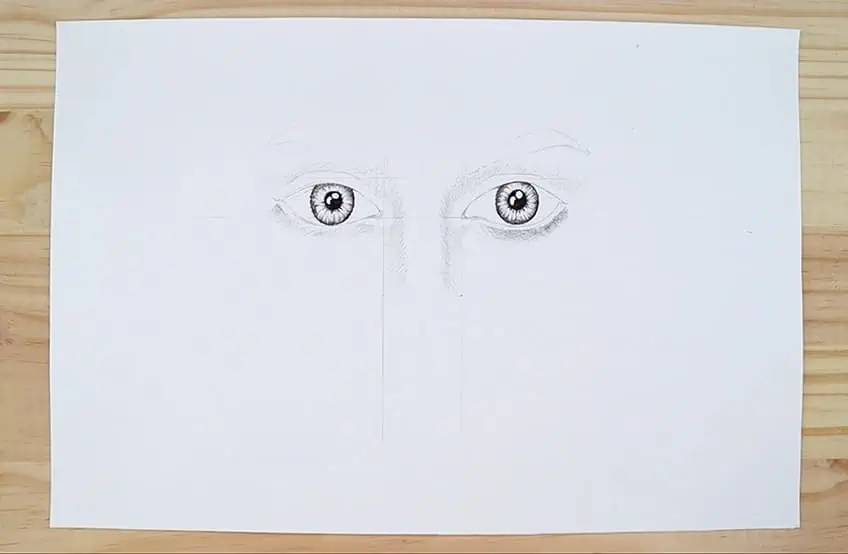
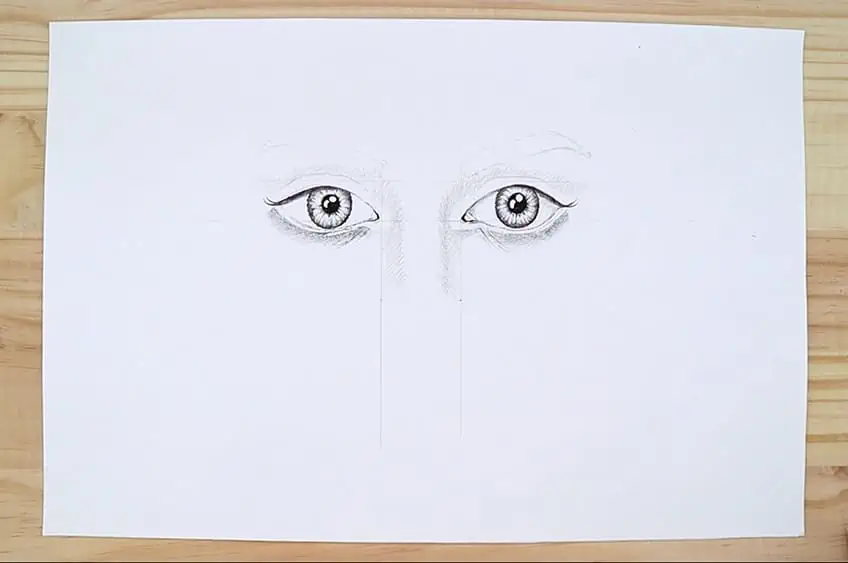
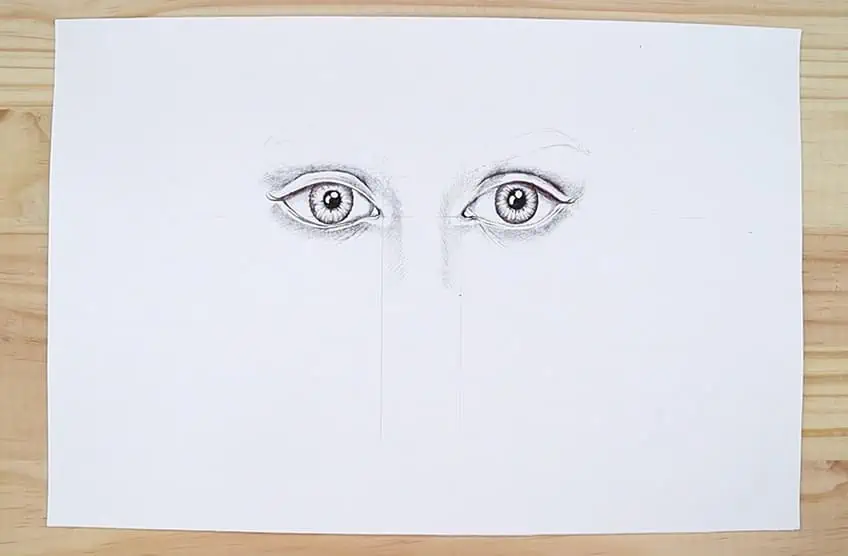
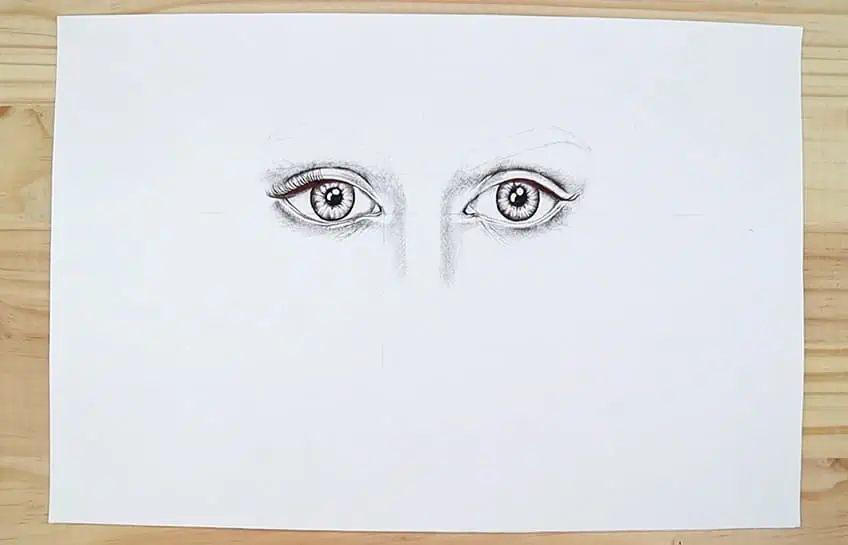
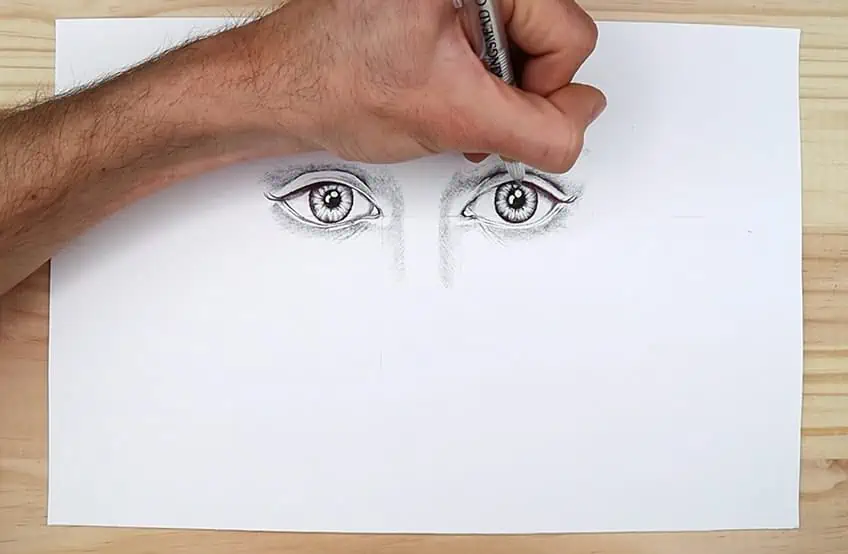
Step 6: Light Shading and Adding Further Details
Now that we have our ballpoint pens in hand, let’s start carefully darkening the penciled-in shadows. Starting with the area below the eyes, also known as the region with the bag under the eyes, is a good idea. Pay close attention to how the original picture depicts these shadows. What we need to do is begin shading under the eyes with gentle pressure and a hand slant.
We may use the same guidelines for shading with a pencil when creating our shades with a ballpoint pen. The mark becomes darker as you exert more pressure. Keeping your hand light and typically tilted is crucial since we are now shading with our pens. We choose the ballpoint pen because it allows the ink to be released carefully.
As a result, we have more control over the markings we produce.
Think about the lines that seem to push forward from the inner corner of the eyes. Under the eye, softly draw lines in an outward motion with your pen. There is a light lid on the bottom portion of the eyes. To mark where you should stop shady, try running your pen down that lid. This lid can also be given a thin pen line to further define it in the drawing. However, when you analyze your original image, use caution while applying these lines.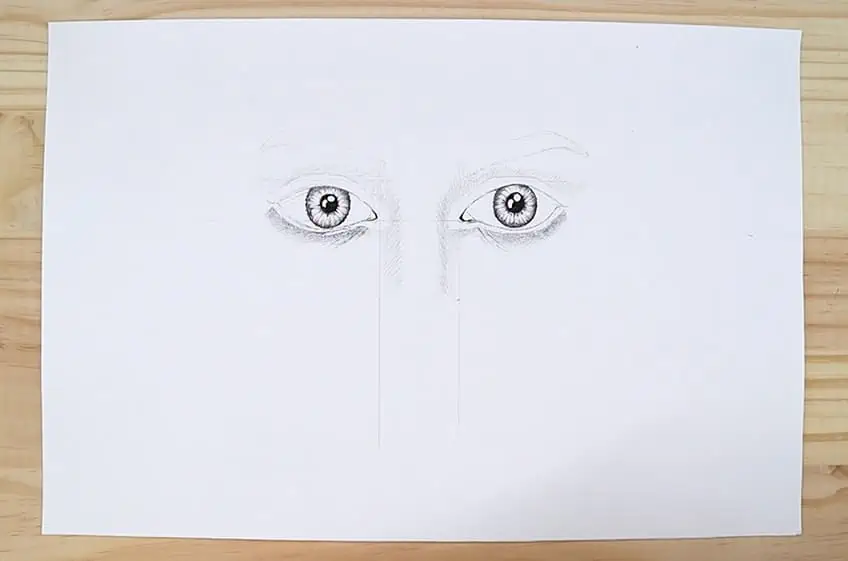
Apply some gentle pressure with our 0.2 mm Micron pens on the inner corner of the eye. The plasma on the eye’s surface gives this region a faint shine in most cases. Looking at our reference image and noticing the subtle contrast in this region helps us produce this quality. Afterward, carefully copy these specifics using your 0.2 mm Micron pen. We can identify it from this source photograph by its bright outlines and the little black markings on the corners’ margins.
We may go around each eye, ideally one at a time, filling in any pencil traces with our ballpoint pens as delicately as we can. This refers to the tiny shadows that appear on the eyeballs at the margins of each eye, close to the eyelids, and surrounding the iris. Pay close attention to every detail.
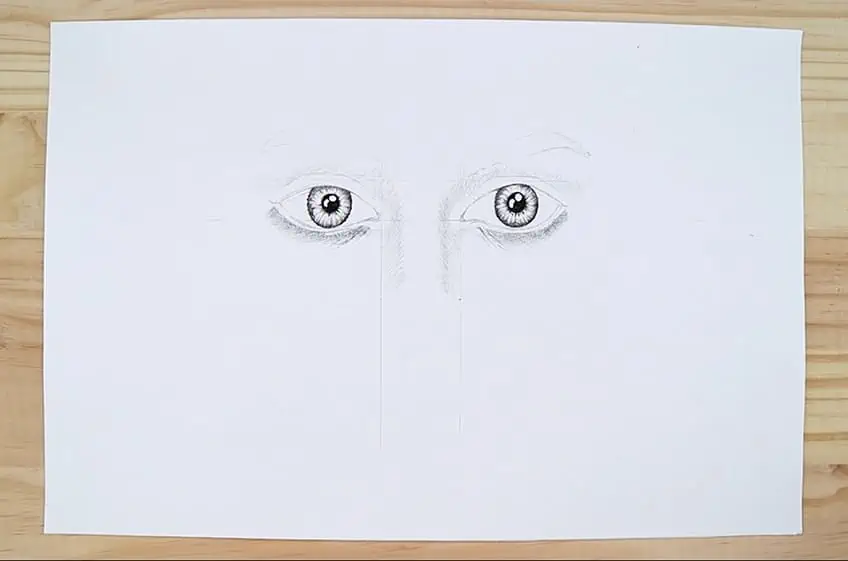
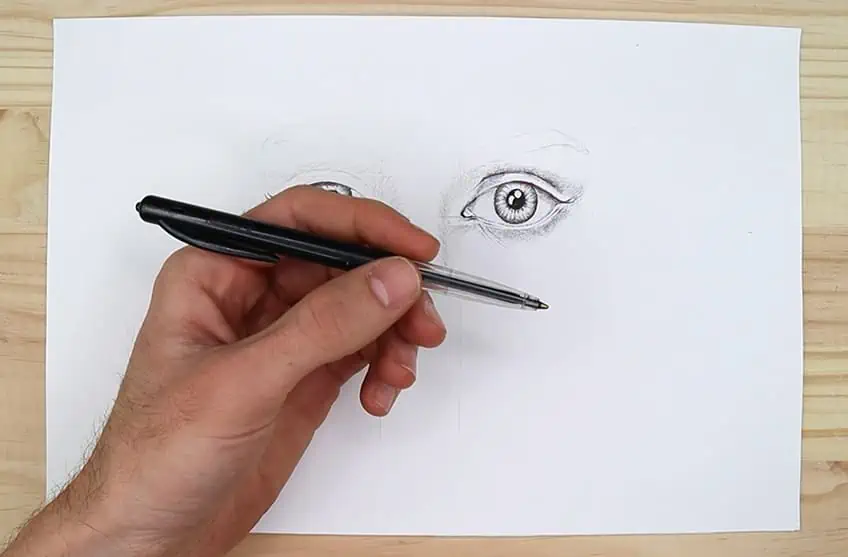
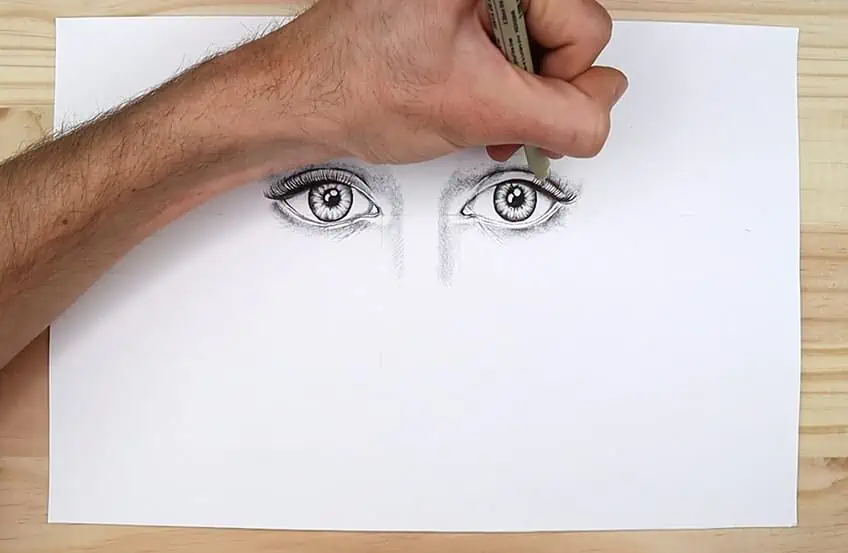
Step 7: Creating Eyelashes and Dark Pen Shading
The overall eyelash shadow and markings will be applied, but not the individual eyelash strokes. The eyelashes appear as a thick, black area near the very top of the eye due to the mascara on them. Take your ballpoint pen and begin by making these dark, black markings above the eyes. These markings should begin to lighten towards the iris and get darker at the top of the eye.
When the artwork is finished, these markings will appear realistic and feminine because of how they were drawn. These markings, which somewhat cover the iris at the top of the eye, are similar to how an eyelash might fall over the eye. These markings are curved, much like the top of the eye is. They may be identified as eyelashes by the small flick at the margins of the eyelids.
At the margins of these markings, you can use multiple strokes.

Let’s take a moment to think about the upper eye or the markings above the eye. The eye is identified by these dents. As we observe where the pencil lines are dark in our source picture, we may start to softly trace the pencil line with our 0.2 mm Micron pen.
Then, using our ballpoint pen, we can start to shade away from the lines.
Then, at the top of each indented line over both eyes, we continue doing this in an outward motion. The upper eye indentation can also be used as a guide as we move this inside. The darkest spot is inside the line’s crease, and these two indentations gradually decrease away from it.
This implies that when the shadow grows brighter, we gradually fade these traces toward the brow.
This may now be done for both eyes. If you look closely, you can see a curve toward the outside borders of each eyebrow in the shadow on the top regions of the eyes, just behind the outer sections of the brow. This highlights the eyes and gives them a more feminine appearance. Use your ballpoint pen to make these markings as slowly and safely as you can.
While drawing, be careful to use your reference image as a guideline as much as you can.
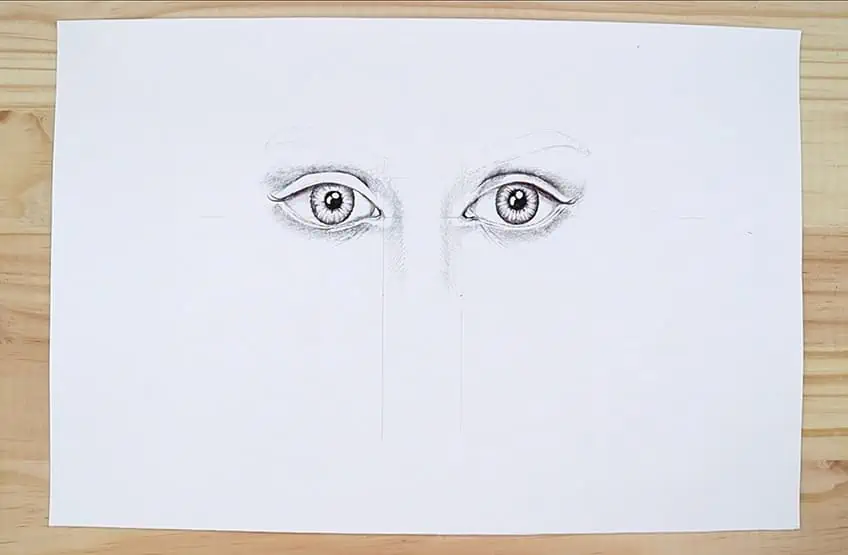
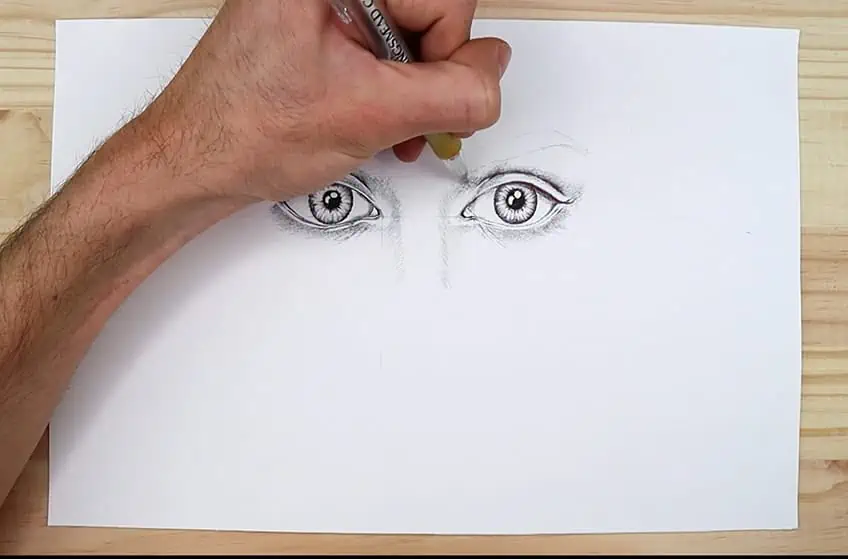
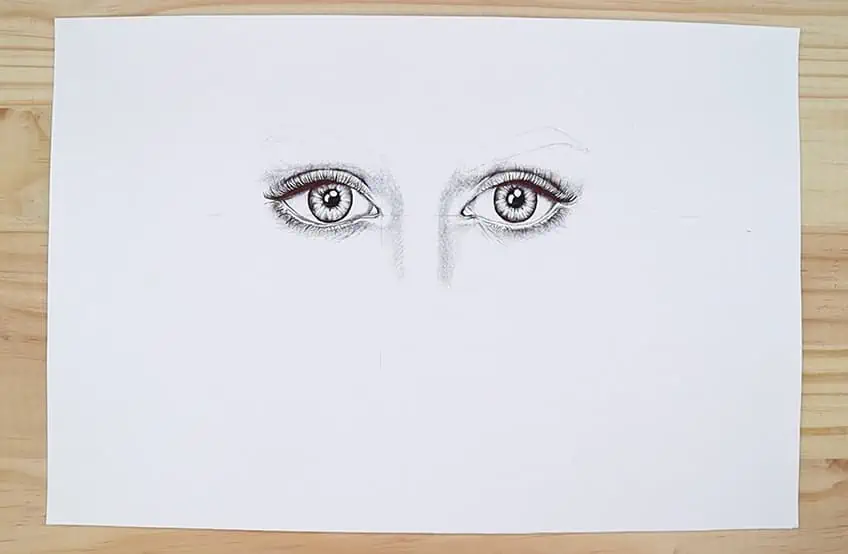
Step 8: Refining the Shadows
Now that the drawing of the eye is complete, we can start to gradually add shading using our pens. It involves gradually layering on more pen strokes to get the required tonal value. With your ballpoint pen, start with one eye and apply the different shadows very softly. Keep in mind to use a soft touch while doing this.
We can fine-tune these shadows by brushing over them while working around our creases over the eye. The top eyelid is another place to spend particular attention. The top of the eyelid’s rim is left in the dark because of this area’s shadows. They become unique and have depth as a result.
Top eyelids should be tinted, but there should be a faint unshaded line close to the top eyelid’s margins.
The more you pay attention to all the shadows, your eyes should begin to appear realistic. Going over these markings and making sure you sharpen all the gradients should cause our eyes to start to sparkle, just as you did when you originally shaded with pencil and pen. Observe the lower eyelids as well.
Similar to the upper eyelids, there are times when you shouldn’t shade since leaving a line uncolored gives them a three-dimensional appearance.
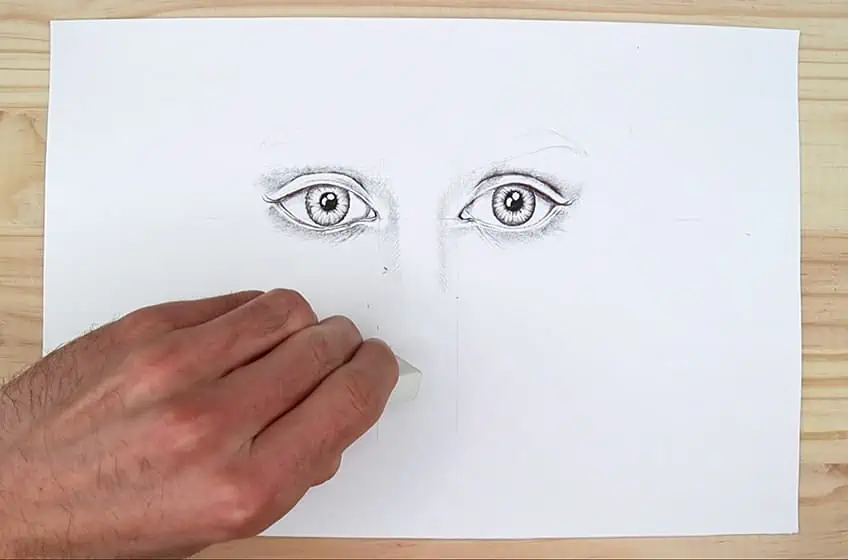
We may also remove any grid lines or markers that are unnecessary because we should have gone past them by this stage. As you look at our reference image, pay close attention to all the shadows close to the top and bottom of the eyes. Do not forget to maintain pressure on the penlight.
The shadows on either side of the nasal ridge might also be discussed.
Rechecking your irises is also a smart idea. See whether you can carefully create lines and dashes with both your ballpoint pen and 0.2 mm Micron pen. The iris can occasionally be filled in with numerous little forms using a pen rather than just lines. However, always use extreme caution because these fleeting moments are precious and shouldn’t be overshadowed.
It makes a significant difference to do this type of intricacy and to spend a lot of time reviewing all of our shadings. Your drawing will come to life as a result of this. Our picture should start to seem more realistic as we gradually add more markings with our ballpoint pens, shading over the necessary places, and gradually create these gradients.
Step 9: Drawing Our Eyelashes
The eyelashes have a significant role in drawing female eyes properly. Now that we have our 0.15 mm and 0.2 mm Micron pens, we can start creating our eyelashes. We prefer these narrower pens because they have a smaller diameter, which accurately depicts fine hairs. The most effective way to simulate eyelashes with your pen is to move them in a motion similar to how they flick. Before continuing, try practicing on a piece of blank paper.
Start creating these markings as soon as you feel comfortable doing so while referring back to your reference image frequently. Since the eyelashes in your original picture are described as having different widths, we will use a 0.2 mm as well as 0.15 mm Micron pen to regulate the width while we concentrate on the action of generating the marks.
Near the outer borders of the eye, the eyelashes appear to be thicker. This is because they are mostly moving in that direction. Some of them do, however, occasionally veer in arbitrary ways. Think about this idea while you make these markings. The lower eyelid lashes can also start to be applied. These lashes are considerably shorter and less pointed. They should be done with a swift and brief sweep of the hand because of their erratic mobility.
For these specifics, use your 0.15 mm as well as 0.2 mm Micron pens.
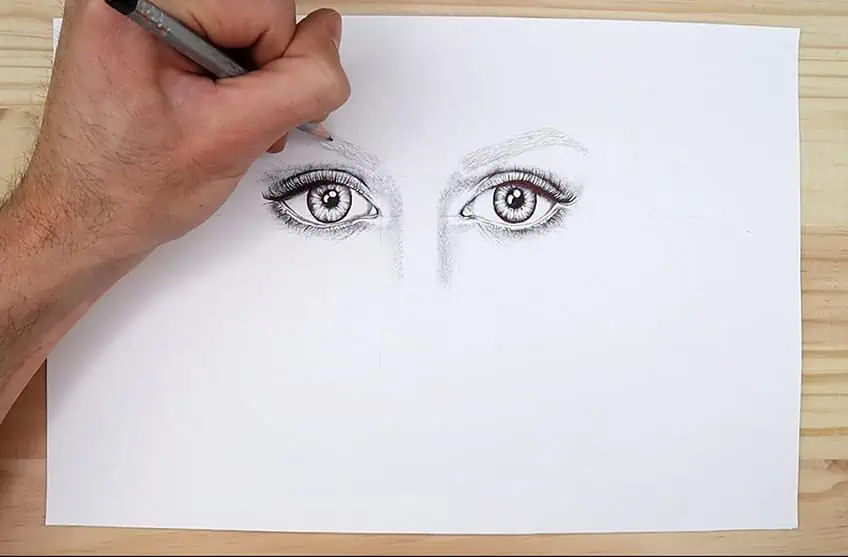
Step 10: Creating Our Eyebrows
The best place to practice drawing tiny hairs is on the brows. We should now have a basic idea of the form or outline of our brows. Start making small, delicate strokes with an H pencil from the inner part of the brow, going up and out towards the end of the brow. Because these hairs really grow outward rather than within, we do this. It will appear more accurate if the drawing replicates this action in exactly the same way.
Continue doing this technique on both eyebrows until they are both filled in with thin pencil lines. Take a look once we’ve completed both brows to determine whether you need to add any additional pencil fill-ins before we continue on to the second level with our Micron pens. Start making the same mark-creating motions and strokes over the pencil marks with your 0.2 mm Micron pen. The same as previously, start at the inner corner of the forehead and work your way out to the outside corners.
This will help to ensure the greatest outcome.
When both eyebrows have been completed with your 0.2 mm Micron pens, start softly shading over each brow with your ballpoint pens. Keep in mind that the pressure you exert on your palm will directly affect the drawing you produce; thus, we want to maintain relatively low pressure so that the brows won’t be very dark.
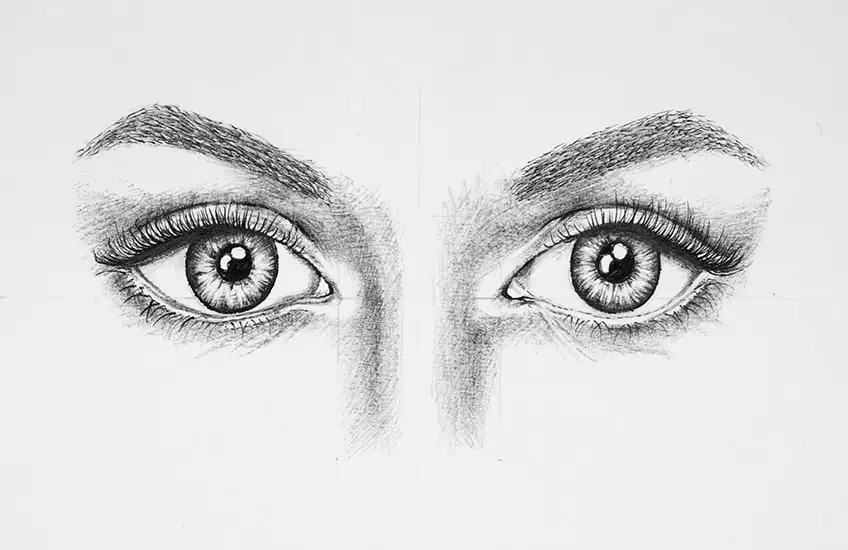
Step 11: Creating the Final Shading Layer With Pen
We’ve reached the end of the road. By now, we ought to have eyes that seem rather realistic. Here is where we may apply our last touches of shading using a ballpoint pen. Layering our shading gives our eye drawing a more realistic appearance.
However, use caution while shading; doing so can sometimes have unintended consequences.
Referencing your source picture, go over every part of your eyes to determine where any final shading layers need to be added. Analyzing the inner parts of the eyes is a good idea because here is where shadows are more likely to be the darkest.
Additionally, the nose’s shadows always characterize the gradient changes in this region quite precisely.

Keep in mind that the inner corners of your eye protrude somewhat, so the markings there may be lighter. Pay close attention to the sections on each side of the ridges of the nose where the slopes change. Your drawing should seem fantastic as long as you are certain that you review each element and check it to your reference image.
Useful Tips
- Give yourself the time you need to work on your painting since sketching takes time. This technique requires patience since it will enable you to acquire this talent in a useful way.
- Eyes may be challenging, and application is not always straightforward. When necessary, it may be necessary to redo a step and return to it later.
- Utilize your eraser for the initial stages. It’s important to get the first few stages perfect since they’ll serve as a model for shading and other elements.
- Always use gentle strokes when adding shade with a pen. In this manner, you may still incorporate a mark that you make accidentally into the drawing.
- Spend time perfecting your iris and pupils since this is the most effective technique for achieving realism.
Drawing eyes may seem like a difficult thing to do, but once you understand the proportions of the human face, it becomes far less daunting! We hope that you have enjoyed this drawing tutorial and we are sure that soon you will be drawing many other parts of the human anatomy!
Take a look at our eye drawing webstory here!
Frequently Asked Questions
Is Drawing Female Eyes Hard?
Learning how to draw eyes can seem extremely daunting. There are so many facets to keep in mind when creating eye sketches. However, it can be broken down into smaller steps that are easy to follow.
What Is the Hardest Part of Drawing Eyes?
Getting the pupils and irises to look real can be challenging. Some people also struggle with eyelashes. Yet, if you follow this tutorial step-by-step, you will find it easy to layer all the various elements until you end up with the result you desire.

Matthew Matthysen is a multidisciplinary artist. He completed his fine art degree, majoring in History of Art and Contemporary Drawing Practice at the University of Witwatersrand, South Africa. Before joining acrylgiessen In 2020, Matthew worked part-time as an art teacher at Reddford Blue Hills High school. Matthew creates drawing and painting tutorials for acrylgiessen and captures them not only photographically and in written form. He also records the creation of his works in his own creative studio as in video format, from which later with a voiceover and a video editor also drawing tutorials for the Youtube channel of acrylgiessen are created.
Learn more about Matthew Matthysen and about acrylgiessen.