How to Draw Eyebrows – A Facial Feature Drawing Lesson
This post may contain affiliate links. We may earn a small commission from purchases made through them, at no additional cost to you.
Our eyebrows are a very distinctive feature of the face. They frame the eyes and define the upper part of the face. You cannot fully capture a person’s likeness until you are able to accurately draw their eyebrows and their eyes. Given the intricate and complicated aspects of the eyes and brows, drawing them can be challenging, so it is essential to observe your model closely and to understand how the eyebrow is shaped and structured. In addition, the type of face you are drawing will also inform the nature of your eyebrow sketch. Men tend to have heavier and less arched brows than women, for example. For the purposes of this lesson, we will examine how to draw eyebrows on a female face. Once you have worked through this tutorial you will be able to apply this method of easy eyebrow drawing to various types of faces.
A Tutorial on How to Draw Eyebrows
Once you grasp the procedure, drawing eyebrows is a simple and enjoyable exercise to do on different faces. Fortunately, hairs are a collection of lines that are straightforward to depict in an image. In this article, we will look at the basic technique of drawing eyebrows on a female face, as well as how eyelashes grow from the lid. It is not difficult to create eyebrow drawings; all it takes is perseverance and a bunch of lines. Turning an eyebrow sketch into a life-like brow drawing is mainly a question of contouring and lighting details, which are then refined.
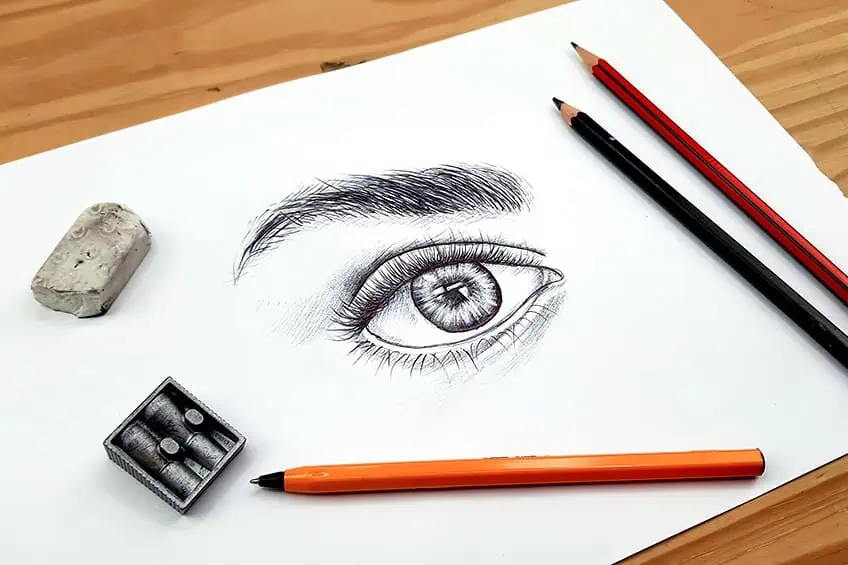
We’ll just need a few simple drawing tools for this easy eyebrow drawing lesson.
How to Draw Realistic Eyebrows Step by Step
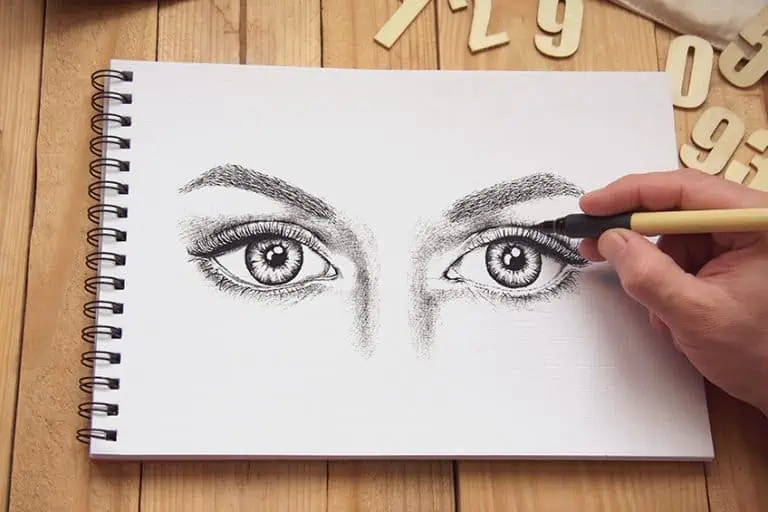
In this lesson, we’ll walk through how to draw realistic eyebrows overall, with an emphasis on how and where to locate the eyebrow above an eye. Although we will be creating a feminine eye and brow, the procedure for creating a brow is the same. When sketching brows, you should start with an eye to assist you to situate the brow.
We’ll start with the basics of producing an eye and eyebrow sketch, drawing an eye and a brow.
As we progress with the eyebrow drawing, we will gradually refine the features by using a darker pencil and, finally, sketching with a pen to bring optimum contrast to the eyebrow sketch. Now that we know exactly what to anticipate, let’s get started with the eyebrow drawing tutorial.
Step 1: Creating an Eye
We’ll begin by lightly sketching the eye, which we’ll then enhance with detailed features. To fully contextualize the brow, we want to create an eye that is as realistic as possible. A useful idea would be to refer to an image of an eye from the web or a photograph as a reference.

As you work on your sketch, try keeping it as simple as possible. As we determine the placement of the eye and brow, we want to create light line work. Maintain a light sketching style, focusing on basic line work and defining the form of the eye. To demarcate the location of the brow relative to the eye, use very light gestures to set out your lines.
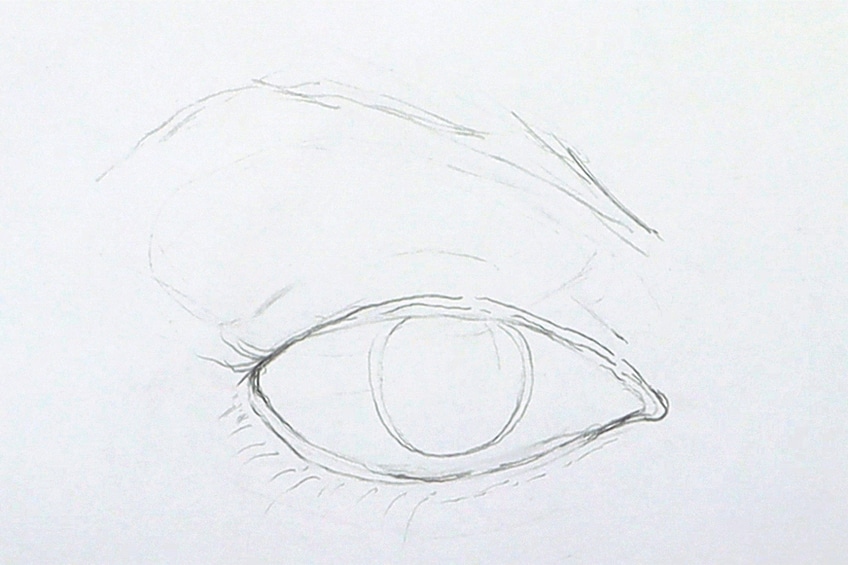
After we’ve placed the features and specified the positioning of the brow and eye, we can begin sketching the eye. Understanding how to draw a realistic eyebrow must be matched with mastering how to create a realistic eye. Set out your sketch with a light pencil drawing; if you’re using a source image, make sure it’s guiding your sketching process.

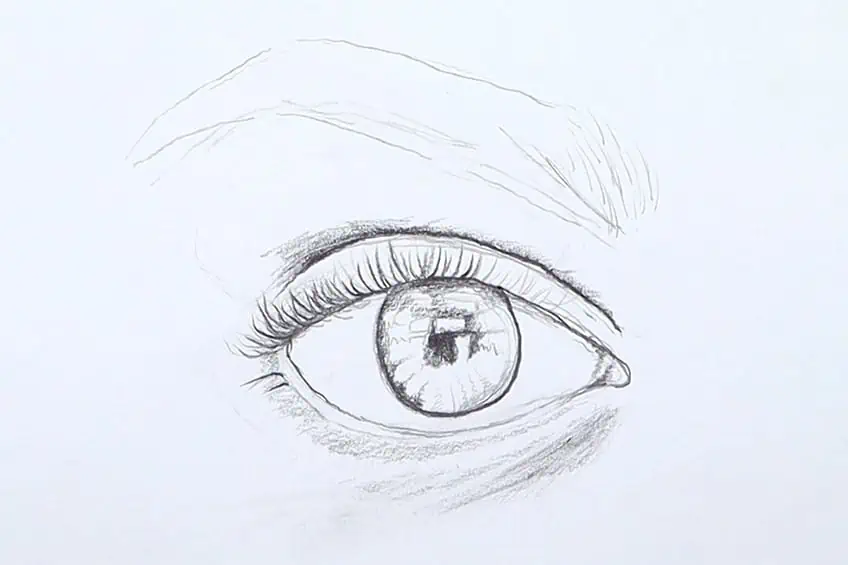
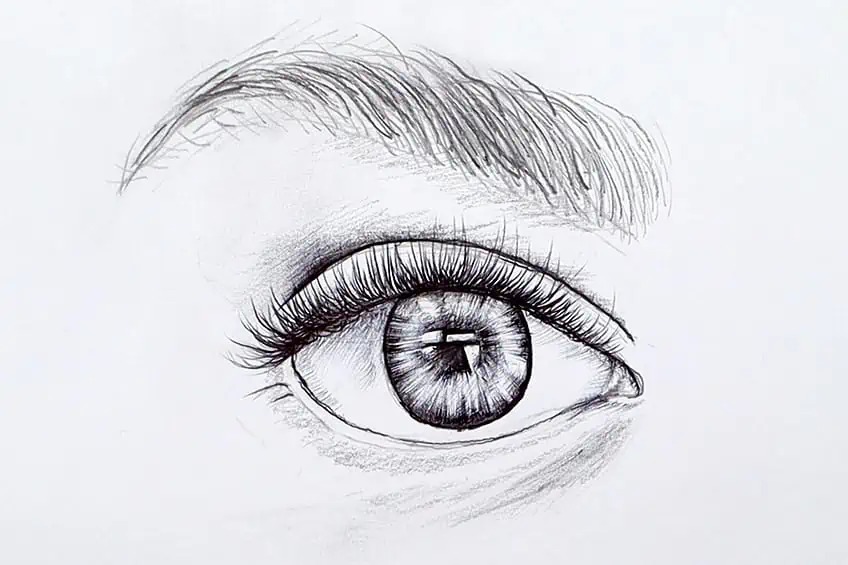
Step 2: Eye Shading and Other Details
You may begin adding features and shading to your eye sketch once you have defined the shape of the eye to your satisfaction. Work on the eye shape a little bit, taking care to get the irises and pupils right. Creating reflections in the eye will make them look more life-like.
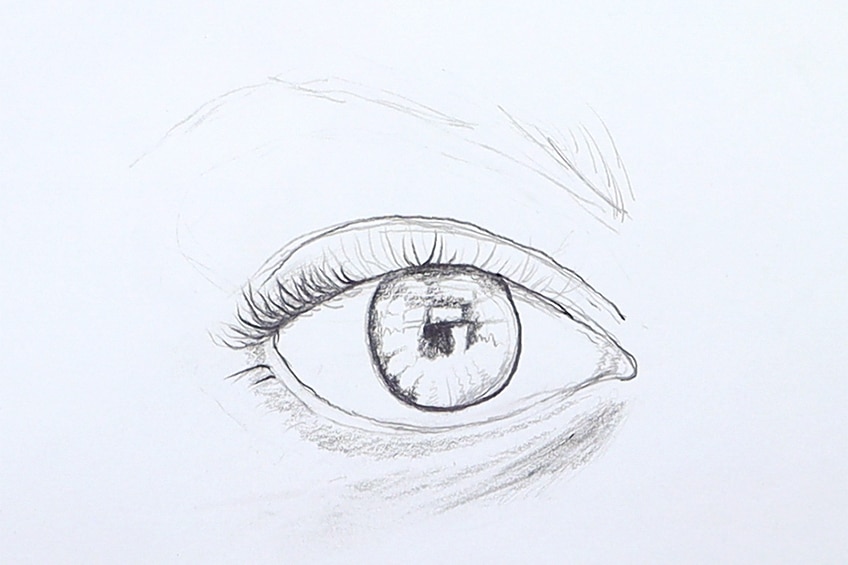
You should focus on putting in the eyelashes and also the eyelid. This is especially significant since the eyelid will cast a faint shadow on the brow. Along with the brow ridge, the eyelids protrude somewhat. This also results in the formation of eyebrows around the peak of the eye.

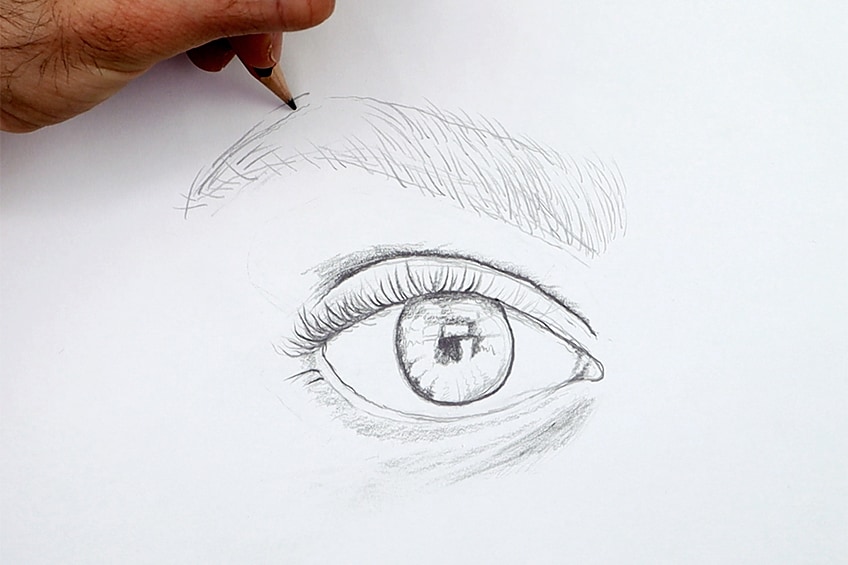
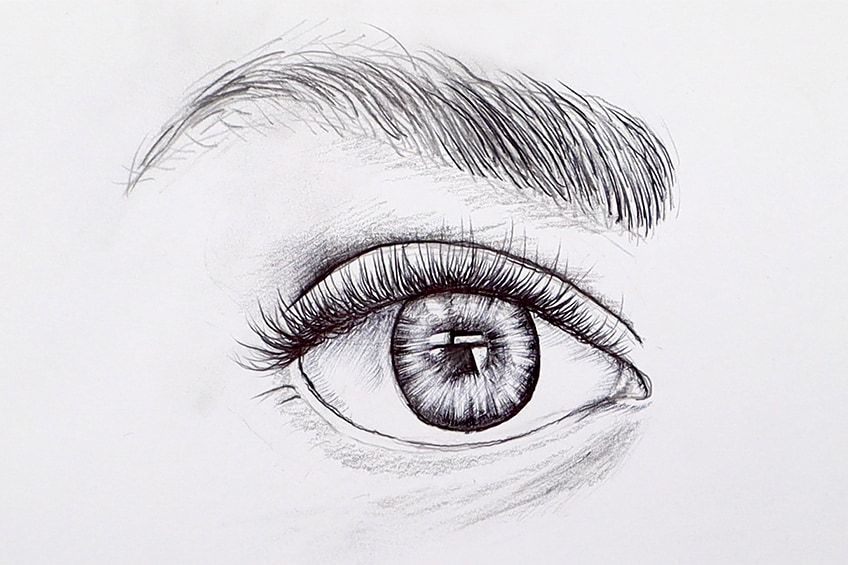
Step 3: Adding an Outline to the Eyebrow
Once we’ve drawn a reasonably realistic eye, we may experiment with how we shape the brow above the eye. Every brow form is unique, and it is entirely up to you. The brow can be narrow, broad, short, long, or any other shape you want it to be above the eye. However, keep in mind that the brow forms an arch shape above the eye that can vary significantly from one person to another.
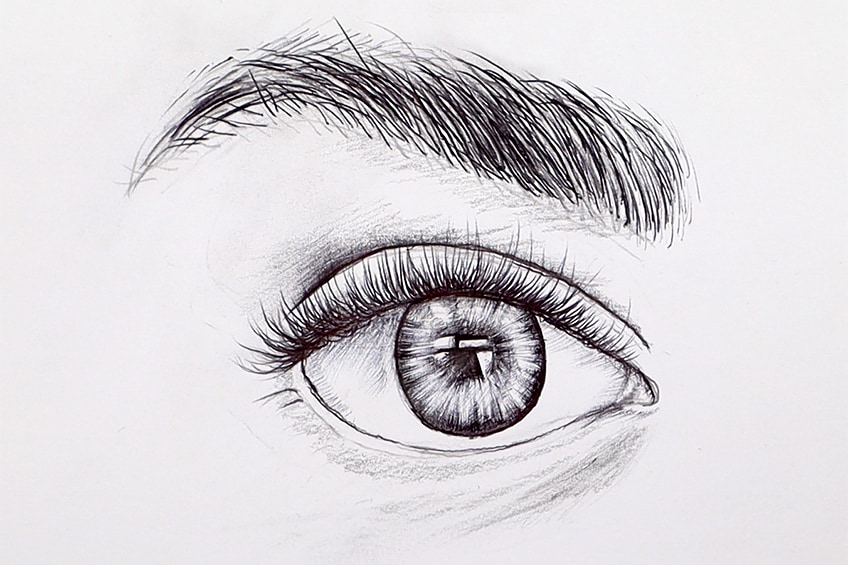
Step 4: Creating the Eyebrow Hair
Now that you have you’ve delineated the form of the brow and sketched the outline, you can use it as a guide for your hair placement. Drawing eyebrow hairs is straightforward; simply draw a succession of small lines with a rapid sweep of the hand. Nevertheless, go gently along each line; for the time being, you may accomplish this with your HB pencil.
The hairs must all move in the very same direction, and you can add more or fewer in different places of the brow to experiment with density. You can have randomized hairs with one or two hairs going the other way to give the brow a more unkempt appearance Alternatively, you may maintain them consistently to make the brow appear more manicured.

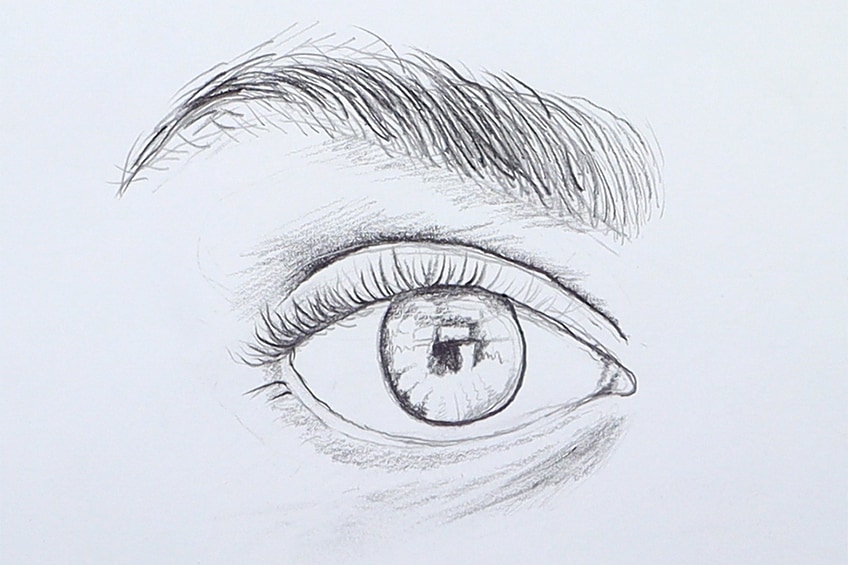
Step 5: Making the Eyebrows and Eyes Darker
We should now have a reasonably accurate drawing of the eye and brow. From here, we can go over our shading and features in the eye with a 2B pencil to render them more distinct. Try keeping your dark lines minimal on the brow, using darker lines in certain parts of the brow. This will result in a range of thick and thin brow regions.

When adding more black hairs to the eyebrow, be mindful of how much pressure you use on the pencil. We produce shading and light with brows by drawing narrower and softer lines or darker, broader lines. So, attempt to draw darker lines in areas of the eyebrow where you want them, and relax your hand for lighter parts.
Step 6: Using Pen to Start Refining the Sketch
We’ll now begin to draw using a pen, going over the eye features and brow lines. The sketching technique is similar to that of a ballpoint pen in that we assess the pressure exerted on the pen and may produce brighter and darker tonal qualities in the drawing. The same is true for adding hairs to the brows.
As you use your pen to do the shading and lines, try to be patient with the eye. Even though this article isn’t about the eye, spending more time on details for the eye will only accentuate the characteristics of the brow. Take your time filling in the eyelashes; each stroke causes the lashes above the eye to move higher.
As you shade in the design with your pen, we will gradually increase the contrast, generating more dramatic shadows. This will provide the eye with more depth and provide the brow dimension rather than resting flat. When drawing with a pen, you want to move slowly to avoid making dumb mistakes.

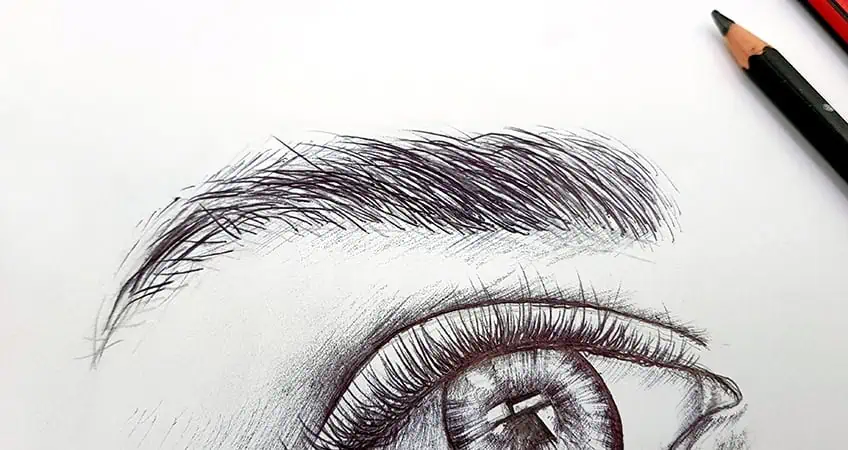
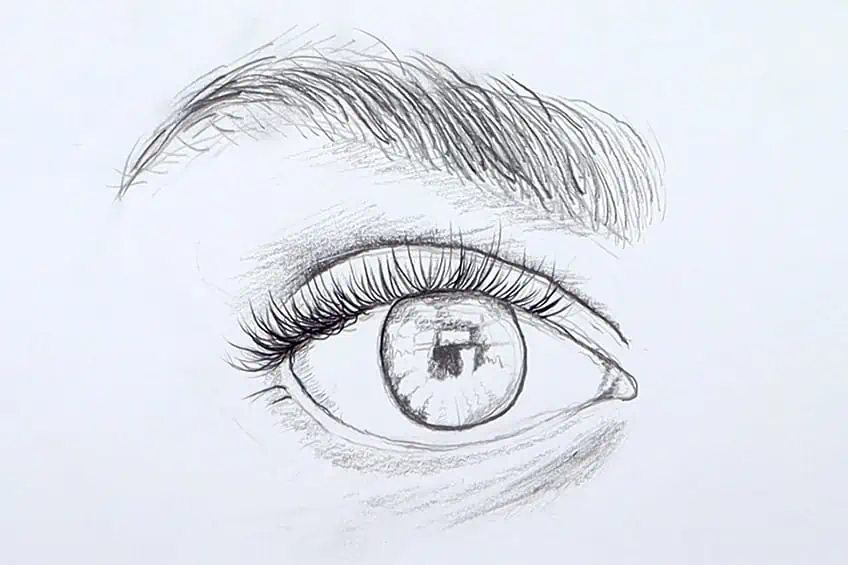
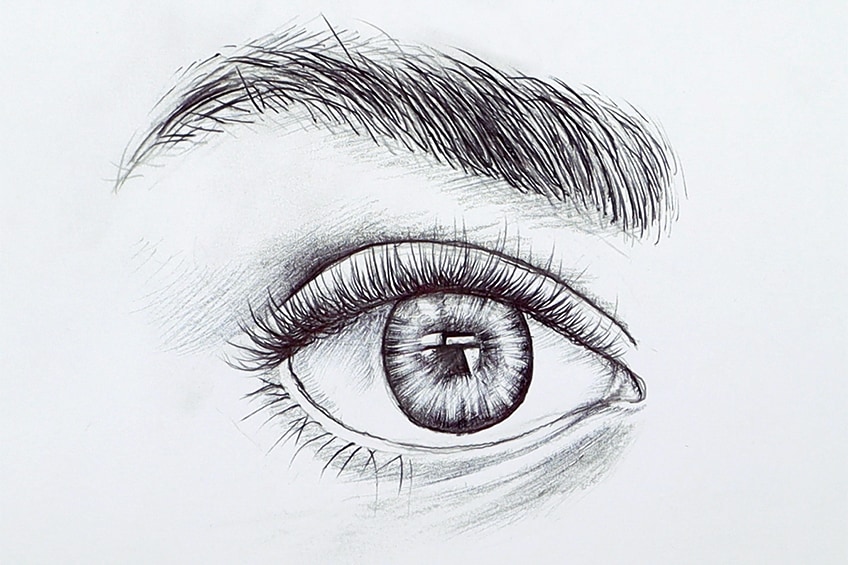
Step 7: Filling in the Brows With Pen
As your eye begins to seem more precise and lifelike upon adding features with your pen, you may begin to add linework for the brows. Again, when you create lines, use the pencil markings to guide you. Also, make sure that all of your lines flow in the same way.
The brows will deepen somewhat as you sketch with your pen. Again, pay close attention to your point pressure, pushing harder for darker lines and gentler for lighter lines. Adding diversity to the brows will make them more lifelike.

The thickest hairs are usually placed in the center of the brow if you want to make it thick. However, there are fewer hairs on the brow’s margins. Again, every brow is unique, so it’s up to you to experiment. Keep in mind that a pen is irreversible, so be certain.
When drawing the brow lines, keep in mind that the action should be one quick, fast stroke of the pen. This will result in each small hair having a bigger tip and a thinner shaft, indicating a genuine hair follicle. Give it your best shot with each one, trying to make sure they all move together.

It’s worth noting that brow hairs travel towards the temple, implying that they migrate in that direction. When sketching the right brow, keep in mind that the follicles will flow to the left, and vice versa for the left eye or eyebrow.
Make absolutely sure you don’t add too many hairs; you want a good number. When it comes to brow hairs, there aren’t many of them. There are times when they are clustered or thicker in areas, but there are other times when they are thinner at the brow’s margins. Remember this throughout the brow-drawing process.
At the end, we should have a really realistic brow. It is entirely up to you whether you want the entire brow to be dense or varied; nevertheless, variation in density frequently makes the brow appear more natural. Most crucial, ensure that the brows flow in a single direction towards the exterior of the face.

That’s a broad description of the sketching technique for creating eyebrows. When learning how to draw realistic eyebrows, it is necessary to include a realistic eye to assist define the brow. Because the brow does not function in solitude, it needs the assistance of an eye to understand how it rests on the brow ridge.
Useful Tips
- Create your layers. Eyebrows are a sequence of lines that you should sketch out with pencils before devoting yourself to sketching them in pen.
- Allow yourself plenty of time. Don’t speed through the brow sketching process; instead, take breaks as needed.
- Put the eyebrows into context. Eyebrows may be drawn in any shape, but to view them as clearly as possible, a good recommendation is to sketch your eye as realistically as possible.
- With a little flick of the wrist, draw each line. You want to create the hairs on your eyebrows with a flip of the wrist, but you also want to proceed gently and take your time with every hair.
- Experimentation is key. You can always make your brows thicker by drawing more lines or thinner by drawing fewer lines. Investigate the many options.
- Enjoy the entire process. It’s natural to become frustrated when attempting to draw something correctly; remember to take breaks to make the task more pleasurable.
It is not difficult to create brows; it is merely an issue of drawing lines and how those lines have been drawn. When you have an eye to assist you to place the eyebrow sketch, you can work on it and polish it with additional contrast and detail. Then it’s just a question of getting the stroke movement right and making sure the hairs all follow the same path, and you’ll have realistic-looking brows. When sketching with a pen, take your time; it’s a terrific instrument for line work, but it can easily be mucked up if hurried.
Frequently Asked Questions
Is Learning How to Draw Realistic Eyebrows Hard?
It’s all about perspective. Once you have placed your eye for some context, it becomes easier to know where to put and how to shape the eyebrows. Use a reference image to assist with the overall appearance.
What Are Good Tips to Remember When Drawing Eyebrows?
Once you’ve added the primary hairs, fill out the brows by adding extra hairs as needed. You can choose to leave this step out if you prefer lighter brows. The size, shape, and shade of the brows you create may have a significant influence on the personality of a face.

Matthew Matthysen is a multidisciplinary artist. He completed his fine art degree, majoring in History of Art and Contemporary Drawing Practice at the University of Witwatersrand, South Africa. Before joining acrylgiessen In 2020, Matthew worked part-time as an art teacher at Reddford Blue Hills High school. Matthew creates drawing and painting tutorials for acrylgiessen and captures them not only photographically and in written form. He also records the creation of his works in his own creative studio as in video format, from which later with a voiceover and a video editor also drawing tutorials for the Youtube channel of acrylgiessen are created.
Learn more about Matthew Matthysen and about acrylgiessen.