Snake Drawing – An Easy Guide to a Realistically-Shaped Snake
This post may contain affiliate links. We may earn a small commission from purchases made through them, at no additional cost to you.
Snakes have a very ominous quality due to their sleek and scaley exterior. Their brooding aesthetic has often turned them into sinister symbols of evil, associating them with gothic lore and the genre of horror. That being said, they are also extremely beautiful and vary so much in species. In this tutorial on how to draw a snake, we will look at how we can create a realistic snake drawing through some simple steps. A snake drawing is quite a challenge, as snakes come with very specific features, especially in their scaly skin. This provides us with not only a great creature to add to our drawing repertoire but also an interesting challenge to represent unique textures within a drawing.
Step-by-Step Guide on Drawing a Snake
There are many different snake species to use as a reference and in this tutorial, we will create our unique snake by drawing inspiration from the python and rattlesnake. Naturally, snakes share very similar visual characteristics, so we will play around with the features. We will start by forming the snake in its most basic shapes. From there, we will start working on some base colors to set the color values for our snake drawing. We will then work on the head of the snake as its part and then move on to the body. We will work with layering color, and shading, and finally spend some time on the scales. Then lastly we will add the final details and highlights. Now that we know what to expect, let’s get started on this tutorial on how to draw a snake.

Step 1: Shaping the Snake
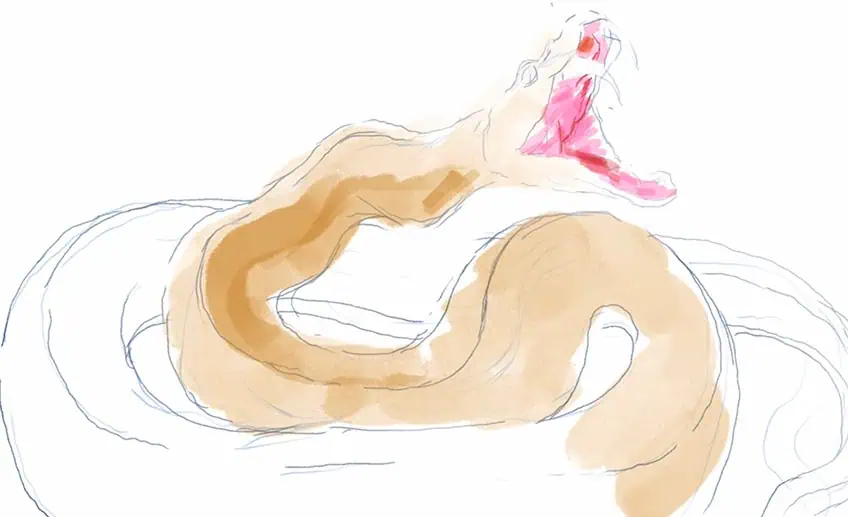
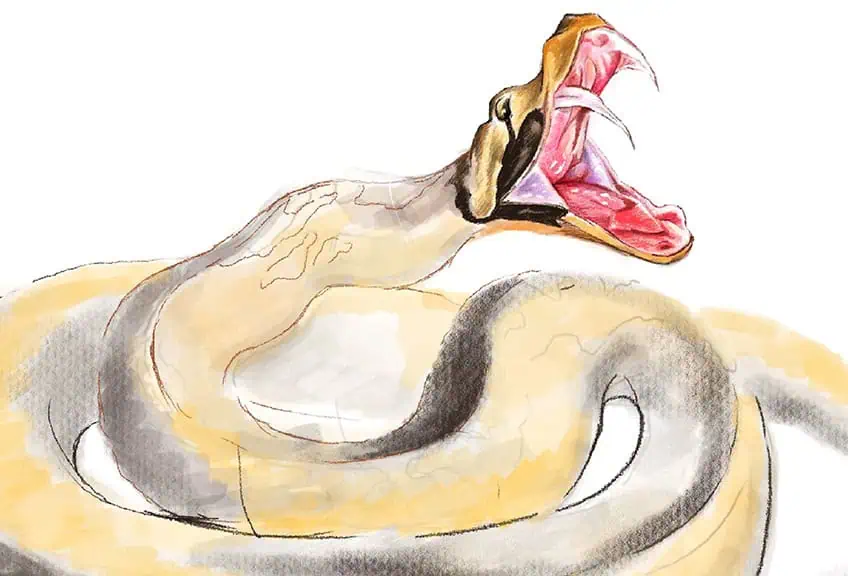
We can start with a very loose sketch, where we aim to capture the basic shape and proportions of the snake.
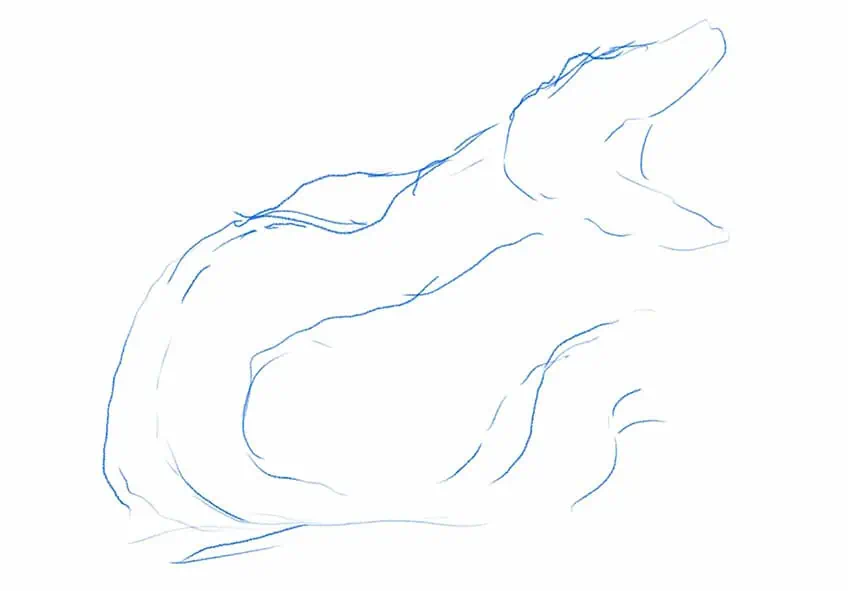
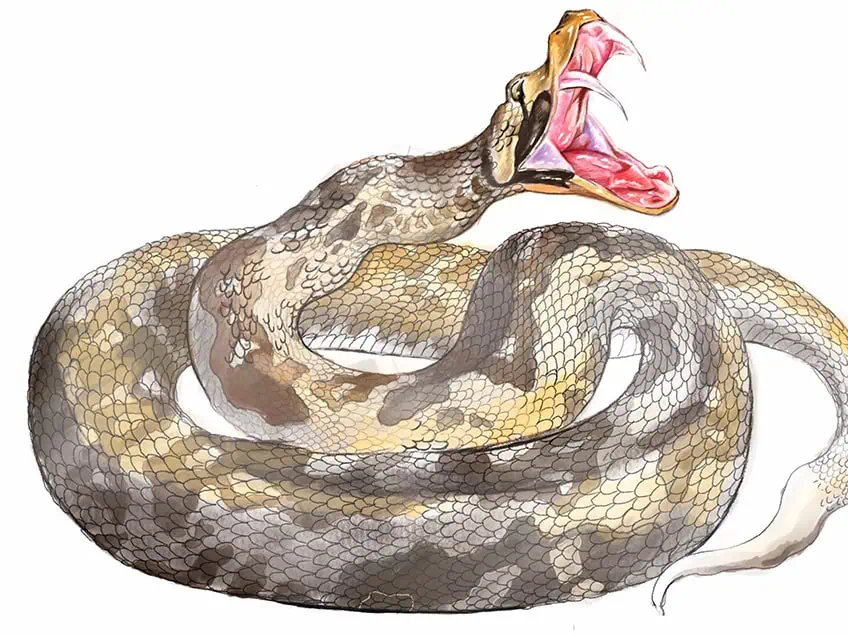
We want to think of a unique pose or movement to give a more nuanced quality to our drawing. In this case, we are establishing a striking pose within the snake drawing.
Naturally, this means the snake will be coiled up as it propels itself into a striking position. We also want to achieve a tube-like structure within its body as we shape the snake. Consider working with a reference image to gain some assistance in your sketching process for your snake drawing.
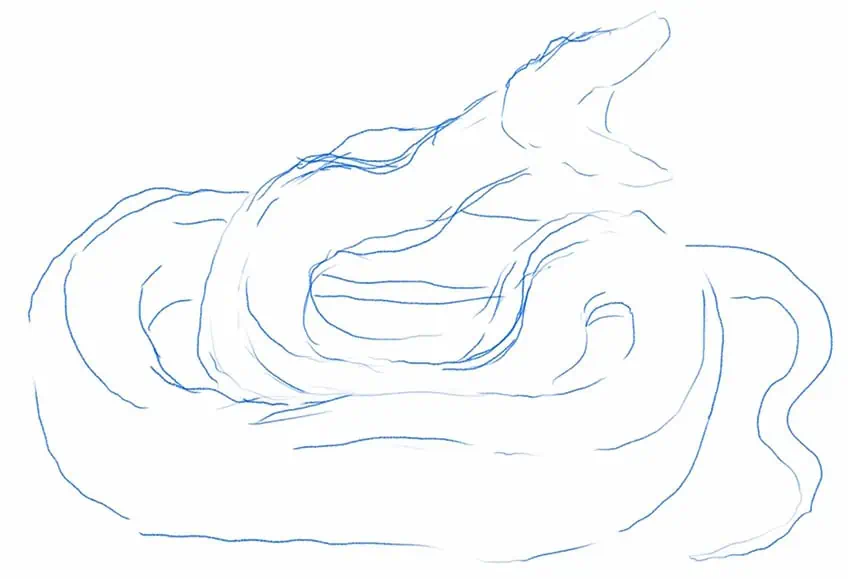
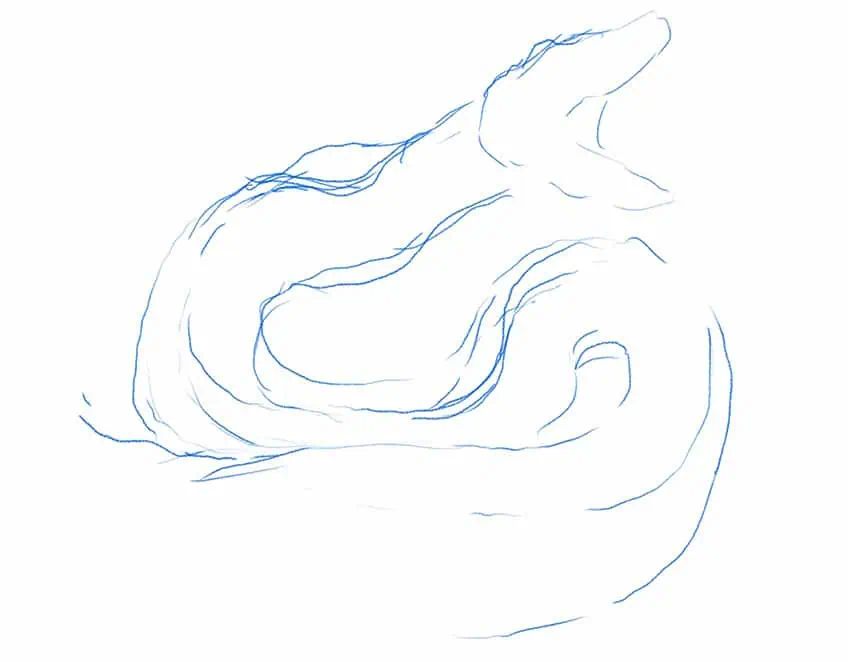
Once we have established the general outline of our snake drawing, we can then proceed to lightly erase the drawing leaving behind ghost lines. This will help to assist us as we refine the drawing of the snake.
Step 2: Refining the Snake Sketch
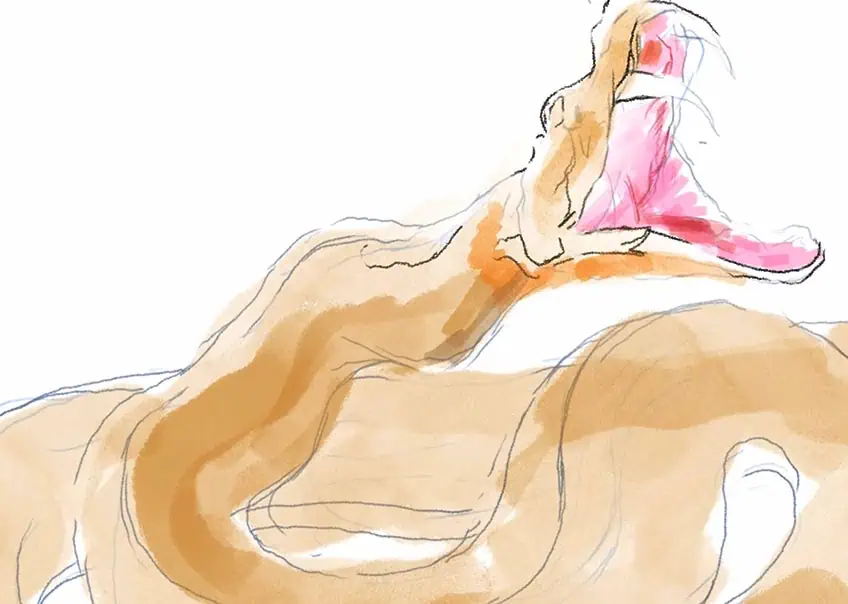
We want to start working from the head of the snake, slowly refining the outline of the snake sketch. This is where we start to bring more form to the unique features, such as the fangs, eyes, and head shape.
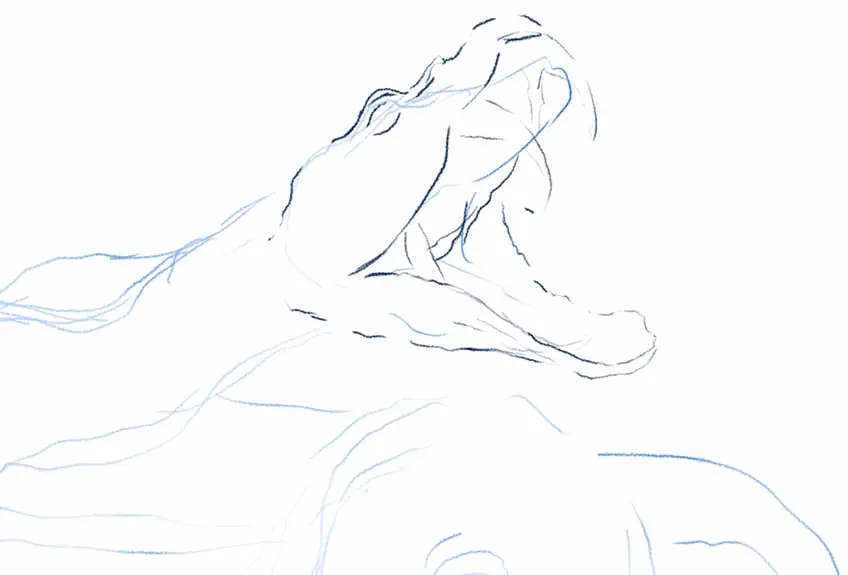
Again, snakes are quite tube-like or cylindrical in their bodies, however, they have a squarish quality to their bodies that causes their base or underbelly to flatten slightly. Snakes are also muscular, so this causes ridges to form along their body.
Take your time with the snake-outlined structure, making sure you create a proportional shape within the snake drawing that accurately represents the scale of the animal.
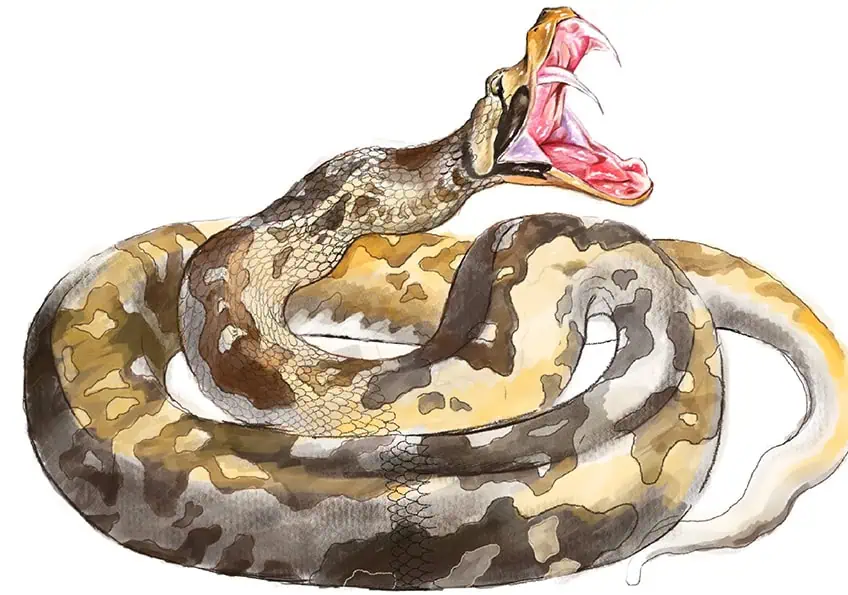
Step 3: Adding Color and Detail to the Head of the Snake
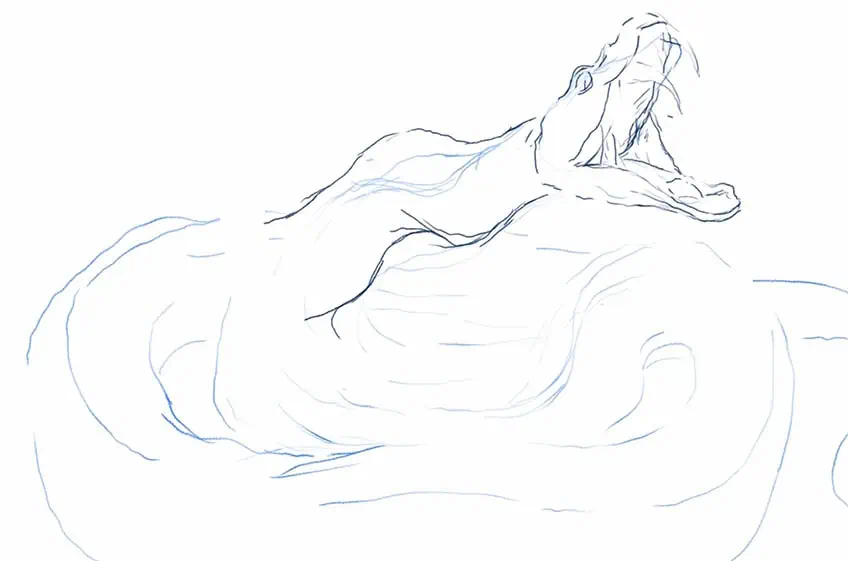
This is where we start to set the undertone of color, as we slowly start to establish the color values within the head of the snake. This is where we decide on the coloration of our snake’s skin.
We want to be quite light with our application of color, as we are simply trying to understand which areas are lighter and darker in the snake. We can carry this color palette throughout the entire snake structure to maintain consistency.
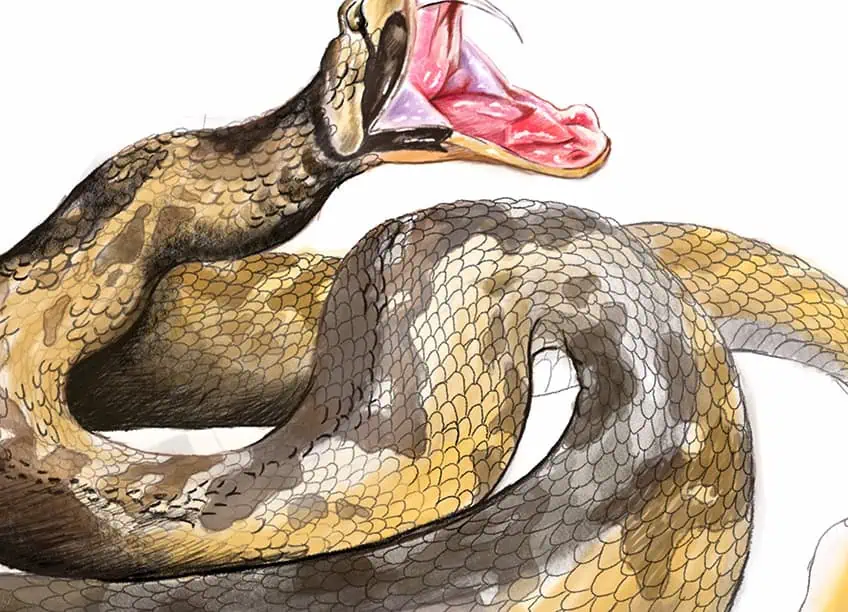
The mouth of a snake is often quite pink and fleshy, so we want to try and capture that quality within the mouth. We want to build up the details with a spectrum of pink and red colors.
We can start to bring more structure to the different features within the mouth such as the fangs, and the web-like structure connecting the upper and lower jaw.

We can also consider working in a pattern along the top surface area of the face, as this can set the tone for the rest of the body and the recurring pattern.
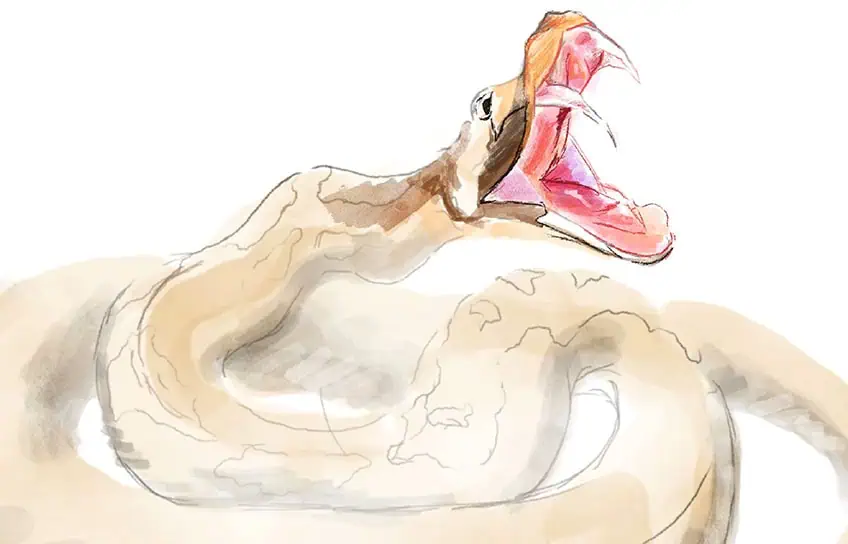
Another good suggestion is to add some light hues of pink to create more reflective qualities that represent moisture within most areas of the inner mouth. We can also start representing the eyes more distinctly with an outline and a pupil.
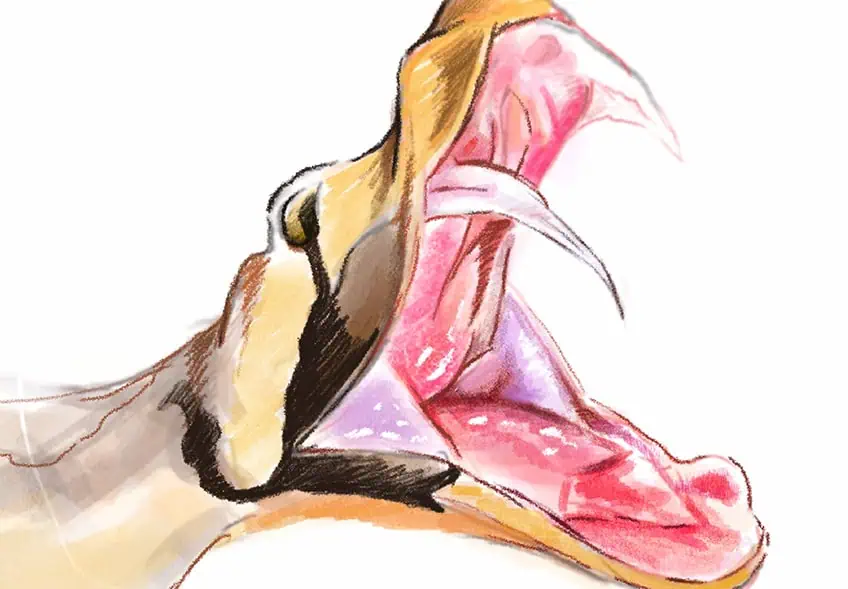
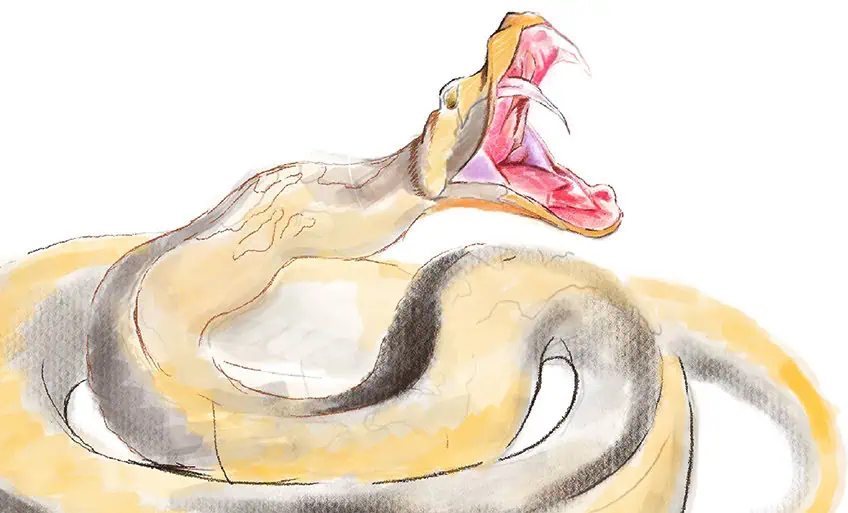
Take your time defining the head and the patterns that move along the surface area of the face. We want to also think about using darker browns and lighter yellows for more dimension in the facial structure. We want to set up the head as an example of the coloration and patterns that will be evident throughout the rest of the snake’s body. We want to work shading and highlights into the yellowish areas of the snake, especially where the head distorts slightly in shape as the mouth extends open.
Take your time building up these layers of color and details until the head becomes more three-dimensional and realistic. We can also add white highlights to the mouth to enhance the moist quality inside the mouth.

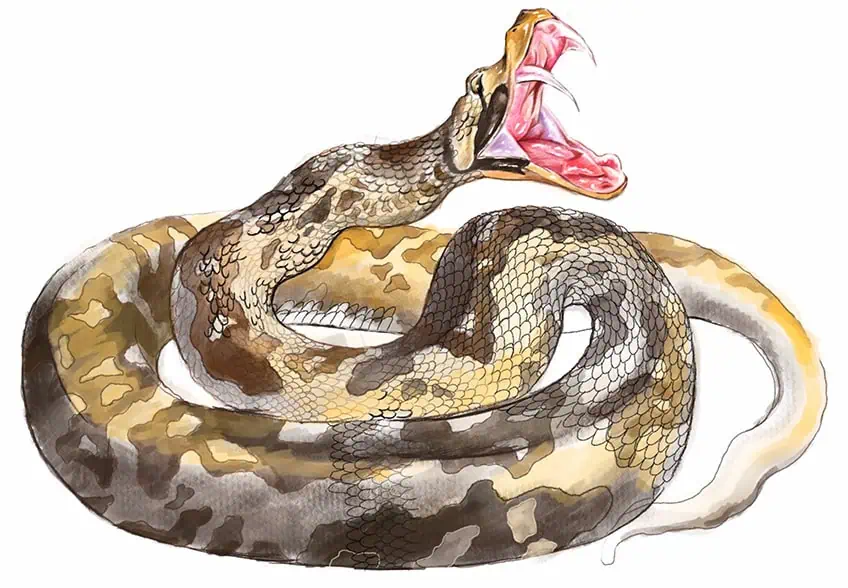
Step 4: Adding Color and Detail to the Body of the Snake
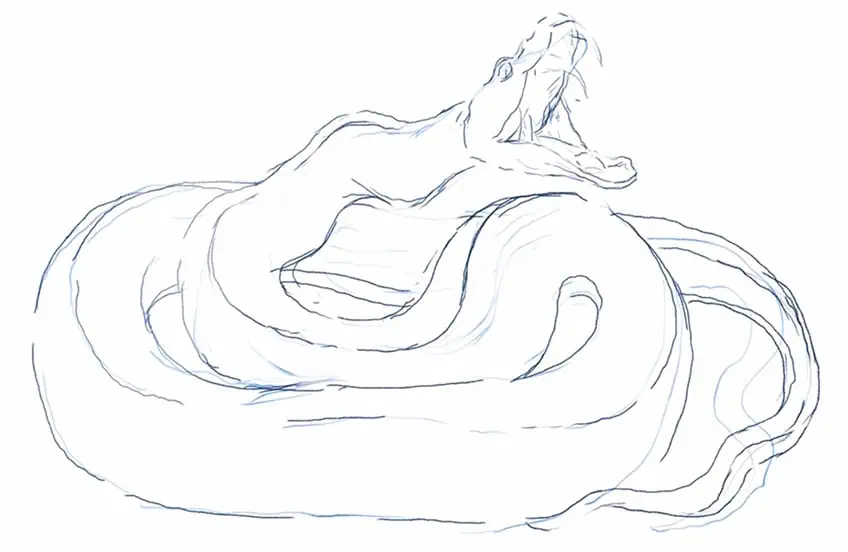
We now want to lightly work in a similar pattern to the face throughout the rest of the body. The intention is to also start working on some brown shading to represent shadows that form around the three-dimensional structure of the snake.
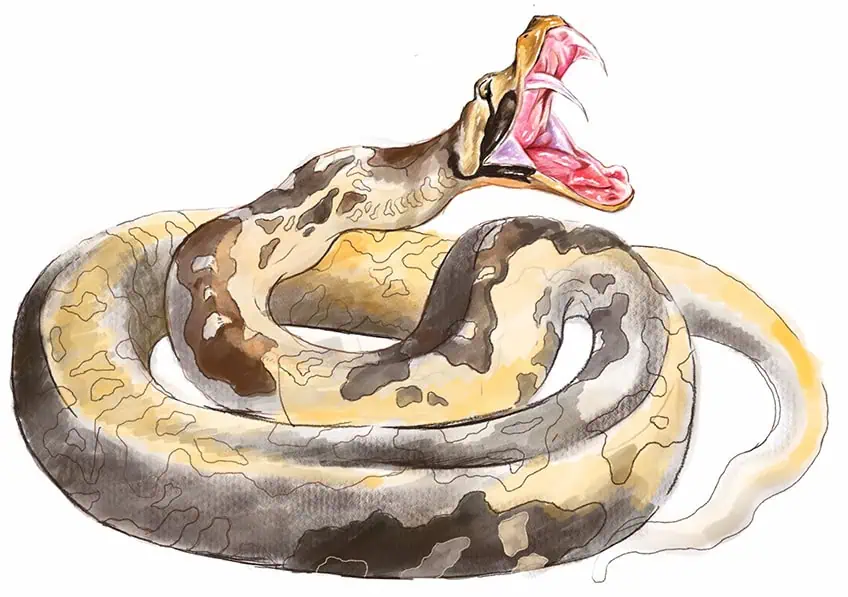
Try to keep these colors and details light for now as you establish them throughout the entire body of the snake.
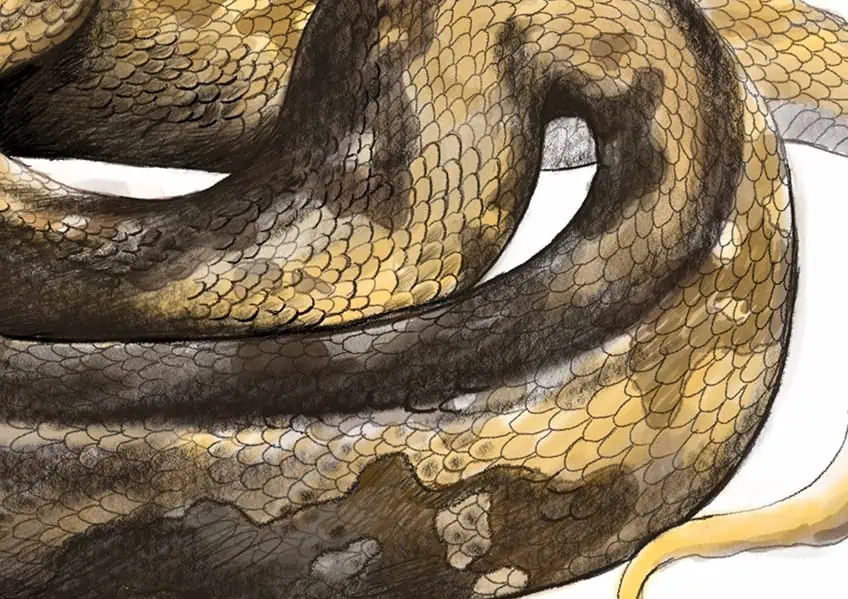
Once we have worked color and pattern throughout the entire snake drawing, we can now work in some light scale details. We want to add these details throughout the entire structure of the snake starting from the head.
We want to think about the pattern as laying bricks, where we add in these little arch shapes row by row. As we complete one row, we can then use it to help establish the placement of the next row of patterns.

As long as we go row by row, we will maintain uniformity and consistency as we work our way through the entire cylindrical structure of the snake. By doing this, we will find that we are less likely to make a mistake.
We will also find that as we curve around the body, there will be subtle twisting and distortion within the scales. This is okay, as it gives a more organic and natural feel to how the scales misshapen as the curve with the body.
This will take some time, but we want to make sure we work these scales throughout the entire body of the snake structure.
Once we have added scales to the entire snake structure, we can then proceed to erase the entire body lightly. We don’t need to erase the head as the head should be complete in its details and color.
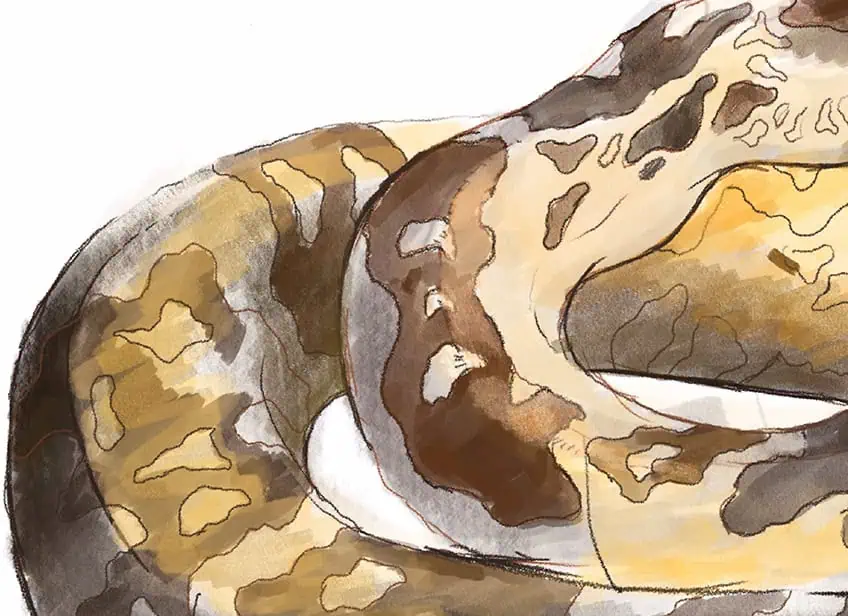
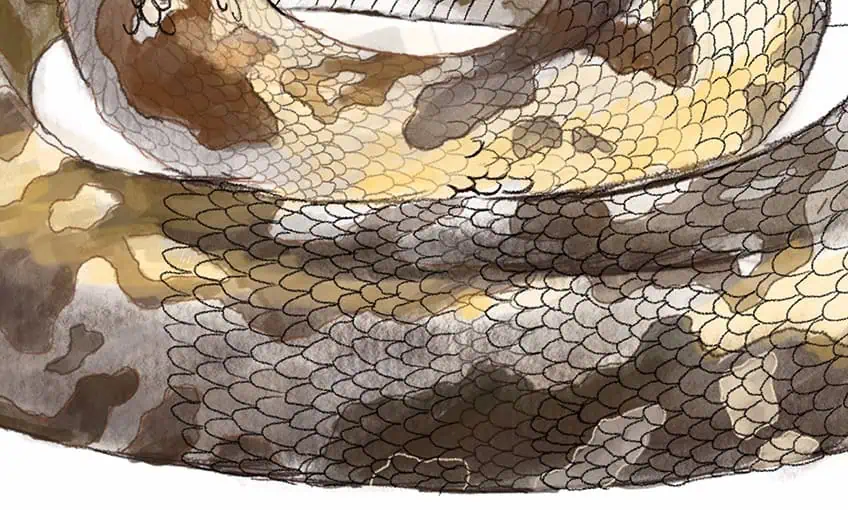
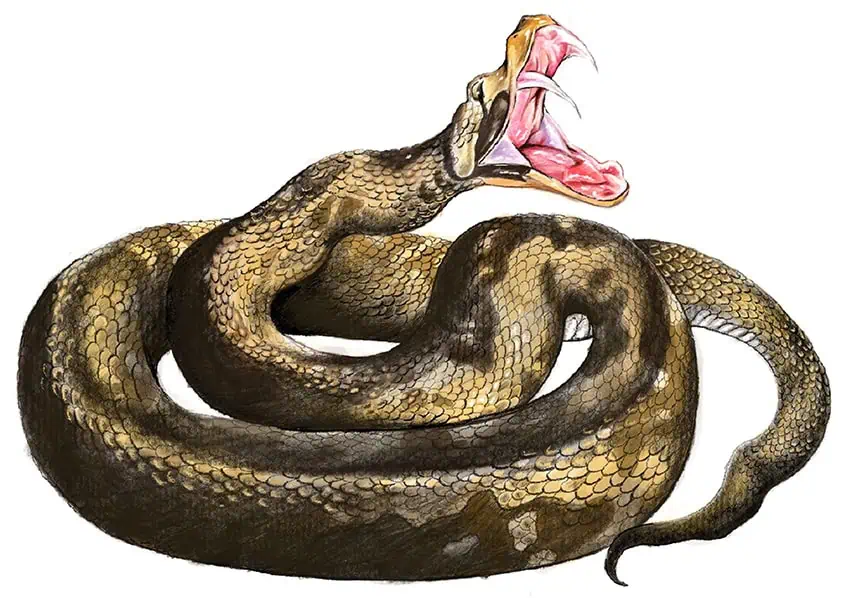
Step 5: Refining the Scales and Shading
This is where we can start working with darker browns and black colors to bring more structure to the shape of the scales and the body of the snake.
We can be quite vivid at this point with how we add in shadow formations, this will enhance the three-dimensional quality of the snake and provide a good contrast between lighter and darker areas.
We want to be conscious of the direction from which the light source would be present to maintain consistency within the shadow placement within our snake drawing. We can also start to work strategically with linework to emphasize the three-dimensional quality of the scales. We can do this by defining a single side of each scale with a darker line that defines the shadowed side of the snake. This means we can move through the body and add these darker lines to each scale, as long as they remain along the shadows. This will take time but if we are patient and work our way through the entire snake we will see how it creates a more realistic shape within the scales.
We can also keep the shape of the scales fainter as they shift into the illuminated areas of the snake’s body.
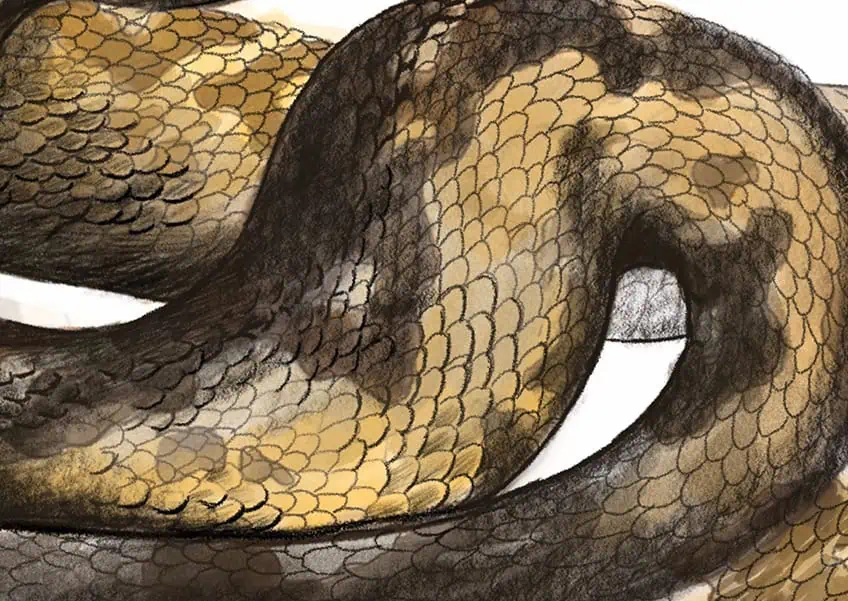
Every time we come to ridges in the body with stark shadows, we can then enhance the ridges of each scale with darker linework. As we proceed with this process throughout the entire body of the snake, we will see how it creates a more realistic snake drawing.
This will take time, but just try to take breaks as you work your way through the entire structure of the snake drawing. Slowly but surely, these scales will enhance the overall quality of the snake drawing, as long as they are consistent throughout the entire structure of the snake.
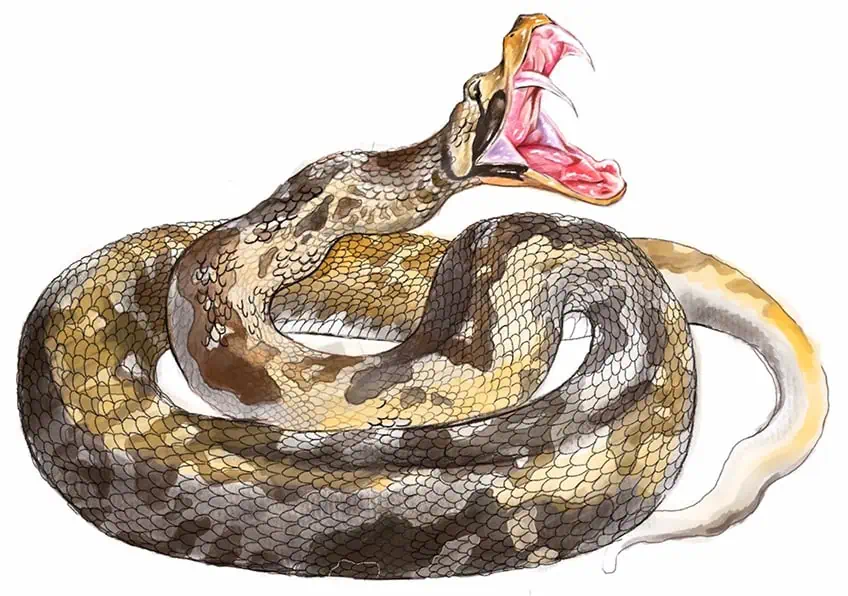
Step 6: Adding Last Details to the Snake Drawing
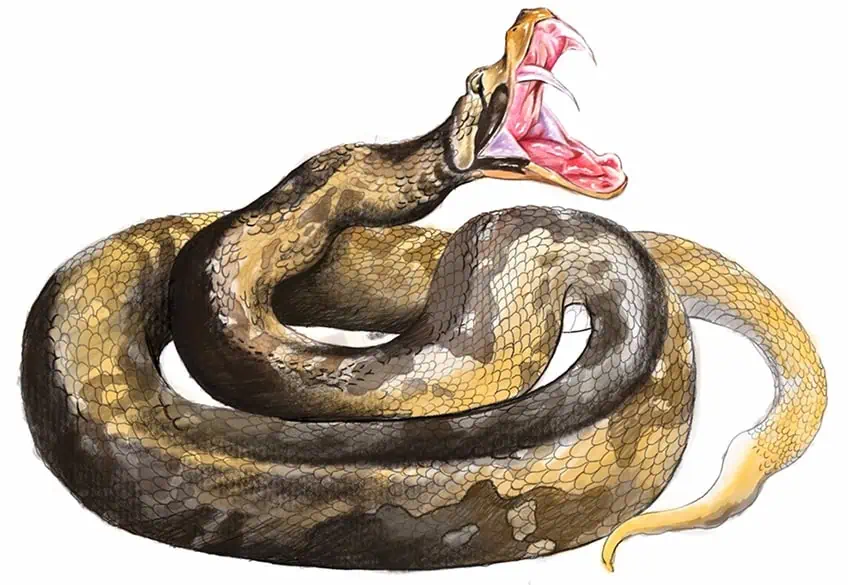
Once we have refined the scales we can slowly work in some darker shading to the patterns throughout the body of the snake with some brown colors.

We can also darker any shades and refine the outline of the snake drawing one last time to further enhance the form of the body.
Another good suggestion is to work on the last highlights that form along the scales that are most exposed to the light source within the snake drawing.
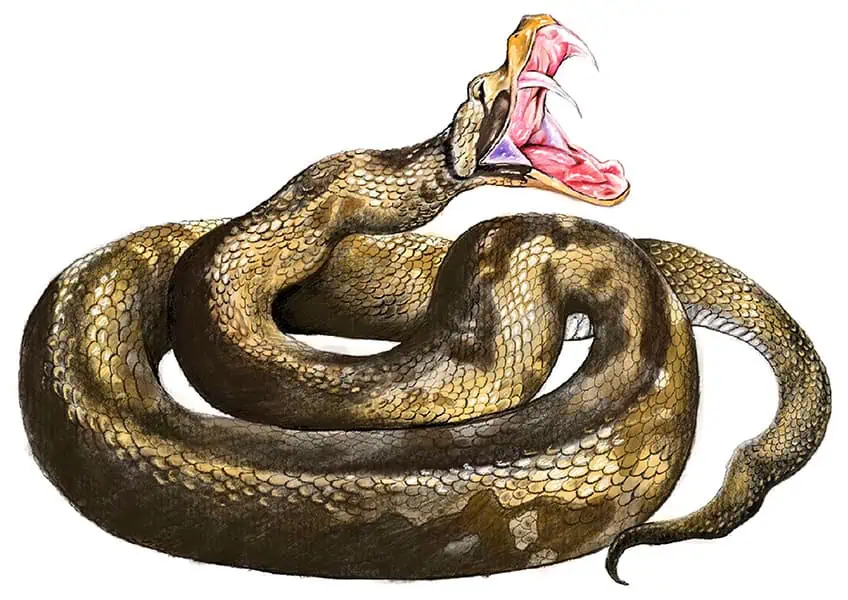
We want to be quite sparing with these highlights, making sure we only add them to the areas of the scales that are the lightest in color. Take your time with this detail and try not to overpower the snake drawing. And there you have it! How to draw a snake through a few simple steps.
Tips and Tricks to Remember
- Work with simple shapes first. Try to capture the proportions as best you can with a simple snake sketch.
- Refine shape with linework. Once you have the general size of the snake, you can then proceed to refine the body with a distinct outline.
- Build up layers of color. Always build up your layers of color with lighter tonal values and then darker tonal values.
- Take your time with the scales. The scales take the longest, so be patient when adding them in.
- Finalize your details. Lastly, add some shadows and highlights on top of the colored details.
Learning how to draw a snake is an interesting drawing exercise because snakes have a very specific scaly quality to them. In this easy snake drawing, we see that scales can be drawn in many ways, and drawing this feature takes the longest. Be patient with the drawing process, take your time, and have fun!
Frequently Asked Questions
How to Draw Snake Scales?
There are many ways to draw scales, and they can often be done with any pattern that maintains uniformity. In this easy snake drawing, we see how we can start on one side and work from each previously drawn layer of scales. By doing this, you maintain the correct placement of the next set of scales in the following row. This is because scales can be drawn the way bricks are layered: one row at a time. This allows you to place the next row of scales correctly based on where the previously drawn row of scales has been drawn. From there, we simply want to be patient with our snake drawing process. As you work around the curved surface area of the snake, having a slight distortion in the scales is a great way to represent movement within the snake’s body.
How to Shade Scales in a Snake Drawing?
There are many ways to shade scales, but perhaps the most effective two methods are shading over the entire structure and adding gradients into each single scale. This sounds time-consuming, but we can be quite selective with where we add shading depending on the direction of the light source. The idea is to maintain a general shading on the sides of the snake that has more shadows. As you do this, you can then shift from shading the entire structure to shading in each scale. This is a great way to seamlessly transition between shadowed and highlighted areas in the snake drawing. This way, you can shift between areas exposed to light and shadowed areas in your snake drawing.

Matthew Matthysen is a multidisciplinary artist. He completed his fine art degree, majoring in History of Art and Contemporary Drawing Practice at the University of Witwatersrand, South Africa. Before joining acrylgiessen In 2020, Matthew worked part-time as an art teacher at Reddford Blue Hills High school. Matthew creates drawing and painting tutorials for acrylgiessen and captures them not only photographically and in written form. He also records the creation of his works in his own creative studio as in video format, from which later with a voiceover and a video editor also drawing tutorials for the Youtube channel of acrylgiessen are created.
Learn more about Matthew Matthysen and about acrylgiessen.