Butterfly Drawing – Draw an Easy Monarch Butterfly Today!
This post may contain affiliate links. We may earn a small commission from purchases made through them, at no additional cost to you.
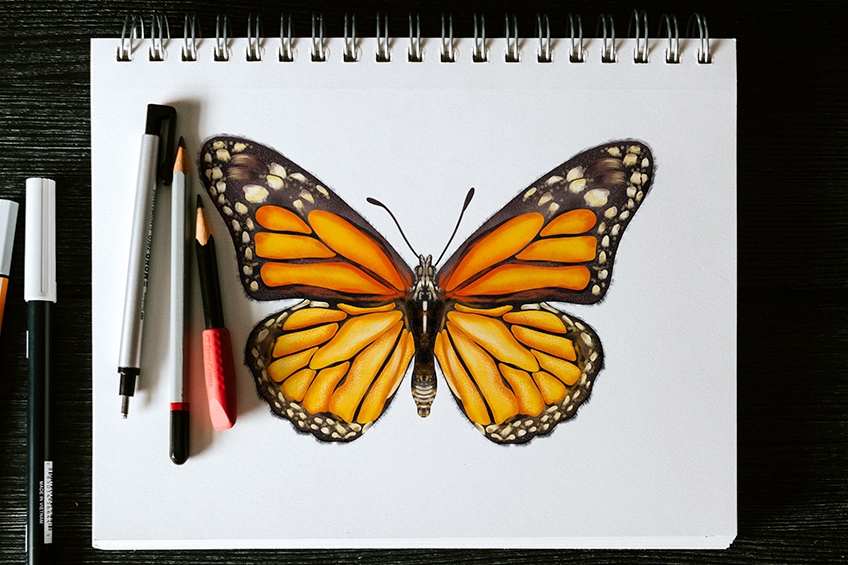
In today’s drawing tutorial, we will be teaching you how to draw the beautiful monarch butterfly. These butterflies come in vibrant and striking orange and black colors, and it’s almost impossible to miss them! Despite the monarch butterfly only living for six to eight months, the most amazing fact about them is their migration from Canada to Southern California or Central Mexico, which is nearly a 2,500-mile migration! Luckily, today’s butterfly drawing tutorial will only take you the afternoon to complete. Let’s roll up our sleeves and get drawing!
Draw a Monarch Butterfly Step-by-Step
Our butterfly drawing tutorial is a full step-by-step guide to teach you how to draw a beautiful butterfly! We have made it easier than ever to learn how to draw a monarch butterfly, as we take you through the basic construction steps, all the way to the shading and contouring process. As an added bonus, our drawing tutorial can be completed on either a graphic tablet or paper, so anyone can enjoy today’s tutorial.
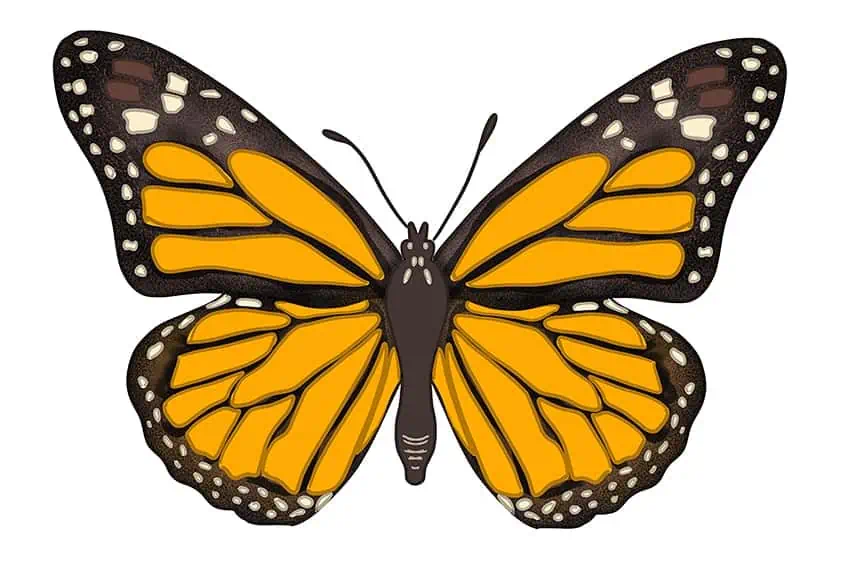
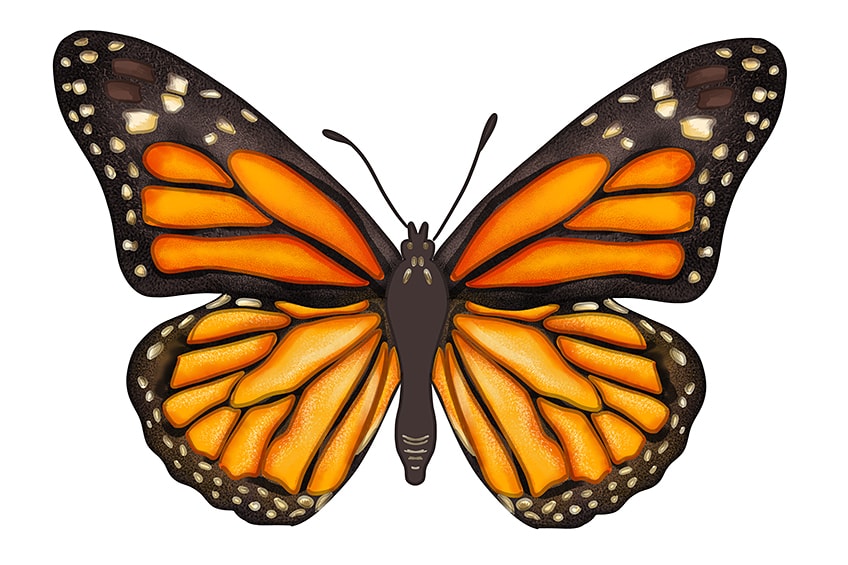
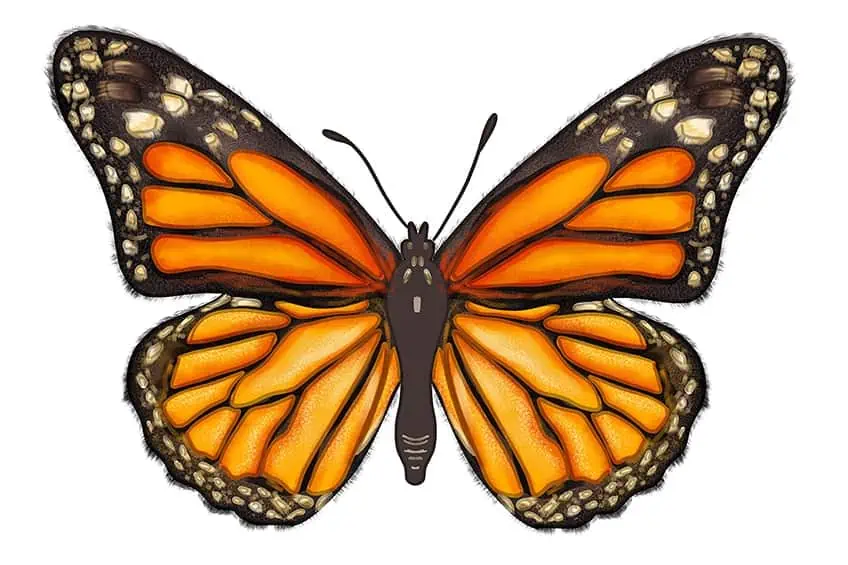
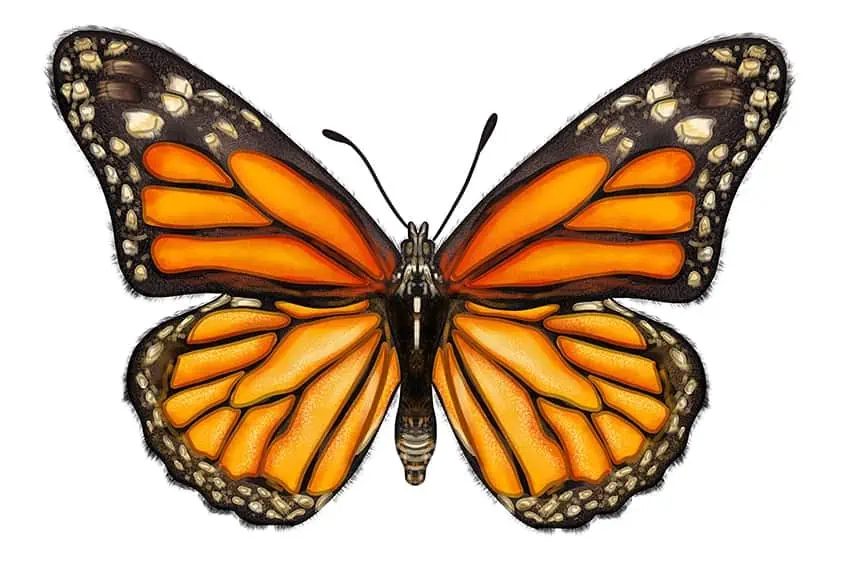
The below collage gives you a more in-depth insight into the steps taken to achieve your final result!
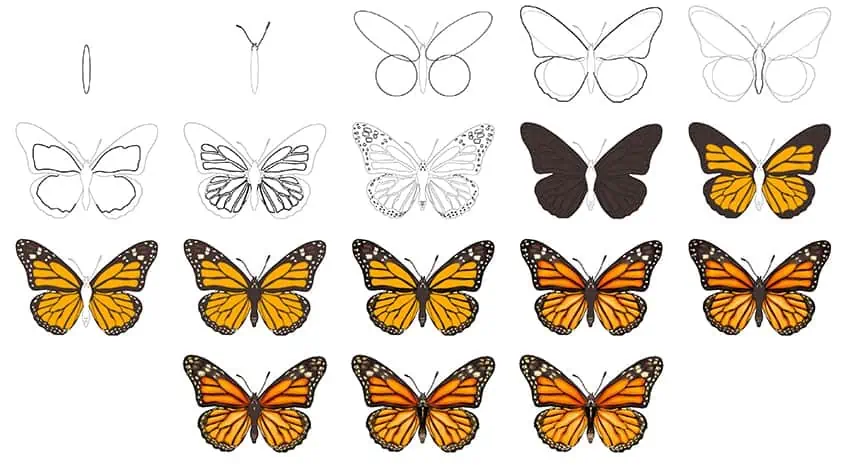
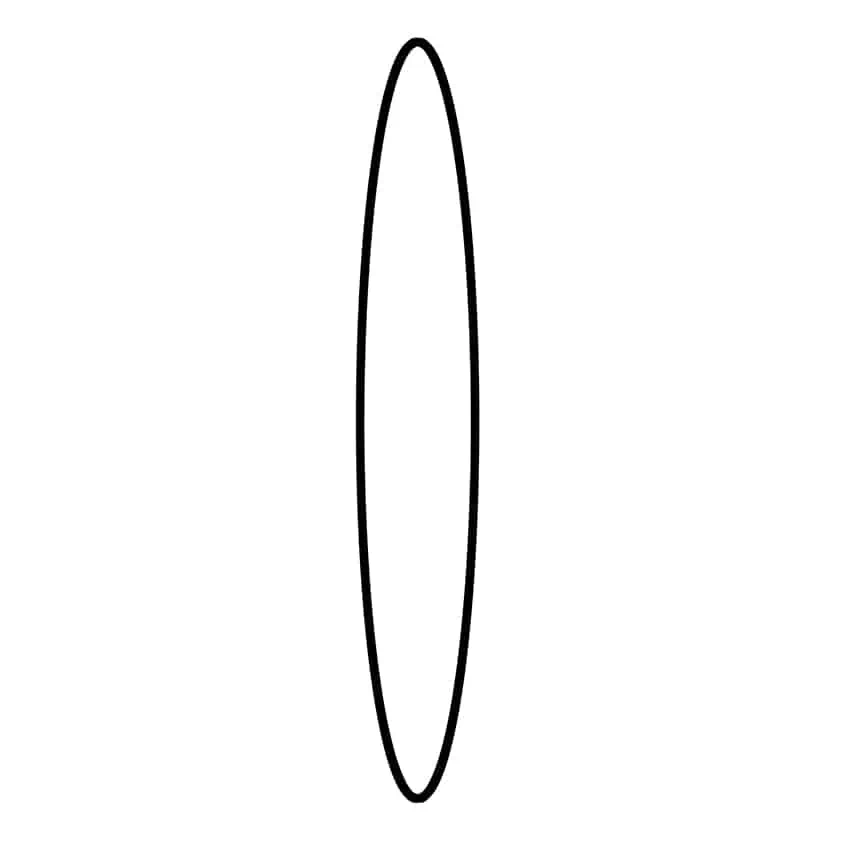
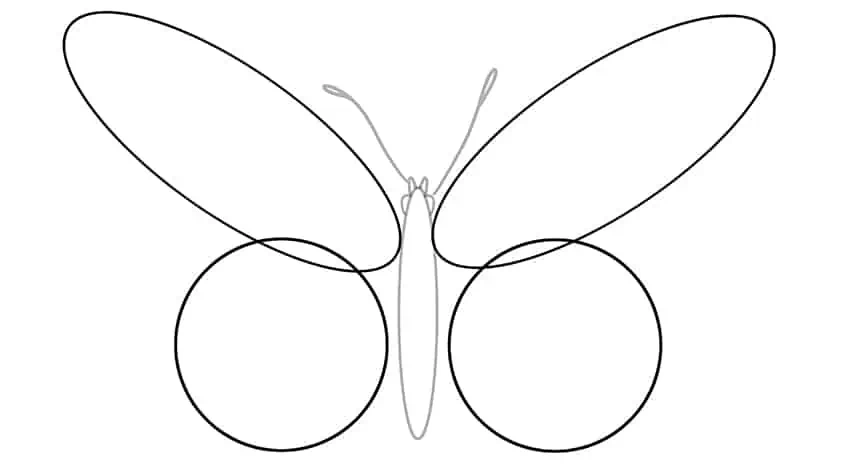
Step 1: Draw the Body of Your Butterfly Sketch
Begin your butterfly drawing by drawing the main body represented by a vertically, stretched-out oval shape.
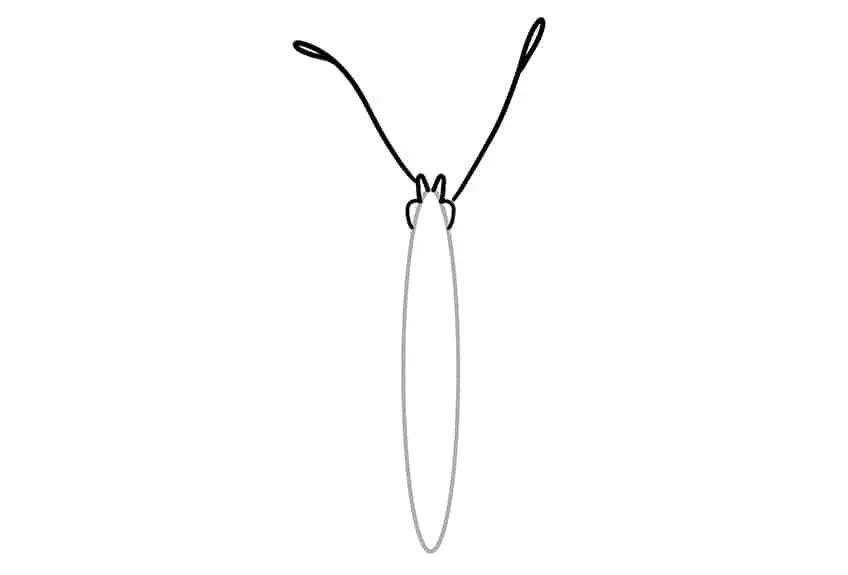
Step 2: Draw the Butterfly Antennas
Attached to the top of the body, draw two antennas reaching outward. These do not have to look symmetrical.
Step 3: Add in the Construction Lines for the Wings
Begin this step by drawing a large circle on either side of the body of your butterfly drawing. These must be positioned towards the bottom. Continue by drawing a large, diagonal oval on either side of the main body. These must be positioned towards the top.
Note! Both ovals may slightly overlap the circles. These construction lines will now represent the wings of your butterfly sketch.
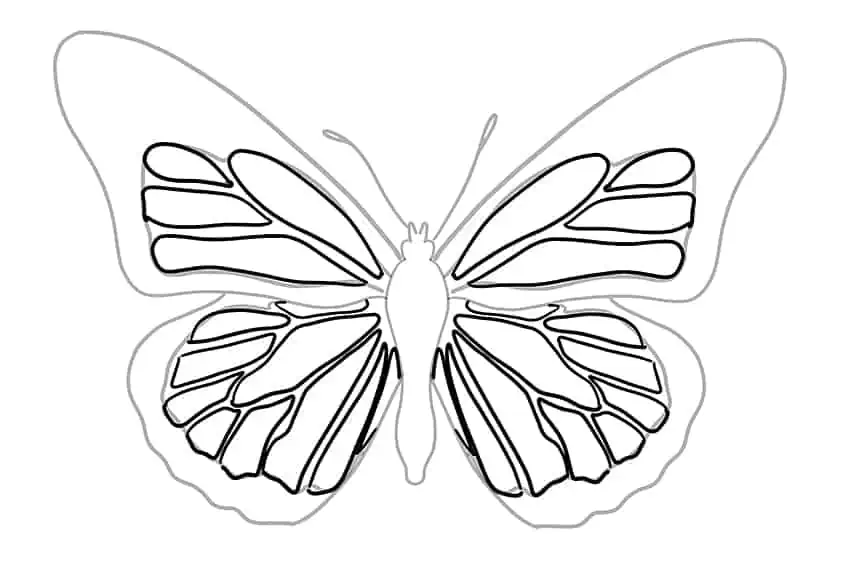
Step 4: Outline the Wings
Make use of your previously drawn construction lines to aid you in outlining a more realistic set of wings for your butterfly drawing.
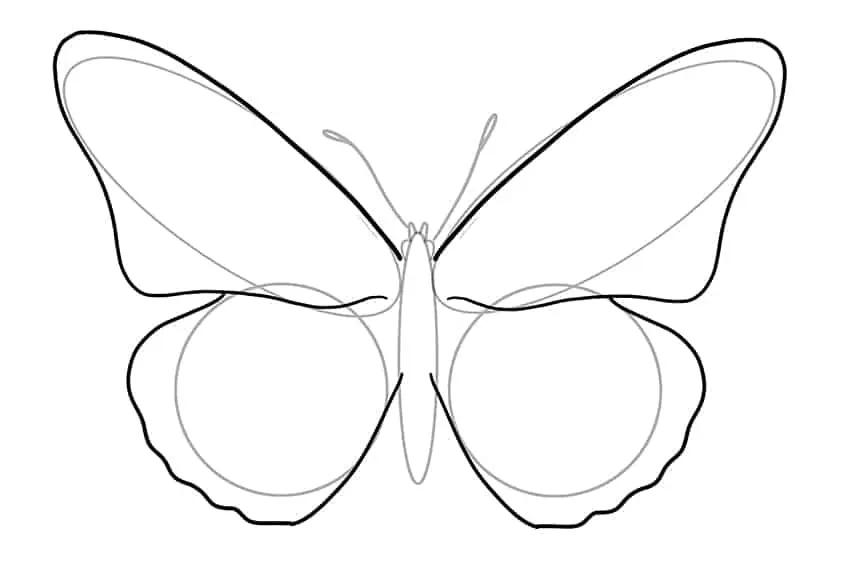
Step 5: Outline the Body of Your Butterfly Sketch
Use the oval shape drawn in step one to aid you in outlining a curvier body for the butterfly. Once you are satisfied with the body of your butterfly, you may erase any visible overlapping or construction lines.
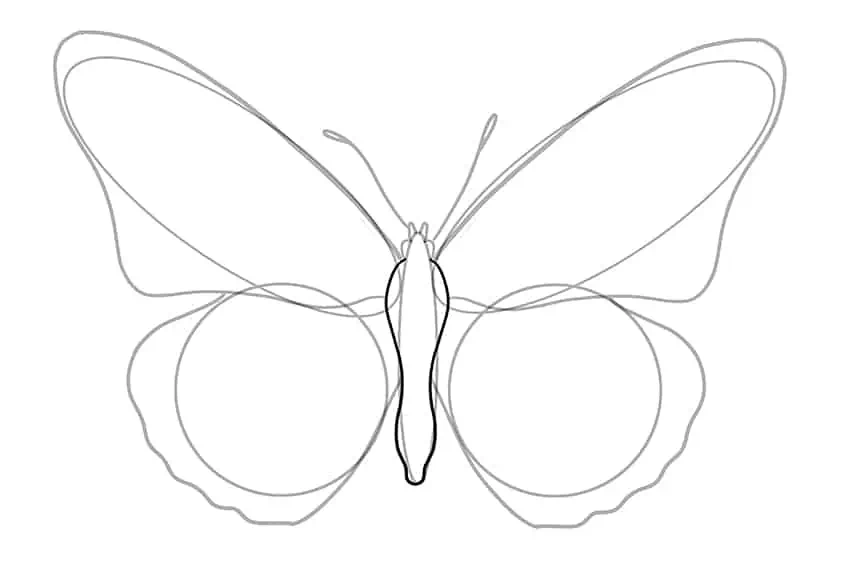
Step 6: Add the Layers to the Wings
Within each wing, draw an inner wing outline. This will add a layer to your butterfly wings and create more depth.
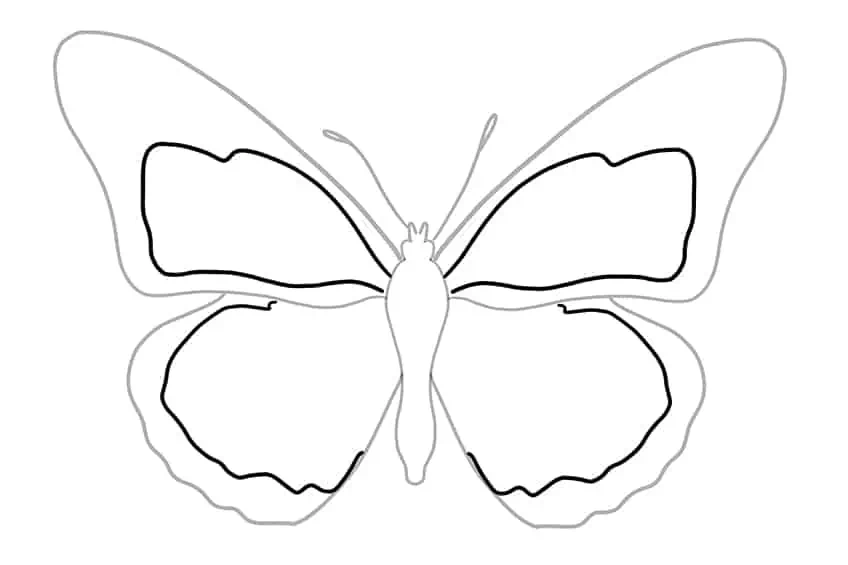
Step 7: Draw the Inner Patterns Within the Wings
Within the inner wing outline, draw a symmetrical pattern on each wing. This pattern can be whatever you choose.
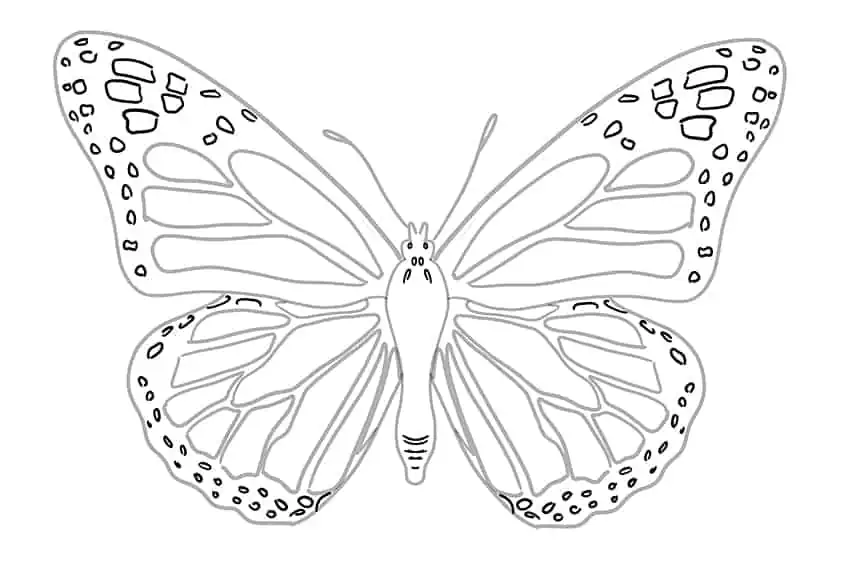
Step 8: Draw the Outer Pattern on the Wings
Surrounding the previously drawn patterns, draw smaller ovals along the outer outline of each wing. Complete this step by drawing two eyes in the middle of the head.
Add in the body texture lines and rear horizontal texture lines by drawing four small circles within the body of your butterfly drawing.
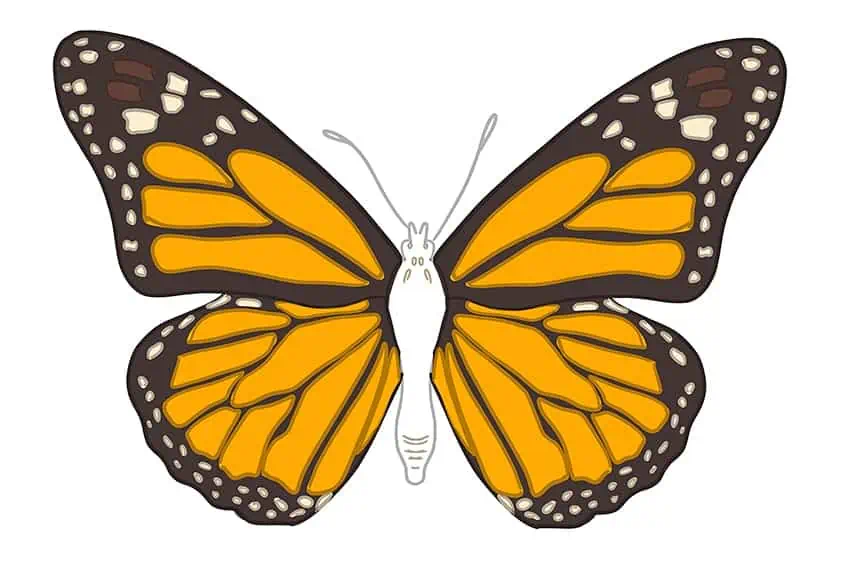
Step 9: Add the First Coat of Color
Select a regular paintbrush and dark brown paint, and evenly color the wings of your butterfly sketch.

Step 10: Add the Second Color Coat
Make use of a fine, sharp brush and golden yellow paint, and evenly fill in the inner patterns on the wings.

Step 11: Color in the Outer Pattern on Your Butterfly Wings
Use the same brush as previously and switch to cream paint, and evenly color the outer pattern on your butterfly wings. For each top wing, select two oval shapes and color them in brown paint.
Step 12: Add Color to the Body
Select a fine brush and dark brown paint, and evenly color the body and antennas of your butterfly drawing. Repeat this step using cream paint, and color the body texture lines and rear horizontal texture lines.
Step 13: Texture the Wings
Use a small, soft brush and black paint, and add light shading along the edges of each wing. Follow this with a fine brush and a combination of black and light brown color paint, and add fine hairline brush strokes to the inside of each wing.
With a rough, textured brush and light brown paint, add dotted texture lines along the edges of the wings.
Complete this step with a fine brush and yellow paint, and add subtle dotted texture lines on either side of the body.
Step 14: Color Blend the Inner Patterns
Use a small, soft brush and bright orange paint, and apply soft brush strokes along the edges of the inner wing pattern. Follow this by using white paint to add highlights to your butterfly drawing. Once completed, select a blending brush to smooth out and blend the color coats together.

Step 15: Color Blend the Outer Patterns
Make use of a fine brush and a dark shade of yellow paint, and apply soft brush strokes along the edge of the outer patterns on the butterfly wings. Repeat using white or gray paint, and add subtle highlights to your butterfly wings.
Complete the step using a soft brush and a dark shade of brown paint, and add subtle shading to the brown spots on the wing patterns.
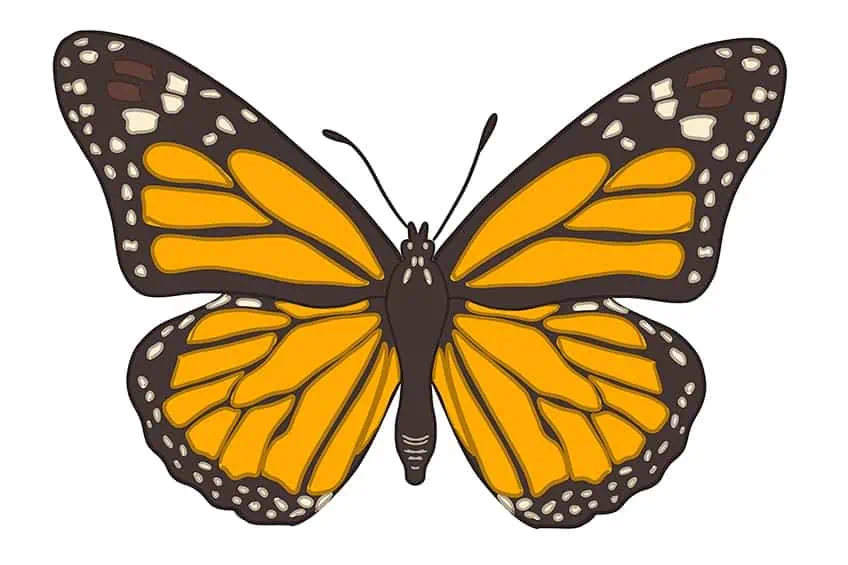
Step 16: Add a Realistic Outline
In this step, make use of a soft brush and black paint, and apply fine hairline brush strokes slightly beyond the outline of your butterfly drawing. This will create a more realistic look for your butterfly drawing. Complete this step with red or dark orange paint, and paint soft brush strokes leading outwards from the main body to the inner patterns.
Step 17: Color the Body of Your Butterfly Sketch
Select a fine brush and golden yellow paint, and apply fine crisscrossed brush strokes across the body. Repeat this process with black paint. Complete the body using cream paint to trace the body texture outlines and facial features.
Step 18: Finalize Your Butterfly Drawing
You have almost completed your beautiful butterfly drawing! To finish, make use of a fine, sharp brush and the corresponding colors, and simply trace the entire outline of your monarch butterfly drawing. This will erase any harsh outlines and create a flawless look!

Congratulations are in order as you have just completed a beautiful butterfly drawing! We have taught you how to draw a monarch butterfly in 18-easy steps that anyone, beginner or advanced, can follow. We hope you will be walking away with new drawing skills that you can pass on to others, or apply these skills to your next drawing!
Frequently Asked Questions
What Color Can a Butterfly Drawing Be?
In our butterfly drawing tutorial, we used a monarch butterfly as our inspiration and their traditional colors are orange with black/brown edges. However, butterflies come in many beautiful and vibrant colors, which opens you up to numerous possibilities and does not limit you to any color. So, let your creative side run wild!
Is It Easy to Draw a Monarch Butterfly?
Our butterfly drawing tutorial will take you step-by-step through the entire process, from creating a basic structure to contouring and shading your butterfly. Our tutorial is easy to follow and understand, and in no time, you would have created a beautiful butterfly sketch!

Matthew Matthysen is a multidisciplinary artist. He completed his fine art degree, majoring in History of Art and Contemporary Drawing Practice at the University of Witwatersrand, South Africa. Before joining acrylgiessen In 2020, Matthew worked part-time as an art teacher at Reddford Blue Hills High school. Matthew creates drawing and painting tutorials for acrylgiessen and captures them not only photographically and in written form. He also records the creation of his works in his own creative studio as in video format, from which later with a voiceover and a video editor also drawing tutorials for the Youtube channel of acrylgiessen are created.
Learn more about Matthew Matthysen and about acrylgiessen.