How to Draw a Skull – A Step-by-Step Human Skull Drawing Tutorial
This post may contain affiliate links. We may earn a small commission from purchases made through them, at no additional cost to you.
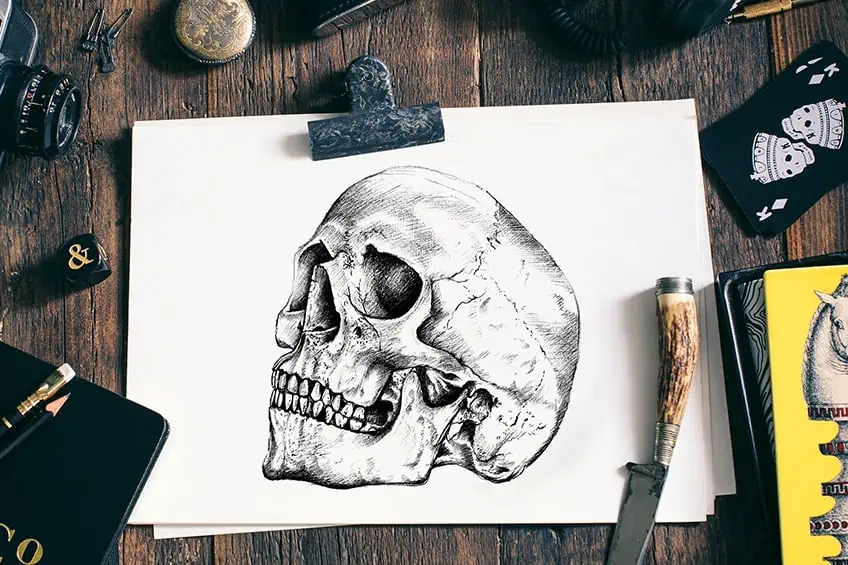
Learning how to draw a skull is a great exercise for refining your drawing skills. A Skull is a very interesting subject to draw, as the form and structure are very unique and contain little intricate details. Human skull drawing is a fundamental task for understanding human anatomy. To draw a skeleton head is to better understand why the head is shaped the way it is, helping our anatomy drawing skills to become more efficient. Skull drawing also refines the attention to detail, as we focus on various little components that make up the skull, we will enhance our drawing skills throughout the process. As we go through this tutorial on how to draw a skull, we will have a better understanding of this interesting object as well as a more refined drawing capability.
An Easy Guide to Drawing a Skull
Learning how to draw a skull from the front view is a great way to learn how to draw a skull, however, we will be drawing the skull from the side view in this tutorial. This will make our drawing more interesting and nuanced as we can then see more of the totality of the skull’s shape. This tutorial breaks down the process of how to draw a skull in a few easy steps.
A skull seems quite difficult to draw in its complete form, however, it is easy to develop this structure if it is broken up into various digestible steps.
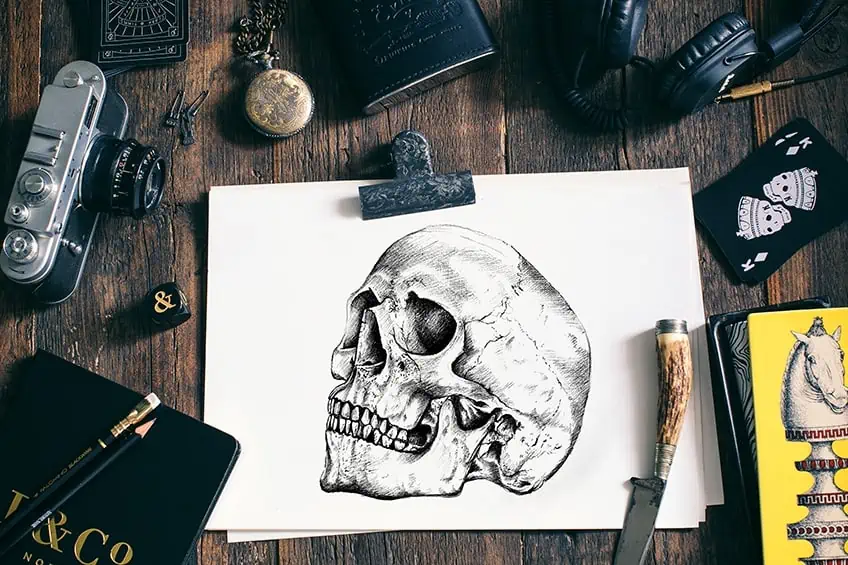
As we slowly develop the skull sketch into a more refined and realistic skull drawing, we will learn how to morph the skull outline and skull sketch into a beautiful representation of a real skull. That being said, let us see what materials we will need. 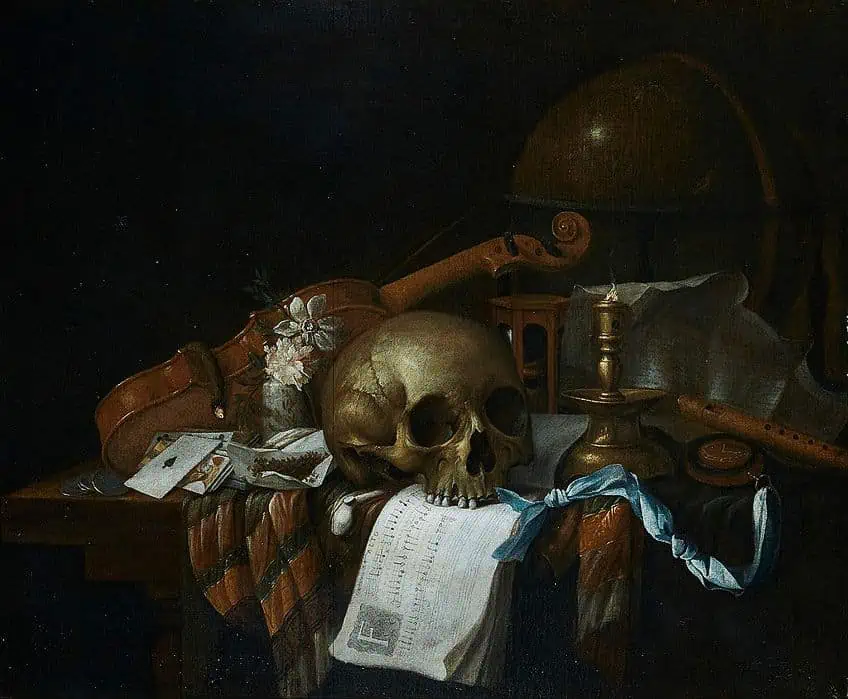 Vanitas still life with a skull, sheet music, violin, globe, candle, hourglass, and playing cards, all on a draped table (1662) by Cornelis Norbertus Gijsbrechts; Cornelis Norbertus Gijsbrechts, Public domain, via Wikimedia Commons
Step-by-Step Instructions on How to Draw a Skull
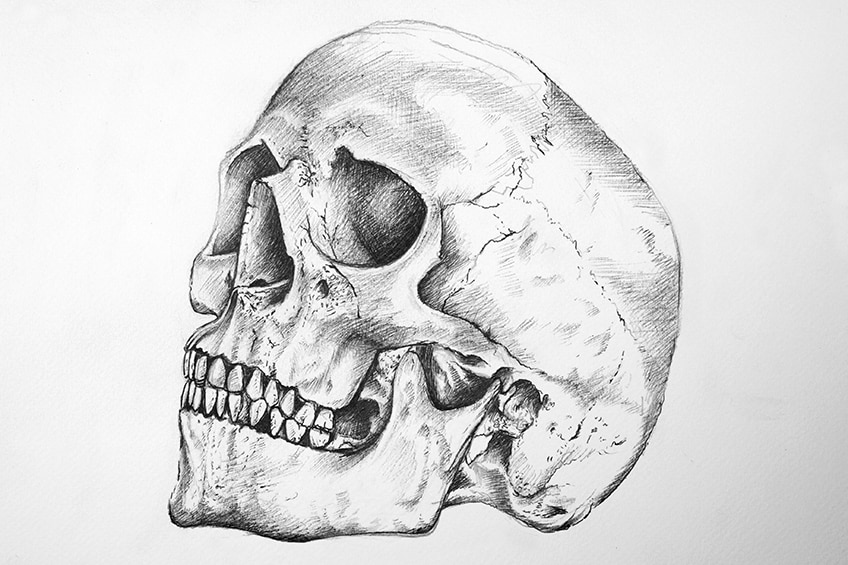
The process of drawing a skull starts by developing the general skull outline, which we then turn into a loose skull sketch. We want to play around with this part of the tutorial, allowing ourselves to go back and forth between the source image and the drawing. We will tweak and refine the drawing in pencil until we are satisfied with the skull drawing. We will then add some light shading to the skull, slowly developing the features of the skull in pencil until we are satisfied with the skull drawing.
Once we have completed the skull drawing in pencil, we can then move on to drawing in pen. As we draw a skeleton head, having the skull accurately drawn and shaded to the best of our ability, we will then allow those pencil marks to guide our pen marks. Slowly go over the pencil marks with our ballpoint pens until we are complete.
With that said, let us go through this tutorial on how to draw a skull.
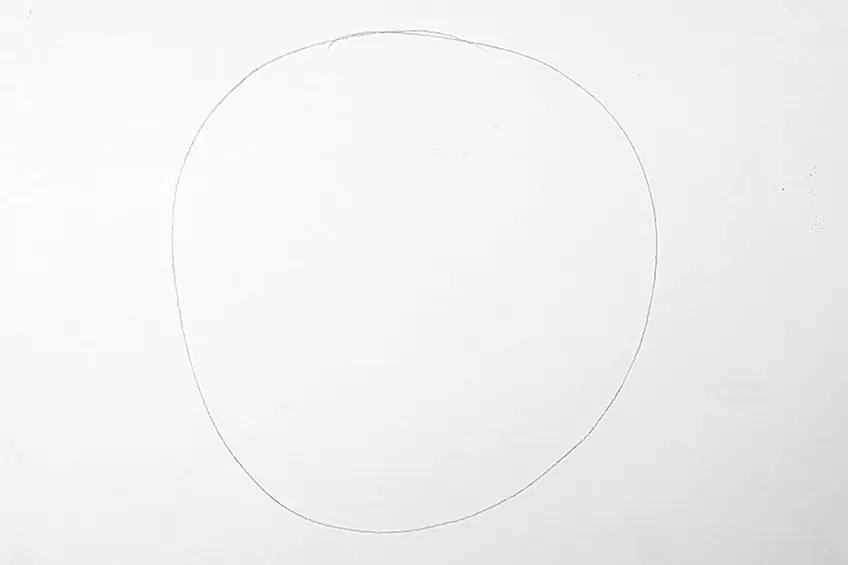
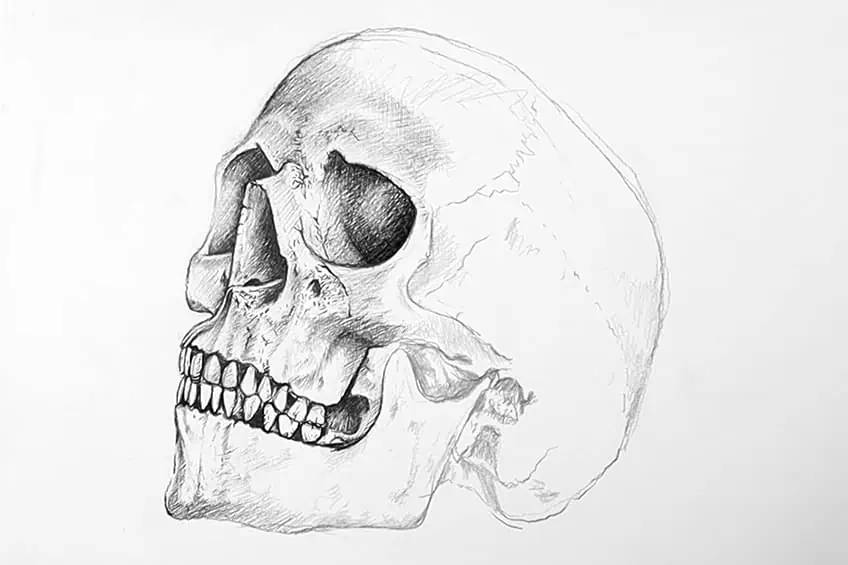
Step 1: Drawing a Demarcation Circle
We want to begin by taking our pencils and drawing a circle on our pages. This circle should be relatively large, enough to draw a skull within. This is going to help us keep the skull in scale, as well as help our skull drawing to be proportional. The circle will define the boundaries within which we will draw the skull.
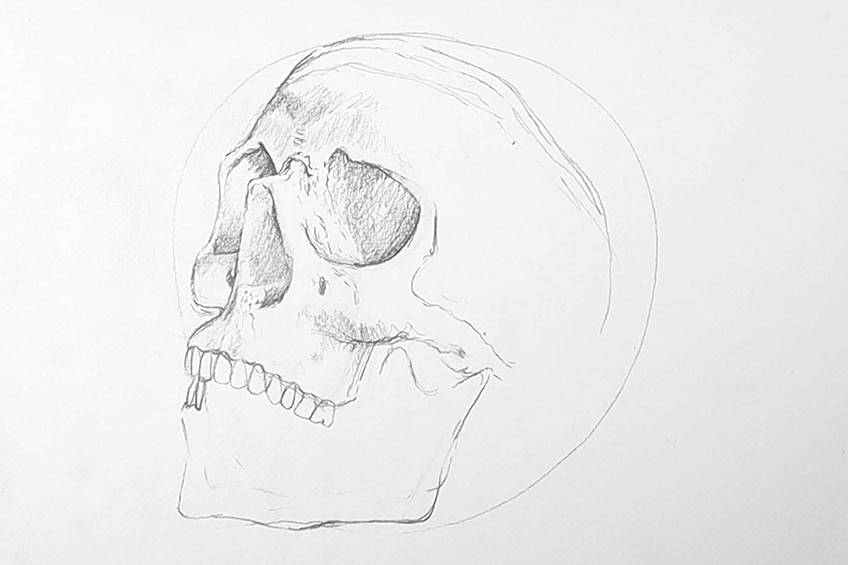
Step 2: Lightly Sketching the Skull
We now will proceed to make a light skull sketch, whereby we want to constantly refer back and forth between the drawing and the source image. Use a light pencil, perhaps a 2H pencil, this way as we slowly define the skull outline, we can erase the light marks easily, should we make any mistakes.
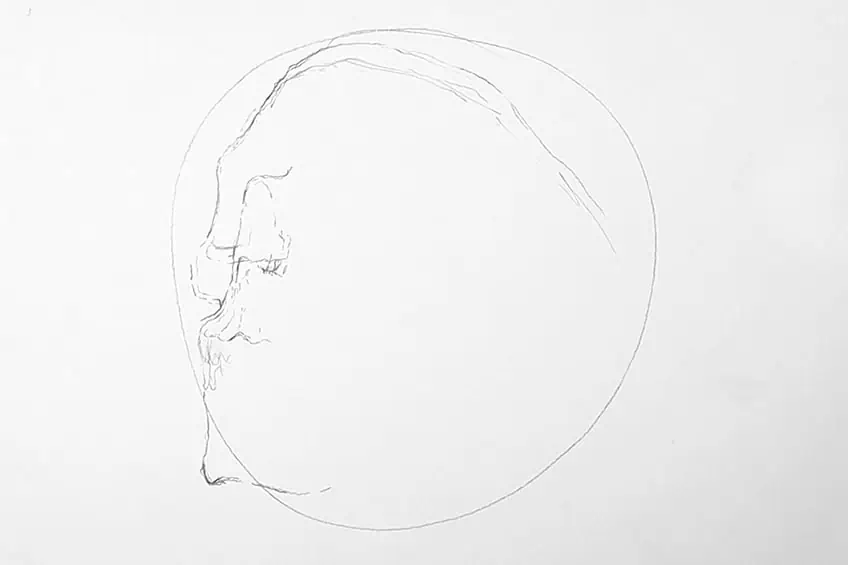
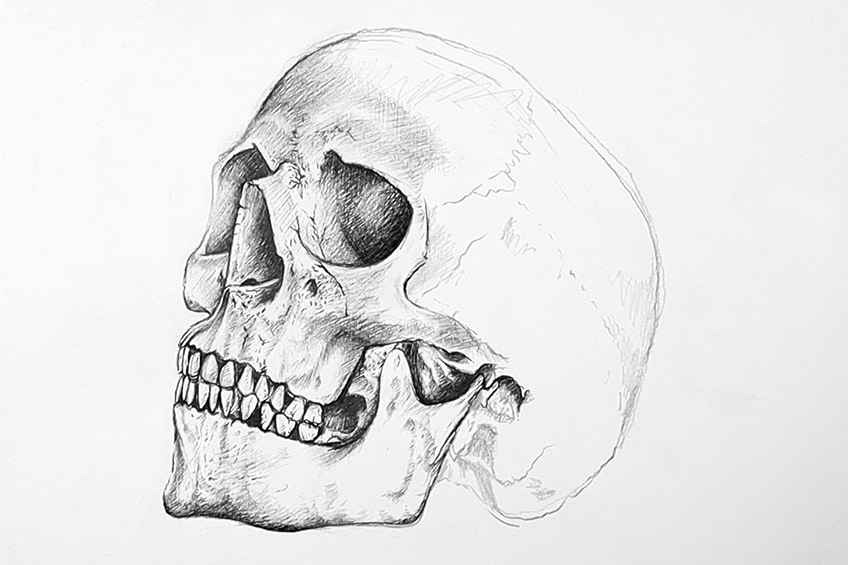
Starting with the eyes will help us configure the shape of the skull more correctly. If we analyze the source image, we can see that there are identifiable shapes between the eyes and the nose. The left eye is seemingly slimmer as it falls behind the nasal cavity. Whereas, the right eye is seemingly larger and more square-like as it sits more in the foreground.
As we proceed with the skull sketch, going back and forth between the source image and the drawing we want to take our time. We should be slowly and cautiously making marks here and there, as we erase any mistakes along the way. Keeping your eraser on hand and your pencil sharp is essential during this part of the tutorial.
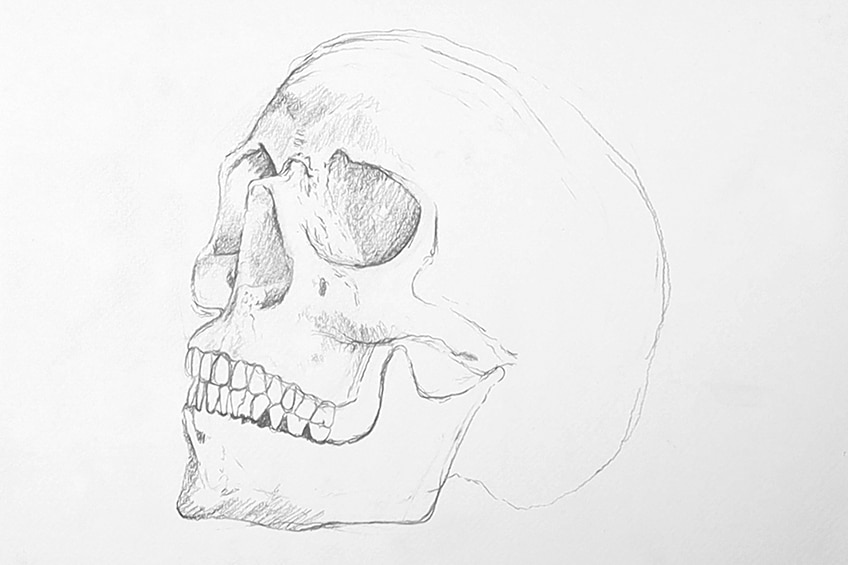
As you draw the cheekbones and the teeth, a good suggestion is to zoom in on your source image to see where the features around the mouth are positioned. Paying attention to the size of each feature in the face next to one another can be helpful to better place your pencil marks.
As you refer to the source image, consider the length of the jaw and where it begins and ends from left to right. considering features with this kind of approach can enable a more accurate mark-making. Another example, for instance, could be to consider how the teeth curve downward in an arch-like fashion. Keep your eraser on hand and take time getting these details correct with your pencil.
The circle, however much it demarcates the size of the skull, is not necessarily intended to keep the entire drawing within its shape.
If your marks deviate out of the demarcated circle it is ok, allow the circle to guide the scale of your skull. Another aspect of the skull to pay attention to is the teeth. Consider how the teeth, both the top and bottom row, are positioned together. Spend some time on this part of the skull drawing.
Again, we want to take our time with this part of the tutorial. So allow yourself to take a break if you need to, to refresh your mind so that you come in with a fresh approach. A skull drawing from the side requires attention to the placement of each feature. Allow yourself to take time to compare the scale of the chin, compared to the teeth, compared to the nose, eyes, and so on.
Compare features to one another to better understand their size.
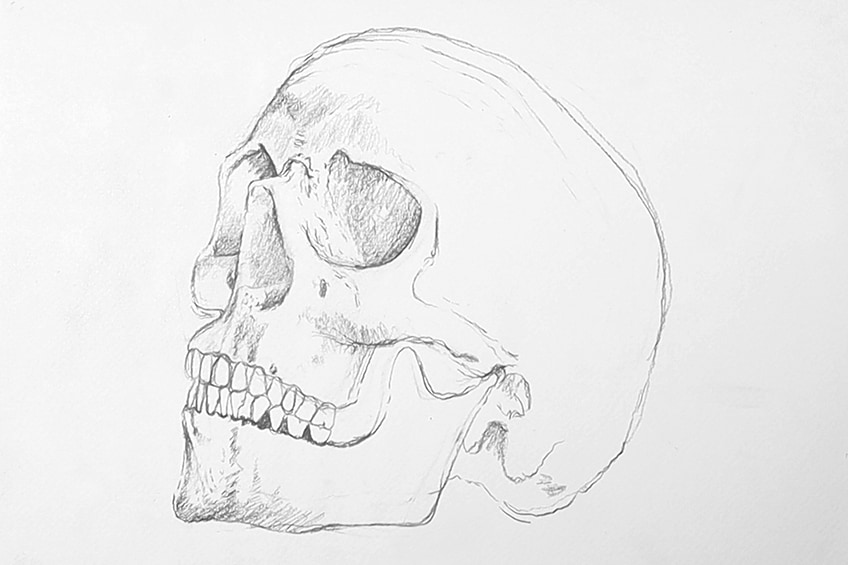
As you refine the skull outline or skull sketch, allow yourself to double-check the placement of the features before moving into the shading parts of the tutorial. Does the jaw hinge fall under the eye socket correctly? Does the back of the skull curve correctly and proportionally?
Ask yourself similar questions in your head as you refer to your source image for certainty before moving on.
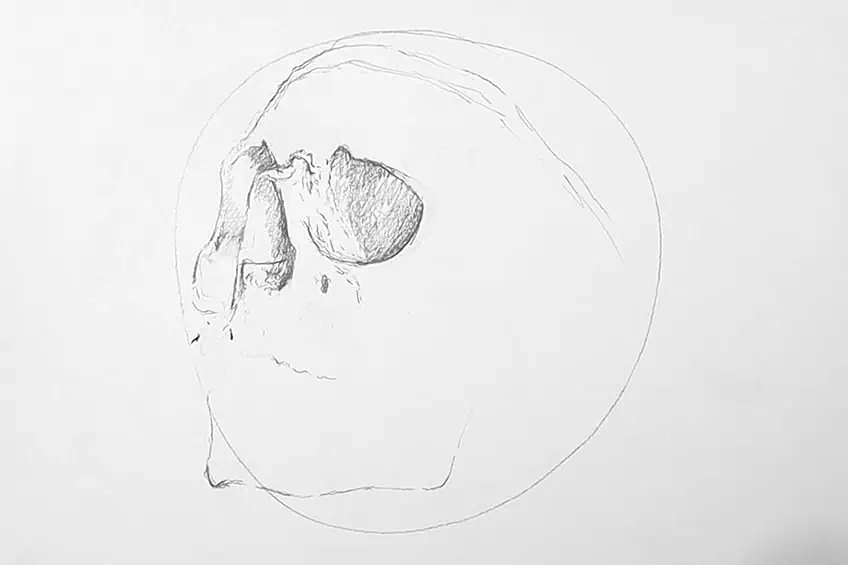
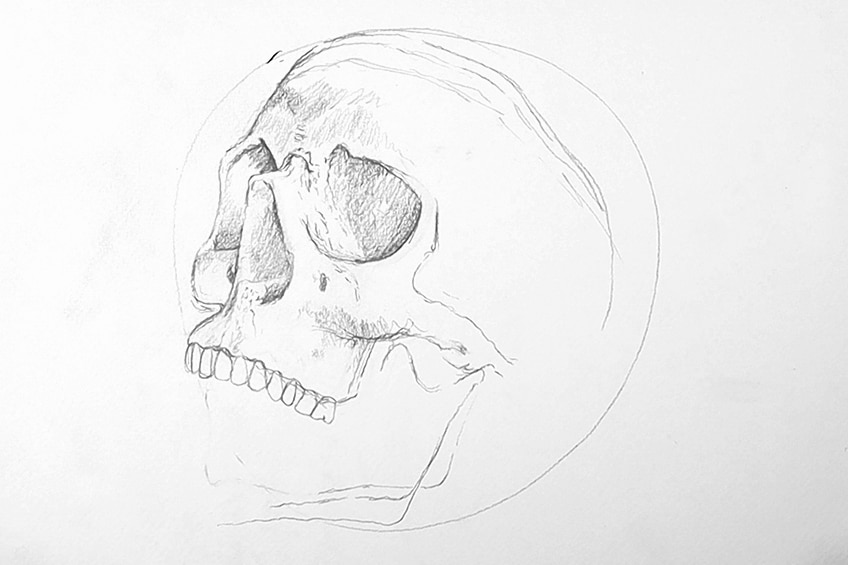
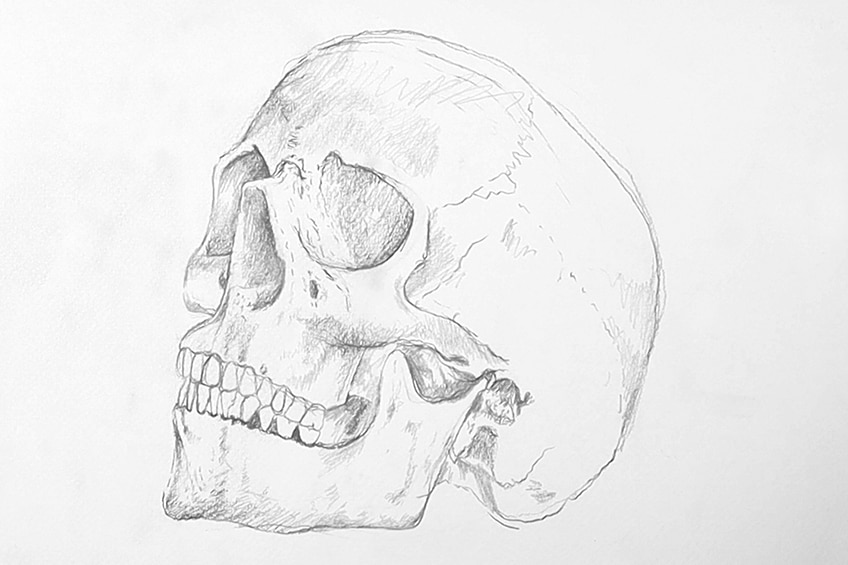
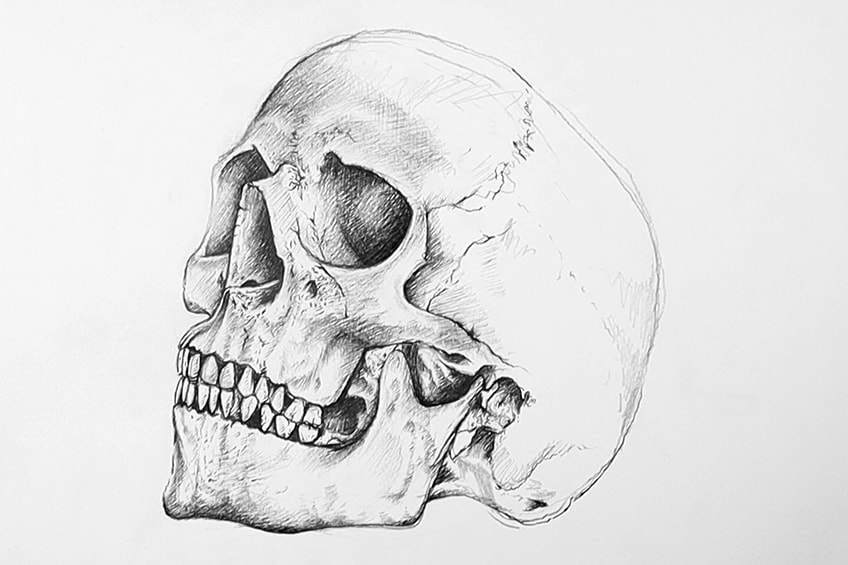
Step 4: Shading the Skull With Pencil
Once we are satisfied with the light pencil sketch of our skull, having its structure and features correctly drawn we can now start working on some shading. We can use an HB and B pencil in tandem, to keep the shading light. As you shade in the skull, consider the source image and see how there are different tonal values in the bone of the skull.
We can also take this time to add in little scratches and cracks in the skull.
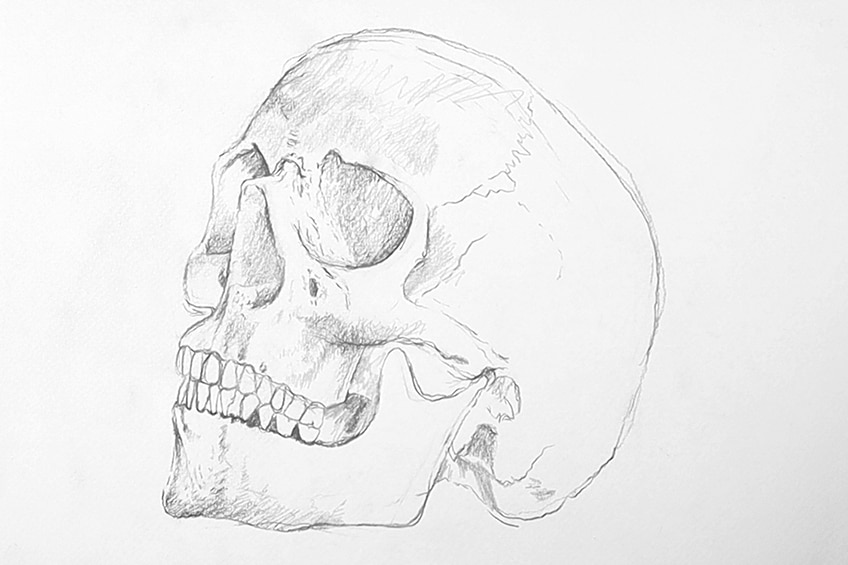
Allow yourself to analyze the source image as you add in some light shading around the skull. From the jaw to the forehead, allow yourself to notice the different moments of light and darker tonal values. We don’t need this shading to be excessive, rather we want to go through the skull adding light shading which we will then shade over with our pens.
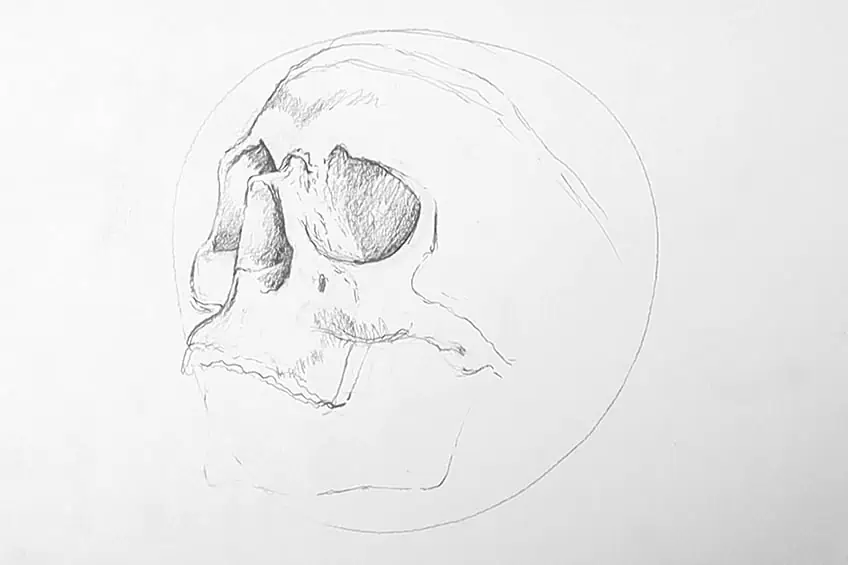
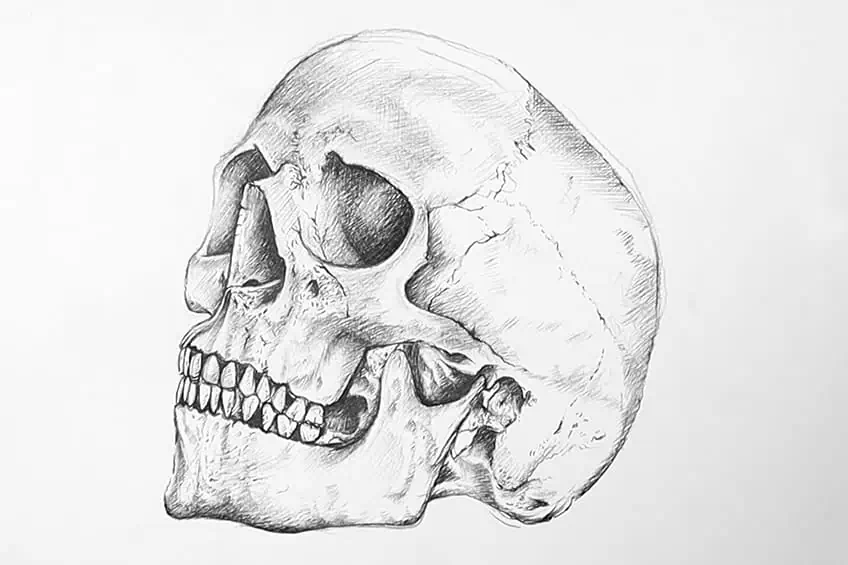
Step 5: Shading With Pen
Once we have a fully drawn skull, that is lightly shaded in with a pencil, we can now move on to shading with a pen. We want to make sure we have a ballpoint pen for shading. A ballpoint pen allows for the ink to come out sparingly, giving us more control over the marks that we make. Proceed to go over your pencil marks with a light hand.
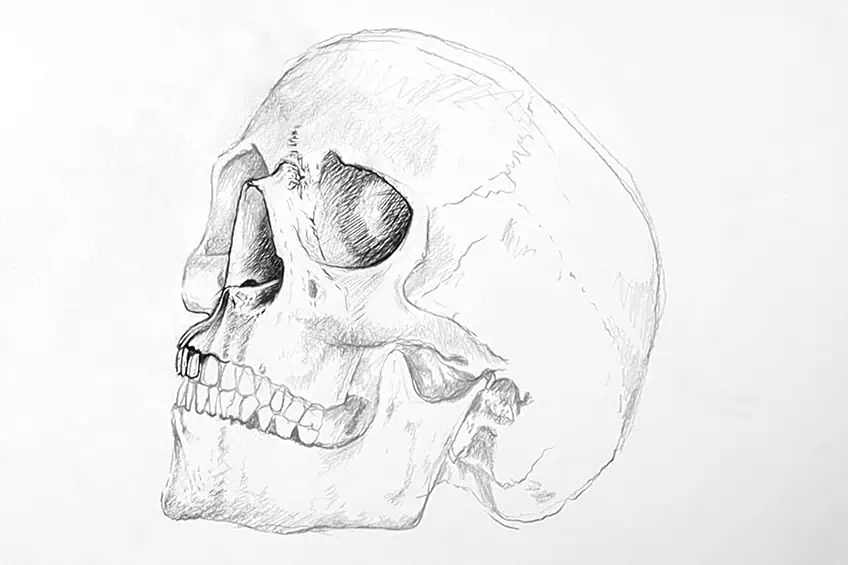
Starting with the darkest areas of the skull, such as the eye sockets can help to loosen up the ink. This will help as you slowly develop gradients with the pen. Take note of the nose and eye sockets, they are darkest where they are most sunken in, which means they lighten as more of the bone becomes exposed.
The light source in the source image seems to be quite neutral and placed centrally.
This means the skull is well lit, allowing for the darkest moments within the skull to be the areas behind the bones. This means the darkest areas are within the skull, making the features where we can see through the skull have the most shadows. We want to focus on these areas when shading.
As we continue to shade in the skull with our pens, pay close attention to other details in the source image along the way. Allow yourself to be playful with the pen, by adding little lines to represent the cracks and scratches. There are a lot of little scratches and marks around the eyes and nasal cavity of the skull. try adding in these little details with your pen.
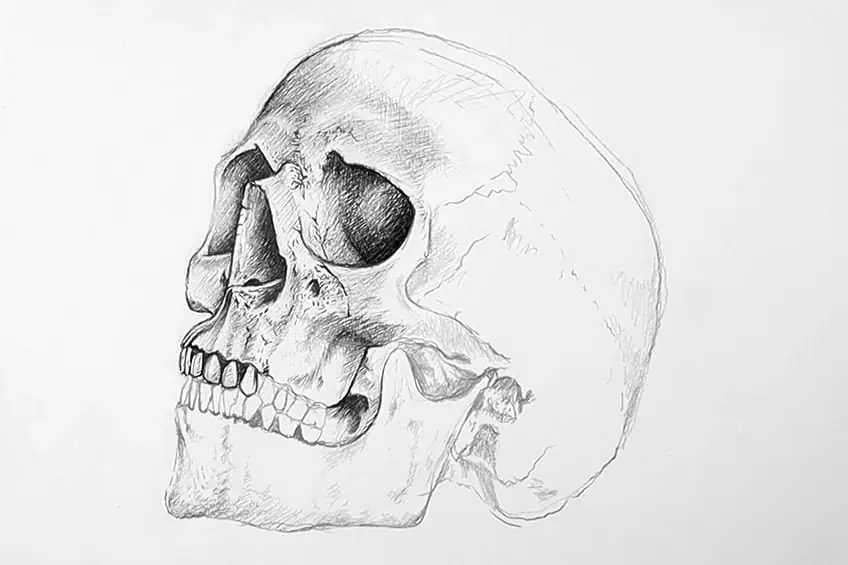
Perhaps spend a good portion of time on the teeth. We want to consider each tooth as we shade it with our pens.
A human skull drawing can be the trickiest around the teeth. As you shade the teeth with a pen, analyze your source image and see how each tooth is placed next to one another. Also consider the darker moments in between the teeth, as the shadows are greatest inside the skull.
Another interesting detail to notice is the ridges that move along the upper part of the mouth. These can be defined with some light shading of the pen. We really want to consider the different tonal values for each aspect of the skull. These ridges darken as they move toward the cheekbone, as it protrudes creating more shadow underneath it.
Consider all moments such as this, whilst referring to the source image.
Drawing takes time, especially drawing with a pen. Allow yourself to patiently go through this skull drawing, as you consider each aspect and feature of the skull. Again, notice that the areas are the areas where we can see into the skull, such as that near the hinge of the jaw. Spend some time shading the inner features of the jaw.
We can also add in some lighter marks with our pen around the jaw. At this point, once we have the main features drawn and shaded correctly, we can add little marks here and there to represent the scratches around the surface of the skull. These lighter moments of pen shading will enhance the skull drawing.
Behind the jaw area, is also quite an intricate and complex part of the skull.
The source image displays a series of bones and cracks. Allow yourself some time to slowly shade in this area as you go over your pencil marks. When shading in pen the lighter the touch the lighter the marks and the harder we press the darker the mark. Keep this in mind as you shade with your pen.
Having a light hand whilst shading with a pen works well for the areas of the skull that would be most exposed to the light source. This means we want to have a soft touch as we slowly add in the lighter tonal values around the forehead, the top, and the back of the skull. These marks will give the skull more variety of marks, however, use your source image to guide you as you add these lighter tones.
Slowly add in any shading, cracks, scratches, and other details you feel that the skull drawing might need.
Again, take your time as you add in the finishing touches and little marks that you may have missed. Learning how to draw a skull takes time, it is only patience that will allow us to refine the skull drawing through the drawing process.
There you have it, a simple guide on how to draw a skull. A human skull drawing really is about patience and attention to detail. Each and every component of the skull is placed in very specific positions. However, once we have the general features correctly placed, we can then be a little playful with adding little scratches and cracks, to give the skull drawing a more interesting look.
Tips to Remember
Learning how to draw is one thing but learning how to draw a realistic skull is another. This requires time and patience, as you slowly develop the skull sketch into a refined realistic skull drawing. Skulls are unique and represent the human anatomy more than any singular structure from the human body.
- Take your time with the pencil marks, this will make it easier once we start to draw in pen
- Constantly refer to the source image to give you better guidance, do this throughout the whole tutorial
- Compare different features to one another, comparing their size and placement for better accuracy
- Take your time, drawing is challenging and requires practice. Especially drawing a skull
- Keep your erase on hand as you will inevitably make mistakes
- Take breaks in between each step, giving yourself a moment to refresh
- Most importantly have fun, allow yourself to enjoy the process
As we learn how to draw a skull, we are also learning about the structure that protects our brains, shapes our faces, and ultimately represents the human body. It is a great learning curve, as learning how to draw a skull gives you a better drawing arsenal. As you have gone through the skull drawing, you will have learned about various aspects of the human face and the white lies beneath it.
Take a look at our skull drawing webstory here!
Frequently Asked Questions
How Do You Draw a Realistic Skull?
Drawing a realistic skull requires having good source material. To learn how to represent something real, we need a reference point to refer to constantly throughout the drawing process. Various little details make a skull drawing look realistic, which we will miss if we do not have an image to guide us. Secondly, we want to use the right materials, often pencil and pen are conducive to finer details. Lastly, and most importantly, we want to pay attention to the concept of light. The way light interacts with objects in the real world defines the concept of three-dimensionality, it does so by casting shadows. To mimic this quality of shadows through the process of shading will refine the skull sketch into a more detailed and realistic human skull drawing. As we develop these shadows with the skull drawing, we will see how it slowly starts to become more realistic, so understanding light so that we may shade better is what will help us in drawing a realistic human skull drawing.
How to Draw a Skull From an Angle?
Drawing a skull from an angle is not as difficult as it seems, however, you will need a good source image. To do a skull drawing from an angle of mind is difficult, having some source material to assist you is the best way to go about the process. This will help you to slowly develop the skull’s shape and features in different depths of fields more accurately. To draw a skeleton head from an angle requires attention to the size and scale of the different features, this is because the features will look distorted as some are closer to the foreground than others. Learning how to draw a skull from an angle requires you to concentrate on the depth of field of the skull. Pay close attention to how each feature of the skull changes according to how close or far they are from sight.
What Are the Different Steps to Drawing a Skull?
Firstly, we want to figure out the scale of our drawing, we do this by drawing a circle to demarcate the boundaries on the page for where the skull drawing will be. Once we have demarcated the page with a circle, we can then start to create a light skull sketch, figuring out the skull outline within the demarcated circle. You will want to spend time lightly sketching as you constantly refer to your source image for guidance. As you draw the skull within the demarcated circle, you will be forced to keep the skull on the correct scale. Once you have accurately defined the outline of the skull, you can then proceed to shade the skull. From there, we can either add a pen for darker, more contrasting marks or we can add darker pencil marks. This tutorial gives you the steps to adding pen marks to darken your drawing.

Matthew Matthysen is a multidisciplinary artist. He completed his fine art degree, majoring in History of Art and Contemporary Drawing Practice at the University of Witwatersrand, South Africa. Before joining acrylgiessen In 2020, Matthew worked part-time as an art teacher at Reddford Blue Hills High school. Matthew creates drawing and painting tutorials for acrylgiessen and captures them not only photographically and in written form. He also records the creation of his works in his own creative studio as in video format, from which later with a voiceover and a video editor also drawing tutorials for the Youtube channel of acrylgiessen are created.
Learn more about Matthew Matthysen and about acrylgiessen.