Best Soap-Making Kits – A Guide to Hot and Cold Process Soap Making
This post may contain affiliate links. We may earn a small commission from purchases made through them, at no additional cost to you.
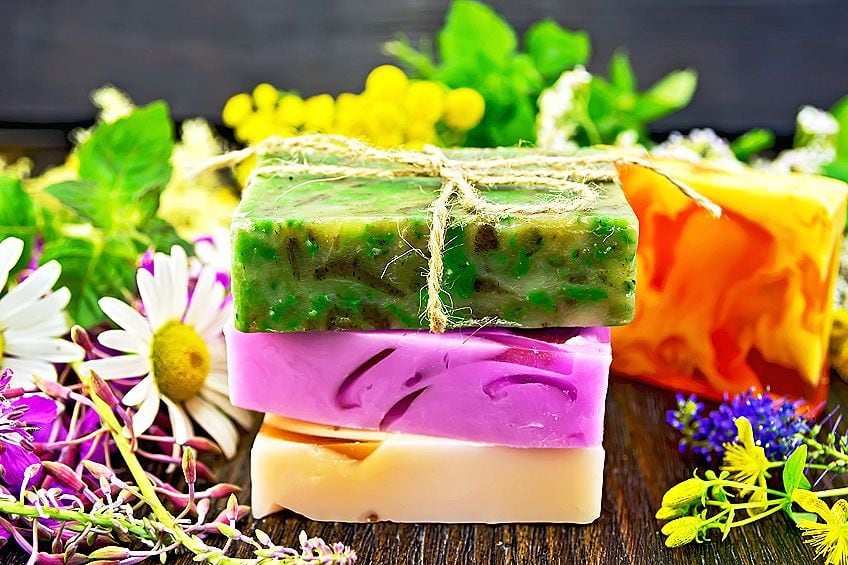
Soap making can be a fun hobby for both young and old, maybe even turn it into a business once you have mastered the techniques. When starting, it is important to get the correct soap-making supplies. The more popular method is to use the simple melt and pour options, which makes it safe and easy to experiment with all kinds of shapes and types of soap. The rest of this article explains the various methods of soap making and, of course, some of the best soap-making kits.
Methods of Soap Making
When creating soap from scratch, it can be a great science experiment, involving processes like saponification. This process occurs when fats or lipids come into contact with something like potassium or sodium hydroxide, which is also known as lye. This then forms your glycerol and soap. There are also various methods of making soap including cold process soap making and hot process soap making. Whatever method you choose, is a matter of preference for some. There are short tutorials on all three methods further in the article.
Cold Process Soap Making
Some of the best soap-makers in the world use the cold-process method which dates back to as early as 2800 CB. The cold process of soap making relies on the internal reaction through the saponification process. So, you will be mixing all the ingredients without adding any more heat to the process, which does have some advantages.
- Once the oils and lye have emulsified, they will form what is known as a trace, which thickens over time. You can create a variety of techniques from swirls to making soap frosting.
- The soap can easily be customized to whatever you want as you have control over the entire process.
- Many agree that this method produces the best quality soap.
- The soaps formed from this process are gentle and extremely moisturizing for the skin once cured over four to six weeks. Great for dry skin.
- It is the best form of natural soap making as the cold process helps to preserve the ingredients added.
- Creates a nice scent over time and lathers better when compared to other soaps.
- Cold-pressed soaps will last a long time once fully cured.
- You have to use the lye (sodium hydroxide), which can be challenging and even dangerous to work with, if not used properly.
- The soap takes at least four to six weeks to fully cure when compared to other soaps you can use almost immediately.
- The soap comes out opaque, so you cannot add things like glitter inside the soap.
- Some added ingredients can react differently, for example, certain fragrance oils might cause problems like turning the soap.
- If you want to make them as gifts, you must plan and make sure the soap is ready in time.
- Cleaning up can be a bit more tedious as you are dealing with caustic soap dishes and any number of containers you use.
Hot Process Soap Making
The hot process of making soap is self-explanatory, the process is speeded up by adding heat to create your hot processed soap. This process uses an external source of heat to bring the soap mixture to the gel phase. This method, as with the above cold-pressed process, has both benefits and drawbacks.
- This also allows you to customize the soap with all the ingredients.
- This is also a more natural type of soap, similar to your cold-pressed
- Can easily be made using a crockpot or double boiler.
- Provides a thicker texture, which produces a less smooth appearance and a more rustic appearance.
- Cleaning up is a bit easier as everything is in one pot, which is already a soap.
- The curing time is less as it hardens in about 24 hours and is best left for at least a week for best results.
- The process is gentler on fragrances and additives as they do not come into contact with the lye.
- The mixture is very thick, and you cannot use certain techniques like swirls or layering.
- You also have to work with lye for the soap-making
- When “cooking”, the soap expands so you will have to keep an eye on everything to prevent it from overflowing.
- Due to the added heat, fresh ingredients might be difficult to add to the soap.
- You might not like the rough texture or appearance of the soap.
- As with the cold process of making soap, you will need similar soap-making equipment including safety gear because you are working with lye.
Melt and Pour Soap Making
Most soap kits are the melt and pour variety, where the base which can be clear or opaque, is already made for you, and all you have to do is melt and pour the soap into the desired shape. Re-batching is similar to melt and pour but uses already made cold processed soap or existing soap bars that are grated or shredded and then melted.
This produces a rougher texture soap and is used mainly by those who want to redo or use up any scraps of soap. So, for beginners, the melt and pour method is best.
- Great for beginners and even kids can get in on the fun.
- You do not need any lye for this method of soap making as the soap is already made. So, you do not need any safety equipment.
- The soap hardens quickly and can be used almost immediately and does not need to cure like the other forms of soap.
- You can easily add fragrances, glitter, and embed objects in the soap as you can get translucent bases.
- Once done, everything is easy to clean up.
- Creating soap layers is quite easy to do when using some isopropyl alcohol to make sure the layers stick.
- The melt and pour a variety of soaps are less customizable as you cannot choose the kinds of butter or oils that go in.
- The soap tends to sweat once hardened as it contains extra glycerin.
- Any fresh ingredients you might add will eventually go off.
- Certain techniques, like adding swirls, cannot be achieved as the soap thickens quickly.
- The soap can get burned if you are not careful, which makes it into a thick mess that is not easy to work with.
How to Purchase the Best Soap Kit
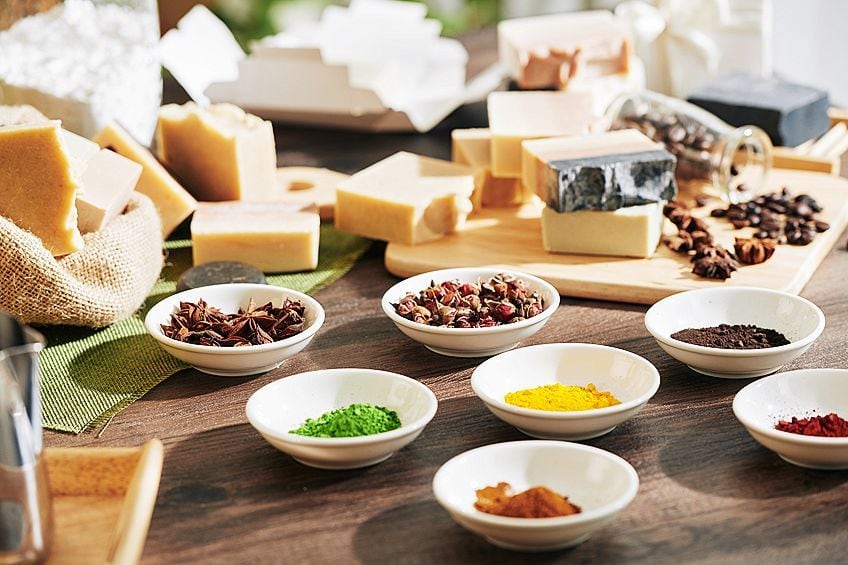
When making soap, it gives you the control of using ingredients that suit you, and you can create many different soap designs. You can experiment with different fragrances, colors as well as other additives. Whatever method of making soap you choose; you will need to get the necessary soap-making supplies and you will need to follow all the instructions. Some other things to consider are below.
Quality and Price
When purchasing the needed soap-making equipment, it can become a bit expensive. You will need different soap colors, additives, fragrances, various sizes, and types of molds, and you might also need safety equipment like gloves and masks. So, it is great if you can get a complete soap kit that provides all you need. Value for money is also important, you do not want to spend a lot of money on something that does not match up to the quality.
Once you have used the soap and other materials like fragrances, you will have to get more.
However, the molds and other tools should be reusable and last a long time. For example, silicone molds are a better option than using plastic molds, which tend to crack and make it more difficult to remove the soap. You are also saving the environment, as you will not be throwing out any plastic unnecessarily. The silicone mols are also easier to use. When it comes to quality and the best soap-making kits, they should also provide step-by-step instructions which are easy to follow.
Who Is the Kit For?
Do you want to get a soap kit that is more challenging for an adult, or are you looking for something that is aimed at children to use? Therefore, in some cases, you will have to look for soap-making kits for adults or something that is good for all ages. Also, consider if it is for yourself or as a gift, you will need to consider what another person would like. Many different types of bases offer various benefits and can include things like oatmeal, cocoa butter, or shea butter.
Be Aware of Skin Sensitivities
You should be aware of any skin sensitivities for yourself and others when making soaps. Some people can have allergic reactions to certain additives, so you will need to make a soap that is as natural as possible, without fragrances or colors. When purchasing a soap kit, make sure to check all the ingredients. Soap bases come in a variety of fragrances and added ingredients.
For example, bases can come in many different fragrances, which could be natural like essential oils, or artificial.
Are You Buying a Soap Kit for Fun or Profit?
The type of soap kit you are looking for is also dependent on if you are doing it for fun or profit. Some of the soap-making kits for beginners or kids might not have the ingredients you are looking for. If you are wanting to make handcrafted soaps to sell, you will need more luxury ingredients, for example, the soap base can be vegan-based and should be paraben-free. You might even want to consider doing something like cold process soap making.
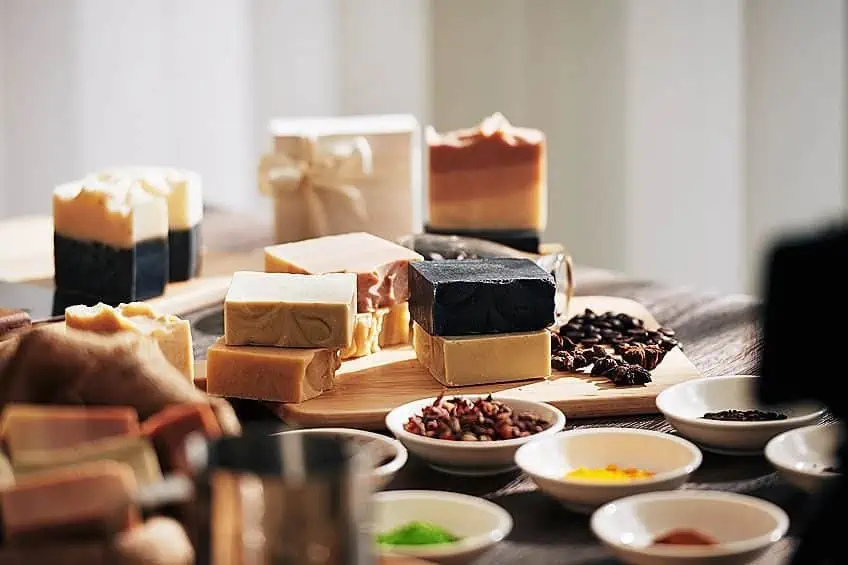
Best Soap Making Kits
When making soap from raw ingredients, can be challenging, and you will need to follow some safety guidelines as you are working with caustic chemicals. This is great for those who wish to make soap professionally, but soap-making kits for beginners and kids are best if they are the melt and pour varieties. These are easier, fun, and safer to work with. Soaps kits should provide all need to start making amazing soaps, some will come with different fragrances and mold shapes, and other soap-making equipment. Below are some recommendations for the best soap-making kits, both for kids and adults alike.
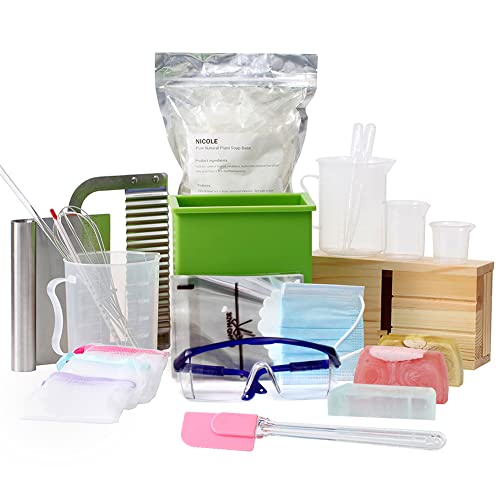
Best Soap Making Kits for Adults: BOOWAN NICOLE DIY Soap Making Supplies
This is one of the best soap-making kits for adults as Boowan Nicole is one of the foremost suppliers of silicone molds. The soap kit comes with all you need to start making soap and is a good kit for beginners for the price you pay. The rectangle soap mold is flexible, reusable, durable, and should be easy to demold. The soap kit comes with all the soap-making supplies you will need including soap cutters, pipettes, thermometer, whisk, gloves, 500 g soap base amongst other items.
- High-quality silicone molds are flexible, washable, and durable
- Includes heavy-duty stainless steel and washable soap cutter
- Comes with a premium quality bamboo wood soap beveler
- Comes with the most necessary soap making supplies
- Affordable
- Contains stainless steel soap cutter
- Good quality silicone mold
- Great kit for beginners
- No clear instructions
- Not the best quality
Best Soap Making Kits for Beginners: SOLIGT Melt & Pour Soap Making Kit
This DIY Melt and Pour Soap Kit has all you need for beginner soap crafters from your shea butter soap base to your measuring cups, silicone molds, fragrances, dyes, stirring sticks, and even labels. The soap kits also come with detailed instructions on how to go about making your soap products. The soap will leave your skin feeling smooth and soft. The soap kit is not only for adults, but kids can also have fun with it.
- Includes everything that you need for soap making processes
- Comes with fragrance, dyes, molds, flowers, and shea butter
- Perfect for beginners as it comes with detailed instructions
- Comes with detailed instructions
- Soap Kit has everything you need for beginners
- The base soap is shea butter
- Provides dyes and scents
- Only comes with one mold shape
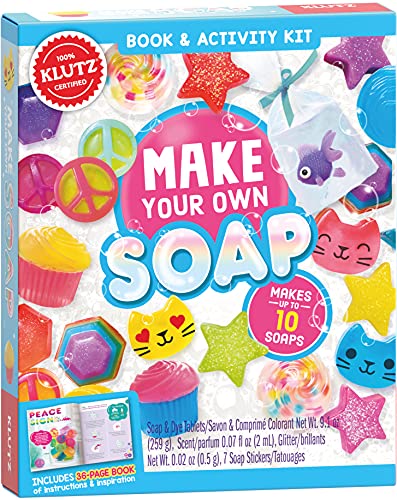
Best Soap Kit for Kids: KLUTZ Soap Kit
The Klutz Soap Kit comes with a mold that provides six different shapes, a clear soap base, glitter, and color tablets. There are also stickers, a gift box, a ribbon, and a clear bag with a plastic fish. You can make 10 soaps from the soap base provided. Not only is the soap kit fun to use, but it also provides fun facts about chemistry and soap making. Together with the kit, you get a 36-page book with instructions and other interesting information. The kids can be creative, learn and have fun with making various shapes and designs of soap.
- Perfect beginners soap-making kit for children
- The molds come in a range of shapes for girls and boys
- Comes with detailed instructions and full-color inspiration
- Fun and educational
- Easy to use
- Color tablets so there is less mess
- Designs and shapes are fun for kids
- Limited fragrance
- Small soaps
- Better aimed at eight-plus years
How to Make Soap
Many of those who make their own soap, do so because they want something more natural as mass-produced soaps can have artificial fragrances and colors. These can cause skin sensitivities, so the best alternative would be to make your own soap, then you have some control of what goes in. This soap is better for you and the environment.
You have more control if you make your soap from scratch but many of the soap kits also provide you with natural ingredients. Some of these ingredients you may even have in your home already, for example, cocoa butter, olive oil or avocado oil, distilled water, coconut milk, herbs, spices, coffee, honey, sugar, sea salt, and oats amongst others. Below is a brief guide on how to make soap using the three methods already mentioned, we will start with the melt and pour soaps.
How to Melt and Pour Soap
This is the easiest way to create soaps without having to come into contact with hazardous chemicals. The only serious caution to take note of would be the heat involved which is necessary to melt the soap. So, if kids are involved, make sure you watch what they do so no fingers are burnt. This is also a great method for beginners who wish to try making their own soap. Many of the best soap-making kits come with a base and other necessary soap-making supplies like molds.
The basic list of materials include:
- Soap base
- Fragrance
- Essential oil
- Dye
- Scale
- Measuring spoon and whisk
- Spatula
- Soap cutter or a knife
- Measuring jug
- Double boiler or two pots
- Rubbing alcohol to spray
- Other items if you wish to embed
Cut and Weigh the Soap
First cut up and weigh the soap so you have enough to fill the molds. You should know the grams for each mold, which should help you calculate the amount of soap you need. Read the instructions that come with the soap kit, you should be able to either melt over the stove or in the microwave.

Melting the Soap
When done on the stove, you need to use a double boiler, so you do not burn the soap. You can simply fill one pot with some water and place another pot inside; this creates a gentler way to heat the soap. In the microwave, make sure your container can go in the microwave and then set it on high for one minute at a time.
You want to heat the soap carefully until it has melted completely.
Adding Fragrance and Color
Once the soap has melted, you can then add your fragrance, a general amount would be about two to three percent of the weight of the soap. Once you have measured out the fragrance, add it to your melted soap and stir. Try adding natural colors or mica powders to the soap, then stir everything again. Do not stir too fast as you do not want bubbles forming. You can spray a little of the spray alcohol to take out any bubbles.
Pouring the Melted Soap
Slowly pour the soap to prevent bubbles. You can spray the surface again to get rid of any bubbles. Once you have poured your mold to the rim, you can then allow the soap to harden. You can try putting it into the fridge, not the freezer, to harden faster.
If left out, wait about several hours, or if in the fridge, check it in about an hour.
Unmolding the Soap
You can also do various techniques like layering the soap, this will take more time as you need to wait for the layers to harden before pouring another layer and spraying the surface with the spray alcohol before pouring the second layer. This helps the soap layers to cling better to each other. You can also embed objects into the soap.

Once the soap becomes hard, you can remove it from the mold. This is easier to do with silicone molds than plastic molds. The soap should pop right out of the mold, however, with the plastic mold, you can try tapping it firmly to try and release the soap if it seems a bit stuck. If it remains stuck, try running a little hot water onto the mold to help release the soap. You can then use the bar of soap immediately as it does not need to cure.
A Brief Tutorial on Cold Process Soap Making
When using this method, you will be working with hazardous chemicals like the lye, so you should use protective gear like gloves, a mask, and protective eyewear. You should also be working in a space that has good ventilation. The tools you use should either be stainless steel or plastic as they do not react with the lye.
Items like a silicone spatula and digital measuring scale are needed.
Weigh and Mix the Lye and Water
You will need to measure some water and lye separately, and then carefully mix the lye with the water. Weigh these out on your scale, it must be accurate. This mixture gets hot, so ensure you add the lye into the water and do not do it the opposite way. This also gives off fumes, which is why a mask is necessary. Stir the mixture and leave it to cool in a safe place. Always be aware of kids and animals, you cannot leave these chemicals lying around. This should cool to about 90 to 110 degrees Fahrenheit (32 to 43 degrees Celsius).

Weigh and Heat Oils and Fats
While your lye mixture is cooling, you weigh out your oils and fats and melt them in a pot. Leave this to cool to a similar temperature as the lye. Once both mixtures are at a suitable temperature, you can then add the lye mixture to the melted oils and fats. This can then be mixed until you reach a trace. Using a stick blender can be helpful for this step.
The trace is when you take a little of the mixture and drizzle a bit over the top, if you notice a slight pattern that sinks back into the mixture, this is the trace.
Adding Fragrance
Now you can add your fragrances or essential oils, or other ingredients like oatmeal, and colorants. Stir these in until fully blended. Some fragrances can react with the cold process, so make sure they can be used.
Pouring and Unmolding
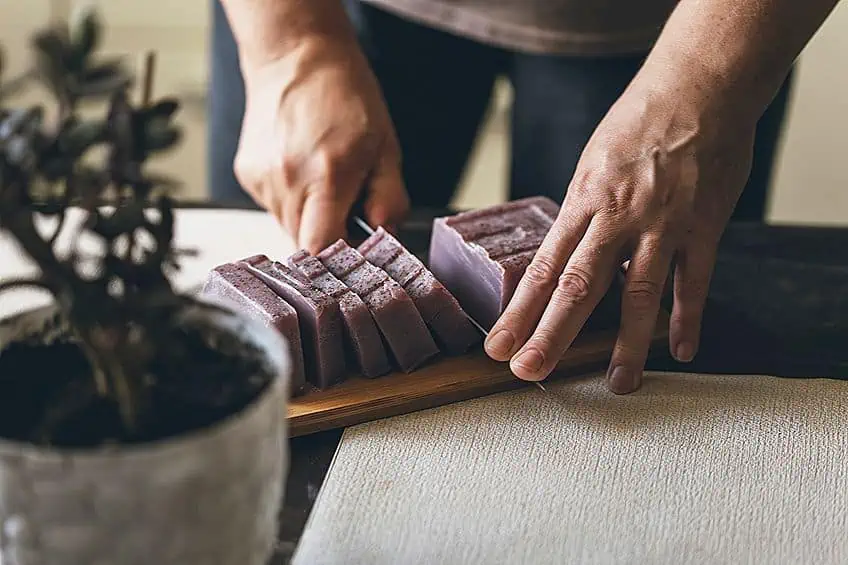
Loaf or box molds are usually used in this process. You can line the box with freezer paper and then pour the soap into the mold. The soap is generally thinner, so you can make patterns or swirls. Once you have poured the soap, pick up the mold and tap it to get rid of any bubbles. Always wear your gloves. Cover the mold and leave it for about 36 to 48 hours. You can then unmold the soap and cut it into slices.
These must then be left to cure undisturbed for at least four to six weeks.
A Brief Look at How to Make Hot-Pressed Soap
The hot-pressed method of making soap is similar to the cold-pressed version, you simply add in heat or cook it, unlike the cold-pressed method. So, you should follow the above steps of measuring and weighing your lye and water and then your oils and fats. You then wait for these to cool and then add the lye to the oil or fat mixture and blend.

This mixture is then cooked in a slow cooker or crockpot. Cooking at a lower temperature helps to make sure there are no “volcano” moments. The soap will undergo a saponification process and the soap will become “gelled.” In a slow cooker, it can take one to three hours, at which time, you must check the consistency every half an hour. Wait for everything to cool before including any fragrances or additives. The hot process soap consistency is thick and can be lumpy, pour this into your mold and smooth out with a spatula.
Tap the mold a few times for bubbles and then leave to cool and harden for about 24 to 48 hours. Unmold and cut and then leave to cure for about a week.
Melt-and-Pour Soap Tips and Tricks
Making soap using the melt and pour method is quite easy that even kids can get in on the fun. However, sometimes there are a few things seasoned crafters learn along the way that can make the process easier and better.
- Use some rubbing alcohol in a spray bottle to spray over the soap before it begins to set in your mold. This helps to remove the bubbles.
- You can also spray the mold with rubbing alcohol before pouring the soap in.
- When cutting your soap before melting it, make sure to use a clean knife as any dirt or dust can get into the soap and it is difficult to get out.
- Keep a record of the recipe you use and the results for future reference.

- Have patience when waiting for the soap to set, especially when layering your soap.
- Silicone molds are preferred when melting and pouring soap. You can also consider making molds for yourself.
- Stir slowly when mixing in fragrances to prevent bubbles from forming.
- Once the soap has hardened and you get fingerprints on the surface, gently wipe off with a cloth and some of the rubbing alcohol.
- Powdered colorants can sink to the bottom or do not mix properly. Dilute in some rubbing alcohol first and then add to the soap. You can also strain first before adding to the soap if there are still lumps present. Add in small amounts of the diluted color until you reach the color you want.
Melt and pour soap-making kits are great fun and an easy hobby to try out, even for the younger generation. Everybody needs soap so you cannot go wrong with it as gifts to family friends. We hope this article will encourage you to start making your own soap at home.
Frequently Asked Questions
Is Cold-Pressed Soap Good for Sensitive Skin?
Yes, cold-pressed soap making can easily be customized, and you have more control of what goes into the soap. So, you can add moisturizing oils and fragrances or leave these out altogether. The soap also cures hard and will last a long time.
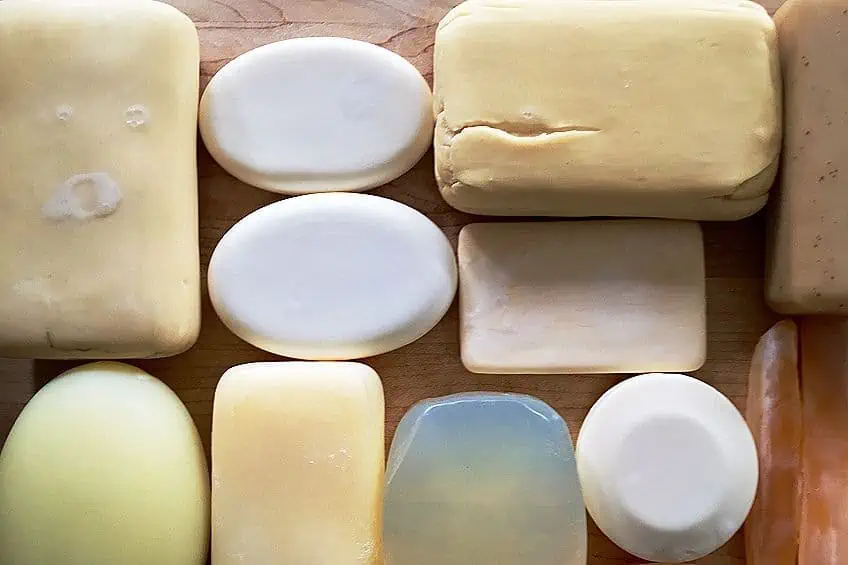
What Are Some Moisturizing Soap Bases?
When looking for a moisturizing soap base, you can choose ones with goat’s milk, shea butter, cocoa butter, or olive oil. Most of these oils and kinds of butter are great for dry as well as sensitive skins. The goat’s milk is a popular choice in this case.
Is Melt-and-Pour Soap Safe to Work With?
Yes, since the soap base has already been made beforehand, you will not be exposed to any harsh chemicals. This is why melt and pour soap is great for everyone, children included. Although, you must still be careful as the soap gets hot when melted. Look for good-quality soap bases that do not contain artificial colors and fragrances but have natural oils and scents.
Does Melt-and-Pour Soap Last Long?
When kept in an airtight container, in a cool, dark space, it can last from one up to two years. Storing the soap properly will stop any moisture from getting out and drying the soap base out too soon.
How Long Can Melt-and-Pour Soap Remain in a Mold?
The soap should remain in the mold for at least four to six hours, so it can harden properly. This is where some patience is needed. You can try and place the soap in the fridge for 10 minutes to help speed up the process, but simply waiting the correct time will produce the best results.

In 2005, Charlene completed her wellness degrees in therapeutic aromatherapy and reflexology at the International School of Reflexology and Meridian Therapy. She worked for a company offering corporate wellness programs for several years before opening her own therapy practice. In 2015, she was asked by a digital marketer friend to join her company as a content creator, and it was here that she discovered her enthusiasm for writing. Since entering the world of content creation, she has gained a lot of experience over the years writing about various topics such as beauty, health, wellness, travel, crafting, and much more. Due to various circumstances, she had to give up her therapy practice and now works as a freelance writer. Since she is a very creative person and as a balance to writing likes to be active in various areas of art and crafts, the activity at acrylgiessen.com is perfect for her to contribute their knowledge and experience in various creative topics.
Learn more about Charlene Lewis and about us.