Cactus Drawing – Succulent Sketching
This post may contain affiliate links. We may earn a small commission from purchases made through them, at no additional cost to you.
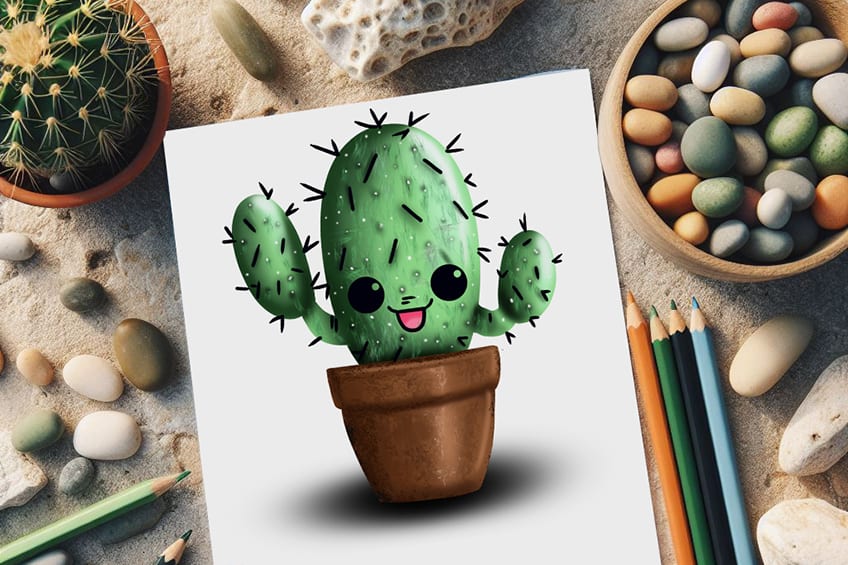
Drawing a cactus can be a uniquely rewarding artistic journey. Whether you’re captivated by desert landscapes, eager to encapsulate the distinctive features of one of nature’s most resilient plants, or simply looking to broaden your drawing skills, this guide will navigate you through 15 essential steps to create a realistic or stylized depiction of a cactus. This detailed guide on how to draw a cactus ensures that you have the necessary tools and techniques at your disposal to capture the serene and enduring beauty of a cactus on your canvas!
Spiky Sketches: How to Draw a Cactus Step-by-Step
This illustrated guide meticulously outlines each step needed to create the final depiction of a cactus. By closely following this guide, you’ll develop expertise in learning how to draw a cactus!

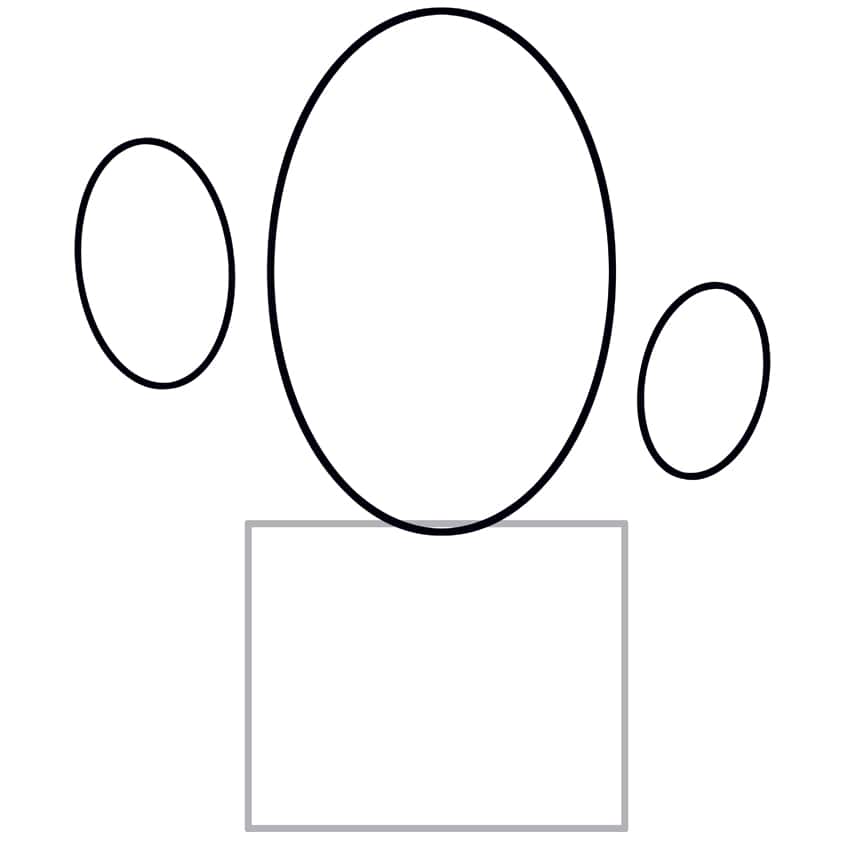
Step 1: Begin to Draw the Pot on Your Cactus Sketch
Start by drawing a square to represent the cactus pot in your realistic cactus drawing.

Step 2: Draw the Main Body
Above the square, draw the main cactus body represented by a large, vertical oval shape. On each side of the cactus, draw a smaller oval shape.
Step 3: Add the Guidelines to Your Realistic Cactus
In the main body, sketch one vertical line down the center and four horizontal guidelines.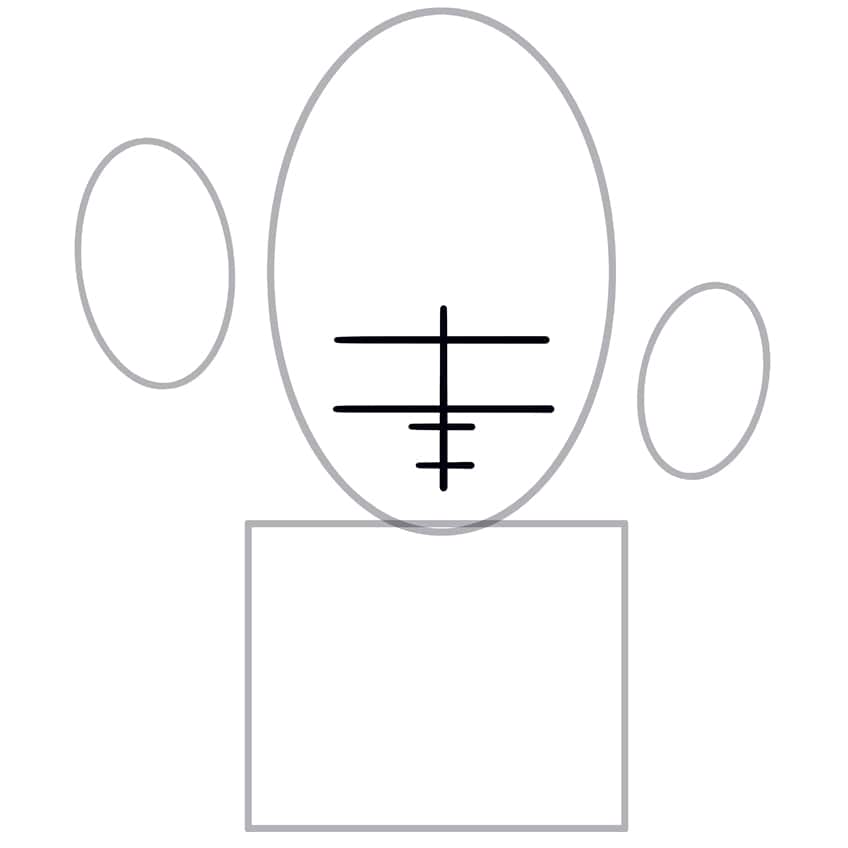
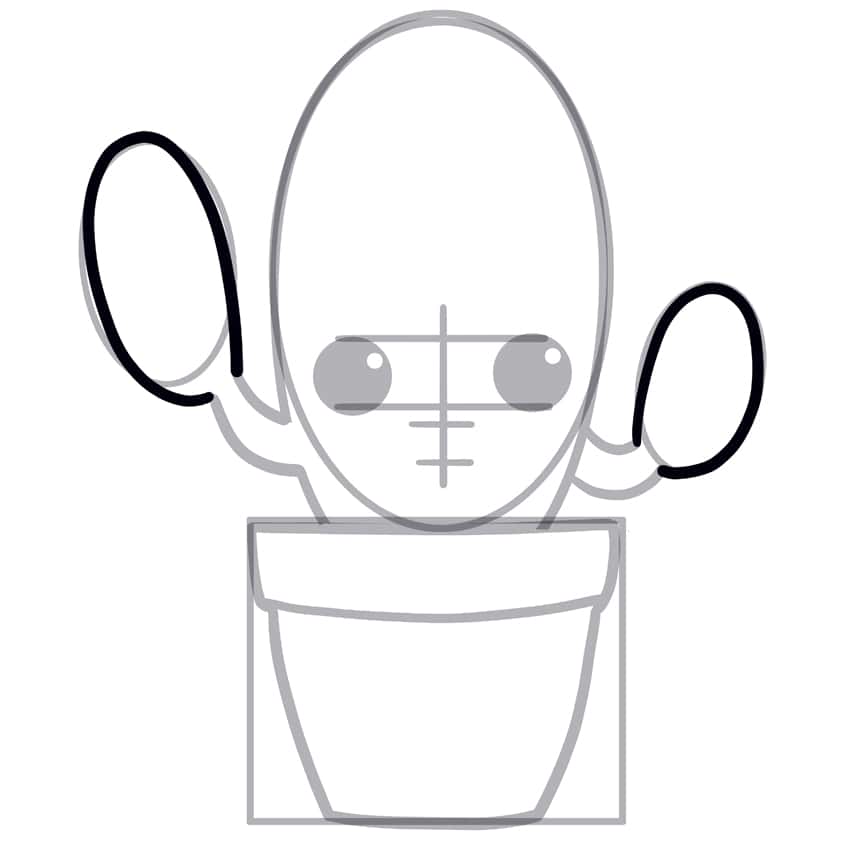
Step 4: Draw the Eyes on Your Cactus Sketch
Make use of the horizontal guidelines to aid you in drawing each of the eyes symmetrically. Each of the eyes should be filled and have a small, single circle that is blank within the eye.

Step 5: Outline the Pot
Begin to outline the pot using the guidelines previously drawn.

Step 6: Continue to Outline the Main Body
Continue outlining the main body of the cactus with a curved branch on each side reaching towards the smaller cactus heads.

Step 7: Outline the Smaller Cactus Heads
Use the construction lines to aid you in outlining each of the smaller cactus heads. Finish off by removing the unnecessary guidelines.
Step 8: Draw the Cactus Spines
Individually draw the spiky spines of the cactus along the main body and smaller cactus heads. These can be represented as straight lines of several lengths and angles. Continue by drawing the mouthline and tongue.

Step 9: Color in Your Cactus Sketch
With a fine, sharp brush and brown paint, evenly coat the pot on your realistic cactus drawing.

Step 10: Continue to Color in Your Cactus
Continue using the same brush and bright green paint, and begin to coat the cactus.

Step 11: Shade and Highlight the Pot
Start by applying light and dark brown paints with a texture brush or sponge, creating abstract patterns inside the pot. Then, use black paint along the edges to enhance shading and white paint in the center to introduce highlights. Repeat this process to refine the effect.

Step 12: Continue Onto the Cactus
Begin by shading the edges of the cactus with black paint, using a small, soft brush. Then, use a blending brush to create a more natural appearance. With the same small, soft brush and black paint, add various spots and rough lines for texture. Shade along the inner sides of the cactus’s spiky spines, then use the blending brush again to gently spread and soften this shading.
Finally, with a small soft brush and white paint, create a distinct highlight along the edges to enhance the cactus’s dimensionality.

Step 13: Add Texture to Your Cactus Sketch
Begin by employing a rough texture brush, combining black and green paint to add rough texture patterns across the cactus. Follow this by using a fine, sharp brush dipped in white paint to place dots in the center of each spot for added detail. Conclude this step with the same fine, sharp brush, utilizing both lighter and darker shades of pink to meticulously fill in the cactus’s flowers.

Step 14: Add Ground Shading to Your Cactus Drawing
Utilize a small, soft brush with black paint to create shading under the cactus and pot. With a blending brush, soften the shading.
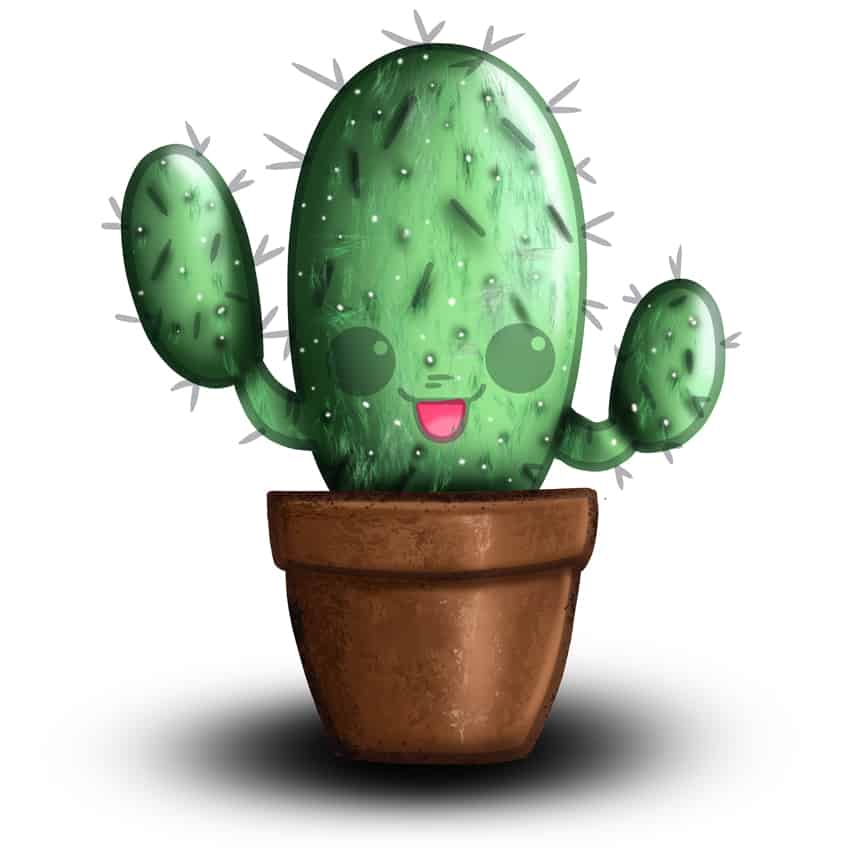
Step 15: Complete Your Realistic Cactus
Remove any stark, visible outlines; where erasing isn’t feasible, simply employ a fine, sharp brush and matching colors to redraw the outlines and any inner texture lines, achieving a smooth, seamless finish. You have just finished learning how to draw a cactus step by step!

Congratulations on learning how to draw a cactus step by step! You’ve not only mastered the unique contours and textures that define a cactus but also embraced an artistic exploration that has broadened your skills. May the techniques and insights gained serve as a foundation for your future artistic endeavors, as you continue to explore and depict the world around you with newfound confidence and creativity.
Frequently Asked Questions
How to Realistically Draw the Detailed Spines of a Cactus?
Realistically sketching the detailed spines of a cactus demands patience and a keen eye for detail. Personally, I start by closely observing the arrangement and patterns of the spines on different cactus species. Then, using a fine-tipped pen or pencil, I carefully render each spine, paying attention to length, thickness, and spacing. Adding subtle variations in shading and texture helps to convey the three-dimensional appearance of the spines, bringing depth and realism to my drawings.
Can I Draw Cacti in Different Stages of Growth or Flowering?
Absolutely! Drawing cacti at various stages of growth or flowering opens up a world of creative possibilities. Personally, I find it fascinating to capture the intricate details of a young cactus sprout emerging from the soil or the vibrant blossoms adorning a mature plant. Depicting cacti in different stages allows me to explore the beauty of their lifecycle and adds depth and interest to my drawings.

IzzyBll is a digital artist and content creator from Israel and currently residing in South Africa. Originally coming from videography, Izzy then turned to digital graphic art. He specialized in using digital drawing software such as Photoshop and Procreate. Drawing and photo editing has always been a sort of second nature for Izzy. In doing so, he can now look back on 5 years of experience in the industry, completing commissions for various well-known brands such as Audi.
Learn more about IzzyBll and about us.