Mountain Drawing – Learn How to Draw a Picturesque Mountain
This post may contain affiliate links. We may earn a small commission from purchases made through them, at no additional cost to you.
Mountains are some of the most awe-inspiring and majestic landforms on the planet. Towering high into the sky, these natural wonders are not only breathtaking to behold but also serve as important sources of biodiversity, freshwater, and recreation. From the snow-capped peaks of the Himalayas to the rugged Rockies of North America, mountains have captured the imaginations of people for centuries and continue to draw adventurers and nature lovers alike to their slopes. Whether you’re a hiker, a skier, or simply someone who appreciates the beauty of nature, there’s no denying the power and allure of these towering giants.
How to Draw a Mountain Step-by-Step
Great job on taking the first step toward learning how to draw mountains! Get ready to begin a creative expedition that will enhance your artistic abilities. When starting this tutorial, keep in mind to approach every stroke with a blend of patience and inquisitiveness, letting yourself learn from any mistakes that may occur. Pay attention to the details of the mountain, from the jagged peaks to the winding valleys, and don’t be afraid to experiment with various styles and techniques. By the end of this drawing tutorial, you will have developed a renewed sense of assurance in your capacity to portray the essence of a mountain on paper!
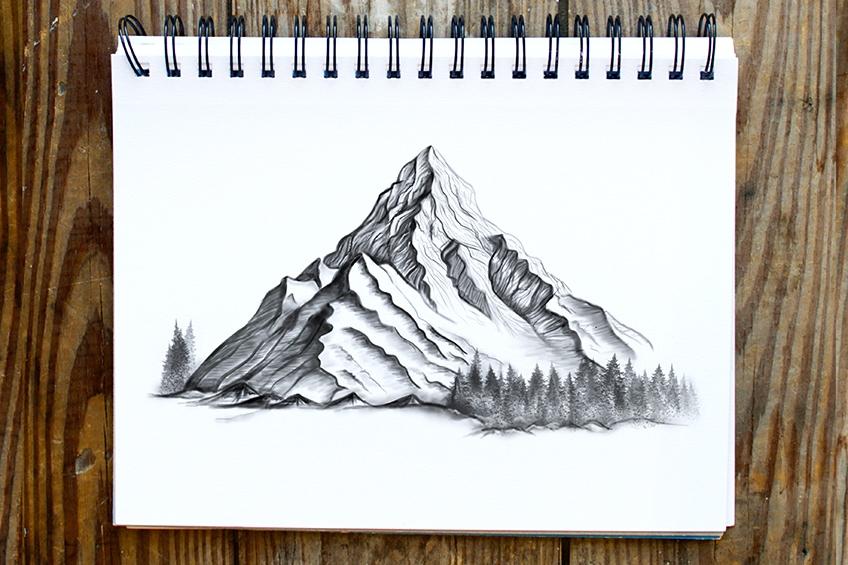
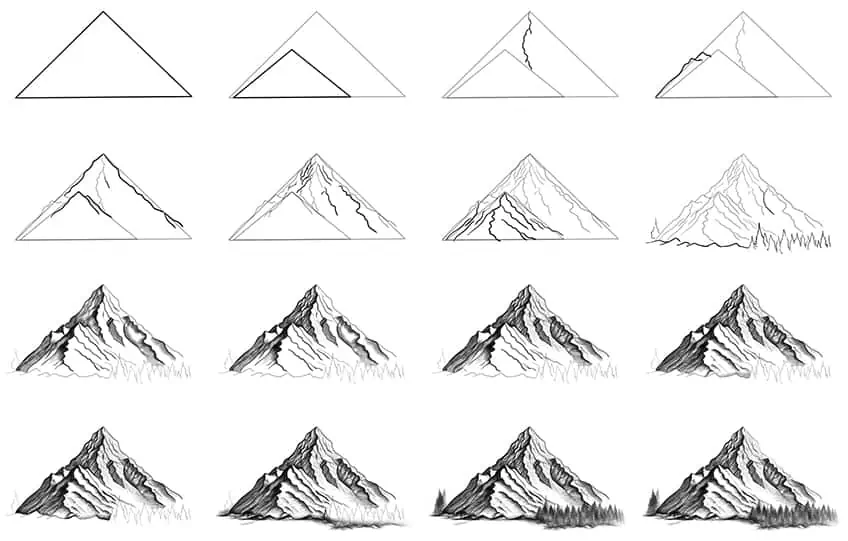
Displayed in the collage below, are the sequential steps taken to reach the end product of a stunning mountain drawing!
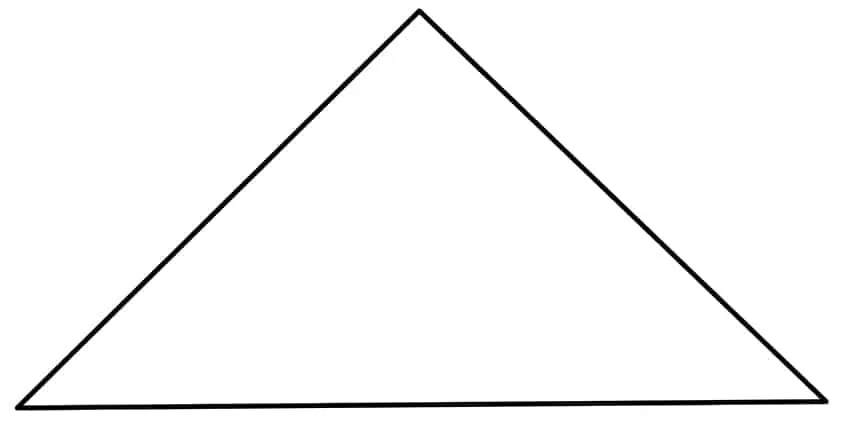
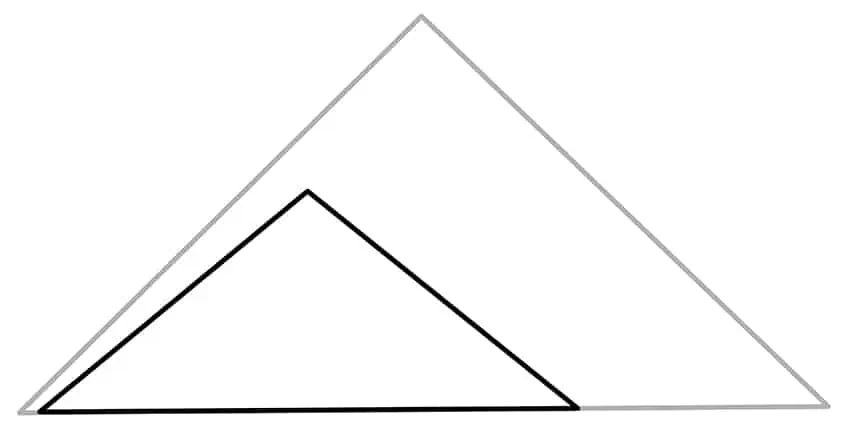
Step 1: Draw the Main Shape of Your First Mountain Drawing
To begin this tutorial on how to draw a mountain, draw a large triangle to represent the main shape of your mountain.
Step 2: Draw the Second Mountain
Within the first triangle, draw a second smaller triangle to represent the main shape of the second mountain.
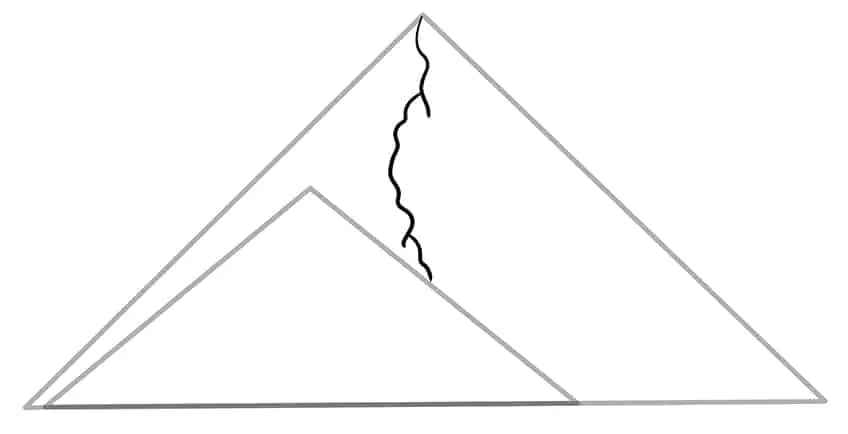
Step 3: Separate the First Mountain into Two
Draw a rough center line within the first large triangle. This will help you in separating your mountain drawing into different parts.
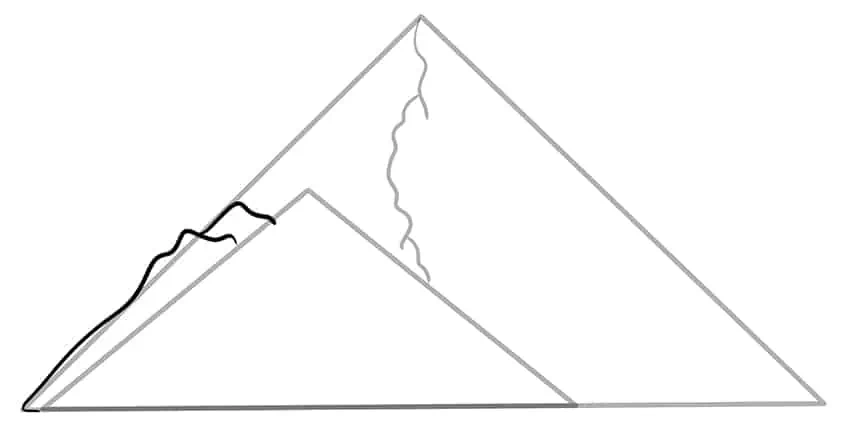
Step 4: Draw the Side Hills
Draw the first side hills attached to the large triangle and ending against the smaller triangle.
Step 5: Outline Your Mountain Sketch
Using the triangles to aid you, outline a rough structure of both the large and smaller mountains.
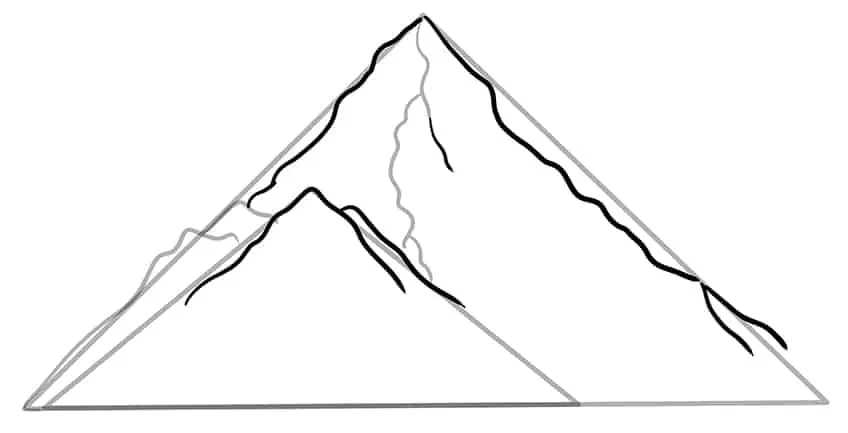
Step 6: Structure the Large Mountain
Within the larger mountain, draw fine rough structure lines leading downwards.
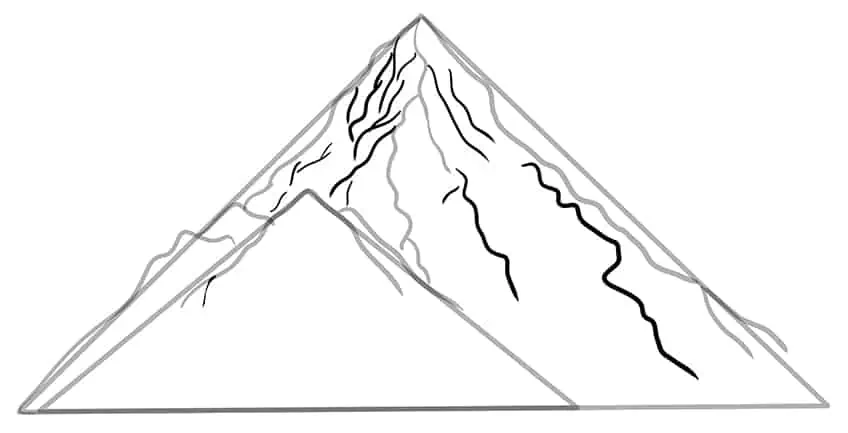
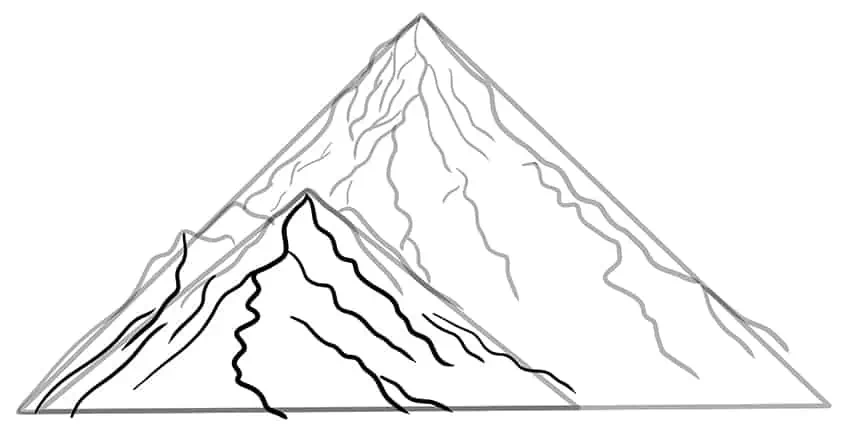
Step 7: Structure the Smaller Mountain
Within the smaller mountain, draw fine, rough structure lines leading downward on either side of the mountain. The center line should be used as the separation line for either side to have its angle leading downward.
Once completed, erase any still visible construction lines.
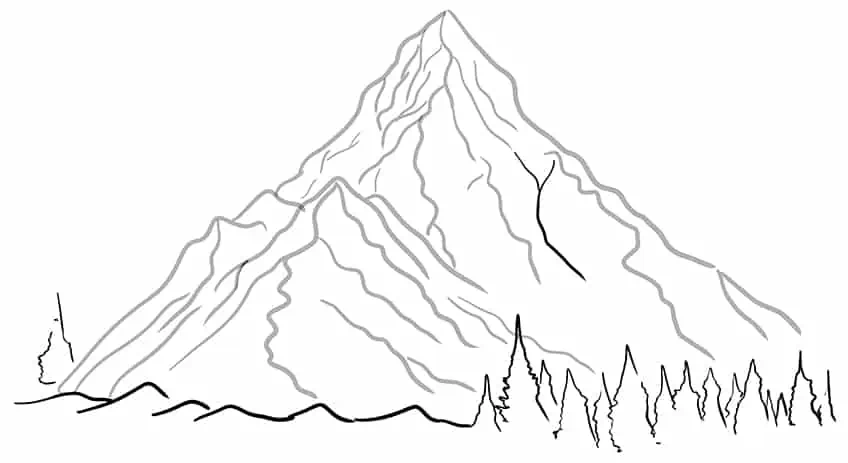
Step 8: Draw the Surrounding Scenery
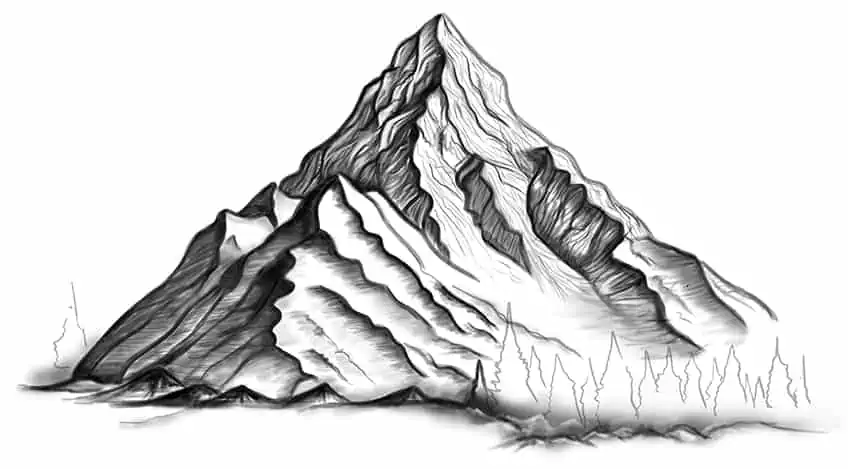
Begin by drawing fine slopes at the bottom of the smaller mountain. Continue by drawing simple rough and spiky structured tree outlines near the second half of the mountain.
Step 9: Shade Your Mountain Sketch
Select a small, soft brush and black paint, and lightly shade the edges of the mountain. Repeat using a blending brush and softly smoothen and blend the shading onto the rest of the peaking hills.
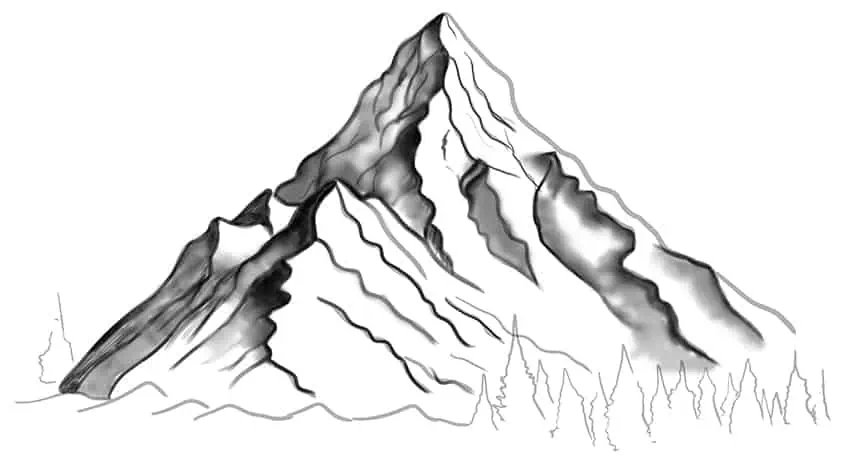
Step 10: Texture the Top Realistic Mountain Drawing
In this step, you will use a thin brush and white paint, and begin to add fine hairline brushstrokes within the top mountain to enhance the structure. Repeat using black and gray paint.
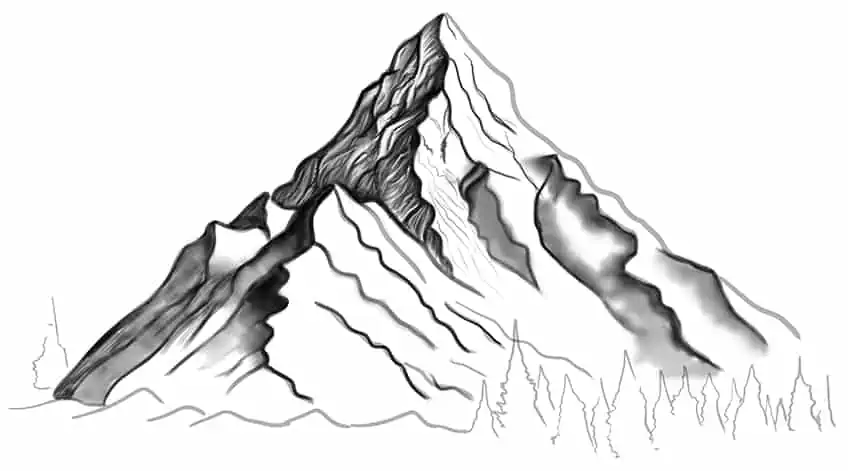
Step 11: Continue to Texture Your Realistic Mountain Drawing
Repeat the previous step with the rest of the areas of the larger mountain but switch to a combination of gray and black paint. Continue to add fine hairline brushstrokes in these areas, following the curvature of each hill.
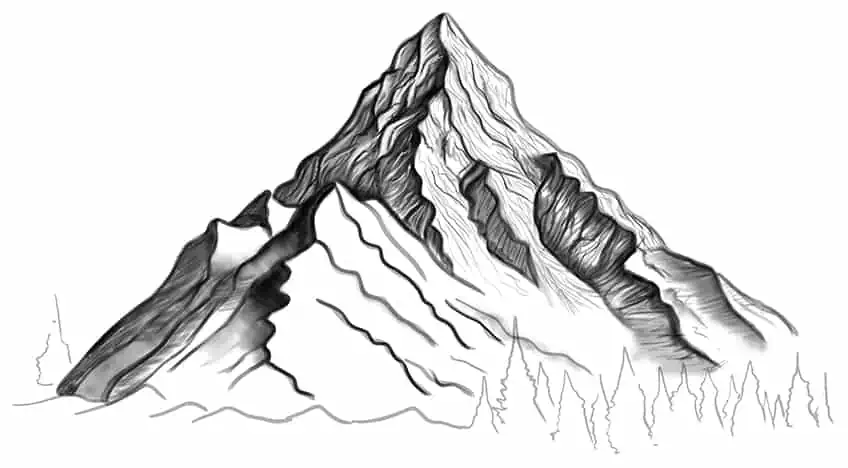
Step 12. Add More Texture to Your Mountain Sketch
Select a thin brush and black paint, and add fine hairline brushstrokes to enhance the texture of the smaller mountain and peaking hills. Switch to a soft brush and lightly shade the area.
Complete this step, by spreading the shading using a blending brush.
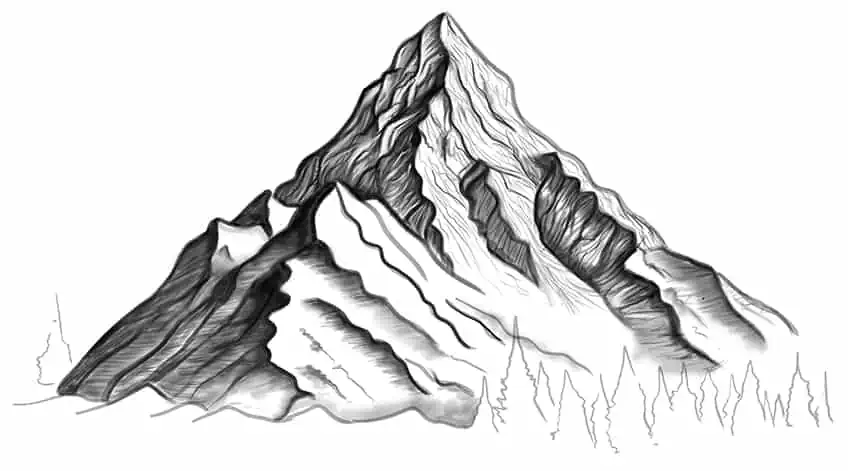
Step 13: Enhance the Structure on Your Mountain Drawing
With a small, soft brush and black paint, lightly shade the structure lines of the lower mountain. Repeat using a fine, sharp brush to add finer texture lines. Complete this step with a blending brush to soften and spread the shading.
Step 14: Shade the Foreground
In this step, apply a misty shading along the foreground line, using a soft brush and black paint. Switch to a blending brush to soften and spread the shading.
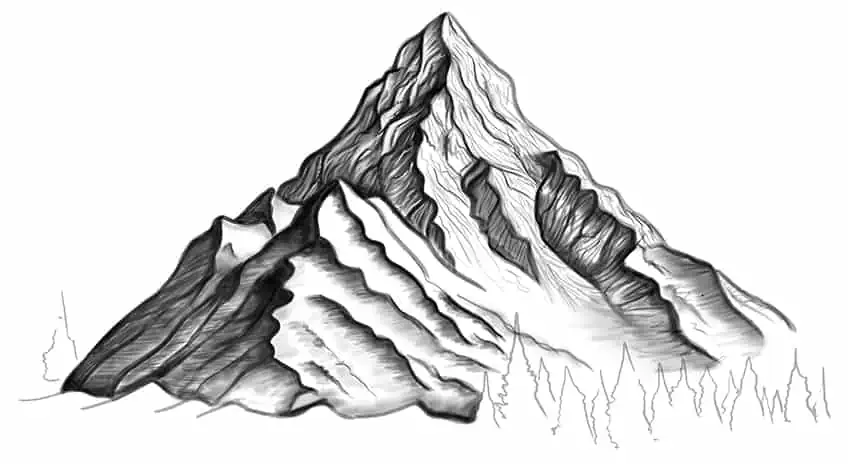
Step 15: Shade the Trees on Your Mountain Sketch
Select a rough, pattern brush and black paint, and shade the trees. Make sure the top of each tree is darker than the lower areas of the trees.
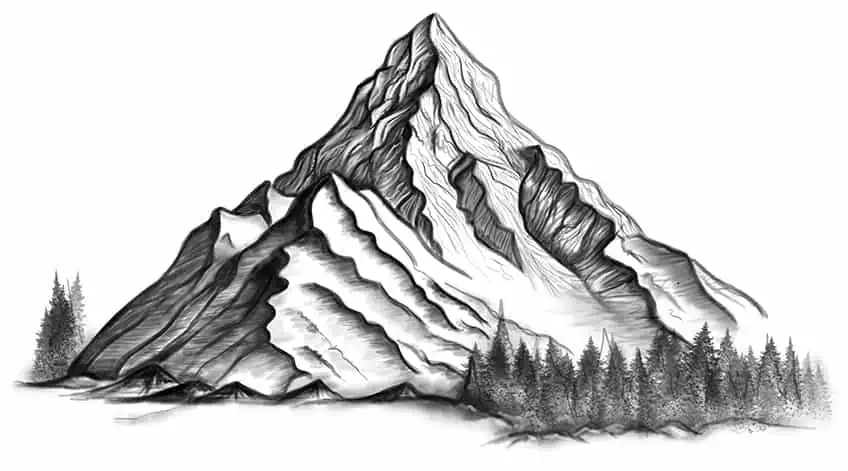
Step 16: Finalize Your Realistic Mountain Drawing
You have almost reached the end of our tutorial on how to draw mountains. To finish off your drawing, simply erase any still visible harsh outlines or construction lines. This will result in a seamless and realistic mountain drawing!

Congratulations on completing the tutorial on how to draw a mountain! You’ve skillfully captured the unique features and character of this natural wonder. Now that you have the basic outline in place, consider adding additional details to make your artwork even more captivating. You might experiment with shading and highlighting to create a sense of depth and perspective, or try incorporating different textures and patterns to replicate the look and feel of a real mountain. Feel free to unleash your creativity and incorporate your unique personal flair to the drawing, as art thrives on self-expression. With dedication and practice, you’ll be able to produce breathtakingly realistic mountain illustrations that are sure to impress. Keep up the excellent work!
Take a look at our how to draw mountains webstory here!
Frequently Asked Questions
How to Make My Mountain Drawing Look More Realistic?
To draw mountains and make them look more realistic, it’s essential to pay attention to the details. Take some time to study photographs or observe real-life mountains, paying attention to the textures, shapes, and color variations. Use shading and highlighting techniques to create depth and dimension in your drawing, and try to capture the sense of scale by varying the sizes of the mountains in your drawing. Additionally, experiment with different paintbrush sizes to create different textures and effects.
How Do You Choose the Right Colors for Your Mountain Drawing?
Choosing the right colors for your mountain drawing depends on the type of mountain you want to draw and the time of day or weather conditions you wish to depict. For example, a snowy mountain may require shades of white, blue, and gray, while a mountain with greenery may require shades of green and brown. It’s helpful to reference real-life photographs of mountains or landscapes to get an idea of the color schemes used in nature. Additionally, you can experiment with colored pencils, markers, or paints to create a unique and vibrant mountain sketch.

IzzyBll is a digital artist and content creator from Israel and currently residing in South Africa. Originally coming from videography, Izzy then turned to digital graphic art. He specialized in using digital drawing software such as Photoshop and Procreate. Drawing and photo editing has always been a sort of second nature for Izzy. In doing so, he can now look back on 5 years of experience in the industry, completing commissions for various well-known brands such as Audi.
Learn more about IzzyBll and about us.