Skeleton Drawing – Create an Easy Skeleton Drawing
This post may contain affiliate links. We may earn a small commission from purchases made through them, at no additional cost to you.
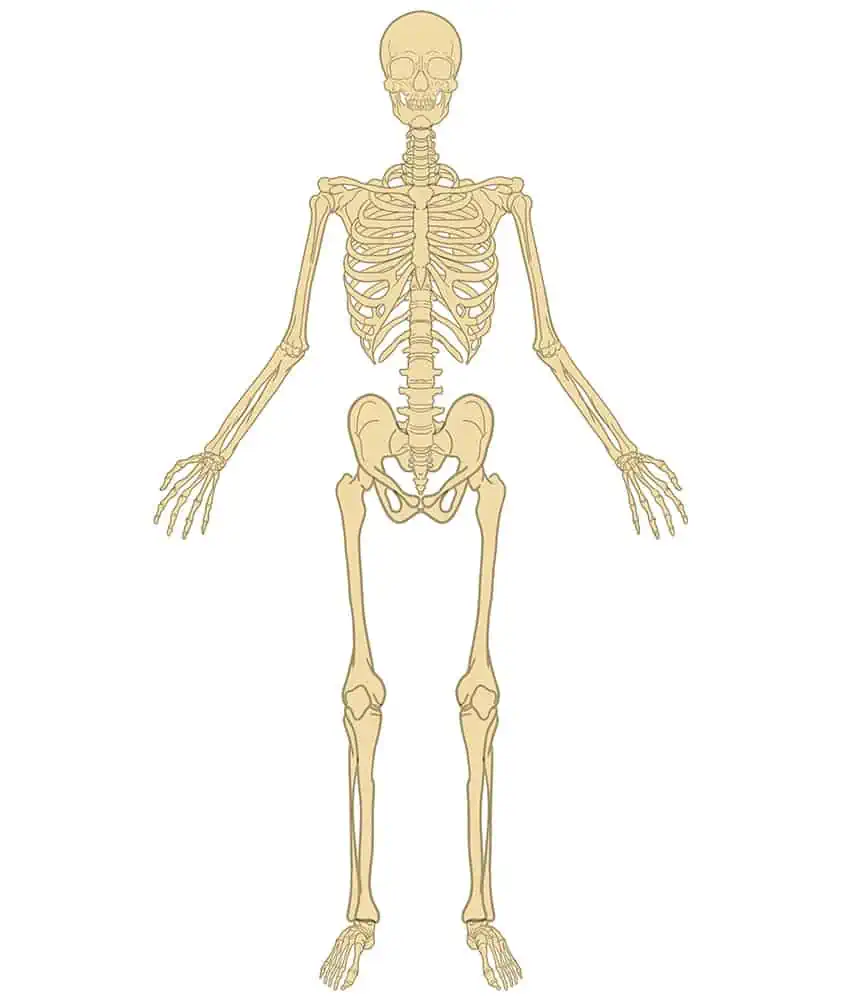
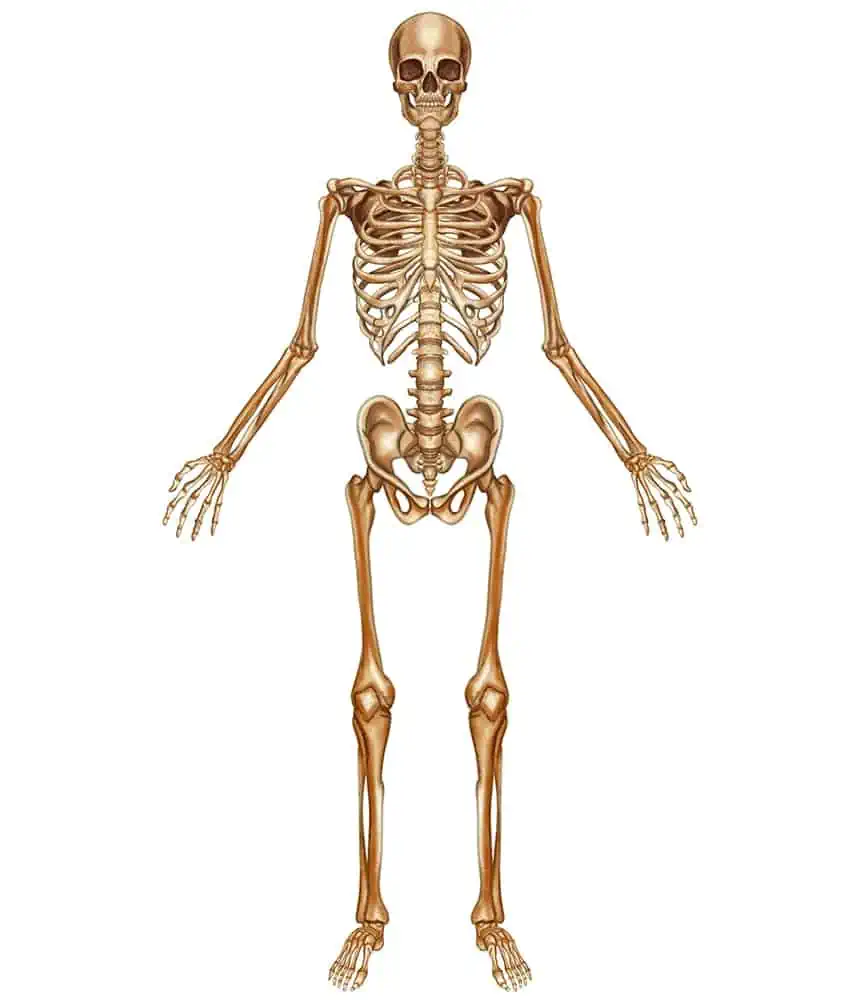
The human skeleton is truly a remarkable marvel of engineering. Comprising 206 bones, this complex framework of support and protection is responsible for giving our bodies shape and structure, as well as facilitating movement, producing blood cells, and storing essential minerals. From the delicate bones of the inner ear that allow us to hear, to the robust femur that enables us to run, jump, and dance, the human skeleton is a wondrous testament to the intricate design of the human body!
How to Draw a Skeleton Step-by-Step
Drawing a skeleton may seem daunting at first, but it can be an incredibly rewarding and enjoyable experience! Not only will you gain a better understanding of the human body’s structure, but you will also develop your artistic skills and creativity. Sketching and learning how to draw bones and joints can be a fun and challenging exercise, as you learn to observe and replicate the intricate shapes and angles. So grab a pencil and start exploring the fascinating world of the human skeleton!
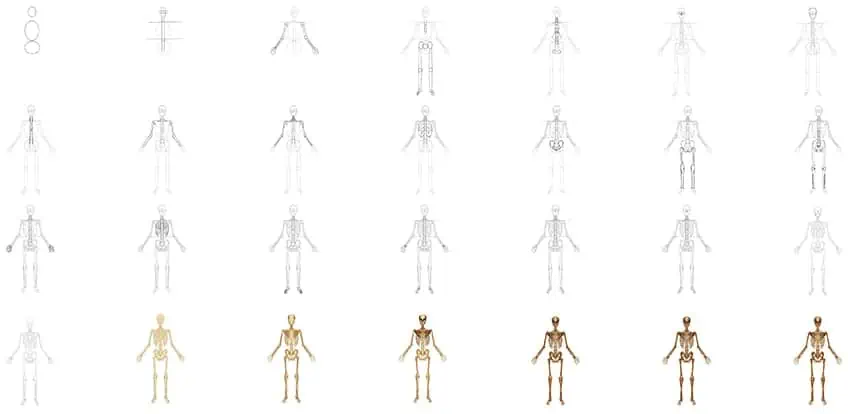
The below collage demonstrates the steps you will take to creating skeleton drawings.
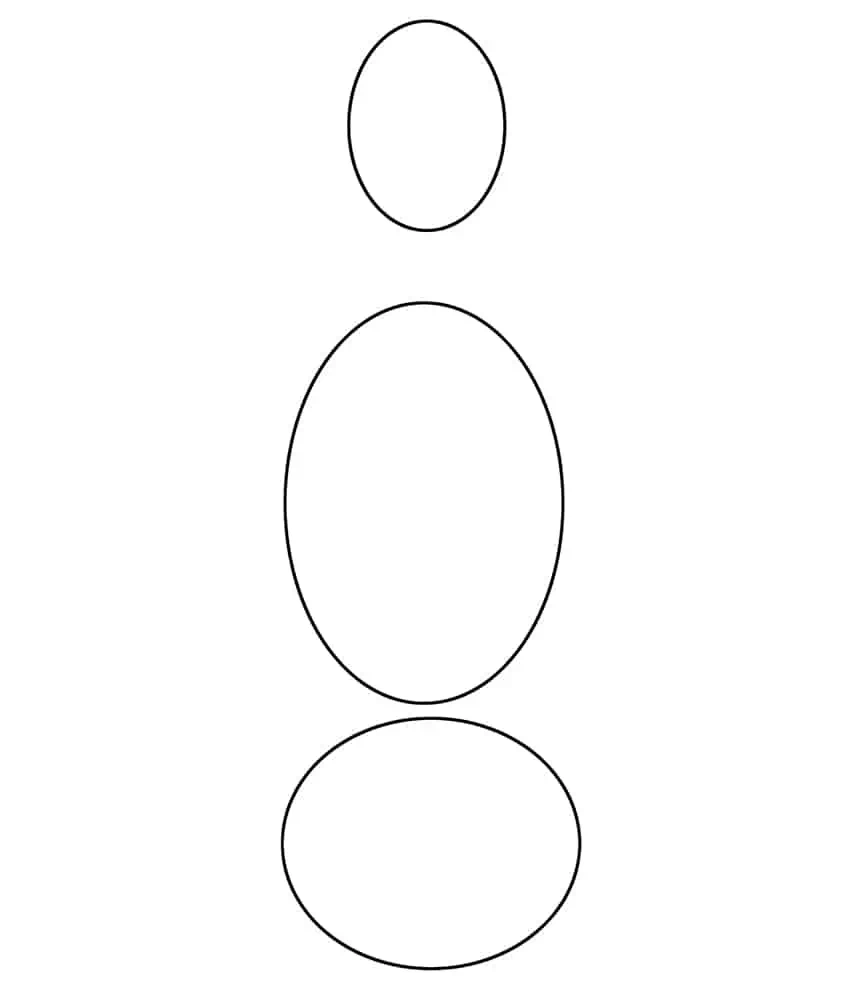
Step 1: Draw the Main Frame of Your Skeleton Sketch
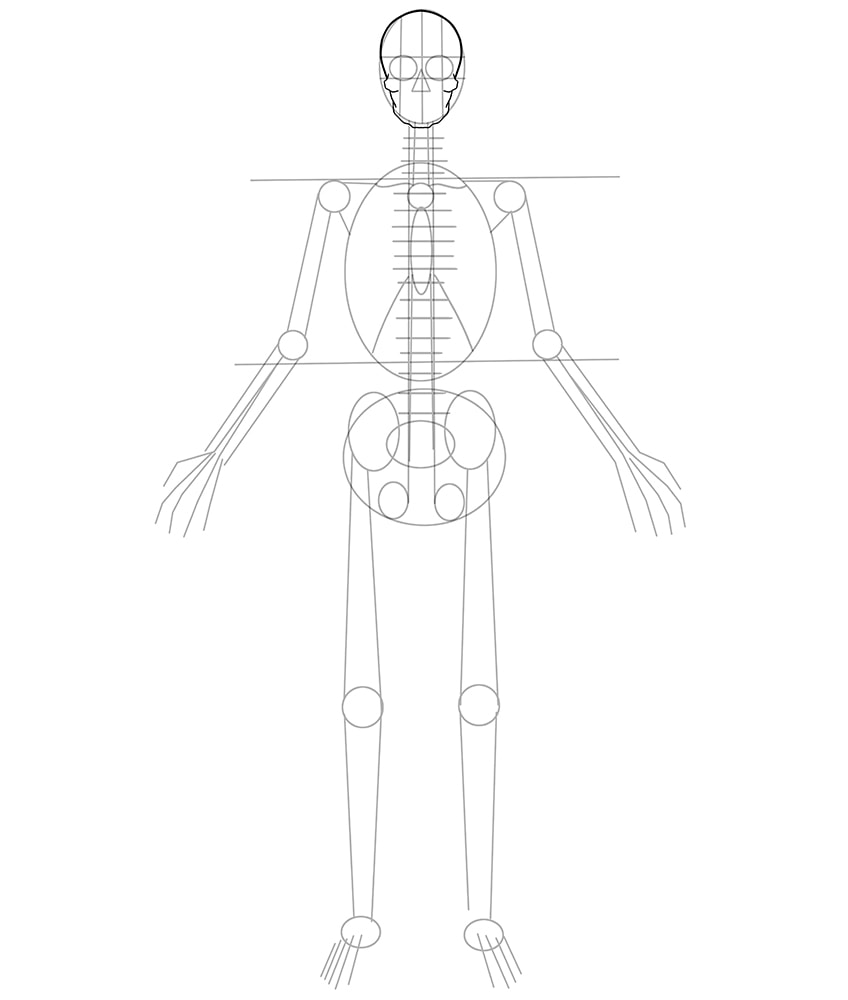
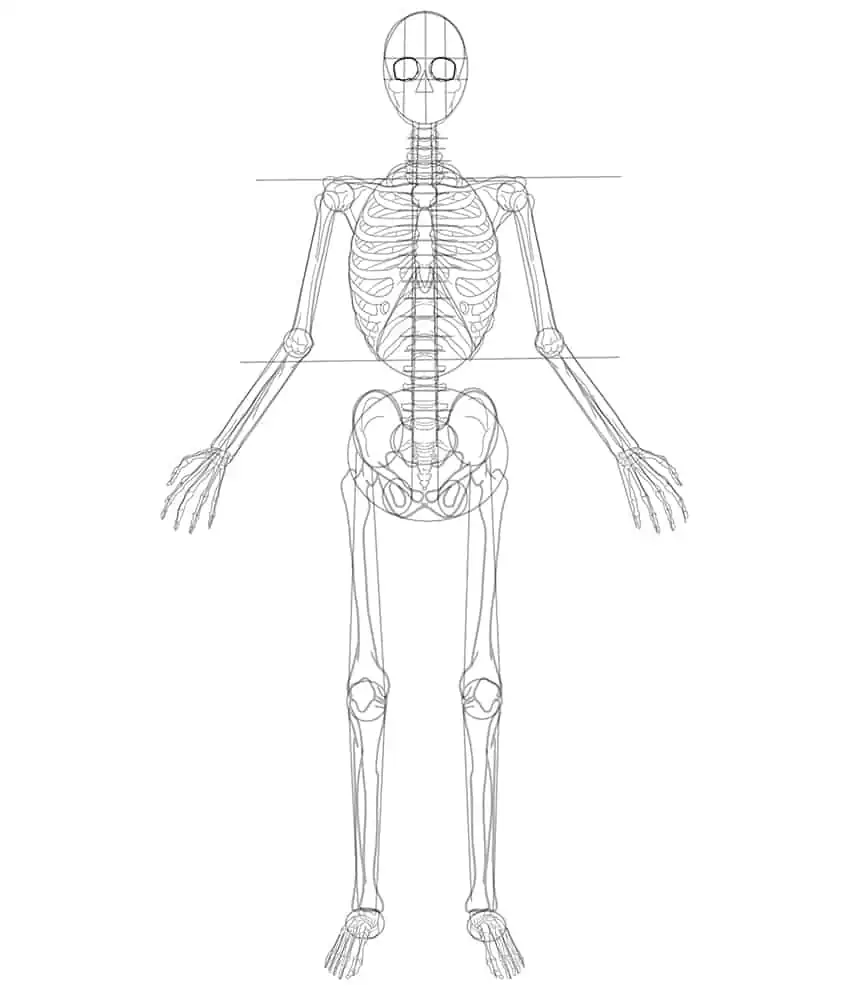
To begin our tutorial on how to draw a skeleton, draw a vertical oval shape that will represent the head of your skeleton drawing. Below the head, draw a larger vertical oval to represent the body. Following this, draw a horizontal oval directly below the main body. This will represent the hip area.
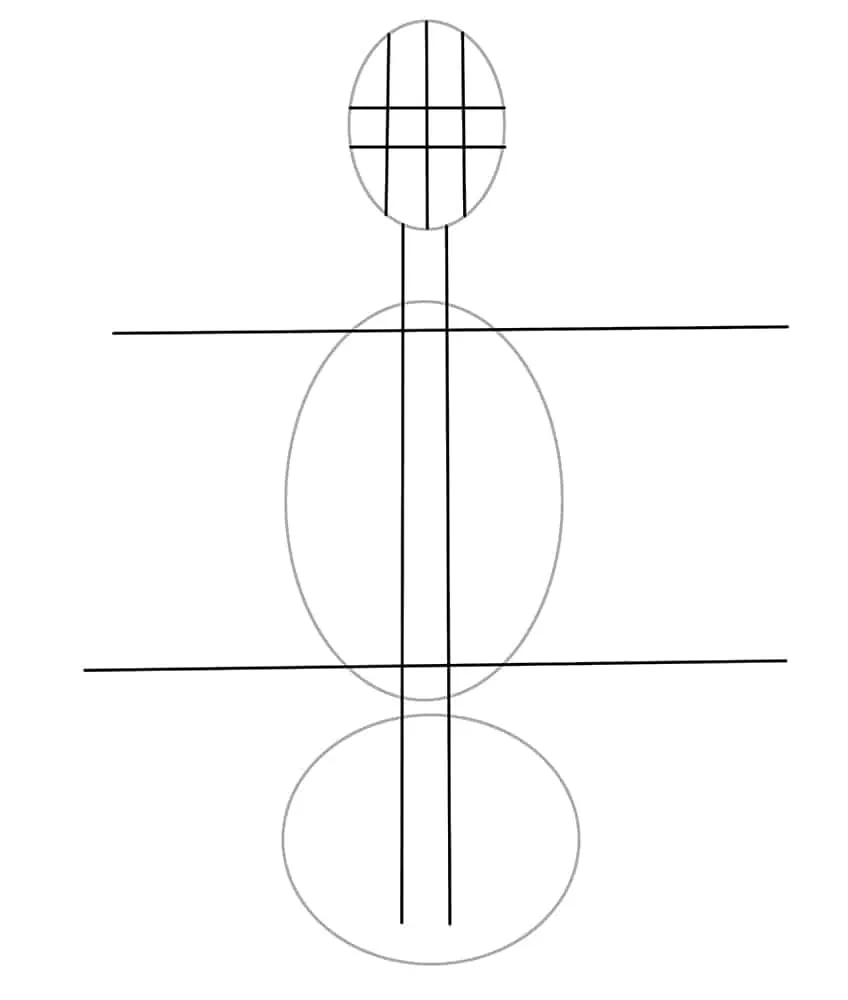
Step 2: Add Guidelines
Separate the head into three quarters using three vertical lines and two horizontal lines. Apply two parallel lines, leading from the head to the hip area to represent the spine.
Finish this step by drawing two additional horizontal lines splitting the top half and the bottom half of the skeleton.
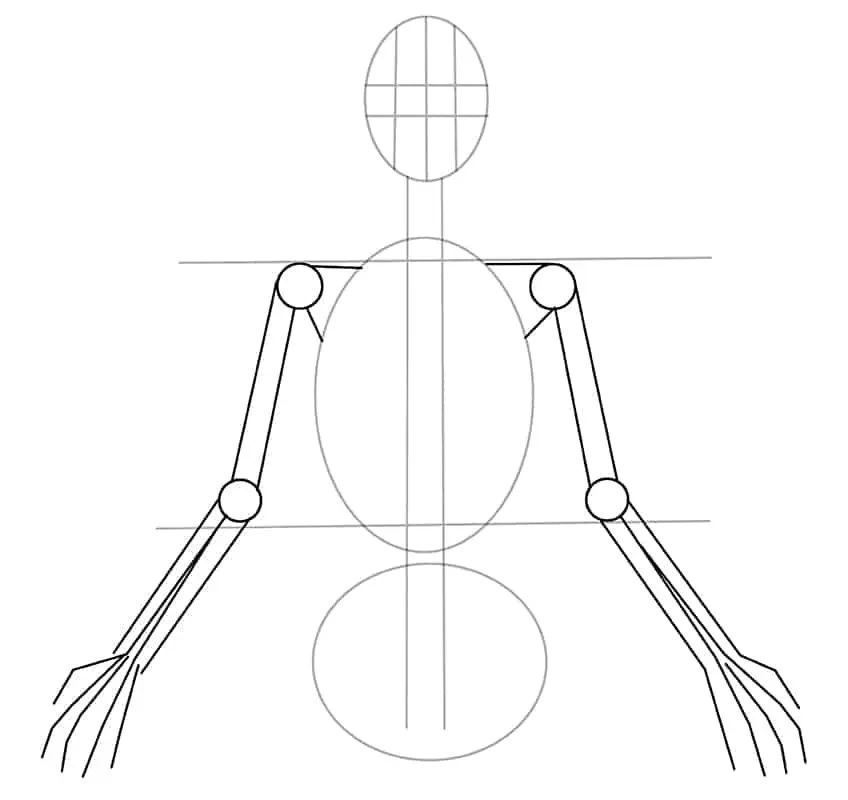
Step 3: Draw the Arms of Your Skeleton Sketch
Using the top guideline as a starting point, draw two small circles on either end to represent the main shoulder joints. At the second horizontal line, draw the next two circles on each end to represent the elbow joints. Continue by drawing each arm as two parallel lines. Complete the step by connecting the arms to the main body, and draw the inner finger lines within each arm.
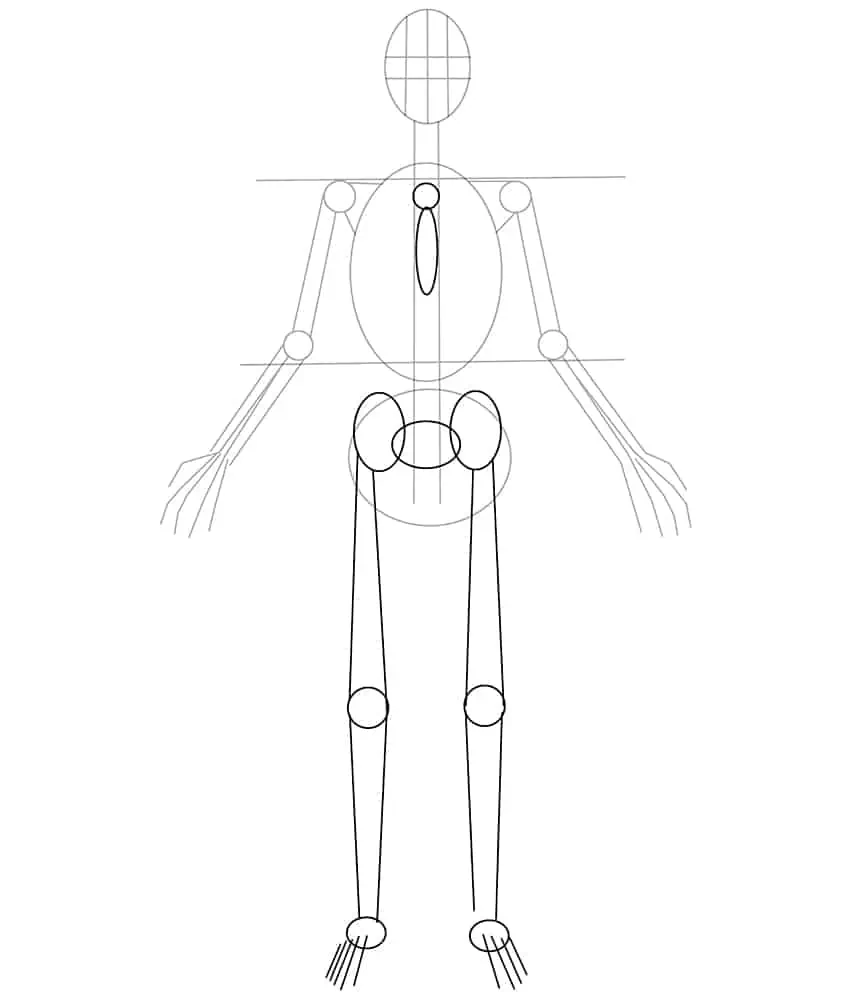
Step 4: Add the Legs and Feet
Before we start with the legs, within the spinal cord, draw a narrow oval shape and a small circle above. Continue by drawing a horizontal oval in the center of the hip area, and on each side draw two vertical oval’s which will later be used to draw each leg. Continue by drawing two lines for each leg leading downwards. The center area should have a circle to represent the kneecap of each leg. Draw a second smaller oval at the bottom of each leg with lines to represent the toes.
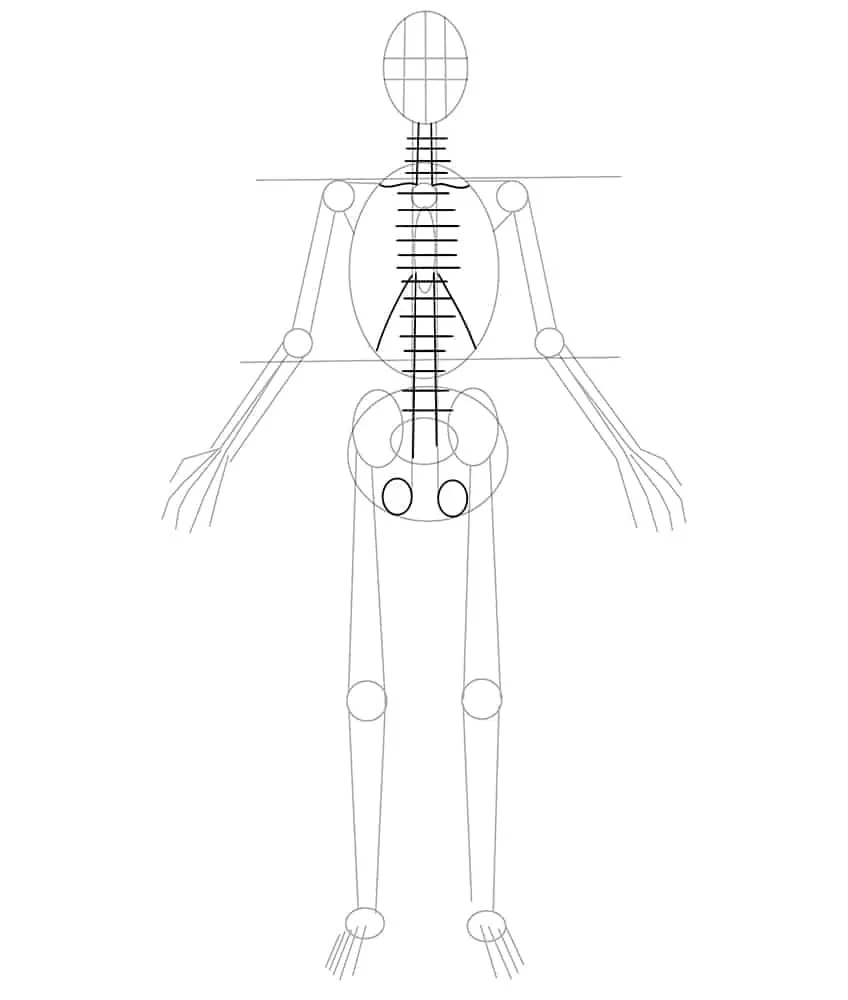
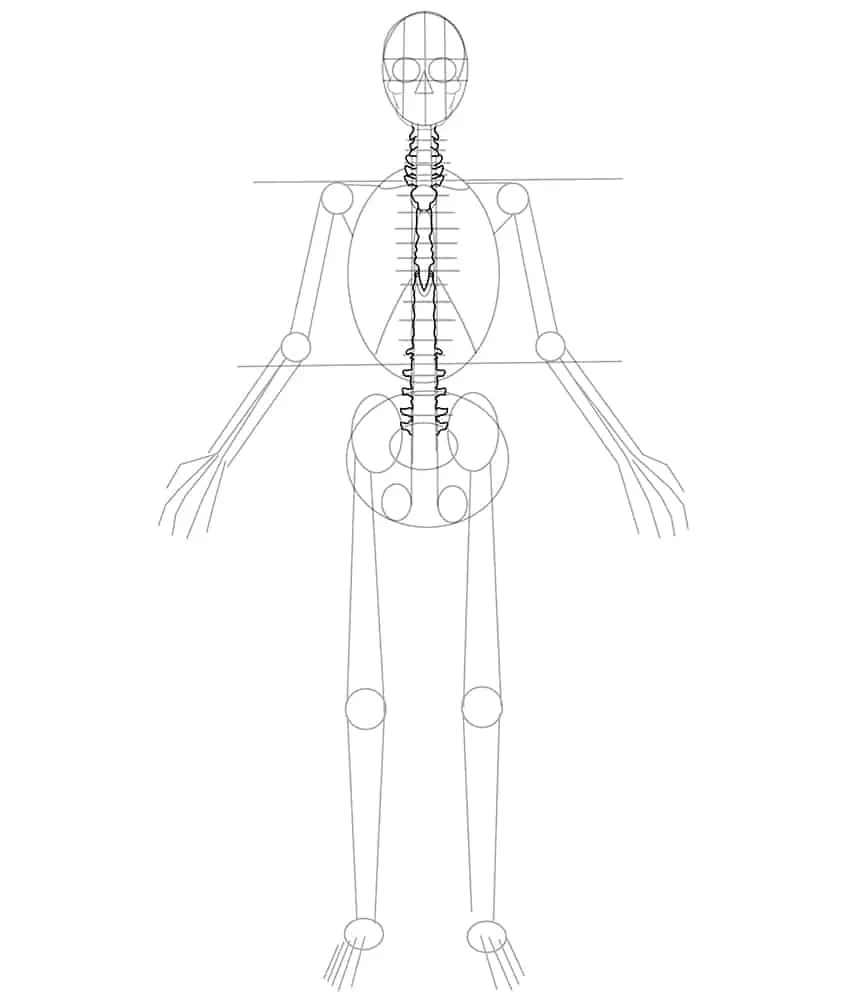
Step 5: Draw the Spinal Cord
Within the spinal cord frame drawn in step two, draw horizontal lines leading from the top to the bottom of the spine frame. After the fourth horizontal line from the top, on each side draw a curving line attached to the spine to the main body. Repeat the step at the lower end of the spinal cord.
Complete the step by drawing two additional oval shapes between both legs.
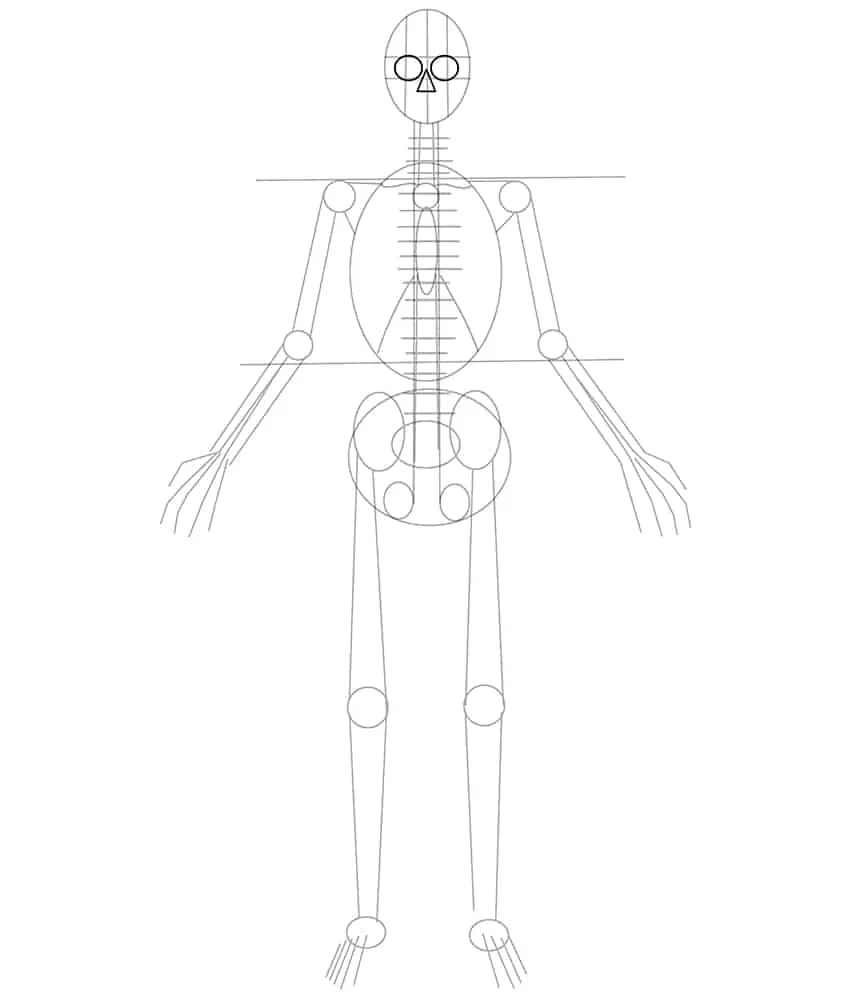
Step 6: Add the Eyes and Nose
Use the guidelines added in step two to aid you in drawing symmetrical oval shapes within the face of the skeleton. Between the two eyes, draw the nose represented by a triangle.
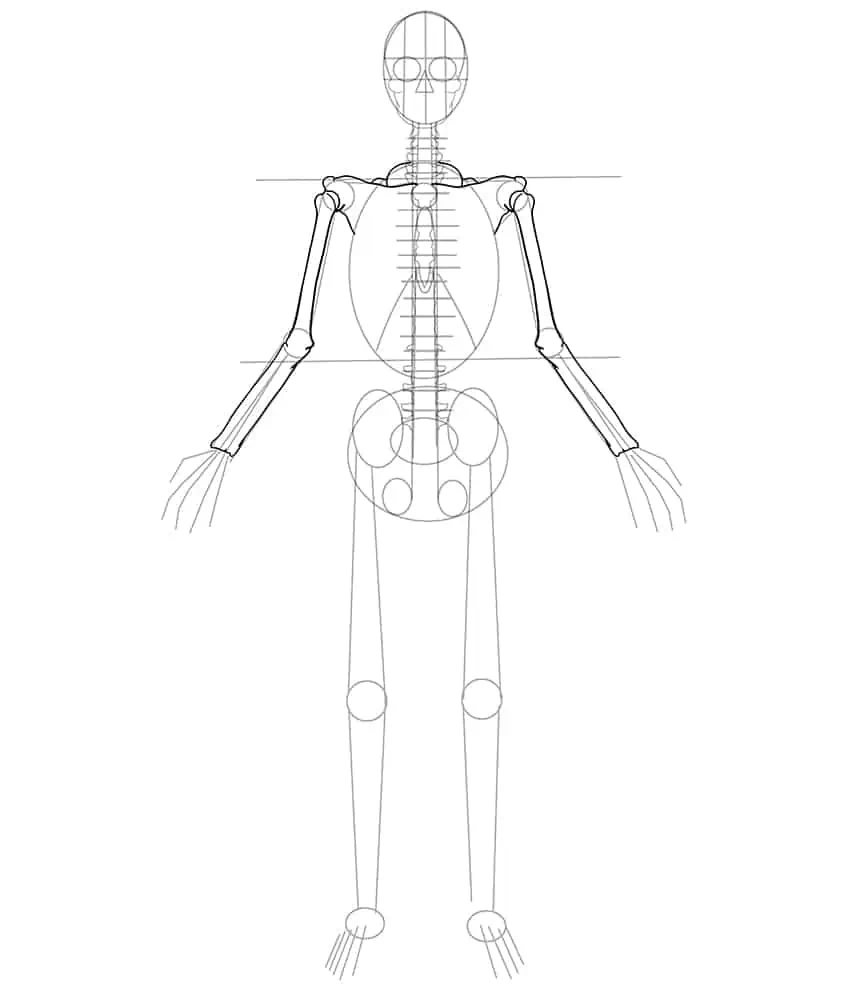
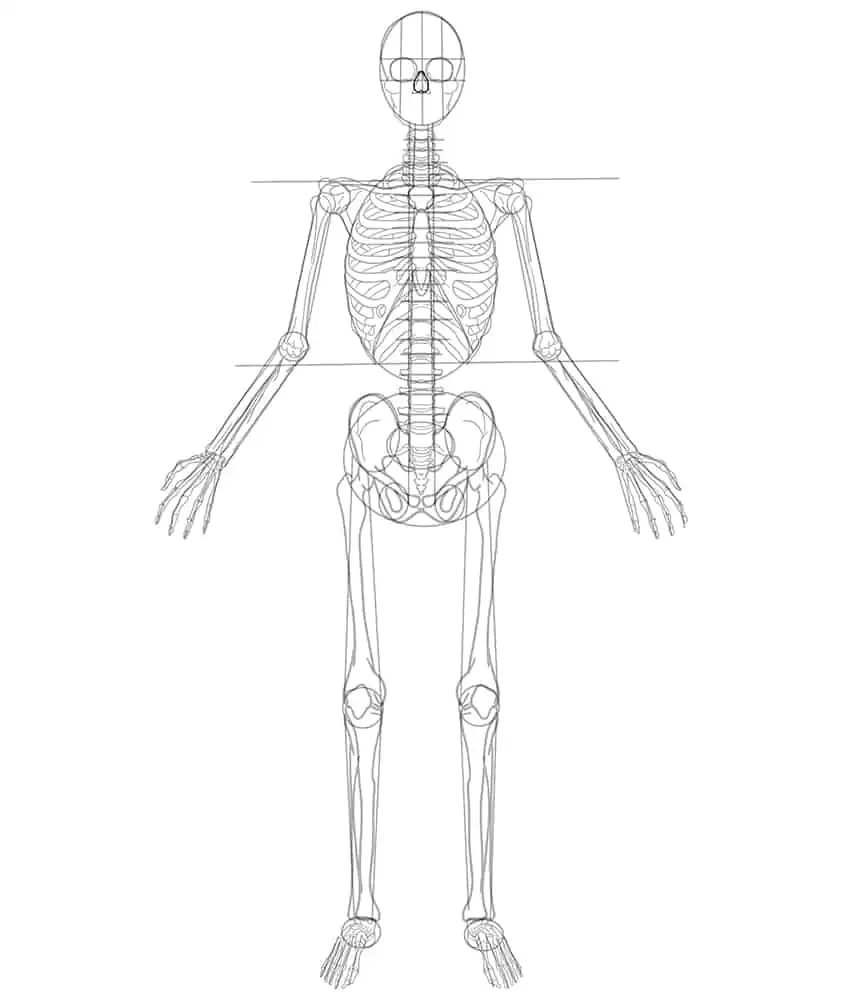
Step 7: Outline the Skull of Your Easy Skeleton Drawing
To outline a more realistic and naturally shaped skull, use the previously constructed lines to aid you. Emphasize the cheekbones and lower jaw.
Step 8: Outline the Spinal Cord
In this step, you are going to outline a more realistic spinal cord. To do so, within the chest outline the sternum, which is the flat bone between the center of the chest. Continue outlining the spine at the lower end of your skeleton sketch.
Step 9: Begin to Outline the Arms
Outline the shoulder area connected to where the rib cage and chest would be. Do this on both sides of the skeleton’s body. Surrounding the circles, previously drawn to represent the joint, draw the arm attached to this joint and outline each arm more realistically.
Step 10: Detail the Arms on Your Easy Skeleton Drawing
Within the arm and shoulder bones, draw fine texture lines to structure the bone joint areas. This can be done by drawing fine root-like lines.
Finish the step by finely tracing and detailing the top portion of the spine and connecting the inner arched lines.
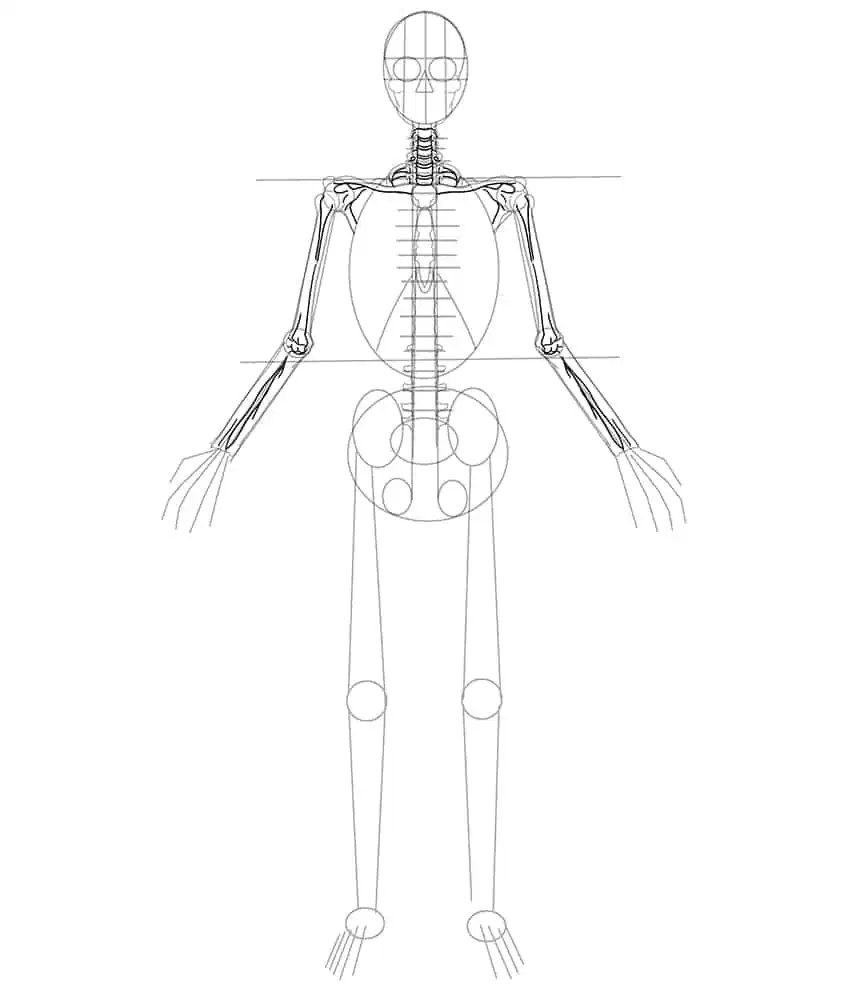
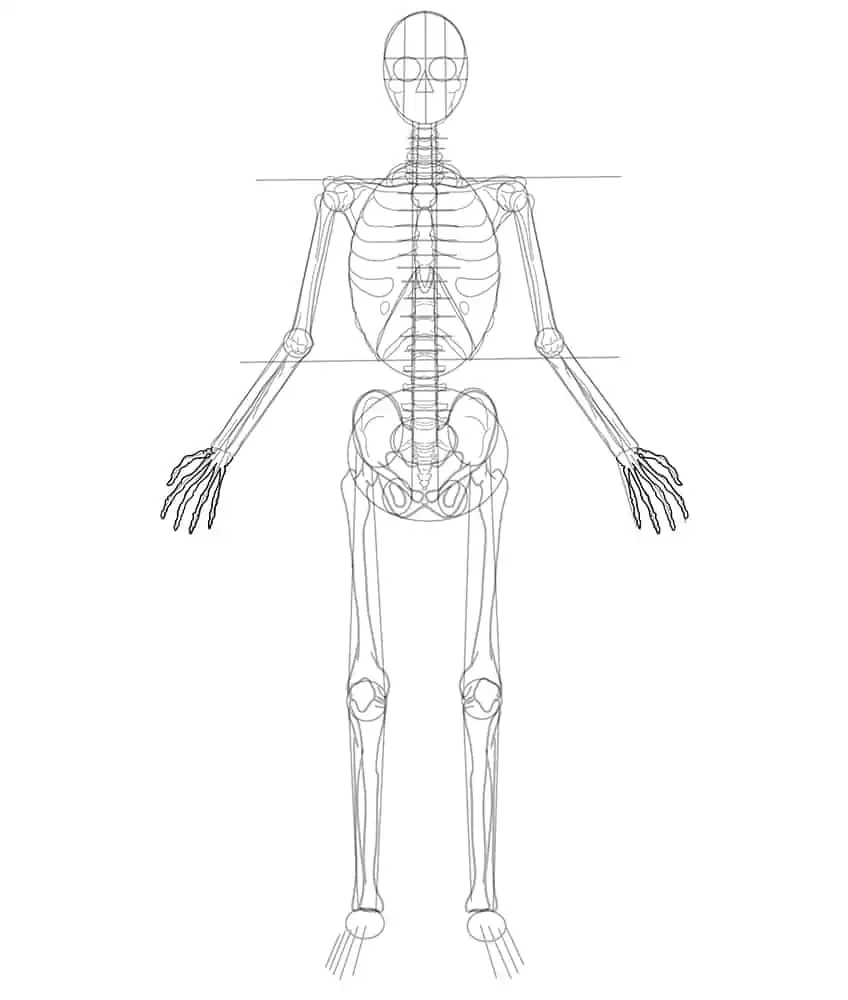
Step 11: Outline the Ribcage
Make use of the long horizontal lines on the center area of the spine to aid you in outlining the curving lines of the ribcage. Complete the full ribcage outline surrounding the main body.
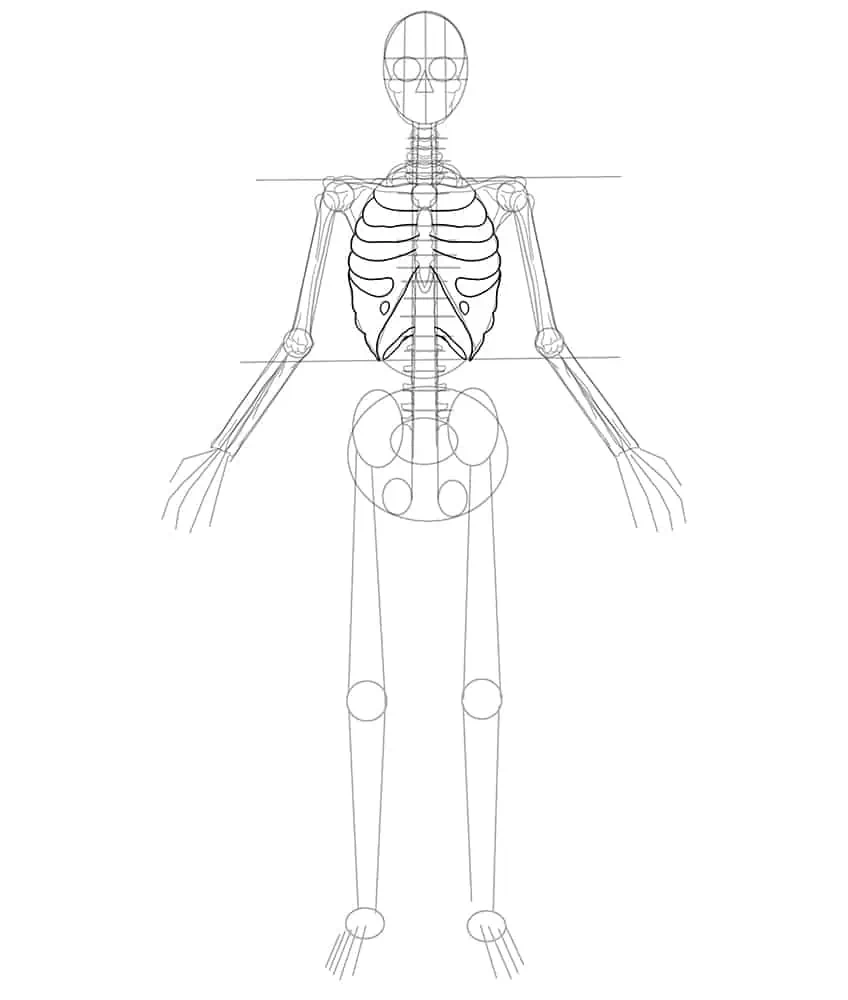
Step 12: Outline the Hip Bone
Use the previously drawn construction lines from step four to aid you in outlining a realistic and symmetrical hip bone. The hip bone should curve around the bottom oval shape drawn in step one.
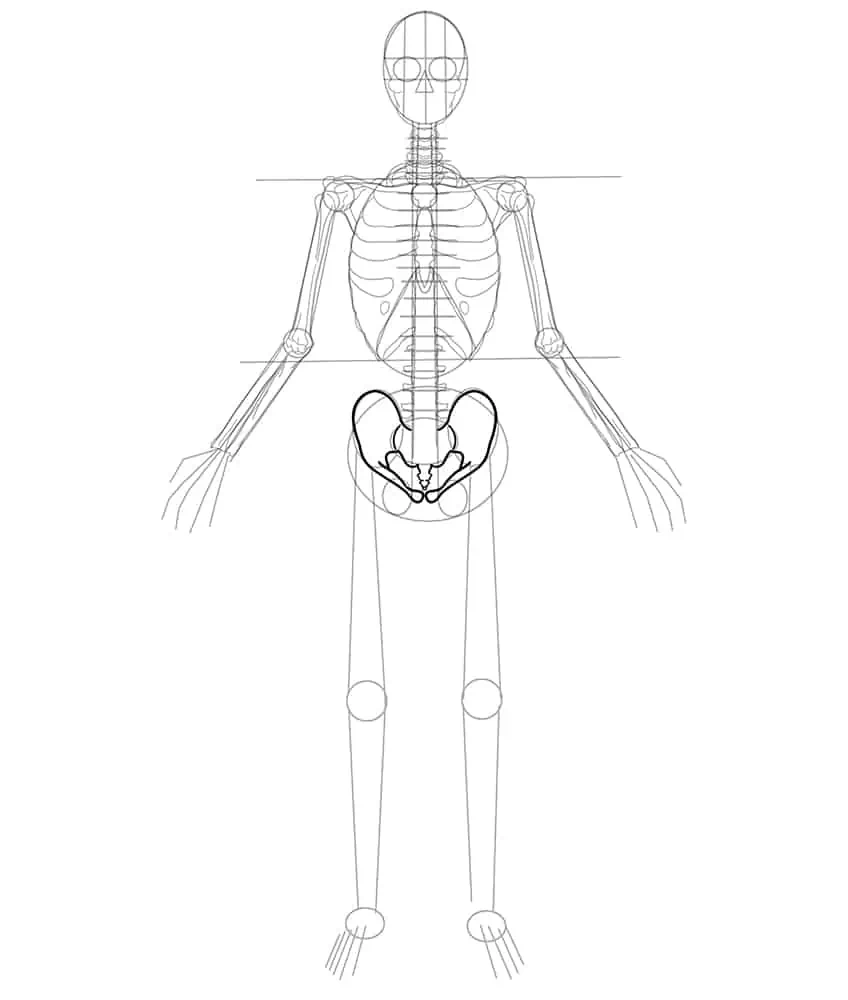
Step 13: Begin to Outline the Legs of Your Skeleton Drawing
Draw the gentle curve around where the circle joints are placed. This will help you in outlining a more realistic-looking leg structure. Connect the legs by drawing a ‘w’ shape connecting the left and right legs around the two oval shapes added in step five.
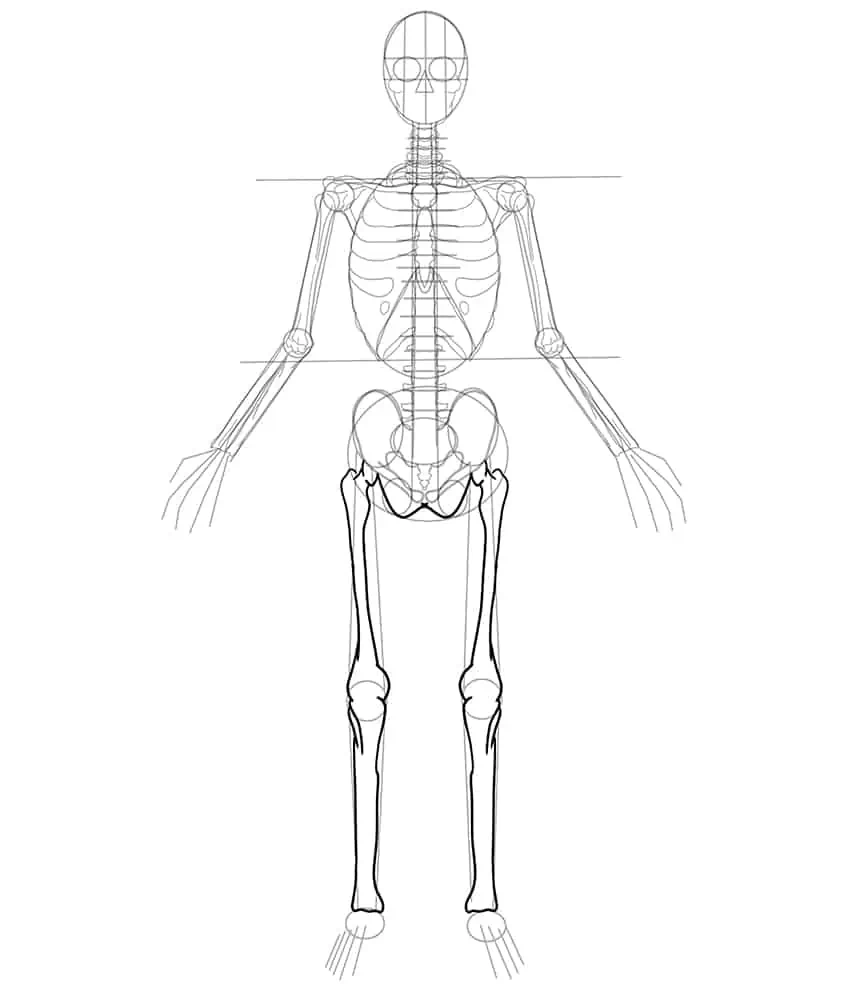
Step 14: Detail the Legs
Within the leg bones and hip bones, draw fine texture lines and structure the bone joint areas. This can be done by drawing fine root-like lines. Complete the visible spine by drawing the arched lines within each horizontal line.
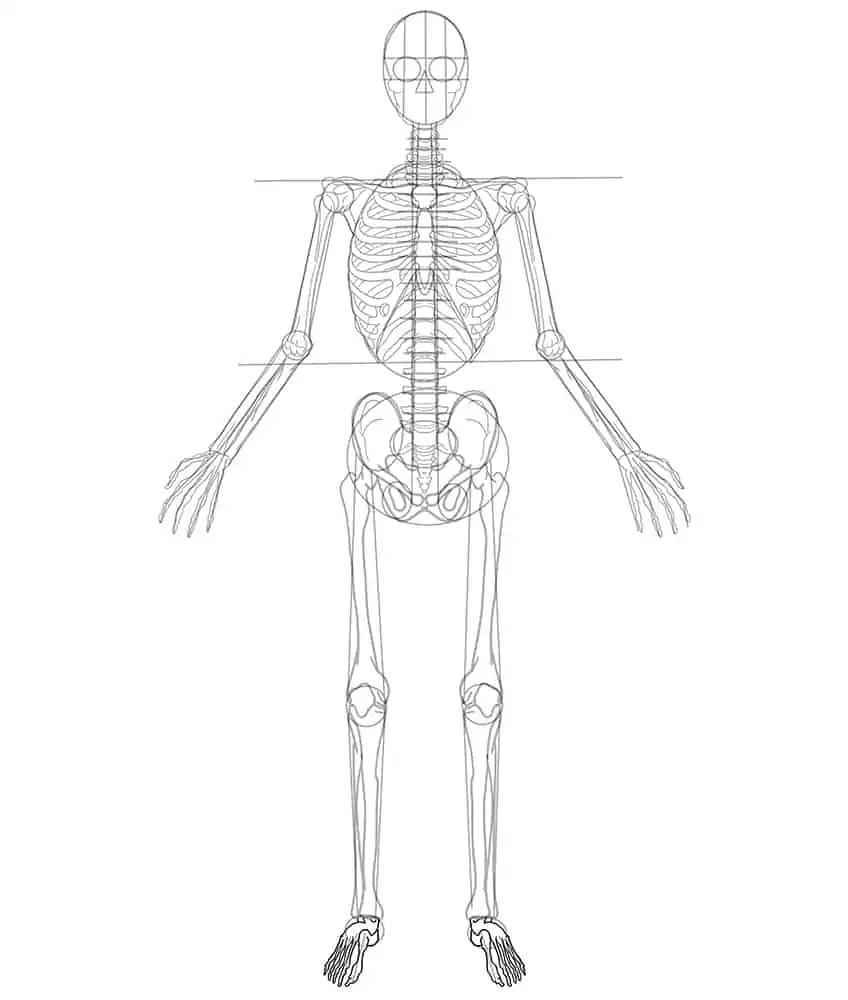
Step 15: Outline the Finger Bones
Make use of the finger construction lines to guide you in outlining five fingers on each hand.
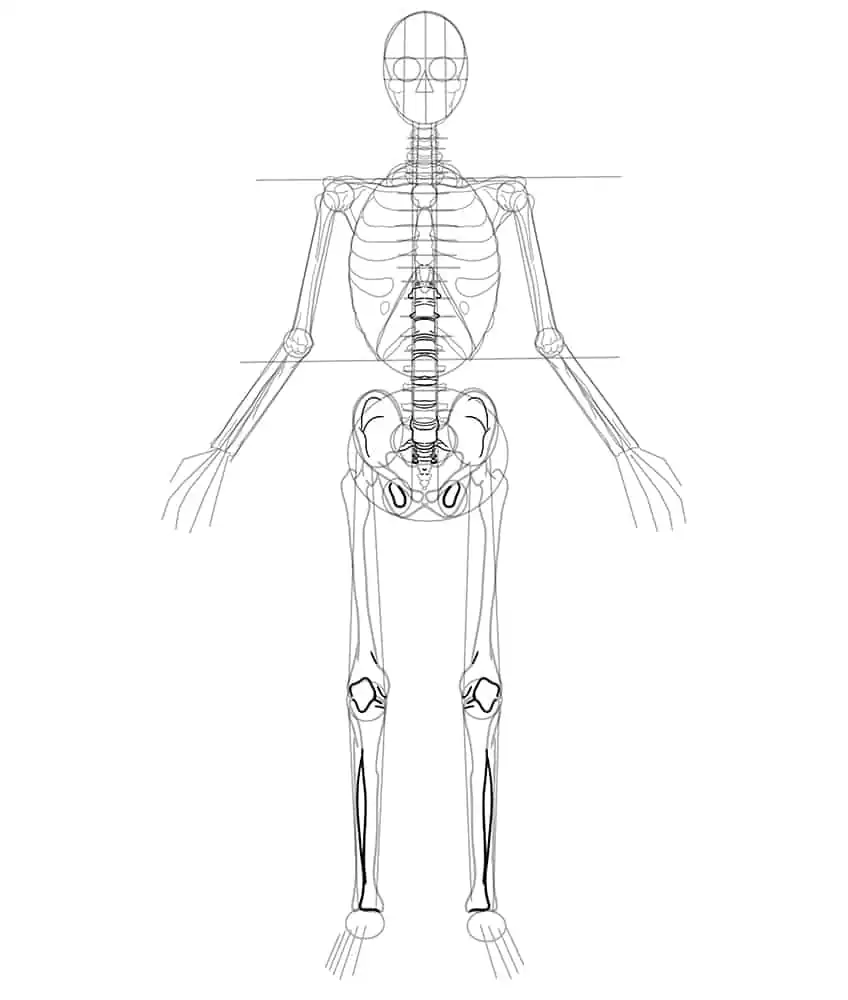
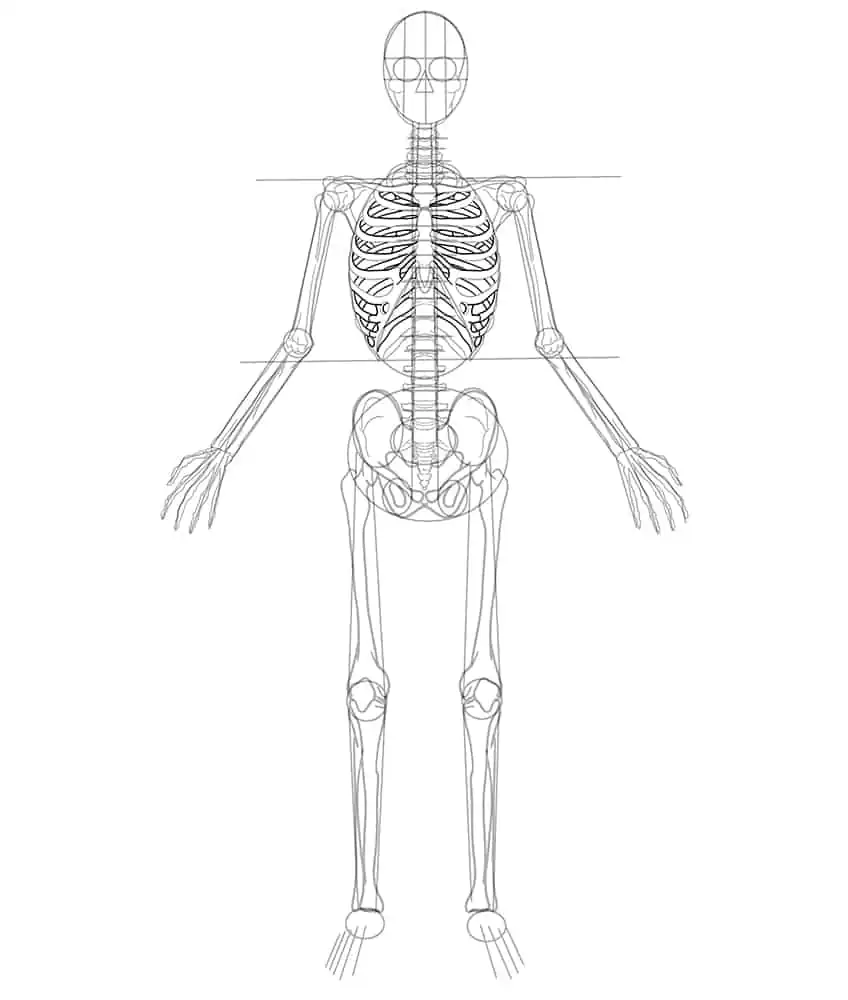
Step 16: Detail the Ribcage
Begin by completing a full circle on the first top rib and work your way to the bottom. Make use of the previously drawn outline from step 11 to aid you in completing the rest of the rib cage view.
Step 17: Outline the Toes of Your Bones Drawing
Outline more realistic toes on each foot with the construction lines drawn in step four. The foot should have a somewhat curved rear shape.
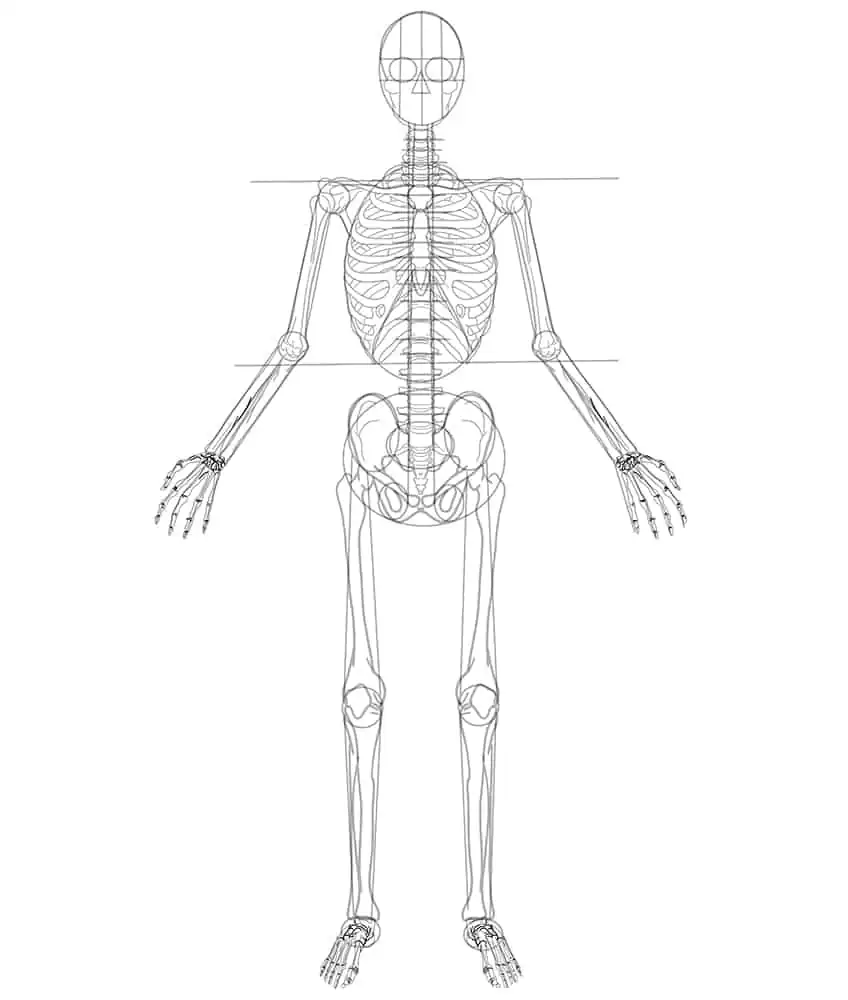
Step 18: Detail the Ankle and Wrist Joints
Begin by drawing a layer of lines onto each other within the joint area of each ankle. This should be drawn within the oval shape previously drawn. Continue by drawing the wrist joints which should look like abstract ovals attached between the hand and the arm.
Complete the step by drawing the additional joins within each finger and toe bone, represented by a fine curved line.
Step 19: Outline the Eyes
Make use of the oval shapes drawn in step six to aid you in outlining more realistic-looking eye holes.
Step 20: Begin to Outline the Nose of Your Skeleton Sketch
In this step, you will use the triangle shape, previously drawn, to aid you in drawing a more rounded and realistic nose shape. Once you have completed this step you are now ready to erase any still visible construction lines and guidelines.
Step 21: Structure the Skull
Draw fine lines around the top of the eye holes, leading slightly upwards into the skull. Continue on each side of the skull and draw the jawlines.
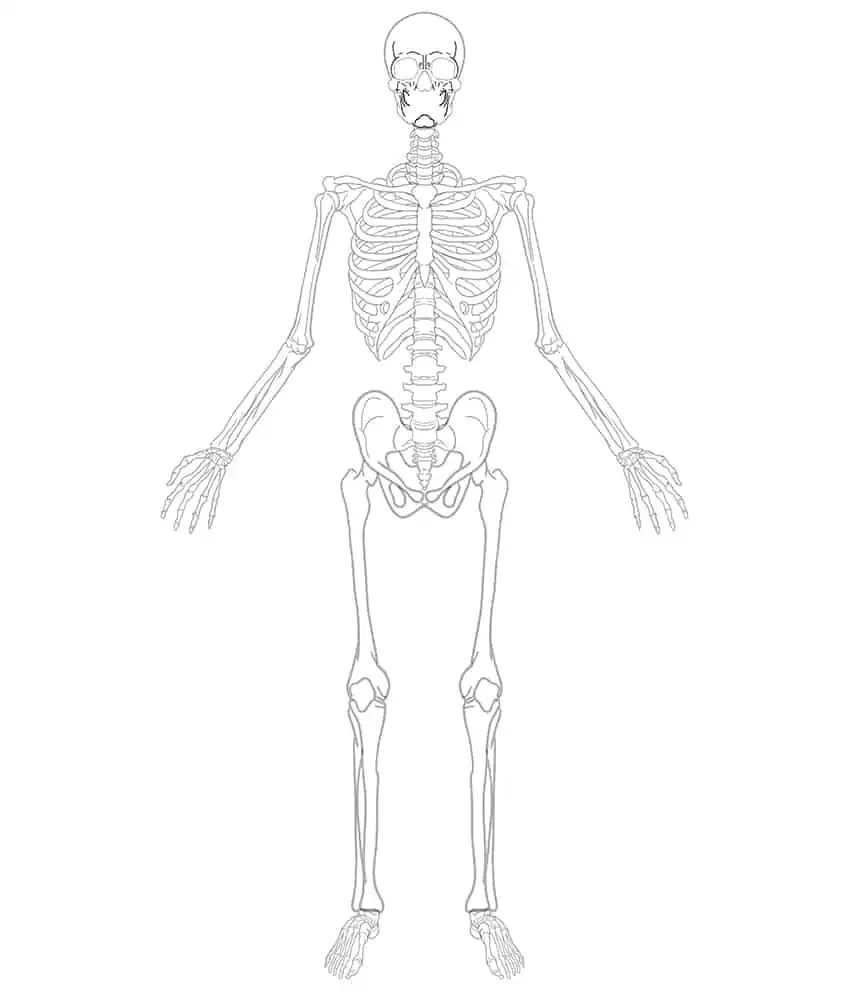
Step 22: Draw the Teeth to Your Easy Skeleton Drawing
Attached to the jawline previously drawn, draw the individual top and bottom rows of teeth.
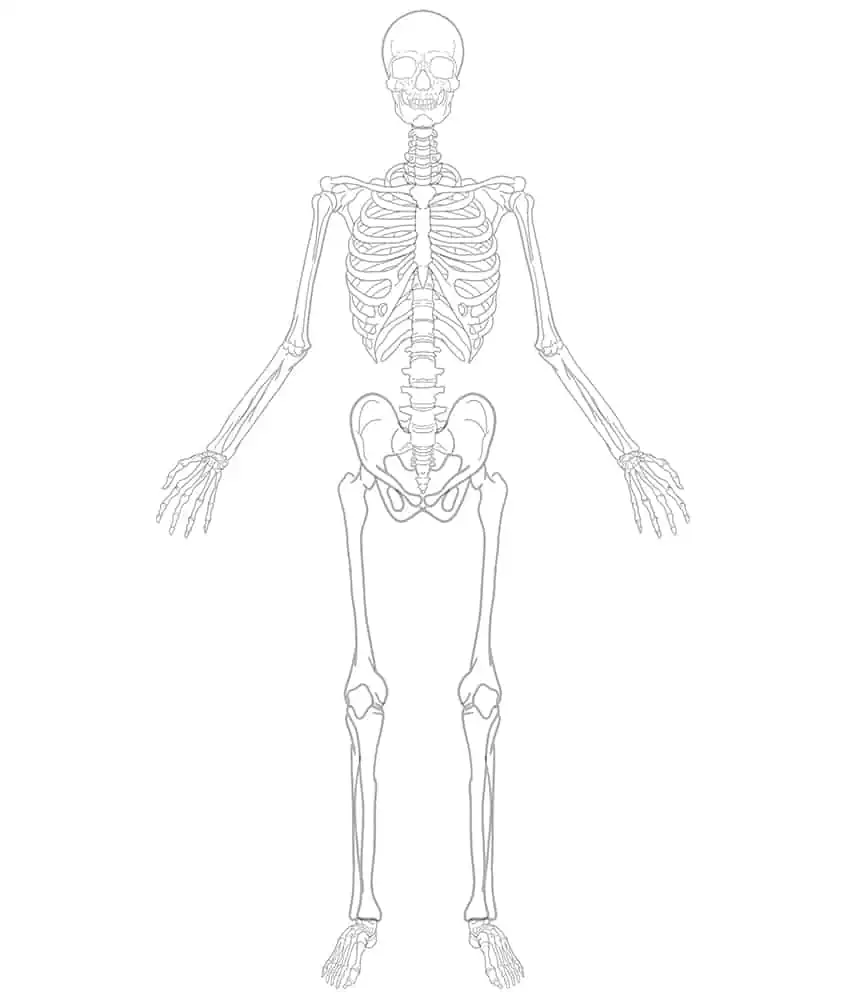
Step 23: Add the First Color Coat
Select a fine, sharp brush and a shade of caramel yellow paint, and evenly coat the entirety of the skeleton.
Step 24: Add the Second Color Coat
With a small, soft brush and a shade of coffee brown paint, apply a soft second color coat to the edges of the skull and the skeleton, leaving portions of the first color coat visible.
Step 25: Shade the Top Half
With a fine brush and dark brown paint, evenly coat the inner facial features such as the eyes and nose of your skeleton bones drawing. Repeat this step using a light shade of caramel yellow to add fine structure lines. Repeat the above step on the shoulder bones and use softer strokes along the top half of the ribcage. Once completed, make use of a blending brush to smoothen and blend the color coats.
Step 26: Add Shading to the Rest of the Skeleton
Use the same brush as previously and a dark shade of brown paint, to softly apply shading along every individual rib bone including those of the spine and hip area. Switch to a blending brush to soften and blend the color coats evenly. Continue on the rest of the skeleton including the arms, legs, and feet using a fine, sharp brush and a brighter shade of coffee brown paint.
Complete the step by softly applying shading patches and strokes along these areas making sure the first color coat is still somewhat visible. Once completed make use of a blending brush to soften and blend the coats appropriately.
Step 27: Add Texture Patterns
Select a rough texture brush and dab patches of abstract texture along the skull, ribcage, and spine using a combination of gray, white, and dark brown paints. Continue to add abstract texture onto the arms, legs, fingers, and toes using a combination of black, white, and brown paints to spread the texture patterns.
Step 28: Finalize Your Skeleton Drawing
Erase any visible harsh outlines. Where this is not possible, select a fine, sharp brush and the corresponding colors to trace the skeleton sketch outline to create a final realistic look!

Well done on completing our tutorial on how to draw a skeleton! You should be proud of yourself for taking on this challenge and seeing it through to the end. By doing so, you have undoubtedly gained new drawing skills and gained knowledge that you can carry forward into your future artwork. Not only have you developed your understanding of anatomy, but you have also honed your observation and attention to detail. Keep up the great work and continue to push yourself creatively!
Frequently Asked Questions
What Are Some Tips for Drawing the Intricate Details of a Skull?
Drawing the intricate details of a skull can be a challenging task, but here are some tips that can make the process easier! Start by sketching the basic shapes and proportions of the skull before moving on to adding the finer details. Pay close attention to the different angles and curves of the bone structure. Finally, use a variety of shading techniques to add depth and texture to the skull, such as cross-hatching, stippling, or blending with a blending stump.
How Do I Add Shading and Texture to My Skeleton Drawing?
Adding shading and texture to your skeleton drawings can help to create depth and dimension, making the drawing look more realistic. When adding shading to a skeleton drawing, it is important to consider the direction and intensity of light sources. Shadows will be created where light is blocked by bones, and highlights will appear on areas that are hit directly by light. Be sure to take your time and gradually build up the shading to avoid making the drawing too dark too quickly.

IzzyBll is a digital artist and content creator from Israel and currently residing in South Africa. Originally coming from videography, Izzy then turned to digital graphic art. He specialized in using digital drawing software such as Photoshop and Procreate. Drawing and photo editing has always been a sort of second nature for Izzy. In doing so, he can now look back on 5 years of experience in the industry, completing commissions for various well-known brands such as Audi.
Learn more about IzzyBll and about us.