How to Clean an Oil Painting – Methods for Cleaning Oil Paintings
This post may contain affiliate links. We may earn a small commission from purchases made through them, at no additional cost to you.
Whether you have a very valuable heirloom or collector’s piece or a less valuable garage sale find, oil paintings tend to need cleaning after a while. Cleaning oil paintings without damaging them is a very difficult and painstaking process. Below we have outlined how to clean old oil paintings, as well as why you would want to do it in the first place.
What Are the Possible Reasons for Cleaning an Oil Painting?
If you were not looking for advice on how to clean an oil painting then you might be wondering why you might want to. As time passes many airborne particles such as dirt, dust or nicotine will land upon the surface of the painting. This will build up over years and create a dirty layer on the surface of your oil artworks. This dirty layer is very stubborn and often requires professional oil painting cleaners to get the job done correctly.

If your oil artworks are looking dull, faded, or discolored then they are likely quite dirty and aged. As we mentioned before, this sort of work is best left to professionals but there are a few ways you can attempt to clean a painting on your own and save a bit of money. These processes can be risky and are often quite time-consuming. So if you are wondering how to clean an oil painting you must make sure that you have the patience to do it properly.
You must also ensure that you are willing to take on the risk of unintentionally damaging your painting in the process.
How to Preemptively Protect your Oil Painting from Becoming Dirty
Oil paintings on canvas most often become dirty because of how and where they are stored. There are methods to prevent the accumulation of dust and other particles on your paintings. These methods act as a preemptive way of caring for your paintings so that you do not have to worry about hiring cleaners or trying to clean them more directly yourself at a later point in time. Light dusting, proper handling, use of protective glazing, and appropriate placement are the most important things to keep in mind while trying to preserve a painting and prevent the accumulation of dirt over time.
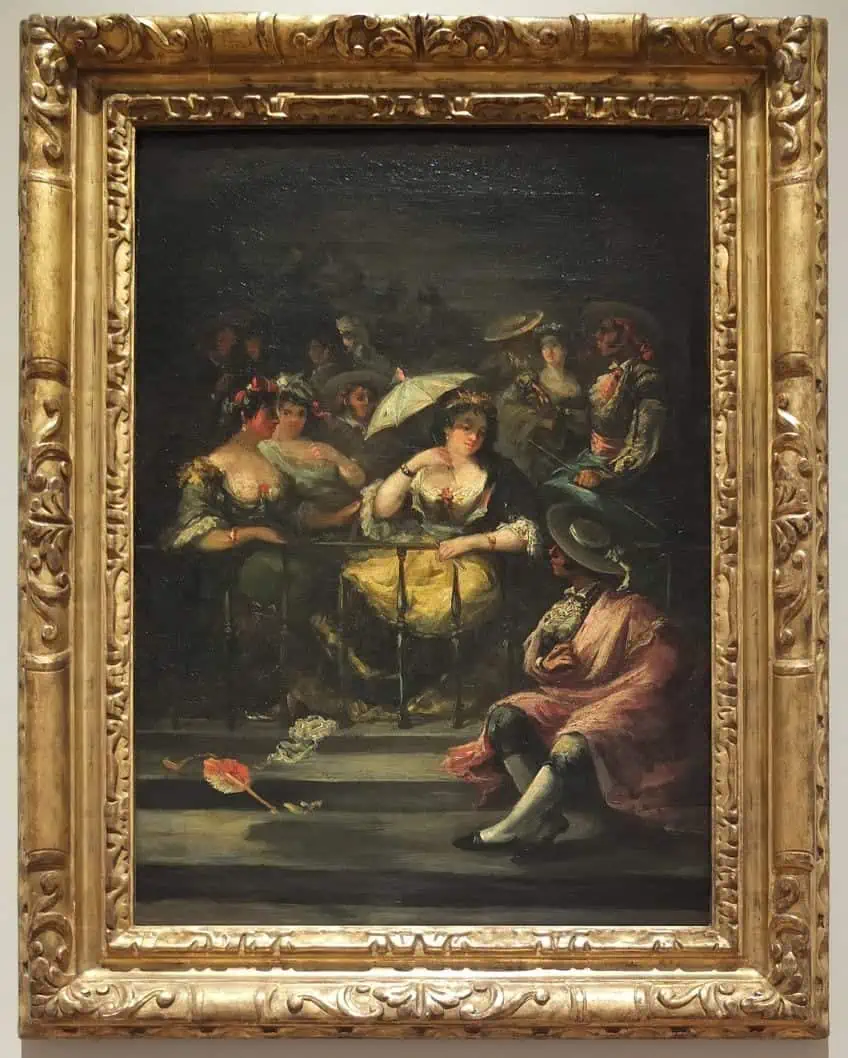 Hommes et femmes espagnoles à une tribune (1800-1900) by Eugenio Lucas Velázquez; Musée Hyacinthe-Rigaud, Public domain, via Wikimedia Commons
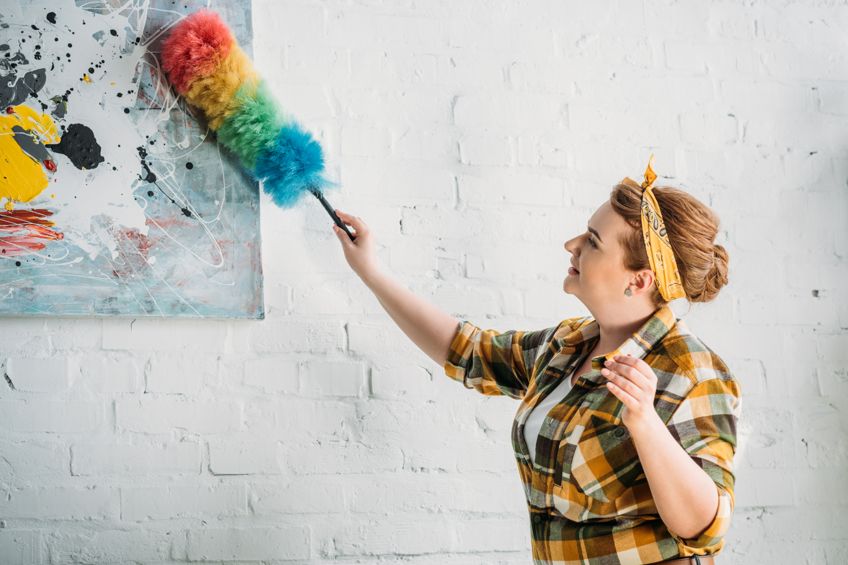
Routine Dusting
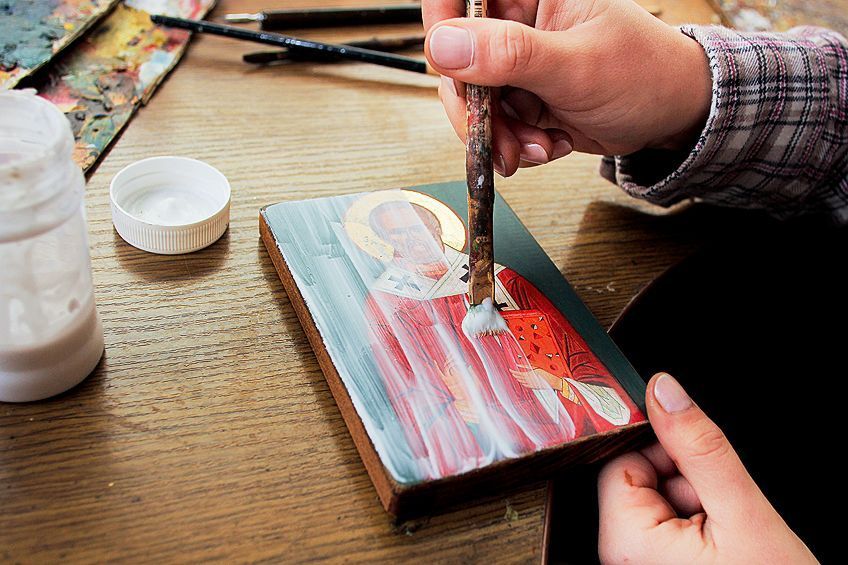
One of the best ways to prevent the accumulation of dust on your painting if you are not using a glazing layer is to simply dust your painting off regularly. First, you will wash your hands and make sure that they are properly dry. Tilt the top of the painting towards yourself and, using a fine-haired brush, begin to lightly dust the surface of your painting. Make sure that you work across and down the painting while ensuring that you are not flaking off bits of paint as you work. Pay attention to the finish of your painting and make sure that you are not altering this with any abrasive movements. For example, if your painting has a matte finish make sure that your dusting is not resulting in any shiny patches appearing on the surface of the artwork.
If you find that you are removing paint as you dust, stop immediately and look into properly sealing the painting with a varnish or adding a protective glazing layer.
Protective Glazing
Ideally, you could have a glazing layer, made of glass or acrylic, within the framing of your oil artworks. When adding this layer leave a space of at least 0.5cm between the glazing and the highest point of the artwork. You can do this by placing a spacer bar or an inner frame liner between the surface of the painting and the frame itself. There are specialized glass and acrylic glazings available that reduce glare and have anti-static properties.
The glazing will protect the artwork from dirt, dust, nicotine, and other forms of damage. To clean the glazing you can use a dry or damp cloth and gently wipe down the surface, depending on the type of dirt that has accumulated. If using a dampened cloth be sure not to touch the frame or allow liquid to run under the frame, beneath the glazing, and onto the surface of the artwork.
Appropriate Placement
Placing your painting away from direct sunlight or sources of moisture is very important. For example, avoid placing your painting across from a window that receives direct sunlight or near a kitchen or bathroom. If you smoke indoors it is ideal for the painting to be kept in a room where smoking is minimal. It is also important to keep the painting away from any areas where there is a lot of open and moving air, such as near an open window. These areas will have the highest concentrations of dust and dirt. Keeping a painting away from a kitchen or dining room is also preferable as the steam and grease in these areas can damage paintings. Oil artworks with a protecting glazing layer do not need to be kept away from these areas as much as exposed oil paintings on canvas would.
This means that the most effective way of protecting your paintings is with proper protective glazing.
Proper Handling
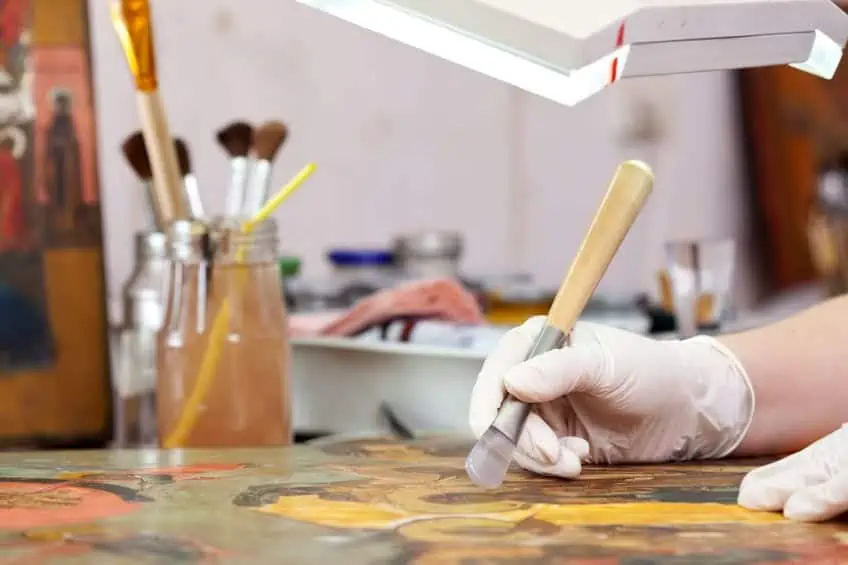
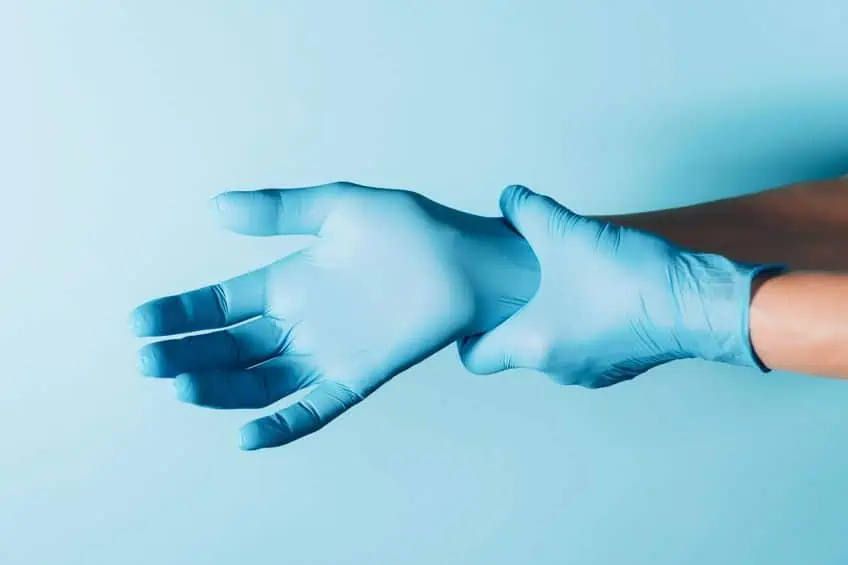
If you handle your painting and it does not have protective glazing, make sure that you are wearing gloves. The dirt, oils, and secretions from your hands can damage the unprotected paint and leave markings on your painting. These may not be immediately visible and will only show up at a later stage. Ideally, you should wear surgical gloves whenever handling your painting and do your best to ensure that children or guests do not touch the painting.
Effective Management of Accidental Damage
If a liquid is spilled or splashed against the surface, lie it down face-up to avoid having it run down the painting. Do not attempt to rub the liquid off the surface. Use the corner of a paper towel or a thin cloth to gently wick up the liquid.
Contact professional cleaners to assess the damage and give you a consultation regarding a cleaning.
When Is It Wiser to Hire Professionals?
An oil painting will get dirty over time if it has been stored incorrectly or has been kept on display over time. However, if your painting is damaged as well as dirty then it is a good idea to take it to professional oil painting cleaners rather than to attempt cleaning it yourself. If your painting has any warping, cracking, or flaking then it is considered damaged. Any attempt to clean a damaged painting, regardless of how careful or gentle, could result in extreme damage to the piece.
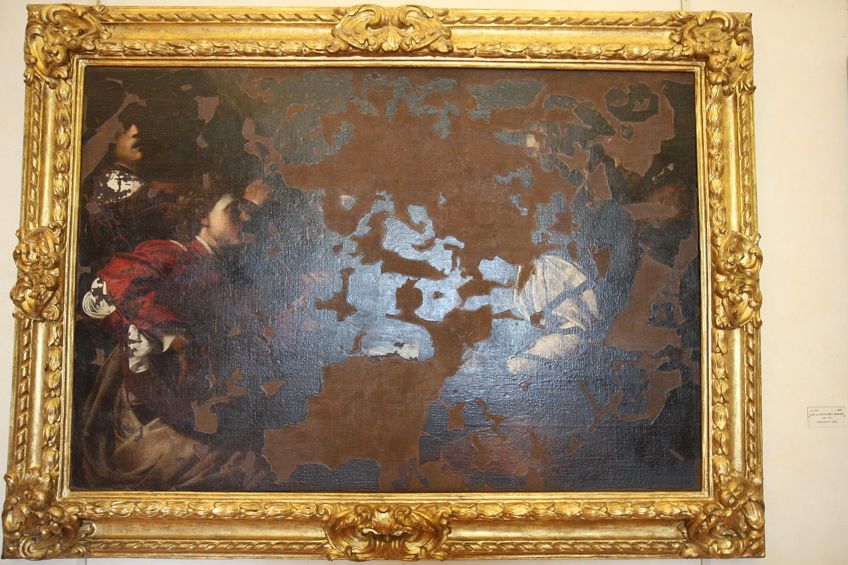 The Card Players (1800-1899) by Bartolomeo Manfredi; Uffizi, CC BY 3.0, via Wikimedia Commons
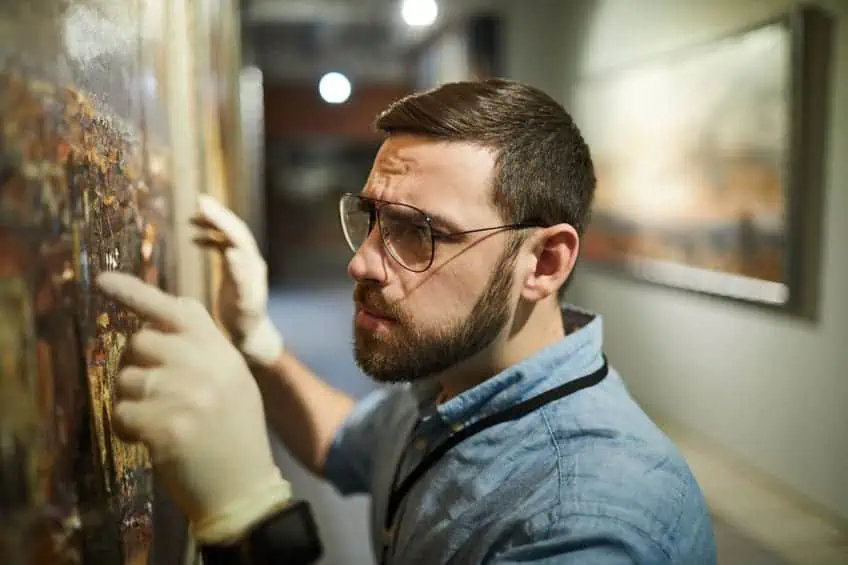
If you would like to have an old and valuable painting repaired, restored, and cleaned then you will need to find an art conservator. However, if you only want to have your painting cleaned you can look for companies online that offer services in your area. Professional oil painting cleaners can be found fairly easily but it would be ideal for you to make sure that you find a company or individual that has a good reputation working with oil paintings on canvas.
If you decide to clean your painting on your own, you must accept the risk that you may cause damage to your painting. It is best to perform a spot test beforehand, to see how your cleaning method interacts with the painting. If you see that you are removing any paint or causing damage then you should immediately stop. Rather choose another method of cleaning or refer the painting to a professional as there is a good chance you could ruin the painting if you continue with the same technique.
We have outlined some methods below that you can try to use to clean your oil paintings on canvas. If none of those methods work you may need to have the painting cleaned by professionals who are trained to use stronger chemicals on artworks or have the old varnish removed. Make sure that you have had valuable paintings insured before entrusting them to professional cleaners.
It is always better to be safe than sorry!
What Are Some Possible Challenges When Cleaning Oil Paintings?
Improper cleaning techniques can irreversibly damage paintings. Even if paintings have not necessarily been damaged to the point of peeling or cracking, it is still very likely that most DIY methods will have unintended consequences on the painting. Often this means paint removal or color fading due to too much abrasion or heavy use of cleaning agents. It can also mean warping or stretching on the canvas due to lack of support and excessive pressure during the cleaning process.
Once some of the dirt has been cleaned away, you will often encounter a layer of varnish on the oil painting. Varnishes yellow over time and lead to a washed out and dull look on your paintings. If you want to fully restore your painting the old varnish will need to be removed and a fresh coat reapplied. Removal of old, yellowed varnish is meticulous and delicate work. It is very difficult to separate varnish from the paint. You often will need specialized products to do this effectively.
If the surface of the paint is no longer properly preserved it can make the cleaning process more complicated. A badly preserved surface could mean that cracks, fissures, and gaps may appear once you begin the cleaning process. It is always a good idea to perform a spot test somewhere along the edge of the painting before continuing elsewhere on the surface of the painting.
This allows you to see how the painting is going to react to your chosen cleaning method.
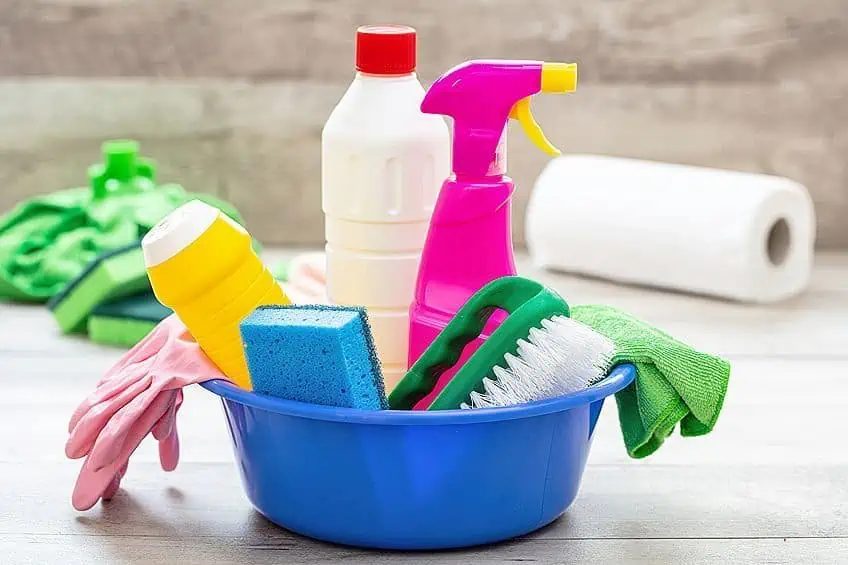
What to Never Use to Clean An Oil Painting
If you read many blogs that tell you how to clean an oil painting you will see some dubious claims about what you can do at home to revive an old oil artwork. We are here to tell you that these techniques come with some very serious risks that you should consider before jumping right in for a fun DIY cleaning.
Many of the at-home methods suggested can cause serious damage to your paintings and are not the amazing timesaving hacks they seem to be. If you are cleaning your oil painting at home instead of using professional services you should consider investing the extra time and money needed to try to do it properly. If a method sounds too good to be true it is usually hiding some downsides. Below we have outlined a few of the most common cleaning misconceptions that you may encounter while wondering how to clean old oil paintings at home.
Paper Towels or Cloths
Using paper towels to clean an oil painting is not a very good idea because the pieces can rip off any texture the painting has. These little pieces may damage the painting as they snag, or make the painting appear even dustier or dirtier than before you tried to clean it. They could even tear the painting itself. Cloths also have a chance of catching on to your painting and pulling away some of the paint. If you really want to use a cloth of sorts, make sure it is a dry, anti-static microfiber cloth.
Wipe your microfiber cloth very lightly over the surface of the painting, being careful not to apply pressure on your oil artworks.
Feather Dusters or Stiff Brushes
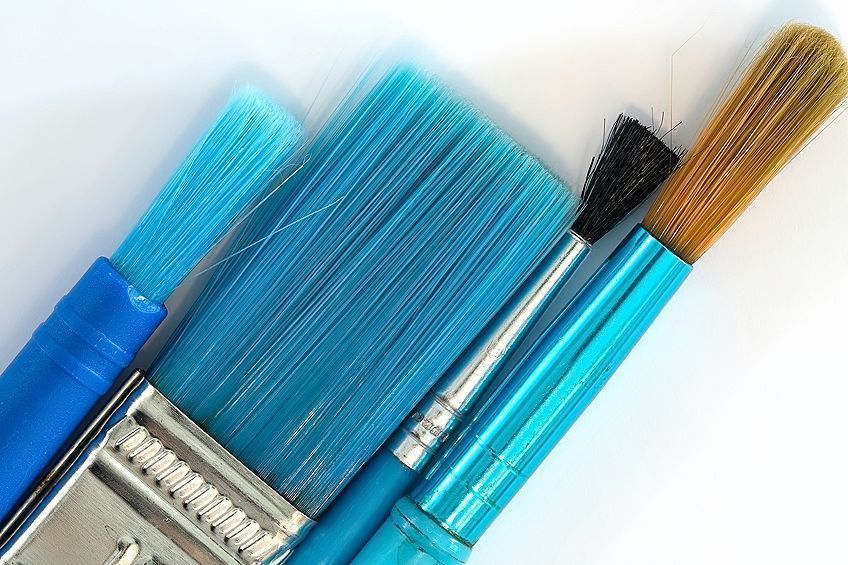
You may think that a feather duster is perfect for lightly dusting your paintings, but feathers actually have sharp barbs that can scratch your painting. This scratching can happen regardless of how careful or gentle you try to be. It would also be unwise to try to use any stiff brushes on your painting for the same reasons. Stiff brushes can damage and scratch your oil artworks. If you want to use a brush to dust your painting you can use a fine, natural-haired paintbrush to lightly clean the surface of your painting. We outline how to clean an oil painting with a fine-haired paintbrush above.
Water
You should never consider using water or any water-based solutions to paintings. Using water in any form on oil artworks can have very detrimental effects. Some of these effects will be immediate while some may only be visible later on. For example, water can weaken the bond between the medium and pigment of your paint which causes loss of pigment. Water can weaken the paint’s attachment to the canvas. This can cause flaking and peeling of the paint either immediately or over time. If water makes it to the canvas in the right amounts it can shrink and cause separation of the paint from the canvas.
This separation can cause permanent distortion of your oil artwork.
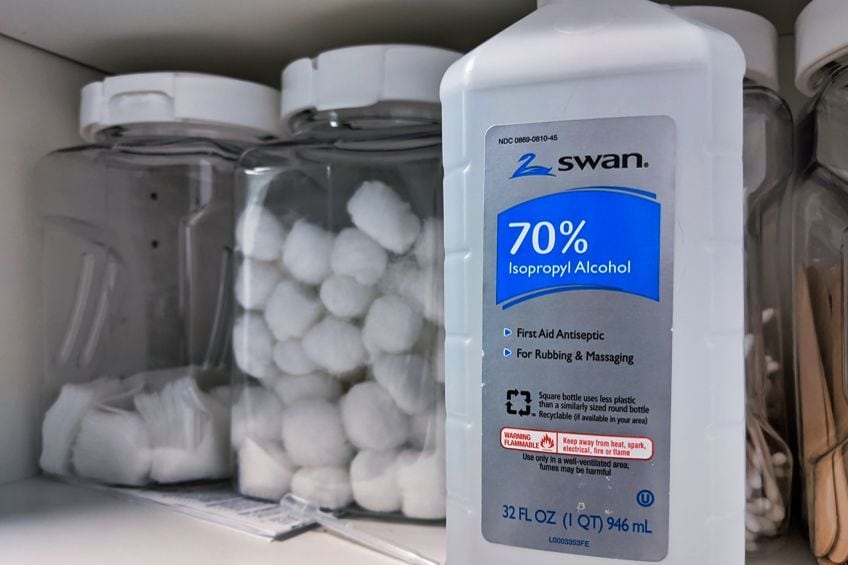
Household Detergents, Vinegar, Lemon Juice or Rubbing Alcohol
Any sort of household detergent can damage your painting by removing the paint. This applies to other substances such as vinegar, lemon juice, and rubbing alcohol that have been spouted as DIY hacks for cleaning oil paintings. Substances this acidic can smudge the paint on your canvas as you try to clean it, or even remove the paint entirely.
Baby Oil
Another myth of DIY paint cleaning is that you can use baby oil with no consequences. The idea is that baby oil can be applied to the surface of a painting to clean the artwork and make the colors appear brighter and more vibrant. In actuality, the baby oil will add a sticky layer to the surface of your painting that will only attract even more dirt as time goes on. Using this method will appear to work well initially but leave you with an even dirtier painting in the long run.
Leaving baby oil on a painting to gather dirt will result in a thick, tough layer of grime that will be much harder to clean.
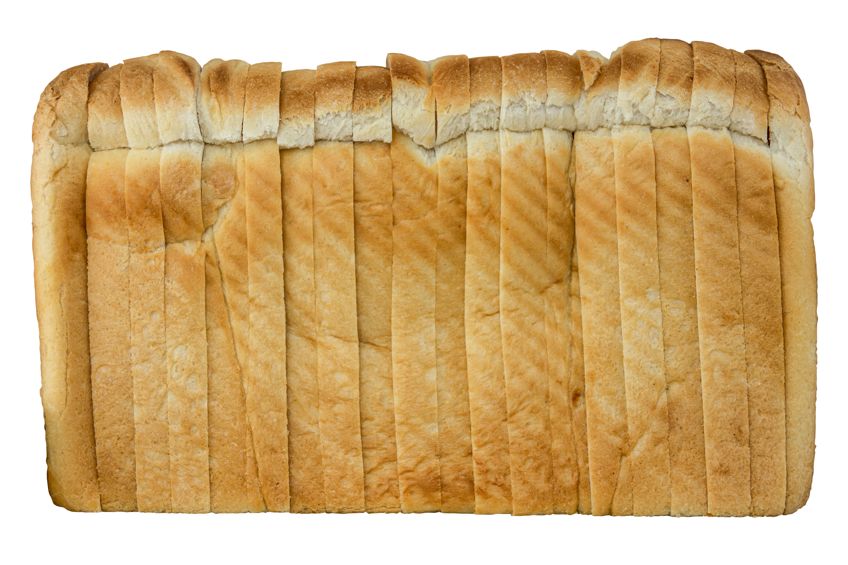
Bread or Potatoes
Using bread or potatoes to clean dirty paintings is a very popular DIY method that you might see all over the internet. These methods are a very bad idea since they can attract unwanted mold growth or leave dust attracting residue on the surface of the painting. Bread can leave crumbs on your paintings or deposit moisture into the paint. The crumbs can attract mold while the moisture can distort the colors and texture of your painting. The process of dabbing the bread onto the canvas can also cause damage to the painting as the pressure can stretch the canvas. Potatoes will deposit a starchy residue on your painting that will attract airborne particles and mold growth with time.
What Are the Different Methods of Cleaning Oil Paintings?
Now that you have an idea of the challenges that you may encounter while trying to clean an oil painting as well as what methods you should avoid trying, we can go on to detail three tried and tested ways to get your paintings looking clean and revitalized.
Cleaning Oil Paintings with Soft-Bristled Brushes
Soft-bristled brushes are a good way to clean your paintings if they have a thin, loose layer of grime built upon the surface. As we mentioned above, cleaning your paintings regularly in this way can help to prevent the need for other, more intense cleaning procedures at a later stage. You will need the following tools:
- A soft-bristled two-inch paintbrush
- Kraft paper or a tarp
- A well-lit working area
How to Clean an Oil Painting with a Soft Paintbrush: Step-by-Step
Take your painting and place it in your working area. Inspect the painting and make sure that there is no cracking, chipping, flaking, or peeling before you start brushing off loose residue. Place down your Kraft paper or tarp and hold your painting upright on top of this area while you work. The paper or tarp is there to make cleanup a bit easier but also to help you notice if you are removing any paint while you work. If you notice little specks of paint landing on the tarp, you should stop immediately and rather take your artwork to a professional.
While holding your painting upright, tilt the top of the painting towards yourself. Angle the painting at about seventy-five degrees to the surface. This is so that as you are working your way downwards and dusting, the dirt will easily land on the work surface and lower down on the painting. Begin lightly brushing the surface of the painting. Make sure that you are using the paintbrush in a down and outwards movement. Start at the top and move across in rows to cover the whole painting. Be sure to take your time and do not rush.
Ensure that you are keeping an eye out to see if you are removing any paint or texture as you work. If you see any flakes of paint coming off or notice that a previously matte surface is becoming smoother, you should stop immediately and take the piece to a professional cleaner instead. Once the painting is fully dusted you can hang it back up on display.
Maybe reconsider where it is placed or whether you would want to add a protective glazing layer as we mentioned above.
Saliva
This method may sound a little bit gross or confusing, but hear us out. Saliva has enzymes such as amylase and lipase that help break down tougher layers of grime without penetrating into the paint or canvas below. The slightly acidic pH value of saliva and its slightly warm temperature makes it effective at removing dirt and grime that has compacted and accumulated on your paintings. Saliva is also available in abundance if you have the patience, which makes it quite affordable too. You will need these items:
- Cotton Swabs
- A well-lit working space
- A folded shirt or towel
How to Clean an Oil Painting with Saliva: Step-by-Step
Lay your painting on a flat surface with a folded shirt or towel underneath it. You are laying it down because this will allow you to clearly see what you are doing as you clean. It is also important because it prevents the running or dripping of liquids down the face of your painting. Placing a folded towel or shirt beneath the painting helps to stop the canvas stretching as you apply slight pressure once you begin cleaning. Make sure that you have not folded the shirt or towel too thickly and that it is not placing outwards pressure on the artwork. Rather have the towel or shirt sitting slightly below the underside of the painting than have it pushing outwards. Take a photo of your painting before you get started (optional). This is so that you can compare what it looks like before and after cleaning.

Wet a cotton bud on the inside of your mouth and start cleaning in an inconspicuous part of the painting. Think of this small area as a spot test so that if something goes wrong it won’t be too obvious. Clean the painting by firmly but gently rolling the wet cotton bud along. Keep an eye on the cotton bud and once it has been covered in grime you repeat the process with a fresh one. Make sure that you are not rushing or scrubbing. The rolling motion is very important.
Make sure that you are only removing grime and not removing paint. Try focusing on certain features of the painting at a time. For example, do the sky and trees of a landscape separately. This is because different pigments can respond differently to cleaning. It also means that if any pigment does lift it will not be transferred elsewhere on the painting. Once the painting has been fully cleaned you can put it back on display.
If you do not manage to clean the entire painting in one sitting you can cover it and place it upright somewhere safe and out of the way until you can continue the process.
Picture Cleaners
If your painting has really tough layers of built-up grime on its surface and neither of the above methods has helped remove it in any way then you will need stronger, specialized art cleaning products. We suggest using either the Winsor & Newton Artists’ Picture Cleaner or the Grumbacher Oil Painting Restorer. Both these products are suitable for cleaning oil paintings and should even help to lighten up yellowed varnish. This may save you the effort of having to get the varnish removed or trying to remove it yourself if the cleaning does not restore your painting adequately. This is what you will need:
- Your picture cleaner of choice
- A folded towel or shirt
- A glass bowl
- Cotton swabs
- Distilled turpentine
- Surgical gloves
- Cotton pads
- A well-lit and properly ventilated area
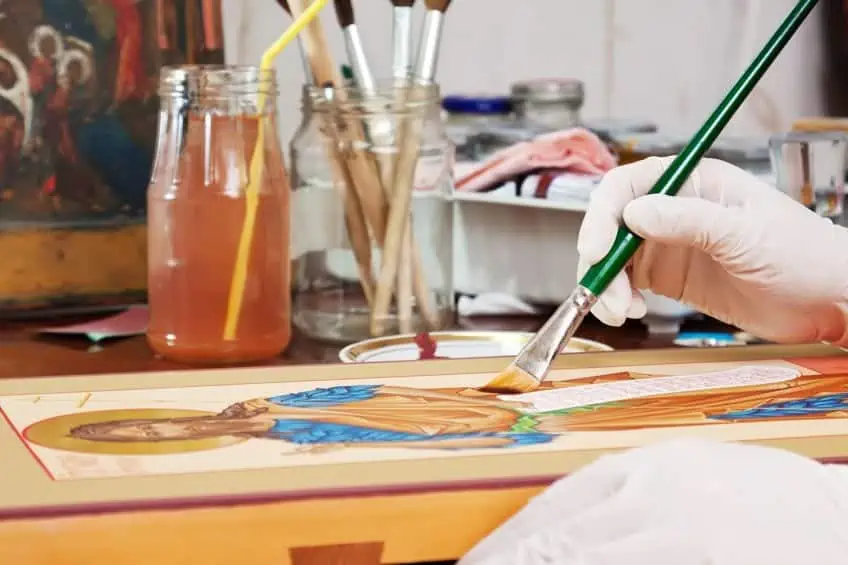
How to Clean an Oil Painting with Picture Cleaners: Step-by-Step Tutorial
Lay your painting on a flat surface with a folded shirt or towel underneath it. You are laying it down because this will allow you to clearly see what you are doing as you clean. It is also important because it prevents the running or dripping of liquids down the face of your painting. Placing a folded towel or shirt beneath the painting helps to stop the canvas stretching as you apply slight pressure once you begin cleaning. Make sure that you have not folded the shirt or towel too thickly and that it is not placing outwards pressure on the artwork. Rather have the towel or shirt sitting slightly below the underside of the painting than have it pushing outwards.
Put on your surgical gloves to protect your hands. Shake your bottle of picture cleaner gently and well before opening. Pour some of the picture cleaner into a glass bowl. Consider taking a photo of your artwork before you begin, it can be helpful to have a “before” photo to reference later. This way you can make sure you are not wasting your time trying to clean a painting that needs a varnish removal or more intense, professional cleaning.

Choose an inconspicuous area of the painting to perform a spot test. Dip your swab into the cleaner and begin to gently but firmly roll it along the area. Take note to see if there is any difference. Ensure that you are only removing grime and not pigment. If you find that pigment is coming off, stop immediately and refer the painting to a professional. Remember that the cleaner may need some time to start working or may take a few repetitions over the surface before you notice a difference. Refer to the instructions on the bottle if you are unsure. Use a cotton pad dampened with distilled turpentine to gently go over the cleaned area. Once again watch to make sure there is no removal of pigment or smudging of paint.
Make sure that as a cotton pad becomes dirty you start using a fresh one. You do not want to be moving dirt around on your canvas. Repeat this process over the rest of your artwork, doing small sections at a time. Use a fresh cotton bud for every new section or whenever the bud becomes built up with grime. Try to do certain features of the painting altogether. For example, focus on the trees of a landscape before moving onto the sky or mountains. This is because areas with different textures or pigments may respond differently to cleaning. Take your time and do not rush. If you find that you cannot clean the whole painting in one sitting then cover it and place it upright out of the way until you can continue. Take a photo of your progress so that you do not accidentally clean the same area a second time.
Once your painting has been fully cleaned you can take a final photo for comparison and then hang it up back on display. If you are not pleased with the results you may need to consider removing the yellowed varnish or having the painting cleaned by professionals.
What to Do About Yellowed Varnish on an Oil Painting?
Sometimes just cleaning the surface of a painting is not enough to restore its colors. Often this is because the varnish has yellowed and is the true culprit of loss of vibrancy in oil paintings. Varnish is applied to paintings to protect the paint from dirt and other hazards. It is also used to actually increase the vibrancy of paint after initial application or to give it a nice finish such as matte or gloss. Over time though, the varnish may darken as it ages and it will begin to make the painting look faded and dull.
Varnish layers can be removed using solvents but this process can be especially risky. Solvents can quickly penetrate through paint layers and cause irreparable damage to paintings and canvases. Paint layers can be completely dissolved by solvents that are too harsh. If handled incorrectly or in the wrong environment solvents can be extremely dangerous too. They are a fire hazard and can have adverse health effects if used improperly.
It can be tricky to figure out what solvent is safe to use on your painting if you want to do it yourself. It helps to know what kind of varnish has been used on your painting in the first place. If it is a painting made by you or a friend then you are in luck and can easily find out what solvent can best remove it by looking online. If you have a valuable heirloom or something with an unknown origin it will be more difficult. Try taking it for an appraisal and see if the varnish can be identified or consider having the varnish removed by professionals.
If you have no idea what varnish has been used, do not want to try to find out, and cannot get it professionally cleaned then you may attempt to remove the varnish yourself. If you try to do this you must accept that it may not work or it may cause damage to your painting. We suggest using a mild, artist’s solvent such as this Winsor & Newton Distilled Turpentine. If this does not work for you, you may consider getting a few different solvents that are intended for different varnish types. Try using each of them on different inconspicuous areas of your canvas to see which works best.
When using a solvent to remove a varnish layer we strongly recommend getting a neutralizer to mitigate the effects of the solvent once it has cut through the varnish.
How to Remove Varnish from an Oil Painting: Step-by-Step
Lay the painting down and use the folded shirt or towel to support the underside of the canvas. Make sure that this support does not cause the painting to bulge outwards. The idea is to prevent any unnecessary pressure on the canvas that could cause stretching and distortion. It is important to lay the painting down in this way as it prevents the running or dripping of liquids down the face of your artwork. Put on your surgical gloves and apply some of the solvents to a cotton pad. Be careful to not soak the pad completely. Too much solvent can damage your painting.
Perform a spot test in an inconspicuous area of your painting. Do this by gently moving the pad across an area and then lifting it to check for damage. You could also lightly dab the area in spots. If everything is in order, you can repeat this process until the varnish has completely lifted. Use a fresh cotton pad when necessary.

If your painting is textured you can use a cotton swab to apply the solvent to those areas. Using a cotton pad on very textured areas could result in too much solvent being deposited on the artwork and causing damage. Make sure to apply a neutralizer to these areas in the same way. Once the surface of the paint has had the varnish removed you can either apply a thin coat of oil painting medium or apply a new layer of varnish. You could even do both for maximum protection. Make sure to properly dispose of your cotton buds and swabs when you are finished removing the varnish off of your oil painting. Rehang your painting up on display and enjoy your newly restored piece.
There are many ways that people try to clean their beloved paintings but many can damage the painting beyond repair. If the painting has monetary or sentimental value it is worth the money to hire a professional to do the cleaning on your behalf. If you feel that you would like to give it a try yourself we have outlined how to clean old oil paintings at home.
Frequently Asked Questions
Can You Clean the Back of Your Painting?
Yes, you can clean the back of your painting by lightly dusting it down with a soft-bristled two-inch paintbrush. Make sure you don’t apply enough pressure to push the canvas outwards. Do not attempt to clean the back of the painting with anything that could impart moisture into the canvas. This means no detergents, sprays, cleaners, and absolutely no water.
How Do I Clean a Faded Area Along the Edges of the Canvas?
If you have a faded area along the edges of a painting it may actually be from the frame. That may be the original color of the painting and it is the inside of the painting that has darkened from age and grime. If you do not have a frame on your painting and are referring to the sides of the canvas itself, you can clean this area the same way as you would clean the whole painting.
Can I Use Soap on an Oil Painting on Canvas?
While some soaps may not be damaging to your oil painting it is the risk of imparting water on the canvas that poses risk to the integrity of the work. We suggest only cleaning your painting in the ways we have specified. However, some artists have suggested using an olive oil-based soap and had positive outcomes. Use this method after doing further research and at your own risk.
How Can I Clean Oil Paint Off of a Surface?
If spilled oil paint is still wet you can wipe it up and then clean the area with a mild detergent. If the paint is dry you could try scratching it off or using mild turpentine. The way you choose to deal with the dried paint will depend on the surface it is on. You should be careful using either of these methods on wooden furniture or upholstery, but it is fine for tiles or plastic. Paint on precious woods and fabric of any sort may require more delicate methods or professional cleaning. The best idea is to try to prevent spills by placing down Kraft paper, old newspapers, or a tarp before you begin working.

In 2005, Charlene completed her wellness degrees in therapeutic aromatherapy and reflexology at the International School of Reflexology and Meridian Therapy. She worked for a company offering corporate wellness programs for several years before opening her own therapy practice. In 2015, she was asked by a digital marketer friend to join her company as a content creator, and it was here that she discovered her enthusiasm for writing. Since entering the world of content creation, she has gained a lot of experience over the years writing about various topics such as beauty, health, wellness, travel, crafting, and much more. Due to various circumstances, she had to give up her therapy practice and now works as a freelance writer. Since she is a very creative person and as a balance to writing likes to be active in various areas of art and crafts, the activity at acrylgiessen.com is perfect for her to contribute their knowledge and experience in various creative topics.
Learn more about Charlene Lewis and about us.