How to Clean Resin Molds – Maintenance Tips for Molds
This post may contain affiliate links. We may earn a small commission from purchases made through them, at no additional cost to you.
Resin molds make resin crafting a fast and easy experience that can be fun for the whole family. The trouble is that they can be pretty challenging to clean once they’ve been used thanks to the tacky residue created by the epoxy. Thankfully, there are a few ways you can go about cleaning the molds, so let’s have a look at how to clean resin molds correctly so you won’t have to get new ones any time soon.
How to Clean Resin Molds
As we mentioned previously, there are a number of ways you can go about cleaning your resin molds to ensure your next workpiece is cast perfectly. To help you along we have prepared a list of ways you can go about cleaning the inside of your resin molds with some common household items, as well as some patience and elbow grease.
Cleaning Tacky Resin
Tacky resin describes a semi-wet residue left behind in your mold before or after casting has taken place.
Tacky resin can be stubborn to remove by conventional means and has a tendency to smear if rubbed with a dry cloth.
Thankfully there are a number of ways you can go about effectively removing tacky resin from your molds.
Put Your Mold in a Freezer
Resin tends to get gelatinous and tacky when left in a mold for too long, especially the left-over bits at the bottom. Since resin is created as a result of the thermic reaction, reducing the temperature of the left-over bits can help you remove it from the mold. What is the best way to make your resin bits cold you ask? By using a Freezer of course!

Although resin is food-safe when completely cured, it can still contaminate food products when it’s in a semi-liquid state. Therefore, you should place your mold in a plastic bag or separate container when popping it in the freezer to ensure it’s nicely isolated. Leave it in there for an hour or two before taking it out and peeling away the leftover resin.
- Requires minimal effort
- Resin can be peeled away in large pieces
- Does not damage your mold
- Mold needs to be wrapped or in a separate container
- Doesn’t work well with large quantities of leftover resin
Use Baby Wipes
Most times it’s easy to get rid of the majority of the resin inside the mold once the casting has been removed. The trouble is usually removing the little leftover bits around the rim and at the bottom of the container. Thankfully, baby wipes make removing these stubborn little bits of resin super easy, especially if they haven’t fully dried.

Wipe the affected areas of your mold with moderate pressure until the resin begins to come away from the surface. Repeat this process until all of the little bits of resin have been removed from the inside of your mold, and remember to swap worn wipes out for fresh ones as you move along to achieve the best results.
- Relatively inexpensive
- Readily available
- Easy to use
- Doesn’t damage your mold
- Can be time-consuming to use
- Might not work on all resin types
Use Acetone
Acetone and resin don’t mix well, which makes it the perfect tool for removing stubborn resin from the inside of your molds. Acetone is a solvent that helps break down the resin and dissolve the bond it forms with your mold. We recommend using a small spray bottle to apply the acetone to the inside of your mold but ensure your workspace is well ventilated when doing so.

This is a great option when looking to clean silicone molds. Simply pour some acetone into a spray bottle, and then spray some into the interior of your mold. Allow the acetone to set in for a while and then peel away all of the little bits of resin. Acetone can take a while to evaporate and the fumes can be very strong so we highly recommend you wear a face mask while handling it.
- Easy to use
- Readily available
- Highly effective at dissolving and displacing resin
- Doesn’t need to be drained afterward
- Produces harmful fumes
- Cannot be used in confined spaces
- Requires constant airflow and low humidity
How to Clean Cured Resin
The only thing tougher than tacky resin is cured resin. Resin is designed to dry and cure in place indefinitely, so removing cured resin from a mold can prove to be exceedingly difficult. Thankfully there are a few simple tricks you can use to remove cured resin from the inside of your mold with just a little bit of effort and patience.
Use Tape or Blu Tack
Resin is quite sticky, and while it might seem counterintuitive, you can use something even stickier to remove it! Strong adhesive tape and Blu tack are excellent options for getting rid of really stubborn resin on the inside of your mold especially if it has already cured. We recommend using high-adhesive tape or Blu Tack for this method.

All you need to do is fold up a bit of tape to form a little pad. Press the tape up against the cured bits of resin until it sticks and then pull it away, removing the resin from the inside of your mold. Pretty simple right?
This action can be done repeatedly with both tape and Blu Tack, and the faster you press and pull, the faster the cured resin will be removed.
Use 99% Isopropyl Acid
Solvents are one of the best ways to clean silicone molds. If you want to know why, it’s because they break down the resin and the bonds it has formed with the interior of your mold. You don’t need a lot of alcohol to remove the resin, just a little bit on a piece of tissue paper or rag will do the trick, and it requires very little effort.
Is there any special technique for using isopropyl alcohol? Not really, all you need to do is get some on your rag or tissue paper and rub the affected areas of your mold.
Why not simply fill the mold with alcohol, you ask? Isopropyl alcohol is extremely flammable and produces a ton of fumes so it’s best not to dispense it in large quantities.
How to Clean Molds Before Use
As the saying goes, prevention is better than cure. In the case of resin molds, ensuring your mold is clean before using it can save you a lot of time and effort down the line. Dirty molds can lead to imperfect castings and leftover resin being particularly stubborn to remove. That’s why we’ve prepared a short tutorial showing you how to clean your mold before use.
Use a Soft Brush
The best way to clean resin molds before using them is by “dusting” them with a soft paintbrush. When molds are packaged for sale, they can get dust and other particles trapped inside them, so using them straight out of the box can result in castings becoming contaminated or failing to cure correctly. Therefore, using a paintbrush on the interior can be extremely helpful in avoiding this.

How do you use a paintbrush to remove dust from inside a mold? Pretty much the same way you would use a feather duster to clean furniture. Feather the bristles quickly along the inside of your mold and watch the dust puff out as you go along.
Be sure to wear a face mask when cleaning as molds can contain silicone dust from the manufacturing process.
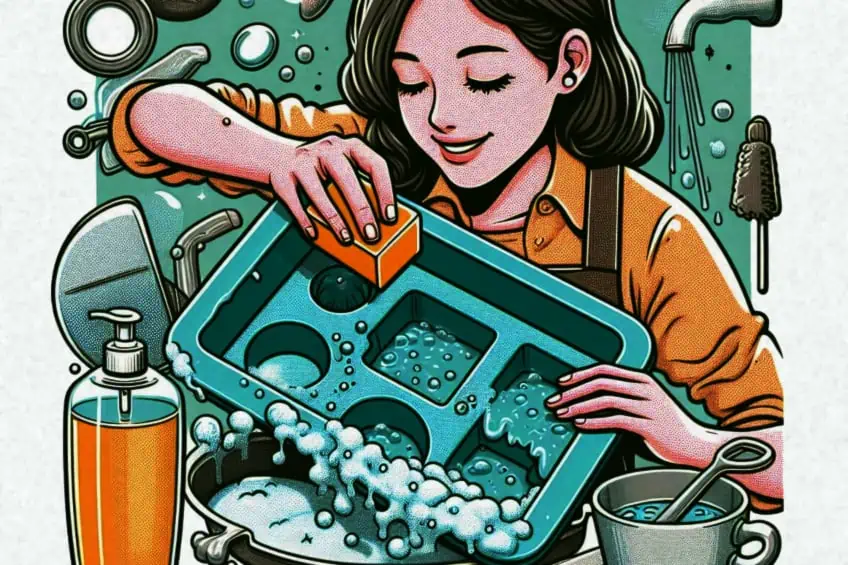
Use Soapy Water
What many crafters consider to be the best way to clean resin molds is good old-fashioned soap and water. Considering that many baking molds that are made of silicone can easily be cleaned using soap and water this should come as no surprise. Is soap and water really that effective at removing dirt and grime from the inside of resin molds?
Whether you are using silicon or plastic molds, warm water, and soap are excellent options for removing dirt, grime, and small bits of material from the manufacturing process from inside the mold.
However, you should ensure that the temperature of your water isn’t too hot as it could damage the mold’s shape retention and texture.
Use Tape or Blu Tack
While Blu tack and tape can be used to clean resin off silicone molds, it’s also a good tool for cleaning new resin molds before they are used. While you could use soap and water to clean your new molds it would be far quicker and more convenient to simply use some tape or Blu tack you have nearby instead.
You would clean new molds in pretty much the same way as used ones.
With tape, fold some up into a little pad and drag/dab the inside of your mold until all of the little dirt particles have been removed. The same can be done with Blu tack, just be sure to swap sides of your Blu tack or tape when they become too dirty while cleaning.
How to Protect Your Molds
Regardless of whether you use resin or silicone molds, there are things you can do to ensure that your mold stays clean and safe.
Remember that if your molds are stored and cleaned well, you can use them immediately when they’re needed.
To ensure you are able to use your molds as quickly as possible let’s have a look at a few steps you can follow to ensure their continued longevity.
Store Your Molds Correctly
Aside from knowing how to clean resin off silicone molds, you should also ensure that your molds are stored correctly. Correctly stored molds retain their shape well and don’t attract dirt, allowing you to immediately use them when needed. Molds need to be stored in a cool dry place to ensure they retain their shape and do not get contaminated.

How do you maintain these conditions though? The best way to go about it is to store your molds inside an airtight container where they will not be subjected to extreme temperatures.
Plastic airtight containers are very easy to come by and tend to be fairly inexpensive, so if you’re out shopping for new molds, you should grab one of these too if you can.
Keep Your Molds Flat
Now we don’t mean you should flatten your molds with a rolling pin, just that your molds should be stored on a flat surface. This prevents them from losing their shape, especially if they are in storage for a long time.
Placing molds on top of one another can result in both becoming misshapen over time and difficult to reshape into their intended form.
Therefore, in addition to ensuring that your molds are stored in an airtight container, we recommend that you store them flat against the bottom of said container. Does this limit the amount of space inside a given container? Sure, but you can make little shelves inside your container using cardboard to increase your mold storage capacity.
Avoid Direct Sunlight
Sunlight is decidedly bad for both silicone and plastic molds. Now, you might be asking “Why would anyone put their precious molds in the sun?” and the simple answer to this question is convenience. For example, if you have just washed out your molds after removing your castings it’s a lot easier to simply leave them in the sun to dry instead of drying them by hand.

Another possibility is simply forgetting to move your storage container out of direct sunlight. Either way, your mold is going to get damaged and horribly misshapen so pay attention to where your molds and/or your mold containers are at all times.
Remember that it’s far easier to maintain your molds than it is to shop for replacements.
How to Prepare Your Molds for Casting
Now that you know how to clean and maintain your molds, we thought we would show you how to prepare your molds for casting. An improperly prepared mold can lead to poor-quality castings, so it’s best to ensure your molds are in tip-top condition before you begin pouring in resin. Here are a few steps you can follow to ensure your molds are properly prepared.
Clean Your Mold
Whether you have purchased some new molds or you are taking your old ones out of storage, it’s always a good idea to give them a good wash before they’re used. The interior of resin molds tends to attract a lot of dust and dirt particles which can affect the quality of your resin casting, so a thorough cleaning can go a long way in ensuring your castings come out as intended.

As we mentioned previously there are a number of ways you can go about cleaning your molds before use, but the most common way to go about it is to simply wash the inside of your molds with some warm water and soap before you pour in your resin.
Ensure that you remove all dust particles that might have built up over time using a clean cloth while your mold soaks.
Once your mold is nice and clean you need to ensure that it is as dry as possible. While you can simply allow your molds to air dry, you could also use some paper towel or a microfiber cloth to remove as much moisture as possible. Remember that your resin will not dry and cure correctly if you pour it into a wet mold.
Apply Resin Release
If you are going to be using resin molds, release spray is a must. Resin is inherently very sticky which makes it rather tricky to remove in one piece once it has completed the curing process, so you need something to act as a barrier between the interior of the mold and the resin as it hardens and cures during the casting process. This is what release spray is designed to do.
Release spray is made of a chemical known as Polydimethylsiloxane which acts as a barrier between your mold and the resin.
Release spray is aerosolized, and is applied by spraying the inside of your mold until any part of it that will be in contact with resin is coated. All you need to do after this is allow it to set for a minute and then pour in your resin.

If you can’t get your hands on some cooking spray, there are some other substances you can use to prevent your rein from sticking to the surface of your mold.
Non-stick cooking spray and petroleum jelly both make excellent release spray substitutes and can be found around the home.
Pour in Your Resin
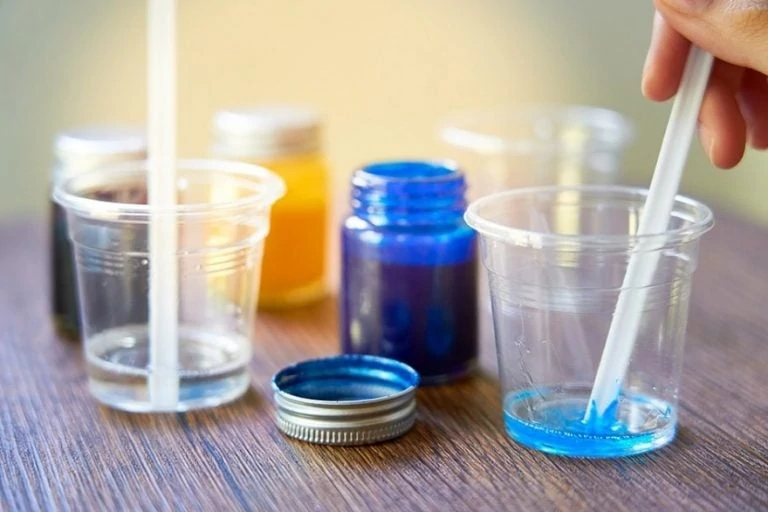
Once your mold has been prepared it’s time to pour in your resin. If you are using a two-part epoxy, you will need to mix the resin and the hardening agent according to the manufacturer’s instructions.
This is usually a 1:1 ratio, but different types of resin have different mixing rations, like deep pour resin that usually needs to be mixed in a 1:2 resin-to-hardener ratio.
Once your resin has been mixed pour it into the mold you have prepared and allow it to both harden and cure for the time period indicated by the manufacturer. Once this period has elapsed, remove the casting from the mold and immediately clean your mold using one of the methods we mentioned previously (whichever is easiest for you).
That’s all you need to know about how to clean resin molds. Remember that the cleaner your molds are, the better your castings are likely to come out. As you can see, cleaning your molds before you use them is just as important as cleaning them after they have been used.
Frequently Asked Questions
How Often Should You Clean Resin Molds After Use?
Cleaning resin molds after use is important to the longevity of your molds and the quality of your castings. How often should you clean resin molds after use, then? It should be done after every use to prevent your next casting from becoming contaminated, and to avoid a buildup of residue inside your mold.
What Are Resin Molds Made Of?
Resin molds can be made of many materials, but they are most commonly made of plastic or silicone. These materials offer good shape retention and consistent quality castings, while being cheap to manufacture and purchase.
Can Resin Molds Break?
Like most other types of molds, resin molds are designed to withstand a certain number of uses. This number largely depends on the quality and price point of the molds, with better quality molds often being more expensive.

In 2005, Charlene completed her wellness degrees in therapeutic aromatherapy and reflexology at the International School of Reflexology and Meridian Therapy. She worked for a company offering corporate wellness programs for several years before opening her own therapy practice. In 2015, she was asked by a digital marketer friend to join her company as a content creator, and it was here that she discovered her enthusiasm for writing. Since entering the world of content creation, she has gained a lot of experience over the years writing about various topics such as beauty, health, wellness, travel, crafting, and much more. Due to various circumstances, she had to give up her therapy practice and now works as a freelance writer. Since she is a very creative person and as a balance to writing likes to be active in various areas of art and crafts, the activity at acrylgiessen.com is perfect for her to contribute their knowledge and experience in various creative topics.
Learn more about Charlene Lewis and about us.