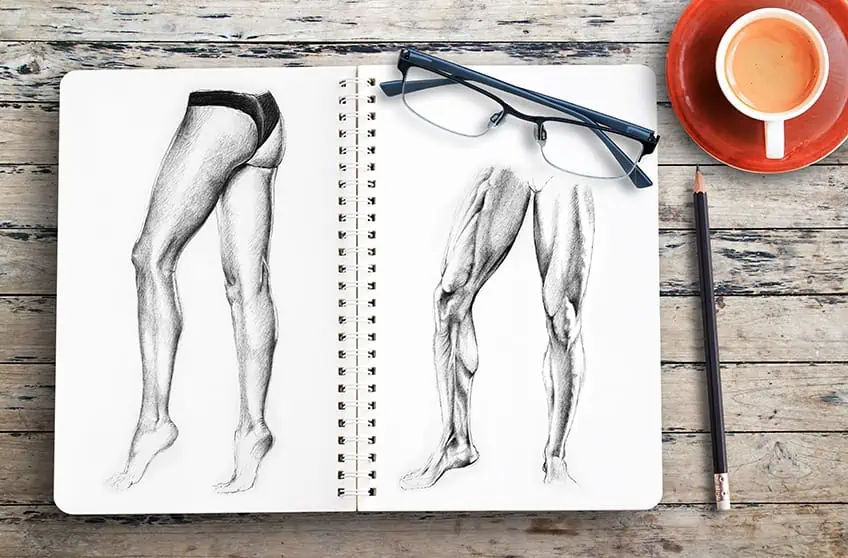
How to Draw Legs – Anatomically Correct Male and Female Legs
This post may contain affiliate links. We may earn a small commission from purchases made through them, at no additional cost to you.
Drawing legs can be really fascinating. As both the skeleton and musculature form part of the visible structure of the leg, it is essential to understand these anatomical aspects when drawing human legs. In this lesson, we will learn how to draw muscular male legs as well as a toned female legs. We will sketch the male legs as seen from the front and side and the female female legs from the side and rear. Each leg anatomy drawing is broken down into easy to follow steps in this lesson. With that said, gather your art supplies, such as a drawing pad, pencils, and an eraser, and find a comfortable place to work before we examine what we will require for this tutorial on how to draw legs.
How to Draw Male and Female Legs
As we progress through this lesson, we will begin by drawing a woman’s legs and then we will sketch a man’s legs. You will notice that there are structural differences between men’s and women’s legs. Let us examine how to accomplish these distinctions as we move through the various processes.
Female Leg Anatomy Drawing
We’ll now move on to the female legs as we continue with this sketching tutorial on how to draw legs. Female legs are less complex to shade since their characteristics are less obvious. In some ways, this emphasizes the early stages. When attempting to define the leg as a female physiological component, the form of the leg is most important. With that said, let us begin with a step-by-step tutorial on sketching female legs.
Step 1: Shaping the Legs and Feet
Looking at our reference image, try to take notice of the overall legs’ shapes and how they are constructed in this sketch. Scale the legs appropriately on your sketching paper. These two forms are elongated and elliptical in nature. Begin by drawing the basic outline of the leg down to the foot using a light pencil.
Step 2: Refining the Shape
Lines are used to improve these forms here. Erase your shapes softly, like you did in the last step, so that they are hardly visible. After that, continue to blend the forms with line work as softly as possible. Use an H pencil for this.

Spend some time on the above instruction while referring to your original image. Continue to switch between your photograph and sketch, attempting to define the leg as similarly in size and shape as possible. Start with the foot and work your way up the legs sketch until you are happy.
Step 3: Adding the Lighter Shades
At this point, we may begin to softly shade our drawing using a very light pencil, such as an HB pencil. The shadows in the original image are largely visible around the knees and feet. When drawing legs, begin with one section of the leg and work your way through it, ultimately attending to all leg parts. An excellent starting point would be the knee or foot, as these tend to be the most difficult parts of the leg.

This leg is very straightforward since the shadows are not intense. It is beneficial to become familiar with a range of shadow sketching techniques. They are soft for a leg like this, moving inward from the margins of the leg, where they are primarily defined at the knees and feet. Go through the entire leg, taking careful notice of each component and applying these light shadows. Apply these markings with care and patience to your leg anatomy drawing. The gradients should be extremely delicate, so draw with a light touch.
Step 4: Adding Darker Shades to Our Legs Sketch
This is where we employ our light shading to influence our deepest tones. Because the original image characterizes the leg in a delicate fashion, we want to use our dark shading sparingly. Begin drawing your darkest tones, using your reference image as a guide.

Examine the flow of your soft shading throughout the leg. The flow of the shadows when drawing legs should be guided by the particular lighting in your reference image. Continue repeating this back-and-forth activity as you add these darker colors on the leg. Do this until you’ve addressed all of the leg parts. Make sure you’ve gone over the entire leg and thought about how the source of light reacts with each part, from the feet to the shins to the upper thigh. We’re not using any shading here since we want to keep the tone of the image light.
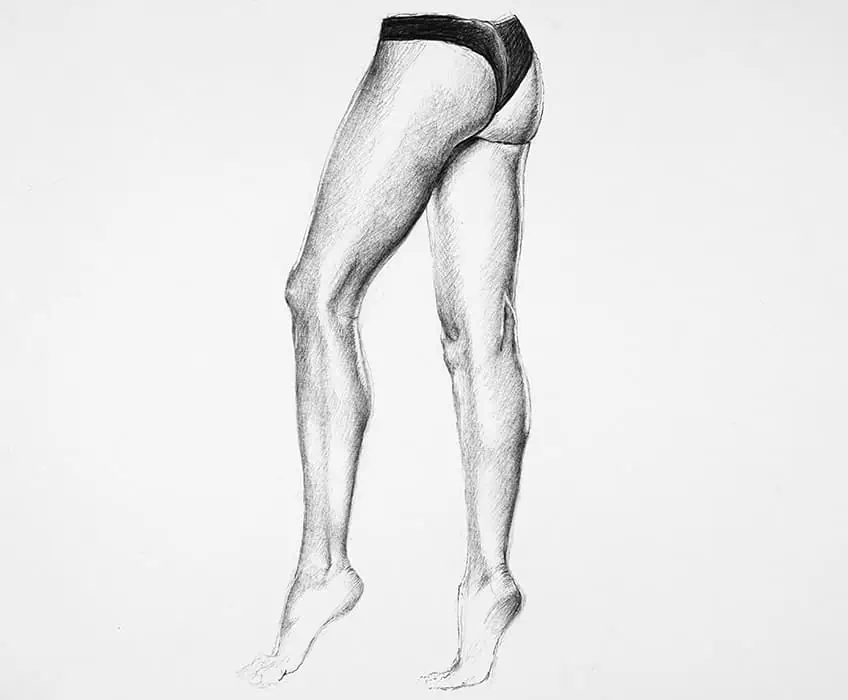
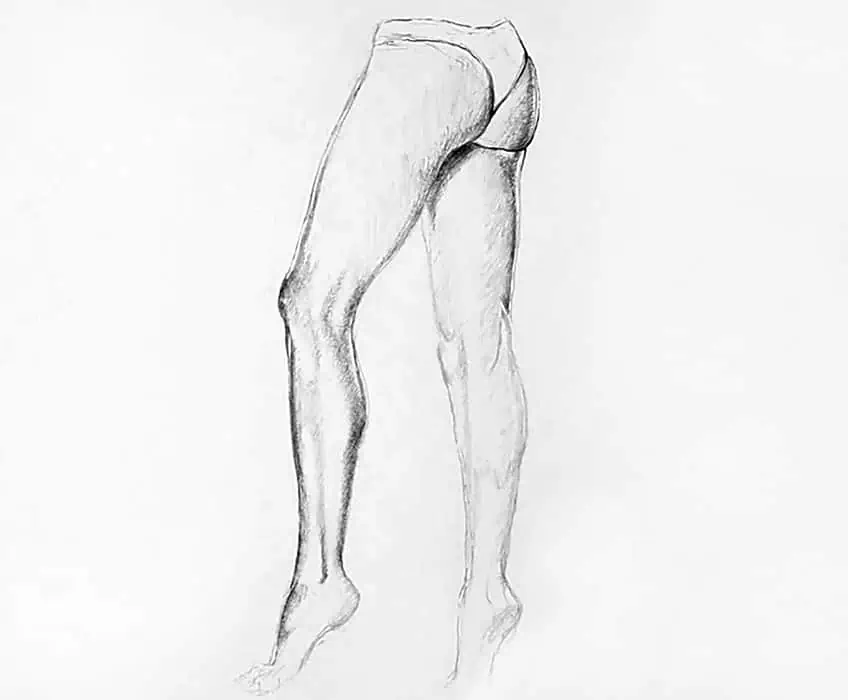
How to Draw Thighs and Legs From the Back
In the reference image, sketching a feminine leg from the rear shows a leg that is pretty fit and strong. We can observe that the leg’s foot is pushed on its toes, emphasizing the leg muscles. This will have an impact on how we depict these aspects in the artwork. So, let’s go over the steps.
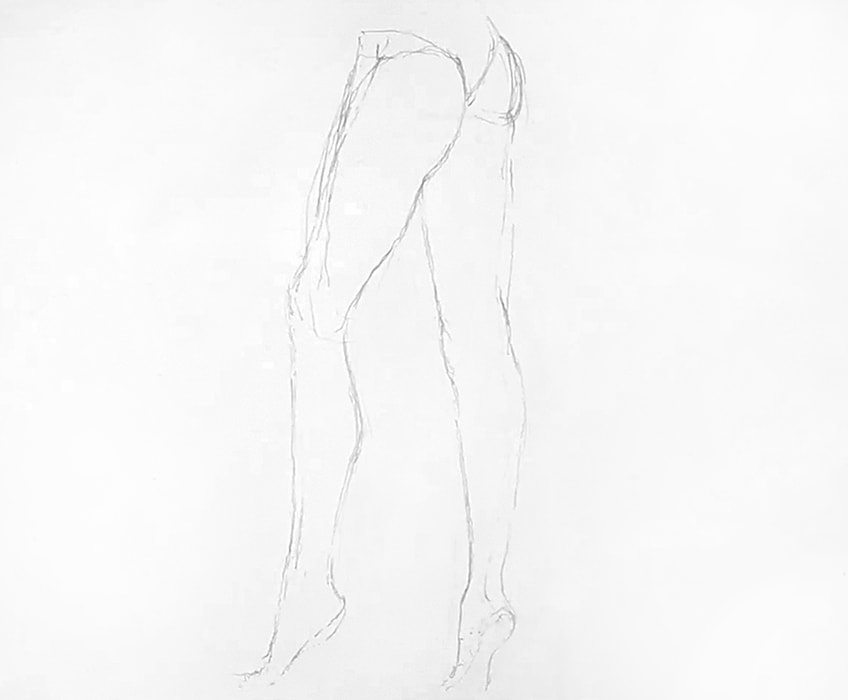
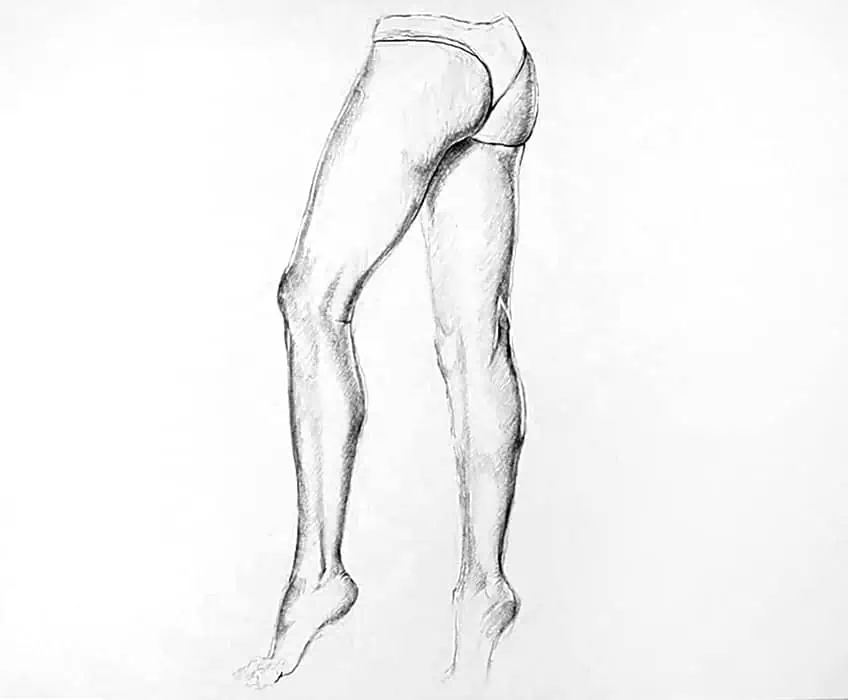
Step 5: Shaping of the Leg Anatomy Drawing and Feet
Begin by examining your reference image to determine the general contours of the leg. While scrutinizing your reference image, proceed to softly sketch the leg forms. These are often extended and elongated forms.
Assess the proportion of the legs’ shapes in your earlier designs to help you measure your leg in the proper proportions. We should have a direction for sketching the scale for the rear of the leg if we look at the frontal female leg. When we are happy, we may lightly erase our drawing to ready it for linework. Be sure to keep these lines light to help you through the following phase rather than entirely erasing them.
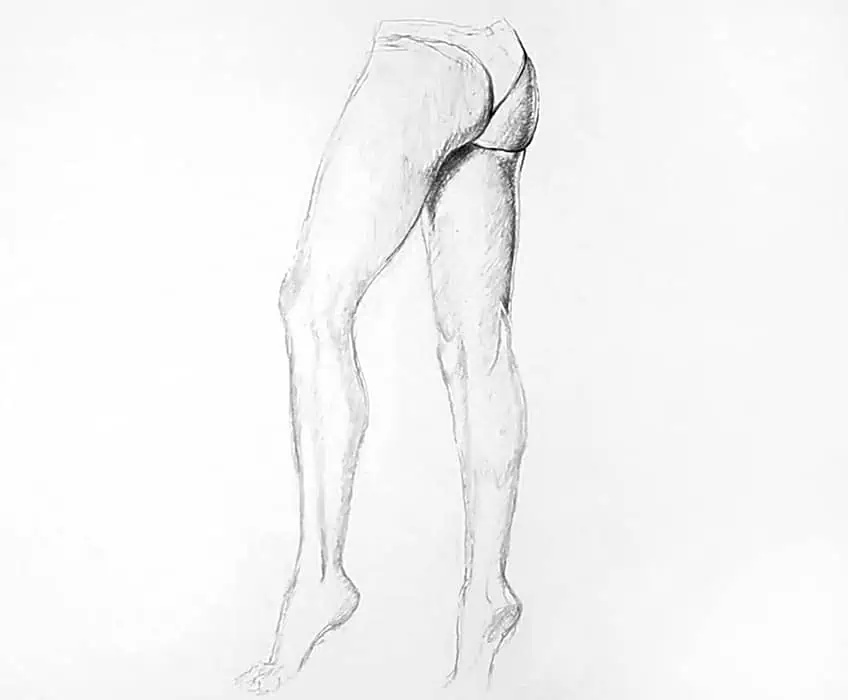
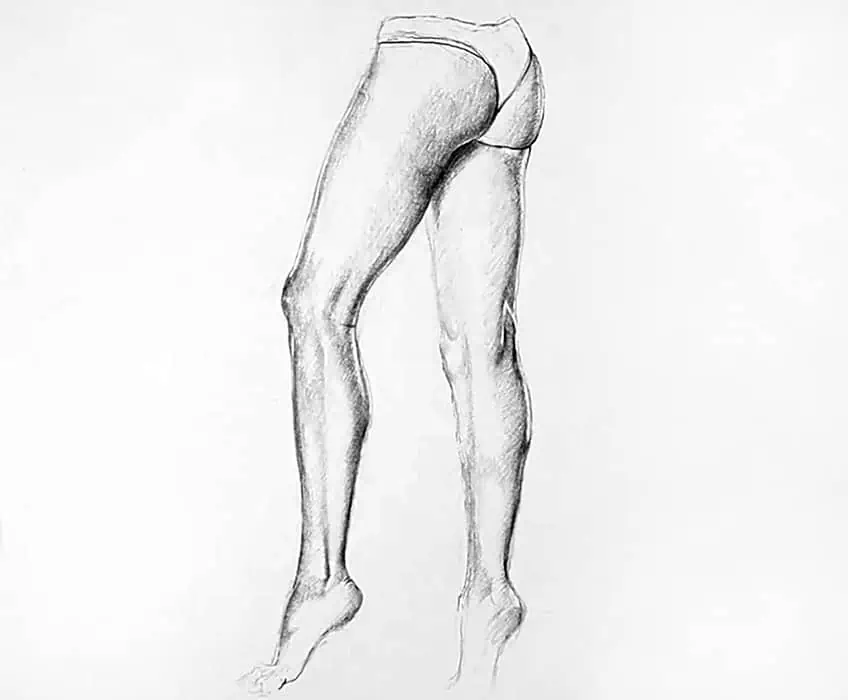
Step 6: Finishing the Line Work
We should now have a basic form that captures the anatomy of the leg rather well. We can then start drawing lines that connect our already-created shapes so that they properly begin to show the leg more accurately. Spend some time on the feet since they are in a distinctive posture, with the foot lifted on its toes. The motion of the foot will also affect the action of the calf, as well as the movements of the shadows. You want to look at how the dimensions are depicted in your reference image to help you.
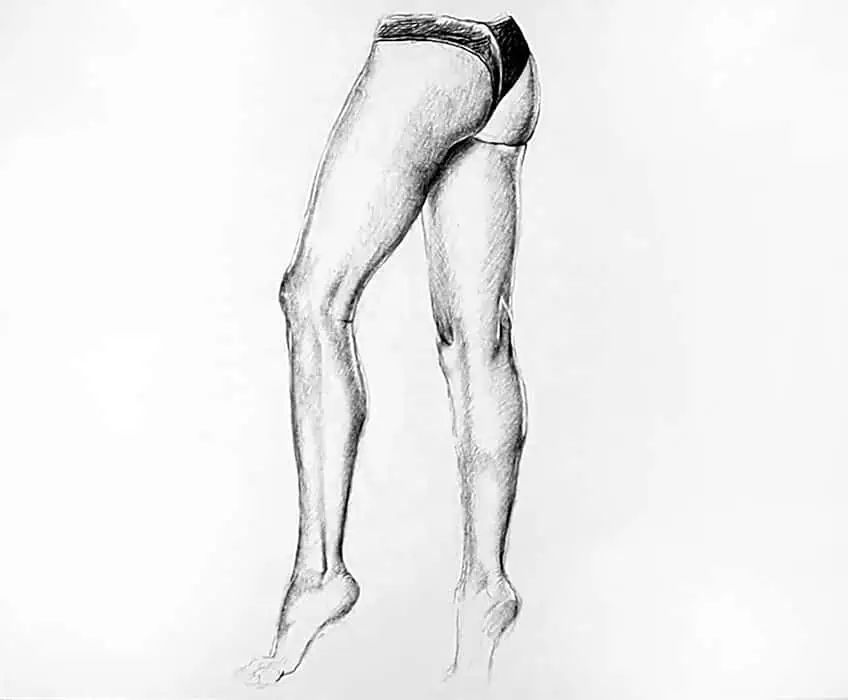
Step 7: Creating Lighter Shades
We may now begin to softly shade our design with a really light pencil, ideally an H pencil. Observe how the shadows grow from the feet into the calves when you examine your reference images. Continue to produce soft light shading lines as you switch between your reference images and your artwork.
Work from the feet through the calves and up the remainder of the leg, making reference to your reference images as a guide throughout the process. We would like to keep the shadows light so that we may easily apply heavier shading later. Let us go over these markings again once we’ve gone from the feet up to the thigh and buttocks area. This does not always mean that we must trace over them fully again, although we do redo certain markings. This time, it’s a good idea to work down the legs.
Step 8: Adding Darker Shades
In a quite light graphite pencil shade, our leg should appear realistic. Now that we have our darker pencils, we can start to go over these markings. Keep in mind that at this stage, we must pay close attention to our source image. As you switch backward and forward between your reference images and legs sketch, start to add the deeper hues. We want to approach this procedure delicately. As explained previously, it’s a good idea to begin at the feet and gradually work up the leg. By doing this, we can pay attention to every detail of the leg and evaluate our marks as we go along.
From the feet to the calves and then to the upper thigh, move up the leg. Take into account the indentations or creases behind the leg. Analyze your reference images carefully to determine how they illustrate this feature of the leg. Be patient and mindful of the entire leg and try keep in mind that shadows are caused by a lack of light. Look at how the original image depicts how the light reaches every part of the leg. Dependent on how the leg is subjected to the light, this might occasionally result in either bright or dark shadows. You can repeat this process a few times to ensure that you have captured every detail.
Ensure the creases behind the legs are as precise as you can make them. The pinnacle characteristic that identifies the posture of the leg is this point in the leg. Take your time with this feature, paying close attention to the nuances as you apply them while referring to your original image.

Complete your design, then use your eraser to correct any unneeded mistakes. Finally, make your way across your drawing, concentrating on the places with the deepest shadows. Think about the foot’s wrinkles at the Achilles heel, for example.

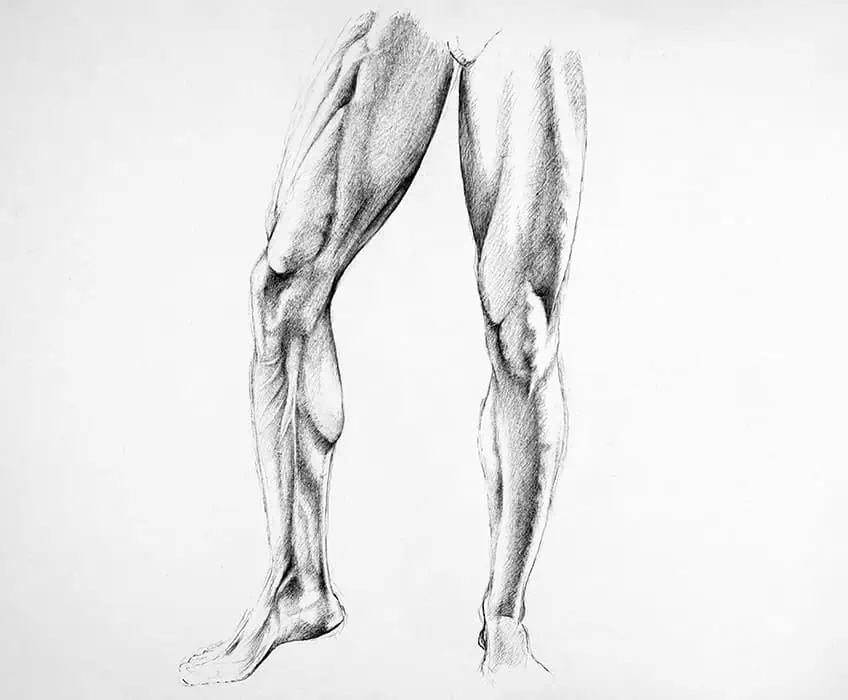
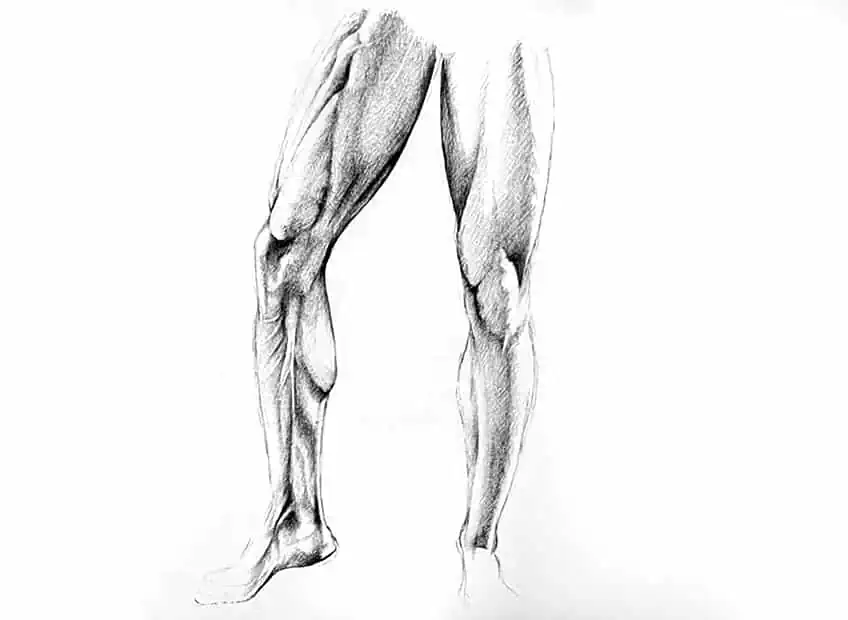
How to Draw Muscular Legs of a Male
Learning the many parts of which the male leg is made is necessary for drawing it. Because the man’s leg we are drawing is quite muscular, every feature of the leg is clearly defined. In light of that, let’s examine how we go about doing this.
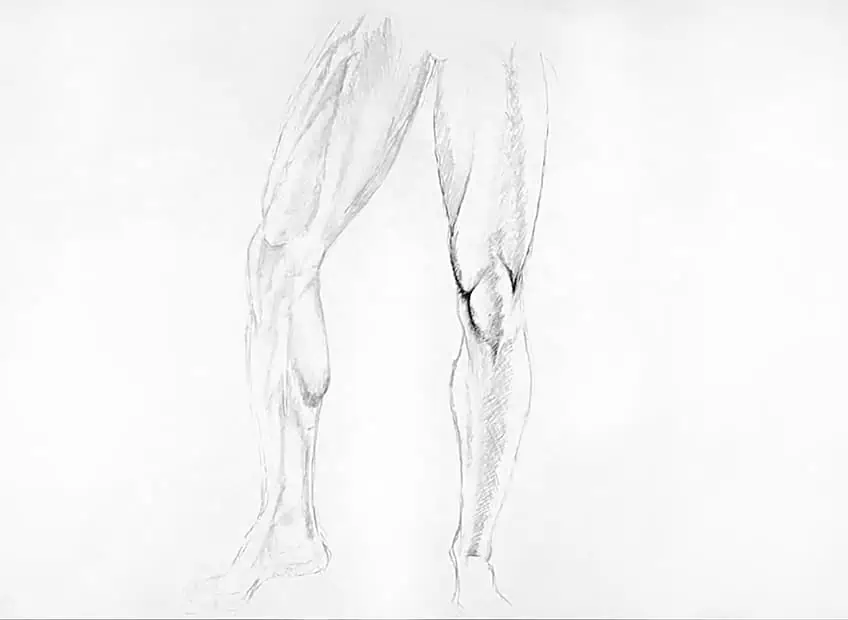
How to Draw Thighs and Legs of a Male From the Front
Now that our supplies are prepared, we can start the drafting process. We should also have a sketching station in a well-lit area close to our reference image. After all of that, it’s time to start drawing. Let’s start with the legs. We’ll practice creating lean legs in this picture. The shadowing on the legs from the calves to the thighs will also be defined for us. Depending on the many leg forms you draw, learning how to draw thighs and legs varies. Let’s go over the several methods for drawing powerful legs as seen from the front and side.
Step 1: The Basic Legs’ Shapes
Finding the common features in the leg is what we’re doing initially. Draw the general contours of the legs with a lighter pencil, preferably your H pencil. These forms resemble two elliptical or extended ovals in most cases. However, the contour of the lower portion of the leg is often a little bit thinner than the thigh.
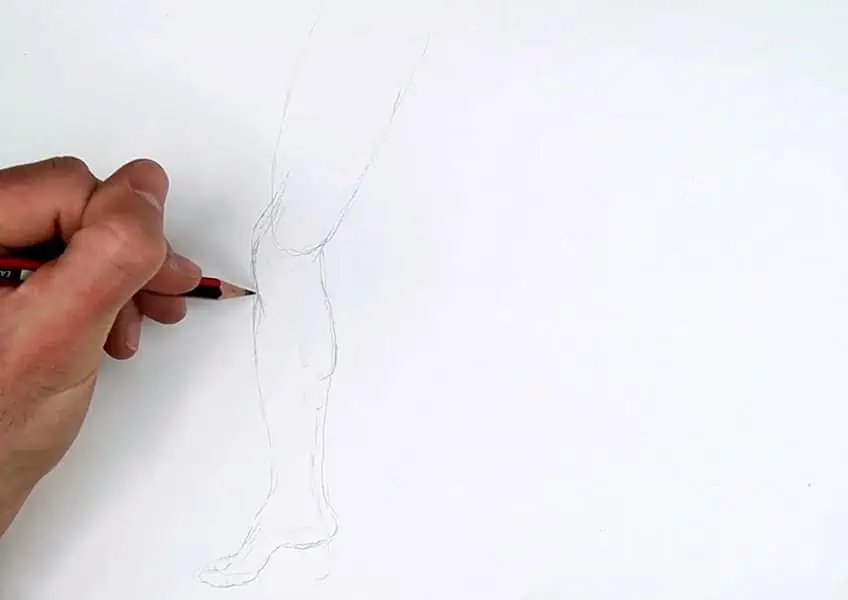
As you continue to make markings, take some time to examine your reference images. Until you are happy with the proportion, you should go backward and forward between your source picture and sketch. We may softly erase our drawing after we’re done with the form and scale. Don’t entirely remove it, however, since we need to leave some faint traces of our forms to aid us in navigating the following phase.
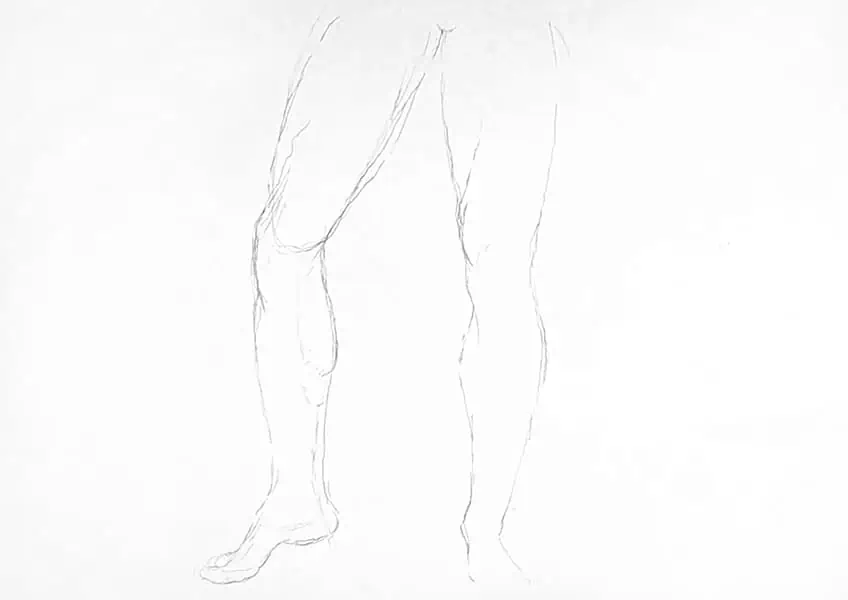
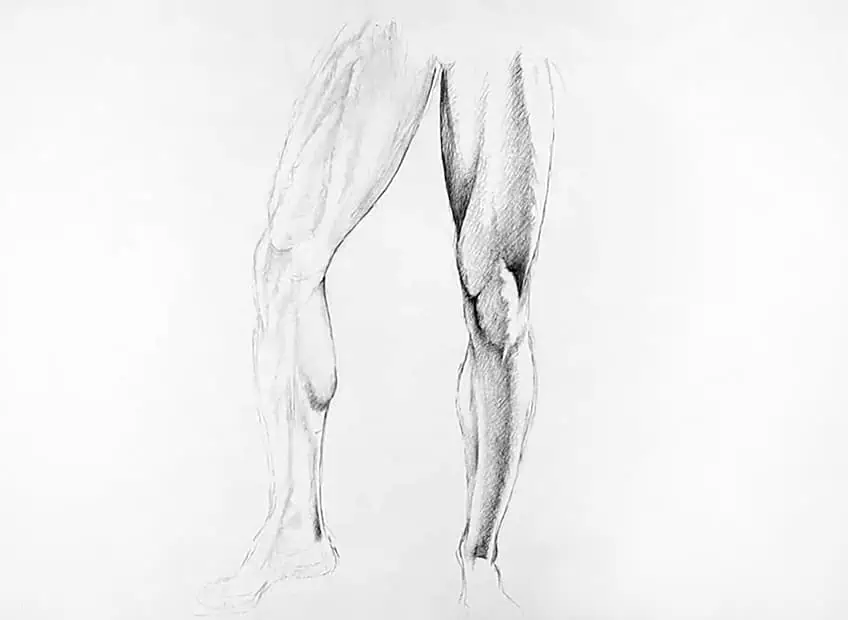
Step 2: Connecting the Lines
We’ll start by lightly drawing lines to combine our forms into a single, leg-defining structure. During this phase, continue using a light pencil; an H pencil is an excellent recommendation. This will make it simpler for us to fix any errors. Take your time throughout this phase because each step calls for endurance and focus. Remember that our legs sketch will be more precise the longer we spend in these first phases.
In order to more precisely define the anatomy of the leg, we will highlight the forms as we return to our reference images in this stage. Consider the next step as an outline. We may softly create a form outline and concurrently use our erasers in case we create any mistakes. Please don’t hesitate to make use of your eraser when needed!
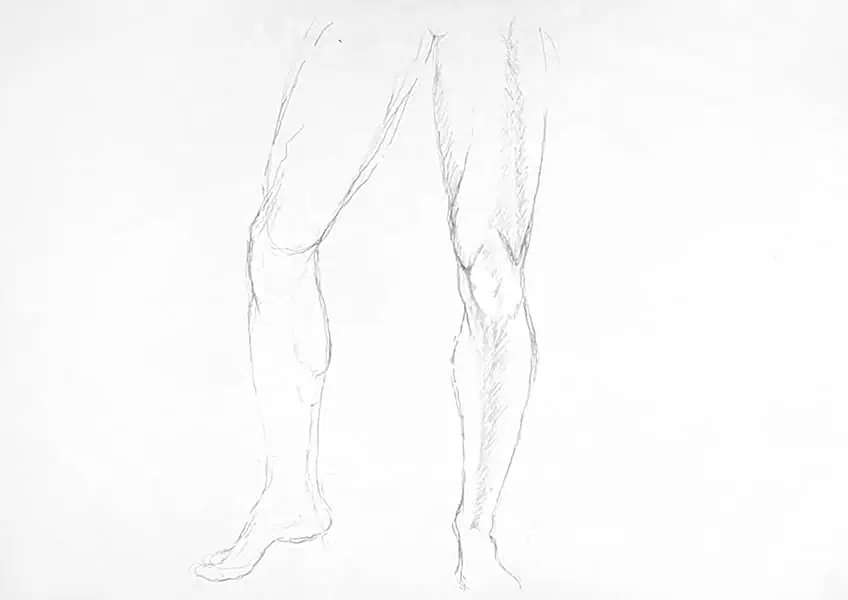
Step 3: Finding the Lines and Adding Light Shades
Here, we examine the shadows’ line motion in the original image. If we examine our reference images, we can notice that the different muscles in the leg cause the leg to exhibit different lines. Draw these lines as you perceive them in as much light as possible. As the most difficult part of the leg, the foot is an excellent place to start.
Make a note of the location of the source of light in the reference image to aid in placing shadows more precisely. Examine how the shadows on the shin are created within the boundaries of the lines that define the size of the leg. When drawing these shadows, attempt to use your linework as a reference to help you decide where to place them as they move along and inside the lines. Progress up the leg until you can clearly see how the shadows on the knees and thighs are produced in the original image. Examine the reference image carefully to see how the leg’s shadows are shown. Do they appear skinny or round? Are they bright or dark?
Take notice of how the shadow of every muscle produces a scattering of lines as you approach the thigh. Spend some time carefully examining your reference images to discover how the shadows link to and outline the muscles. Draw the shades and tendons very softly with a light pencil.
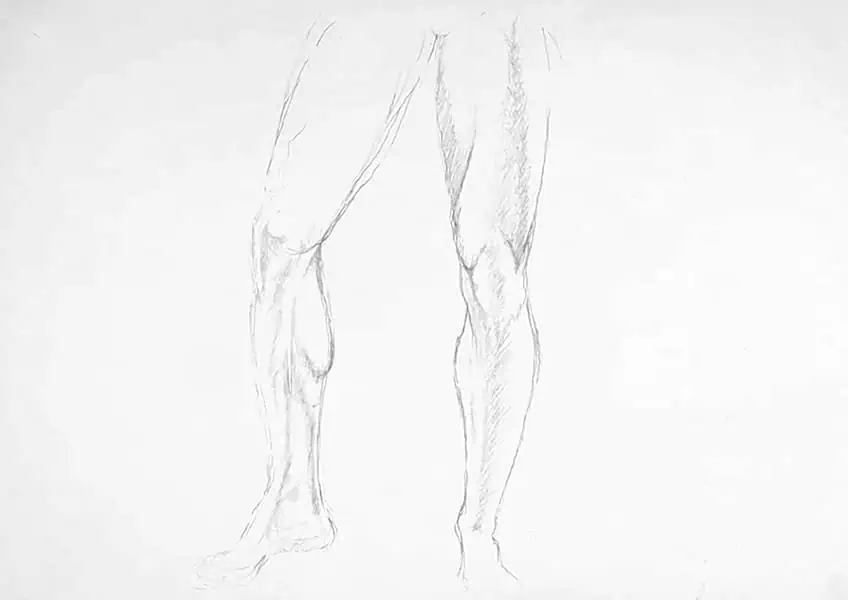
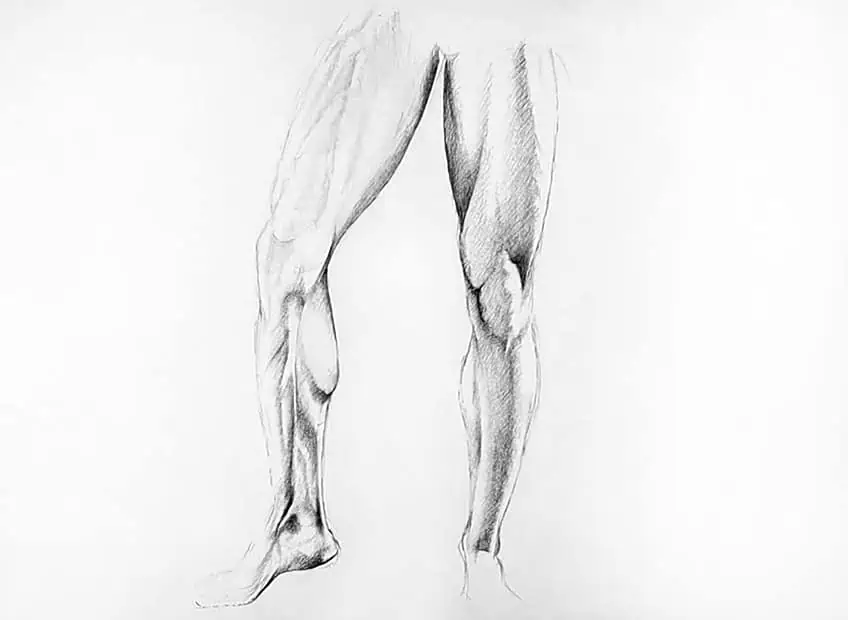
Step 4: Adding Darker Shades
By this point, you should have a leg that closely resembles the reference image we have been using, with lightly drawn muscles visible throughout. Remember that the goal here is to simply direct us toward a more accurate representation of a muscular leg rather than to accurately replicate our reference images when drawing legs. Using our dark pencils, ideally between a 2B and 4B, we may now start covering the lighter markings. Start by sketching the deepest tones of your shadow with a variety of dark pencils. To achieve this, we examine our reference image to determine precisely where the source of light is originating. This will enable us to arrange our shadows and create their gradients more properly.
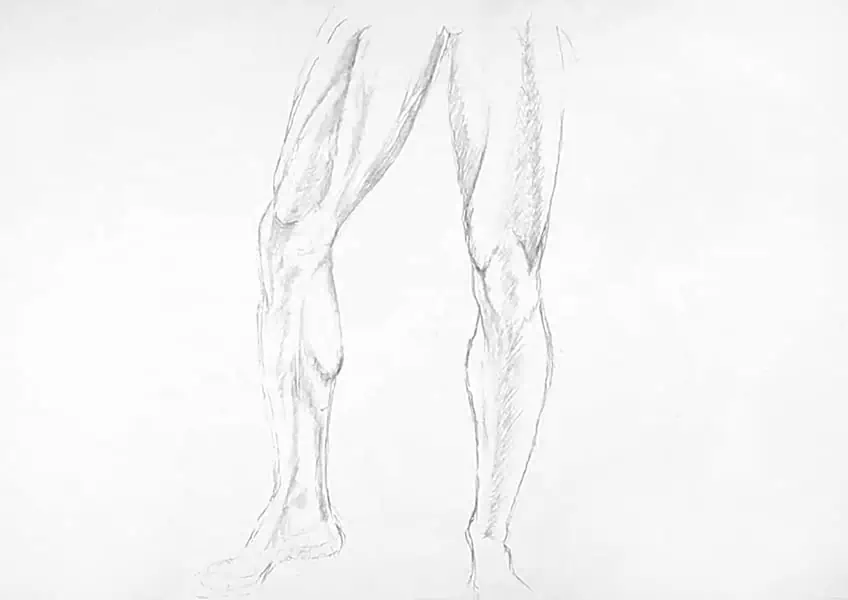
Light causes shadows; thus, areas on the body where light has a harder time penetrating will have darker shadows. Create the shadows in gradients using your darkest pencils; you’ll find that some gradients are smaller than others. Starting at one location on the leg and working your way down it is a wise recommendation. By doing this, you may avoid making careless errors in the size and location of the shadows. It is important to take your time because it is easy to make mistakes at this stage.
Observe how the various muscles in the thigh cast a variety of shadows, some with softer contrasts and others with sharper ones. This is a consequence of both lighting and the manner in which each muscle protrudes. Be sure to take care of the source of light when creating shadows, as some shadow gradients demand darker markings where light would fail to enter the leg. A group of muscles is seen on the thigh close to one another. This describes them as protruding with little dents between them. Try to position the middle of these creases using your darkest tones, so that it appears to be a genuine connection with the source of light. We then want to faintly shade outwards from them.
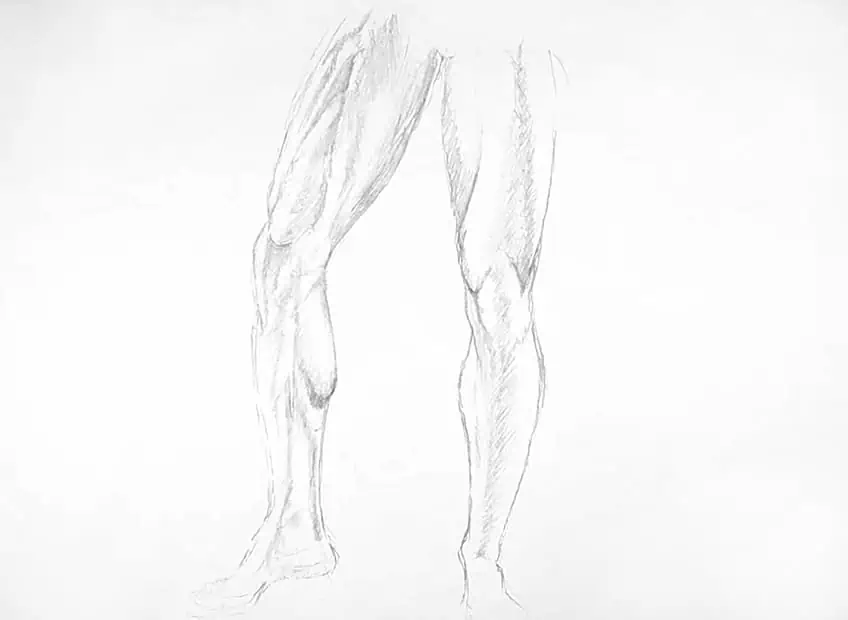
Follow the aforementioned rule for the entire leg to help you navigate your darkest shaded areas. Pay close attention to the shadow formations on the whole leg in the original image. With attention and focus on the reference image, attend to every part of the leg. By specifying the shadows on the leg, the reference image specifies just where you should shade. We shall shade over these locations. Always perform a cross-check between your reference image and legs sketch when you feel as though you have taken care of every part of the leg. Examine the similarities and make any necessary corrections to the differences by lightly erasing and replacing the markings.
Drawing the Male Leg from the Side
With regard to our reference images, we ought to have a rather good representation of our front leg. We will scale the following design using the prior one as a guide through these many processes. We can now proceed to the next action. Drawing legs for a male from the side is similar to drawing it from the front. In essence, it involves arranging the basic forms and then morphing them into a recognizable structure utilizing line work. We will then start the shading process to give the leg life.
Step 5: Creating the Leg Shapes
Finding the common shapes in the leg is what we want to do initially. Draw the general contours of the leg with a lighter pencil, ideally your H pencil. These forms often resemble two elliptical or extended ovals that are identical to those on the front. Yet, the contour of the bottom of the leg is often a little bit thinner than the thigh. As you start sketching next to your earlier picture, use it as a scale reference.

After identifying the forms in the leg of our reference picture and making an effort to draw them, we may then gently erase these shapes if we are happy. Similar to the last sketch, refrain from erasing all of these markings. Leave them as light as possible so they can serve as a pointer for your next move.
Step 6: The Back Legs’ Lines
We’ll start by lightly drawing lines to combine our forms into a single, leg-defining construct. During this phase, continue using a lighter pencil; an H pencil is an excellent recommendation. This will make it simpler for ourselves to fix any errors. Examine the feet in the original image for a moment. We can better comprehend how the leg is placed when we sketch a generalized foot outline.
Take your time throughout this phase because each step calls for endurance and focus. Keep in mind that the longer we spend here, the more useful it will be when we begin shading. In order to more properly characterize the anatomy of the leg, we will highlight the forms when we refer to our reference images in this stage. Consider the next step as an outline. We may attempt a form outline and concurrently use our erasers in case we create any mistakes. Try to create an outlined leg that resembles the one in your reference image, and please try to use your eraser whenever required.
Step 7: Creating Lighter Shades
Here, we examine the shadows’ line motion in the original image. If we examine our reference image, we can notice that the different muscles in the leg cause the muscular leg to exhibit different lines. Draw these lines as you see them in as much light as possible. It’s a good idea to start at the foot and gradually move up the leg, paying close attention to each component as you go. Make a note of the location of the source of light in the reference image to aid in placing shadows more precisely.
Examine how the shadows on the calves are generated within the limitations of the lines that delineate the proportion of the leg. Use your linework to indicate where you create these shadows as they flow over the outlines. Move up the leg, observing how the shadows on the calves are formed and how they shift in the curve of the leg towards the hamstrings. Observe how the creases get sharper and stiffer as the muscle becomes more apparent.
Examine your reference images carefully to observe how the shadows appear on the leg. Are they thick or thin? Is it shorter or longer? As you draw these markers, ask yourselves similar questions to ensure you cover all areas of the leg.
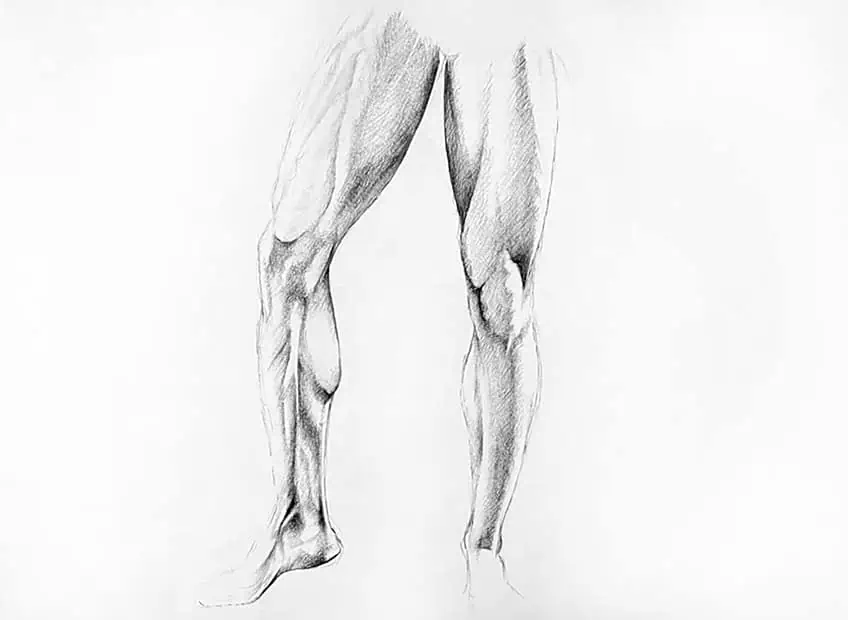
Step 8: Creating Darker Shadows
We may now start going over the light shading with our dark pencils, ideally anywhere from a 2B and a 4B. Notice how the lighter shadows you just created determine where you’ll set your deepest markings.

Keep in mind that shadows have transitions, which means they shift from dark to light. Begin with the feet and work up through the leg. Notice the calves and how the light strikes the leg, casting delicate shadows on the leg’s edges. This is because light has a difficult time shining around the leg. Notice how the shadow tints change somewhat across the various parts of the leg.
Until you are confident that you have given attention to each element, continue making your way through the entire leg. This is why it’s a good idea to start in one spot and progress through until you’ve addressed all of the various sections. Do this until you’re happy with the outcome, but be careful not to over-shade and recognize when to stop.
Useful Tips
- Drawing legs is difficult. We must be diligent and attentive to every detail while sketching any anatomical structure.
- Consider this tutorial to be a layering guide. You should always make generic markers that offer an area for you to color inside.
- Always keep the light source in mind, as this is what causes shadows to be cast on a body part.
- Defining muscle bulges is the most common technique to distinguish between masculine and feminine legs. In this article, we’ll look at how to make these bulges more inconspicuous on the female leg.
Understanding how to draw legs in a way that allows us to compare them to a reference is a useful exercise for proportion and placement. The size disparities between female and male legs might be difficult to depict in a drawing. This is why sketching a sequence of female and male legs in various postures can help us improve our ratio and size skills. Typically, these are the most challenging things to discern when depicting the female and male legs. We hope that you enjoyed this tutorial!
Frequently Asked Questions
Is Mastering How to Draw Legs Hard?
The legs are rather complicated limbs to portray. There are many things to keep in mind, such as ratio, placement, and perspective. The next thing to remember is how the muscles create shadows which help to define the legs’ shapes.
Where Can I Find a Leg Anatomy Drawing Reference?
It is always very useful to have a reference image to refer to. These images can be found anywhere on the internet, from stock photos to medical or anatomy images. For the purposes of this tutorial, we only need a reference of the outside of the leg, although an understanding of how muscles work underneath the surface will also help us understand how to portray legs from the outside.

Matthew Matthysen is a multidisciplinary artist. He completed his fine art degree, majoring in History of Art and Contemporary Drawing Practice at the University of Witwatersrand, South Africa. Before joining acrylgiessen In 2020, Matthew worked part-time as an art teacher at Reddford Blue Hills High school. Matthew creates drawing and painting tutorials for acrylgiessen and captures them not only photographically and in written form. He also records the creation of his works in his own creative studio as in video format, from which later with a voiceover and a video editor also drawing tutorials for the Youtube channel of acrylgiessen are created.
Learn more about Matthew Matthysen and about acrylgiessen.