How to Fix Epoxy Mistakes – Epoxy Problems and How to Fix Them
This post may contain affiliate links. We may earn a small commission from purchases made through them, at no additional cost to you.
Working with Epoxy is not exceedingly difficult, but it doesn’t mean you won’t make any mistakes, even if you are a professional. So, in this article, we will be assisting you on how to fix or repair your epoxy mistakes. Bear in mind that it is easier to repair or fix any mistakes while the epoxy is still wet. When epoxy hardens, it takes a lot more effort to fix the problem. The good news is that by applying a second coat, in most cases, usually fixes even the worst mistakes.
Common Epoxy Mistakes
Not mixing the Epoxy correctly
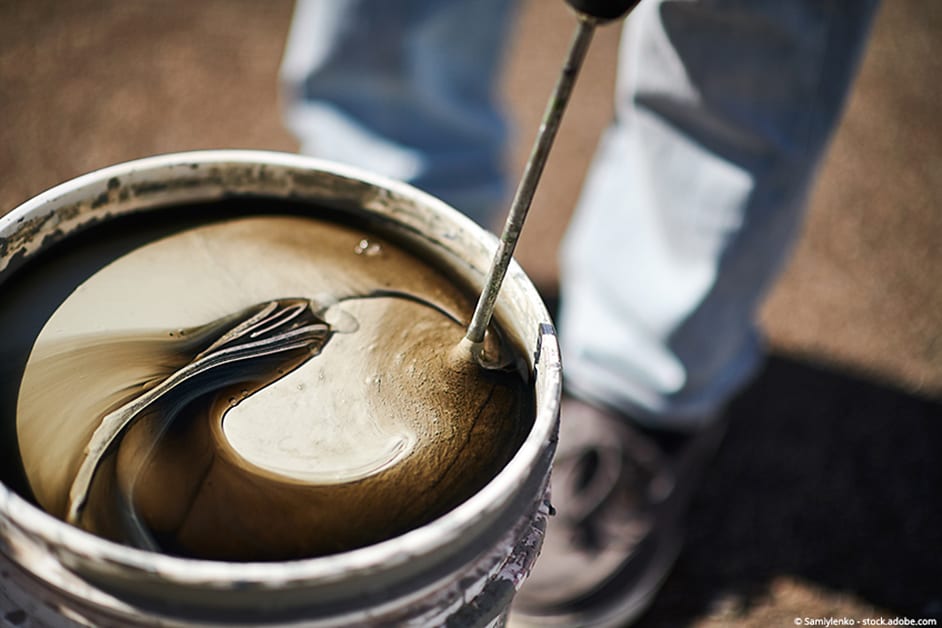
Most Epoxies are sold in two-part component kits and need to be mixed before you use them. The mixing ratio is of vital importance and must be strictly adhered to. Some epoxy mixing instructions specify that you mix it by weight and others by volume. You need to take careful note of these instructions. If you make a mistake in the mixing ratio, you will find that your epoxy will harden too quickly or too slowly, and worst of all not harden at all.
Selecting the wrong Product
This can be confusing, as epoxy products are very versatile. Some are used as a bonding agent, others as molding, casting compounds, structural fillers, or for electronics and much more. Make sure you select the correct product that is suitable for your project. For choosing the right product, check out our article about the best Epoxy Resin for your project.
Have not considered the Weather
When you are working with epoxy, temperature always plays an important role. Almost all of the epoxies comply with a temperature range that governs how it cures properly. If you work outside of these temperature ranges, your epoxy can fail by curing too soon, too late, or not at all.
The Storage is not proper
When not using your epoxy, it should be stored at a temperature between 60° F and 70° F (16° C and 21° C). When the temperature fluctuates too much, it causes the epoxy to crystallize or solidify.
Surface Preparation was inadequate
Before applying your epoxy, it is of utmost importance you prepare your surface properly. Your surface needs to be clean, free from oil and dry. Failing to do this can lead to your epoxy not bonding or adhering to the surface.
How to fix an uneven Epoxy Resin Finish
Nearly all the epoxy resins you can purchase are self-levelling. However, if you find your epoxy resin is not levelling out properly, it could mean you are using too little resin. This is how you fix your uneven epoxy resin mistake. Also, ensure that your work surface is level. If you do encounter an uneven finish with your epoxy resin, how can go about fixing it?
A good rule to follow is to mix a little bit more epoxy than you need, ensuring you cover your surface completely. So, if your epoxy has already cured properly, you will need to sand down the surface and apply a second coat. This allows your next layer to bond properly. If the epoxy has not fully cured, say after 12 hours or less, all you need to do is pour a second coat directly over it. Allow this to fully cure, which will provide you with a uniform surface finish.
Trying to prevent those uneven Epoxy Finishes
The first thing you need to be sure of is, have prepared your surface correctly? There should be no dirt or dust and it must be perfectly clean. Next, be sure that the resin, as well as the hardener you are going to use, is fresh. If you fail to mix or apply the epoxy correctly, it may result in an uneven finish. Therefore, read and follow the mixing instructions properly to avoid or prevent an uneven finish.
Repairing your Epoxy Resin Countertop
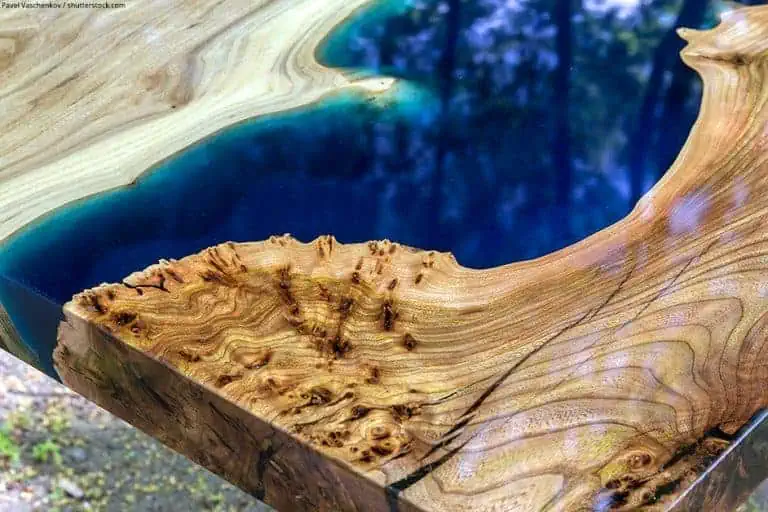
After a time, you will begin to notice that your countertops are peeling or there are scratches on the surface. This is an indication your countertops are due for a repair or touch up job. This type of repair is quite easy and can be treated as a DIY job, which will save you a great deal of money. Also, by repairing it yourself, will give you great satisfaction. This also belongs to Epoxy Tables.

How to fix your Epoxy Resin Countertop
- To start, you need to repair any deep scratches, peeling or indentations on the surface area. To do this you need to cover all imperfections with approved surface abrasions. Old English is a particularly good product that you may consider. Remember, make sure to follow the instructions properly to ensure you get that clear glass finish.
- Now, you need to sand over all your imperfections including scratches by using a wet/dry, 650 grit sandpaper. Make sure to sand parallel to all these imperfections. After you are satisfied that your countertop surface is ready, it needs to be cleaned properly. To do this you will need to use a 50/50 cleaning solution consisting of 50% commercial cleaner and 50% water. Make sure you wipe the area clean removing all cleaning solution as well as any dirt or grit.
- The next step is to buff the surface of your countertop and apply a thin layer of epoxy, which should seal the surface and restore that clear glass shine and finish. You now need to wait for at least 24 hours for the epoxy to cure, then check to see if is dry and not sticky. Lastly, take a clean towel with some alcohol and remove any chips that have formed along the edges of your countertop.
How to get rid of Ripples and Waves from your Epoxy Surface Finish
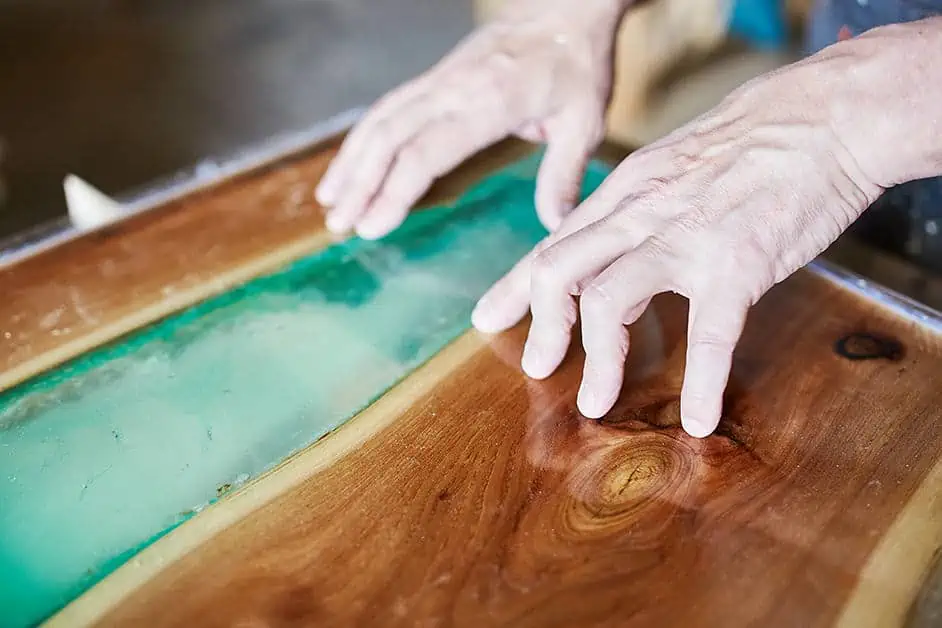
When you are working with a wood surface, you may discover certain imperfections such as ripples, waves, or bubbles. You will find that applying only one coat of epoxy will not be enough, you will need to apply more than one coat to fix the problem. First, apply a thin coat, this is referred to as a flood or seal coat. This should be applied over the entire surface at a thickness of 1/8” or (3 mm). Remember, you will be applying your epoxy resin in 2 stages. First, the seal coat, which is a small and thin amount, to help avoid any air bubbles. Next, apply the float coats, this is the same product as your seal coat. This must be adhered to in all the subsequent layers until you reach your levelling goal.
Remember, the temperature is always important, so be careful to avoid too much heat when you remove the ripples or bubbles. As within any other epoxy work, be sure to take any precautions needed such as working in a well-ventilated area and protecting your skin and eyes.

Epoxy Mixture failed to cure after recommended Curing Time had elapsed
The first question that comes to mind is, how long does it take for the epoxy resin to cure? The curing time of resin varies, but don’t stress, as all the information you need is included with the resin kit. However, most epoxies will dry to the touch within 24 hours, and fully cure within 48 to72 hours. There is a quick-drying resin on the market that cures within 2 hours, but it is not recommended for beginners.
Reason 1 – Mixing Ratio
The main reason your epoxy did not cure in the desired time, is that the mix ratio was not followed correctly. This means that there was too much, or too little hardener added, which will affect the curing time.
How can you fix this Problem?
- The only sure way to obtain a great finish is to remove the epoxy completely. Do not try to cover it over with an additional layer, then begin the process over again.
- Mix the epoxy and hardener thoroughly at the correct ratio and only add fillers or additives afterwards.
Reason 2 – Temperature
Another aspect affecting the epoxy curing time is temperature. If you are working in an area that has a low temperature, it will result in a slower curing time.
How can you fix this Problem?
- You will need to give your epoxy extra time to cure, more than the instructions on your kit.
- You can also apply heat, which assists the chemical reaction and so speeds up the curing process.
- There is a product on the market called 205 Fast Curing Hardener. This product is specially designed to help the epoxy cure at lower temperatures.
Reason 3 – Incorrect Products
One last reason your epoxy is not curing correctly is that you may have used the incorrect products.
What you can do to fix it?
- The only sure way to obtain a great finish is to remove the epoxy completely and not try to cover it over with an additional layer. Then start this process over again.
- When purchasing your epoxy, you need to take care and check the compatibility of the resin and the hardener. Many resins will not cure properly if mixed with other brands or with polyester catalysts.
Epoxy failed to bond
There can be several reasons why this happens. Here we will explain and try to give you the solution to fix it. The first reason would be that the epoxy failed to cure properly. Refer to the section above, which should provide you with all you need to know in this regard.
Another reason, it could be the result of a contaminated surface area. Ensure your surface area is thoroughly cleaned and prepared before you apply your epoxy mixture.
Glaze Coat Epoxy Problems
Your epoxy coat could become cloudy. This is referred to as a Glazed Coat Epoxy Problem.
Reason 1 – Humid Conditions and Moisture
This could be the result of humid conditions or moisture from condensation, which reacted with the components of your mixture before the epoxy could cure.
How to fix it?
- Try by applying heat to the epoxy coating in an attempt to remove any moisture and allow the epoxy to cure fully.
Reason 2 – Trapped Air in your Epoxy
The problem could be the result of air trapped in your epoxy.
How can I fix it?
- Try applying the epoxy when the temperature is warmer, as epoxy tends to be thinner in warmer temperatures.
- Another method, try and apply your epoxy in thinner coats.
- Apply heat to the epoxy coating in an attempt to release any trapped air, and allow the epoxy to cure fully.
Sticky or tacky Epoxy
Your glazed coat epoxy problem could also leave your epoxy sticky or tacky after leaving it to cure for a few days.
How to fix it?
- The only sure way to solve this problem is to remove the epoxy completely and do not cover it over with an additional layer. Try to remove as much as possible.
- When most of the resin has been removed, you can apply a fresh layer of resin.
- After the first coat, allow to cure thoroughly, then give the surface a very light sanding and wipe the surface area clean.
- Now, you are ready to apply the second coat.
- If you have followed the procedure correctly, your epoxy should cure without having a sticky or tacky feel to it.

In 2005, Charlene completed her wellness degrees in therapeutic aromatherapy and reflexology at the International School of Reflexology and Meridian Therapy. She worked for a company offering corporate wellness programs for several years before opening her own therapy practice. In 2015, she was asked by a digital marketer friend to join her company as a content creator, and it was here that she discovered her enthusiasm for writing. Since entering the world of content creation, she has gained a lot of experience over the years writing about various topics such as beauty, health, wellness, travel, crafting, and much more. Due to various circumstances, she had to give up her therapy practice and now works as a freelance writer. Since she is a very creative person and as a balance to writing likes to be active in various areas of art and crafts, the activity at acrylgiessen.com is perfect for her to contribute their knowledge and experience in various creative topics.
Learn more about Charlene Lewis and about us.