Is Crocheting Hard to Learn? – Learn the Basics on How to Crochet
This post may contain affiliate links. We may earn a small commission from purchases made through them, at no additional cost to you.
Crocheting has been around for many years and began as a type of chain-stitch embroidery, but instead of a needle, a single hook was used. This thread of interlinked chains was and is still used to make anything from sweaters and blankets to scarves and much more. This might sound simple enough, but is crocheting hard to learn? To decide for yourself, read further to find out all about this amazing craft!
Table of Contents
- 1 The Basics of Crocheting
- 2 What Tools Are Needed for Crocheting?
- 3 Holding the Yarn and Hook
- 4 Basic Crochet Stitches
- 5 Common Crocheting Techniques
- 6 Common Mistakes Beginners Make
- 7 Understanding Crochet Patterns
- 8 Tips and Tricks to Make Crocheting Easier
- 9 Common Crochet Project Ideas for Beginners
- 10 Frequently Asked Questions
The Basics of Crocheting
Is crocheting hard to learn? When you first start crocheting, it can feel awkward, and progress can seem slow. Getting the hang of each stitch can take time and you may get discouraged before you even get halfway through the project you are busy on. All the stitches, abbreviations, and patterns will seem foreign to begin with. However, as you practice and learn, it will get easier and become more effortless as you find your rhythm. You should also begin with patterns that are simple and easy to understand, do not try and jump into something more complicated, as your efforts might land in the cupboard, never to be completed.
We understand you want to make and have that nice crocheted top you saw, but getting to that level does not happen overnight.
Why is crocheting so hard? Some might have more of an affinity for crocheting than others, as they could already have experience with knitting or embroidery. Others might find it hard to do because of all the techniques and stitches, and everything is new. However, if you are finding it difficult, you should not just give up. It just means you should spend more on practicing it so that it can become more natural for you. It is always best to form a foundation and develop your skills, and then you can move on to more challenging patterns.

Is crochet or knitting easier? Both have a learning curve and might seem challenging, to begin with. However, crocheting only uses a single hook and might be easier to work with than knitting. The tools required are minimal and the techniques are relatively easy to learn, making crocheting a little more accessible. Even though there might be challenges, anybody can learn how to crochet.
Let us first look at what tools you will need to crochet and how you should be holding your crochet hook and thread before we move on to the basic stitches.
What Tools Are Needed for Crocheting?
There are not many tools needed to crochet, it is very simple, all you need is a crochet hook and some yarn. You should be able to get these items from a craft store or you can purchase everything online. There are also crochet kits available that provide all you will need for a project. Other items you might need include some scissors, which are simply used to cut the yarn when needed. Another optional item is stitch markers, which help you to count your stitches.
Crochet Yarn
When looking for yarn to crochet with, you should know that it comes in different weights. You can get a super-fine baby weight and others that are bulky-weight wool. The type of yarn will depend on the pattern and project. However, if you are a beginner, you can try starting with medium-weight yarn, also known as a number four. You can get this in cotton yarn, wool, or acrylic. Consider acrylic as it is smoother and lower-priced when compared to the others. Choosing a yarn with a smoother texture will help you to observe your stitches more easily.
You should also try to choose a lighter-colored yarn, as darker colors or multicolored yarn can be difficult to work with
Crochet Hook
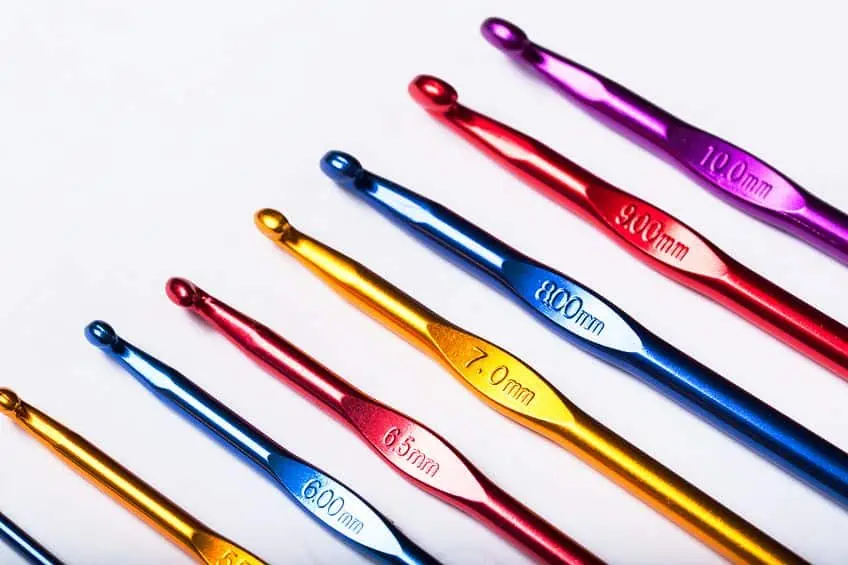
There are a variety of sizes and shapes available when looking for crochet hooks. Many of the hooks are also made from different materials. Often, you can purchase a kit that contains all the sizes you might need. When you are deciding on the size of the hook, you should match it with the weight of the yarn. Simply put, you use a bigger crochet hook for yarn that is thicker, while a smaller crochet hook will handle thinner yarn better. As a beginner, we recommend you start with a medium size hook, which is a measurement of 4.25 mm (G6), or a 5.00 mm (H8) crochet hook. The hook size is recognized as an “H” size as well as a US size 8. You can also check the yarn label, which should tell you what hook size is appropriate.
Holding the Yarn and Hook
This is where it feels a bit awkward if it is your first-time crocheting. You might feel all fingers and thumbs, but with practice, this will get better and begin to feel more natural. This is your first step when starting to crochet. The most recommended way is to hold the crochet hook in your dominant hand and hold the yarn in your other non-dominant hand.
The Best Way to Hold Yarn
You can begin by looping the yarn through your fingers, taking it over the little finger or “pinkie” finger, underneath the next two fingers, and then over the index finger, which should create enough tension on the yarn. For more control, you can also loop the yarn once around the little finger before taking it under the next two fingers and over the index finger.
You might feel a little clumsy to start with, but just keep on practicing and over time you will find a comfortable position to hold and keep the tension on the yarn.
The Best Way to Hold a Crochet Hook
There are two methods that most people use. One is to hold it like you would a pencil, which will be between your index finger and your thumb. Your third finger can be used to provide more control. The second way is like you would hold a knife, which means you would place your hand, palm down over the hook, with the hook now being between your index finger and thumb. The other three fingers will then be holding the crochet hook body to provide more control. You can choose the way that is comfortable for you. In the discussion below, we will be describing steps for somebody that is right-hand dominant.

Basic Crochet Stitches
You might have seen a list of many different stitches, however, there are a few basic stitches you can use. There are three or four basic stitches, which can be used in different orders and combinations to form all the other stitches. So, it is not as complicated as it may seem to be. Before we get into these stitches, you need to first learn how to form a slip knot. Then you can move on to the foundation chain stitch. You can then learn the following stitches.

- Single crochet stitch
- Double crochet stitch
- Treble crochet stitch
Following these basic stitches, you will also discover how you can increase and decrease, which then creates all the other stitches. There are many things you can do by simply playing around with all these basic techniques.
How to Create a Slip Knot
This step is how you are going to attach the yarn to the crochet hook. Pull some yarn loose and begin the knot at about six inches from the end of the yarn, leaving a small tail that can be woven in later. Move the ball end of the yarn clockwise and lay it over the top of the tail end. Take the crochet hook and place it in the middle of the loop and maneuver the hook so it grabs the ball end, pulling this through the center.
Tighten both ends around the crochet hook.
How to Yarn Over
One of the main crochet techniques you will be using that helps create all the basic stitches is known as ‘yarn over” (YO). You have your yarn ready on the crochet hook and you are holding both properly in front of you. Take and loop the yarn clockwise, which will be from the back to the front. You can either use the left hand to move the yarn, or the right hand to bring the hook under the yarn.
How to Start a Chain Stitch
Forming the chain stitch will create the foundation for your crochet project. Hold your crochet hook and yarn as described, the slip knot will be ready on the crochet hook. So, you will have the tail of the yarn hanging loose, while the working yarn will be in your hand. Begin by following the yarn-over technique and twist the crochet hook slightly so that the looped end catches the yarn.
Use the hook to draw the thread through the first loop of the slip knot.
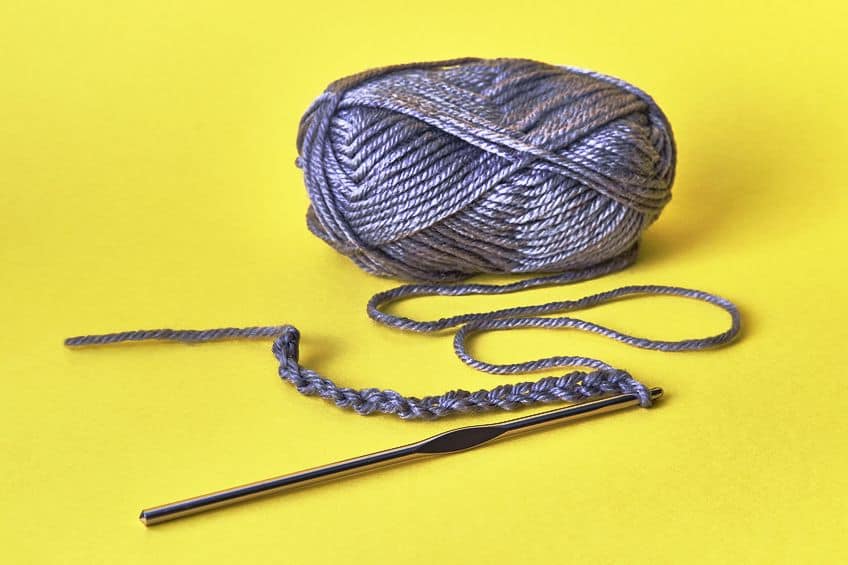
Follow the same process over and over again to create a row of chain stitches or as many as the pattern indicates. Keeping the yarn tension right and maintaining control can seem difficult at first, but with practice, it will become consistent. When you count the number of stitches needed, do not include the first loop on the hook. Practice this until you can get it right.
How to Single Crochet
This is also one of the easier stitches and is an ideal method for any first crochet project. Begin a chain stitch and make as many as the pattern indicates. Once this is done, you can insert the crochet hook into the second chain and not the first from the hook. Follow up with the yarn-over technique and pull the yarn through to create a loop, which will give you two loops on the hook. Follow up once more with the yarn-over technique and draw the yarn through both loops. This will leave a single loop on the crochet hook. Repeat this with the remaining chain stitches. When you get to the end of the row, you will need to turn what you have done over.
Create one or more chain stitches, which is the turning chain, and then you can start with the next row.
How to Double Crochet
This is another easy and versatile crochet stitch and is abbreviated as DC, however, when looking at a British pattern, it works a bit differently. It is known as a treble crochet stitch and the abbreviation is TR. Just remember to take note of this if you decide to try out a pattern that has United Kingdom (UK) terms. The basic method for creating a double crochet stitch is as follows. This means the basic chain stitch foundation has already been created.
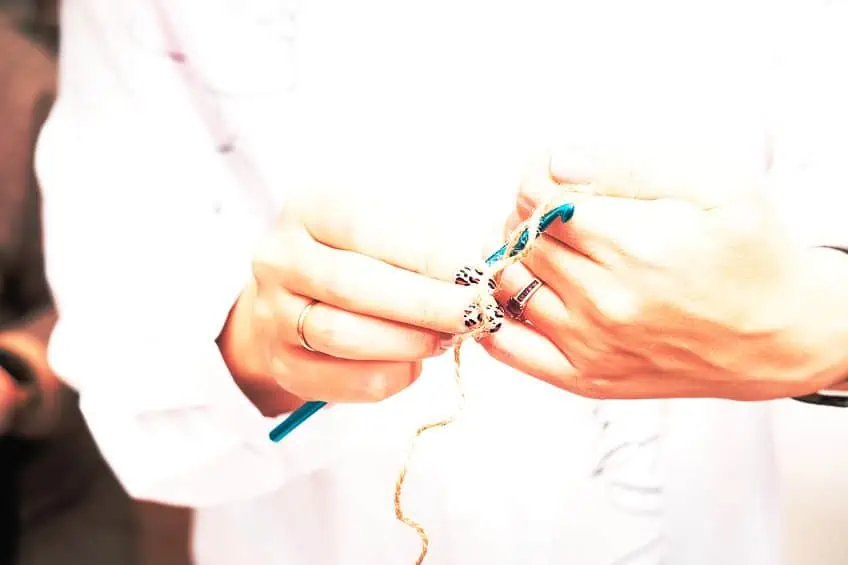
- Begin with the yarn-over technique
- Place the crochet hook into the following stitch
- Yarn over again and draw up a loop
- Yarn over
- Pull through both loops
How to Fasten Off
Once you are done with the last row, you will need to fasten off to prevent the yarn from unraveling. Simply cut the yarn, but make sure to leave about six inches. You can remove the crochet hook and pull the yarn you have just cut so it tightens. You can then use a yarn needle to weave in the yarn tails on each end to secure them.
Common Crocheting Techniques
We have discussed a few of the crochet stitches, but there are many others you can also learn, from the half-double stitch, slip stitch, and crochet ribbing to a treble crochet stitch and the hardest crochet stitch known as the Jasmine stitch. There are also other techniques you will need to learn, and you can learn some of them below.

Increasing and Decreasing Stitches
This technique must be used if you want to create something that is not a flat rectangle. Increasing simply adds more stitches while decreasing takes away stitches. When increasing, you create two or more stitches within the same stitch. When decreasing, it is governed by the type of stitch. However, in general, decreasing stitches will make the row you are working on shorter than the previous one. In a pattern, you will identify this technique by the letters “dec”, or it can say “crochet together”.
Working in the Round
This is simply a crochet round or circle of stitches. This could mean encircling one another, creating a bigger and bigger circle, or the rounds are the same size and circumference and stack up on top and do not encircle. This is where you can make something that requires sides like a hat or a basket.
Another way to explain is that there are two ways this technique can be done, one is to close the round using a slip stitch, while the other is to work continuously.
Creating Different Textures
In many cases, you will need to do a bit of sewing as well as crocheting. So, some sewing techniques can come in handy. For example, you might need to stitch some seams to create a joined crochet piece using a whip stitch. There are quite a few techniques but have a look at some of them below.

- Tunisian crochet: This is a similar knitting technique used for crocheting.
- Tapestry crocheting: The technique is used to create some colorful and patterned items.
- Bead crocheting: You can learn how to create crochet beads and learn how to crochet with beads.
- Wire crocheting: Making use of similar crochet stitches, you can crochet with wire, which can be quite challenging.
- Fabric crocheting: This uses long strips of fabric, which are then used to crochet with.
Common Mistakes Beginners Make
When starting anything, there will be mistakes made. It is a little disheartening to look at your crochet piece that does not quite look like it should. However, this is how we learn, even if we have to unravel everything and start over. This is most probably what you will be doing, as fixing mistakes like dropped stitches can be difficult to reverse if you are a beginner. So, what are the top five mistakes beginners make when crocheting?
Not Reading the Pattern Thoroughly
Do not be impatient when learning how to crochet. You must read through the patterns properly before you begin. Do not simply glance at them, and then later realize you missed something. Make sure you read and follow all the instructions and be prepared for what the pattern tells you to do.
Tightening the Yarn Too Much
Do you find that the yarn seems to get tighter and tighter as you work? The stitches become so tight; it becomes impossible to move forward. This might happen in the beginning, however, once you have gained some experience and learned how to properly hold your tools, you will begin to create just the right amount of tension as you work. The stitches will relax, and the process will become easier. Remember to hold the yarn loosely as you wrap it around the hook.

Not Understanding the Terminology
There are differences in abbreviations and terminology in various countries. This is why it is important to take the time to read the pattern properly. Most patterns will tell you whether it is UK or US terms being used. In most cases, the alternative name will also be in brackets, but not always.
Not Counting Correctly
Most crochet patterns will require some stitches in a row and will also tell you how many rows are needed. Sometimes, this can be easy to observe and keep track of if you look closely. Keeping track is important if you do not want to have to start over when you think you are done. You can easily use a pen and paper to keep track of stitches and rows, or you can use a stitch marker at regular intervals to help you keep track of things.
There are also digital stitch counters available.
Gaining or Losing Stitches
This is a regular mistake that can happen to anybody. The problem often comes up when making a turning chain, or it could be that you gain a stitch by accidentally splitting the yarn and working in a stitch twice. Hopefully, you notice the mistake soon, and you simply have to unravel the row. Make sure to check your rows as you work so they remain even.
Understanding Crochet Patterns
Is crocheting hard to learn? Reading patterns is one of the hardest parts of crocheting. It may seem like a foreign language at first and understanding it will take a little time. Once you have deciphered all the terms, symbols, and abbreviations, patterns will become easier to read. Just remember that the American and British patterns can differ, so make sure to check this before you begin crocheting. You will also need to know what requirements are needed to begin with, for example, the yarn type or crochet hook size. Here you will find the most common of the abbreviations to look out for when crocheting.
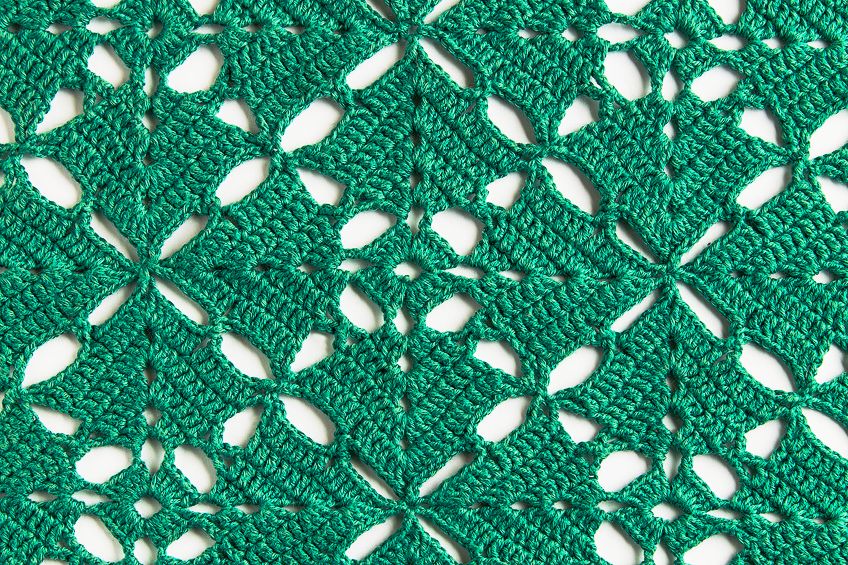
- Ch: chain
- Sc: single crochet (only found in US patterns)
- Sl st: slip stitch
- Hdc: Half double crochet
- Dc: Double crochet
- Tr: Treble crochet
Most patterns will have abbreviations and names, so you do not have to worry about having to memorize all of them. Besides the abbreviations, there are also other terms to look out for. For example, you have the increase (Inc) and decrease (dec) terms, or join, turn, and repeat (rep). There are also other symbols you should know about, for example, asterisks that are used to indicate that you should repeat a step. There are also brackets, which help to provide clarity on a set of instructions you need to complete a few times.
Tips and Tricks to Make Crocheting Easier
You might be thinking why is crocheting so hard after pulling out your work for the fifth time? Do not worry, practice and perseverance do pay off. However, a few tips and tricks can help make things a little easier. See below for some simple crochet tips.
- Crochet over the ends. Instead of weaving the ends in after you are finished. Simply hold the end of the yarn over the crochet row you are busy with and stitch it in as you go.
- Try using different tools. For example, you might need a hook that has a deeper bowl or one that has a pointier head to help you insert the hook more easily.
- Try to notice mistakes early so you can quickly unravel back to that point and fix them. If it is a mistake that is barely noticeable, you may decide to simply carry on.
- Consider using different yarns. A smooth, medium-weight, or worsted type yarn that does not split is great for beginners. However, everyone has a favorite so feel free to experiment.
- Understand gauge. This informs you about the number of stitches and rows that will fit into a certain measurement. It will make sure your work comes out exactly like the pattern or picture you are working from.
- Always try to keep the stitches loose and relaxed. You will be able to insert the hook easily and the whole process will be much easier.
- Tying yarn ends together when starting a new skein or ball can be as simple as a normal knot. However, other methods are more reliable. Find out about other types of knots like the magic knot to make the changeover more seamless.
Common Crochet Project Ideas for Beginners
There are countless crochet projects you can try. Some are more suited to beginners and are easier to complete, while others require a bit more skill. Try these ideas that any beginner can do. Some of them are easier than others, so we recommend you start with the granny squares.

- Beanies
- Scarves
- Dishcloths
- Headbands
- Socks
- Granny squares for blankets
- Face scrubs
- Toys
- Fingerless gloves
- Amigurumi (mini-stuffed creatures)
Finding Resources and Support for Crocheting
Many people find it easy enough to learn how to crochet by themselves. There are many books on crocheting that you can get from the library. However, today you also have access to the internet, which opens up a whole other avenue. There are many videos on YouTube and online workshops you can attend. Many of these are free and can be done in your own time. You also have access to many online communities as well as forums, where you can learn and ask questions. In many cases, if you have a local craft or yarn store, the chances are good that they will provide classes you can attend.
This makes it a nice social endeavor as well, and you can ask questions and work out problems a lot easier.

Crochet is a great way to reduce stress, which also helps with a lot of other health issues. For example, depression, anxiety, and high blood pressure. Going to actual classes can also help increase confidence and the groups can be a way to form new friendships. Crocheting can also be seen as an art form and is an ideal way to express yourself. Another benefit of crocheting is that you can make gifts for family and friends, or even start a small business selling crochet items.
Crocheting can be challenging to start with, however, once you begin, it can become a fun and relaxing way to spend your time. Crocheting is also useful as you can make unique gifts or simply crochet yourself a new scarf for winter. It is no surprise why crocheting is loved by many, and there is no better time than the present to start learning!
Frequently Asked Questions
Is Crocheting Hard to Learn?
Crocheting is not really hard to learn, but you do need to practice, understand how to do quite a few stitches, and learn the abbreviations and crochet terms. Common stitches are fairly easy to learn, but as you become more proficient, you will also learn some of the hardest crochet stitches.
Is Crochet or Knitting Easier?
Both require practice and a few tools to get started. However, some would say crocheting is easier, as you only need a single crochet hook and some yarn. Also, there are only a few basic stitches you must learn to get started. Again, others might find that knitting is easier, so it ultimately depends on personal preference.
Does It Take Long to Learn How to Crochet?
If you have a crochet hook and some yarn, you can get started straight away! You can easily pick up the basic stitches in a day. However, you will need to practice, and learning to understand a pattern can take much longer.
In 2005, Charlene completed her wellness degrees in therapeutic aromatherapy and reflexology at the International School of Reflexology and Meridian Therapy. She worked for a company offering corporate wellness programs for several years before opening her own therapy practice. In 2015, she was asked by a digital marketer friend to join her company as a content creator, and it was here that she discovered her enthusiasm for writing. Since entering the world of content creation, she has gained a lot of experience over the years writing about various topics such as beauty, health, wellness, travel, crafting, and much more. Due to various circumstances, she had to give up her therapy practice and now works as a freelance writer. Since she is a very creative person and as a balance to writing likes to be active in various areas of art and crafts, the activity at acrylgiessen.com is perfect for her to contribute their knowledge and experience in various creative topics.
Learn more about Charlene Lewis and about us.


