Alcohol Ink Art – How to use Alcohol Inks for your Art
This post may contain affiliate links. We may earn a small commission from purchases made through them, at no additional cost to you.
With this Alcohol Ink Art tutorial I want to familiarize you with the basics of the Alcohol Ink technique. I will show you how to create your first pictures with Alcohol Ink and what you should pay attention to. I also explain the most important terms, show you which supplies you need for the alcohol ink technique and where alcohol inks are available. All the basics for a successful start in working with Alcohol Inks can be found in the following article.
What is Alcohol Ink?
Alcohol Ink is a fluid painting technique and also the name for pigmented alcohol-based inks. This term refers to various techniques that have to do with working with paint in a liquid medium.
You will probably already be familiar with acrylic casting; if you would like to work with a new medium, until you are just right with Alcohol Inks. The highly pigmented alcohol-based inks can be gradually integrated into the work, in contrast to the acrylic paints that are usually applied at the same time.
The alcohol also evaporates much faster, which means that the paints dry within a few minutes. Unlike acrylic paints, however, alcohol inks can be “revived”. This means that when dried ink comes into contact with fresh ink or pure alcohol, it reacts and can be further processed. In this way, different techniques are possible.
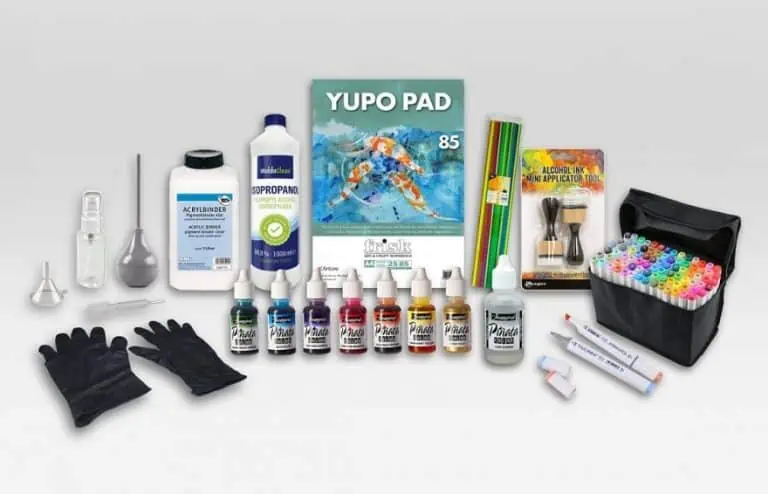
Which Supplies do I need for Alcohol Ink Art?
Working with alcohol inks is really easy because you don’t need many supplies to start with. You only need high-quality alcohol inks, a Yupo paper or other non-porous surfaces, and a blending solution.
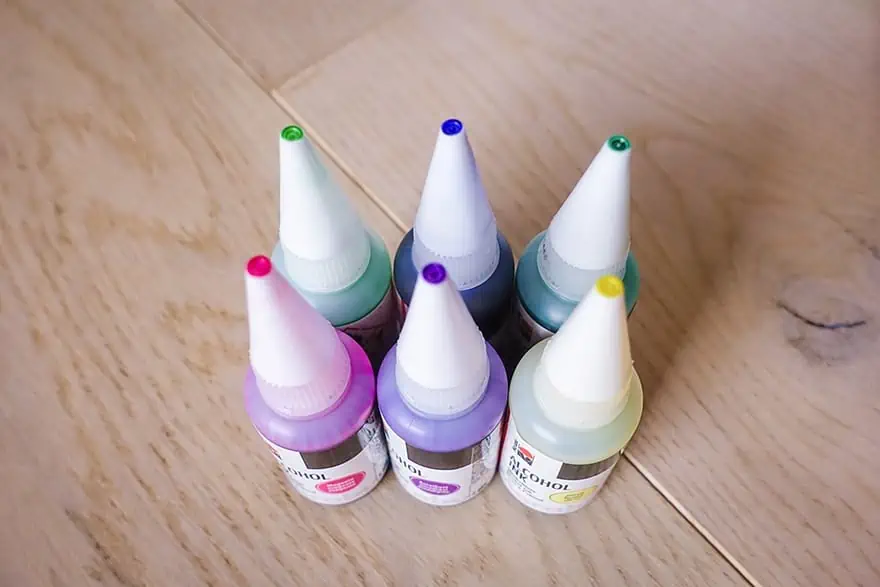
Which Are the Best Alcohol Inks?
The Let’s Resin Alcohol Inks are most commonly used. They are available in 24 colors and additional metallic tones. Other inks are Tim Holtz (you get very cheap sets for the first time) or refill bottles for Copic Markers. These inks are all based on alcohol. Sharpie markers are also suitable for painting more precisely defined shapes. If you want the biggest selection, it’s best to order the inks online.

- Offers 26 vibrant colors, providing a wide range of options to create dynamic and colorful resin art
- Highly concentrated alcohol-based formula
- Versatile application
Blending Solution
In order to have even more technical possibilities (and also to be able to use the ink sparingly), you should also use the so-called blending solution in addition to the ink. This solution consists of a mixture of isopropyl alcohol and glycerine to lighten and mix the colors. Alternatively, you can get pure isopropyl alcohol with 99.9% alcohol content on amazon at a very reasonable price. Buying isopropyl alcohol in large quantities is quite worthwhile – you can use the alcohol with the inks like you would use water when painting with watercolor – isopropyl forms the basis for working with ink next to the substrate. It is important that you use isopropyl over 90%, because too much water or oil can have a negative effect on the pictures.
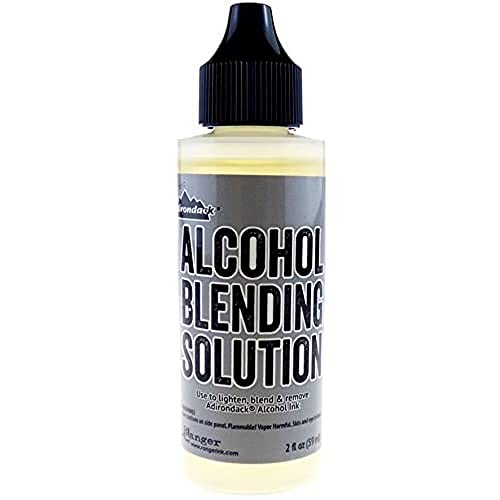
- Lighten, blend, and even remove Alcohol Ink Colors
- Special formulation for Alcohol Inks
- Bottle features a detail applicator tip

- Isopropyl alcohol, 99% pure in 16 ounce volume
- Use to create cells in Epoxy Resin Artworks
- Also suitable to clean your tools
Yupo Paper and other Painting Subtrates
Unlike acrylic, oil or water-based paints, alcohol ink is not used to paint on normal paper because it is too porous and the paint would sink directly into the sheet like a fountain pen. In order to be able to swivel, blow and mix the colors in alcohol, this must happen on as smooth a surface as possible. Glass, metal, ceramic tiles or Yupo paper are suitable for this.
But what is Yupo paper? Yupo is a synthetic paper made of polypropylene and is tear and water-resistant.
Any paint will hold fast to its vibrant colors and clear edges. Experimenting on paper is a great way to learn how alcohol inks react. Use droppers or sponges to test out how the ink reabsorbs and play with textures and other techniques. Try an effect with wet Yupo paper and spray alcohol.
Easily use mixed media to create even more detailed art pieces. For instance, use alcohol ink to make beautiful backgrounds onto which you can add other effects. This is great for things like making cards or stamping. Also, you can draw more detailed images onto the created background. Remember, the paper is synthetic and will not absorb the inks.
It gets creased relatively easily and should be touched as little as possible with the fingers (rubber gloves recommended) because of the repulsive effect of oil. Frisk produces sheets with 85 g/m2 and 110 g/m2, whereby 85 g/m2 is usually sufficient for the beginning.
Alcohol Ink Supplies
- Jacquard Alcohol Ink Set 24 colors
- Tim Holtz Ranger Alcohol Ink Set Beach Deco Set
- Sharpie Permanent marker
- Ranger Adirondack Blending Solution
- Jacquard Pinata Alcohol Ink Extender
- Isopropyl Alcohol 91%
- Ranger Adirondack Blending Solution
- Yupo paper for alcohol ink, 5 x 7 inch
- Yupo paper for alcohol ink, 11 x 14 inch
- Tim Holtz Ranger Alcohol Ink mini blending tool
- Nitrile Gloves
- Varnish for Alcohol Ink paintings
How to Use Alcohol Ink – Our Easy Painting Tutorial
So if you have the ink, alcohol or blending solution, and a painting surface, you can start experimenting. But how to use alcohol ink? If you buy DIN A4 sheets, it may be worthwhile to halve them first. If you are not satisfied with the result, you can also use the back; this leaves enough room for experiments.
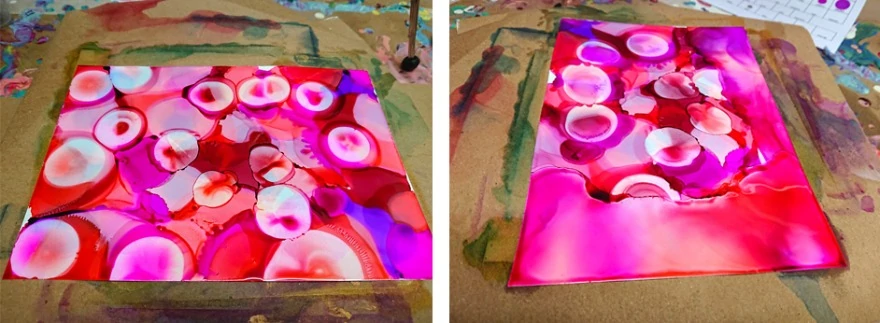
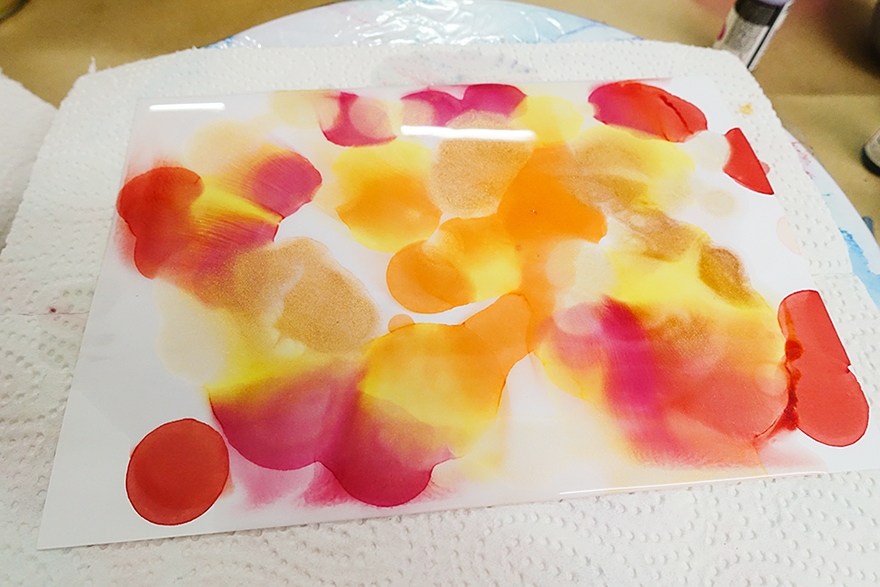
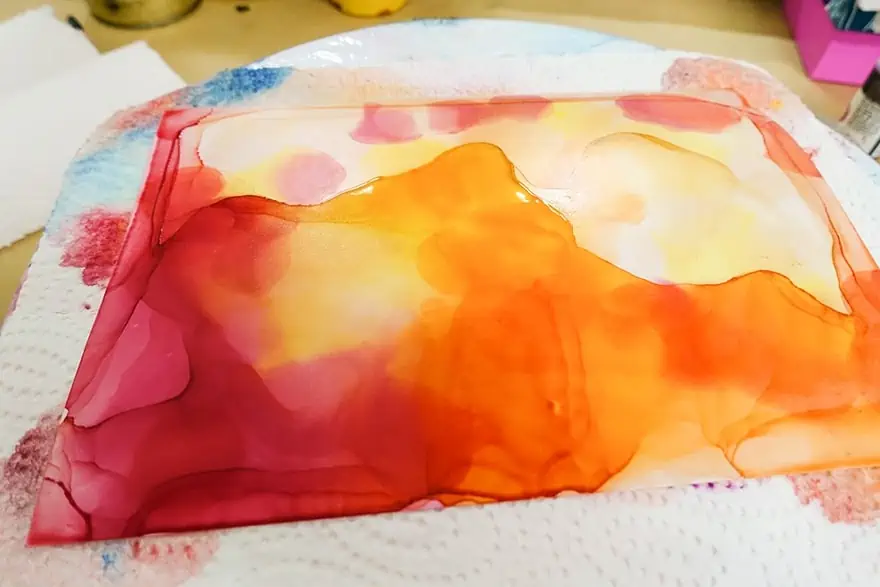
You can now put the ink directly on the synthetic paper and observe how the colors behave; you will see that a single drop spreads out in a circle. If you now add a drop of another color to the first circle, you will see how the new color spreads quickly and the first color displaces. If you drip next to a color, growing circles push into each other again and again.
If you add a drop of alcohol to the colors, a colorless circle spreads out that also displaces the other colors. With this technique dark, partly shiny edges can be created, which provide beautiful contrasts. In this way, your first works of art are already created.
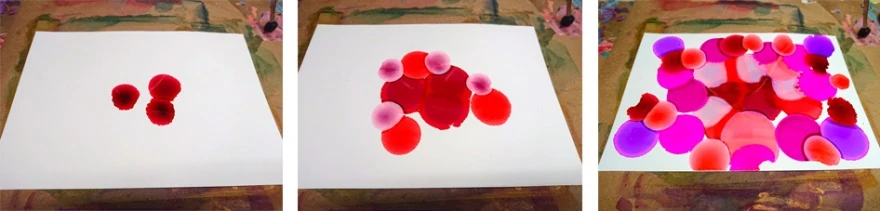
left: Single drops spread in a circle: Individual drops spread in a circle. middle: New colors displace the first drops. right: In the middle blue pigment spots can be seen. Some colors consist of different pigments, which can then separate and settle.
Alcohol Ink Art Step 2 – Create Color Gradients
If you cover the fresh painting ground with alcohol and then drip on paint, you can swivel the surface or create new color gradients with a straw. The disadvantage of the straw is that moisture collects in it, which may drip onto the picture. To avoid this, the purchase of a borehole blower is worthwhile later.
This corresponds to a tube with a pump balloon. In this way, you can also avoid hyperventilating after an hour because you are so enthusiastic about your work. A hair dryer is also a good choice. However, it must be set to the coldest level, as highly flammable alcohol is involved and the plastic paper will otherwise get waves that cannot be removed.
You should also set a low airflow and slowly move the hair dryer from a distance (approx. one arm’s length) onto the sheet to avoid splashes and to avoid blowing all the alcohol off the sheet.
left: Alcohol displaces all colors and also spreads in a circle: Alcohol displaces all colors and also spreads out in a circle.
right: More alcohol is added to the colors and the colors are spread with the hair dryer.
Further Creative Possibilities in the Alcohol Ink Art
The manufacturer Tim Holtz has stamps on offer, on whose surface a piece of felt can be attached. If you apply different colors and a little blending solution to the piece of felt, you can use it to stamp backgrounds, e.g. for cards. With a brush moistened with alcohol you can work in decorations.
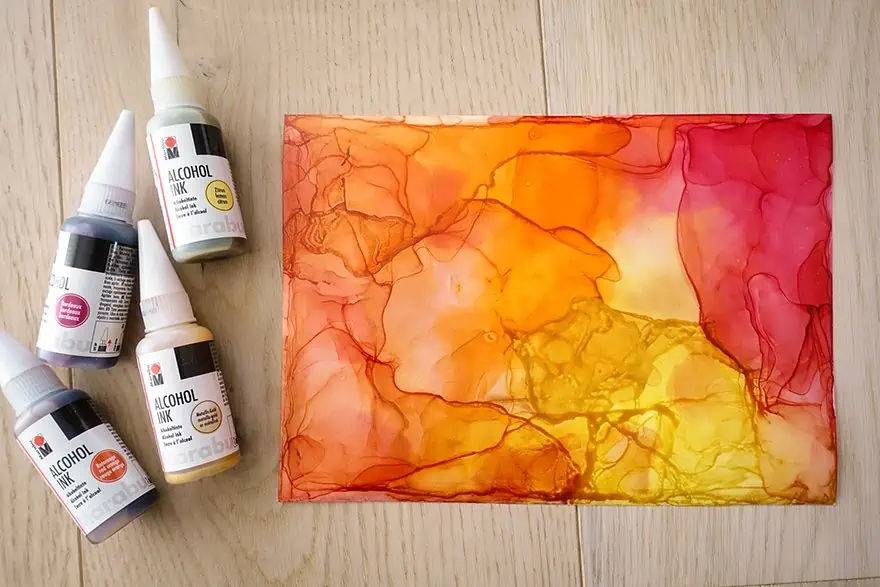
Some artists paint beautiful, realistic pictures or landscapes with Alcohol Ink art – so there are no limits to your imagination. The best thing to do is to start experimenting curiously to get to know the properties of the different colors.
You will notice that some colors spread faster than others, that there are similar colors in different brightness gradations, that they react differently to each other, that you can let the darker ones run out with the light tones, etc. This is exactly how you should experiment with tools: different brushes, cotton pads, wooden sticks, mixing in a palette, blowing with a straw or hair dryer, painting and decorating with markers and so on.
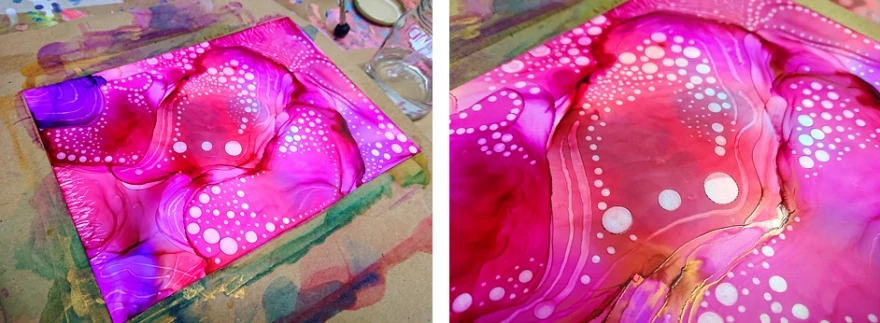
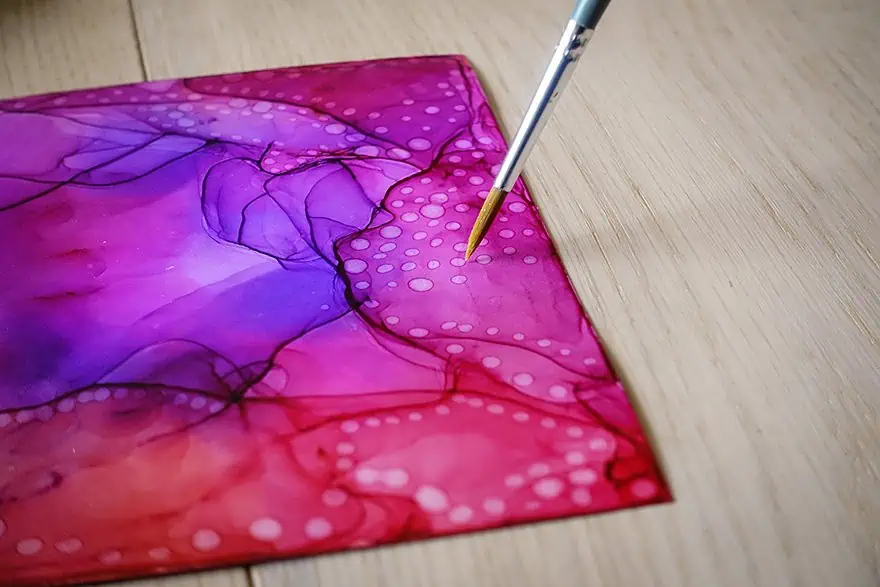
left: With the brush dipped in alcohol, decorations can be worked in.
right: Glossy edges appear, where colors meet with alcohol
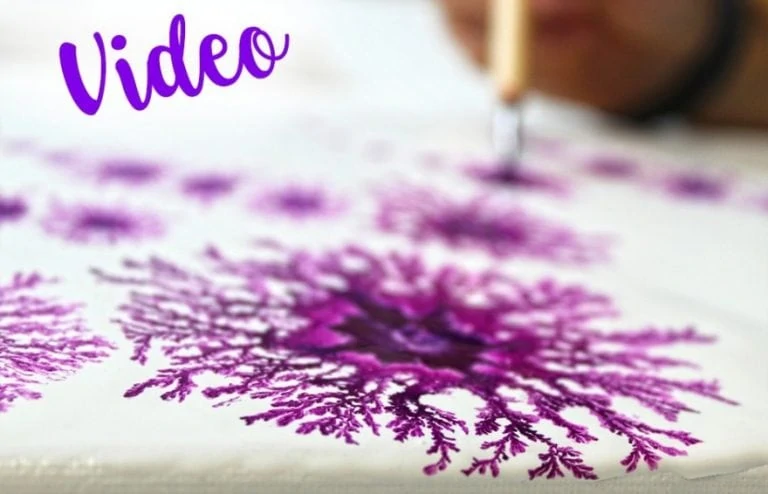
Video: Alcohol Ink Tutorial
The creation of the upper picture I have additionally recorded for you in a video:
Protection of your Alcohol Ink Artwork
Since the pigments in alcohol inks are light-sensitive, you should not wait too long to seal them. UV protection for spraying is suitable for this purpose. We can recommend either Solo Goya Painting Varnish or Schmincke Universal Varnish.
Health Advice
If you don’t have the possibility to work in a well-ventilated room, respiratory protection is recommended when working with alcohol ink art.

- The sealing edge is made of high-quality silicone mixture material, which fits the face very well and the soft texture provides you with a comfortable wearing feeling.
- Comprehensive anti-fog splashing to prevent any invasion of tiny substances.
- Reusable design
The detailed material list with many great recommendations for painting with Alcohol Ink supplies can be found in a separate article.
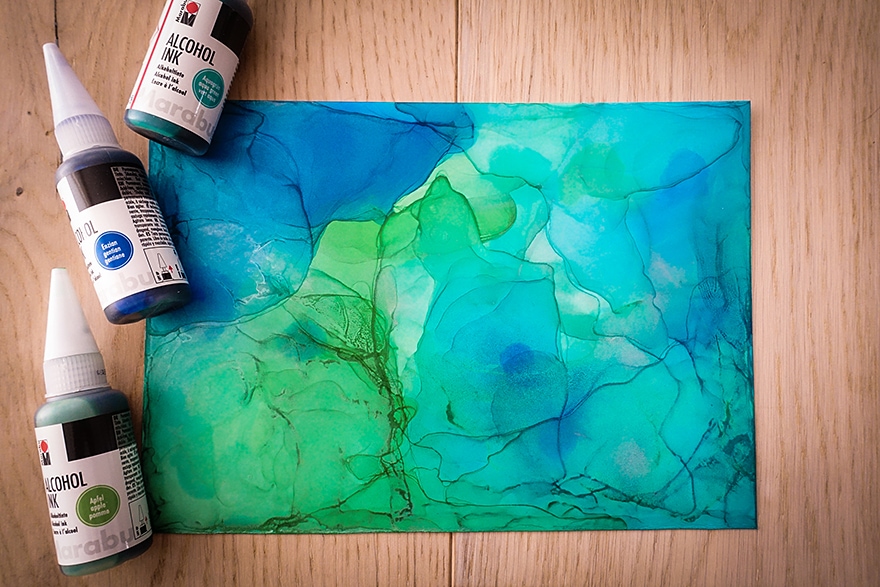
Mixing and Diluting Alcohol Ink
When using alcohol ink, you will need something besides water to successfully mix and blend it. The best and easiest choice would be rubbing alcohol. Now, rubbing alcohol comes in different percentages from 70 percent to 99 percent. However, some of the lower percentages may contain other unwanted substances and this could affect the outcome of your alcohol ink project.
Remember, when working with a substance like alcohol, that the surrounding temperature can also affect the rate of evaporation. A popular choice is the 70 percent rubbing alcohol, however, depending on your experience and what you prefer to work with, the rubbing alcohol will be what you use to mix, dilute, and clean your inks with. Besides rubbing alcohol, many ink manufacturers provide a blending solution that is similar to Isopropyl Alcohol (IPA) but contains additives to help improve the blending process.
Note: Since rubbing alcohol is a volatile organic compound (VOC), when it evaporates it can cause headaches and some other health issues if you do not work with the substance properly. Always work with rubbing alcohol, and any other solvent-based product in a well-ventilated space.
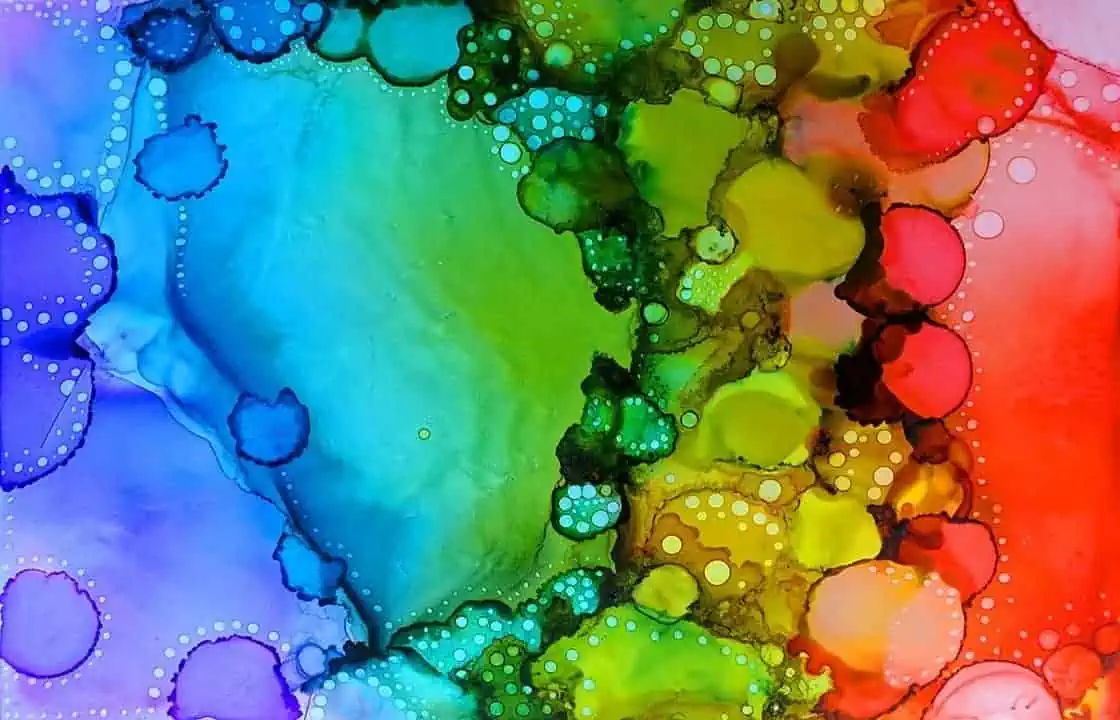
Alcohol Ink Techniques
Alcohol inks are extremely versatile and provide wonderful vivid and bright colors. Alcohol inks can be applied to different surfaces like ceramics, tiles, plastic, metal, glass, and more. Yupo paper is a popular choice when it comes to alcohol ink art as it is synthetic and waterproof, and it has a smooth non-porous surface. To create your art piece, various techniques can provide different results. Let us have a look at a few of these techniques.
Drop Technique
This uses a few drops of alcohol ink directly from the bottle. For example, have different colors ready and apply a few drops of each onto the Yupo paper. Tilt the paper in all directions so that the ink blends. It is important to note that alcohol ink does dry more slowly than your watercolors. You will find that the ink dries tacky to the touch in a few hours and completely dries in 24 hours. Or course, the drying time will depend on the surrounding temperature and humidity. The outer edges of the ink do tend to partially dry in a few minutes, which can add to the effect when dropping a color next to it or on top.
- Select three alcohol inks you want to use
- Take some rubbing alcohol or blending solution and wet your Yupo paper. You can tilt the paper to make sure it spreads over the entire surface
- At random, apply a few drops of each color to the paper and tilt to spread. You can also use a small wooden stick to push the ink to the edges
- If there is too much excess, simply tilt it off onto some paper towel
- Once done, leave and allow to dry
- You will notice the colors will blend and settle as it dries
- Follow the same process without using the blending solution
- Do it again, this time use the blending solution and do not tilt the paper
- Again, this time with no blending solution and no tilting of the paper

Using a Brush with Alcohol Ink
Using a brush with alcohol inks also works well, you can use different types of brushes for various effects. Coarse brushes provide more texture, while a softer brush blends better and can produce finer details. A bigger, flat brush will work if you want a wash of color, the same as you would for a watercolor painting. When working with a brush, be careful because if the ink dries too quickly, it can leave brush strokes behind. Also, if you work too slowly, the ink evaporates, and you are left with a patchy wash effect. Do not paint back into an area you have already covered; it is the same principle as with watercolors.
Using Cotton Buds
You can use some cotton buds to achieve a smoother wash. Simply pour some ink into your palette, then dip your cotton bud into the ink. Take the bud and move it quickly and evenly across the piece of paper. You can also create gradients of color by adding some blending solution as you go.
Applying Alcohol Ink to Metal Surfaces
As mentioned, alcohol inks are quite versatile and can be applied to a number of different surfaces. A non-porous surface seems to work well with alcohol inks and metals are the perfect fit, however, you should follow these few steps to achieve your best results.
Preparing Your Metal Surface:
- Make sure your metal surface is clean and remove any oily substances that could affect the alcohol ink
- Use some warm soapy water and wash thoroughly
- You can also scrub on some baking soda for added benefit
- Scrub with the grain of the metal
- Rinse and dry without letting your skin come into contact with the surface. You can clean the metal surface with gloves if you wish
Application of Alcohol Ink:
- First, test your alcohol ink on a scrap piece of metal. You can check the colors this way and test out various techniques before moving on to your actual metal piece
- Select the color alcohol ink for your metal surface and apply a drop
- You will notice the ink spreads by itself, so go slowly applying one drop each time
- Wait to see what happens before moving on
- Select a second color and drop it onto the metal surface
- To spread the ink out, you can also use a cotton bud tip
- You can also use a second color choice to drop onto the metal
- Add a drop of your chosen color to a bare corner
- If you want, you can also apply another color over an already inked area
- Before handling the metal piece, make sure it is thoroughly dry. You can leave the painted metal dry for about 24 hours, just to be certain
Creative Inspirations with Alcohol Ink
Here you can find more inspiration for artwork with alcohol inks.
Alcohol Inks on Porcelain
Think of tiles, vases, or any other shape, all these ceramic surfaces are perfect to paint on with alcohol ink. Create amazing abstract pieces for yourself or as gifts. You can use the tiles as coasters or simply display as art.
Besides tiles you can also decorate dishes with Alcohol Inks – from plates, cups to vases everything is possible. The procedure here is the same as on Yupo paper, but the challenge lies in the mostly round shapes – here the colors sometimes run unexpectedly. Another possibility is the application of alcohol inks with an airbrush gun. This way a very specific application is possible and realistic pictures can be sprayed with it.
To make the Alcohol Inks stick better, you can place the painted porcelain in the oven at 150 degrees Celsius for about half an hour. The colors will burn into the surface, the paint application will be more resistant. A dishwasher will damage the paint even after the paint has burned in, so hand washing is recommended.
Coloring Epoxy Resin – Resin Petri Dishes
Alcohol can be used to color epoxy resin – for example for resin art. You can get a visually bombastic impression by filling silicone molds with crystal clear resin and then dripping Alcohol Ink colors directly into the resin. The chemical reaction creates so-called “petrified rainbows”, i.e. petri dish effects. So you can spice up your resin artwork with fascinating color effects.
Alcohol Ink with Zentangle
You can achieve an equally ingenious effect by combining a classic alcohol ink image with the Zentangle technique. Create a beautiful image with color transitions. After drying, you can apply your Zentangle patterns with waterproof markers. You can apply simple or complex patterns, depending on your mood.
Alcohol Ink on Glass
Alcohol inks flow easily over glass surfaces, creating attractive blended colors. The final finish appears like stained glass and when placed in the light, will create a lovely effect. You will have to seal the alcohol inks on the glass surface. You can do this by:
- Spray with a clear glass glaze or glass fixative after the ink has dried
- Use a heat gun to burn off the alcohol, this also stabilizes the dye. Do this before the ink has dried properly, and this will create a realistic stained-glass effect
Alcohol Inks on Metal
Painting on metal, is this possible? Using alcohol ink, you can easily create amazing art pieces. The easiest way to begin with this art form is to get yourself an aluminum canvas from your local craft store. Many artists also use alcohol inks on copper, brass, and stainless steel.
Crafters also use alcohol ink to make jewelry pieces using bracelets, earrings, and metal pendants. If you are just entering into the crafting world, there are many low-cost ways to begin. You can easily use hardware items like washers, and then convert them into one of a kind jewelry pieces. Other metal and alcohol ink ideas include kettles, thermos containers, and tumblers.
Fabric and Alcohol Inks
Tie-die is very much back in trend, and you can easily use alcohol ink to create some beautiful fabric pieces. Create intense and vibrant colors with the concentrated alcohol ink, or dilute and go for lighter more pastel colors. If you have the experience, maybe try dying silk material and create unique elegant scarves.
When using alcohol ink on fabric, you can control what you do. This means you can easily create patterns with stencils and spray bottles. You can even design more abstract patterns, similar to ones on paper. You can also use alcohol inks to create a watercolor effect.
You can dye almost all kinds of fabrics from clothes, pillows, scarves, sheets, shoes, and tablecloths.
Other Creative Ideas
- Apply Inks on wood – although wood is an absorbing material, you still can achieve beautiful results
- Mirrors can also be used
- Use it on Pearls
- Why not use any plastic surface?
- Also, any kind of plastic will work perfectly
Best Alcohol Ink Brands
These are the most used and famous Alcohol Ink brands:
- Tim Holtz Ranger Ink
- Jacquard Piñata Colors
- T-REX
- Copic (Ink Refills)
- Pixiss
- Let’s Resin
- U.S. Art Supply
- DecorRom
Questions and Answers
Is Alcohol Ink safe to use?
The alcohol inks themselves as well as the isopropyl alcohol which dilutes the inks, do produce an odor. So, you must use these in a space with plenty of fresh air, keep windows open and maybe use a fan. For safety, always use a respirator mask and also use gloves to protect your skin. In cases where you will have to varnish your alcohol ink painting, you will need to use the mask again.
Is Alcohol Ink something you can use on a Canvas?
Yes, once you know how to work with alcohol inks properly, it is an amazing medium to work with on canvas. You need to prime the canvas surface first, so that the inks can flow better. Other items like metal, plastic, and ceramics are non-porous. Since canvas is absorbent, and the alcohol inks work on a non-porous surface, the canvas needs to be prepared first.
Can Epoxy Resin be Colored with Alcohol Ink?
Yes, this is possible without any problems. After mixing resin and hardener you can add a few drops of Alcohol Ink. Alcohol Inks are even very well suited for coloring epoxy resin, because due to the transparency of the ink, you can see through the color.
Can you Make Alcohol Ink yourself?
Alcohol inks can be made by mixing printer ink with isopropanol. The mixing ratio is 2 parts printer ink with 1 part isopropanol. In this way you can make your own alcohol inks very cheaply.
Which Varnish for Alcohol Ink?
Alcohol inks are relatively light sensitive. Therefore you should always seal your finished works. The easiest way to do this is with a spray varnish, which protects your pictures from UV light and mechanical effects. For this purpose, a UV-protection is suitable for spraying. We can recommend either the Solo Goya painting varnish or Schmincke Universal varnish.
How does Alcohol Ink Art Work?
Add some Blending Solution or Isopropanol to the Yupo paper. Now carefully drip the first few drops of Alcohol Ink on the paper. These drops will spread out in a circle. If you put another drop of another color in the first blob, it will spread and displace the first color in the middle. If you add another drop of paint next to the one already on the painting ground, you will displace the already applied paint.
Do I Need to Seal Alcohol Ink?
A coat or two of UV protectant can help to combat fading. But if applied directly over alcohol inks, the ink will activate and move around as it is drying. This means that a sealer should be used instead – one which won’t reactivate the ink during its process of curing on your fabric!

As a musicologist, art is part of Jennifer Pace’s daily life; creative work has always been part of it. Whether through photography, sketching, writing and calligraphy, or expression through abstract art. Fluid Art is currently her favorite form of expression. What applies in photography to the principles of image composition and the interplay of colors can also be transferred to abstract art – with the loss of control – and that is what makes it special. Instagram captures the passion for visual art in a casual way. Time-lapse videos of Alcohol Ink art and Acrylic Pours can be found on YouTube.
Learn more about Jennifer Pace.