Painting Ceramics With Acrylic Paint – The Best Paint for Pottery
This post may contain affiliate links. We may earn a small commission from purchases made through them, at no additional cost to you.
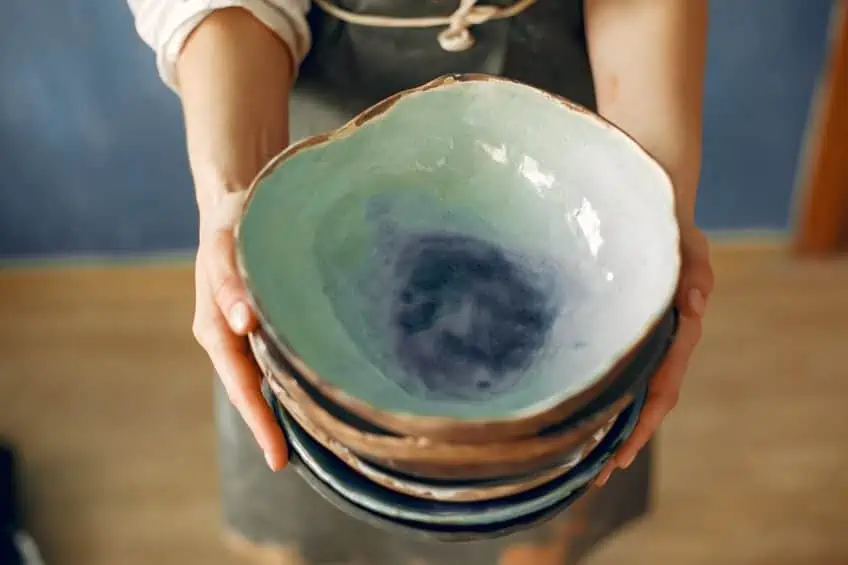
Do you want to attempt a piece of artwork made from clay or ceramics? The scope of ceramics is wide open as you can create any form or shape. However, you need to take care and follow certain procedures if you want to create your very own masterpiece. Working with ceramics is fairly simple, but there are certain things you need to know if you want to bring life to your creation by applying paint colors. So, we are going to be helping you understand and learn all about painting ceramics with acrylic paints.
Understanding the Term Ceramics
The general definition of ceramics is a type of clay that has been heated and hardened. When we refer to any item made from ceramics, it does not necessarily mean the type of material used to make the item, but rather the state the ceramic material is found in. To understand this better, we will now consider the three stages a ceramic item has to go through before it becomes an item that can be used or displayed.
Greenware Ceramics
In this stage, the clay is referred to as green or greenware. This means it has been air-dried but has not yet been subjected to fire in a kiln or oven. In this state, the clay is very fragile, and you need to take extra care when handling it as it is not very strong and has a very short life span. We do not recommend that you apply acrylic paint to the item in this state. Firstly, the paint will not adhere properly to the surface, and secondly, even if the paint does stick to the item, the product itself has no strength or protection.
This state of the ceramics can also be termed unpainted ceramics.
Bisque Ceramics
The bisque state or unglazed state of the clay means that it has been put in a fire kiln once, which gives it strength and also builds its structure. This is the ideal state your clay needs to be in for you to apply your paint. In this state, your clay is very porous, and the paint will soak into the clay, providing the adhesion you are looking for.
Glazed Ceramics
This means the clay has already been kiln-fired once, then the acrylic paint or glazers have been applied, and it is fired a second time in the kiln. However, this time a higher temperature is used. This process turns the paint or glazers into a glass-like finish, and it is now much more durable and becomes waterproof, which means it can hold water, take heat or cold, and be put into the microwave oven or dishwasher. Do not use acrylic paint on ceramics that has already been fully glazed, as the paint will not adhere to the surface, and you will be able to scratch it off using your fingernails.
Remember, it is always advisable to apply a top or sealing coat over the paint once it has been glazed, which will provide the protection it needs.
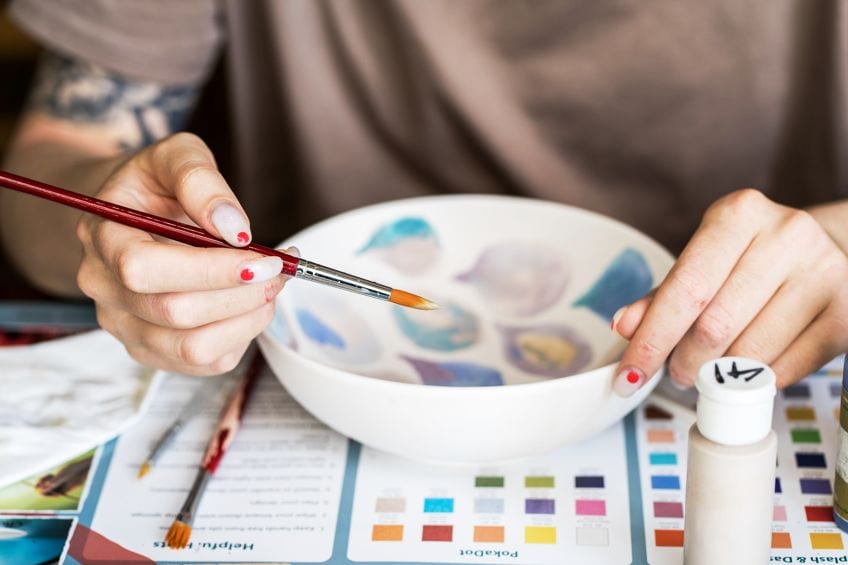
Painting Ceramics With Acrylic Paints
Acrylic paints that have especially been designed for ceramics will allow you to add some vibrant and brilliant colors. You can also try adding some of your own creative ideas to your ceramic art pieces. Acrylic paints are convenient and simple to use and all you need to clean up afterward is some water.
Most of the acrylic paints used for painting ceramics are non-toxic, so they can be used indoors as well as being safe to use with the whole family. The manufacturers of acrylic paints offer you a large variety of colors, so finding the right color for your project is a very easy task. Here is all you need to know about how to use acrylic paint on ceramics to give you that perfectly painted ceramic item.
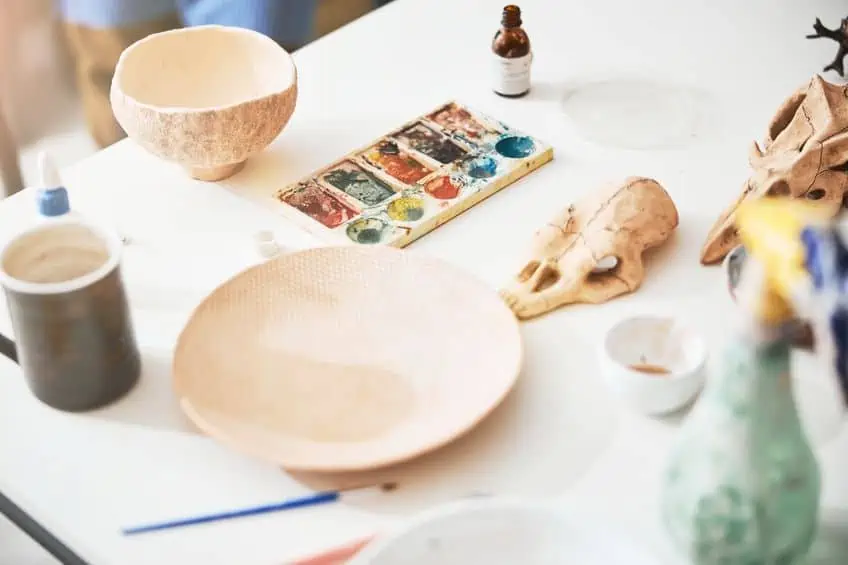
Tools and Equipment Needed for Painting Ceramics
Before you start painting, make sure all the tools and equipment that you will need are ready and nearby. You may also want to prepare the table or workspace you are going to use to ensure that there is the least amount of dust and wind in the area, which could ruin your painting. Tools and equipment you will need include the following:
- Acrylic Paints
- Your ceramic art piece
- Painting palette or paper plate
- Paintbrush
- Assortment of acrylic paints
- Clear spray sealant
- Soft-bristled paintbrush
- Kiln or oven to fire the finished art piece in
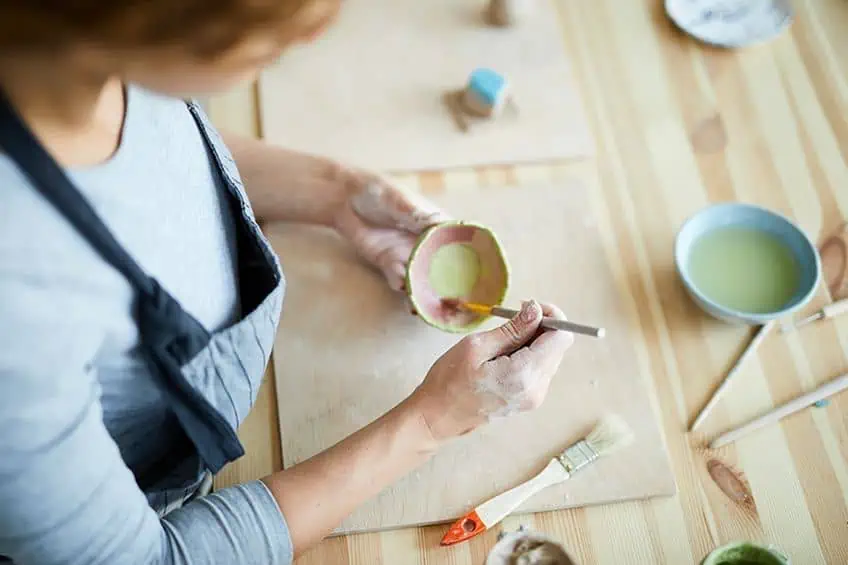
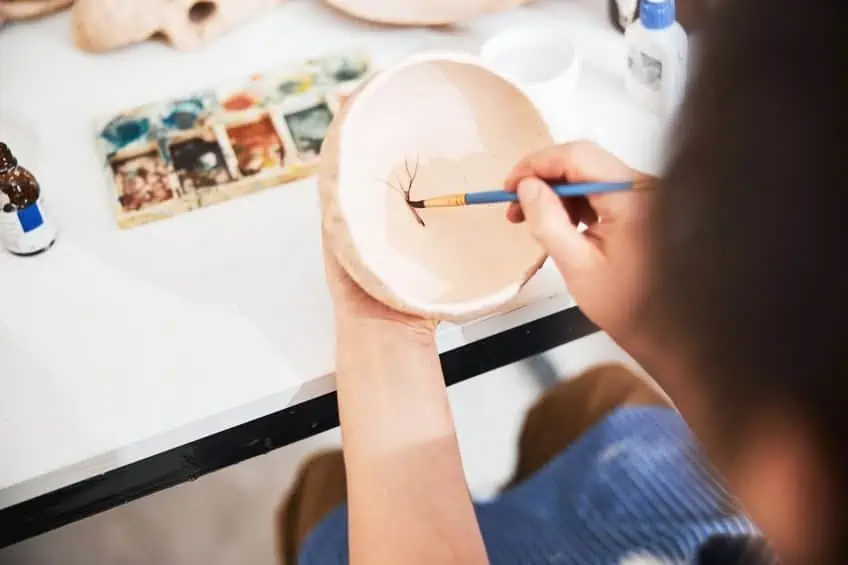
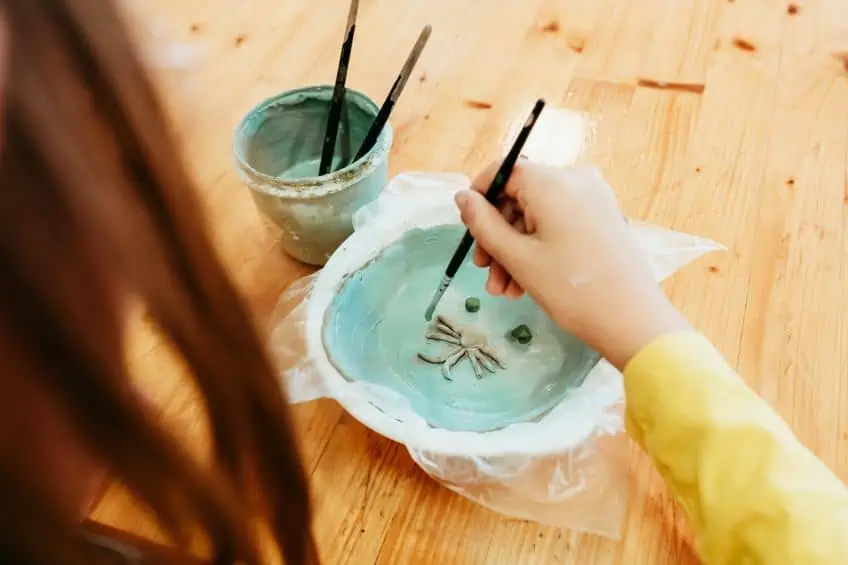
Use the soft-bristled paintbrush to remove all the ceramic dust, powder, or any other loose particles from the bisque stage of your ceramic piece. If this is not done properly, then you may end up with an undesirable finish to your art piece.
Where there are rough areas on your ceramic piece, use fine sandpaper to remove them, which should leave you with a smoother surface for your painting.
Choosing the Right Acrylic Paint for Ceramics or Pottery
The variety of paints to choose from is vast, and you need to be careful as many paints do not work well on ceramics. Some paints will not stick properly to the surface, they will leave streaky marks, appear translucent, or will just not look nice at all. So, what is the best acrylic paint on ceramics? The ideal paint for painting on ceramics is acrylic paint that has been specially designed for painting on ceramics. Most of these paints are easily available in arts and crafts and hardware stores. The paint needs to be water-based and non-toxic so that it can be safe to use near food and hold hot drinks.
Never use acrylic paint before you have checked the manufacturer’s instructions. You must also have the correct acrylic paint colors you need for your creation. You only need to put a small amount of paint on your palette or paper plate, which makes it much easier to access when you start to paint. By doing this, you will not have wasted paint left over, and if you do run short, it is very easy to just a little more of the color you need.
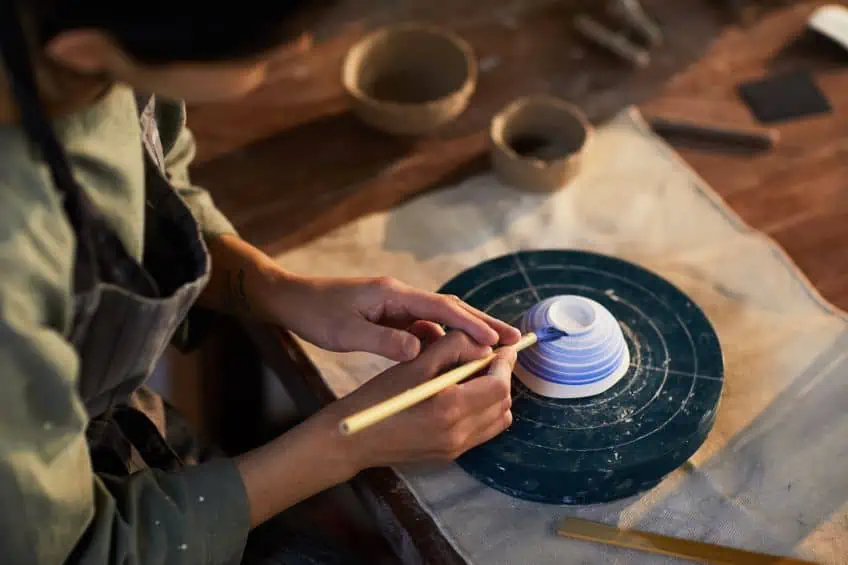
Choosing the Right Brush When Painting Ceramics with Acrylic Paint
You can use any type of brush when painting with acrylic paints, but there are some differences you need to be aware of. Natural-hair bristled brushes, like soft sable or hog bristles, are commonly used by oil painters as they can hold heavy textured paint and still retain their shape. However, the natural-hair bristled brushes may get damaged by acrylic paints when used for a long time, and they do not like to be sitting in water for any length of time. The synthetic-bristled brushes, usually made from polyester or nylon, are supplied in a wide range of soft as well as stiff bristles.
These brushes are more suited for acrylic paints as they can cope very well with acrylic resin. These brushes are also much easier to clean and have no problem sitting in water for any length of time. Unfortunately, they do not hold their shape as well as the natural-bristled brushes, but they are still very durable and cost a lot less. We recommend them for applying acrylic paint to ceramics. We also need to bear in mind that when choosing a brush for your acrylic painting, a lot depends on the special effect you want to create. The softer synthetic brushes leave a smooth finish with more blending, while the stiffer brushes will leave visible marks, but provide more texture.
Nylon brushes are best to use when painting flat areas and natural bristles will give you a more even texture.
Applying the Paint for Pottery
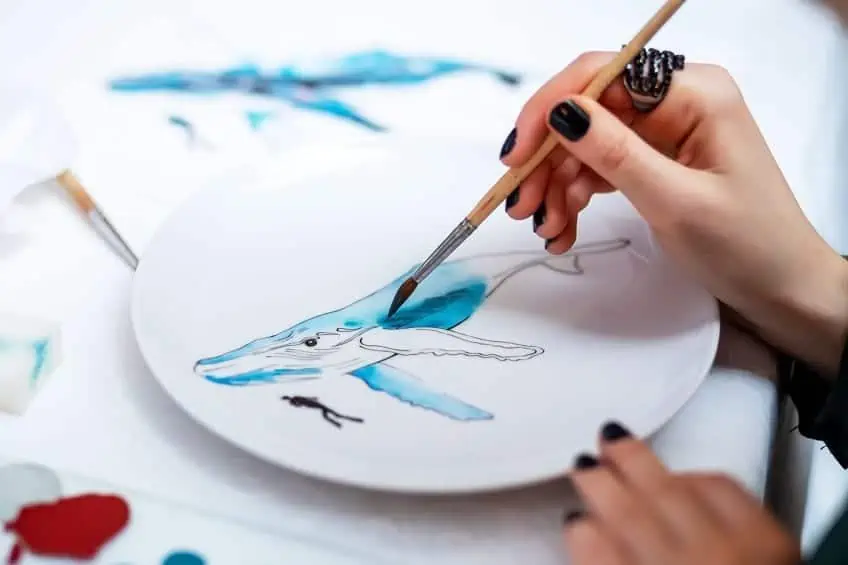
Before you start painting pottery, it may be a good idea to prime the surface first by using spray paint. This process will help you to use less paint when you begin to paint. You can use flat spray paint or even some gesso as a primer to stop the paint from soaking into the surface too quickly, as the fired ceramics surfaces are very porous. Another great idea is to first sketch the design or figure you intend to paint onto your ceramic item, which will make it a lot easier to paint.
As acrylic paints are very versatile and dry very quickly, they need to be applied in thin layers or directly from the tubes. Remember, first wait for the paint to dry before you apply the second layer of color. When working with different colors, it is a good idea to first start with the dark colors and then you can apply the light colors, which should bring out the contrast you are looking for.
For different types of surface appearance, you can use hard strokes or gentle strokes to create a weathered look.
Baking Your Ceramic Masterpiece
Most of the acrylic paints on the market are bakeable and will allow you to bake your ceramic item in your oven or kiln. However, we advise you to first read the manufacturer’s instructions to make sure that the acrylic paint you are using is bakeable, non-toxic, and can be put into the oven. You can use a firing kiln for baking your ceramic item, but this process takes a long time and if you do not have all the necessary equipment, it may cost you a lot of money. However, by using your oven, you will save yourself a lot of time and money, and it is not even necessary to buy a special oven for this purpose.
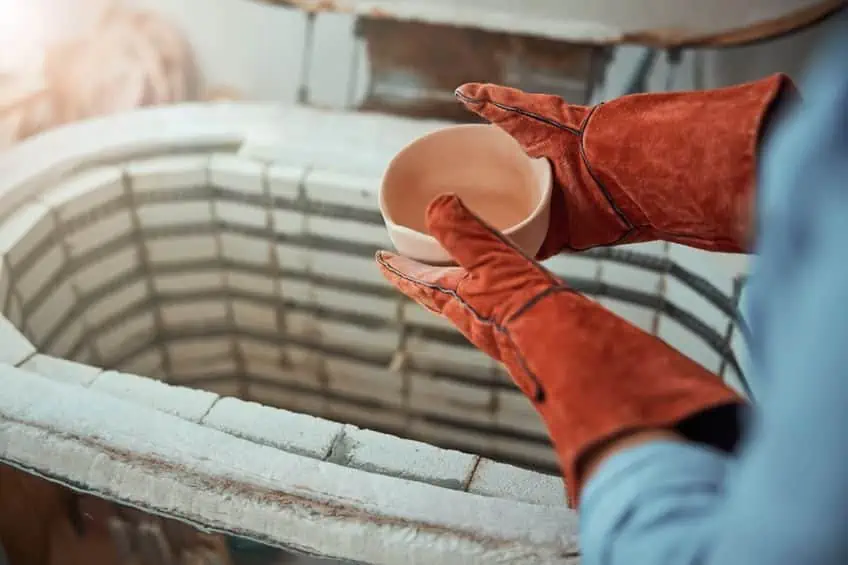
Even a toaster oven will do the trick for smaller items. The baking process is fairly simple and can be done with ease by any beginner or even your children. The baking process is not only to harden your acrylic paint but can also be used to decrease the drying time of the paint, especially when you are using multiple color layers. When painting a ceramic item with multiple colors, it can take a long time as you need to wait for the first layer of paint to cure before you can apply the second layer.
This is where the baking process comes in handy, just pop the item in the oven, allow it to cool, and you are ready to continue with painting, saving yourself a lot of time.
Baking Method
We did discuss a little earlier how the baking process is very simple and can be done by children, but what exactly is the baking process? We will now show you what you need to do, and if you follow these steps, you will end up with a baked ceramic item that can be used for food or drinking.
- First, you need to make sure the acrylic paint you applied to your ceramic item is properly dry. To achieve this, you need to leave it for about 24 hours after you have finished painting.
- Put the item in the oven when it is still cold so that it will heat up slowly, otherwise, it could crack and break.
- Set your oven temperature at 350 degrees Fahrenheit.
- Let the item bake in the oven for 30 minutes.
- Turn the oven off and leave your item in the oven, allow it to cool down slowly until the oven is cold.
- Remove the item from the oven, and let it stand for around 72 hours before using.
Another Method for Drying Acrylic Paint on Ceramics or Pottery
Acrylic paints are very easy to use, affordable, and dry very fast; however, not all acrylic paints can be heated and put into the oven or used near food. For example, craft acrylics. These acrylic paints need to be dried in some other way before you can use them.
Below are a few ways you can dry your craft acrylic paints quicker.
- Acrylic paints dry much faster in well-ventilated spaces, so open the windows and switch on the fans as more increased ventilation causes more airflow drying your acrylic paint quicker.
- Higher temperatures will also increase the drying time of your acrylic paints, so switch on the heater in the room.
- When painting with your acrylic paints, try to apply thinner coats as thin coats of paint will dry much quicker.
- High humidity causes the paint to thin and run, so try to decrease the humidity by using a dehumidifier, or opening the windows if you live in a dry climate zone.
- You can also buy fast-drying acrylic paints and save yourself a lot of trouble.
- Make use of a hairdryer, set at the lower settings, a heat gun, or a heat lamp.
- Have patience when drying your acrylic paint as applying too much heat can cause damage to the paint finish, which can cause bubbling or discoloration.
Applying a Sealing Coat
Why is it important to seal your ceramic artwork after you have baked it? If you do not seal the acrylic paint on the surface of your art piece, the paint will not last for very long and will begin to peel and flake off. Also, if you have painted a cup, mug, or plate, then the paint can come off into your drink or food because acrylic paint is water-soluble. The sealant you use must be of high quality and should also be food-safe. You can use a water-based varnish that will give you good protection and is excellent when used for sealing small items like ceramic mugs or cups. There is also the option of a solvent-based varnish, which will give you a tougher finish, but they do tend to give off a strong odor and are more difficult to clean.
Another option is Modge Podge, polyurethane varnish, or a clear acrylic topcoat, which can be applied with a paintbrush or sprayed on.
The Best Sealing Method
First, ensure that your ceramic item has been properly cured in the oven and allowed to cool down before you apply the sealing coat. This is to ensure your paint lasts for a very long time. Make sure you have your sealing product close by and ready to apply.
- Lay some newspaper or plastic sheet down to protect your working area.
- Place your item on the sheeting or newspaper.
- Apply a thin layer of sealing coat and ensure it is completely covered in sealant. The sealing coat can be sprayed on or applied with the use of a brush.
- If you are sealing a cup or mug, make sure no sealant comes inside the cup or mug. Also, ensure the sealant does not come right up to the top of the cup where it can come into contact with your mouth.
- Allow the sealing coat to dry, which could take 15 minutes, or some sealants take a little longer to dry.
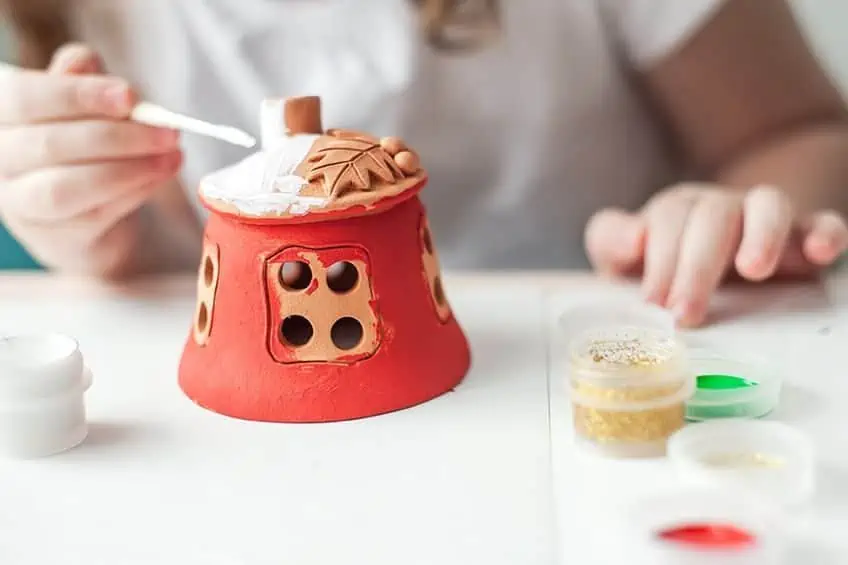
Painting Pottery With Added Effects
Many potters like to add extra color effects to their pottery pieces, where they use other ceramic mediums instead of paint, which include underglazes, oxide stains, and slips (a form of liquid clay). All these mediums fuse to the pottery after they are fired and will not wear or flake off.
However, this form of painting is intended for display purposes only and not for functional use.
Tips and Tricks When Painting Ceramics with Acrylic Paint
Are there any tips or tricks that you need to know when you paint ceramics with acrylic paints? The number one thing to take note of is whether to paint already glazed or unglazed ceramic items. Items that have already been glazed are waterproof, and your acrylic paint will have very little adhesion capabilities, so it is not recommended that you use acrylic paint on an already glazed item.
- We recommended that you only use unglazed ceramic items to paint on, as your acrylic paint will adhere much better.
- Remember, when you put your ceramic items into the oven make sure the oven is still cold and then apply the heat, or else you run the risk of your items cracking.
- Never paint your dark colors first, go from light to dark.
- When drawing your image onto your piece before painting, rather use a pencil and not a pen. The pencil will come off when the item is placed in the kiln, so no marks will be left behind.
- You can use various painting techniques to add texture.
- Make sure the paints you buy are made for painting pottery.
There are so many methods and techniques you can use when painting ceramics with acrylic paints, you just have to experiment as you go along. Use your imagination and creativity to find different ways of expressing your art so you can produce some amazing ceramic items. Just one word of caution, if you are decorating that mug you want to give your loved one for Christmas, make sure that the materials you are using are non-toxic as well as food-safe. Also read our best paint for ceramics article.
Frequently Asked Questions
Can You Safely Bake a Painted Ceramic Item in the Oven?
You need to read the manufacturer’s instructions to ensure the paint product you bought is non-toxic and can be baked in the oven. So, yes you can place a painted ceramic item in the oven as long as you follow the recommended process.
Is an Acrylic Painted Ceramic Item Dishwasher Safe?
After applying acrylic paint on ceramics and baking it in the oven and has been sealed, it is safe to put in the dishwasher. However, you need to wait for about 72 hours before you wash it.
Is Acrylic Paint Permanent?
After it has been properly dried, it is permanent, and the paint texture is very flexible and will adapt to the surface of your ceramic item without chipping or cracking. However, for durability, the ceramic item and paint must be sealed.
Is Acrylic Paint Flammable?
As acrylic paint is water-based, it is not flammable and will not suddenly burst into flames, which also means it is travel-safe. Acrylic paints are safe to use, however, for smaller children, it is better to use craft paint.
Is Acrylic Paint Waterproof?
When acrylic paint dries, it does not become water-proof but rather water-resistant. This is why you should apply a sealing coat to make it waterproof.
Must You Prime Your Ceramic Clay Surface Before Painting?
Because ceramics are porous, it is advisable to prime the surface before you paint. This will save you a lot of paint, as the paint is absorbed into the surface if not previously primed The primed surface also gives your paint a better grip on the ceramic surface.
What Is Unpainted Ceramics?
This simply means the state a ceramic material is in which means it is not ready for painting. In other words, it is in a green or greenware state.

In 2005, Charlene completed her wellness degrees in therapeutic aromatherapy and reflexology at the International School of Reflexology and Meridian Therapy. She worked for a company offering corporate wellness programs for several years before opening her own therapy practice. In 2015, she was asked by a digital marketer friend to join her company as a content creator, and it was here that she discovered her enthusiasm for writing. Since entering the world of content creation, she has gained a lot of experience over the years writing about various topics such as beauty, health, wellness, travel, crafting, and much more. Due to various circumstances, she had to give up her therapy practice and now works as a freelance writer. Since she is a very creative person and as a balance to writing likes to be active in various areas of art and crafts, the activity at acrylgiessen.com is perfect for her to contribute their knowledge and experience in various creative topics.
Learn more about Charlene Lewis and about us.