Best Paint for Ceramic – Your Detailed Guide to Ceramic Painting
This post may contain affiliate links. We may earn a small commission from purchases made through them, at no additional cost to you.
Ceramic painting is a creative way to add some color to a plate, mug, or tile you might have lying around. You can paint some really fun and interesting patterns or designs onto ceramic if you have the right paint! Painted ceramic makes for a thoughtful, personalized gift idea for friends and family members. Before using any paint on any ceramic, you will need to understand the different kinds of paint and ceramic as well as the best paint for ceramic available for purchase. This article covers everything you will need to know if you want to paint on ceramic.
Table of Contents
Types of Ceramic
Before you can start considering what kind of paint you want to use, you will need to know what kind of ceramic you plan on using or have to work with. You may have a lot of pottery to paint but do you know what kind of ceramic it is? Different ceramics will have different reactions to the variety of paints available. We will be looking at a few of the main types of ceramics that you will encounter. Many types of ceramic have been glazed and fired in a kiln. These actions alter the surface of the ceramic and affect the kind of paint that can be used.
Greenware Ceramic
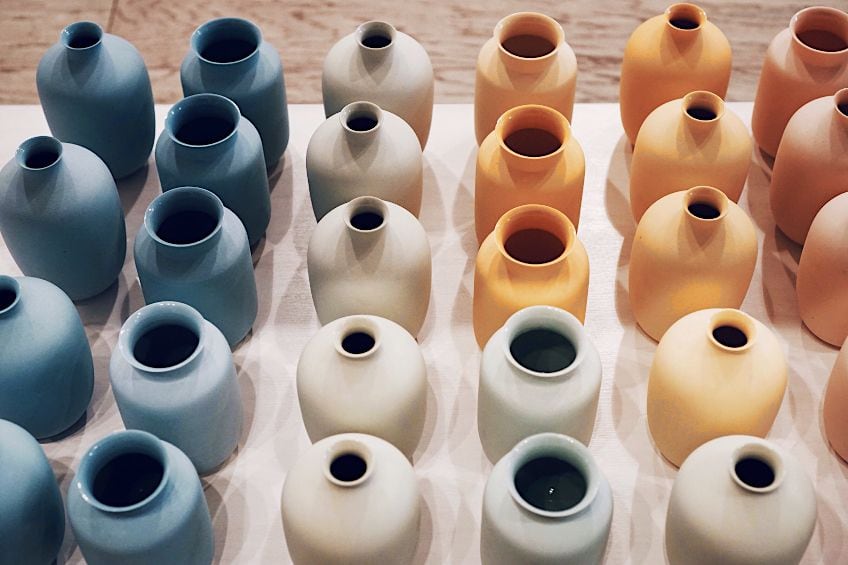
Greenware is a kind of ceramic that has only been air-dried and is still quite delicate. It can break very easily because it has not been fired in a kiln yet. Greenware is not waterproof and will soften if exposed to water. This means that greenware needs to be handled with care and cannot be used as a finished piece such as a plate or mug. Greenware pieces can still be used for other purposes, however, such as being used decoratively. Acrylic paint can be applied onto greenware pieces and are affordable, easy to use, and readily available for purchase. You cannot, however, use acrylic paint on your greenware if you plan on firing it in a kiln at a later point. This can be dangerous as the acrylic paint may catch fire in the kiln.
Instead, you will have to use bake-on ceramic painting markers or bake-on epoxy ceramic paint
Bisque Ceramic
If you take greenware and fire it in a kiln, you will get bisque. The process of firing means that the bisque is stronger than greenware but it still isn’t completely waterproof. The porosity of bisque makes it perfect for receiving paint. Paint effortlessly adheres to the surface of the bisque and is readily absorbed to create a strong bond. Much like with greenware, bisque can accept acrylic paint, bake-on epoxy, and bake-on ceramic painting markers but it is not suggested that you use acrylic paint if you plan on firing your bisque at a later stage.
Glazed Ceramic
Glazed ceramic is made by applying a colored glaze to bisque and then firing it in a kiln a second time but at a higher temperature. This process makes the ceramic feel very similar to glass. Glazed ceramic is very strong and waterproof at the cost of being less ready to accept paint. Since glazed ceramic is no longer porous, paint can no longer readily adhere to it with as much ease as greenware or bisque. Painting on glazed ceramic may require some light sanding or the application of a primer if you are hoping for perfect results. bake-on ceramic paint markers or bake-on epoxy are the best and most durable paints to use on this kind of ceramic, but acrylic may be applied as well.
Acrylic is more likely to require light sanding and a primer than ceramic markers or epoxy paint.
Types of Paints Suitable for Use With Ceramic
Now that you are aware of the most common forms you can find ceramic in, you might be wondering what kinds of paint are available for use on ceramic. In the past, the only option was to apply a colored glaze and then fire it in a kiln, but nowadays it is easier than ever to paint ceramic. If you have pottery to paint, then it is easier than ever to do it in the comfort of your own home without any need for a kiln!
Bake-On Paint Markers for Ceramic
Ceramic paint markers are one of the most popular choices if you are looking for an affordable, versatile option when painting ceramic. They are easy to use and quite durable too! The spring-loaded nib releases paint as it makes contact with the ceramic and you can control the flow rate by adjusting the amount of pressure you apply. Ceramic markers come in a wide variety of colors too, so you will never have to work with a limited palette while painting on ceramic.
You will need to give your design some time to air-dry before baking it in an oven. The drying times and temperatures will vary depending on the brand you are using. Baking the paint is what increases adhesion and durability so that your design will become very difficult to try to remove.
Bake-On Gloss Enamel Paint for Ceramic
Gloss enamel paints are very versatile and convenient for use on ceramic. They are not as popular as ceramic markers because they are not often found in food-safe varieties. This means that baked-on gloss enamel paint should only be used decoratively on pieces that do not come into contact with food or drink. If you are using gloss enamel on mugs or plates that you eat and drink from, then you should place the designs where food or drink would not touch.
There are many kinds of enamel paint available, as well as many colors. You can even find enamel paint that is transparent, opaque, textured, or that contains glitter. Much like with baked-on ceramic markers, gloss enamel paints will require some air-drying and then baking in an oven to set and cure properly. The difference, however, is that enamel paint has better adhesion and durability than ceramic paint markers. If durability is your biggest concern, then you should definitely choose baked-on enamel for your painted ceramic project.
Acrylic Paints for Ceramic
Acrylic paints are very affordable and easy to find but are not food-safe and cannot be baked in an oven or kiln. This means that if you paint on your ceramic with acrylic paint, you will not be able to fire your ceramic again at a later stage. We don’t recommend using acrylic paint on ceramic that will be used near any source of heat, such as near a fireplace or stove. Acrylic paints can easily be applied by using a paintbrush or a roller. If you are using glazed ceramic, you should prepare the surface by sanding it and/or applying a primer. This will assist the acrylic paint with adhesion. Applying primer to porous ceramics will also help with adhesion but is not absolutely necessary.
Primer applied to porous ceramics will help you to save quite a bit of paint, however, not as much acrylic will be absorbed into the ceramic.
| Ceramic Markers | Gloss Enamel | Acrylic |
| Spring-loaded nib built into the marker | Applied with a brush or roller | Applied with a brush |
| Requires baking | Requires baking | Cannot be baked |
| Durable | Durable | Moderate durability |
| Food safe | Not food safe | Not food safe |
Best Paint for Ceramic
Now that you know the types of paints and ceramics that are available, we are taking a look at our top picks for paint products that can be used on ceramic! It can be overwhelming to try to choose from all the ceramic paints available on the market, which is why we have chosen one high-quality product from each variety of ceramic paint and saved you the worry. Regardless of what your ceramic project is or what your design is, one of the products below will be exactly what you are needing!
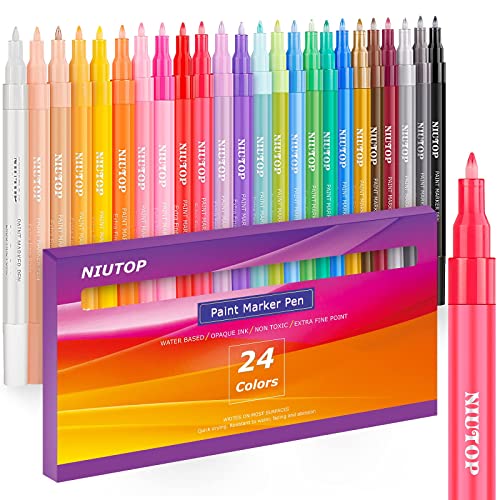
Best Paint Markers for Ceramic: NIUTOP Water-Based Paint Marker Pens
These water-based ceramic paint markers are extremely durable and versatile. They can be used on many surfaces, such as glass, metal, fabrics, and stone. The pack includes 24 vibrant colored markers that are also environmentally friendly, non-toxic, and food safe. Nutop markers have a valve action nib that allows for consistent paint flow while you apply pressure. The flow rate of the paint can be easily adjusted by adding or removing the pressure to the nib. Once the paint has been baked in the oven according to the manufacturer’s instructions, it will become both oven and dishwasher safe.
- The pens have a nylon tip allowing a smooth and even flow
- The water-based paint is weather-resistant and quick-drying
- Set includes 24 vibrant colors of high-quality acrylic paint
- Perfect for use with glazed ceramic
- Easy to use
- Convenient
- 24 different colors in a pack
- Oven and dishwasher safe
- Water-based
- Greenware and bisque can still be fired after painting
- Non-toxic and food safe
- Not suitable for large projects
- Improper storage can dry out the pens easily
- Improper use can clog up the nib
- Requires an oven to cure
Best Gloss Enamel for Ceramic: FOLKART Enamel Gloss Paint for Glass and Ceramic
The Folkart gloss enamel set is a premium quality pack of 16 different colored paints suitable for use on ceramic. This set is made by reputable manufacturers with a good reputation in the art community. The paints apply smoothly and evenly with a brush or roller and can be easily cured in an oven. Enamel paint is not food safe and is thus best for use on exclusively decorative pieces. This pack of Folkart enamel paint is the most durable product available on this list of suggestions and is the best paint for ceramic that has been glazed. This is because enamel paint adheres exceptionally well to surfaces regardless of whether they are smooth or not.
- This paint set includes 16 bottles of enamel craft paint
- Brilliant colors, durable, and scratch-resistant gloss finish
- Can be baked after drying to make it dishwasher safe
- Can be used with glazed ceramic
- Easy to use
- Convenient
- Durable
- 16 different colors in a pack
- Oven safe
- Water-based
- Greenware and bisque can still be fired after painting
- Not ideal for large projects
- Requires an oven to cure
- Not food safe
- Requires a paintbrush or roller for application
Best Non-Bake Acrylic Paint for Ceramic: GOTIDEAL Acrylic Quick Drying Multi-Surface Paint Set
This Gotideal acrylic paint set includes 18 3.4oz bottles of different colored paints. They come in a sturdy box that is durable and can easily be used for convenient storage and organization of your paints. The paints included in this set are non-toxic, water-based, quick-drying, and versatile! They can be applied to several surfaces aside from ceramic, which means they can be easily used for other projects too. If you happen to make a mess, the cleanup is quite easy, requiring only a bit of water and maybe some soap. The consistency of the paints is smooth and even, but you may require multiple coats depending on the surface of the ceramic you are working on. You don’t need to bake your designs when you use these Gotideal acrylic paints as they will air dry within an hour or so.
- High-quality acrylic paints have fantastic consistency
- The paints glide on smoothly and dry quickly for long-lasting color
- The creamy consistency allows for easily mixing and blending
- 18 different colors in a pack
- Non-toxic
- Versatile and convenient
- Water-based
- Great for painting bisque and greenware
- Affordable
- Easy to find
- Quick-drying
- Not as durable as bake-on paint options
- Not ideal for larger jobs
- Not food safe
- Not oven safe
- Greenware and bisque cannot be fired after painting
How to Paint Ceramic
Once you choose the paint that you want to use on the ceramic you have available, you are ready to start painting! Below we give some general instructions on how to use each type of paint properly, but always remember to follow the manufacturer’s specifications above generalizations. Painting different ceramic objects will also introduce some deviation from the steps below, but the general advice will remain unchanged.

How to Paint Ceramic Using Bake-On Ceramic Markers
The easiest way to paint glazed ceramic, greenware, or bisque is to use ceramic paint markers. Using ceramic paint markers helps you to create fine and detailed designs and patterns on your ceramic. Most ceramic markers have a valve-action nib which lets out a controlled stream of paint with use. To get started, you should make sure that your ceramic is free from any dirt, grease, or grime. Any dirt or grease on your ceramic will prevent the paint from properly adhering and bonding to the ceramic. You can wash off dirt and grime using dish soap and some warm water. Keep in mind that you can only wash glazed ceramic in this way, as greenware and bisque are not completely waterproof.
Try to envision your designs before you get started so that you don’t have to clean up a big mess if you happen to make a mistake. If it is possible, you should consider lightly outlining your design onto the ceramic using a number two pencil.
Shake your ceramic paint marker before you begin to ensure that the paint is properly mixed. Take a piece of paper and press the tip downwards onto it until the paint begins to flow. Once the paint begins flowing smoothly and consistently from the ceramic paint marker, you can begin applying your design to the ceramic. You will find that you need to apply constant pressure while using your ceramic markers due to the valve-action nib. The pressure is what will keep the paint flowing. If you are using multiple different paint marker colors, always be sure to replace the cap on the marker you were using and store your markers horizontally. If you make a mistake while you are working, you can remove the wet paint with a clean damp cloth.

Once you have completed your designs and you are happy with how they look, allow the paint to air dry for around 24 hours. Leave your ceramic in a warm, dry place where it will not be disturbed. Once 24 hours have passed, you can place your ceramic item in the oven for 30 minutes at 350 degrees Fahrenheit (176 degrees Celsius) or according to the ceramic paint markers manufacturer’s instructions. Make sure that you preheat the oven to the correct temperature before placing the ceramic inside. Once the ceramic has cooked for the correct amount of time, switch the heat off and allow the ceramic to cool inside the oven. The ceramic will crack if it cools down too quickly, so it is crucial that you are patient and only remove the ceramic from the oven once it has completely cooled.
How to Paint Ceramic Using Bake-On Gloss Enamel
Make sure that your ceramic is clean. Use some warm soapy water to clean off glazed ceramic, and remember that greenware and bisque are not water-soluble and can only be lightly dusted. Grease, grime, and dirt will negatively affect the adhesion of the enamel paint to the ceramic. If you are hoping to paint glazed enamel, you may need to sand the surface of the ceramic lightly in order to help the paint adhere.
Think about your design and consider using a number two pencil to draw a rough light outline on the ceramic before you get started.
You could also make use of painter’s tape or an adhesive vinyl stencil. Painter’s tape can be applied to the ceramic to create interesting geometric patterns while vinyl stencils will allow for more complex, dynamic designs. Make sure that the painter’s tape or stencil is firmly attached to the ceramic so that the paint doesn’t leak inwards and ruin the design. You can use a paintbrush or a roller to apply epoxy ceramic paint.
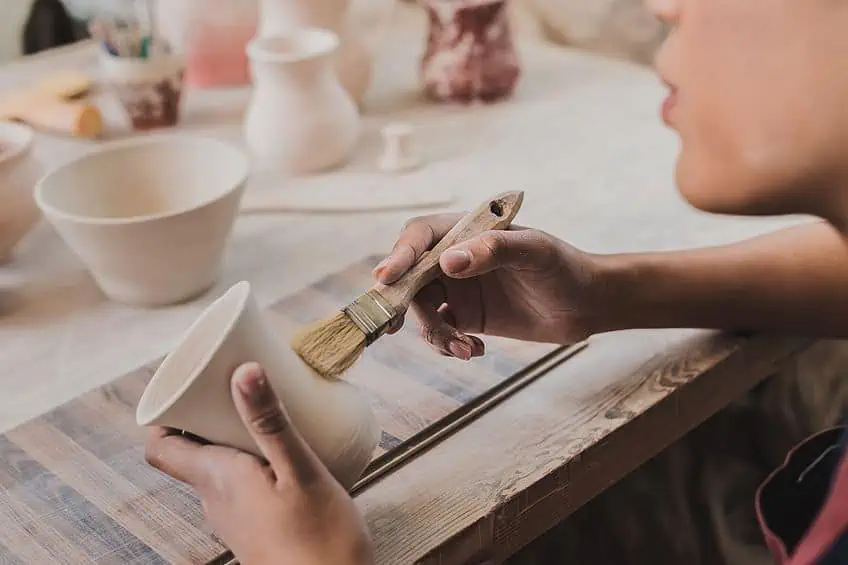
Once you have completed your design and are happy with it, you can leave it to air dry in a warm dry place where it is not likely to be disturbed. Allow it to air dry for at least 24 hours before moving it to an oven that has been preheated to 350 degrees Fahrenheit (176 degrees Celsius). Let it bake in the oven for 30 minutes before turning off the heat. Allow the ceramic to cool completely while still within the oven before taking it out. Make sure to read the manufacturer’s instructions regarding the time and temperature required for baking, as the information given here is a broad general guideline.
How to Paint Ceramic Using Acrylic Paint
Dust off your greenware or bisque ceramic with a dry cloth if it has any dirt on it. Once your bisque or greenware is clean, you can move on to the final paragraph under this heading. However, if you have glazed ceramic, you can clean it using warm water mixed with dish soap if there is any dirt or grime present. You should then allow the glazed ceramic to dry before lightly sanding where you plan to apply your designs.
Make sure that there is no dust present from sanding before you start priming or painting your glazed ceramic.
In the case of glazed ceramic, you may consider applying a coating of primer before you apply acrylic paint. This will help the acrylic adhere more readily to the surface of the ceramic glaze. You can choose to only sand your surface, to only prime your surface, to do both, or to do neither. We recommend sanding and priming the surface of your glazed ceramic if you plan to apply acrylic paint to it, as it will provide the most optimal results.
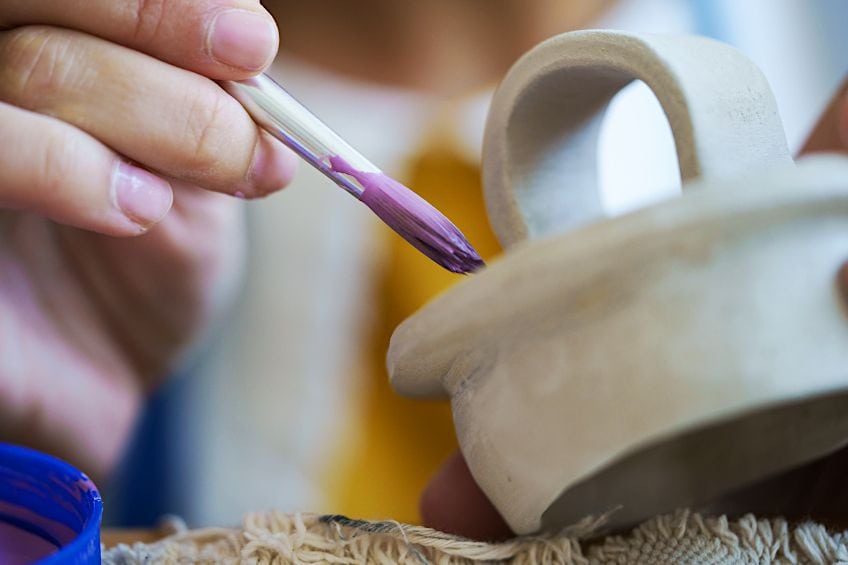
You can now paint onto your ceramic using a paintbrush or roller. Before you get started, you should think about your design and consider drawing a rough design onto the ceramic in pencil. You could also use stencils or artists’ tape to create some intricate or geometric designs. Once you paint your design onto the ceramic and you are happy with how it looks, you can leave it to dry and cure for around 24 hours. While the acrylic will dry within an hour in optimal conditions, it is best to allow a day or so to cure before attempting to handle it.
Tips and Tricks
Painting ceramic is a fun process, but if it is your first time, then you may find some aspects a little tricky. To help you out, here are some of our top tips and tricks.
- When heating your ceramic in an oven, allow it to cool in the oven once done. This is because removing the ceramic can cause it to cool too soon and break.
- If you don’t have confidence in using paintbrushes, you can use stencils to apply many different patterns and designs. You can purchase vinyl stencils online or in most craft stores.
- Using a primer on porous ceramic such as greenware or bisque will help you to save quite a bit of paint. This is because the primer makes the ceramic less porous while still allowing for proper adhesion.
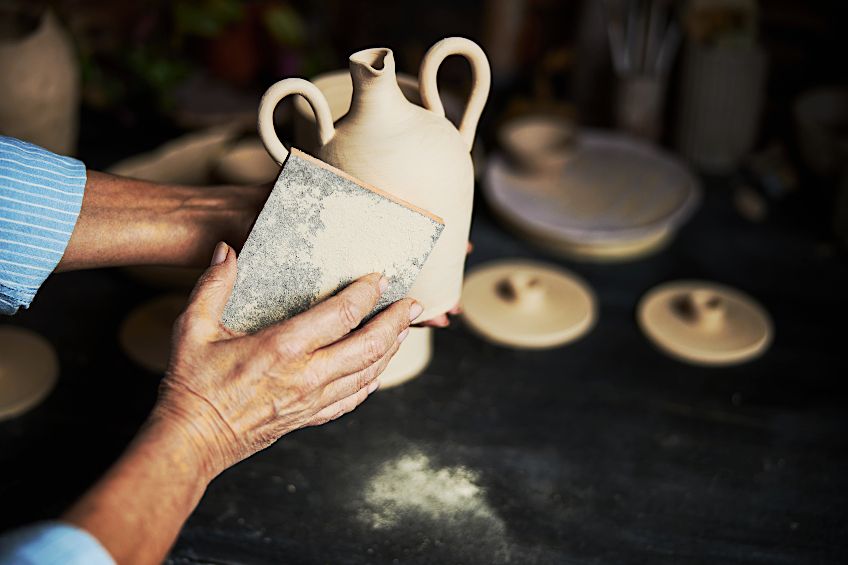
- Sand down the surface of any glazed ceramic that you want to paint on. Roughening up the smooth glaze of the ceramic allows for proper adhesion. We suggest using 220 grit sandpaper for this purpose. You can also apply a primer to the sanded surface of your glazed ceramic to further aid with adhesion.
- Be sure to follow the manufacturer’s instructions when using bake-on paints. The instructions will inform you of the temperature and time that will be needed to bake your ceramic paint appropriately.
- When choosing ceramics, try to pick those that don’t have any decorative designs already painted on them. Ideally, you should try to pick plain white ceramics so that there is nothing that will detract from your design and you have a blank slate, to begin with.
- Not all ceramic paints are safe for use on objects that come in direct contact with food. If you are using non-food safe paints, you must be sure to put them on the outside of mugs or the outer ring or lip of a plate. When possible, always opt for non-toxic, food-safe paint options for ceramic.
If you’re looking for the best paint to use on ceramic, then it depends on the kind of ceramic that you are working with. Bake-on enamel is the most versatile paint option available since it can be used on porous and glazed ceramic without the need for applied primer or any prior sanding. Ceramic markers are easy to use and are also versatile options that work on all kinds of ceramic, but they are not quite as durable as bake-on enamel paint. Acrylic paint can also be used on all kinds of ceramic, but it does prevent you from being able to fire bisque and greenware safely at a later stage. This really means that the best paint for ceramic also depends on what you want to do and what you are comfortable with. Feel free to experiment with all different types of paint to see what works for you. Now that you know how to paint ceramic, you just need to find some pottery to paint and have fun!
Take a look at our ceramic paint webstory here!
Frequently Asked Questions
What Is the Best Paint for Ceramic?
If you are working with glazed ceramic, you will be happiest using enamel paint. Enamel paints will require you to place them in the oven to be baked in order to strengthen the bond of the enamel to the ceramic. Enamel paint is perfect for use with glazed ceramic because of its ability to adhere to smooth surfaces with ease.
Can I Use Acrylic Paint on Ceramic?
Yes, while bake-on gloss enamel is the most durable and versatile of options, acrylic is also a good choice if you don’t plan on baking your ceramic at another point once it has been painted. Simply apply acrylic paint to greenware or bisque that is free of dirt or to glazed ceramic that has been sanded and/or primed with acrylic primer.
Do I Have to Bake Enamel Paint?
Yes, while it can seem very annoying to have to bake your ceramic so many times, you must do it again after applying enamel paint. Enamel paint will only reach its full durability once it has been baked according to the manufacturer’s specifications. If enamel paint has not been baked or has been baked incorrectly, then it will chip, scratch, break and peel quite easily.
What Is the Best Paint for Porcelain?
If you are looking for the best paint for porcelain, you should choose enamel or epoxy paint. This is because these paints are water, chemical, and abrasion-resistant and have excellent adhesive qualities which make them a great choice when looking for a suitable paint for porcelain.
What Kind of Paint to Use On Ceramic Plates?
You can use paint markers, enamel paint, or acrylic paint on ceramic plates, but you should make sure that you don’t use anything that isn’t food safe on a plate that will be eaten off of. When wondering what kind of paint to use on ceramic plates, you need to consider whether the paint will be purely decorative or not before deciding on what paint you will use.
In 2005, Charlene completed her wellness degrees in therapeutic aromatherapy and reflexology at the International School of Reflexology and Meridian Therapy. She worked for a company offering corporate wellness programs for several years before opening her own therapy practice. In 2015, she was asked by a digital marketer friend to join her company as a content creator, and it was here that she discovered her enthusiasm for writing. Since entering the world of content creation, she has gained a lot of experience over the years writing about various topics such as beauty, health, wellness, travel, crafting, and much more. Due to various circumstances, she had to give up her therapy practice and now works as a freelance writer. Since she is a very creative person and as a balance to writing likes to be active in various areas of art and crafts, the activity at acrylgiessen.com is perfect for her to contribute their knowledge and experience in various creative topics.
Learn more about Charlene Lewis and about us.
