Bunny Drawing – How to Draw a Bunny Step by Step
This post may contain affiliate links. We may earn a small commission from purchases made through them, at no additional cost to you.
Learning how to draw a bunny, easy and simple as it is, can be a great drawing challenge due to its unique features. In this easy bunny tutorial, we will learn how to utilize shading, color, and finer details to create a beautiful bunny drawing. We will also learn how to represent unique animal features such as fur, which can easily be utilized in other animal drawings. Bunnies also make for a great addition to your drawing repertoire, as they are often used within various genres of art. Whether it is an addition to a fantastical artwork or a little creature in the woods, there are many ways to use a bunny drawing in your work!
An Easy Guide on How to Draw a Bunny
Bunnies are unique in form and features, making them seem like a complex subject for a drawing exercise. However, we will find that bunnies are quite simple to draw and in this easy bunny drawing, we will be breaking down the process of how to draw a bunny step-by-step. We will learn a few simple tips and tricks along the way that can help us transform a basic bunny sketch into a beautiful and realistic bunny drawing.
Necessary Materials
This tutorial on how to draw a bunny is done with a digital drawing device. However, all necessary drawing processes are transferable to traditional mediums, and you will find that the drawing process can be followed without needing to use a digital device.
- Ballpoint Pen
- Micron Pens
- Pencil
- Eraser
- Sharpener
- Paper
Step-by-Step Guide on How to Draw a Bunny
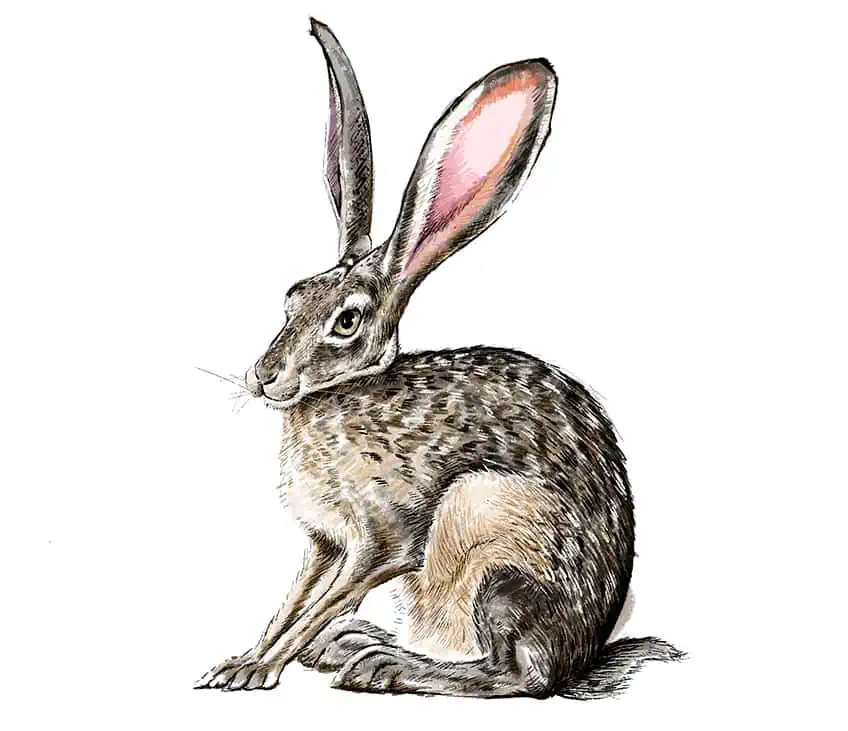
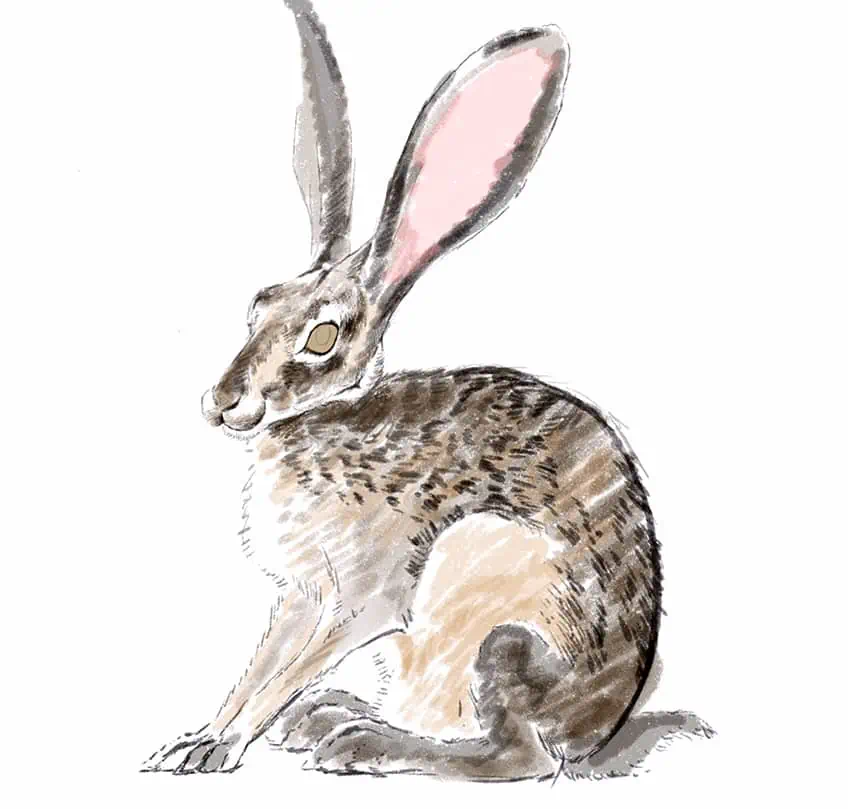
There are many different rabbit species, however, in this tutorial, we are drawing inspiration from the Nebraska black-tailed jackrabbit. In this tutorial, we will be learning how to draw a bunny through a layering process, where we first establish a simple outline of our bunny drawing. From there we will then integrate some simple base layers of color, which we will then refine with some detailing, shading, and some fine line work. As we proceed, we will take our time to give more definition to our bunny drawing by the addition of fine details towards the later steps. Now that we know what to expect, let’s get into this tutorial on how to draw a bunny step-by-step.
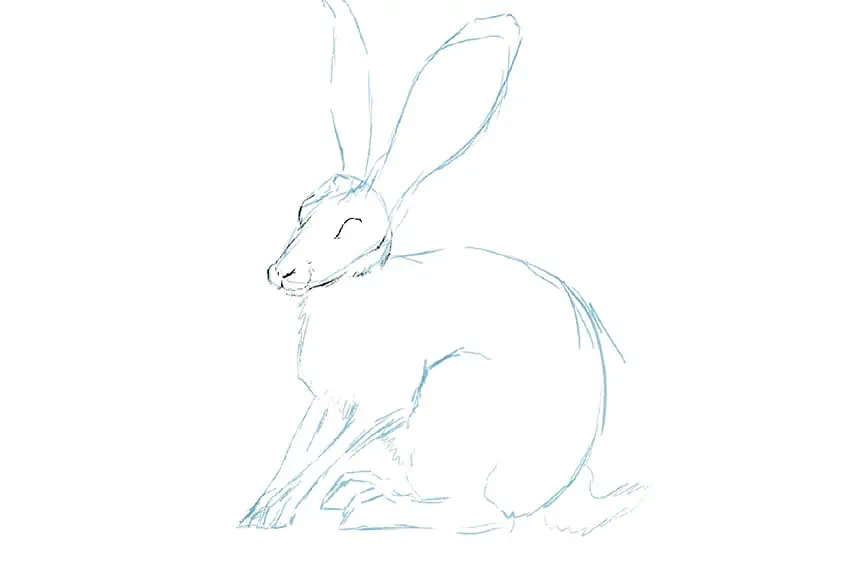
Step 1: Shaping the Bunny
We are going to start by forming the bunny drawing, by establishing the general outline of the animal. This is where we can start to draw the very simple triangular shape of the head.
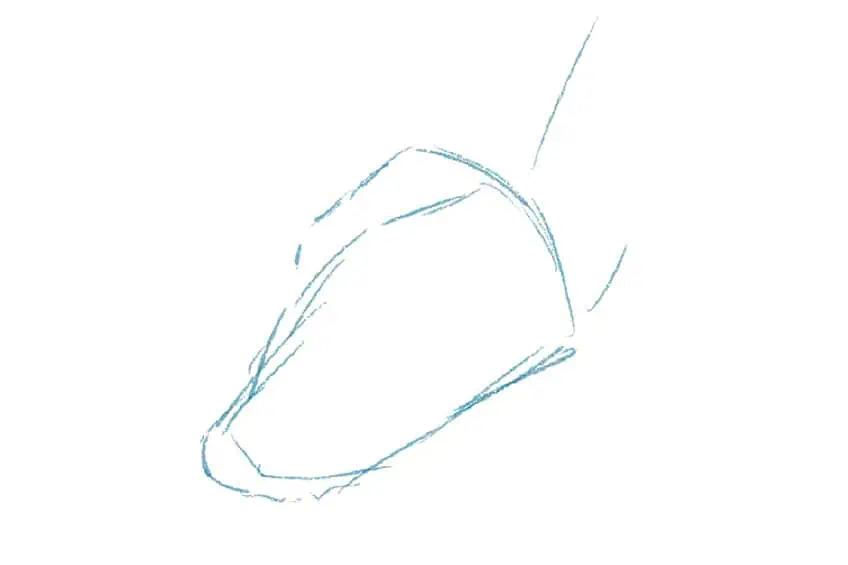
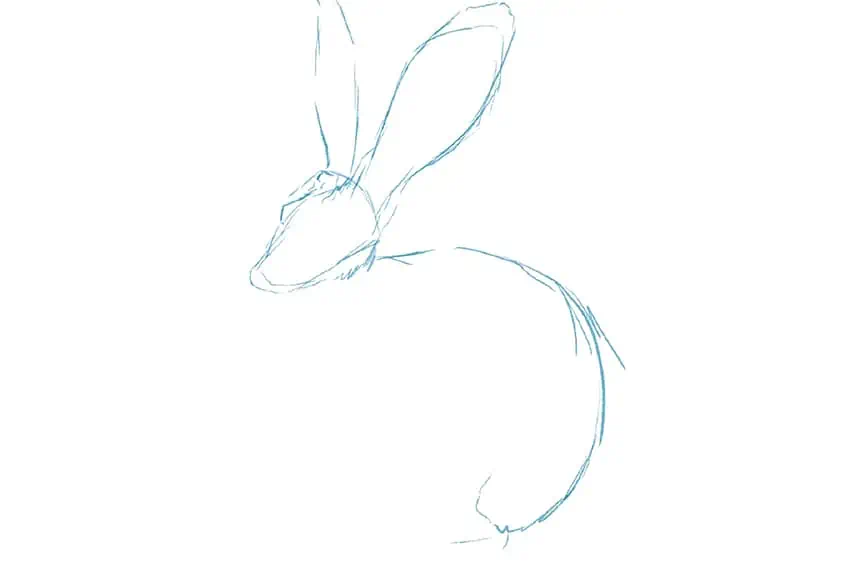
In this case let’s make the bunny drawing in a seated pose, giving the bunny a circular shape as it sits on the ground, resting on its hind legs. We can proceed by drawing in the narrow triangular ears that extend upward in a vertical direction.
Rabbits will often have large hindlegs that will rest in a horizontal direction as it sits on the ground. the front legs will extend outwardly, remaining straight in form as it keeps the rabbit upright.
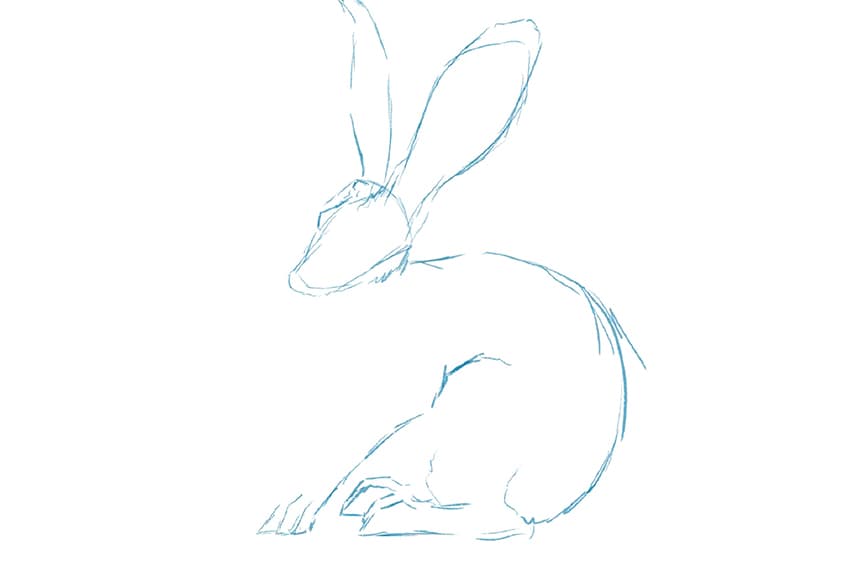
Step 2: Sketching the Bunnies’ Features
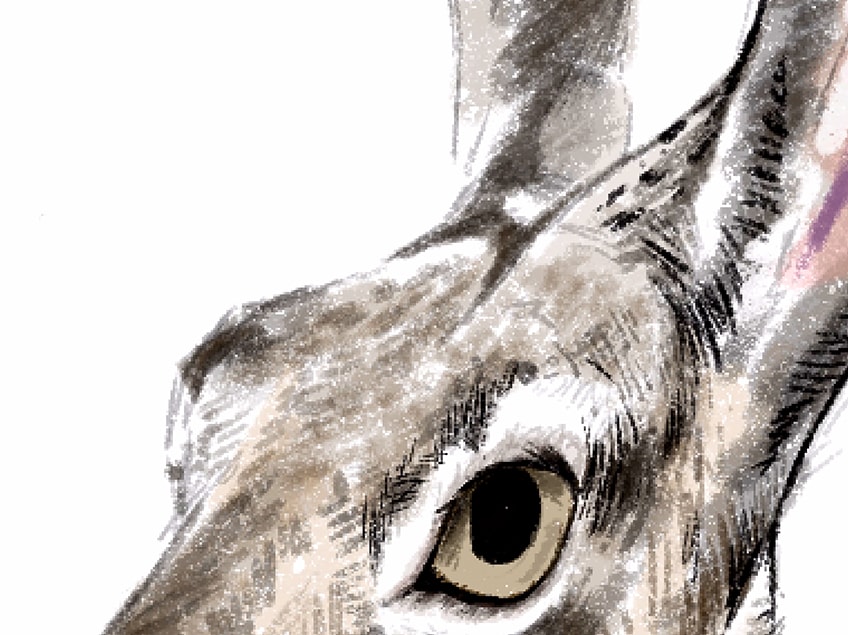
Starting with the face, let’s start to refine the shape by sketching some general features. we will find that the nose of the rabbit is quite long, whereas the eyes bulge from the head quite significantly.
We will find that the tip of the nose has these two rounded qualities near the muzzle of the rabbit. The rabbit also has eyes that bulge from their head, with protruding ridges around the eyes.
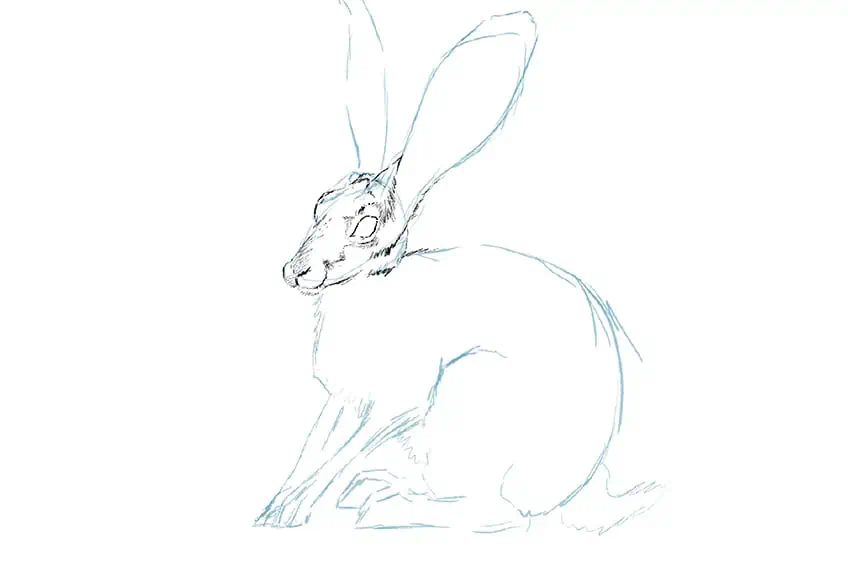
As we work our way through the rabbit drawing, we can also keep the back of the rabbit quite rounded. We can also work our way through the ears of the rabbit, making sure we emphasize the oval shape within the ears.

Depending on what perspective you are drawing the rabbit from, some features will be slightly less visible. In the case of a side profile, we want to make sure we emphasize the protrusion around the eye in the background.

As we add curvature to the back of the rabbit, slowly working our way down to the hind legs, we want to make sure that the hind legs are quite large. they should be significantly larger than the shorter front legs.

With the front legs, we can make sure that they remain straight as they make contact with the ground along the same axis as the hind legs. we want to make sure it makes sense in the way the front legs reach the ground compared to the hind legs.

Step 3: Adding Light Layers of Color
Once we have a general sketch of the bunny, we want to now work through layering colors into the drawing. The idea is to build up colors from lighter to darker tones. with the jackrabbit, we can work with a variation of browns and grays.
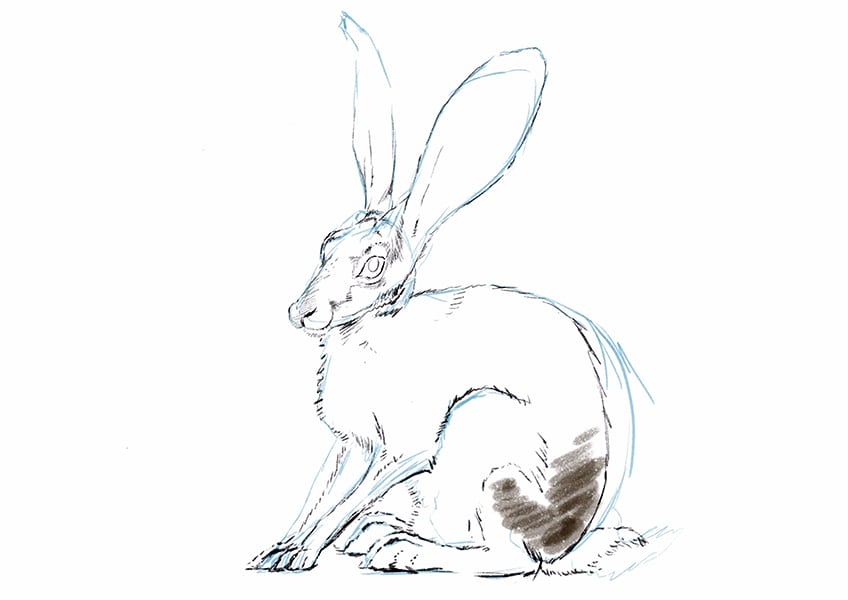
We will find that the jackrabbit has a darker coloration in its fur coat that runs along the back of the rabbit, whereas the front chest area of the rabbit is much lighter.

The rabbit also has variations of color on the face. We also want to use color to establish some three-dimensionality to the facial structure. the ridge of the snout will be slightly darker than the colors around the cheek area in the face.
We want to use our colors to represent shadows and lighter areas within the fur, which will create a sense of three-dimensionality in the animal as well as variation of color in the fur.
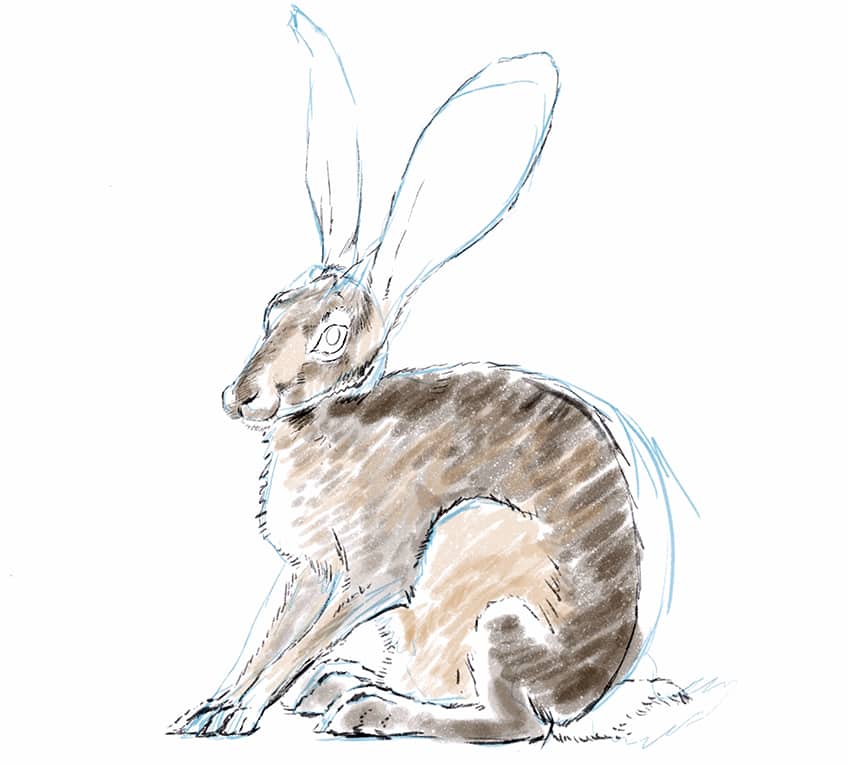
Again, the jackrabbit does have lighter and darker tones in the facial features. The ridge of the nose has a dark gray coloration, as well as the fur running around the eyes.

Try to work with blending browns and grays within the body. Again, there is this transition from darker colors in the fur that shift from the back of the rabbit into the chest area of the rabbit.
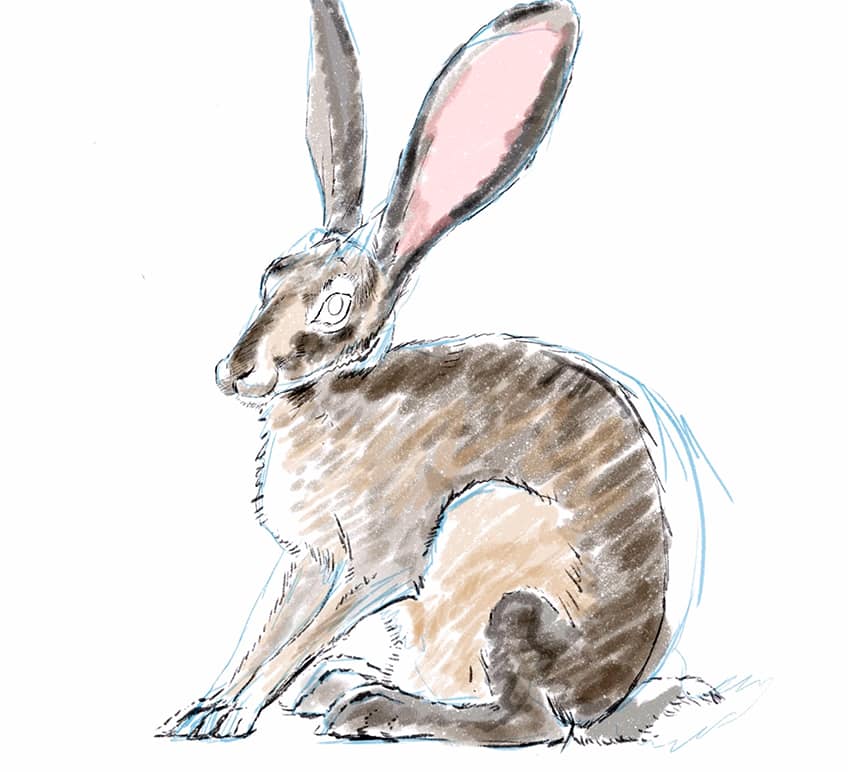
Step 4: Adding Darker Layers of Color
We can also start to be strategic with the drawing techniques we use to represent more of a fur quality in the rabbit. This is where integrating strokes of lines can be very effective in creating a disheveled quality in the fur.
We can also start to work darker hues over the fur, maintaining the combination of colors between browns and grays. allow yourself to start working with the form of various features, where you work colors along the shape of both head and body.
As you build up your colors with darker hues, you can create layers through line work to establish a more textured effect within your bunny drawing. remember, work with the flow and form of the body, making sure your marks move along the arch in the back.
As you shift into the lighter areas, near the front areas of the bunny, work with transitions between grays and browns. We want to maintain lighter brown hues within the front features of our rabbit drawing.

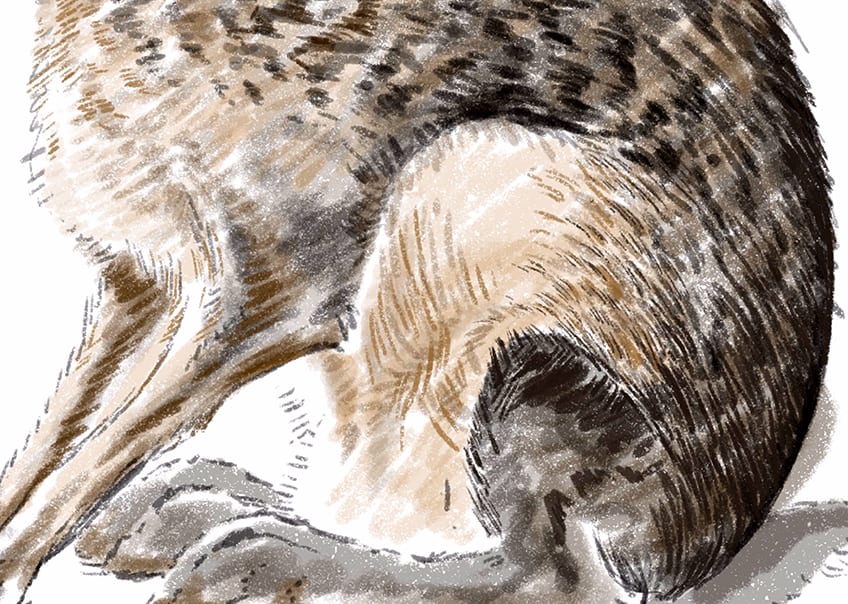
We will also find that the hind legs will remain much darker than the front legs. the front legs will have more brown coloration, whereas the hind legs will have a darker gray coloration.

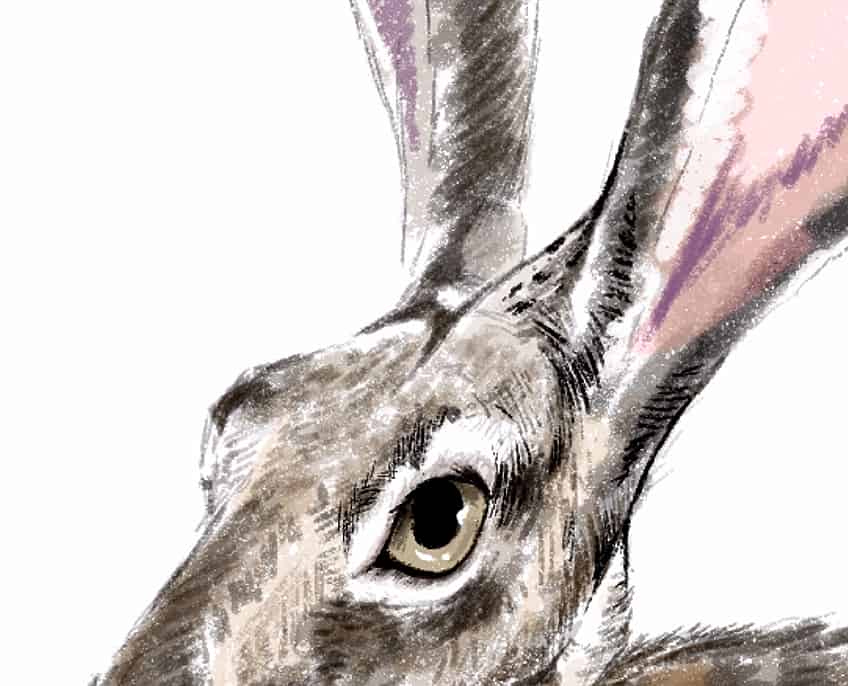
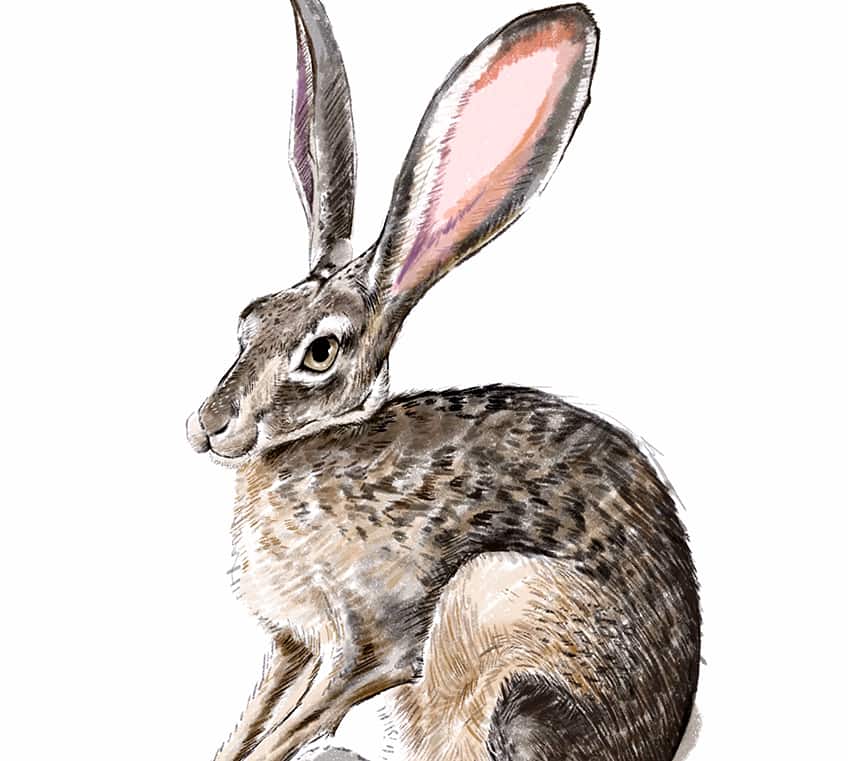
The ears of the rabbit are quite different in coloration because some of the skin is visible near the inner ear surface. This means that we will see a subtle pink coloration within the exposed inner ear.

Again, consider looking at a reference image as you proceed with your coloring process. The ears are darker and gray on the exterior surface, however, the inner ear has a slightly pink coloration.

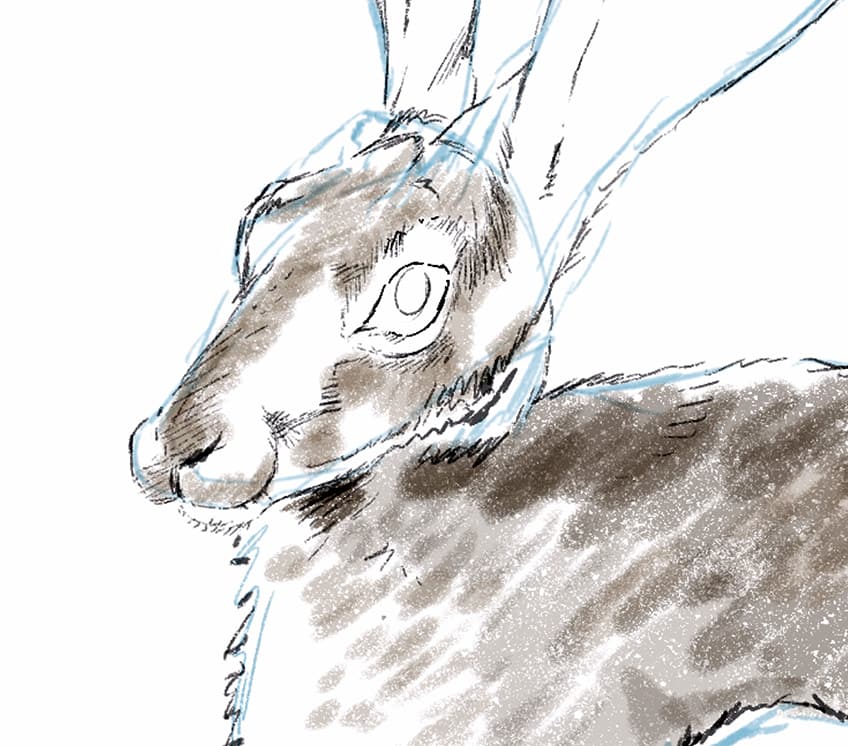
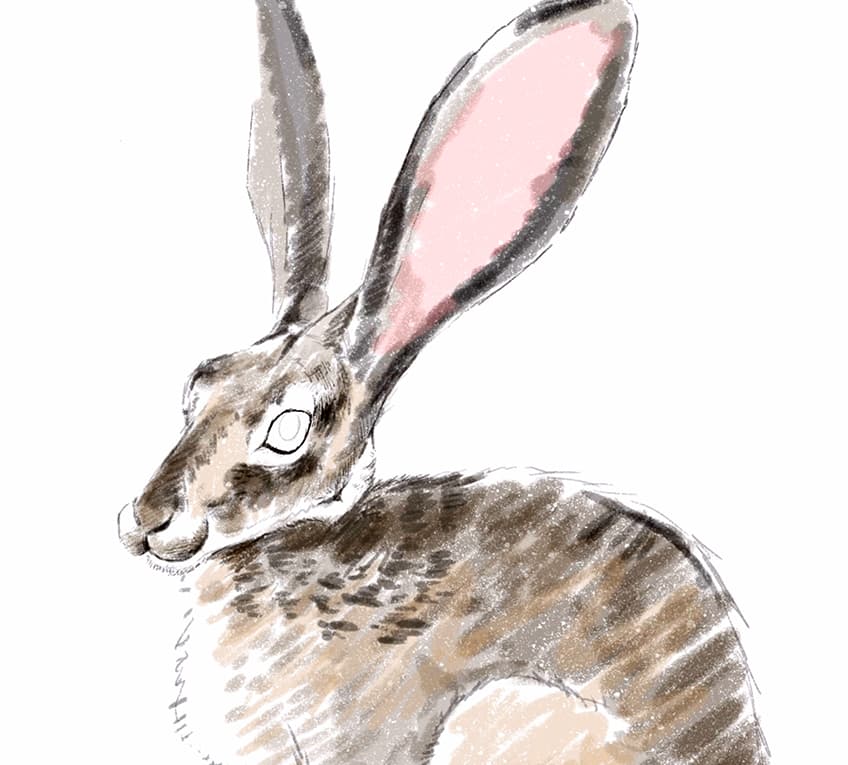
Step 5: Adding Refined Details to the Bunny Drawing
Once you have worked in layers of color to establish the main coloration in the various features, we can start to refine those features further. This is where we utilize line work and detailed drawing to create more structure and shape in various features.
Starting with the face, start working on some line work and shading to bring the formation to the various features. For example, we can share the eye structure to create more three-dimensionality around the eye.
We can also start to work some darker line work throughout the lower section of the body. This is where we can create some distinction in the fur where the hind legs curve near the knee area.

Again, we want to make a transition of colors within the fur, from the back towards the front features of the rabbit. The back of the rabbit will be darker in color, and become slightly lighter as they shift towards the front of the rabbit.
The idea is to now work through the rabbit drawing with some darker marks. we can integrate more line work to emphasize the fur-like texture within the body, we can also add more shading along the side of the face to emphasize the protruding ridge of the nose.

We can also bring more structure to the ears of the rabbit, emphasizing them a little further by working in dark edges along the tips of the ears. This is a common feature within the ears of jackrabbits, especially along the upper edges.
We want to make sure we spend a good portion of time on facial features, making sure we emphasize the shape as best we can. especially the protruding features, such as the eyes and nose of the rabbit.
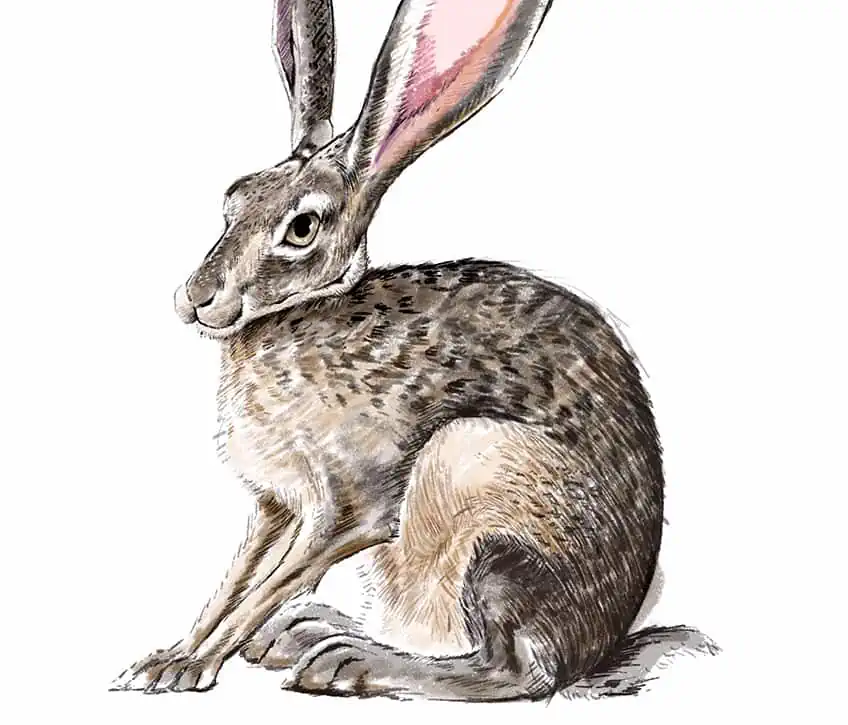
We can also start to work on more outlined shapes for the hind and front legs of the rabbit. This is where we can give them a more distinct shape in the bone structure by defining the digits in the paws, as well as the bone formation of all four limbs.
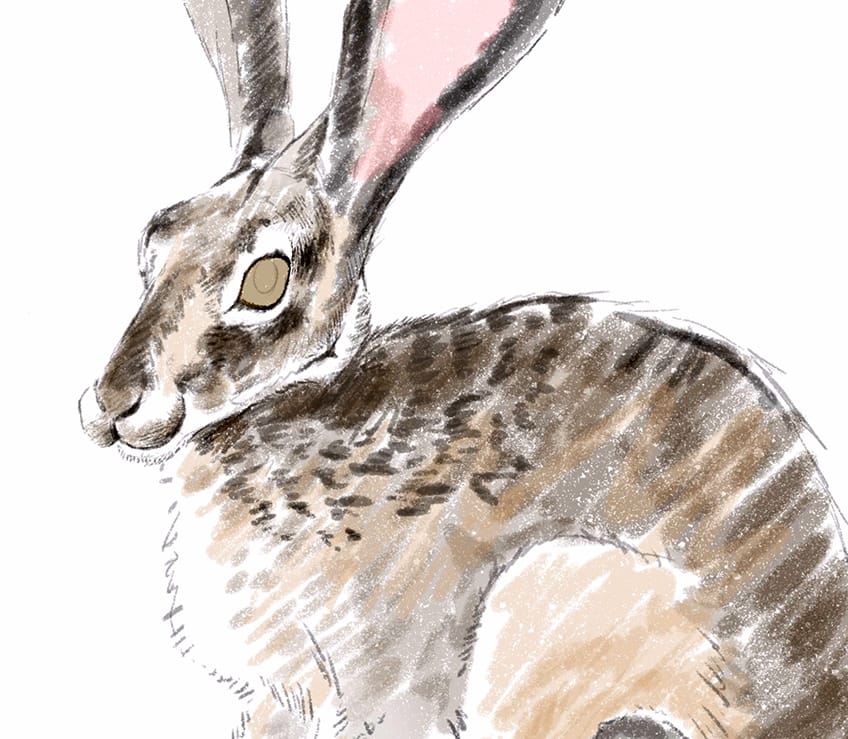
Step 6: Adding Final Details to the Bunny Drawing
Lastly, we can start to add some final details to the bunny drawing, by working on some highlights along the various features. This is where we can work in some light tones into the fur, maintaining the line work quality to represent the quality of fur-like texture.
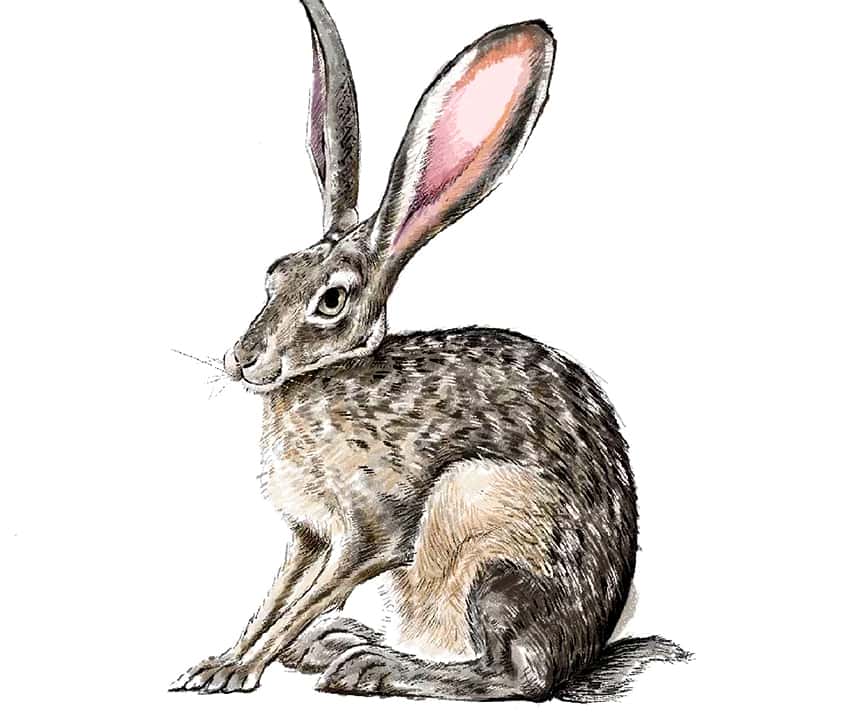
Learning how to draw a bunny, easy as it may be, does require us to focus on the necessary steps. We want to take your time going over any little details that might need some darker shading and linework. Otherwise, there you have it! an easy bunny drawing demonstrated through a few simple steps.
Tips and Tricks to Remember
- Establish the sketch before adding color. Working out the shape and refining them into a rabbit is essential before adding color to your bunny drawing.
- Consider light and shadow. Work with color to represent both the color of fur and to also establish shadow and light in the bunny drawing.
- Work in layers of color. Always build up colors from light to darker tonal values, As this way you have more agency in your mark-making process.
- Take your time with the details. Take your time with shading and line work to represent the shape and form of the rabbit as best you can.
Learning how to draw a bunny, easy as it seems, requires some attention to detail. This animal is a really good drawing subject matter because of how their features are similar to other animals. Bunnies are strange and mystical-looking creatures that can be used in so many ways. Understanding how to draw a bunny is a great addition to your drawing knowledge, as a lot of the drawing processes can be applied to similar animals and drawing topics.
Frequently Asked Questions
How Do You Draw Eyes on a Bunny?
Bunnies tend to have large eyes compared to their head. This is an evolved survival physiological feature that allows them to see their surroundings for any predators. In this tutorial on how to draw a bunny step-by-step, we look at how the eye is a protruding structure that is quite large compared to the face. The eye has an oval-like shape that is also quite dark, which is specific to the jackrabbit, with a very large pupil. We also want to add shading along the top section of the eyeball to create more dimension in shape. Lastly, we can add little highlights of white marks to create a sense of reflection off the surface of the eyeball.
How to Draw Bunny Ears?
The ears of rabbits differ in size, however, what’s unique about the jackrabbit is that its ears are larger and extend in an upward direction. The ears are much larger than the face and have these very narrow and elongated oval-like shapes. The inner feature of the ear exposes the surface of the skin, showing a pink-like coloration in the ear. The outer-fur feature is quite dark in color, and the ears have black coloration along the edges. As you draw a bunny, easy as it is, it is important to capture the large scale of the ears as they extend upward from the top of the head.

Matthew Matthysen is a multidisciplinary artist. He completed his fine art degree, majoring in History of Art and Contemporary Drawing Practice at the University of Witwatersrand, South Africa. Before joining acrylgiessen In 2020, Matthew worked part-time as an art teacher at Reddford Blue Hills High school. Matthew creates drawing and painting tutorials for acrylgiessen and captures them not only photographically and in written form. He also records the creation of his works in his own creative studio as in video format, from which later with a voiceover and a video editor also drawing tutorials for the Youtube channel of acrylgiessen are created.
Learn more about Matthew Matthysen and about acrylgiessen.