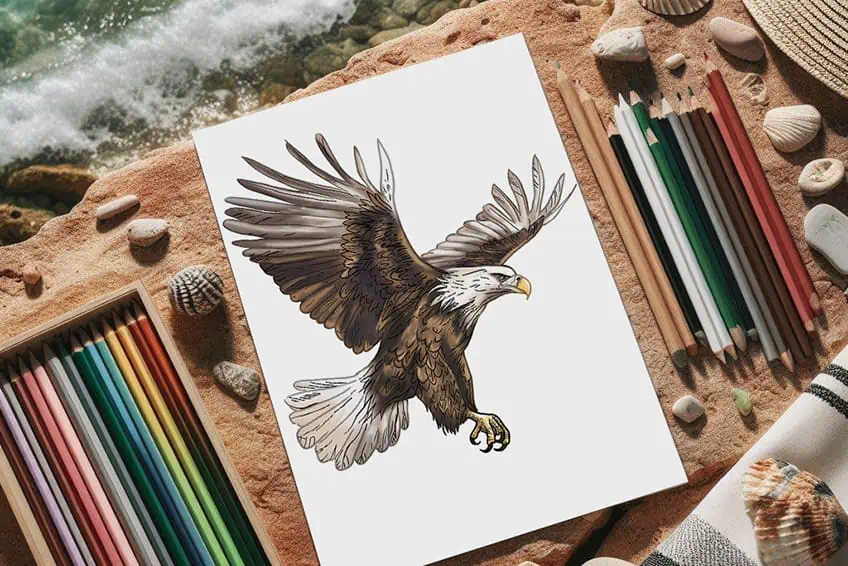
Eagle Drawing – 16 Steps for Drawing Graceful Guardians
This post may contain affiliate links. We may earn a small commission from purchases made through them, at no additional cost to you.
Eagles: icons of the sky, masters of grace and power. With wings spread wide, they command the heavens, their keen eyes spotting prey below. Whether you’re intrigued by the intricate details of an eagle’s plumage, or simply eager to elevate your artistic prowess, this guide will walk you through 16 indispensable steps to create a lifelike representation of an eagle. This comprehensive tutorial ensures that you have the tools and techniques necessary to immortalize the noble beauty of an eagle on your canvas with unparalleled precision and grace.
Majestic Mastery: A Guide to Drawing Eagles
Discover the artistry behind depicting the majestic grace and power of eagles with precision and finesse in this comprehensive guide. This illustrated guide provides a detailed walkthrough of every step required to bring an eagle to life on paper. By following along closely, you’ll gain the expertise needed to master the art of drawing an eagle!
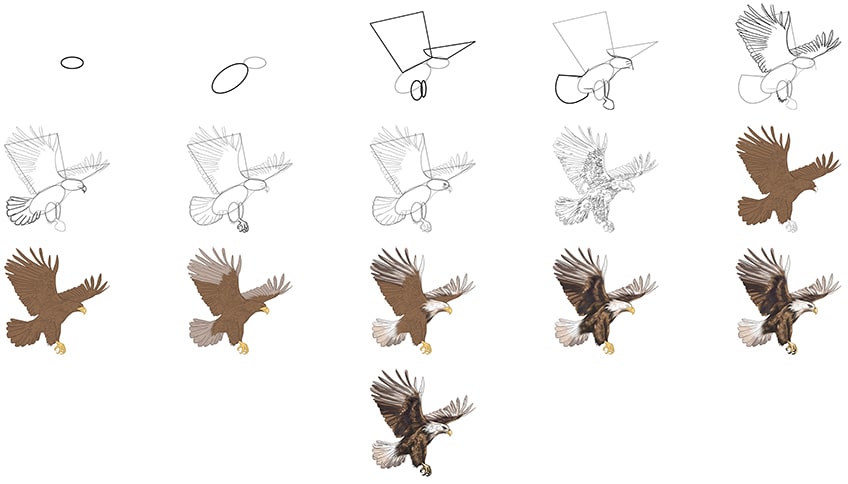
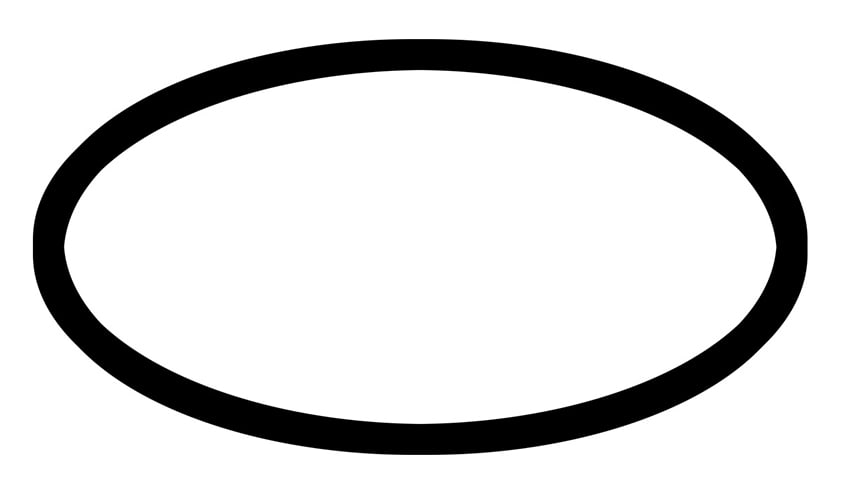
Step 1: Draw the Head of Your Eagle
Start this guided tutorial by drawing a horizontally laid oval shape to represent the head of your bald eagle drawing.
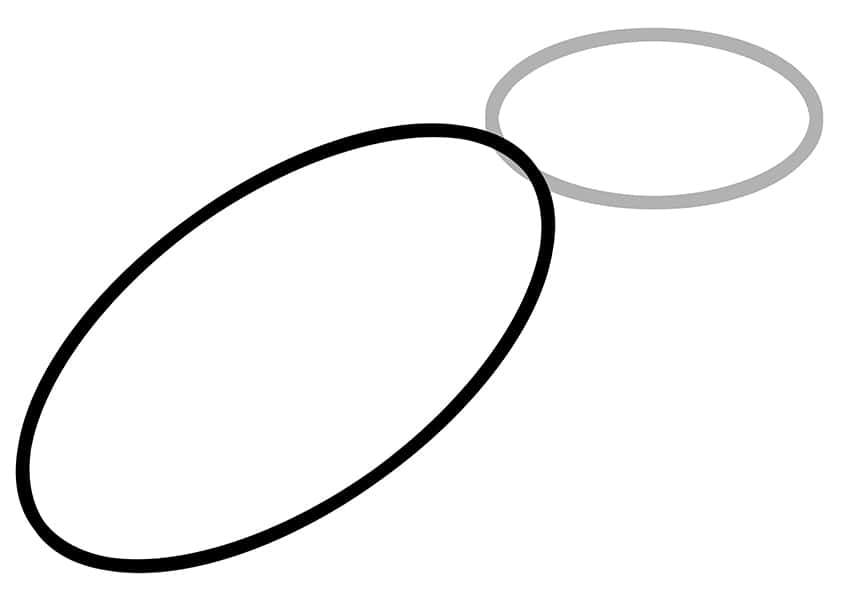
Step 2: Continue Onto the Body of Your Bald Eagle Drawing
Draw a slightly angled oval shape attached to the head to represent the main body of the eagle.
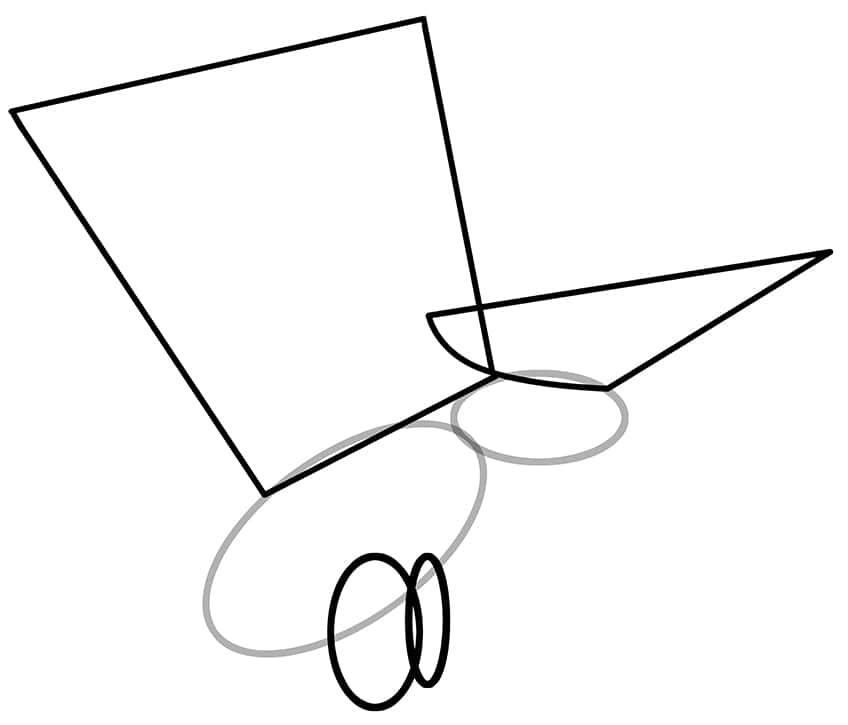
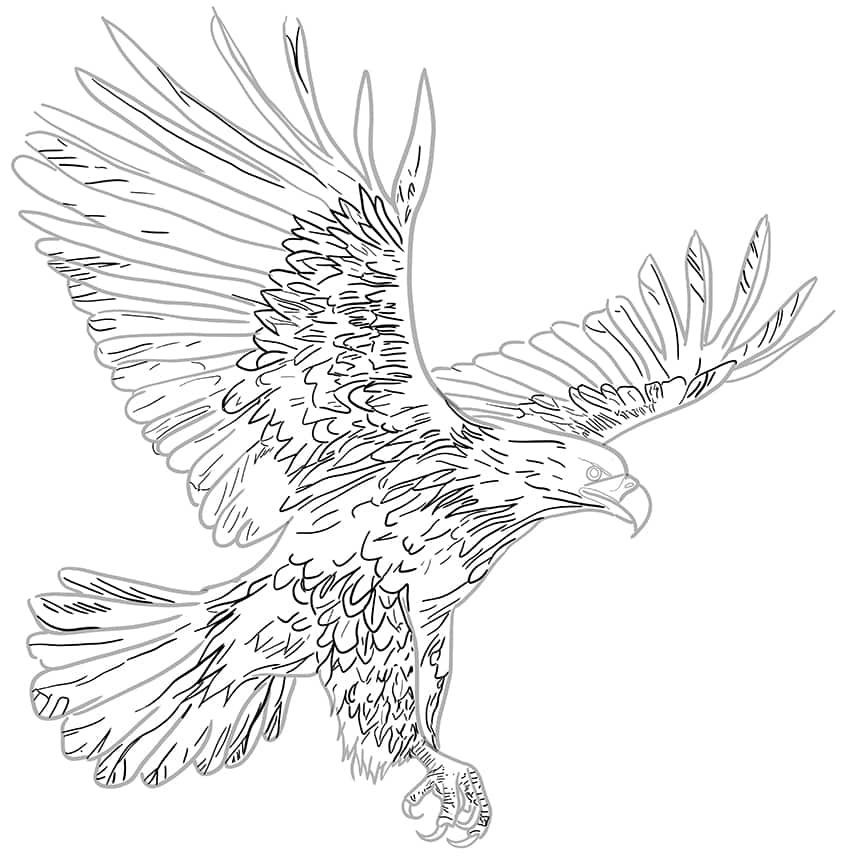
Step 3: Draw the Legs and Wings
Overlap the main body by drawing two vertical oval shapes of different sizes to represent the eagle’s legs. Complete this step by sketching the draft shape of the wing position and angles above the head and main body.
Step 4: Outline the Main Body and Tail of Your Eagle Sketch
Keep utilizing the construction lines to assist you in outlining the head, legs, main body, and tail.
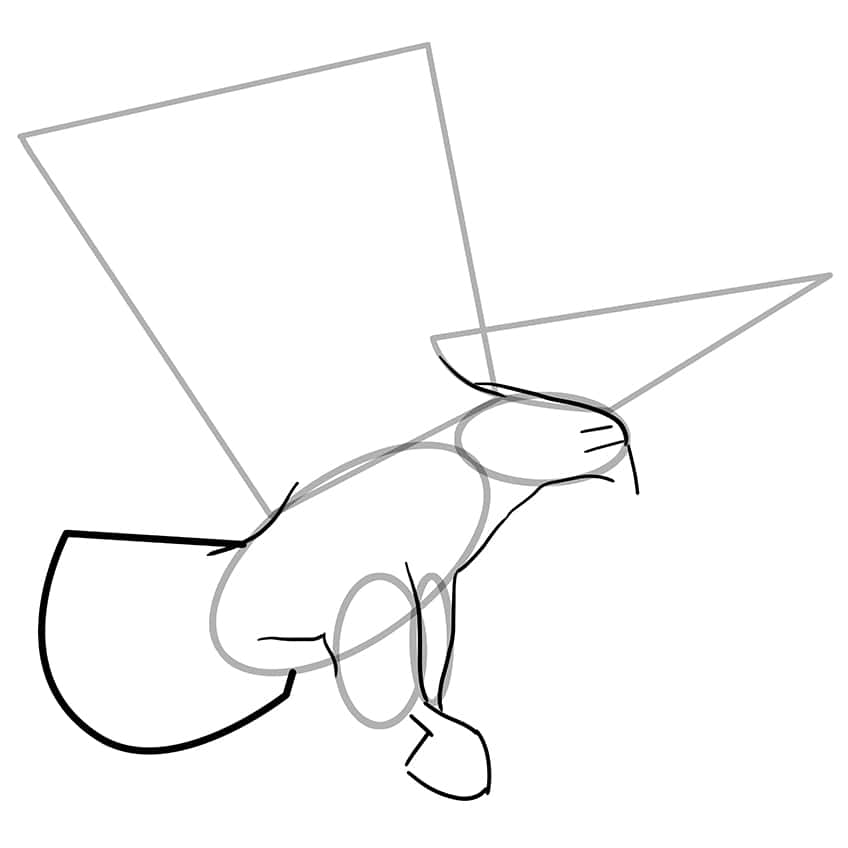
Step 5: Continue to Outline the Wings
Utilize the previously drawn construction lines to assist you in outlining and drawing the shape of each wing, then individually sketch the feathers to curve along with the wing shape. Complete this step by drawing the hairy leg patch.
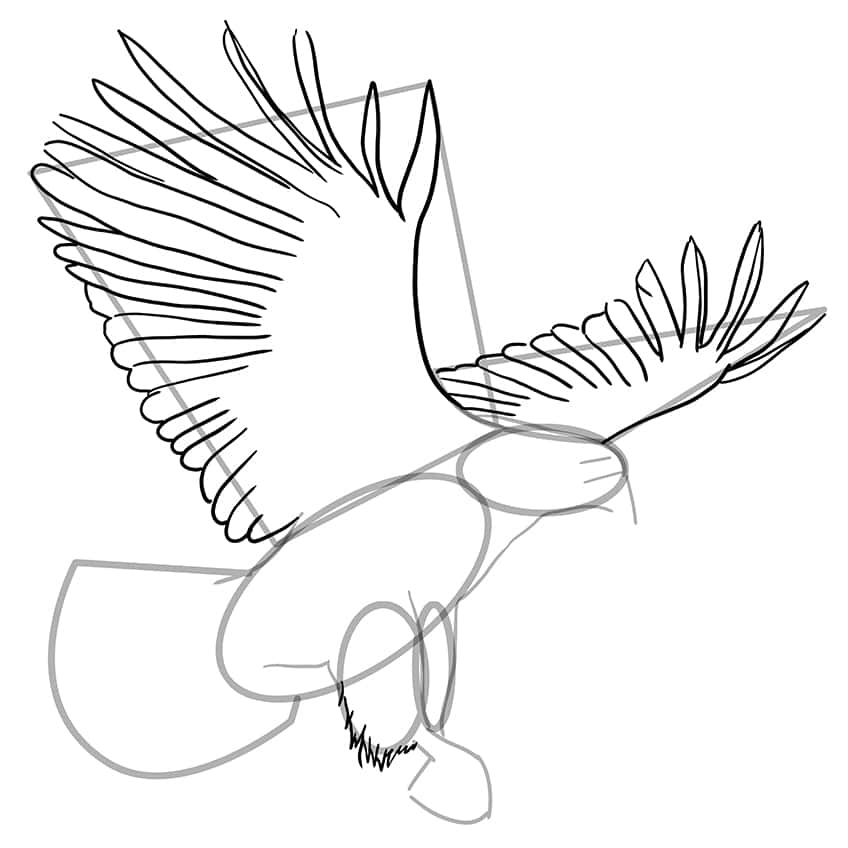
Step 6: Outline the Tail of Your Eagle Sketch
Continue outlining the tail of your eagle drawing and start drawing its individual feathers. Finish off by outlining the beak.

Step 7: Begin to Outline the Feet
In this step, being to outline the visible feet and claws using the construction lines. Each of the claws should be drawn ending with a curved sharp-end.

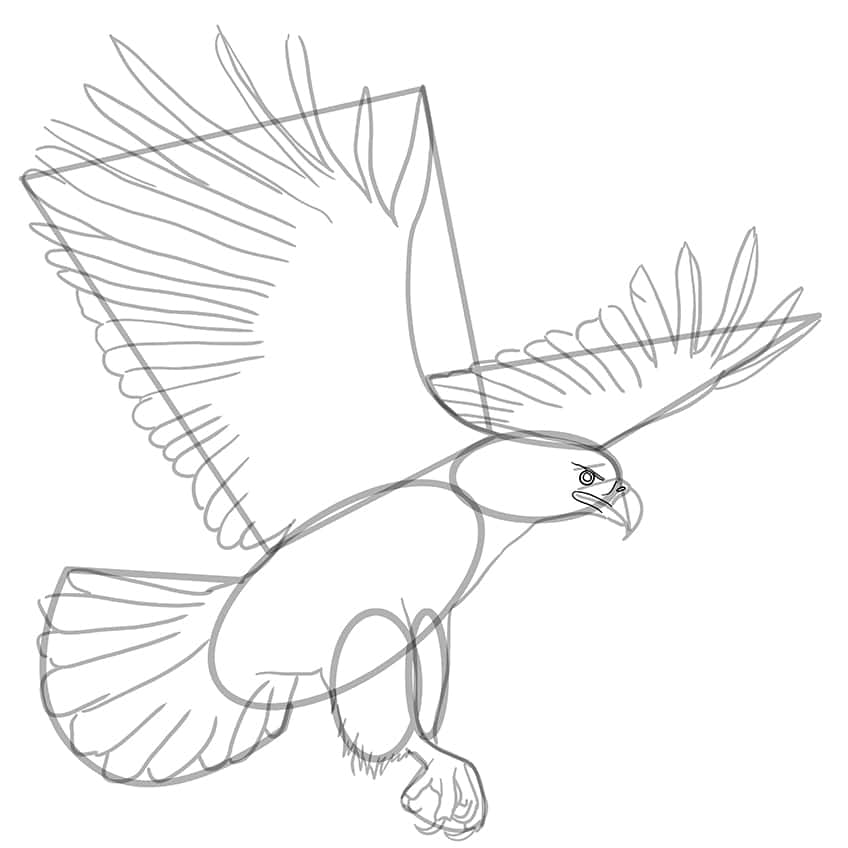
Step 8: Draw the Eye on Your Bald Eagle Drawing
Utilize the previously drawn construction lines to help you draw the visible eye, ensuring that the eye has a sloped eyebrow angle to give the eagle a more serious appearance. Complete this step by drawing the nostrils and the beak line, and then erase any remaining visible construction lines.
Step 9: Add the Feathers
In this step, fill the blank areas of the wings, tail, main body, head, and legs of your eagle drawing with fine, individually drawn feather lines. Continue by drawing fine texture lines along the claws and flight feathers.
Step 10: Apply the First Color Coat to Your Eagle Drawing
Begin the coloring process by selecting a fine, sharp brush and brown paint, and evenly coat the eagle.
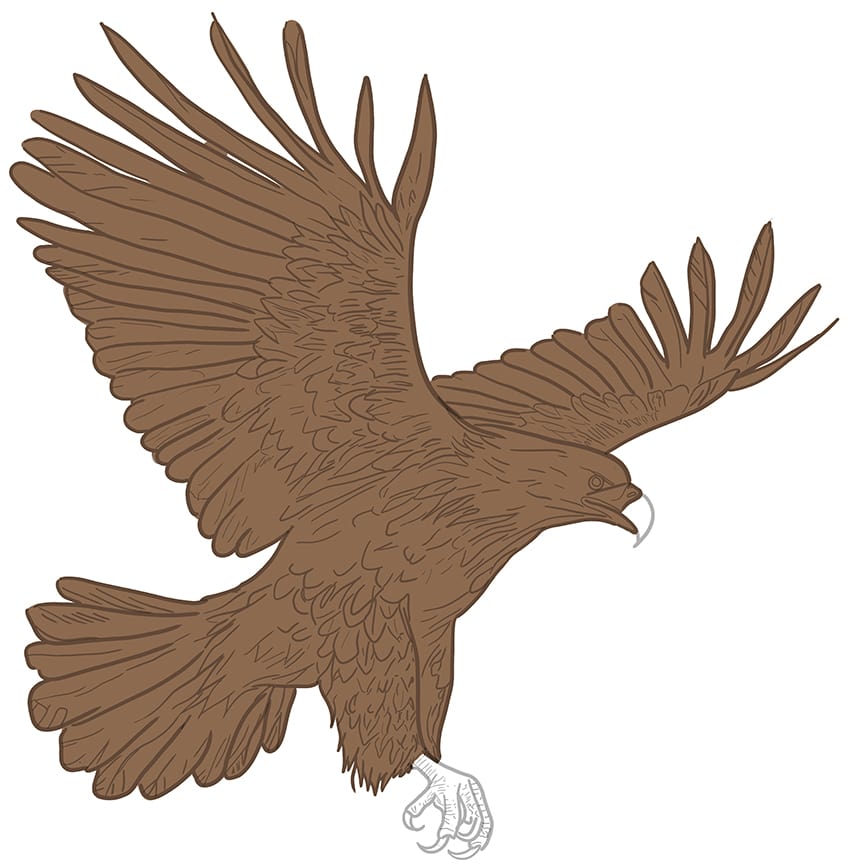
Step 11: Continue to Color Your Bald Eagle Drawing
Using the same brush, switch to a golden yellow paint, and evenly coat the beak and claws on your eagle sketch.

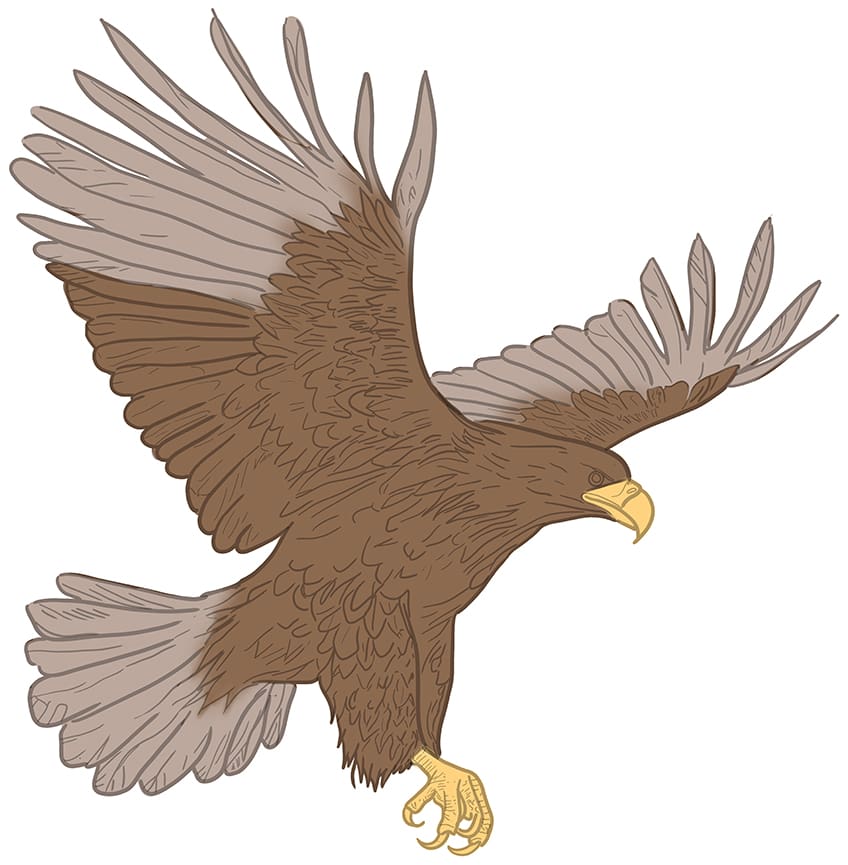
Step 12: Add a Secondary Color Coat to the Feathers
With a fine, sharp brush and light stone gray paint, coat the main feathers on the wings and tail on your eagle sketch.
Step 13: Shade and Highlight the Wings
Start by using a gentle brush and black paint to add gentle shading within the main feathers of the wings, tail, and head. Repeat this process using a blending brush to spread and soften the layers. Then, apply white paint to add highlights. For the tail and head area, utilize tan and white paint.
Complete this step by employing a blending brush to diffuse and soften the highlights.

Step 14: Move Onto the Main Body
Select a small, soft brush and black paint, and apply shading along the main body and the rest of the feathers on your eagle sketch. Repeat using tan and white paint to add soft highlights.
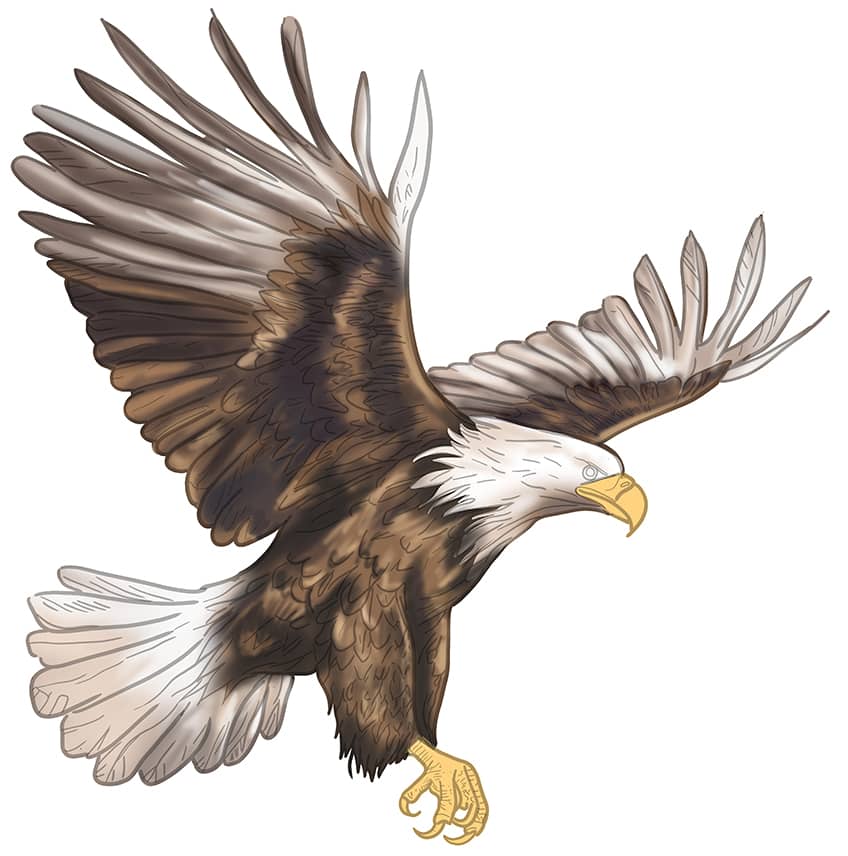
Step 15: Shade and Highlight the Facial Features
Utilize a fine, sharp brush and dark brown paint to shade the surrounding area of the eye and nostrils. Repeat this process using yellow and white paint to complete the eye, iris, and eye shimmer. Shade the claws using a soft brush and black paint, then repeat the process switching white paint to add soft highlights.
Finally, use a blending brush to soften and spread the coats.

Step 16: Finalize Your Bald Eagle Drawing
Use a fine, sharp brush and black paint to trace the inner texture lines surrounding the claws to complete the eagle artwork. Once you’ve followed these steps, you’ll have completed our tutorial on how to draw an eagle with intricate detail and finesse!

Congratulations on mastering the art of learning how to draw an eagle in 16 steps! Your dedication, patience, and talent have truly shone through as you meticulously brought this majestic creature to life on paper. From sketching the initial outlines to adding intricate details, each step of your journey has led to a stunning masterpiece that captures the essence of the eagle’s grace and power. Your achievement is a testament to your perseverance and passion for the arts. Keep soaring to new heights, and may your future artistic endeavors continue to inspire and amaze.
Frequently Asked Questions
What Are Some Essential Features to Include When Drawing an Eagle?
When I draw an eagle, I always focus on capturing its distinct features that embody its strength and grace. Essential elements include the sharp beak, piercing eyes, powerful talons, and the characteristic wing shape that allows it to soar through the skies with effortless elegance. Each detail contributes to conveying the majestic presence of this iconic bird, from the curve of its beak to the intricate patterns of its feathers.
What Are Some Common Mistakes to Avoid When Drawing an Eagle?
To ensure the accuracy and realism of my eagle drawings, I make a conscious effort to avoid common mistakes that can detract from their authenticity. One frequent error to steer clear of is neglecting to pay attention to proportions and anatomy, as inaccuracies in these areas can undermine the overall impression of strength and grace. Additionally, I am careful not to oversimplify or overlook details such as feather patterns and wing structure, as these nuances contribute to the lifelike quality of the drawing.
How Can I Add Detail and Texture to My Eagle Drawing?
Adding detail and texture to an eagle drawing is a rewarding process that enhances its realism and visual impact. To achieve this, I employ various techniques such as cross-hatching, stippling, and shading to replicate the intricate patterns and textures of the eagle’s feathers. By studying reference images and observing the subtle variations in texture, I can recreate these details on paper, layering different pencil grades or brush strokes to create depth and dimension. Additionally, I pay close attention to light and shadow, using highlights and shadows to further enhance the three-dimensional quality of the drawing and bring the eagle to life on the page.

IzzyBll is a digital artist and content creator from Israel and currently residing in South Africa. Originally coming from videography, Izzy then turned to digital graphic art. He specialized in using digital drawing software such as Photoshop and Procreate. Drawing and photo editing has always been a sort of second nature for Izzy. In doing so, he can now look back on 5 years of experience in the industry, completing commissions for various well-known brands such as Audi.
Learn more about IzzyBll and about us.