Shading Techniques – How to Create Volume with Light and Shade
This post may contain affiliate links. We may earn a small commission from purchases made through them, at no additional cost to you.
If you want to draw, understanding how to create the illusion of volume and mass through the application of light and shade is arguably the most useful ability you can master. There are several approaches for shading drawings using both pencils and pens. Studying the various shading techniques will help to improve your drawing abilities and will mean the difference between creating a sense of three-dimensionality in your art-works. This is because shading practice is an important technique for defining shadow and shape across two-dimensional art genres. This shading tutorial includes a variety of easy-to-learn shading techniques, and useful tips on how to shade with pencils and pens.
A Note Before We Start
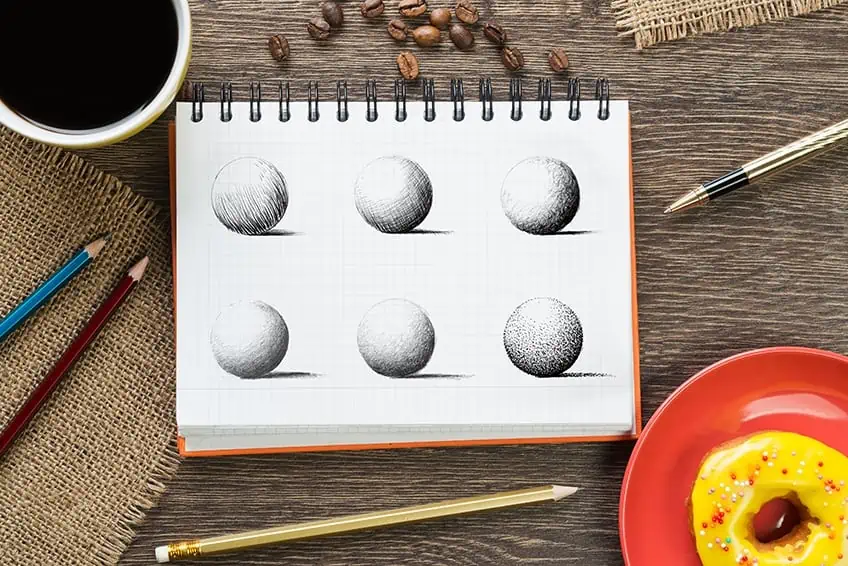
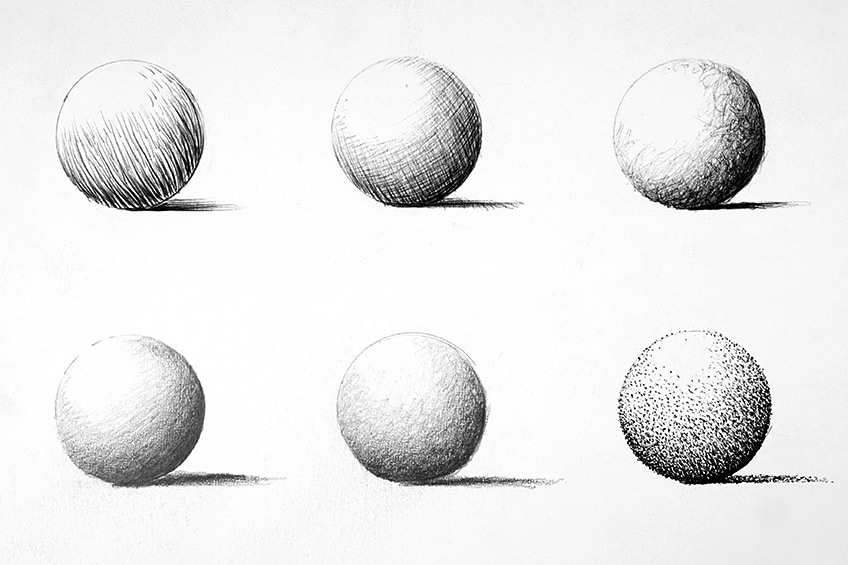
This shading tutorial breaks down some shading techniques into six simple sketches. We will make a sequence of spheres and shade them with the drawing materials that best suit various approaches. Adding shade to a sphere is a fun project since you have to pay attention to how light falls across a sphere and creates various types of shadows. All the tips for shading are simple to grasp and straightforward to master.
Understanding the many shading techniques available with both pencils and pens will help us fully understand how to use light and shadow in drawings overall. We shall go over various tips for shading, allowing you to learn abilities that you may use in your shading practice. In this shading tutorial, we’ll go through the many sorts of shading techniques, such as how to shade with pencils and pens.
Our Guide to Pencil Shading Drawings
When we break it down into manageable pieces, shading becomes really simple. There are several methods for adding shade to a drawing. Shading may dramatically improve your drawing by creating the illusion of dimensionality. Understanding the various approaches you can use to apply shadows with a pencil and a pen is essential if you are to make successful drawings.
Method 1: The Hatching Technique
Hatching with a pen is the first shading method we’ll look at. Let’s start by sketching a basic sphere. A compass or a stencil can be used to draw a circle. To define a shadow in an object, we utilize lines in the shading method known as “hatching.” Deciding which side the light source is, and where light is coming from is important.
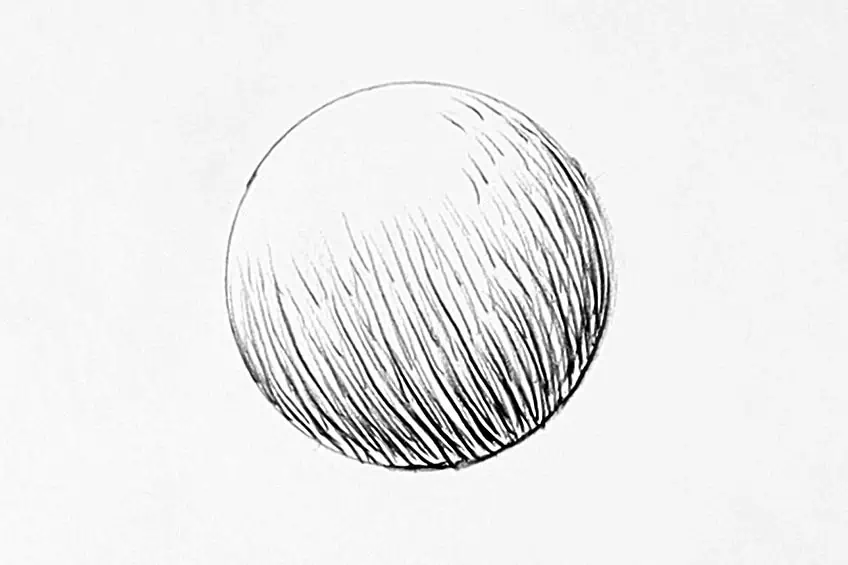
We require a source of light coming from a precise angle in order to portray the shadow. Let’s pretend that it is originating from the left side of the sphere in this instance. As a result, our shadows will be cast to the right of the item, which is the opposite side of the light source. With a pen, hatching is effective since we can concentrate on our pressure, allowing for lighter or darker lines.

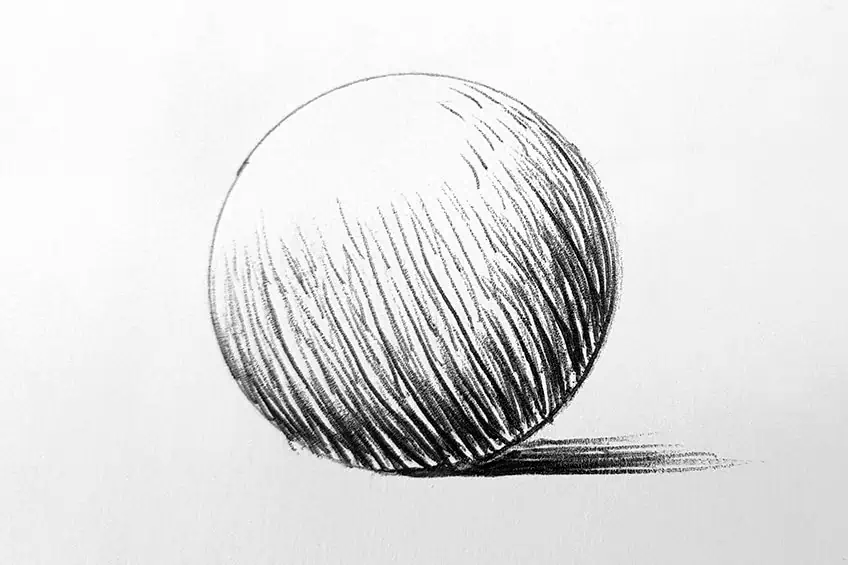
By grouping individual lines together, we may portray the shadow using hatching. We do this by drawing darker and thicker lines the closer we get to the darkest part of the object. The lines can be made thinner by bending them around the sphere in the direction of the area that is lighter. To further form the sphere, we can interlace thinner lines. The final modification we may do is to create a small horizontal shadow next to the sphere’s shadowed area.
Method 2: Cross-Hatching
In contrast to hatching, cross-hatching involves crossing lines to provide a gradient in the shade. Once more, we start by sketching a spherical. We want to create our shadows on the right-hand side of the sphere since the source of light is coming from the left-hand side. We start by drawing lines that resemble hatching along the sphere’s curvature in only one direction.
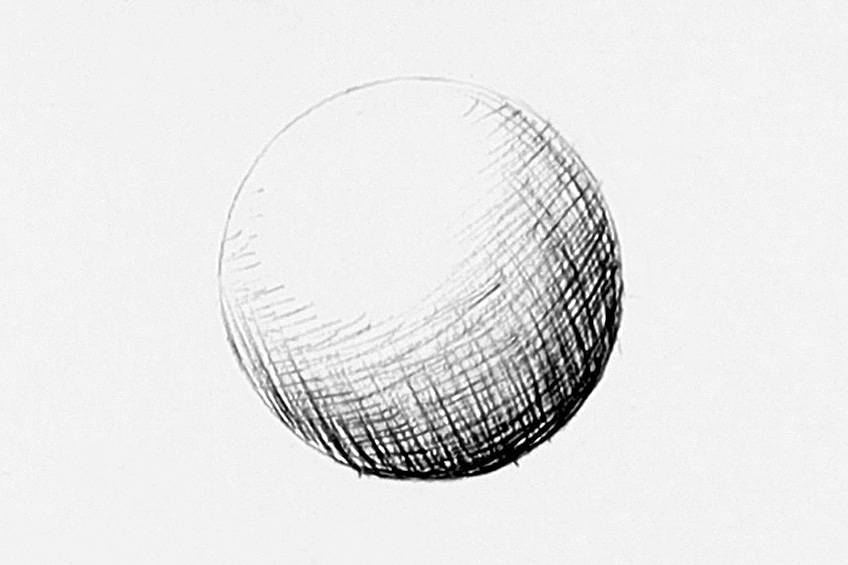
The next step is to create lines that cross our initial lines diagonally. From the darkest parts of the sphere to the lighter parts of the sphere, we want to gradually work these lines into the sphere. Additionally, we may lighten these lines by easing out the pen pressure.
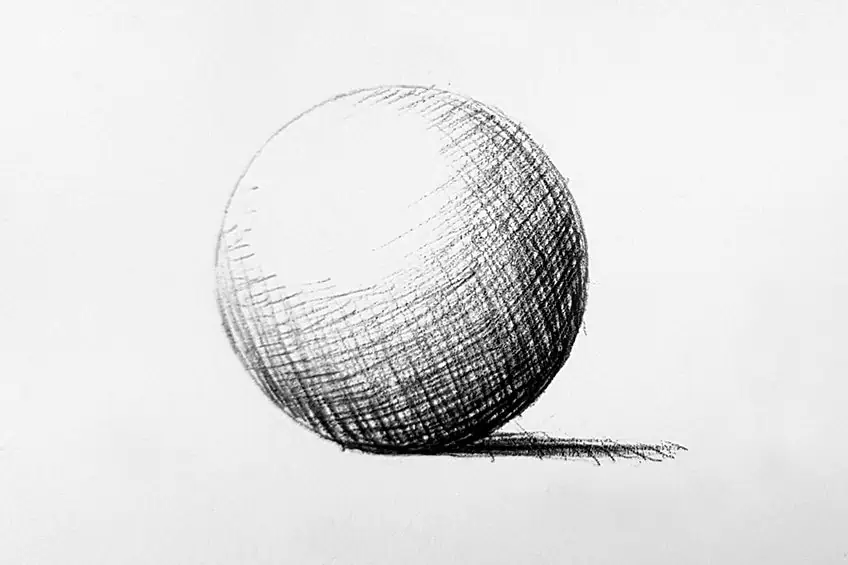
With a pen, crosshatching and hatching produce striking results that are quite graphic. Simply by using crossing lines in certain regions, we may darken or lighten a portion of an item. We also need to take into account the curvature of spheres. When shading the sphere, keep this in mind. Finally, on the right-hand side of our sphere, we may draw another little horizontal shadow to depict the shadow it throws on the ground.
Method 3: The Scribble Technique
The scribbling technique is an entertaining approach to adding gradients and shadows to an item. Let us create another sphere and start scribbling markings around the right-hand side. You want to gradually build up levels of darkness with the scribbling approach.

We start out gently and gradually increase the pressure with which we apply the drawing implement to create the darkest area.
As we allow our markings to gradually curve all around the sphere toward the illuminated area, we relax our touch, putting less stress on the pen and producing lighter marks. With a pen, this shading approach works wonderfully. That’s because the ink in pens can be pretty well regulated by the force we exert on them.
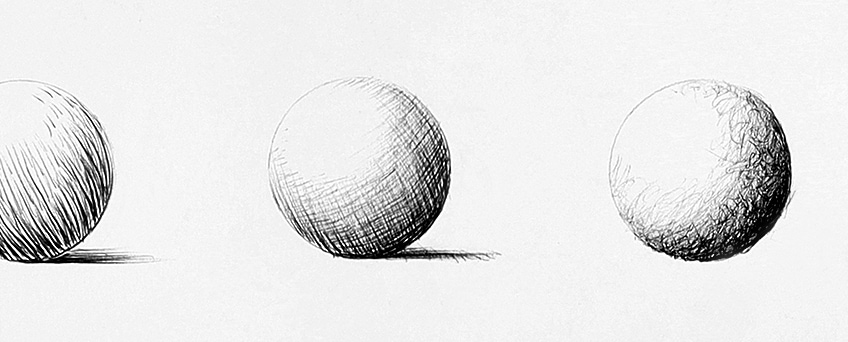
Finally, on the right-hand side of the sphere, where the shadow area is visible, we want to cast a horizontal shadow. Because things create shadows when light falls on them, we added these small horizontal shadows adjacent to the spheres. As with real-life things, this gives the item a more lifelike appearance.

Method 4: Creating Smooth Shading
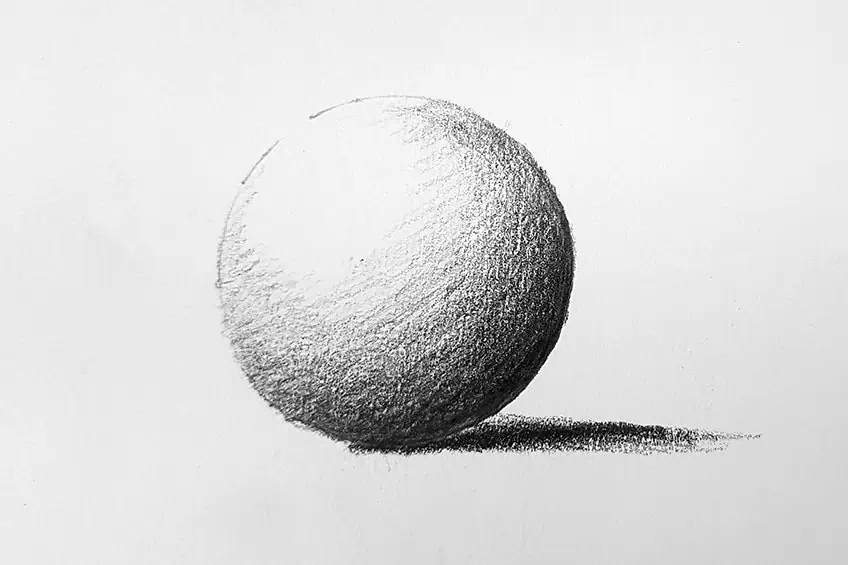
The following method is a shading technique well suited to pencils. Begin by creating another little spherical. Then, using an HB pencil, we’ll softly color in the region where the shadow would be, on the right side. As we shade across the sphere toward the section that is revealed to the source of light, we put greater force on the pencil when delineating the edge of the shadow to create a darker mark, and less force when moving across the surface of the where where the shadow is lighter.
This shading technique is quite easy, and it is most likely the simplest way to tone something. The lighter your pressure, the smoother the gradient will be, with no discernible lines. For lighter and darker markings, you may alternatively use a single HB or 2B. Finally, on the right-hand side of the sphere, we may add a little horizontal shadow.
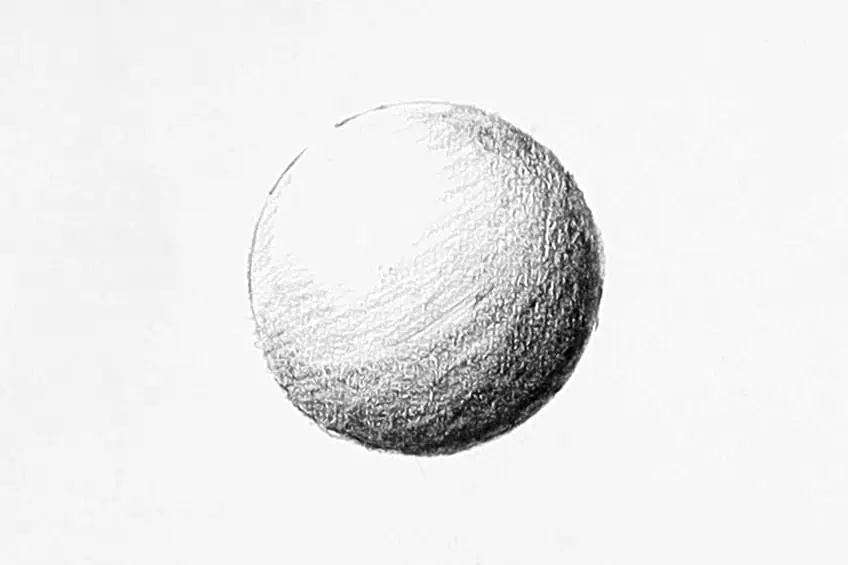
Method 5: Creating Circular Shading
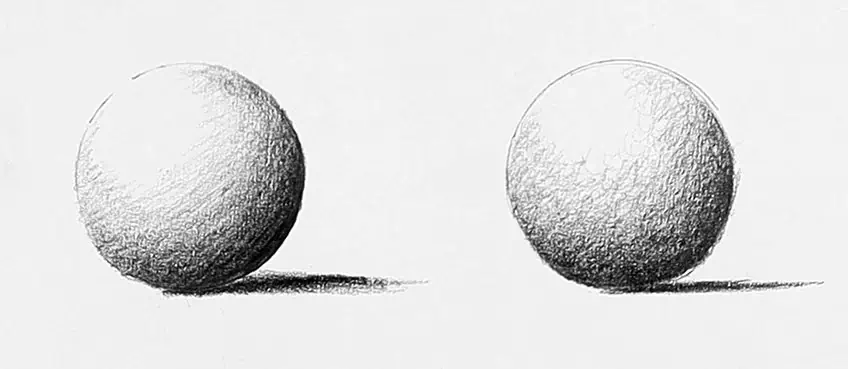
Circular shading is comparable to scribbling, but the action is more circular, as the name implies. Once you’ve made a sphere, start creating circular markings around the darkened part of the sphere. We don’t want to produce deep dark marks on the surface, but an overlapping series of lighter marks that will darken with each successive layer of marks.

We want to work the markings onto the spherical layer by layer with this shading approach. This implies that when the sphere curves, we produce light circular markings around it. The markings can then be darkened by applying additional pressure to the regions that should be the darkest. The sphere’s shadow may then be created by adding a little horizontal shadow.
Method 6: The Stippling Technique
Stippling is our last shading method. We’d want to use our micron pens for this method. Using this approach, we draw a sequence of dots around the locations where there would be shadows. Thicker tips can be used for darker markings and thinner points for lighter marks. We may also increase the number of dots to generate deeper tones and decrease the number of dots to create brighter tones.
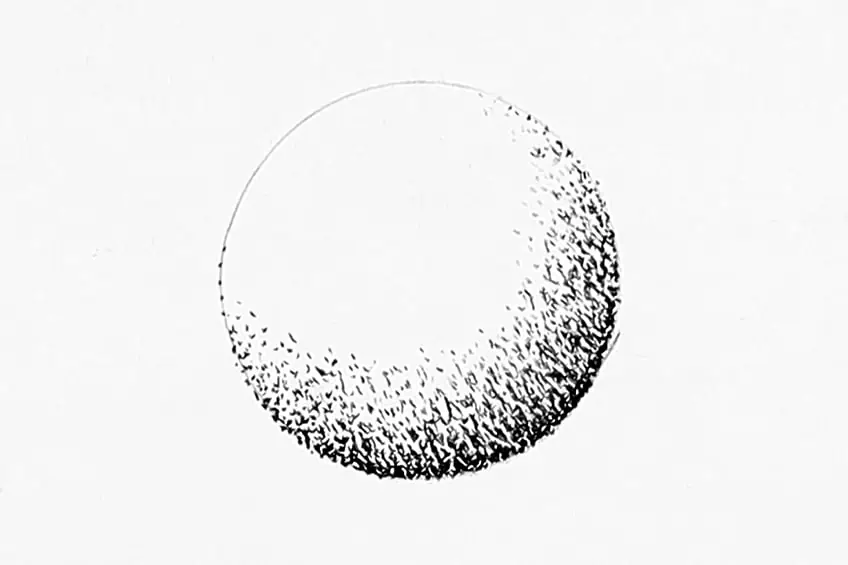
Likewise, we want to delineate the curvature of the sphere with all of these dots. This means that when shading the sphere you want to follow an imaginary curved surface.

The quantity of dots you add with stippling will have a direct link to how dark the sphere will be. However, you must have at least one large and one little tip. Micron pen to determine how the thickness of the markings affects the overall mark-making. Allow yourself to explore shading with the help of this lesson, and restart if necessary. Create the little horizontal shadow once you’re happy.

Useful Tips
- Don’t be concerned if you don’t master any of these methods the first time. Allow yourself some practice time.
- Remember that a shadow follows the shape of the surface on which it falls. The shadow is circular if it is on a ball, and horizontal if it is on the floor.
- If you need to remove surplus ink from your pen, keep a piece of scrap paper on hand.
- Allow yourself to try again if you are not pleased with your drawing. Even though these techniques are easy, they do take some practice to master.
- Above all, have fun and explore the various methods and mediums!
That’s all there is to it! A quick tutorial on a few different shading techniques. You may practice shading methods in a variety of mediums while studying them. The ones we’ve looked at in this shading tutorial aren’t limited to the mediums we’ve utilized. Shading practice is a terrific approach to improving your talents, but it does take some time to master. This tutorial will teach you a few shading strategies that can help you improve your pencil shading and pen drawing skills. Understanding how to shade using a pencil is quite similar to knowing how to shade with a pen, which is why you should experiment with both mediums.
Frequently Asked Questions
What Is the Best Shading Technique?
There is no perfect shading method. This is why we should master diverse shading techniques since we will discover that we may utilize different shading approaches for different types of subject matter. Understanding how to shade drawings using various shading methods and styles helps improve a drawing. Using different shading techniques may give a design more personality and dimension, eventually making it more appealing. However, any shading method may provide a variety of results. This is why knowing shading methods and practicing shading techniques will help you comprehend which shading technique to use in a drawing to achieve a certain look.
Why Do We Apply Shading to Pictures?
Shading is quite useful for sketching three-dimensional objects. Learning how to shade may improve and elevate your drawings, whether they are portraiture, plant life, or just an item. Shading allows for the presence of lighting and shadows inside the image, which is a characteristic of real life. As we maintain our shading practice and discover how to shade with pencils, we will be able to apply these abilities to make our works more lifelike and three-dimensional. The goal of mastering shading methods is to help you obtain the skills necessary to enhance your drawings and, eventually, give them greater dimension.
Is It Possible to Shade Without Using Lines?
There are several shading techniques that do not use distinct lines. Smooth shading is one technique. We achieve this using a pencil, with the gradient defined entirely by the forces given to the pencil. This shading technique enables flawless gradients that flow into one another extremely nicely. Another fascinating shading method is stippling, which involves using a number of little dots to produce a gradient based on their size. Larger dots provide darker effects, whereas smaller ones produce lighter effects. However, in this shading lesson, we will go through numerous ways for shading using a pencil and a pen. Many shading suggestions will help you improve your shading practice and, as a result, your drawing skills.
Are There Any Useful Tips for Shading?
Don’t be alarmed if you don’t perfect this approach the very first time. Allow yourselves time to practice. Keep in mind that a shadow is cast immediately onto the surface onto which it falls. If the shadows are on a ball, it is round; if it is on the floor, it is horizontal.

Matthew Matthysen is a multidisciplinary artist. He completed his fine art degree, majoring in History of Art and Contemporary Drawing Practice at the University of Witwatersrand, South Africa. Before joining acrylgiessen In 2020, Matthew worked part-time as an art teacher at Reddford Blue Hills High school. Matthew creates drawing and painting tutorials for acrylgiessen and captures them not only photographically and in written form. He also records the creation of his works in his own creative studio as in video format, from which later with a voiceover and a video editor also drawing tutorials for the Youtube channel of acrylgiessen are created.
Learn more about Matthew Matthysen and about acrylgiessen.