Fall Crafts for Kids – Simple Autumn Crafts to Make for Young Children
This post may contain affiliate links. We may earn a small commission from purchases made through them, at no additional cost to you.
Fall and winter produce cooler days where the kids spend more time inside, and you have to start wondering how to keep them busy. Why not try some fun and easy fall crafts for kids? There are many kids’ fall crafts that can be done on a budget and most of them can easily be done by kids of all ages. We have collected a few simple autumn crafts, and we hope you enjoy making them.
Kids Fall Crafts
It’s autumn and you don’t only want to play card games for teenagers, but also to inspire your kids for creative activities? The below easy fall crafts use mostly natural materials like leaves and paper and require little experience or materials and equipment to complete. Most of the materials are also items that can be found around the house, making it really easy to whip up a crafting project for the kids on short notice. So, next time the kids say they are bored, make sure to try one of these fall arts and crafts.

Easy Fall Crafts With Leaves
What is more appropriate for fall arts and crafts, than going out into the garden and looking for leaves to use in a project? Fall leaves are usually all kinds of green, browns, oranges, and yellows, and some oak trees have the largest and most beautiful leaves that are perfect to work with.

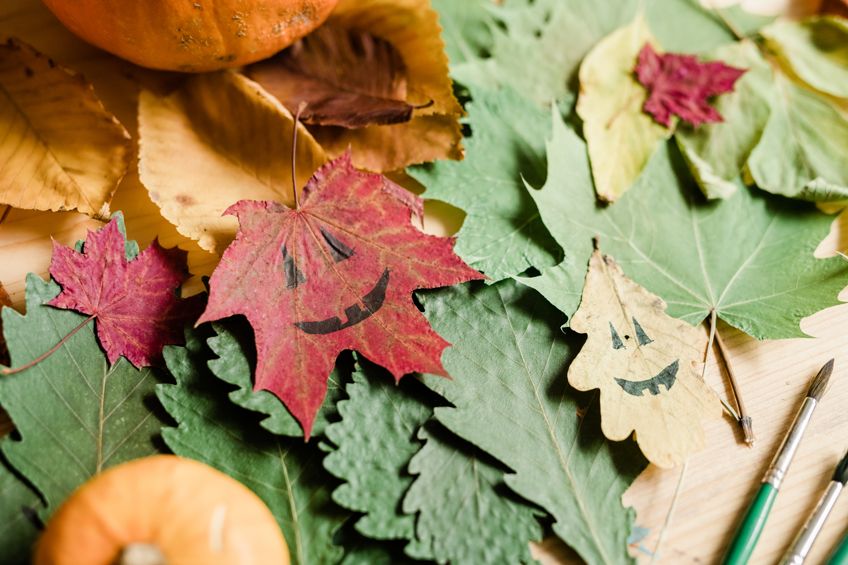
Leaf People and Faces
There are many creative ways you can work with leaves, and it is a great fall craft for kindergarten kids and older kids. The simplest way is to paint or draw on the leaves. The kids can use their imagination for this, from painting them various colors and shapes to making funny faces. You can get those googly eyes from the craft store to create funny faces on a single leaf or use a couple of leaves to make a leaf person.
Take a stick and glue the leaf face onto the top of the stick to make a leaf puppet.
Preserving Leaves
There is a way you can take the leaves you pick, and you can preserve them. This means the leaves can last a long time. To do this, you can use wax paper or glycerin. These methods can easily turn into a teaching moment as you show and explain how it is done. You can use the leaves as bookmarks, and decorations or create a fall mobile you can hang in the window.

Making Animal With Leaves
Kids love animals and they will enjoy creating them with leaves. To make it easier, you can print out some templates, like a lion head or turkey body, and color these in. The leaves can then be used to create the lion’s mane and the turkey’s tail. A similar design can be used for creating a porcupine. You could also go for the entire leaf as an animal, which could be anything you can imagine from a fish to an owl.
You can use different shaped leaves, paint, and markers.
Teaching Numbers With Leaves
Why not use kid’s fall crafts to teach some simple counting lessons. This is both fun and educational, and the kids are sure to remember what they learned. The activity is also something that can help to improve fine motor skills. All that is needed for this are some leaves, a marker, and some clothing pegs. The kids can help collect the leaves, and once they have been washed and are dry, you can use the marker to place different numbers on each leaf. The leaves can then be placed in a bowl or basket and the pegs in another basket. The kids must now attach the same number of pegs to the leaf with a similar number.

Leaf Lanterns
These are easy to make and can help to light up some of those cold fall evenings. All you need for this project are some leaves, cardboard to provide structure, greaseproof paper to stick the leaves onto, glue or a stapler, and preferably some battery tea lights.
The paper with the leaves becomes the body of the lantern, to which you can also attach some string or wire so you can carry it around.
Fall Leaves Collage
This can be fun for all ages, and it is extremely easy to do. Go for a walk with the kids and pick up some leaves, flowers, or sticks. Take some thick paper or cardboard and paint an autumn-themed background, using brown, red, and yellow paints. Once this is dry, the kids can then proceed to glue the leaves and other items randomly to the surface.

Leaf Template Ideas
We have already dealt with painting the leaves, the next step is to use them as a template. Instead of painting the leaves, place them down onto some paper and paint around them, creating a silhouette effect. You could also use leaves or paper templates to place on other surfaces like a mason jar, which you then paint. Once the jar is painted, remove the leaf, and you are left with a beautiful leaf jar.
You can try using real leaves, or you can also cut out paper or board leaf shapes.
Leaf Printing and Painting
There is more than one technique you can use for leaf printing. The first way is without any paint and only using a hammer. The leaf is placed onto some paper and a piece of paper towel over everything. Take the hammer and pound the leaf, not too vigorously, until the natural dye of leaves comes out. Why not teach about colors using leaves, paint, and thick paper or board.
Choose vibrant colored paper and then also select bright paint colors that will stand out against the paper. This is the definition of complementary colors. Paint the leaves and place them onto the paper, place some paper towel over the leaf, and press so the paint will come off onto the paper. You could do a similar technique onto canvas, but in this case, the design will be more of a silhouette of the leaves.
Leaf Rubbings
Leaf rubbings can be fun and educational at the same time. You can get a variety of shapes; however, larger leaves do work better for this. To do this you need a hard surface like a clipboard, which can also hold the paper. You can use tracing paper, wax paper, or parchment paper, to place over the leaf. To create the rubbing, you can then use crayons, oil pastels, or even colored pencils.
This project is a fun way to learn the structure of a leaf.
Leaf Wreath
This can be a fun family project and very few items are needed to complete it. Cut out a round piece of cardboard and simply glue the leaves you have collected onto the cardboard until you are happy with the design. For something really simple, cut out the center of a paper plate. If you want, the kids can also paint a few of the leaves for added effect. Once your masterpiece is complete, it can be attached to the front door.

Bowl Made Out of Leaves
This fall arts and crafts idea might be something for slightly older kids. You will need a bowl, quite a few fall leaves, some mod podge, a sponge, or brush, and a balloon. The blown-up balloon can be placed in the bowl for support. Apply the leaves and then the mod podge, making sure everything is covered.
Once you are done and it has dried, you simply pop the balloon, and you are left with a beautiful bowl.
Glitter Leaves
Working with glitter is great fun, although the cleaning up may be a bit of a problem. So, make sure you work in a designated area and cover the surface you are going to work on. All you then need are some leaves, glue, and various glitter colors. Cover the leaves with some glue and then sprinkle the glitter over and leave to dry.

Leaf Mask
Kids love the idea of dressing up and playing with masks. Here is an opportunity to use leaves to create a unique mask the kids make for themselves. You will need some cardboard, leaves, glue, scissors, and some string. The cardboard is cut out into the shape of the mask, and the leaves are then glued onto the cardboard.
The string is used to secure the mask onto the head, you could also try using some elastic for this.
Paper Fall Crafts for Kids
If you do not want to go outside and gather some leaves, there are other options for creating easy fall crafts. Paper is cheap and easy to use and there are many ways you can use it to create kids’ fall crafts.

Tissue Paper Fall Tree
There are different colors of paper and there are different types of paper you can use. Tissue paper is one of the options and you are sure to find the color you want. For this, you will also be using some cardboard and a paper plate. Cut the board into a rectangular shape, and this is going to be attached to the paper plate and acts as the trunk of the tree. You can paint the board before attaching it. Get some tissue paper, preferably some red, yellow, and orange, as these are fall colors. These are then crumbled up and glued to the surface of the paper plate.
You could also simply draw the trunk on some paper and then add the tissue paper.
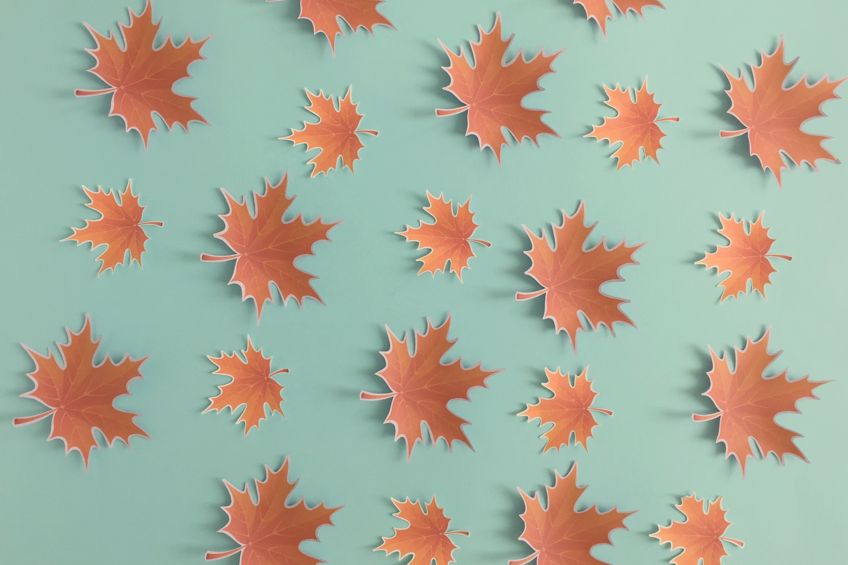
Creating Fall Leaves With Paper
Instead of using real leaves, you could also create leaves from paper. Once the leaves are cut, the kids can use some paint to decorate them. You can also get more inventive and make some scratch art out of the paper leaves. The leaves can then be used in many ways, for example, to create a leaf banner or garland, or use the leaves and attach them to a few sticks in a vase for a unique décor piece.
Leaf Stamping Using Toilet Rolls
You can use items around the house to create stamps. One of the common items everybody has is toilet paper rolls. To do this, you have your paper onto which you have drawn a tree trunk and some branches. Take the paper roll and squish it slightly to form an oval shape. Dip this into some paint and then use it as a stamp to create the tree leaves. Again, you can use fall paint colors like red, yellow, and orange.
To create a similar effect, you could even cut an apple in half and use this as your stamp.
Handprint Trees and Leaves
This might be a bit messy, but it can be loads of messy fun. You will need some paper, paint, and some water and rags to clean up. Take someone’s hand and paint it with black paint, making sure you go a little way up the arm and then lay the hand on the paper. This will form the base of the tree, and you can then paint in the leaves any way you want. This can also be done the other way around by drawing the trunk and using painted hands to create the leaves. Again, use fall colors for this idea.

Cupcake Liner Owl
Cupcake liners can be used to create many different craft ideas. One of them is to fold them into a shape that looks like an owl. You can then paint and embellish as you wish. Since fall is also the time for Halloween, you can use the liners to make cupcake liner bats. Flatten the liners and draw on scary faces and glue them to some paper.
Cut out and paint some black wings, which you can then stick next to the liners.
Creating a Marbled Leaf Effect
To create this effect on paper, you will need some shaving cream in a container, added to this some acrylic paint or food coloring. Swirl this into the shaving cream, and then place the cutout paper shape onto the shaving cream, leave for a few seconds and slowly lift it off and then allow it to dry. The effect will be beautiful marble swirls on the paper.

Painting Trees With Q-Tips
This is quite similar to the leaf stamping with the toilet rolls. However, in this case, you take some Q-tips and dip them into the paint and use it to create the leaves. You can use single buds, or you can combine a bunch and tie them together with some elastic.
Then, dip them into the paint and apply them to the paper surface.
Mosaic Fall Crafts for Kids
These can be categorized as easy autumn crafts to make. All you need is different colored paper and some glue. Cut the paper into various shapes and sizes, and then glue these to your image design on another piece of paper. You can create trees, leaves, pumpkins, and many other designs using this method.

Paper Bag Puppets
These are easy and fun to make, and kids love puppets. All that is required are some small brown paper bags. You can decorate them as they come in their folded form, as the bottom of the bag forms the mouth. You can decorate with paint, markers, googly eyes, and other embellishments.
Some ideas include monster faces, and people or animal faces.
Paper and Glow Stick Broom
Glowsticks can be used in many different ways as a fun way to keep busy. For example, you can form shapes out of the glow stick and attach them to various parts of the body. When the lights go out, you can move around like glow-in-the-dark puppets. For Halloween, simply cut strips of paper and attach them to the end of a glow stick to create a witches’ broom.
Simple Autumn Crafts to Make
There are so many fall crafts for kids, that we cannot mention all of them here. However, we have covered a few interesting fall arts and crafts ideas, and below are just a few more to get the creative juices flowing.
Autumn Popcorn Tree
Most kids love popcorn, so while making a batch to eat, you can use what you have already made in some fun craft activities. You can color the popcorn with food coloring, autumn colors of course. First, take some sticks and glue these into a shape of a tree on some paper, or simply draw the tree shape. Dip the colored popcorn in some glue and then place it on the tree so it forms the leaves.
You could also use the popcorn to make garlands or glue a bunch of popcorn onto a paper plate and make this into a face of a snowman.
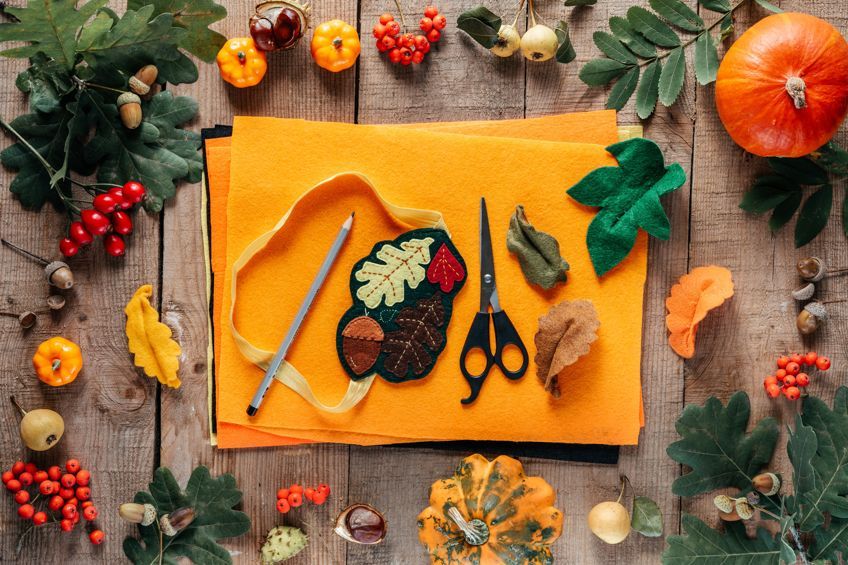
Fall Yarn Wrapping
This is a fall craft for kindergarten kids and helps with fine motor skills. All you need is some cardboard cutouts, in various shapes, and some different color yarn. The yarn is then wrapped around the cutout to finish the look. For example, fall leaf shapes are wrapped with yellow, orange, or red yarn. These are easy autumn crafts to make.

Acorn Necklace
If you live where there are oak trees, you will have access to an abundance of leaves and acorns. You can simply paint and add cute little faces onto the acorns and leave it at that, or you can make them into cute necklaces. It does require the use of a drill to make some holes for the string, so some adult supervision is necessary.
You could also try gluing a jewelry bail to the top of the necklace.
Fall Craft Stick Ideas
Popsicle sticks are always easy to find and can be used in many arts and crafts ideas. They can easily be painted and glued into various shapes. Stick them all in a row and make faces, for example, a scarecrow face or a monster face. Googly eyes can be used for added effect. These are great for stick puppets as well.

Fall Suncatchers
To do this, you will need clear contact paper, cardboard, and various colors of cellophane. The cardboard is to get the shapes you want, for fall, leaf shapes would be a good idea. The border shape is placed on the sticky paper, and then pieces of cellophane can be placed onto the sticky paper, inside the border shape. Another piece of contact paper can be placed face down onto the leaf to seal it.
Take a needle and poke a hole in the top and thread through some string or wool to hang the suncatcher up.
Impressions in Salt Dough
Playing with dough is fun for all ages and you can use some salt dough to create beautiful leaf impressions. Flatten out the dough and place your leaf onto the dough. You can then use a rolling pin over the leaf to get the best impression. Once you are done, this can be baked and then painted. You can also use playdough to create leaf shapes and other ideas.
Washi Tape Pumpkins
This is an extremely simple idea using washi tape. You can turn boring old pumpkins into multi-colored ones in no time. You can take strips of washi tape and cover the entire pumpkin or cut the tape into shapes and use as little or as much as you want.
You can then lay them out on the porch or in the front garden for display.
Fall Craft Ideas With Pinecones
We have dealt with leaves and acorns, how about some pinecones this time? These can be painted in various colors, made into a wreath, or you can create some cute animals. For example, an owl or turkey. Add some paint, glitter, and string, and you have some pretty decorations to hang around the house.

There are many fun fall crafts for kids, and I think we have covered a fair amount of them. We hope they inspire you to have some family fun or use these fall arts and crafts ideas to keep the kids busy on those cooler autumn days.
Frequently Asked Questions
What Are Fall Crafts?
Fall is a time of change, and this can be seen in the leaves and the cooler temperatures. Most of the colors used for fall crafts are fall colors like orange, red, and yellow. Thanksgiving and Halloween are also holidays during this time, so some of these ideas can also be included. Easy fall crafts can be done with popsicle sticks, paper, paint, and anything else you can think of.
What Type of Leaves Can You Use for Fall Crafts?
You can use any leaves you can find in your vicinity. However, for some projects, larger leaves can work better. For example, if you want to paint or draw on a leaf, it is better to have a larger surface. Large oak leaves are a popular choice.
What Craft Ideas Are Best for Kindergarten Kids?
Most fall craft ideas can be done by younger kids if it is kept simple and safe. Using scissors can be good for developing motor skills, under supervision. Supervision should also be done if using tools like a hot glue gun.

In 2005, Charlene completed her wellness degrees in therapeutic aromatherapy and reflexology at the International School of Reflexology and Meridian Therapy. She worked for a company offering corporate wellness programs for several years before opening her own therapy practice. In 2015, she was asked by a digital marketer friend to join her company as a content creator, and it was here that she discovered her enthusiasm for writing. Since entering the world of content creation, she has gained a lot of experience over the years writing about various topics such as beauty, health, wellness, travel, crafting, and much more. Due to various circumstances, she had to give up her therapy practice and now works as a freelance writer. Since she is a very creative person and as a balance to writing likes to be active in various areas of art and crafts, the activity at acrylgiessen.com is perfect for her to contribute their knowledge and experience in various creative topics.
Learn more about Charlene Lewis and about us.