How to Draw Lips – Our Guide to Drawing a Lifelike Mouth
This post may contain affiliate links. We may earn a small commission from purchases made through them, at no additional cost to you.
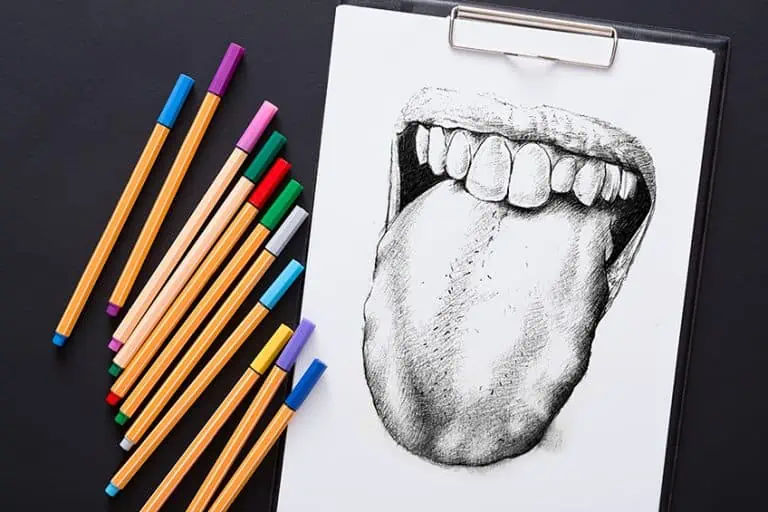
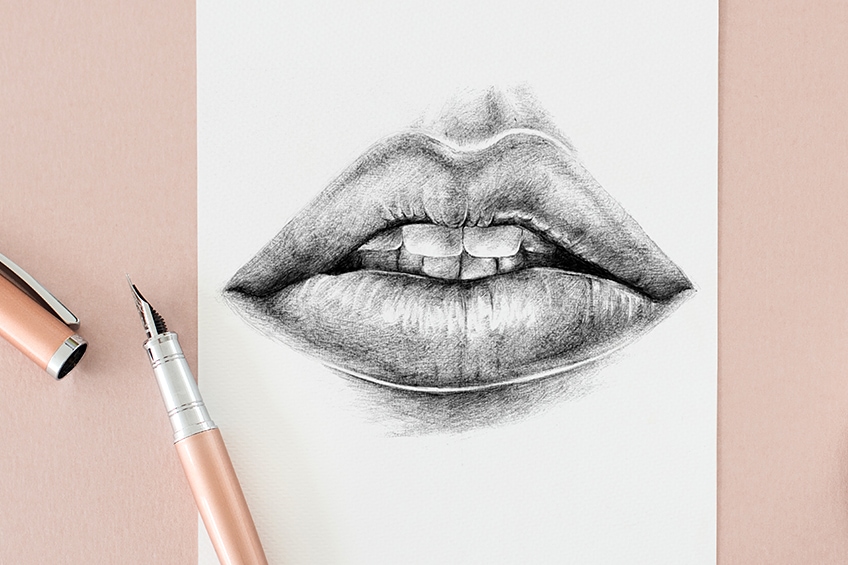
Every mouth is unique, and the way it is constructed may convey a lot of information. Drawing all of the individual the elements that comprise the mouth can be challenging. It not just the form, even the texture of lips prove to be a rather tricky task to draw. While the mouth may be small part of the face, it is highly complex requiring accuracy in your ability to depict everything from the contours to the shading of the lips, as well as the outline where it is distinct form the rest of the face, and those areas where it merges into the face. In this lesson on how to draw lips, we will learn how to draw realistic lips that are shown slightly open, allowing us to see a tiny glimpse of the teeth.
A Step-by-Step Guide to Drawing Lips
Before starting with this tutorial, take along look at your reference image. We chose a picture of a set of well-moisturized lips that are partially open, revealing a glimpse of the teeth. When lips are wet, they get shiny. In our mouth drawing, this shine effect is a key component of what we want to accomplish. Last but not least, the lower lip, which is thrust outwards catches more light than the downward-tilted top lip. These are some broad principles that we should keep in mind while we follow this lips sketch tutorial. Ready? Let’s begin!
Step 1: Making Measurements and Grids
First, we need to draw a horizontal line along the center of the page. In order to identify the center of the page, we measure the page both horizontally and vertically and mark the halfway point in each. Once you have located the center of the paper, draw a 15 cm in length horizontal line. Keep in mind that you may create this picture in any size you choose, but these instructions are particular to the measuring scales we used in this lesson. The next step is to divide our horizontal line vertically. By multiplying 15 cm by two and then constructing a vertical line across that position, we can determine where the midpoint of our horizontal line will be.
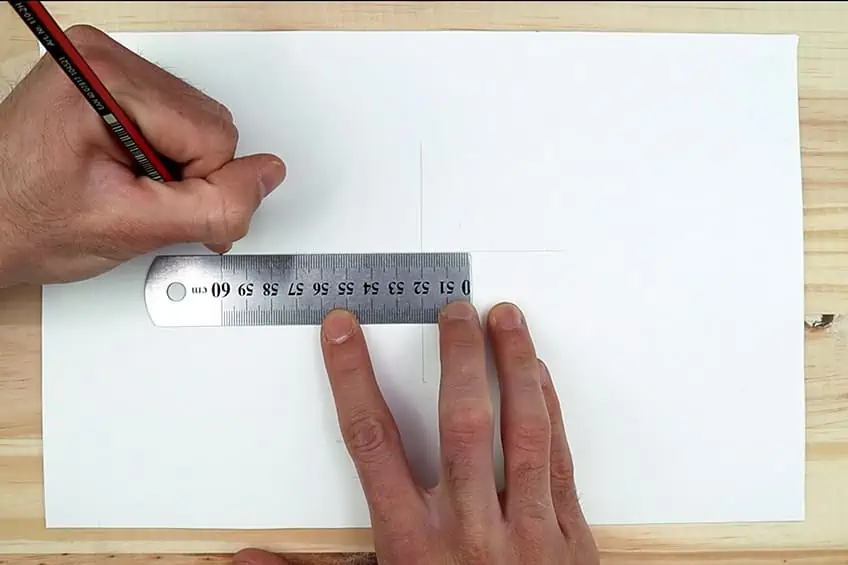
Beginning at your vertical line, we need to determine your 7.5 cm on each side, then construct a mark on either side. This is where the mouth’s outer edge will start and finish. We want to take our time with this step since the drawing of lips can prove to be a tricky section of this lesson.
Step 2: How to Scale the Lips Correctly
The lips are essentially the mouth. Learning how to draw lips will result in a realistic mouth drawing. However, we are interested in learning how to draw realistic lips by carefully observing our reference image, which mostly demonstrates the lips that just barely conceal the teeth. Start by sketching the outline for the upper lip with your H pencil. The two points we made can be used to provide a starting place.
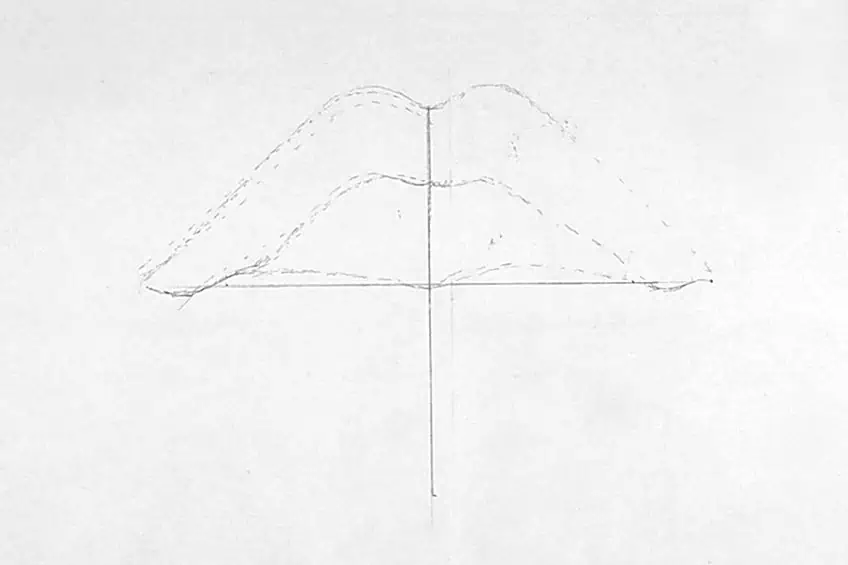
We may go back and make corrections to our lips drawings as we sketch. Since the distance between the top and lower lips differs somewhat, establishing the contour of the lips takes time. We want to draw an arch-like form with our H pencil, starting at the arc and dipping toward the vertical line. Spend some time until you are satisfied with your attempt at accurately depicting the upper lip form while using our reference image as a guide. Once we’ve completed this, we’ll want to lightly shade the top lip with our pencil to further define the lip’s outline and contour.
After completing this, we can start drawing the bottom lip. Understanding the form of lips is essential to grasping how to draw realistic lips. The lower lip has an arch that is turned upside down. Contrary to the upper lip, it has a slight curve. Referencing your reference image, start drawing the lower lip with your H pencil. Once you’ve done that, lightly shade it with your pencil to assist you in better understanding the scale and contour.

Step 3: Shaping the Teeth and Lips
This is where we complete the contour of the lips. What we want to do now is spend some time looking at our reference image and trying to clarify the form of the lips sketch with our erasers and pencils. This stage involves tracing the drawing of lips using our H pencil, or the lightest pencil you have available. We want to establish a rhythm of looking as much at the reference image as the drawing, so we will only draw what we observe.
For example, we can use light shading markings to signify where we will shade in the image. Take notice of the top lip’s tiny indentation as it begins to fold into the mouth. A dark shadow is visible under the upper lip in the original picture. Keep in mind that the upper lip has a deeper tone, so keep that in mind as you try to finish your lips drawing.
We also want to take a minute while we sketch to take a step back and examine our mouth drawing overall. We might lose sight of the real form of the lips as we create; thus, it is critical to spend time modifying the contours of the lips sketch as you go. This stage is critical for achieving realistic lips at the end.
When we trace the lips with our light pencil, keep in mind that the lower lip is always marginally larger than the upper lip. This is yet another method for learning how to draw realistic lips. This is due to the fact that the upper lip is normally smaller, but the lower lip also protrudes somewhat more forward than the top lip.
We may begin drawing the teeth after we have the overall lips outline. Teeth may be tough; a helpful tip is to scale them depending on how they appear in the original image’s mouth. You can observe how the bottom and top lip define which tooth is located where by following the reference image. Another good idea is to commence with one of the front two teeth and work your way up from the top lip.
Spend some time focusing on your teeth. Use a light pencil for this, and try to use the eraser as you sketch the teeth and adjust them until you are satisfied that they are correctly situated in the mouth. Take note of how the teeth should connect to the shape of the lips towards the inner mouth.
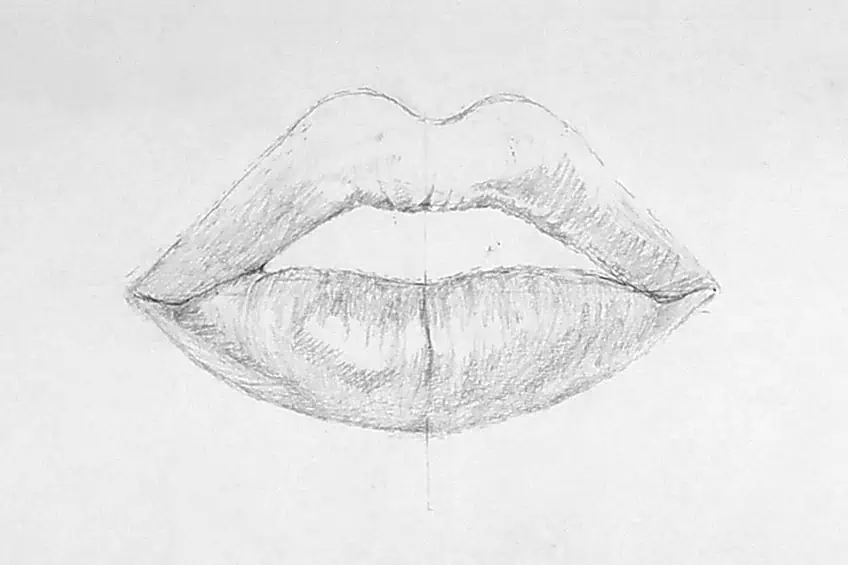
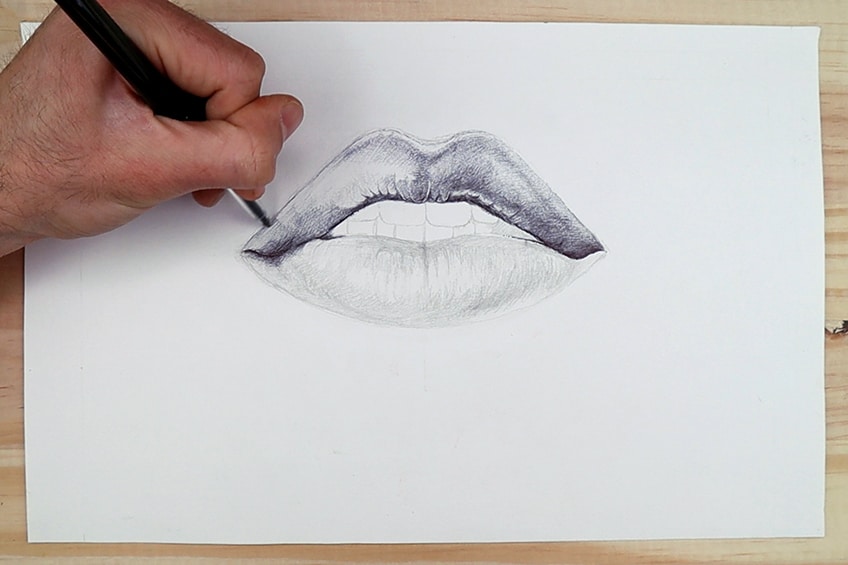
Step 4: Using a Pen to Shade the Top Lip
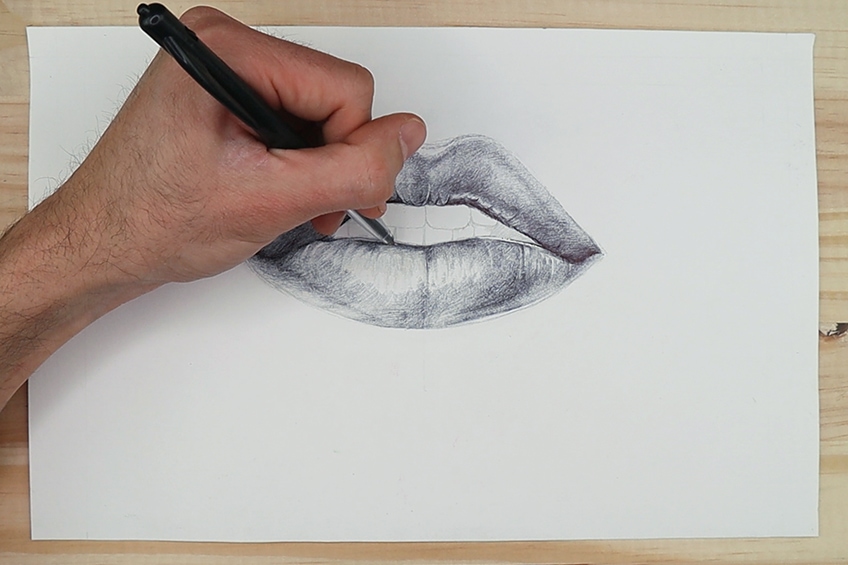
We can now start shading using the pen. If you’re still unsure about the form of your lips sketch, go back to step one and spend some time solidifying the form of the lips outline. After that, use your 0.2 mm Micron pen to form suggestive markings within the darkest areas of the mouth.
We may do this by beginning with the edges of the mouth and making our way through the mouth while referring to your reference image. The darkest areas are at the inner corners of the mouth drawing. This is also a good method to start developing the remainder of our shading.
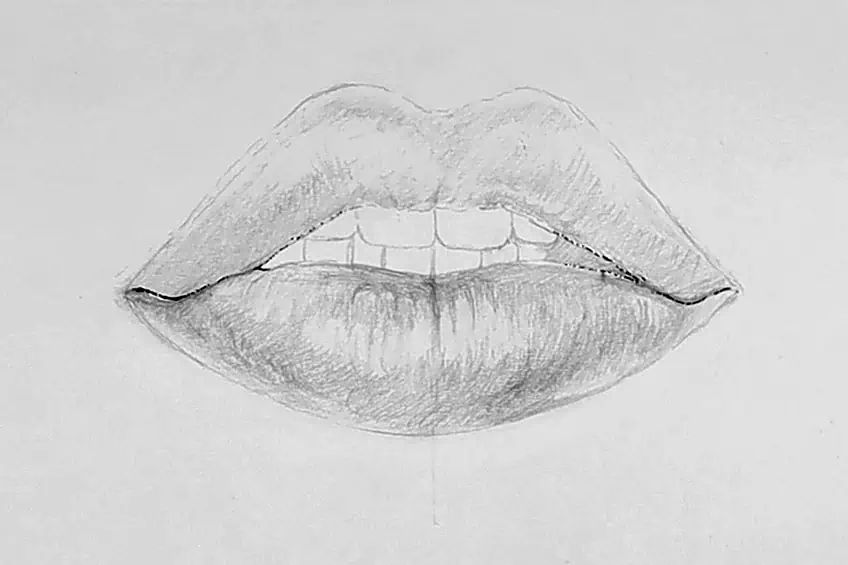
We may now start shading with our ballpoint pens. Let’s start with the upper lip and work our way down to the mouth’s corners, shading in the shadows. We can achieve this by looking at the original image and noting how the upper lip is somewhat darker in tone than the bottom lip.
As you compare it to the original image, begin working your way through the whole top lip. Pay attention to the deep shadows at the lower part of the upper lip as you shade – the shadows on the upper lip change as they move in different directions.
Take a minute to observe your reference image from an arm’s length as you darken the upper lip. Take note of the lip outline and how the central region of the top lip is somewhat lighter than the upper margins and how the bottom portion seals the mouth hole. When shading with our pen, keep your grip mild and your hand at an incline. Apply layer after layer, slowly and gently.
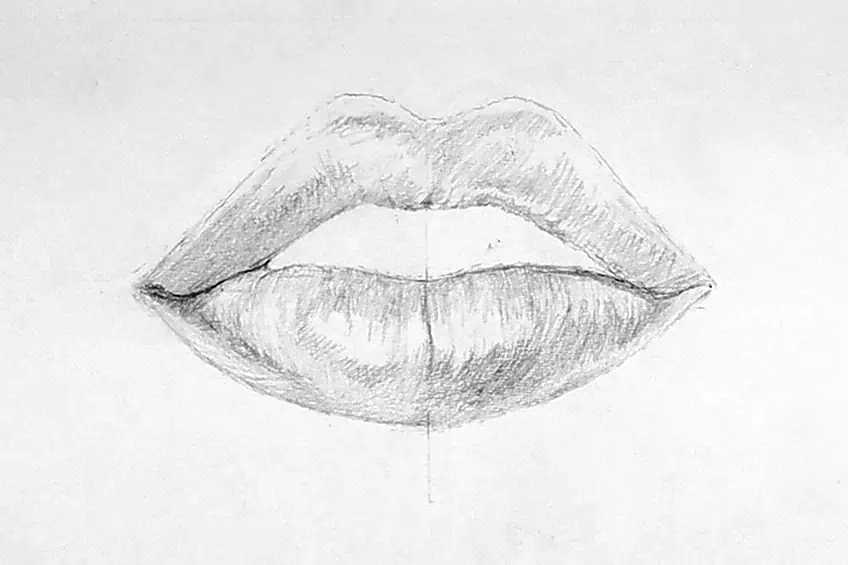
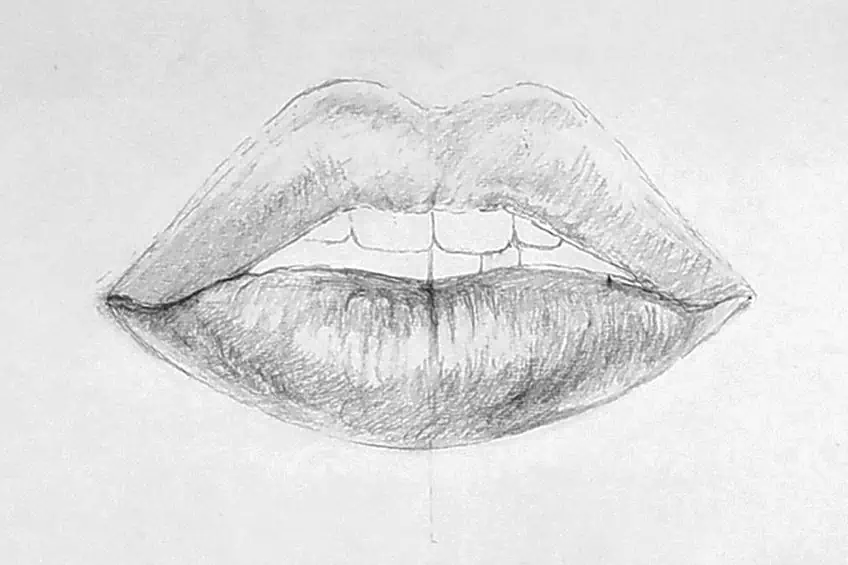
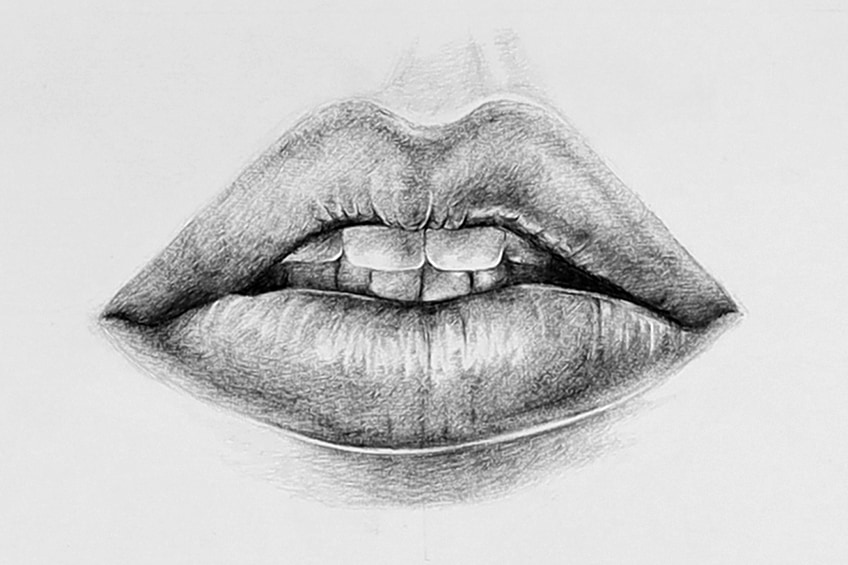
Step 5: Adding Shading to the Bottom Lip
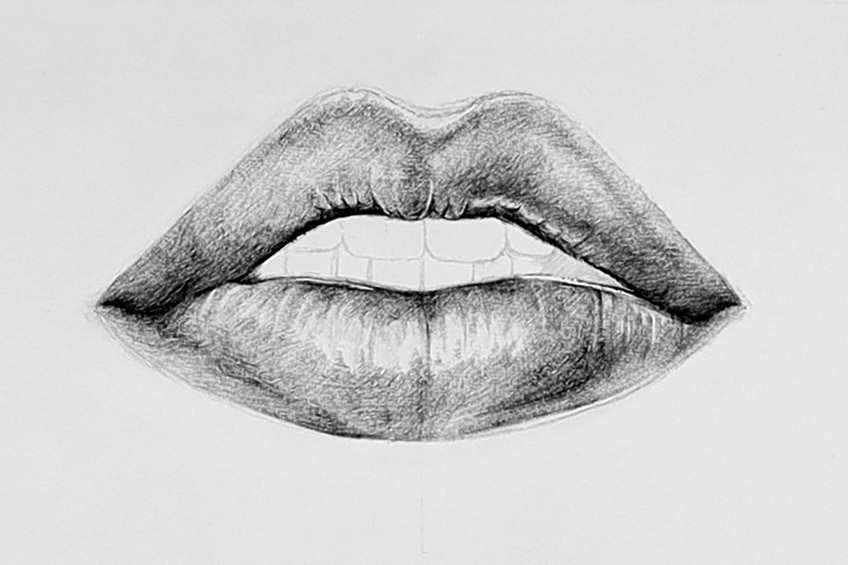
Take notice of the lip shape, notably how the lower lip’s shadows fall on the lower lip when you examine your reference images. The lower tip protrudes at the top and bends inward toward the chin at the bottom. The way the shadows develop on the sides of the bottom lip demonstrates this.
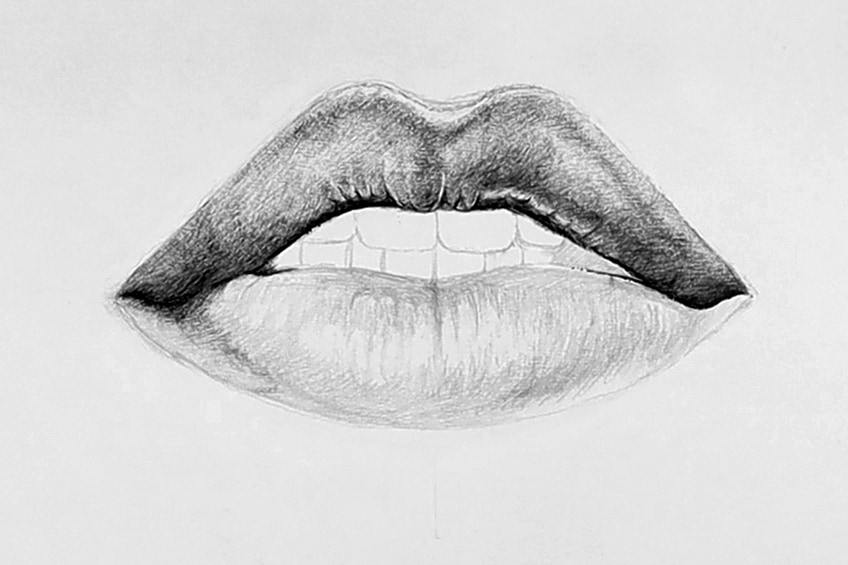
With your ballpoint pen, draw a downward slant from the edges of the mouth toward the middle of the lower lip. Since this is how the shadows on the bottom lip take on their overall tone, we can do this softly.
The hardest part of shading from the sides inward is achieving the shine on the lip. Keep in mind that when we look at the lip as a whole, the small line creases in the lip are not evident as we softly shade. These lip creases are only visible when you look at the mouth up close. Try softly shading the area surrounding the bottom lip’s bright reflection in light of this.
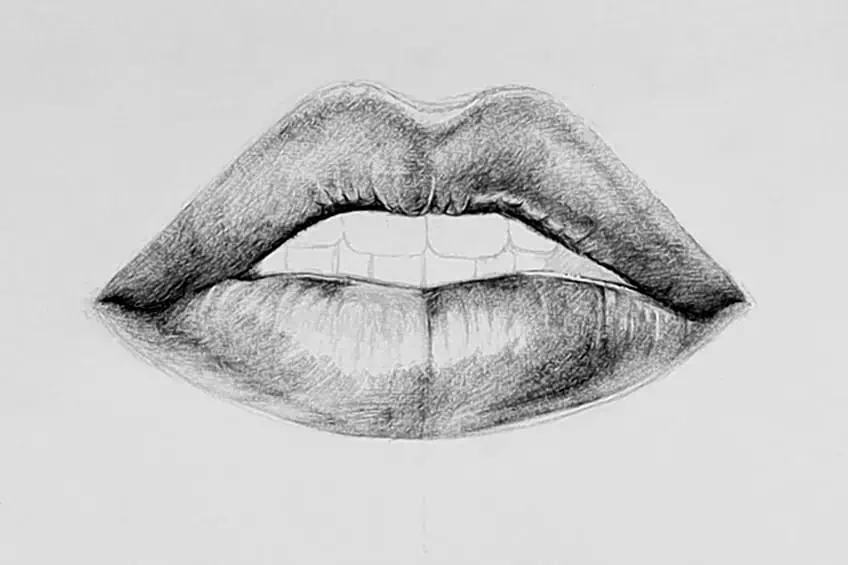
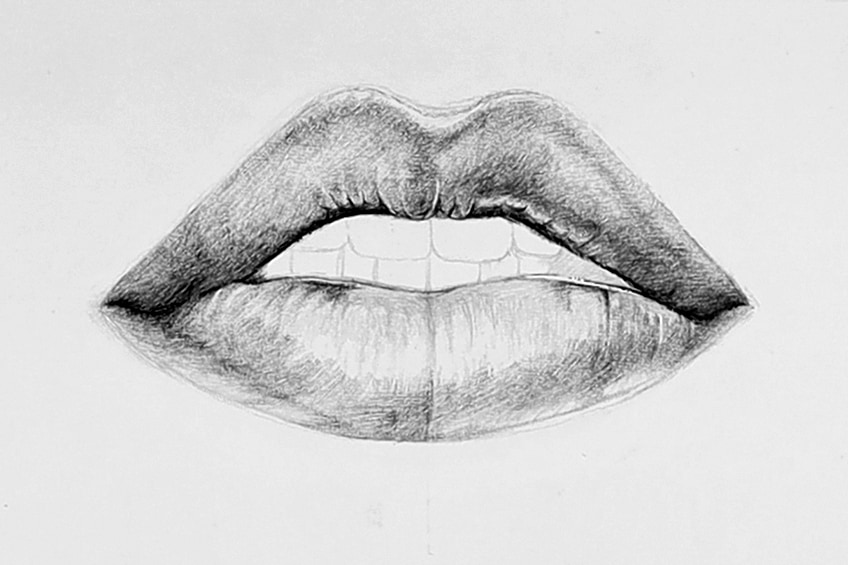
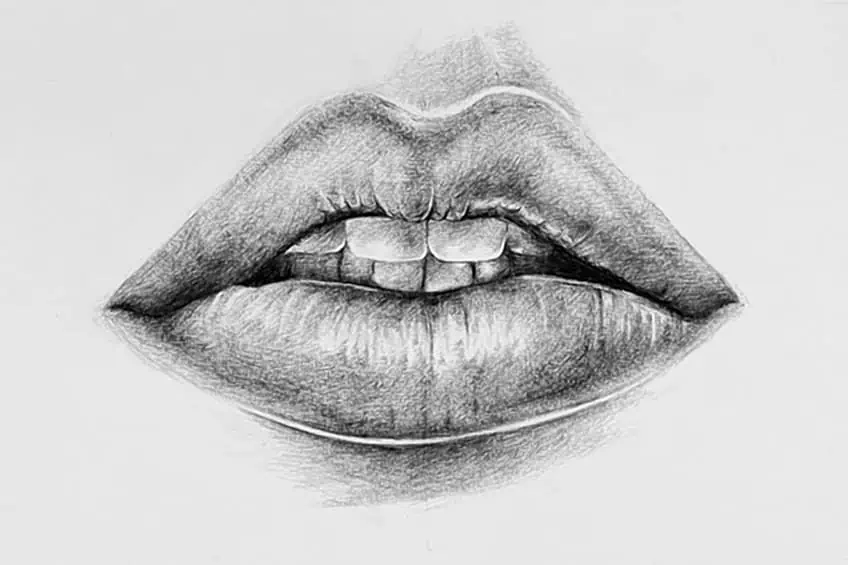
Mark a blank space in the middle-upper region of the bottom lip, then softly shade the region with your ballpoint pen. Be aware of how the lip tends to get darker closer to the mouth’s entrance.
Observe how there appears to be a black rim line around the top of the bottom lip when you darken this area. The best advice is to make short, slanted sweeps from the top of the lower lip toward the center of the bottom lip while making these lines using a ballpoint pen.
We may begin putting faint markings around the middle of the lower lip as we continue to draw it. What we can do is lightly shade the lip from the outside inwards using a ballpoint pen.
By gradually applying shade inward from the upper portion of the lower lip, we may achieve this. A similar thing may be done by moving inward from the bottom of the lower lip. When we do this, we aim to create our shading edge off into tiny points in the lip’s center. This will provide a shimmering look.
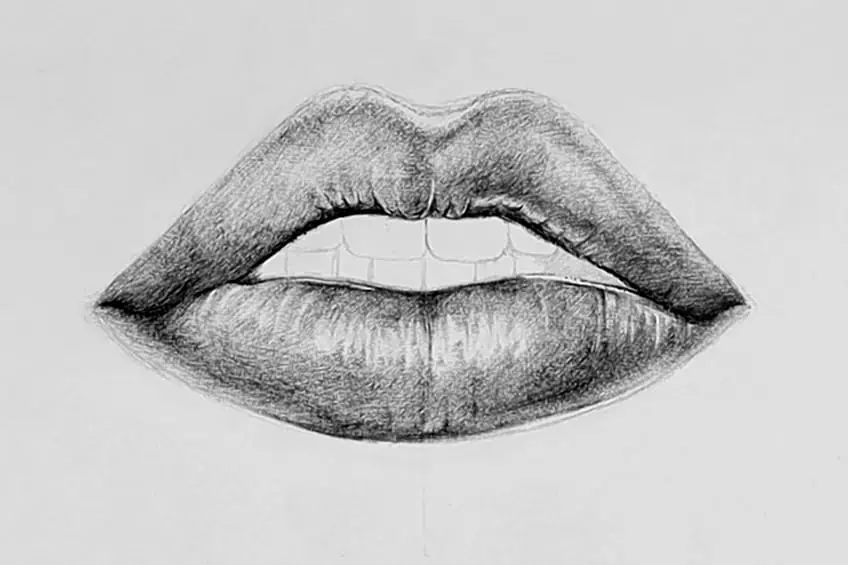
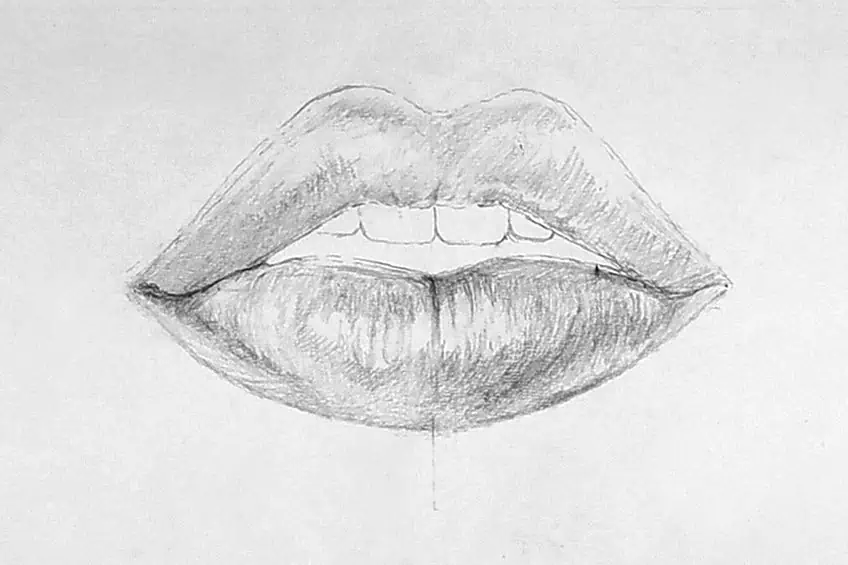
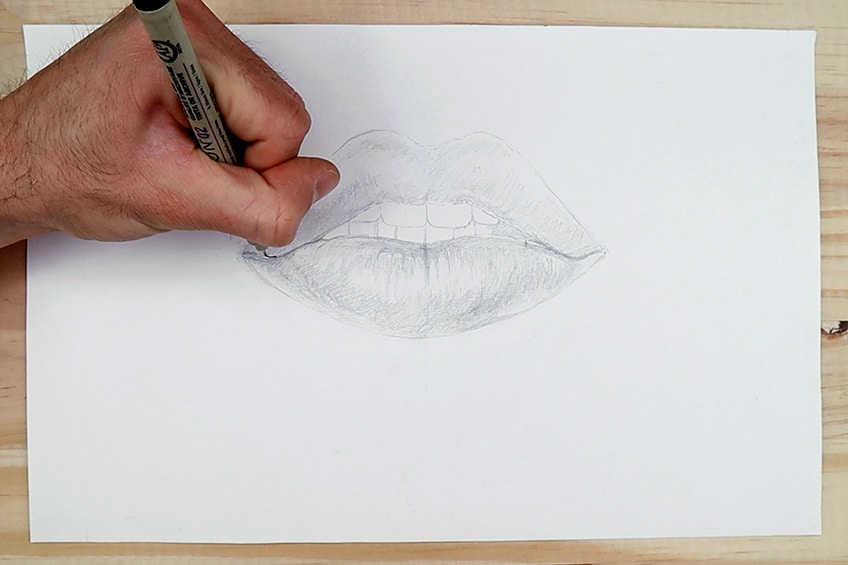
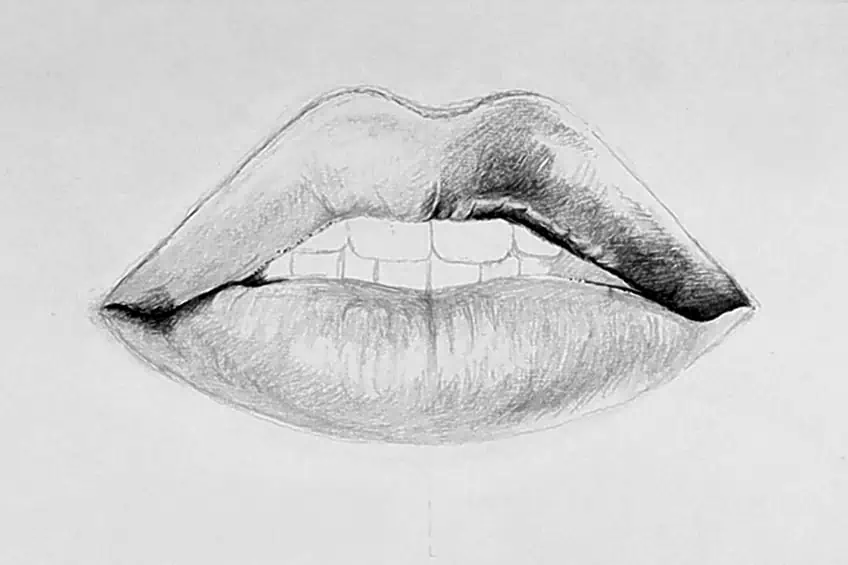
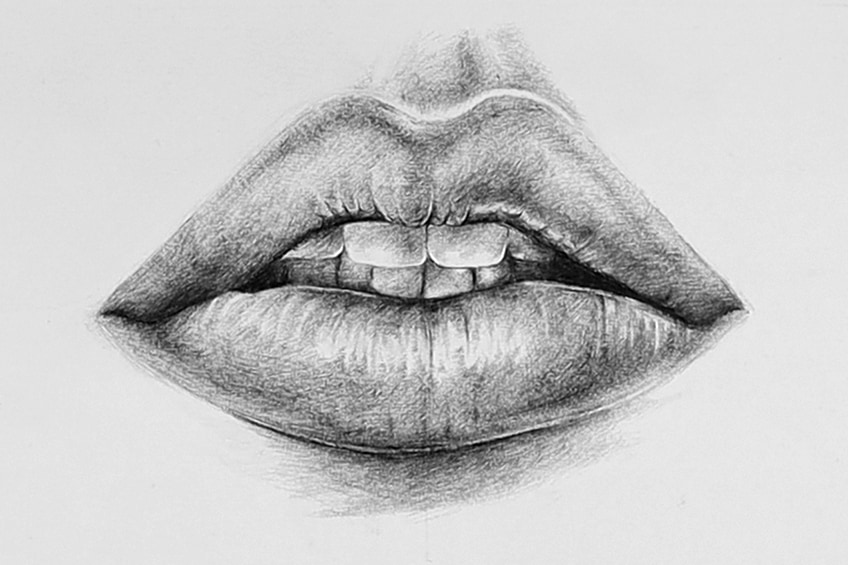
Step 6: How to Shade the Mouth’s Interior
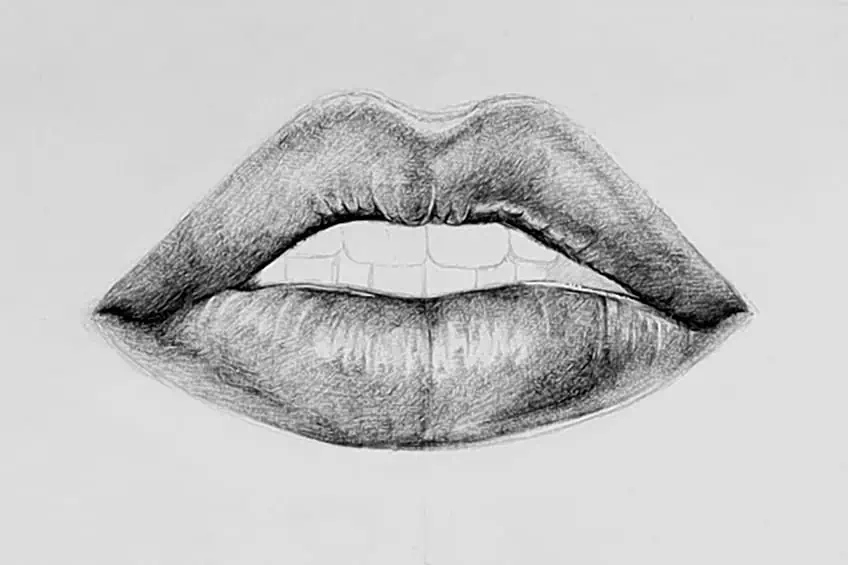
We will use our ballpoint pen to darken the edges of the mouth in a manner similar to how we shaded the lips. If you look at the original image, you’ll see that the edges of the lips have an appearance of a shadow. However, when it approaches the front teeth, this shade becomes lighter.
Take notice of the teeth in the original image and how they have very faint shadows. Because the top lip blocks light from entering the mouth, there is a shadow effect. Concentrate on your reference image as you continue to darken the teeth, paying close attention to each tooth as you go.
It is essential to observe that the front teeth somewhat overlap the lower teeth as we progress through each tooth. The bottom row is a little bit darker than the top row due to this overbite. A good approach is to initially leave the teeth a lighter color. Starting with the darker areas at the bottom, start shading by continually referring to your reference image.

What we can do is review our shading markings and add darker shading wherever necessary to complete them. As you are doing this, examine the reference image, switching backward and forth between it and the sketch. Spend some time doing this comparison.
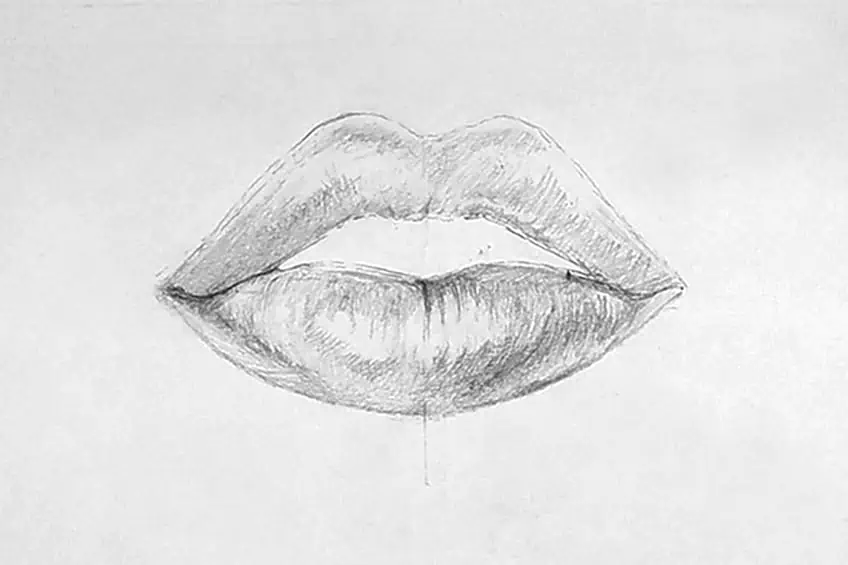
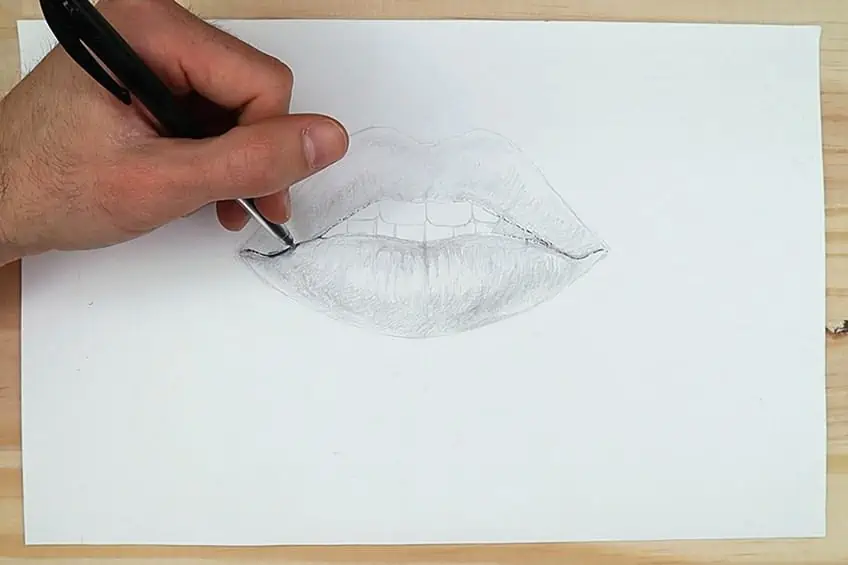
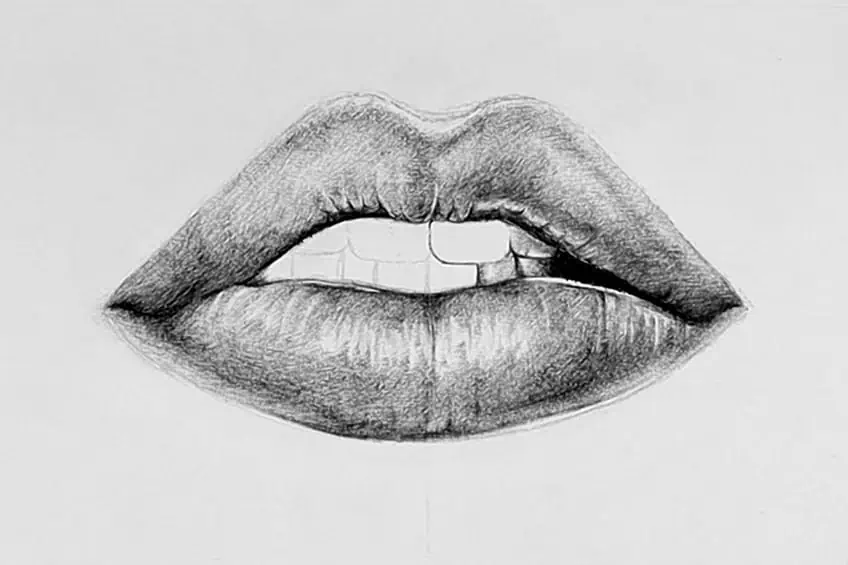
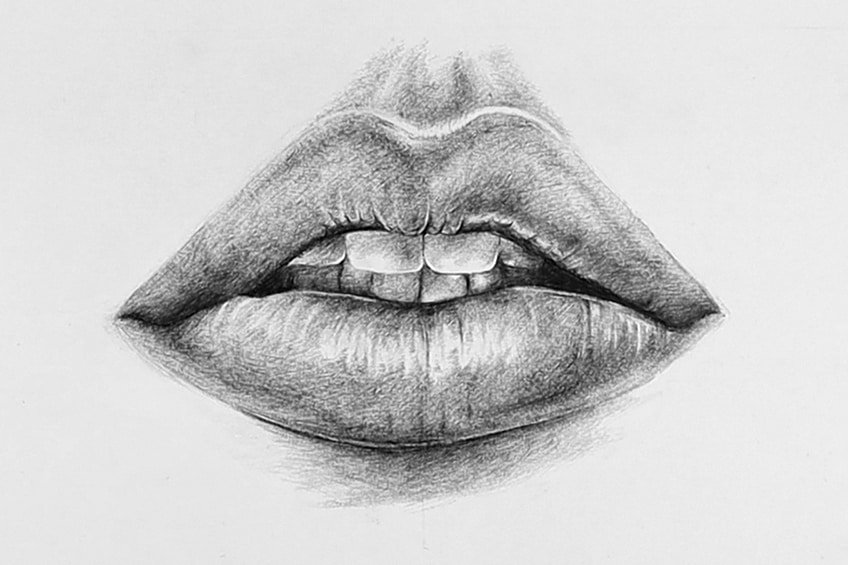
Step 7: Creating Shadows Around Our Mouth Drawing
The philtrum over the top lip and a little shadow under the bottom lip will now be drawn. In order to do this, we will take our H pencil and start making markings on the page while making references to our source image. Keep these markings light to allow shading them over simpler.
Take note of the faint bright ring that surrounds the bottom lip’s edge when we shade the darkness underneath it. This line of light will aid in creating a distinction between the lips and the shadow. This shadow can be softened using our ballpoint pen. As it stretches out from under the lip, this shadow has a gradient from dark to light.
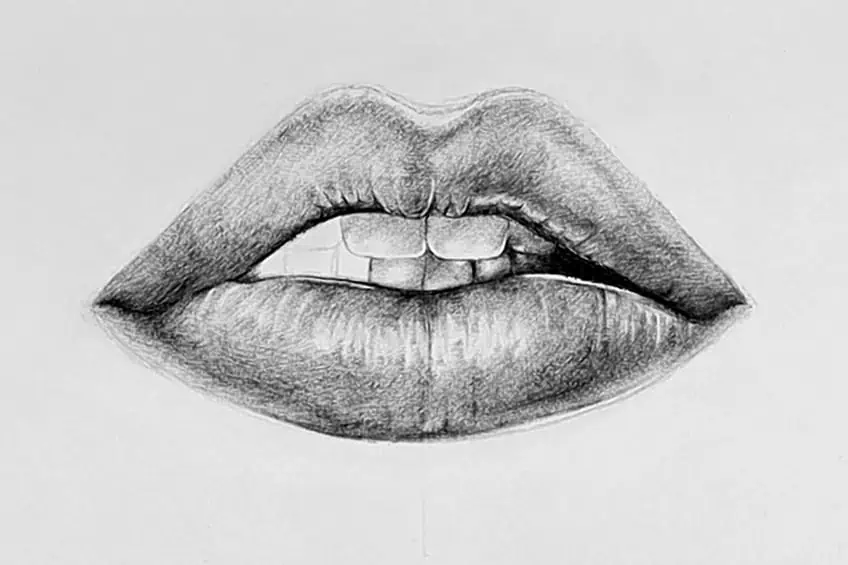
The philtrum in the original image is really faint, as we can observe when we pay attention to it. Remember to keep your shading light as you progressively layer these hues with your ballpoint pen, and pay attention to the two projecting dents. As you shade, these dents force the shadow to descend in the philtrum’s center.
On either side of the protruding dents, we can tint it a little darker. The dents will stand out and provide a three-dimensional look when there is shading on both sides and in the middle of the philtrum. As we shade, we should also observe how the top lip and philtrum do not converge, producing a light look.
Let’s return to the lower lip now and faintly shade the pale line that runs down its edge. It is beneficial to faintly shade over the extremely tiny line of light on the bottom lip’s edge since it is there. This will guarantee that it is not overly contrasted.
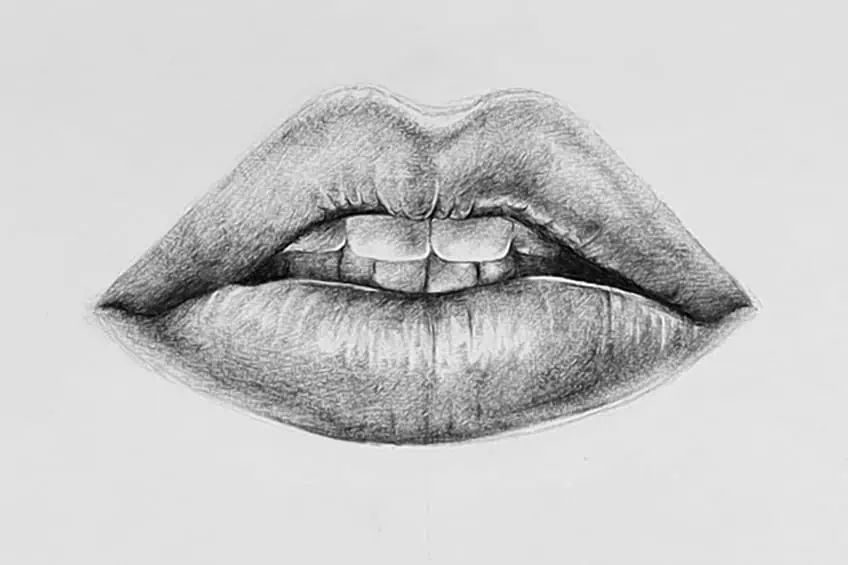
Useful Tips
- The size of the top lip in relation to the lower lip is the key to drawing lips. Therefore, before shading, we want to take our time to ensure that the proportions are correct.
- Working around the lower lip’s shine should be done gradually. You then gradually draw sharp markings into that empty space on the bottom lip as the last phase of darkening the lip. This gives the appearance of a sheen.
- In general, the mouth is where the darkest times usually occur. The lips should look like it is casting fading shadows outward.
- Due to its downward slant, the top lip is usually somewhat darker than the bottom lip.

Lips are the most difficult part of drawing a mouth. This is due to its smoothness, which is quite distinct and unlike skin. We focus on the minute light reflections in the lip when we want to produce this appearance. In this instruction, well-moisturized lips were displayed, and the lips’ surface would reflect light. Finally, we want the forms to be accurately scaled and proportioned. Prior to adding shade, always take your time in the early stages to correct the shape and scale.
Frequently Asked Questions
What Is the Hardest Part of a Mouth Drawing?
The hardest feature to sketch in a portrait is the lips. Lips may make a variety of expressions, such as basic grins, smiles that reveal teeth, shy smiles, or smiles that are really joyful, sad, or typical, among others. Every kind comes in a variety of sizes and forms. Those are always challenging to draw. The form of the teeth might occasionally be difficult.
What Are Some Good Tips for Learning How to Draw Lips?
Spend some time studying our reference image and using erasers and pencils to try and clarify the shape of the lips sketch. The secret to the drawing of lips is the size of the top lip in relation to the lower lip. We should therefore take our time to verify that the proportions are perfect before shading.

Matthew Matthysen is a multidisciplinary artist. He completed his fine art degree, majoring in History of Art and Contemporary Drawing Practice at the University of Witwatersrand, South Africa. Before joining acrylgiessen In 2020, Matthew worked part-time as an art teacher at Reddford Blue Hills High school. Matthew creates drawing and painting tutorials for acrylgiessen and captures them not only photographically and in written form. He also records the creation of his works in his own creative studio as in video format, from which later with a voiceover and a video editor also drawing tutorials for the Youtube channel of acrylgiessen are created.
Learn more about Matthew Matthysen and about acrylgiessen.