Oil Painting for Beginners – Learn Oil Painting Basics Step by Step
This post may contain affiliate links. We may earn a small commission from purchases made through them, at no additional cost to you.
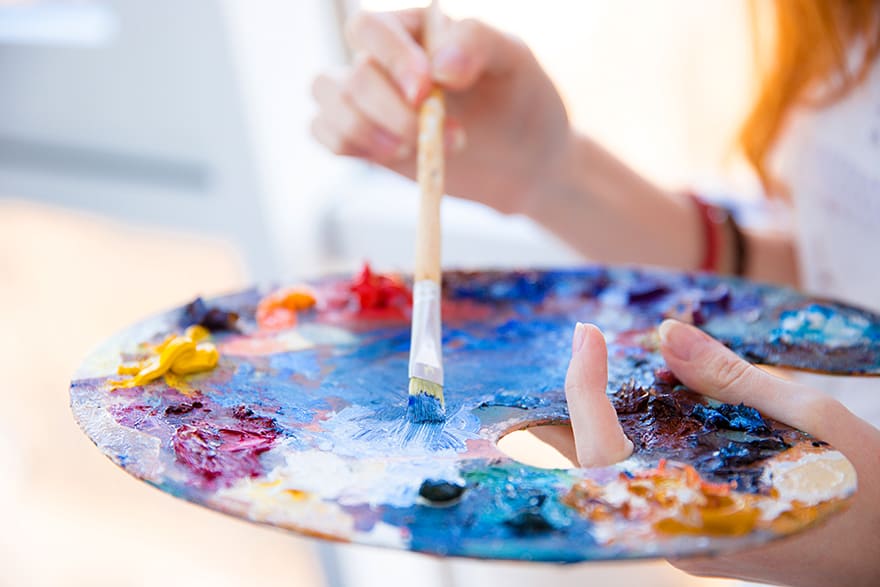
So, you want to learn how to oil paint, but it seems too much of a daunting task. Beginning oil painting might be difficult to get into as there are so many things to learn and understand. When it comes to something that appears too overwhelming, it is always best to keep it simple and break things down into smaller manageable tasks. So, let us take you on a journey of oil painting step by step. As with everything, if you want to do it right, you have to learn a few basic rules and techniques. Let us face it, you are not going to be creating a ‘Monet’ on your first attempt, so have fun while discovering oil painting basics, experiment, and enjoy the creative process.
Taking a Closer Look at Oil Paints
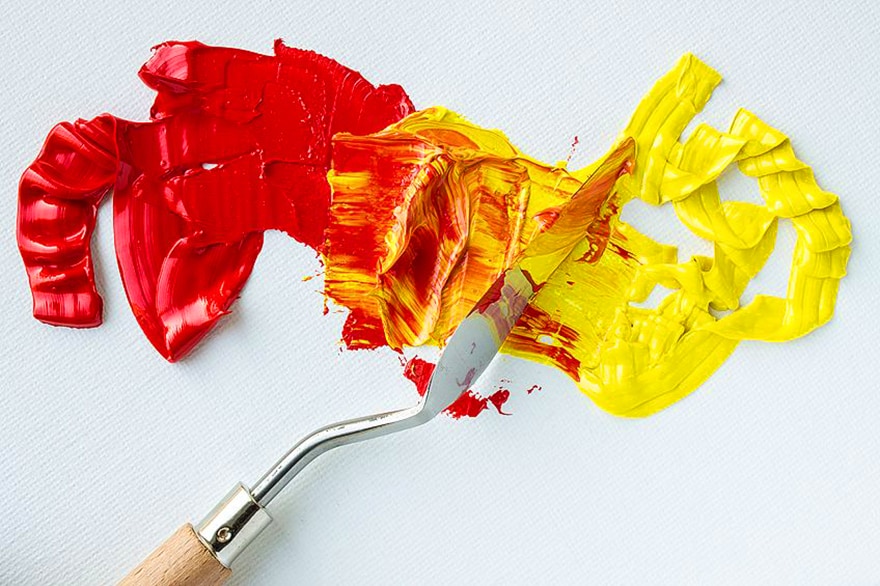
What are oil paints? To understand this question, you will need to understand what oil paints consist of. What goes into oil paints is quite simple, it consists out of a pigment color that is floating around in a drying oil-like linseed. What separates the various oil paints is the quality of the pigment and the medium used. There are different mediums you can use to mix with oil paints. For example, turpentine helps to dilute the oil and changes its consistency. This can help with blending and producing various brush techniques. When it comes to color pigments, the more well-known ones include:
- Umber
- Sienna
- Zinc oxide
- Cadmium
Some pigments are toxic, for example, cadmium and cobalt, so always check and work carefully with these. Just make sure you wash your hands after using these types of paints. However, today there are many synthetic alternatives to these that work just as well.
Now that you understand the basics of what oil paints are made from, you now get different grades of oil paints. These vary greatly in price and quality and consist out of your student-grade oil paints and your artist-grade oil paints. Before we get into that, here are a few famous painters and works of art.
- Claude Monet – The Water Lily Pond (1899)
- Vincent van Gogh – Starry Night (1899)
- Rembrandt – Self-portrait with Beret and Gathered Shirt (1659)
- Frida Kahlo – Self-Portrait with monkey (1938)
- Picasso – Guernica (1937)
Artist Grade Oil Paints
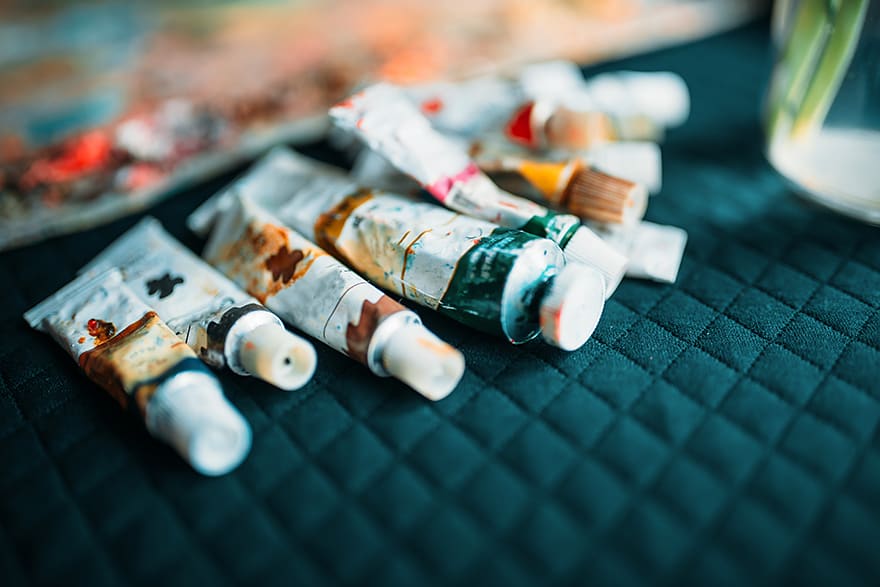
These paints are of the highest quality and the colors are the most vibrant and as permanent as possible. The paint is made from the purest and sometimes rare pigments along with high-grade linseed or poppy oil. Artist-grade paints are more expensive because of the high quality with no added elements, which could affect the color. You can, however, purchase smaller individual color tubes to test out the difference against lower-grade paints. Some of the popular brands for artist grade oil paints include:
- Sennelier
- Schmincke Mussini Oils
- Gamblin Artist Oils
- Winsor & Newton
- Bob Ross
- Williamsburg

Student Grade Oil Paints
A cheaper option is to get the student grade option. These are not as pure as the artist or professional grade paints as they contain stabilizers and fillers. Pure pigments are exchanged for the synthetic variety, which is cheaper to manufacture. However, the quality is lower, and this can affect the color, especially when blended. The results are less vibrant and dull colors when compared to the artist-grade variety. Here are a few well-known brands for student grade oil paints:
- Winsor & Newton
- Van Gogh
- Gamblin
- Grumbacher
Pros and Cons of Oil Painting
The question sometimes comes up as to why use oil paints when there are alternative options available? Oil paints might seem to have some difficulties concerning price, techniques, and rules. However, they offer a distinct look and are very forgiving when making mistakes. On the other hand, they are also quite expensive. Let us have a look at a few more advantages and disadvantages when it comes to using oil paints.
PROS
- Versatility: The drying times and consistency can be changed using different mediums, which allows you to apply various techniques
- Oil paints have a better reputation than acrylic paints when it comes to the art produced. This is especially true for art collectors
- You can easily make corrections when you need to, as the paint dries slowly. You can also create more realistic colors, tones, add depth and range of color as you have enough time
- Extremely durable and vibrant colors
- Colors remain vibrant and unchanging, even after drying. Oil paints are very consistent
- Has a range of finishes and effects from opaque to transparent
- Wide color range available
- The different strokes and textures you can achieve
CONS
- Slow drying time and requires a much longer commitment to complete a piece. Applying layers can take some time
- Oil paints can yellow over time
- Blending can be difficult and eventually create muddy colors
- Solvents can be a health risk but there are alternatives available
- Cleaning brushes can be a mission
Acrylic Versus Oil Paints
There are many things to understand when learning how to use oil paints and any other medium like acrylics. If you want to decide between the two then discovering the differences is an important step. Also, it is a good idea to first learn some good drawing skills, which should help you better your painting experience. Since you do get quick-drying oils, also known as Alkyd oils, as well as slow-drying Acrylics or open acrylics, we will be looking at your basic or original oil and acrylic paints.
| Oil Paints | Acrylic Paints | |
| Drying Times | May stay wet for weeks or even months | Dries within the hour |
| Light Fastness | May fade and yellow over time | Have excellent lightfastness |
| Cost | Expensive (although there are more affordable options) | Cheap to affordable |
| Blending and mixing | You can take your time to blend colors | More difficult to mix as the paint dries faster |
| Clean up | Difficult to clean up using solvents | Easy clean up with soap and water |
| Toxicity | Generally non-toxic unless consumed, some pigments can be toxic. Solvents used when oil painting can be toxic | Non-toxic, unless otherwise stated (some pigments are toxic, for example, cadmium manganese, and cobalt |
| Permanence | Colors and paint can last for a long time if taken care of properly | Paints should also last a long time |
| Color | Vibrant colors with more pigment that stays the same color on application | Not as vibrant and the color can change when it has dried, may darken slightly |
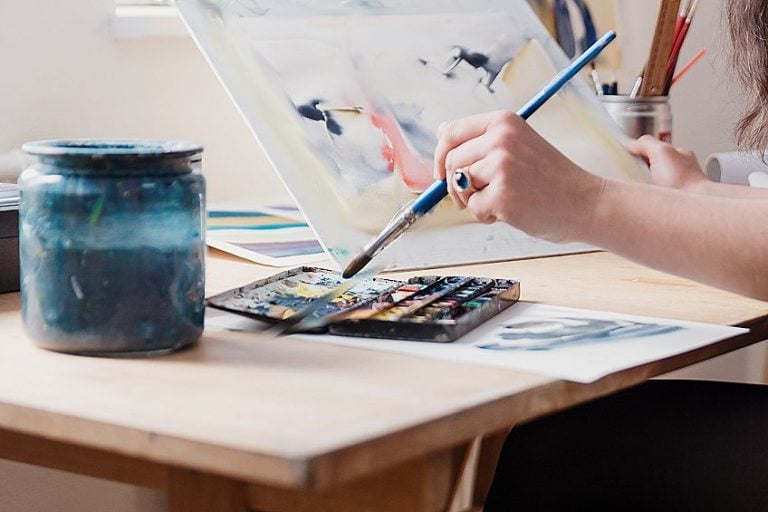
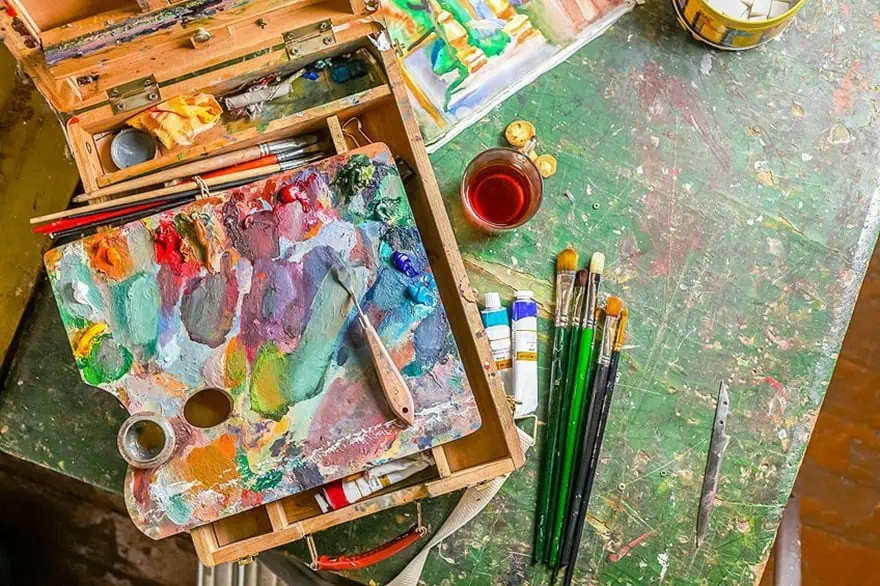
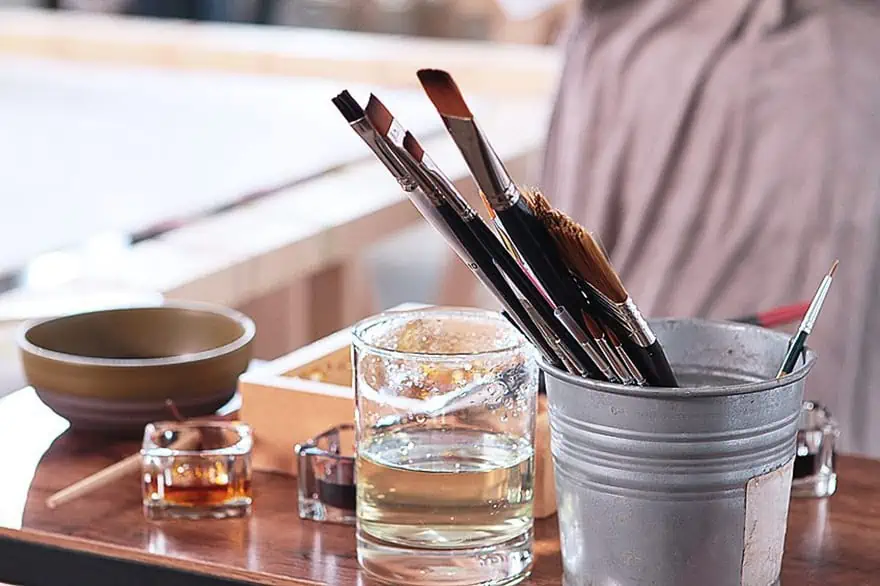
Oil Painting Supplies
When beginning oil painting, you need more than just your oil paints to get started. You need certain essential oil painting supplies that will help you produce the best oil painting piece possible. You also want the creative process to flow and to make this as easy as possible, you must have everything you need ready and at hand when painting. Below is a list of oil painting supplies for easy reference.
- Oil paints: if you are a beginner, it is best to purchase a kit that already has all the basic colors you need
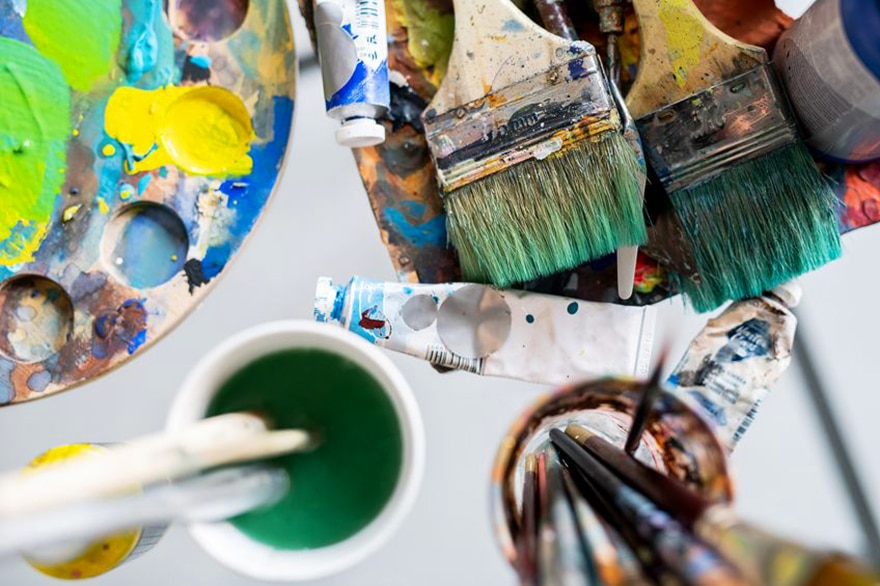
- Brushes: to begin with, a medium-size fan brush, medium round brush, small, medium, and large flat brush, small and medium Filbert brushes. You can always add to this eventually. Maybe look for a starter brush set
- Paint solvent, which you can use to clean your brushes and can be used to dilute and increase the drying time of the paint. For example, turpentine or mineral spirits. Special paintbrush cleaners are also available
- An empty jar for cleaning the brushes
- Medium to improve the oil paint drying time and other effects (optional)
- Palette knives to help mix paints and provide textured strokes, these you can also get in sets
- Canvass or other painting surfaces
- Newspaper, paper towels, and rags for cleaning
- Palette, disposable palettes are best when cleaning up
- Easel (optional)
- Charcoal pencil
- Preferably wear old clothes or something over your clothes
Oil Paintings Techniques for Beginners
When learning how to use oil paints, certain techniques and rules must be followed to produce the best oil paintings possible. Even if you do not use all of these rules and techniques, it is important to understand them.
Oil Painting Rules
When it comes to oil painting for beginners, in most cases, an art piece is made of different layers and how these layers work together will ultimately affect the outcome of your work. So, the following ‘rules’ should be noted
Fat-Over-Lean
When applying paint layers, each consecutive layer should be more bendable than the one below it. This prevents any cracking from happening once the paint dries. So, the layers underneath should be leaner than the ones above. Fat and lean is a reference to the amount of oil paint, the more oil, the fatter the paint and the slower it dries. Lean paint contains less oil and dries faster. This rule is important if you are going to add solvents or mediums to the paint. For example, if you apply a fast-drying paint over a slower drying paint, this will cause problems like cracking the paint. You can also look at it as flexible over non-flexible.
Working with mediums can be a challenge, and ultimately, you do not have to use mediums when oil painting. Simply use the paint directly from the tube, in most cases, the drying times should not differ that drastically.
Thick-Over-Thin
When painting thick layers of paint, for example, using the Impasto technique, you should again apply thicker layers over thinner layers. Thin layers dry faster, and if applied on top of thicker layers, it will cause cracking in the paint. For best results, rather apply thin layers and slowly increase the thickness of consecutive layers.
Slow Dry Paints Over Fast Drying Paints
Again, if you apply a fast-drying paint over a slow-drying paint, it will most likely start to crack. The underlying layers will still be drying out, while the top layer has already dried. While the bottom layers are still drying, they are still flexible and will start to crack the inflexible, dry top layer. It is also important to note that some colors dry quicker than others. So, always check the brand manufacturer’s website for more specific information on drying times.
Oil Painting Techniques
Following are a few of the oil painting techniques that can help you create amazing art pieces. You will most likely not use all of these techniques, however, it is a good idea to understand how to apply them all.
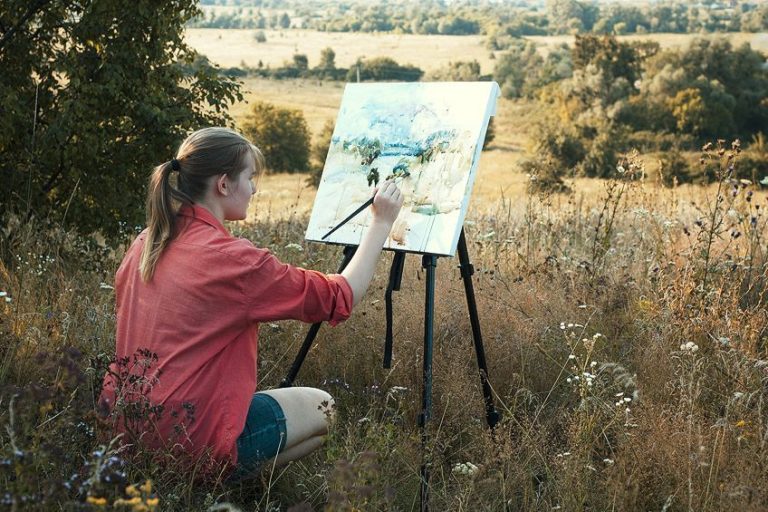
Alla Prima
This is also known as the wet-on-wet technique, where each layer is applied without waiting for the previous layer to dry. When using this technique, the artwork can usually be completed much faster. This technique is popular with those artists who paint outside, who do not have the time to wait for the paint to dry before capturing their image. This form of painting is a quicker and more spontaneous method of oil painting.
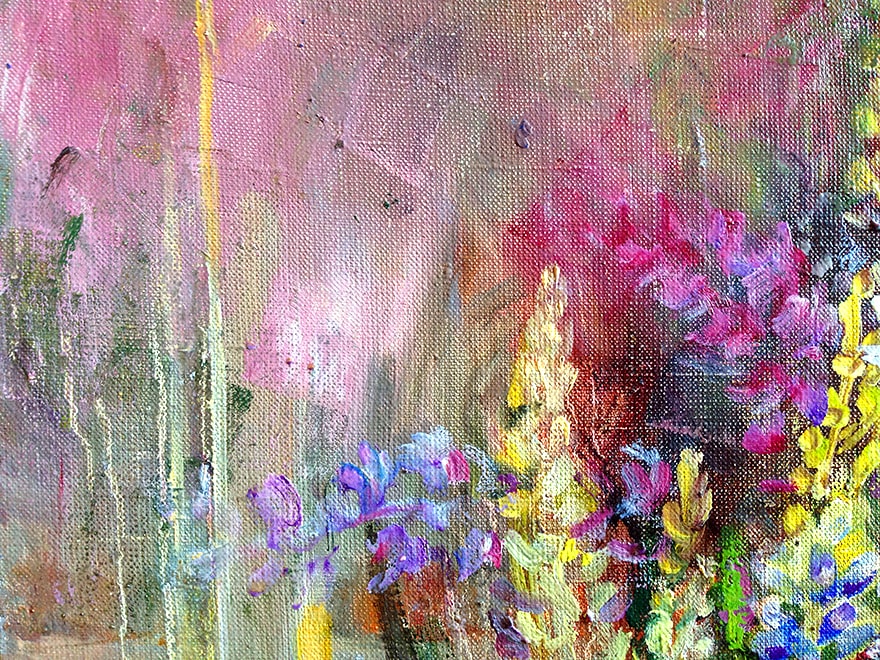
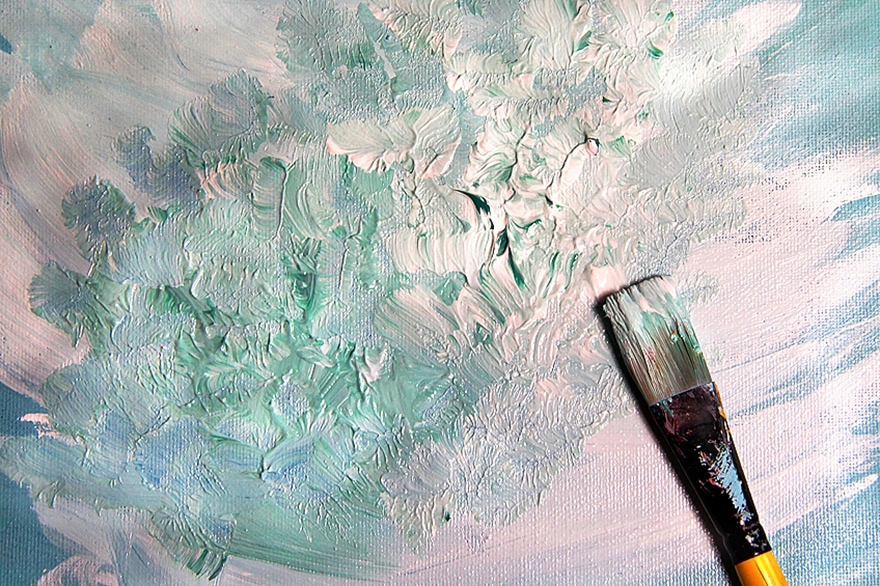
Impasto Technique
This technique applies thick paint that holds the texture of the brush or pallet knife. Impasto is used mostly on sections of the canvas, rather than the entire surface. The pallet knife helps to produce even thicker effects than a brush. The increased texture brings more attention to the selected areas. It is a great technique to add depth to a painting. By applying this technique, you can also produce the effect of distance. Closer areas can be more built-up, while the distant areas are flatter and smoother. Impasto is also a great way to create movement by applying directional lines.
Scumbling
Using a stiff dry bristle brush, apply some paint over another dry layer so that the layer is broken, and the color underneath shows through. It is important to consider the fat over lean rule in this case. A great technique that adds texture to a painting.
Glazing
Applying a thin semi-transparent layer over a dry opaque layer using a glaze medium. You build up these glazed layers, which can create some interesting effects. You must wait for each layer to dry and then you can apply the next one, so it does take some time to do this technique. Again, the fat over lean rule is important for it to work. The outcome should improve the shine of the art piece, give it more depth, and creates contrasting colors.

Chiaroscuro
This creates a contrast in the darker and lighter features of the painting. This technique was used extensively in the Renaissance period, for dramatic effect and created pieces that were almost sinister in their appearance. When applying this method, many artists recommend you begin with your single light focal point, for example, a candle and then paint out from there.
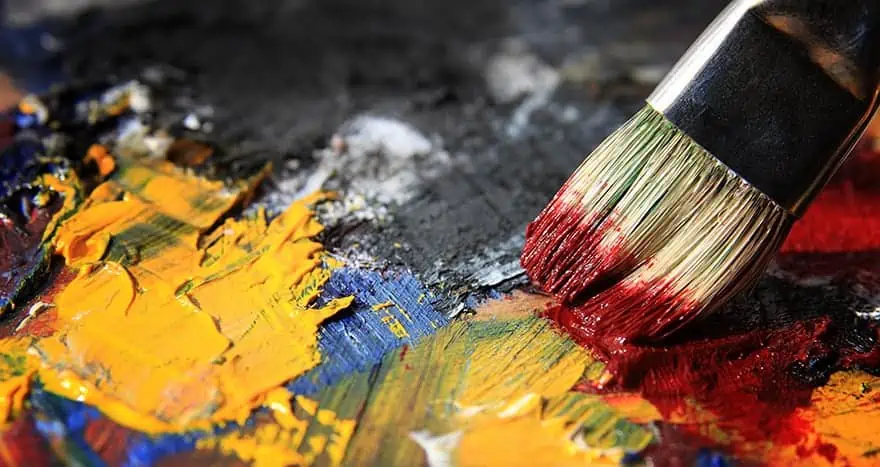
Blending
To create a different color, two paint colors are blended when still wet. You can either blend your colors on your pallet or while painting on the canvas. For example, if you want to create a green, use yellow and blue. Blending is popular with oil paint artists, as the paint dries slowly, and you have enough time to get just the right color you want. You can easily create different shades and tones, which can make a more ‘realistic’ looking painting. However, many recommend that blending be used sparingly to avoid an exaggerated polished look.
Underpainting
Maybe a blank canvas is a bit daunting, and you do not know where to start. However, underpainting can help by applying a thin layer of fast-drying paint, which will act as the base for all other colors. Choosing the right color will later affect the tones and shapes of the painting. For example, rather use yellow for a desert setting, you do not want to add a blue for this purpose. You can either apply a transparent color evenly over the entire canvas surface or add a tonal underpainting by applying a single transparent color to certain areas and leaving other areas altogether. You will then add more surface colors and more detail as you progress.
Blocking-In
Blocking forms part of the early stages of painting and involves ‘blocking’ shapes and colors on the canvas. This means applying shapes and colors to the outlined areas to create a general composition and does not go into too much detail. This is one of the easier oil paintings techniques for beginners.
Knife Painting
This is a simple technique, whereby an artist will use a pallet knife to apply the paint. This should create more texture in the painting and offers a less controlled way of applying the paint when compared to a brush. There are also different sizes and styles of pallet knives and are used in conjunction with the Impasto technique.
Grisaille
When painting, this method uses monochrome colors of white, gray, and black to create a sculpture-like look. This techniques is not as popular and widely used as the others, as today you get a variety of colors, which are much more fun to work with. Although, this might be a good technique to use as underpainting as it is a great way of adding shades and tones before applying any details.
Oil Painting Tutorial
This tutorial is only to explain the very basics of how to use oil paints. When it comes to painting, the most challenging part is simply getting started and maybe, sometimes, even knowing when to stop and declare your work finished. Instead of a white canvas, the best way to help you start is to apply an underpainting or stain to the canvas. When you have decided what you want to paint, you can start with a thin layer of paint and solvent. For example, choose an earth tone for an outdoor mountainous scene. You can also consider a neutral gray or burnt umber as a layer for your underpainting.
Take the paint directly from the tube and smear some onto the canvas surface. Then, take a cloth and dip into some solvent, preferably odorless, and use this to wipe the paint all over the canvas. Now that you have made the first step, and covered the intimidating white canvas, you can envisage what you want to do more clearly.
You can then take your brush and make strokes where your general outlines will be. This is to simply get a feel for where your main features will be appearing. Once done, wipe off any excess paint, as you want this to be a thin layer that dries quickly before moving on. It does not matter if there appear to be strokes or textures on the canvas at this moment, as this is going to be more of an open composition with less refined details. Once you have stained the canvas, you can leave it for about 30 minutes to dry a little.
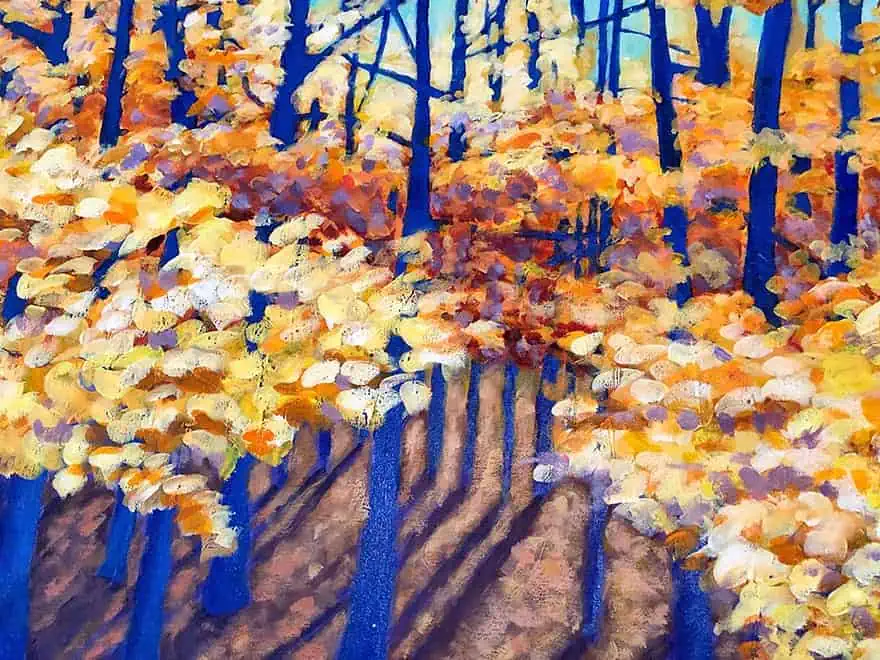
Next, do a rough sketch and draw in any major reference points. For example, draw where the edge of a cliff or mountain will be, or the placement of a pond, the horizon line, or the top of a line of trees. Once these are placed, you can then use them and start adding in relevant lines, colors, and shapes, but you do not have to add details just yet. This is fine when doing an impressionist landscape. Doing a more complex still life, you will need to add more details. You can consider doing some more research on this and reading some books on the subject.
As we carry on, a simple way to proceed from where we left off in this, is to block in your shapes and colors. For example, green for grass and land and blues for the sky and ocean. You can then go over and create textures and more detail. You can leave certain areas open, which can produce more depth to the painting. You can then perfect any details until you are satisfied with the outcome. Once done, do not forget to sign your work.
What to do After you Have Finished Painting?
The first thing to do is let the painting dry, which could take anything from 6 months to two years, depending on the thickness of the paint. To protect your painting, some apply varnish for this purpose. However, before applying varnish, you must wait for the paint to dry. Thankfully, there are now synthetic varnishes available that you can apply when the paint is dry to the touch, as it is a permeable layer that will allow the underlying layers to still dry properly. Do you need to apply a varnish to your painting? No, if you have done all the necessary steps like painting fat over lean and slow drying over fast, and you have a well-primed and good quality support or base, then you will not need to apply a varnish. However, varnishing does have a few advantages which include:
- Provides a protective layer and keeps away any dirt and dust
- You can change the surface appearance to a matte or gloss look
- Can give you a more level finish
- Helps to improve the color saturation
- The painting is easier to clean
- Also protects from UV light
You can get a permanent or non-removable varnish; however, an archival removable varnish is needed for an oil painting because it can be removed so you can clean and touch up the painting. You can get varnishes that you apply with a paintbrush or sponge and then those you can easily spray on. When you display your oil painting, make sure to keep it out of direct sunlight and away from any kind of heat source. For example, do not display over a fireplace, as the heat may affect it. Also, smoke can damage the colors, so keep it away from this as well.
Oil Painting Tips
Oil painting has been around for many years and is popular among many because of the vibrant color paints and versatility of the medium. Oil painting for beginners might seem intimidating, but once you start, you will learn and create some wonderful art pieces. Artists who have been painting for many years, have their own way of doing things and have discovered a few tips and tricks. Let us have a look at a few of these oil painting tips.
- Start small and save on materials, experiment with different techniques before moving on to larger projects. You can also experiment and get to know your colors and different tools
- Be prepared, organize your work area, making sure it is in a well-ventilated space, and have all your tools in this space as well. This gives you more time to consider your painting instead of worrying about where your brushes are
- Get yourself a few high-quality brushes, you can always add on later when you feel more confident
- Remember, when learning how to oil paint, you need to have a well-primed surface to paint on
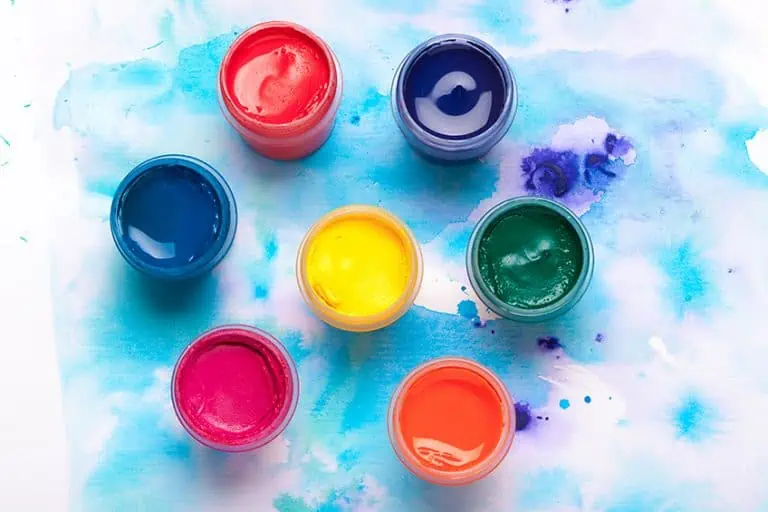
- Learn about colors and color mixing, this can only improve results
- You do not have to start with a full set of paint colors, a few basic color paints to start is fine. Try your primary colors and white as a starting point
- Understanding the painting rules is a good way to avoid problems
- Pallet knives are great for mixing paints but also as a tool for painting
- Blending is a great technique but remember to not overdo it
- You can focus more on your techniques if you try and paint the same subject more than once
- Cleaning and looking after your brushes is important as they are an expensive tool and should last you a long time
Frequently Asked Questions
Do Oil Paints Have a Lengthy dry Time?
Yes, especially when compared to acrylic paints. Oil paints can dry to the touch in about two to twelve days. To fully dry or cure it can take anything from six months to two years and depends on the different pigments and thickness of your oil painting.
Is Painting with Acrylics Easier Than Oil Painting?
Acrylic paints are said to be easier to work with as they are non-toxic, easier to clean, and cheaper to purchase. However, they do dry much faster than oil paints. Oil painting has its own set of advantages from more vibrant colors and a much longer drying time. So, it is really up to each individual to find their preferred medium to paint with.
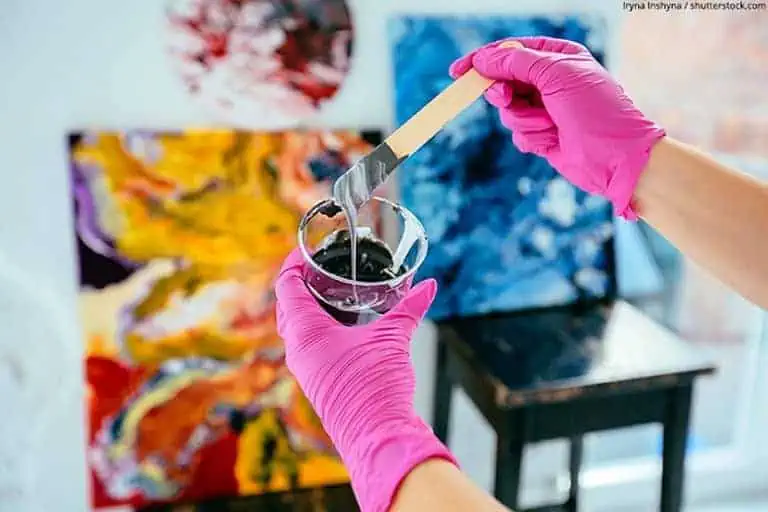
Do you Need to use Mediums in Oil Paints?
You do not have to use mediums, but if you want to thin or change the paint consistency, then adding a medium or oil can help. A medium can also be added to help boost the paint’s drying times.
Can you Use Acrylic Paints with Oil Paints?
No, you should not mix acrylic and oil paints on your pallet before painting. If you want to use both mediums, first paint your acrylics, and then apply the oils over them. You should never apply acrylic paints over oil paints.
What are Alkyd and Water-Miscible Oil Paints?
These are different from traditional oil paints. The alkyd oil paints have a synthetic resin binder, which replaces the linseed oil. This allows the paint to dry faster than normal. The water-miscible paints contain linseed as well as safflower oil, which has been modified and this makes it possible to use water-soluble mediums
Do Oil Paints Last Long?
Oil paints still in their tube can last for up to 10 years or longer if kept under good conditions. This also depends on what the paints consist out of, but in general, they can last for many years. When storing the paints, unscrew the lid and wipe away any excess paint before replacing the lid tightly. Then keep the paint with the lid down in an airtight container.
Can Oil Paint be used with Gesso?
Yes, oil paint can be used on gesso. Gesso is a white primer that is applied to a canvas or painting surface to create an even and grippy surface for applying paint. Oil paints are very versatile and can be used on a variety of surfaces, including gesso primers.

In 2005, Charlene completed her wellness degrees in therapeutic aromatherapy and reflexology at the International School of Reflexology and Meridian Therapy. She worked for a company offering corporate wellness programs for several years before opening her own therapy practice. In 2015, she was asked by a digital marketer friend to join her company as a content creator, and it was here that she discovered her enthusiasm for writing. Since entering the world of content creation, she has gained a lot of experience over the years writing about various topics such as beauty, health, wellness, travel, crafting, and much more. Due to various circumstances, she had to give up her therapy practice and now works as a freelance writer. Since she is a very creative person and as a balance to writing likes to be active in various areas of art and crafts, the activity at acrylgiessen.com is perfect for her to contribute their knowledge and experience in various creative topics.
Learn more about Charlene Lewis and about us.