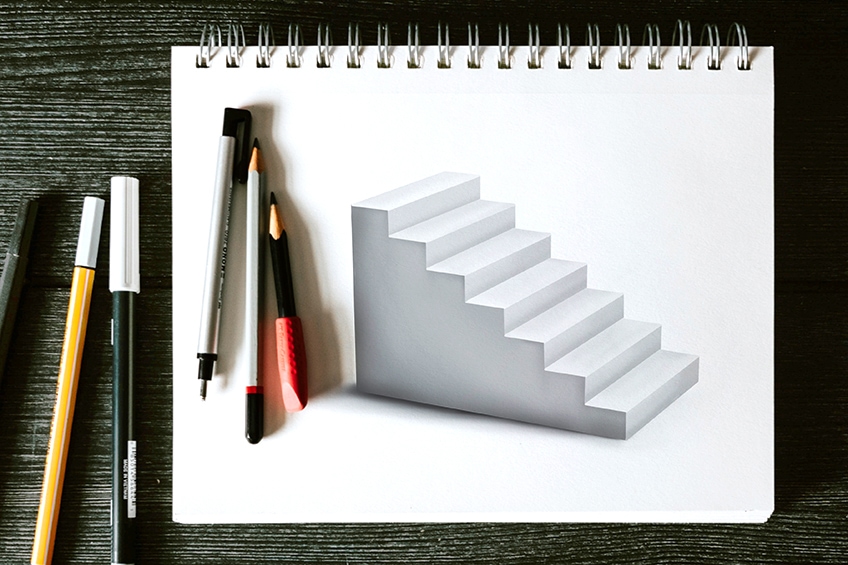
Stairs Drawing – Learn How to Draw Stairs Easily
This post may contain affiliate links. We may earn a small commission from purchases made through them, at no additional cost to you.
Stairs, the often-overlooked workhorses of architecture, are much more than a means to an end. They have a remarkable ability to capture our imagination and inspire us to greater heights. Whether it’s the dizzying spiral staircase of a medieval tower or the majestic grand staircase of a historic mansion, stairs have a unique power to evoke a sense of wonder and awe. Not to mention, they’re also an excellent way to get in some cardio exercise without ever leaving the house! So next time you find yourself climbing a flight of stairs, take a moment to appreciate the architectural beauty and physical benefits they offer. So let’s get started with today’s drawing tutorial where you will learn all about staircase drawing in a few easy-to-follow steps!
An Easy Guide to Drawing Staircases
If you’re planning to start our drawing tutorial on how to draw stairs, there are a few important things to keep in mind. First, it’s essential to understand the basic principles of perspective and foreshortening. Stairs can be particularly challenging to draw because of their complex geometry and the way they recede into the distance. Luckily for you, our tutorial breaks down the process into manageable steps, starting with the basic shape of the staircase and gradually adding details like handrails and balusters. With a little patience and perseverance, anyone can learn how to draw stairs like a pro!
By following along with the below staircase drawing collage, you too will gain the ability to draw stairs in no time!
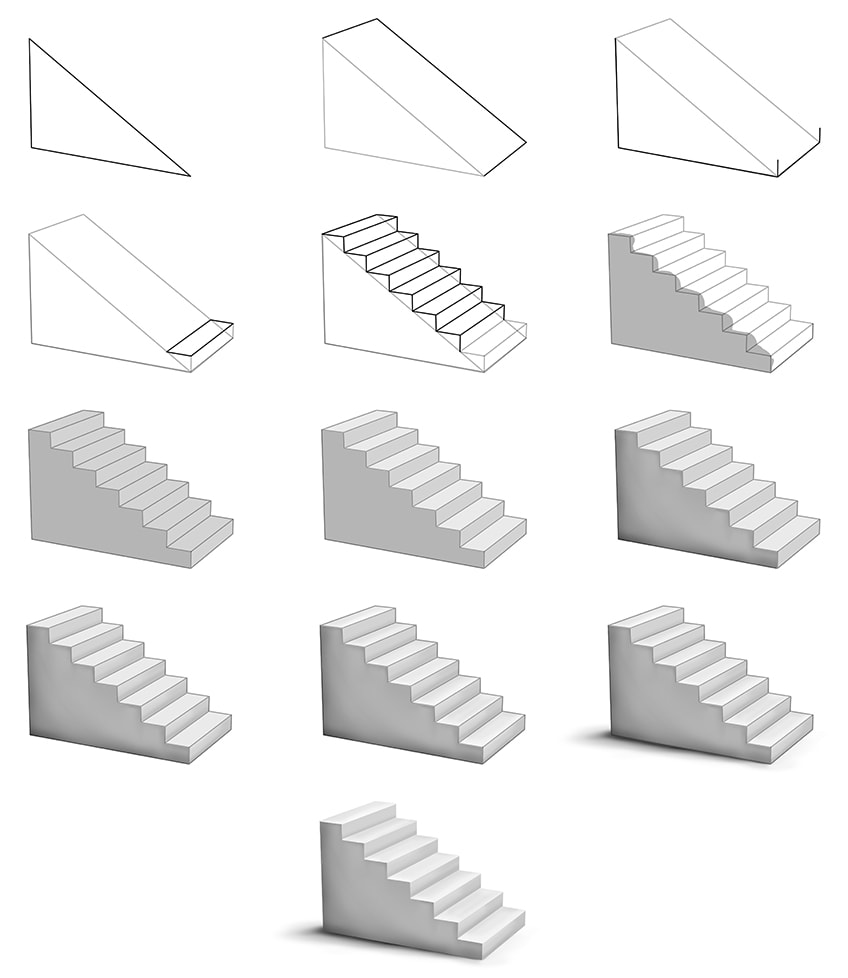
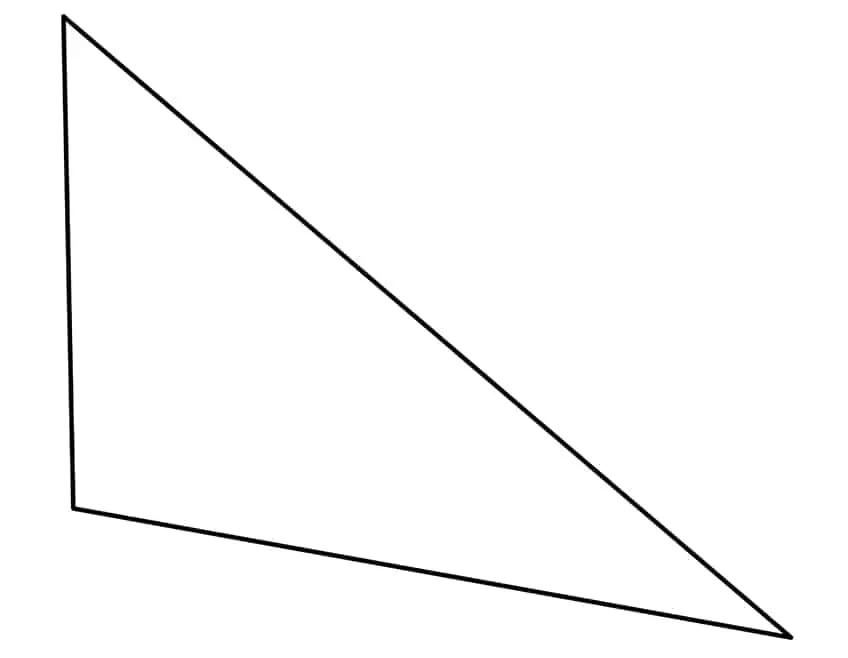
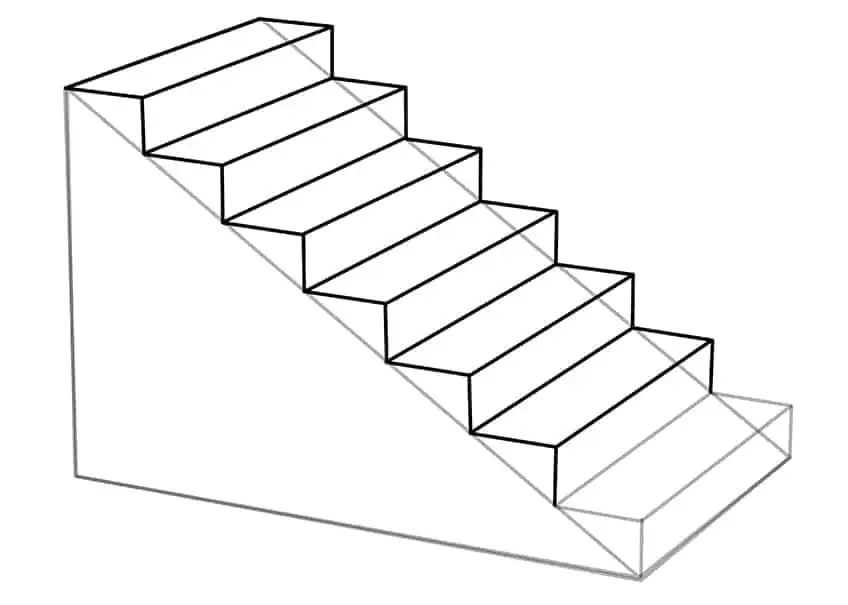
Step 1: Draw the Flat Side Surface of Your Staircase Drawing
To begin our drawing tutorial, locate the center of your drawing area and draw the flat side surface of the frame of the stairs. To do this as accurately as possible, we strongly suggest using a ruler.
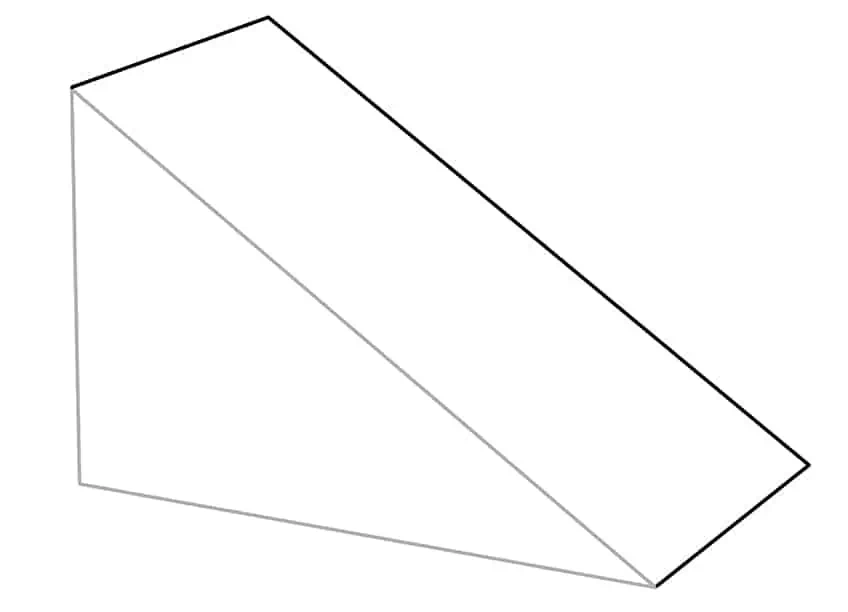
Step 2: Add the Second Dimension of the Stairs
Attached to the previously drawn side surface, draw a second top surface. The final result should look like a three-dimensional triangle.
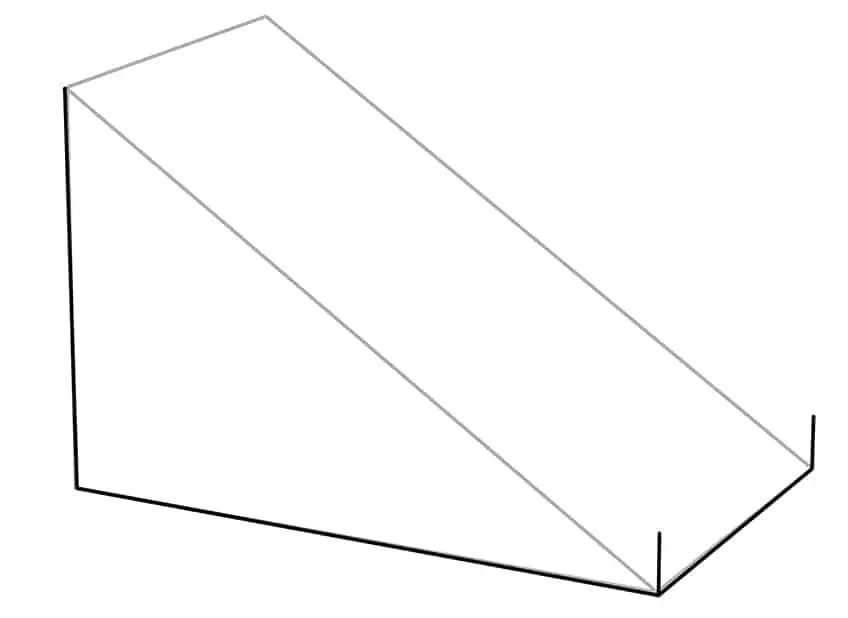
Step 3: Draw the First Rise of the Step to Your Stairs Drawing
Using a 90-degree right angle, draw the first two rises of the first step represented by two straight lines raised at the same height.
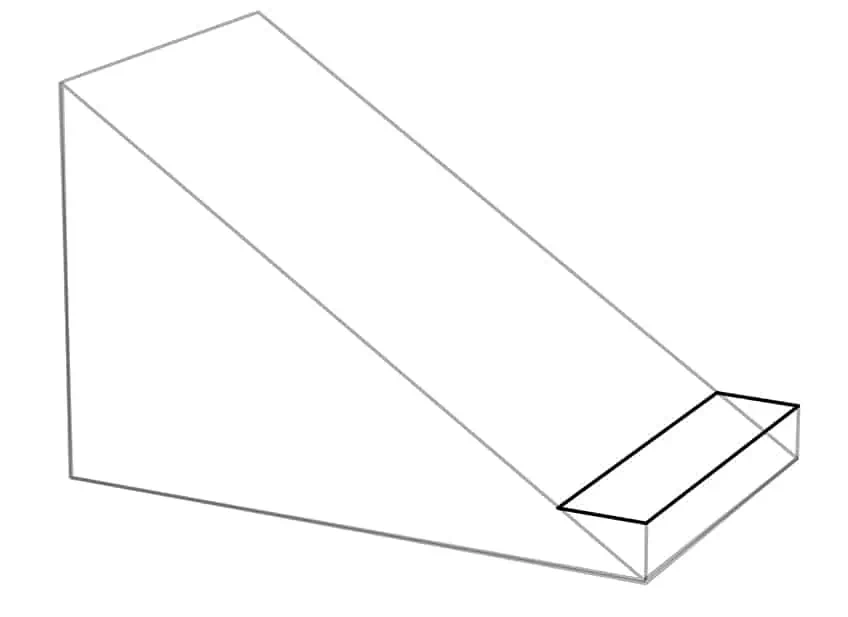
Step 4: Draw the First Step of Your Stairs Sketch
Draw a straight line on either end of the first rise leading towards the slope of the staircase. This should represent your first step.
Step 5: Add the Rest of the Steps to Your Stairs Sketch
Repeat the process done in steps three and four, and continue drawing the identical steps one above the other until you reach the top of the staircase.
After finishing your stairs drawing, erase any remaining construction lines that are still visible.
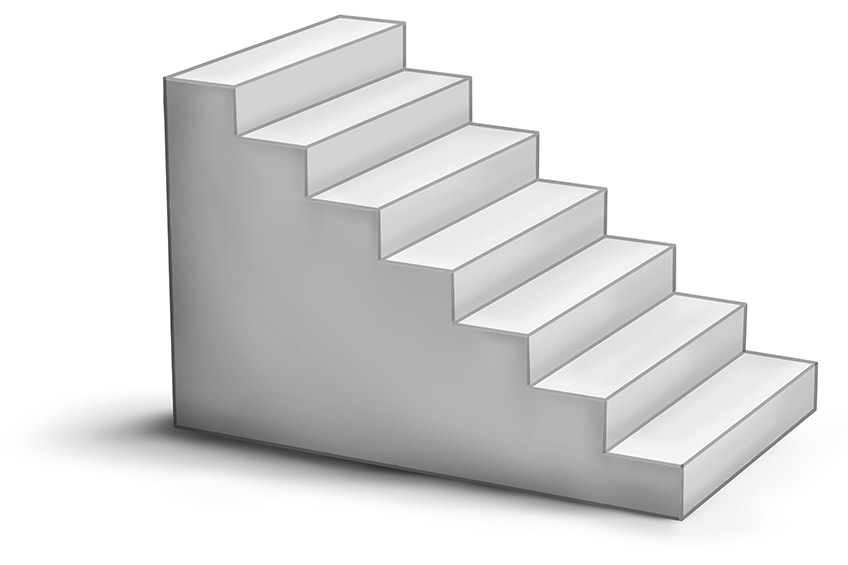
Step 6: Apply the First Color Coat to Your Stairs Drawing
Select a thin brush and a shade of gray paint, and evenly coat the flat side wall surface of your staircase drawing.
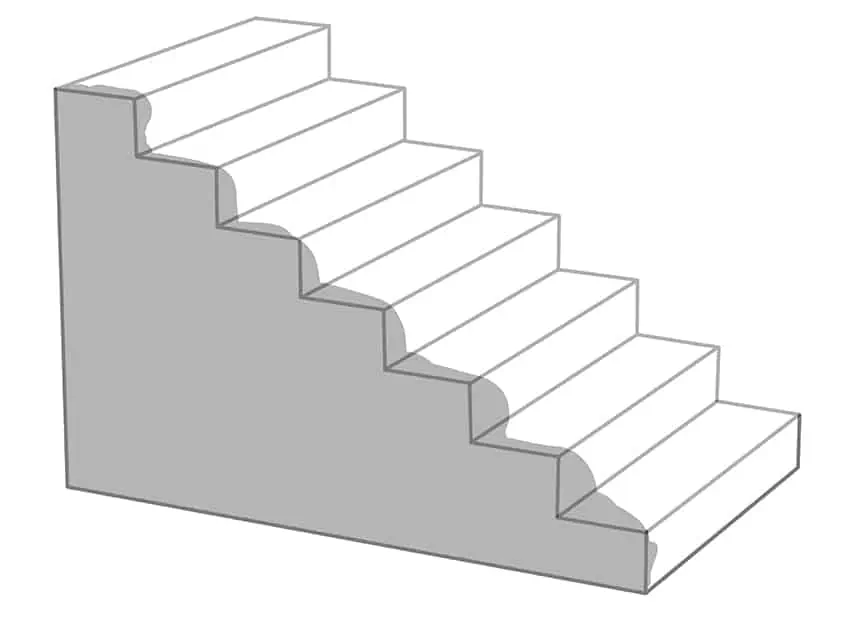
Step 7: Add the Second Color Coat
Use the same brush as previously and a shade of light gray paint, and evenly coat each of the steps.
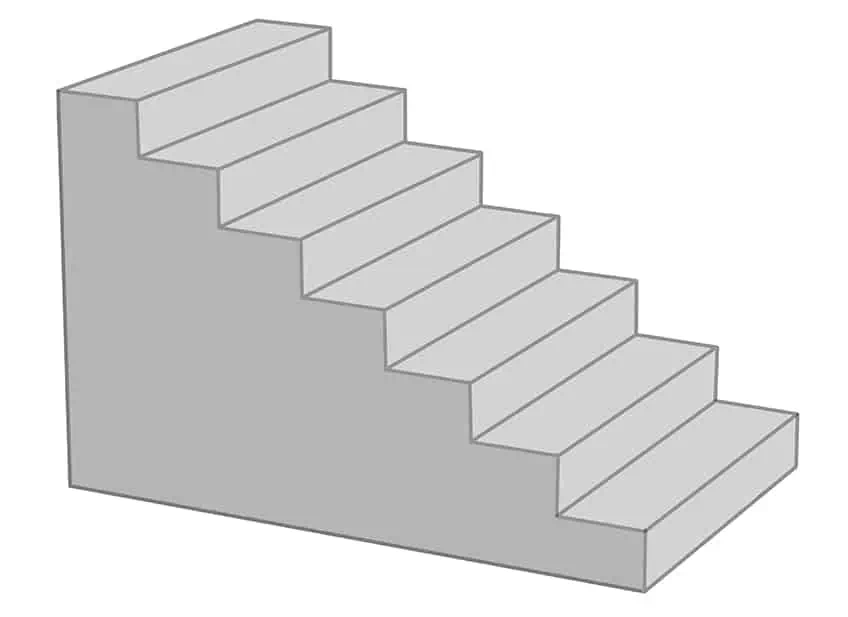
Step 8: Highlight the Top of Each Step
Using a small, soft brush and white paint, apply a lighter shade onto the top flat surface of each of the steps.
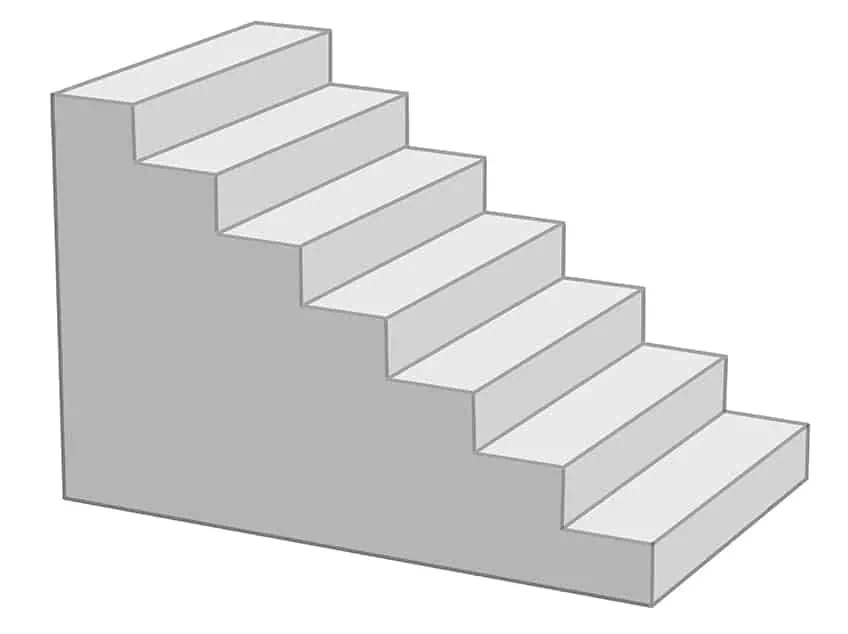
Step 9: Shade the Side Wall of Your Stairs Drawing
In this step, you will apply soft shading to the edges of your stairs drawing, using a soft brush and black paint. Continue to apply subtle shading along the sidewall of the staircase. With a blending brush, begin to soften and spread this shading.
Step 10: Continue to Shade Your Staircase Sketch
Continue to use the same brush and paint as previously, and apply gentle shading along the bottom area of each side wall on each step. Use a blending brush to soften and spread this shading.

Step 11: Paint the Casted Shadow on the Steps
Repeat the same process done in step 10, this time add shading onto the top flat surface of each step. Repeat once more using white paint and apply a softened and realistic highlight to the areas not affected by the casted shadow.
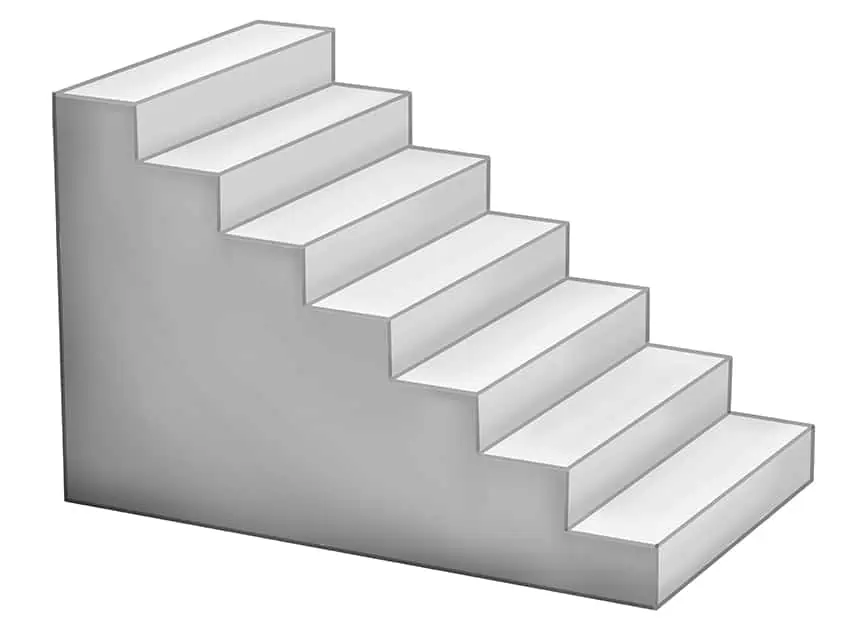
Step 12: Add a Ground Shadow to Your Stairs Sketch
Select a small, soft brush and black paint, and shade underneath the outline of the staircase. Continue by lightly spreading the shadow towards the left end of the staircase.
Complete the step using a blending brush to spread and soften this shading.
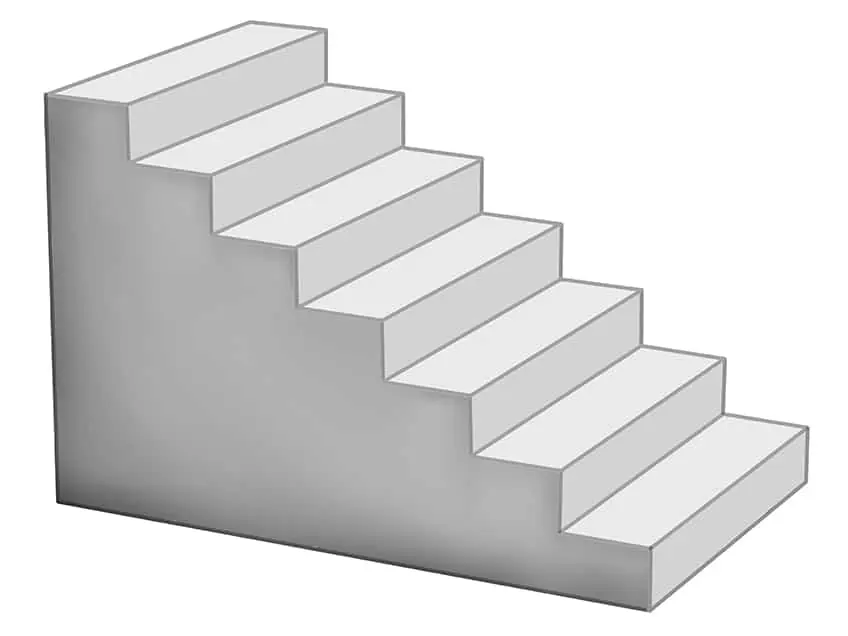
Step 13: Finalize Your Staircase Drawing
You are almost at the end of our how-to-draw stairs tutorial! To complete, simply erase any harsh outlines that are still visible. This will help you to achieve a realistic and seamless look to your staircase drawing!
Congratulations on finishing your staircase drawing! Drawing stairs can be a challenging task, but it’s also a rewarding one. Now that you’re finished, take a moment to evaluate your work. Look for any areas that may need improvement, such as proportion or perspective. If you’re satisfied with the overall composition, consider adding some finishing touches like textures to bring the drawing to life. Finally, step back and admire your work – you’ve created a beautiful and functional piece of art that can be appreciated by anyone who sees it. Keep practicing and experimenting with different styles and techniques, and you’ll continue to improve your drawing skills!
Frequently Asked Questions
How Do You Correctly Proportion a Staircase Drawing?
Drawing staircases can be tricky but with a properly guided tutorial, you will easily learn how to draw stairs! First, you need to ensure that your staircase is in proportion and correctly aligned. To do this, you will use construction lines and guidelines. Start by drawing a horizontal line to represent the floor or base of the staircase. Then, use vanishing points and converging lines to create the perspective and depth of the staircase. Finally, use additional guidelines to draw each step in proportion to the others. You can also use a ruler or other measuring tool to double-check that everything is aligned properly.
How to Make My Staircase Look Like It’s Receding into the Distance?
To make your stairs look like they’re receding into the distance, you need to use perspective techniques. Start by drawing the first few steps at the front of the staircase, making them larger and more detailed. As the steps recede into the distance, make them smaller and less detailed. Use vanishing points and converging lines to create the illusion of depth and make sure that each step is in proportion to the others. Finally, add shading or other details to create a sense of realism and dimensionality!

IzzyBll is a digital artist and content creator from Israel and currently residing in South Africa. Originally coming from videography, Izzy then turned to digital graphic art. He specialized in using digital drawing software such as Photoshop and Procreate. Drawing and photo editing has always been a sort of second nature for Izzy. In doing so, he can now look back on 5 years of experience in the industry, completing commissions for various well-known brands such as Audi.
Learn more about IzzyBll and about us.