Fox Drawing – An Easy Drawing Tutorial for Beginners
This post may contain affiliate links. We may earn a small commission from purchases made through them, at no additional cost to you.
Learning to draw a fox is a great drawing exercise because it provides you with various drawing challenges. Fox drawings are a great visual addition to different landscapes, and learning how to draw a fox is a great asset to your drawing repertoire. Fox illustrations, like many woodland creatures, are visually versatile and can be used in all sorts of ways. Fox sketches can easily be integrated into genres such as fantasy, mystical, and nature. There are many ways one can be creative with a fox drawing, making it a great drawing to learn and use in your work.
Step-by-Step Guide on How to Draw a Fox
In this tutorial on how to draw a fox, easy and simple as it may seem, will require some attention throughout each step. We will start with forming the animal in its basic shapes, and slowly working out the placement of all the features. From there, we will proceed to work with our pencils, where we will then refine the shapes and features. We will then move on to adding in some details and light shading, giving more dimension to the fox drawing. Lastly, we will work on some darker shading to bring more tonal value and contrast to the various features in our fox drawing. Now that we know what to expect, let’s go through the drawing process.
Step 1: Drawing the Basic Shapes of the Fox
We want to start by drawing the basic shapes of the fox, this is where we establish the main fundamental features of the fox. We want to start lightly drawing the triangular narrow head, this includes the ears and how we position the fox.
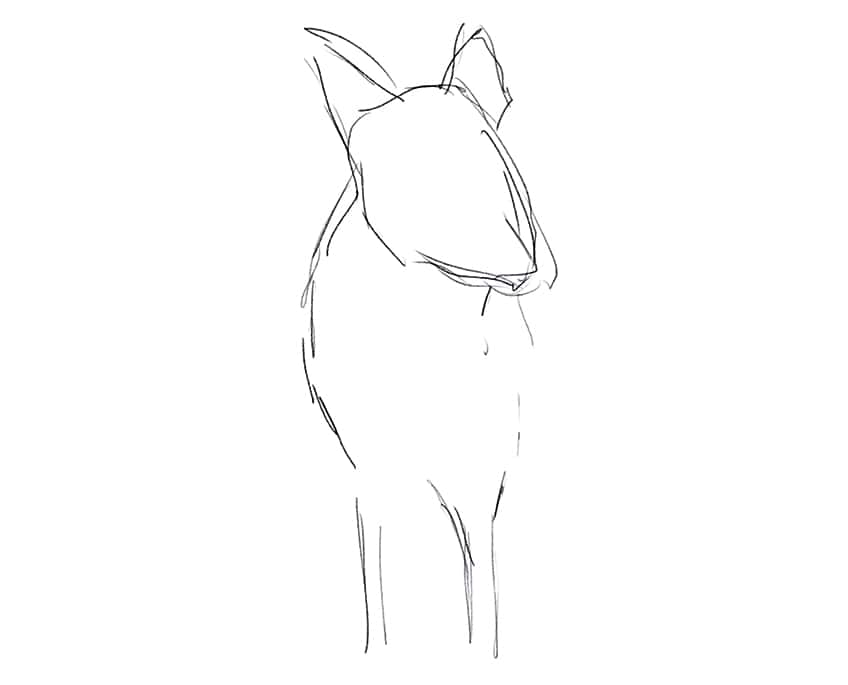
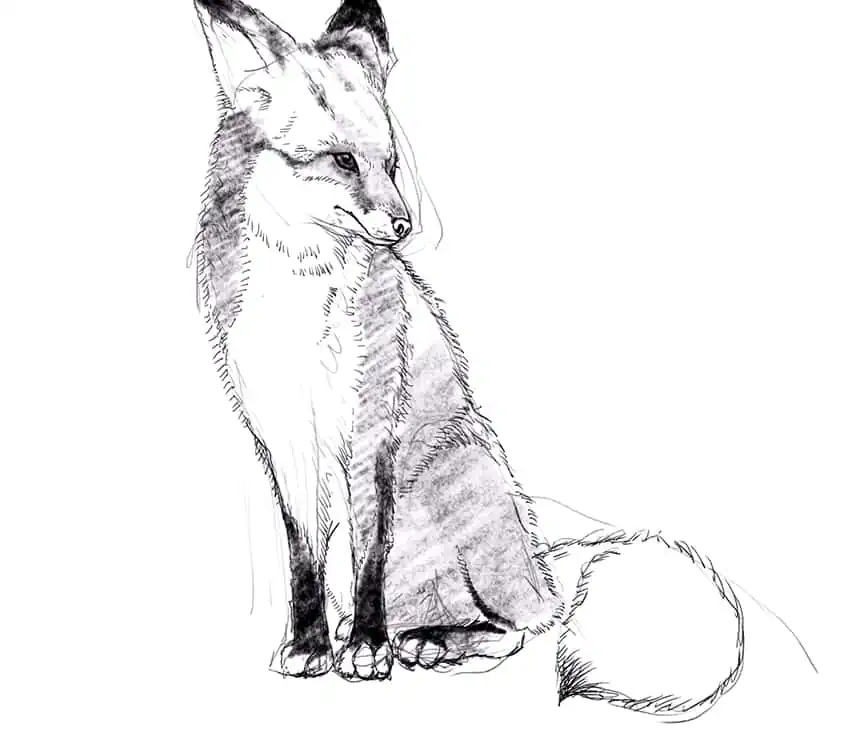
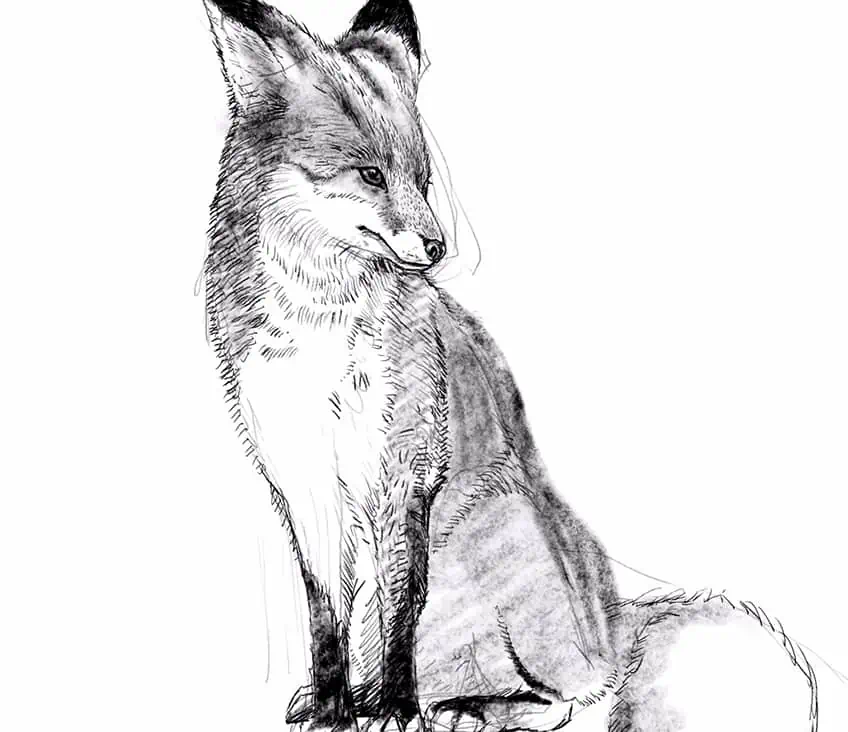
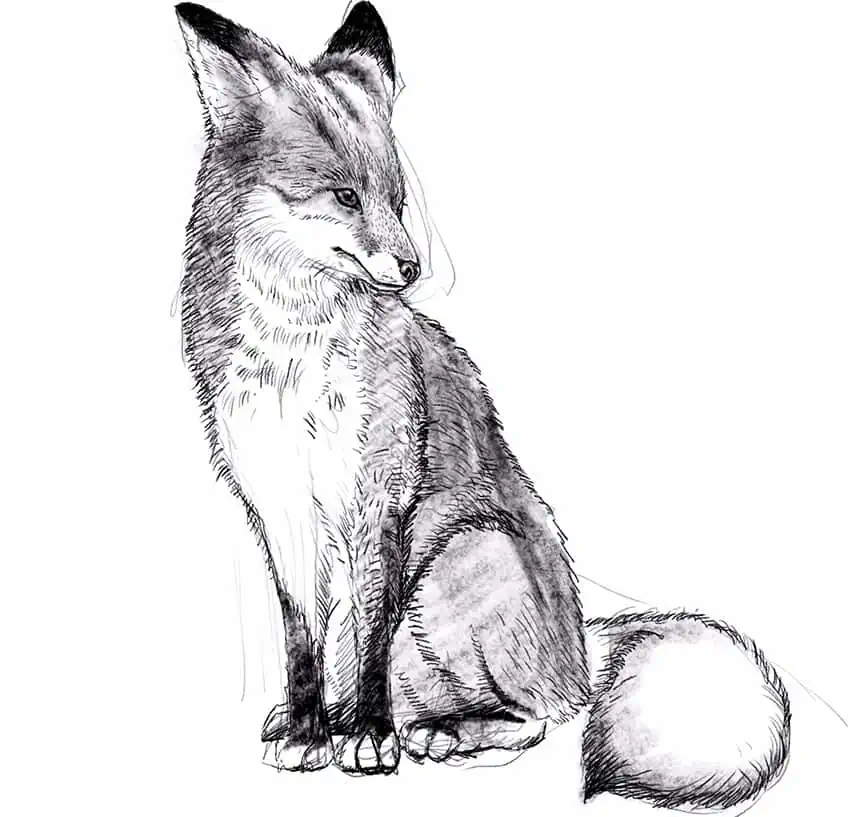
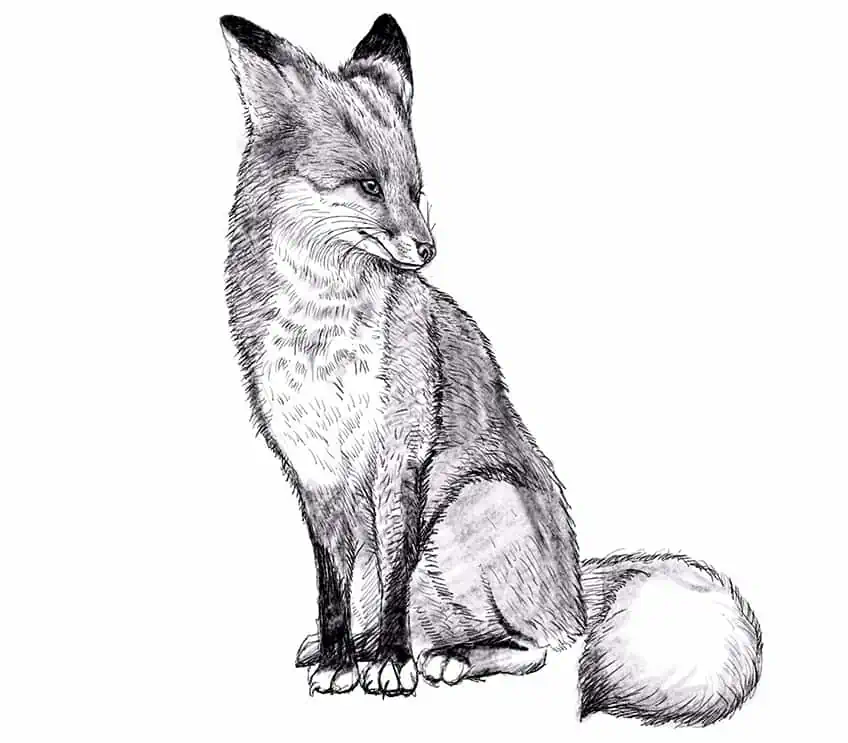
To keep it simple, let’s draw a fox from the side view, we can start to draw the legs and body of the fox as well. We don’t need to worry about drawing any realistic features at this point. Work on the basic pose of the fox drawing, where it is seated with its two front legs upright and the hind legs resting. We can also draw in the large tail, resting on the floor next to the fox.
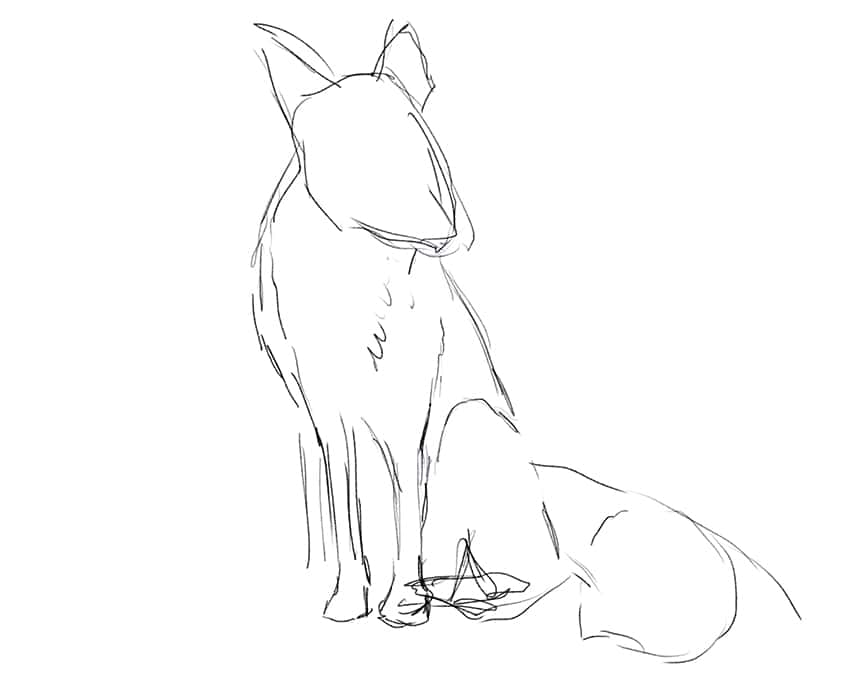
We can also start to place features in the face, allowing us to get a sense of positioning and structure. We want to work with simple shapes, to help us understand how the features work together. We can add the diamond eye shape near the center of the face, as well as the elongated snout.
We can also start to add a more disheveled outline to the fox drawing, this way we start to form the fur coat around the fox. It is good to add these scattered fur-like outlines around the fox drawing to define the fur-like shape in the fox drawing.
Step 2: Lightly Erasing the Fox Drawing
This is a weird step, but the idea is that we will work with ghost lines to refine the drawing more effectively. As we lightly erase the drawing, we are creating a light outline that is going to assist us in refining the drawing with more detail and defined mark-making.
Step 3: Refining the Fox Drawing
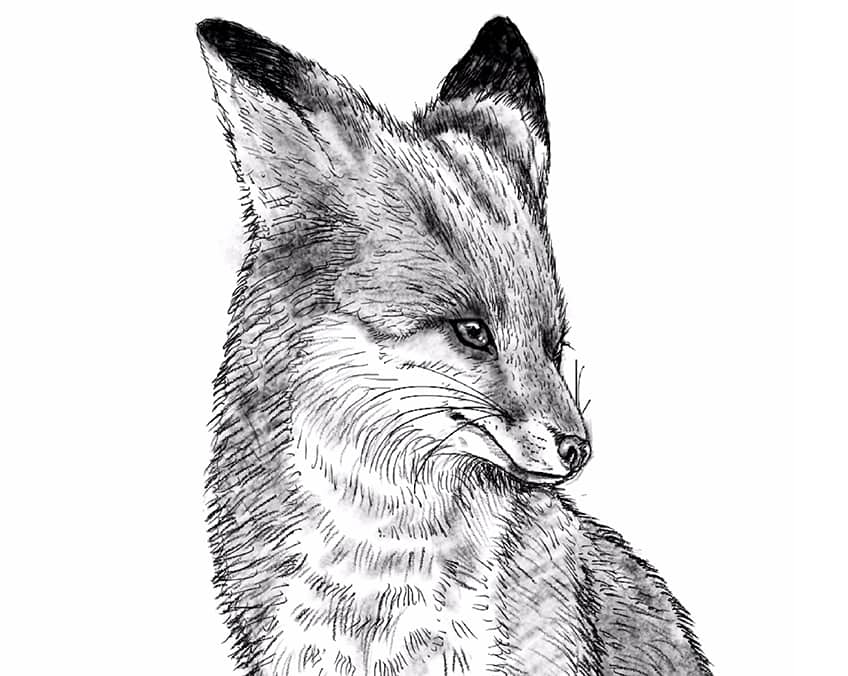
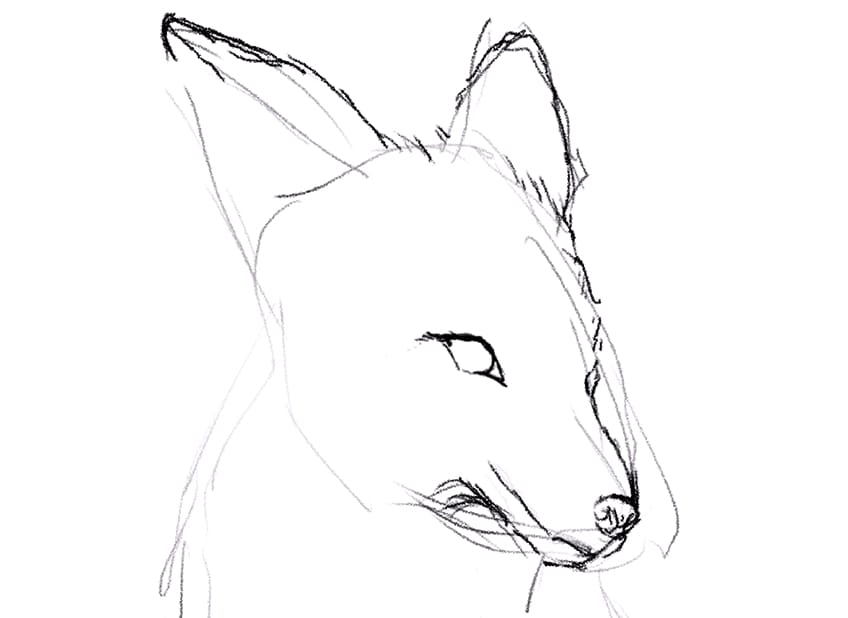
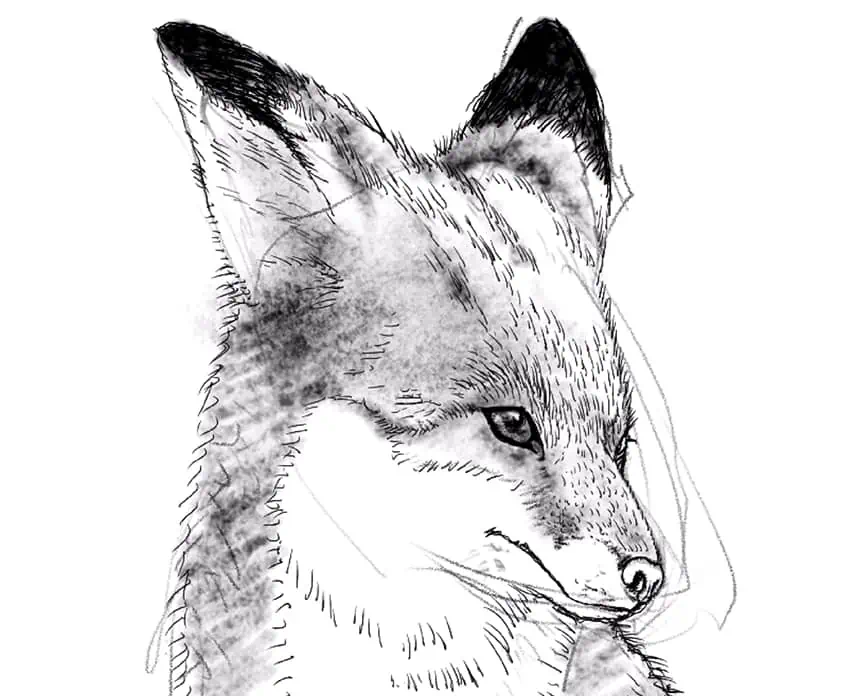
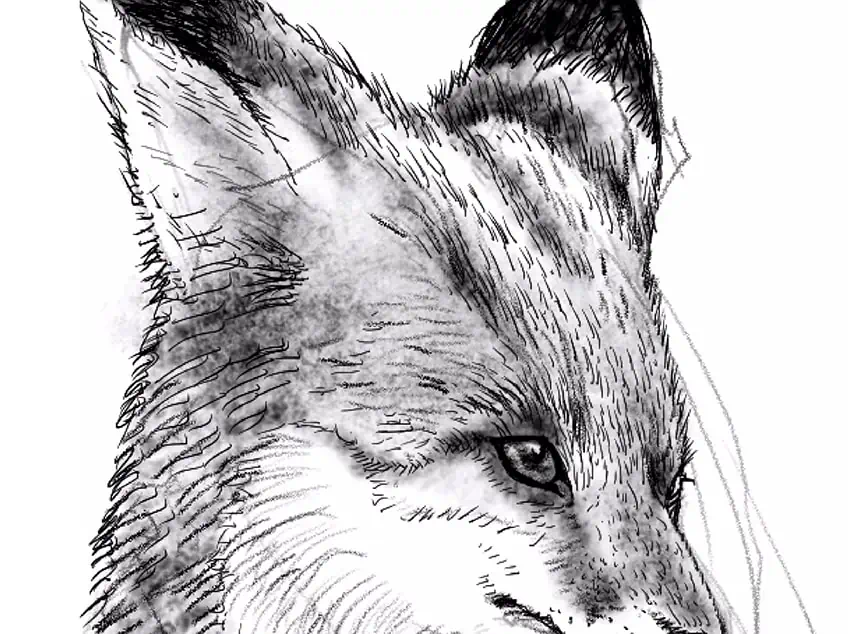
At this point we can start to work on details, a good idea would be to start with the head of the fox. The eyes of the fox have this unique diamond shape, due to their darkened edges which give the eye a narrow and sharp aesthetic.
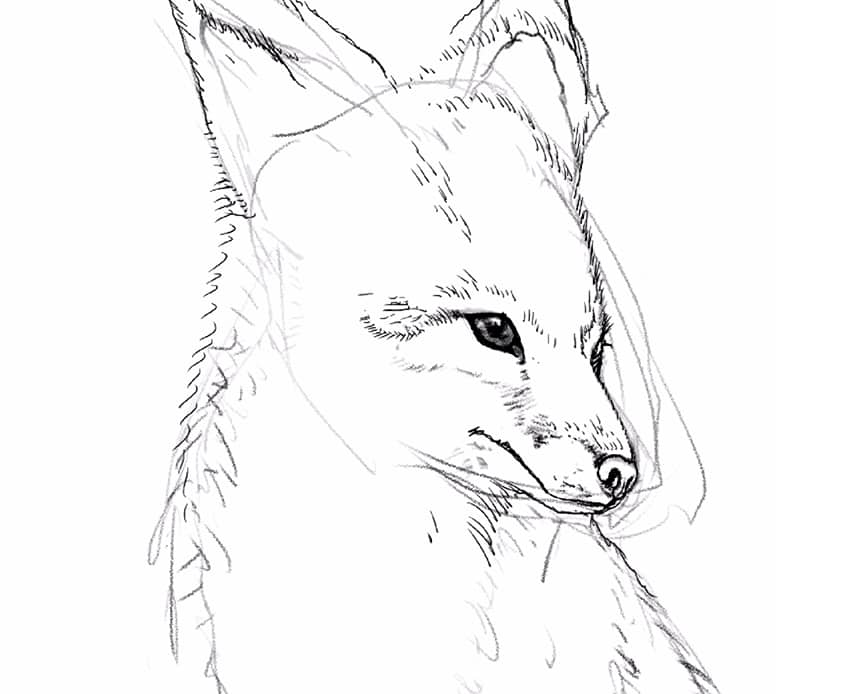
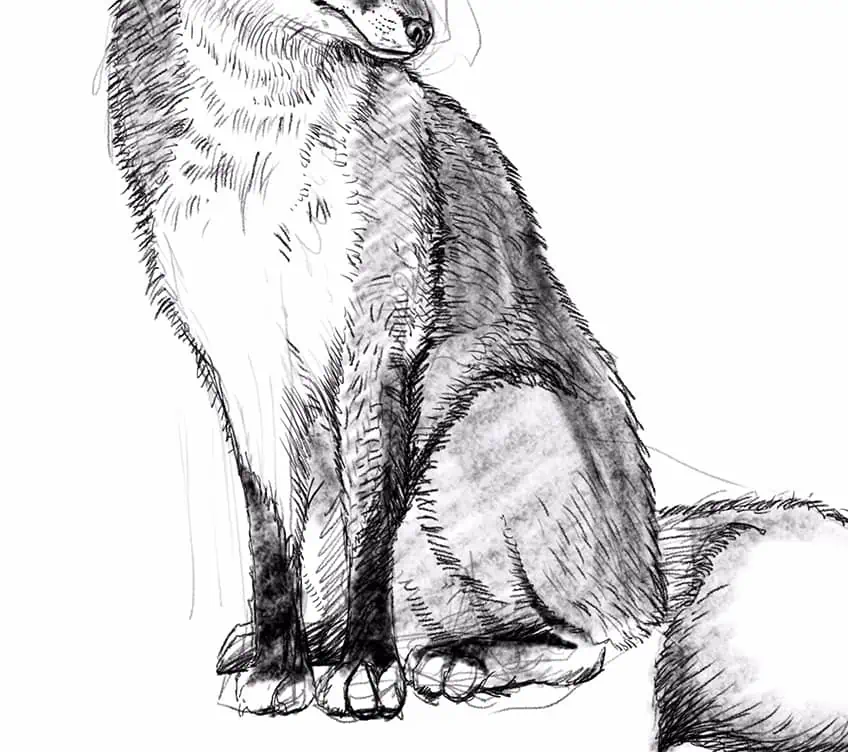
Working with a light pencil, we can strategically add linework to define the pattern of the fur coat. Foxes have various tonal values in the fur surrounding their face, we want to use our line work to define this pattern in the face. We can also start to draw in the nose and whiskers, making sure we shape the snout as accurately as possible.

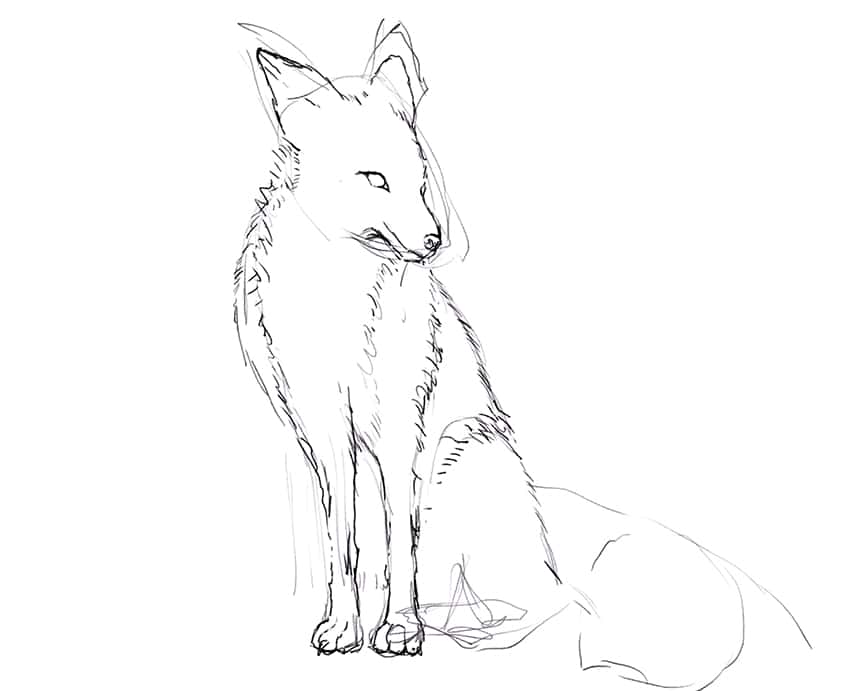
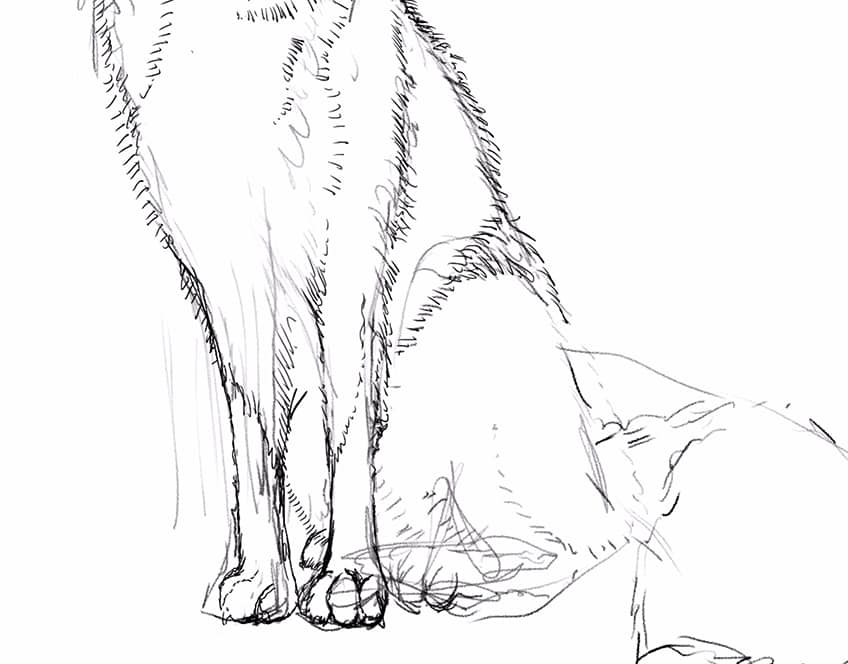
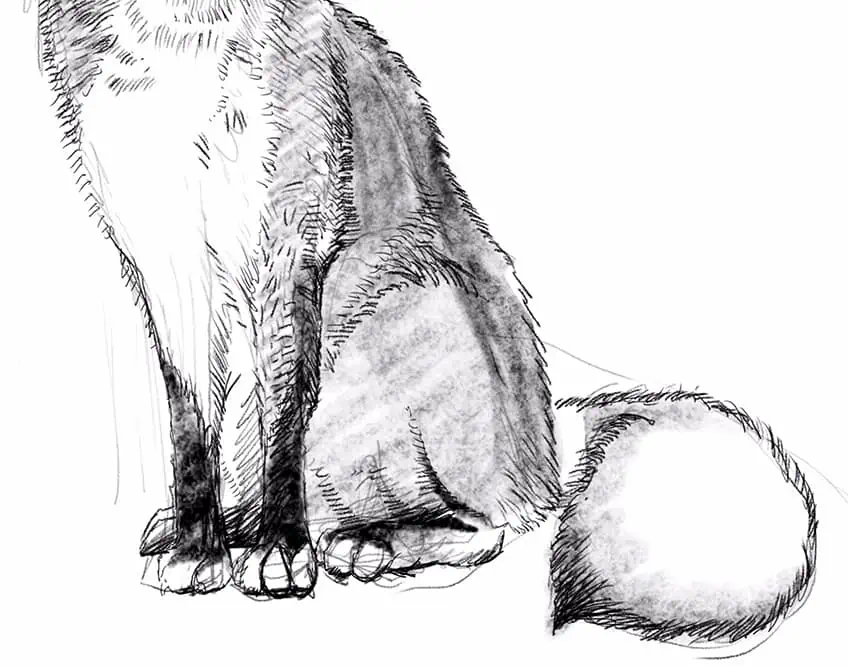
We can take our time with refining different features of the fox; we can also start to work on the legs of the fox. Foxes have narrow legs with four digits, we want to make sure we think about the anatomy as we refine the features.
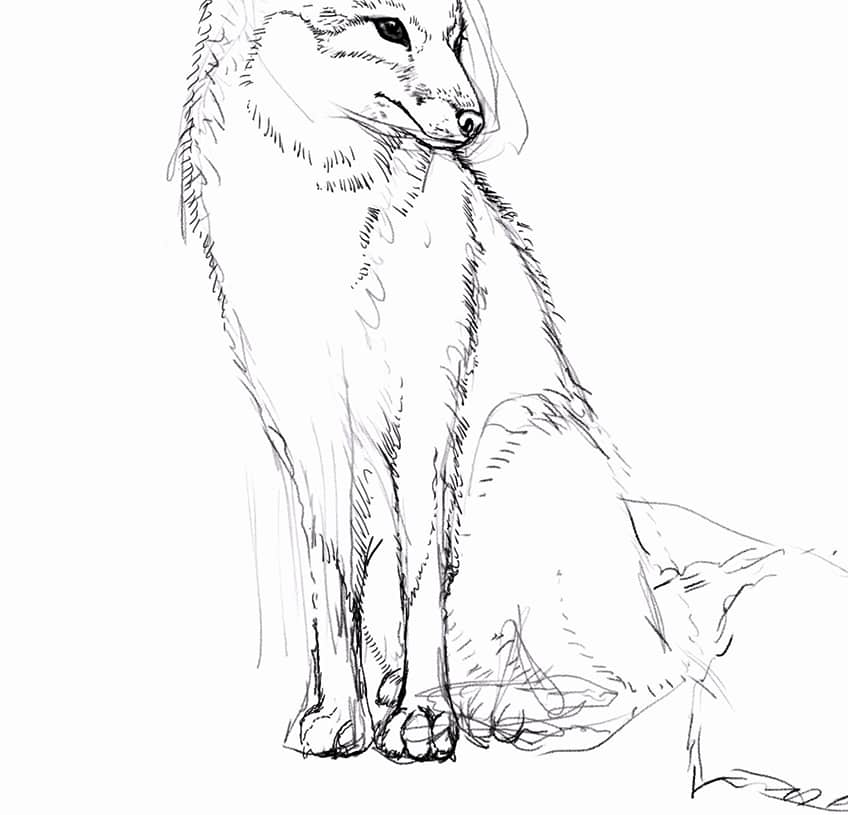
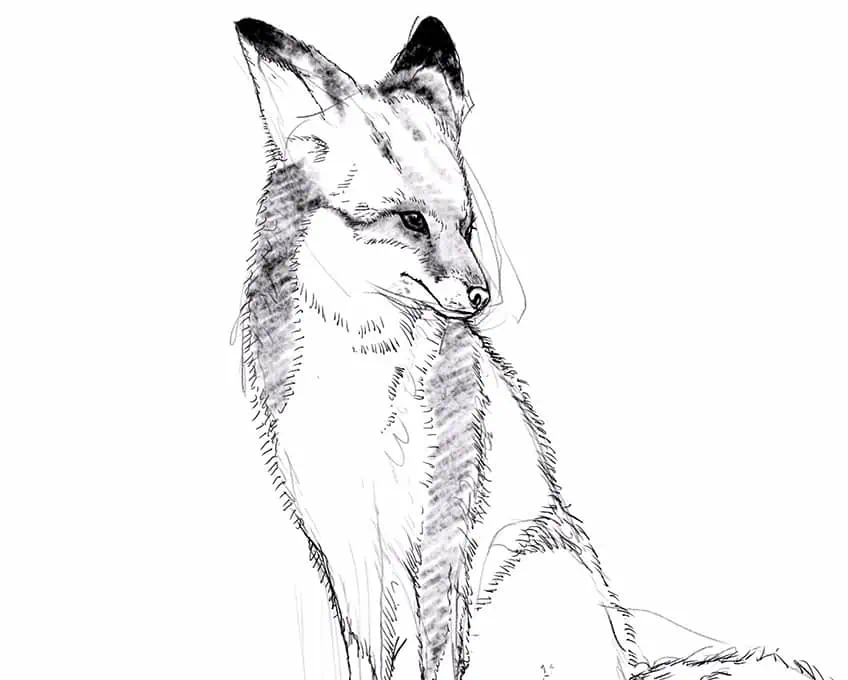
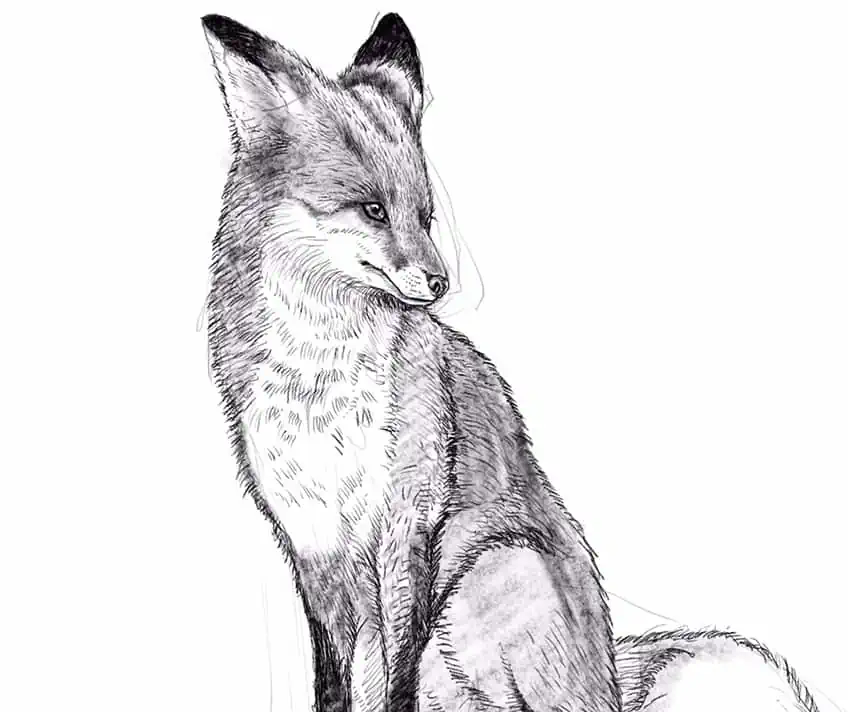
When a fox is in a seated position it rests on its hind legs, this causes the hind paws to shift into a horizontal position. We will find that this will also cause hind legs to arch, allowing for the fox to rest on its tail. The tail is quite large and triangular, wrapping around the hind legs and curling towards the front of the fox.
As the fox rests in a seated position, we want to make sure that we define the bending motion in the leg, giving a more accurate depiction of a seated position. We also want to make sure that as we draw the tail, it comes to a point like a spear-headed leaf shape.

Step 4: Adding in Light Shading
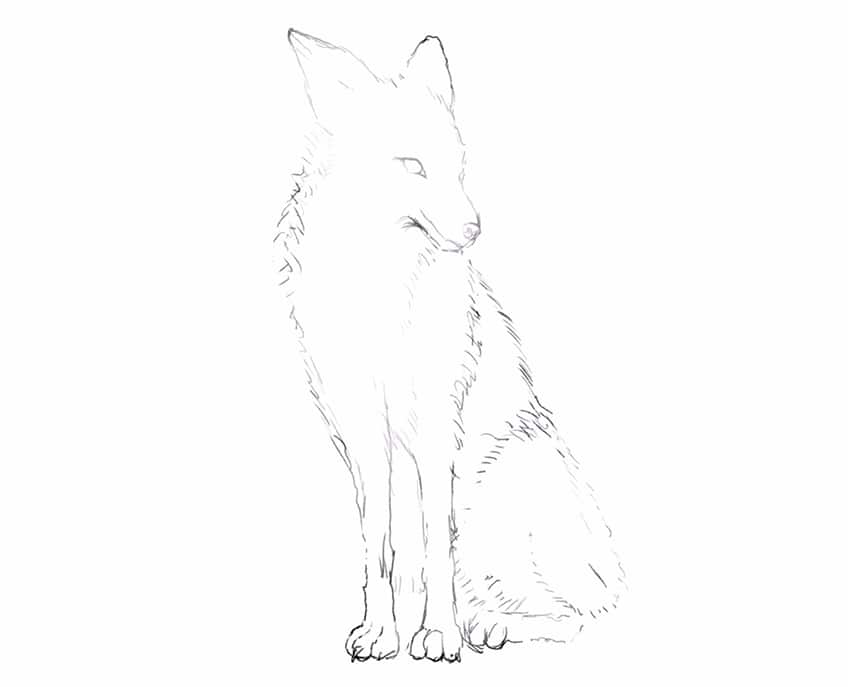
We should have a basic fox drawing at this point, where our fox’s main features are defined. From here, we want to start working on some light shading, this is where we define the tonal variations within the fur.
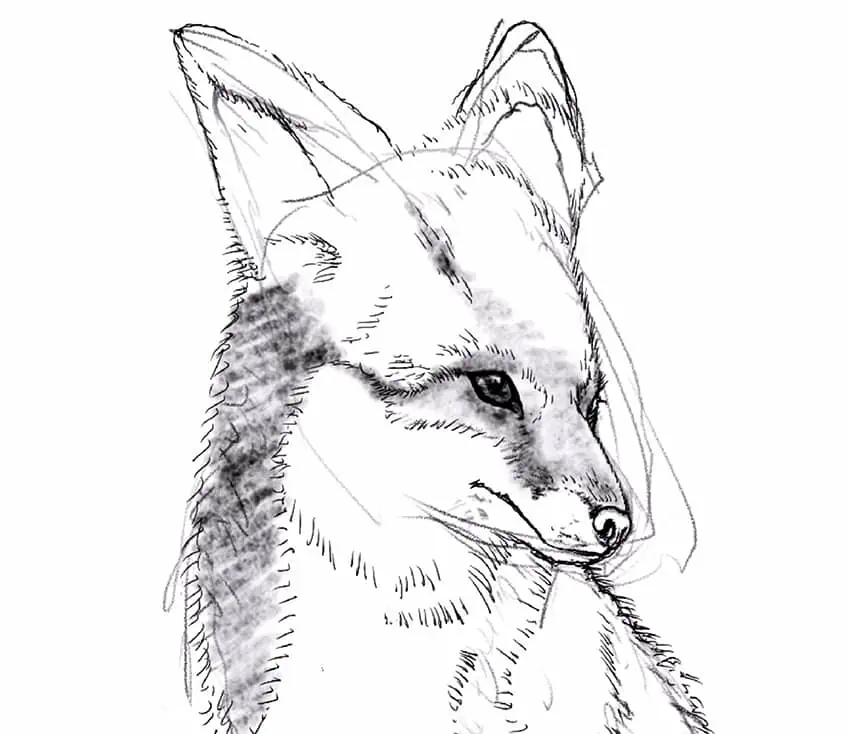
A good suggestion would be to look at a reference image of a fox and use it in tandem with your linework to guide you in your shading process. We want to make sure we leave negative paces near the chest area of the fox, to capture the white fur within the fox drawing.
Take your time working through the entire fox drawing, slowly adding in some light shading into the areas where there will be moments of dark fur. We want to build up layers of shading, at this point, we want to add light shading to the draw, which we will then darken later on.
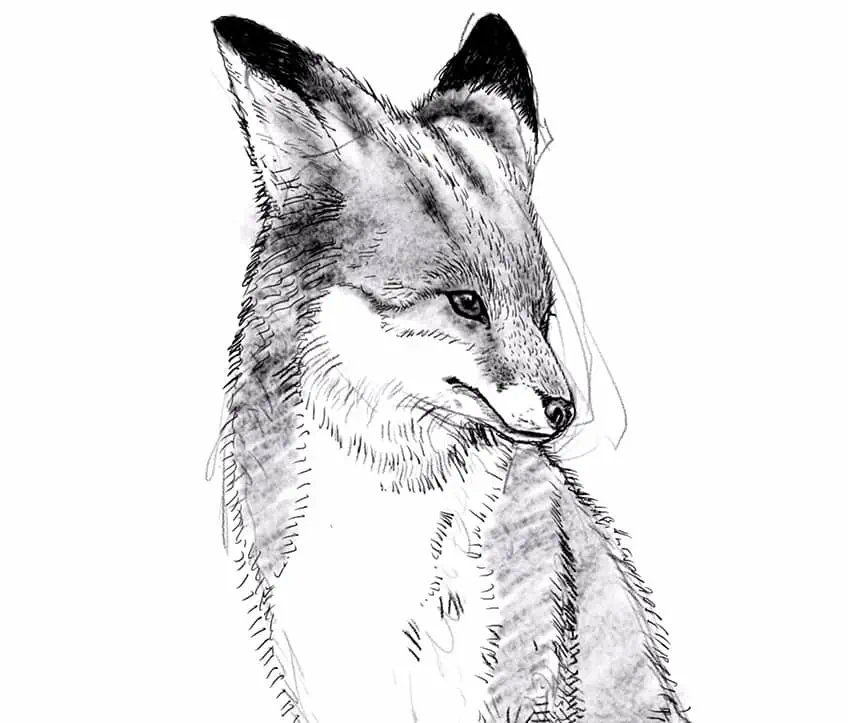
Make sure you spend some time on the head, where the fox has more variation of tonal value within the fur. There are unique features, such as darkened fur around the eyes as well as dark tips on the ears.
We want to be strategic with how we use negative space to establish the white areas in the fur. Foxes have a white underbelly coat that extends from the bottom of the snout to the chest area. Make sure you bear this in mind as you add in shading.
Step 5: Adding in Line Work to Define the Fur
Now that we have a drawing of a fox with different areas shaded in, we can now work with our pencils to establish line work within the fox drawing. The shading is going to function as a base layer of tone which we will then add linework over to provide more texture and fur-like quality.
The intention is to add little strokes of lines throughout the entire body of the fox illustration. We can work on different features at different times because the shading has already established the color variation in the fur. Now we are simply adding texture and a fury aesthetic to the fox drawing.

As we add in-line work to the different features we can also start to darken the legs, this is also a unique feature of the classic red fox. Another thing to consider is that as you add line work you want your lines to flow in the same general direction to maintain uniformity.
We can allow for the linework to be scattered and sporadic, but for the most part, we want to make sure that the lines flow in the same general direction. Try to think of fur as an actual coat that wraps around the body of the fox as you add linework.
This process does take time, but it is important to be patient. As you add in linework you can also think about how fur would flow in certain features. For instance, fur would flow in a vertical direction as it runs along the legs of the fox.
The fur in the chest area of the fox will also be drawn as little vertical strokes of lines. These lines move across the chest into the back area of the fox, where the lines start to flow along the side in a diagonal direction.
We want to make sure that we consider the body positioning and how this changes the flow of the lines in the fur. Again, a good suggestion would be to look at a reference image for assistance. However, as long as you follow the form of different body parts you can intuitively understand how to draw in these lines.
It is important to come back to the head and spend some time on the facial features and how you add in the lines. We want to consider how the fur moves along the forehead, up the ears, and around the eyes. The fur flows in a more dynamic way around the facial features.

We can also make sure that we darken the eyes a little more to establish that distinct fox eye aesthetic within the fox sketch. Again, make sure you take your time working the lines around the features, making sure they flow from the head into the body.
Make sure you keep the line work more subtle in the chest area of the fox drawing, allowing the lines to curve inward towards the snout of the fox. We don’t need to add too many lines in the negative spaces, making sure we don’t take away from the white features in the fur.
That is how to draw a fox in a few simple steps. From here, you can take your time, going through the fox drawing and making sure that you have worked on all areas of the fox drawing.
Tips and Tricks to Remember
- Establish the shape of the fox. Make sure you work out the basic pose of the fox in its fundamental shapes before moving on to more refined details.
- Lightly erase the drawing for guidelines. Lightly erasing your basic fox sketch is going to give you a ghost line reference to use as an outline for refined details.
- Work on the facial features. Take time on the facial features in the fox illustration, making sure you capture the eyes, snout, and ears as best you can.
- Use line work and shading together. Shading will establish tonal variations in the fox drawing, whereas line work will provide a furry texture to the fox sketch.
Drawing a fox is an interesting drawing activity because you are learning new drawing skills throughout the process. Foxes have a unique combination of features, which requires you to utilize line work, shading, and attention to detail. Learning how to draw a fox, easy and simple as it may seem, provides you with a lot of information that you can use for other drawings of furry little creatures drawings.
Frequently Asked Questions
How to Draw Eyes on a Fox?
Fox’s eyes are quite simple to draw as they resemble the eyes of most canines. The eyes are placed high above the snout, and central within the head of the fox drawing. The shape of the eye is a diamond-like shape, with darkened edges that give it a very sleek and narrow appearance. Fox’s eyes have both a pupil and an iris that give it a human-like aesthetic. As you draw a fox, an easy way to establish the eye is by first developing the basic diamond shape. From there, you can slightly round out the eye with darkened edges. As you proceed to add in details such as an iris and pupil, you can then work with negative space to create a highlight effect.
How Do You Draw Fur on a Fox?
Drawing fur is a simple process, but a long and repetitive one. The idea is to think of fur the way it is in real life, which are these single strands of hair fibers. Fur is simply a set of little strokes of lines, and that is exactly how we should approach the drawing process. We want to simply draw in fur as a set of little lines that flow through the body of the fox sketch. However, we want to use some smooth shading in tandem with line work to define dark and light features in various sections of fur. Foxes have a unique coat of fur with a pattern of different colors. In a drawing, we represent these colors through the use of dark and light shading, creating a tonal distinction. The idea is to take your time working in both shading and line work, as you define the patterns of fur within the fox drawing.

Matthew Matthysen is a multidisciplinary artist. He completed his fine art degree, majoring in History of Art and Contemporary Drawing Practice at the University of Witwatersrand, South Africa. Before joining acrylgiessen In 2020, Matthew worked part-time as an art teacher at Reddford Blue Hills High school. Matthew creates drawing and painting tutorials for acrylgiessen and captures them not only photographically and in written form. He also records the creation of his works in his own creative studio as in video format, from which later with a voiceover and a video editor also drawing tutorials for the Youtube channel of acrylgiessen are created.
Learn more about Matthew Matthysen and about acrylgiessen.