Watercolor Poppies – How to Paint Poppies in Watercolor Paint
This post may contain affiliate links. We may earn a small commission from purchases made through them, at no additional cost to you.
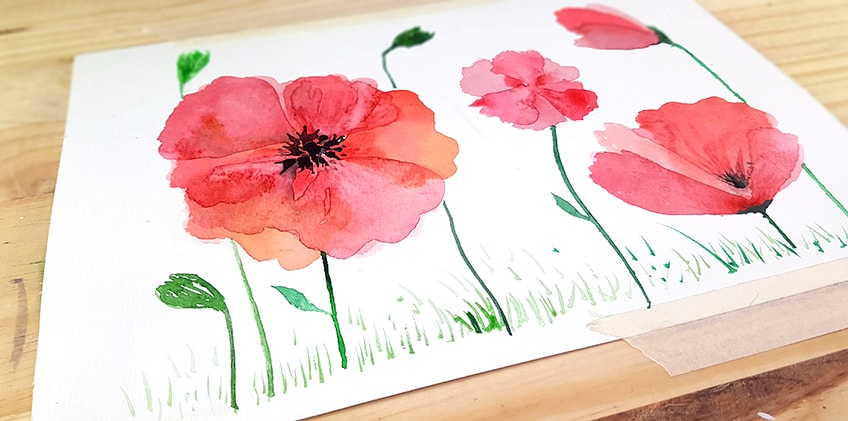
Creating your own watercolor poppies is an excellent watercolor painting activity. It is not only easy to do, but it also provides you with some essential watercolor techniques and methods that you can apply to other works. A watercolor poppy appears to be a straightforward flower to create. As we discover how to paint poppies in watercolor, we’ll see that the poppy flower’s composition is made up of very simple forms. Watercolor Poppies are a wonderful element that may be employed in a number of landscape contexts. So have fun while learning how to paint poppies in watercolor with this lesson.
Our Guide on How to Paint Poppies in Watercolor
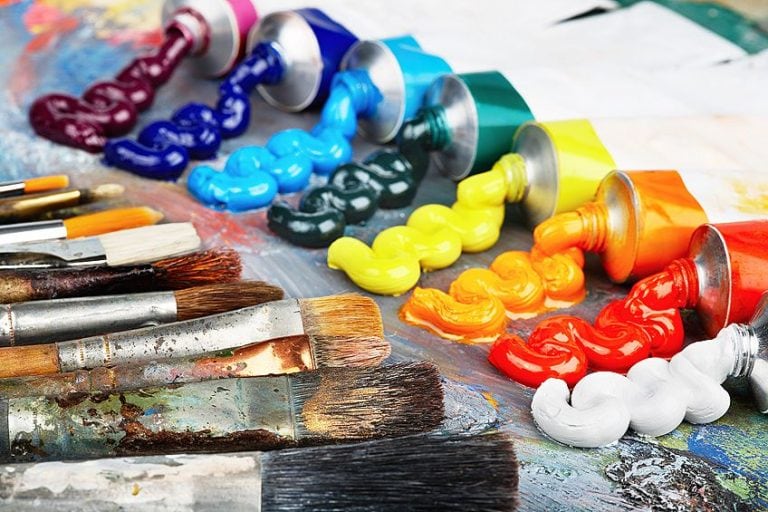
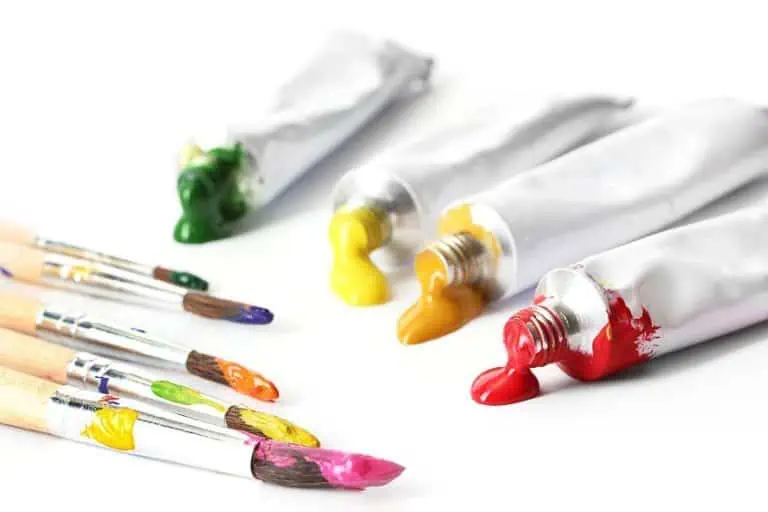
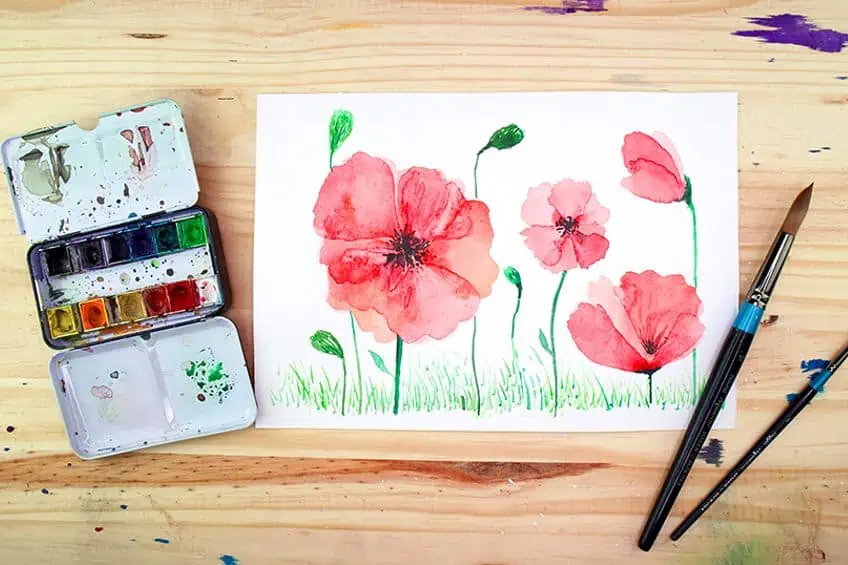
This article breaks down the basic method of creating watercolor poppies with brighter and deeper washes of paint, making it very easy to grasp how to paint poppies in watercolor. We’ll also go through how to create watercolor poppies from various perspectives. A watercolor poppy may come in a variety of colors and patterns, allowing us to be creative with our color choices. Water poppies with an easy-to-create stem and pistil are included in this watercolor painting. Let us look at what we’ll need to ensure we have the correct materials:

Creating Watercolor Poppies Step by Step
As we proceed through the steps of this instructional, we will discover that the technique is pretty straightforward. Nevertheless, as we wait for one bloom to settle, we will start painting another to conserve time. Painting watercolor poppies is a simple and enjoyable pastime, so don’t put a lot of pressure on yourself to achieve perfection. It takes patience and effort to become a good painter. As we work through this lesson, we’ll add detail to the flowers by creating stems and vegetation around them.
With that being said, let us go over the various methods for painting watercolor poppies.
How to Create Watercolor Poppy Petals From Various Angles
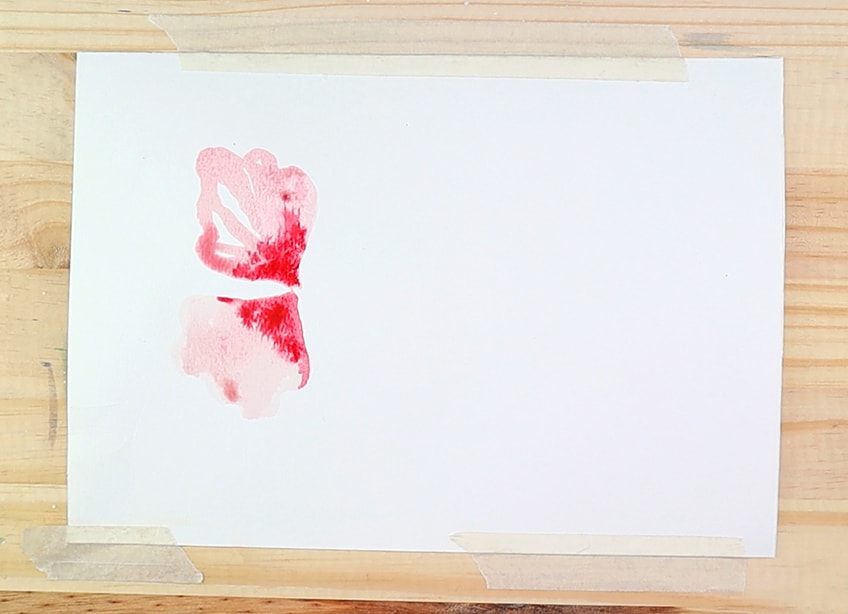
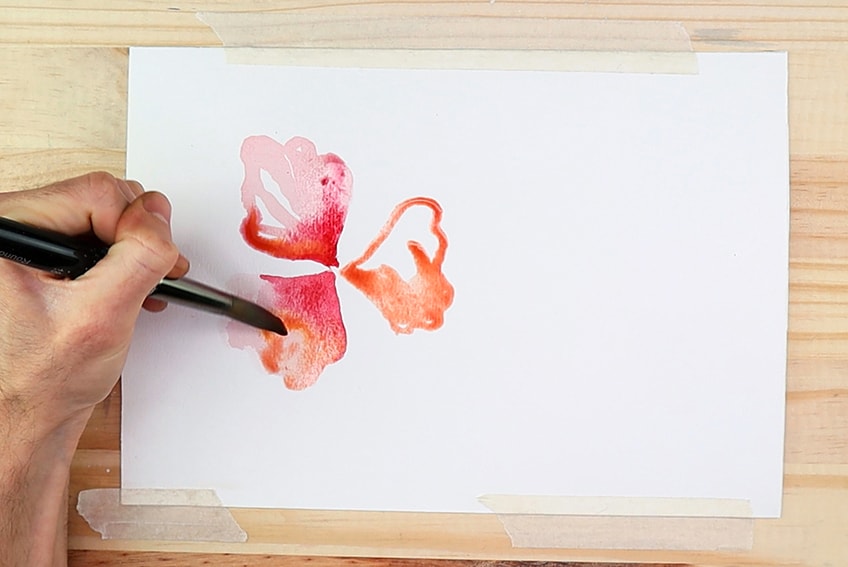
Let us start by designing a flower from the side. The poppy blossom may be colored in a variety of hues, but the poppy’s natural color palette is usually this vibrant red. We’ll be a bit more imaginative in this lesson. Let us start by painting a faint red wash over which we’ll create a spear-head triangle form. The segments of the poppy flower are triangular in form. The petal, on the other hand, has delicate bends along its ridge. This indicates that it is not straight and curls externally. We’d want to begin by painting the first group of petals. We accomplish this by creating three curved-triangular-shaped lobes, with each of the petals’ points meeting in the middle. The pistil will be located here.
Next, we will fill our paintbrushes with red and daub the bottom portions of the flower while the flowers are still wet. This will allow red paint to leak into the other parts of the flower. Because the multiple petal colors will dry simultaneously, this will give the petal a bit more depth by producing a smooth gradient. While the petals are still wet, grab some orange pigment and dab it down one side of the flower once again. Reduce the color with a small amount of water to make it less vibrant. We give the damp petal a bit more brightness in its design by adding color to it gradually.
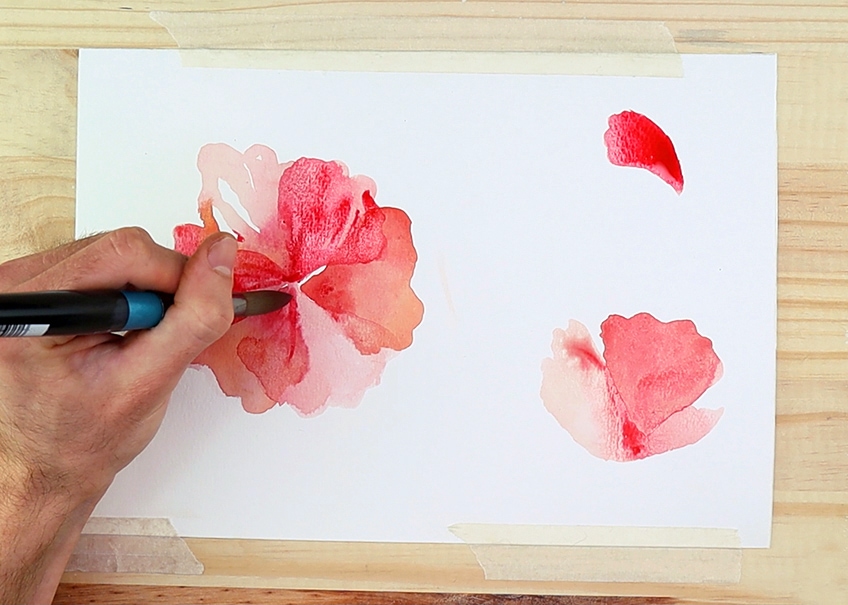
Allow the first coat to dry fully after you’ve filled the petals with a subtle wash of crimson and hints of orange. While it is curing, let us go on to a fresh flower and start painting the petals from a different perspective. Likewise, we’ll use a small wash of red paint to create a triangle form. Because flowers are fairly abstract in their shape, people’s opinions on the poppy might differ. This implies that there are many different ways to render a poppy in a painting. We wish to represent the poppy from the side perspective of a poppy pointing upward in this picture.
This is accomplished by re-creating the triangle form, which will be overlapping with additional layers after it has dried fully.
Creating More Petals and Another Layer
While we are painting petals, we will want to add fresh ones to our watercolor poppy painting while we wait for the previous ones to dry. We can now continue the same procedure of adding curved triangle forms of washed-out crimson to the initial poppy. This will be done in the spaces between the first three petals. Allow the forms of the dry petals to overlay with the contours of the wet petals. We can do something similar with the second poppy we created, but the overlapping of these new triangular forms must be clustered together rather than spread out circularly. This is a depiction of poppy from the side. While the other poppies are drying, we may start painting another poppy in our artwork.
Let us paint a second poppy from the side. Watercolor poppies have the advantage of allowing you to experiment with how you draw them. The basic premise to remember is that they have a triangle shape with curving ridges that are all the same color. We may paint a few petals, let them dry, and then go back and create additional petals over the old ones.
Creating Additional Petals and Features to the Dried Poppies
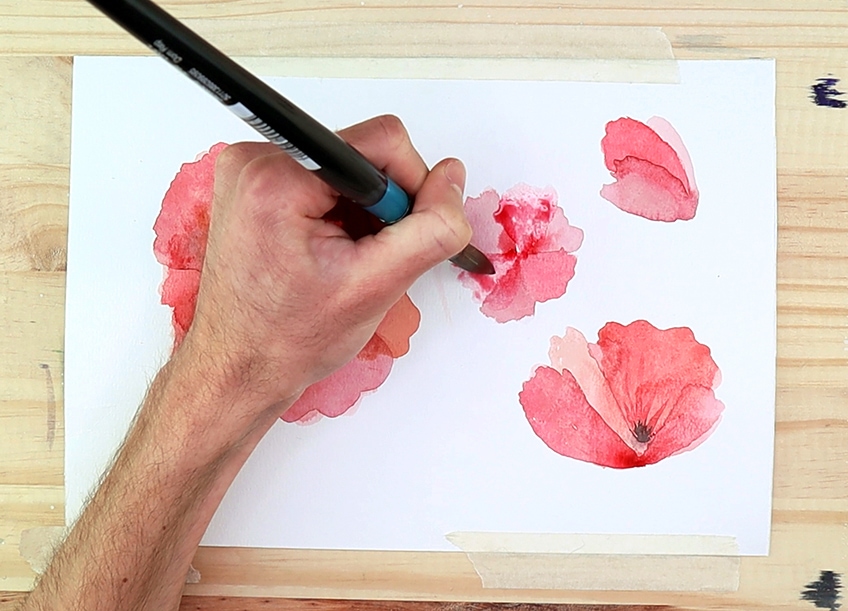
The pistil, or core of the flower, is black, and the stem is a slender light green branch. These are the two crucial features to remember. These two elements establish the poppy blossom’s identity as a poppy flower. We can start putting black dots in the middle of our dried poppy flowers now. Making a black circle mark in the middle of the watercolor poppy presented in a direct front perspective does this. We may then add some little black strokes around the black circular center to provide some texture.

Now with this second poppy, we want to try to figure out how the flower is formed. We can observe that the petals are represented from the side, which only allows us to see the pistil within the flower. This implies we should imagine looking between the petals to see the black pistol at the core of the flower.
Creating New Poppy Flowers
We have now reached the stage where you should grasp the fundamentals of painting the poppy flower. This means you may now include as many poppies as you like in your environment. Consider alternative angles and distances from which the poppy flower will appear in your painting. You may also continue to add additional petals to already painted poppy flowers. Just ensure the previously painted petals are totally dried. You really do not want to add too many petals; restrict it to a maximum of roughly six petals.
Keep in mind the position from which the bloom will be seen. This implies that in certain circumstances, we only see a sliver of the flower’s pistil or none at all. This is especially true of the poppy when seen from the side when the petals might cover and hang, hiding the pistil. Always let the initial layer of petals dry fully before painting your poppy flowers. After that, you may add more petals to the flower, enabling them to overlap.
This overlap characteristic is specific to the watercolor medium, giving the flower a more painterly appearance rather than a sketch.
Creating the Watercolor Poppy Stems
The poppy flower’s stalk is quite basic. First, we’ll produce light green paint mixed with a touch of dark green. The stem should be a bright green tint, similar to the more natural color quality of the watercolor poppy stem. Then we paint small lines connecting the bottoms of each blossom. Consider the varied perspectives of your flowers once again. We want to link the stem to the bottom of the blossom in a manner that makes sense if your watercolor poppies are dangling over and we can see it from the side perspective. Tinkering with how you create your watercolor poppy petals is also a fantastic exercise for finding out about form and shape.

Creating Blooms and Greenery
You may now add as many more watercolor poppies to your environment as you like now that you know how to paint watercolor poppies in watercolor completely. However, after you’re happy with the number of flowers in your watercolor poppy picture, we’ll add some foliage and blossoming poppies to contextualize the setting. We accomplish this by creating thin green branches that run throughout our artwork’s backdrop. We’ll next create an upside-down droplet shape at the end of each stem as we paint the stems. Consider it a flower in the midst of blossoming; it is a simple element to paint that sets the scene for the artwork to be in a garden setting.
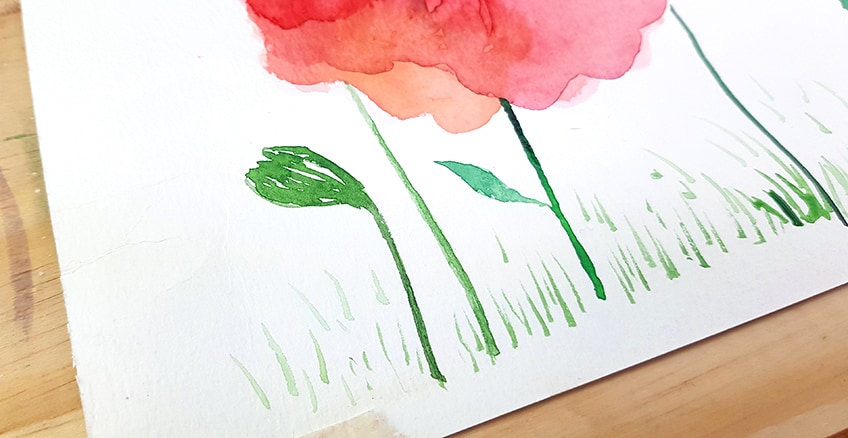
Finally, we may add additional green strokes to our picture to make it look like it is made of grass. This is a good aspect to add to the picture since it allows the flowers to live in a context rather than in nothingness. We are free to use as many of these flowering poppies as we choose. We could do the same thing with the grass; it is just a matter of taste.
Important Things to Remember
The very first thing to remember while drawing the petals is to let the initial layer dry fully before painting additional petals on top of it. We are looking for an overlapping effect that’s distinct from watercolor. This is a critical feature of the watercolor poppy flower since it gives the poppy its distinct watercolor feel. The pistil is always black, which is the second important feature. Not only is it black, but it also has two distinguishing characteristics: a single black spot in the flower’s core and a few dots, spots, or dashes painted around it. This will vary significantly based on the angle from which the bloom is painted.
Last but not least, there is the stem of the watercolor poppy. The flower’s stem is usually a slender light green stick-like feature that connects to the flower’s bottom. This means we’ll need to add some greenish dashes around the bottom of the blossom when we draw the stem to show that it is related to the blossom. On the stem, we may also put a few little spearhead leaves, but not too many.
That concludes the discussion on our tutorial for painting watercolor poppies. You may improve your watercolor poppy abilities and utilize them in a variety of landscape paintings or just as a single topic by remembering a few easy essential elements.
Handy Tips and Tricks
It is easy to learn how to paint watercolor poppies, but it takes time. This is because we’ll be painting over dry washes with new paint washes. The procedure needs some patience. You may also speed things up by drying your work with a hairdryer.
- A nice tip is to use a ceramic dish from your kitchen as a palette for combining colors.
- Ensure that you have got two jars of water for washing your paintbrush while you discover how to paint watercolor poppies.
- Do not fret if you do not get it right the first time; painting takes time and practice.

- This lesson does go through the fundamental color pallet for poppy flowers, so do not stress about choosing just one color.
- Just remember to have fun and take pauses during the process. Art is about learning, growing, and enjoying the process.
- If you want to dry your paint markings faster between applications, you may use a hairdryer.
A watercolor poppy may be a stunning addition to other paintings or stand alone as a subject in its own right. In any case, this lesson lays down the fundamentals of how to paint watercolor poppies, helping you to acquire confidence in your ability to do so.
Frequently Asked Questions
How Does One Create Loose Watercolor Poppies?
There are several ways to paint watercolor poppies; however, in this lesson, we will go over the fundamentals of how to paint the poppy’s overall shape as well as how to paint the poppies in a consistent color scheme. Because poppies are such basic flowers, you may get creative with their petal shapes and color palette. The black pistol at the center of the flower, as well as the slender green stalk, are the most distinguishing features of the poppy. These characteristics frequently identify the flower as a poppy. This implies that the process of lightly painting the petals and experimenting with different colors may be freely represented. You may be as fun as you like as long as the two distinguishing characteristics that make a poppy a poppy are there.
How Does One Create Watercolor Poppy Petals?
The poppy petals are rather triangular in shape. They are, nevertheless, quite subtle in the way they bend around their edges, making them soft-edged rather than harsh. The application of various petals piled over one another is how to paint watercolor poppy petals. We achieve this by painting three triangle forms in the center, with the thin points joined. After that, we’ll let them dry fully before adding a new layer of petals that overlaps the previous. This is how the poppy petal is painted in general. We study the triangular shape and how it may either stay strong or fall down if we painted the petals from a side perspective. Despite the petals’ bent triangle structure, gravity may produce numerous deviations in the petals’ bodies, allowing them to bend in a variety of directions. This is an idea you’ll want to keep in mind as you paint petals from different perspectives.
How Does One Create a Field of Poppies in Watercolor?
To paint an entire field of poppies, you must first learn how to paint a single poppy blossom. Which you can then repeat numerous times inside a landscape to make a field of them. This lesson shows you how to paint watercolor poppies in several different methods. Painting watercolor poppies from several perspectives, such as front, side, and other, can assist to highlight the range of ways we have them present in a landscape. As we paint larger ones to depict the foreground and smaller ones to depict the background, we’ll need to have a sense of scale. The contextual relevance of the foliage around the flowers is another component of creating a watercolor poppy field. This article explains how to add foliage as well as additional unsprouted poppies to the scene to simulate the blossoming process of poppies. To put it simply, learn how to paint a poppy flower and then experiment with angles, forms, and contextualizing elements.

Matthew Matthysen is a multidisciplinary artist. He completed his fine art degree, majoring in History of Art and Contemporary Drawing Practice at the University of Witwatersrand, South Africa. Before joining acrylgiessen In 2020, Matthew worked part-time as an art teacher at Reddford Blue Hills High school. Matthew creates drawing and painting tutorials for acrylgiessen and captures them not only photographically and in written form. He also records the creation of his works in his own creative studio as in video format, from which later with a voiceover and a video editor also drawing tutorials for the Youtube channel of acrylgiessen are created.
Learn more about Matthew Matthysen and about acrylgiessen.