DIY Resin Coffee Table – Make a Resin and Wood Coffee Table
This post may contain affiliate links. We may earn a small commission from purchases made through them, at no additional cost to you.
Resin and wood coffee tables have become all the rage recently. Depending on the wood and resin you choose to use, you can create a unique and exciting table for your home. If you have wanted to hop on this trend, but you do not know where to start, then you have come to the right place. In this article, we take you through the preparation and all of the necessary steps that you will need to take to make your very own DIY resin coffee table. You will find out all you need to know about how to make a resin coffee table!
Some Skills You Will Need
With such a large project, there are a few skills that we strongly recommend you have before you take it on. We recommend that you already have some experience with epoxy resin before attempting this project. Epoxy resin is expensive to purchase and even beautiful wood, especially burl wood has its price. Getting some experience with casting resin will help ensure that your first table is a success. Especially the processing of larger amounts of epoxy resin is again more demanding than smaller projects like casting molds. It is also useful to have some woodworking skills – you should have used a sander and a saw before. Making an epoxy coffee table is not a beginner’s project.
Gathering the Right Supplies
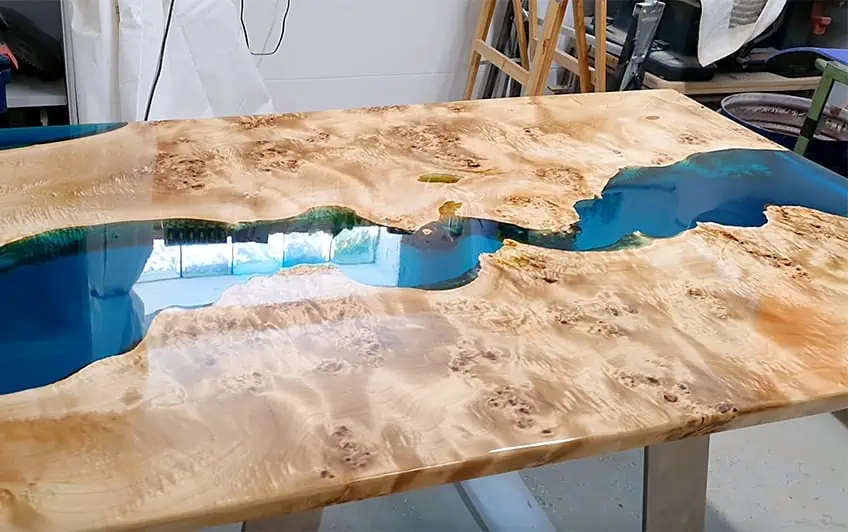
For your resin and wood coffee table, you will need your epoxy resin and some beautiful wood. In our tutorial, we use some beautiful poplar burl planks because this wood has a lovely and distinctive grain. You can use any type of wood you like for your own live edge resin coffee table. One thing you will need to make sure of when choosing your wood is that it should be dried with moisture between 7 and 10%. If you start to work with wood that is not fully dry, it will begin to shrink, causing you problems in the long run. At this point, you also need to decide how you want your final table to look. Do you want a natural edge in the style of a river table, or would you prefer straight sawn edges?
It’s also a good idea to decide on the color scheme now – you want your dyed epoxy to match the color of the wood you’ve chosen. With lighter woods, you tend to be more flexible. With dark walnut combined with red epoxy, things get a little tricky. Poplar wood is a relatively light wood, so the chosen blue-green matches very well.
Safety instructions
Special precautions should be taken when working with liquid epoxy. Always wear nitrile gloves, safety glasses, and a high-quality respirator with filters. Both contact with the skin and inhalation of the vapors should be avoided at all costs. Inhalation of cured epoxy resin sanding dust should also be avoided at all costs.
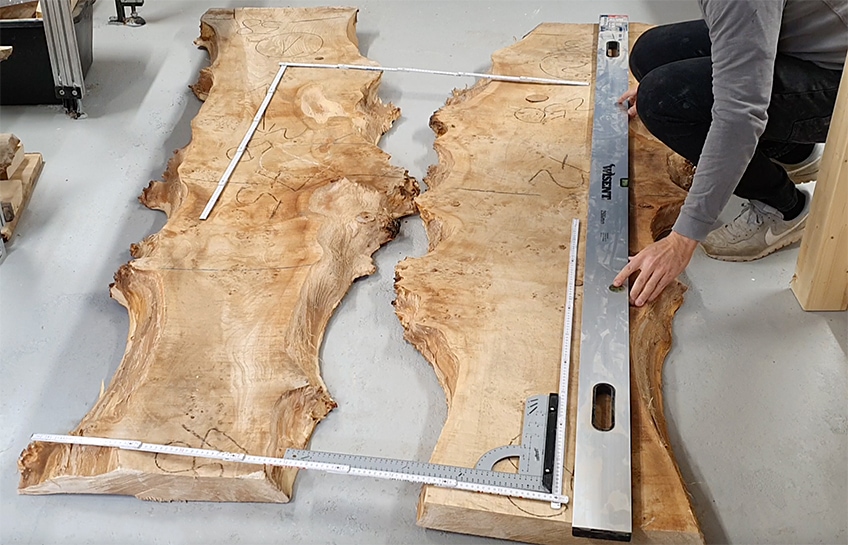
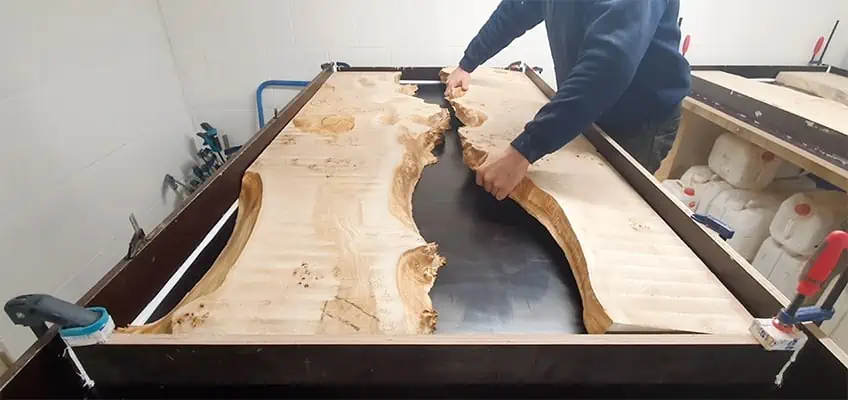
Step 1: Measure and Lay Out Your Wooden Planks
The first step of your DIY resin coffee table involves laying out your wooden planks and measuring them up. Lay the wooden planks next to each other in different combinations, until you find the perfect fit. This requires some imagination, but this is where you decide how your table is going to look, so it is an important step. Either use a template or a folding rule to find the right cut. The planks do not necessarily have to lie parallel to each other, but the epoxy resin can also flow more diagonally. When you are happy with the shape, use a straightedge to draw at right angles very precisely on the wood planks where you need to saw along. Plan for this some reserve – 2 cm in width and 4 cm in length are a good guideline measure.
Step 2: Cutting the planks
In this step, you are going to use a circular saw to cut the wood to the right size. Follow the marks that you made in the last step, and cut the ends of the planks so that they are level and straight. This step is very important, as it will determine the final shape and finish of your resin and wood coffee table. Take your time and be as precise as possible.
Remember to wear the correct safety equipment when working with the circular saw.

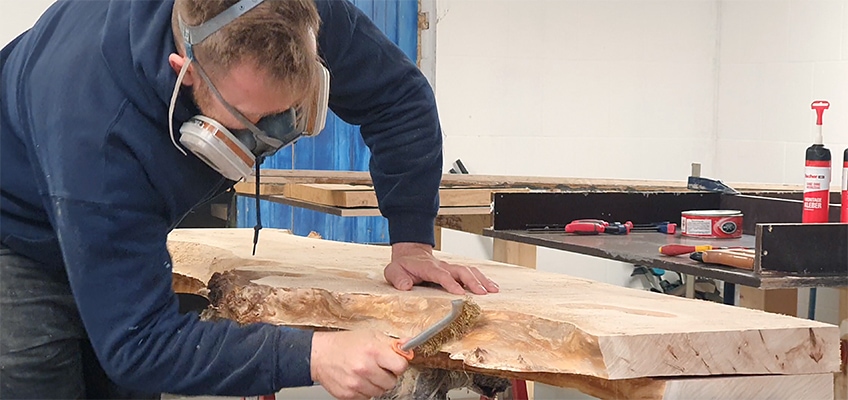
Step 3: Cleaning the Wooden Planks
In this step, you are going to smooth and level the wooden planks. Raw wooden planks are usually warped and have stress cracks from the drying process. You need to make sure that the planks are the same thickness throughout so that they will lie flat in the mold. You can sand down the wood after it has been planed to make sure everything is smooth.

When it comes to the natural edge of the wood planks, you can use a wire brush to remove any remaining bark and dirt. This step is very important because this is where the epoxy will connect with the wood, and any dust or bark will interfere with the bond between resin and wood.
This step will also ensure that no loose pieces of wood or dust will fall into the resin while it is still wet.
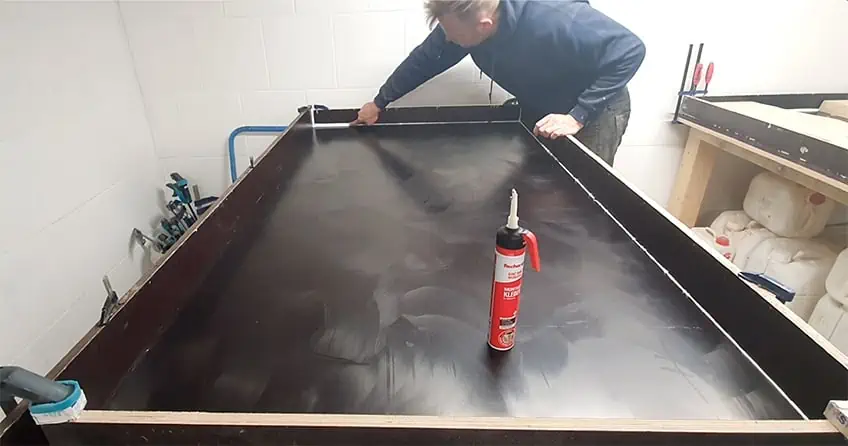
Step 4: Building Your Mold
In order to get a perfect final shape for your DIY resin coffee table, you need to build a mold that will hold the wood and resin in place. The mold can be made from a base plate with side ledges. You can use silk-screen plates to construct your mold. This material has a smooth waterproof coating which makes it perfect for this purpose. Begin by rubbing each piece of your mold with a release wax, and then screw them together. To assemble your mold, you can use Fischer assembly adhesive, as this will prevent the resin from leaking out later.
Once your mold is set and ready, you can place your wooden planks within the mold. Make sure that they are perfectly aligned within the mold. You can then use beams and glue clamps to fix them in place and ensure that they do not float or shift when you pour in the resin.
Step 5: Preparing Your Resin
Your mold is ready, your wood is clean and smooth, it is now time to mix and prepare your resin. The exact amount of resin that you will need for your table will depend on its size. It can be tricky to calculate the required amount of epoxy resin and mix. We have an easy resin calculator that can help you determine how much you will need for your live edge resin coffee table:
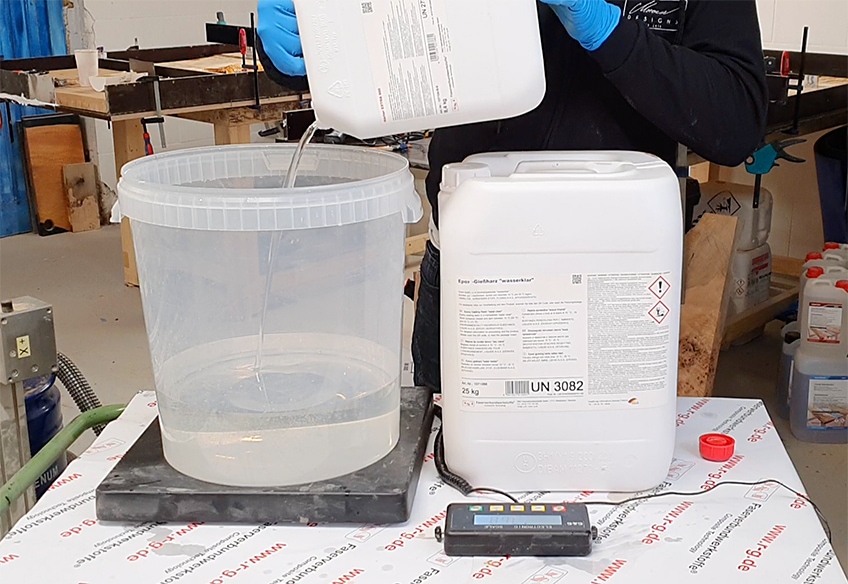
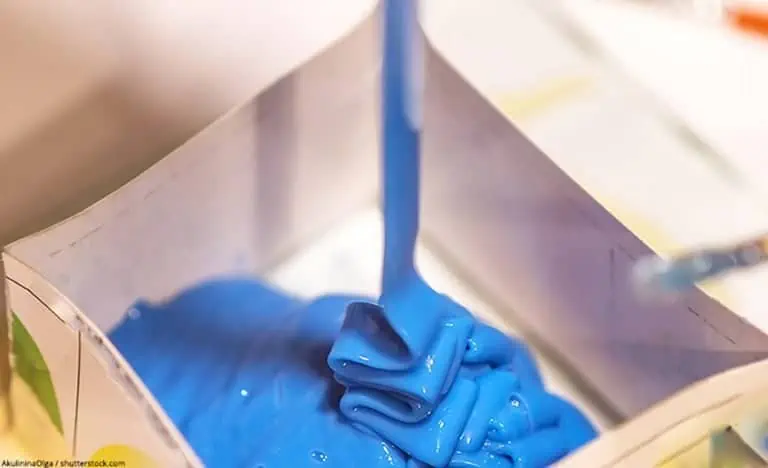
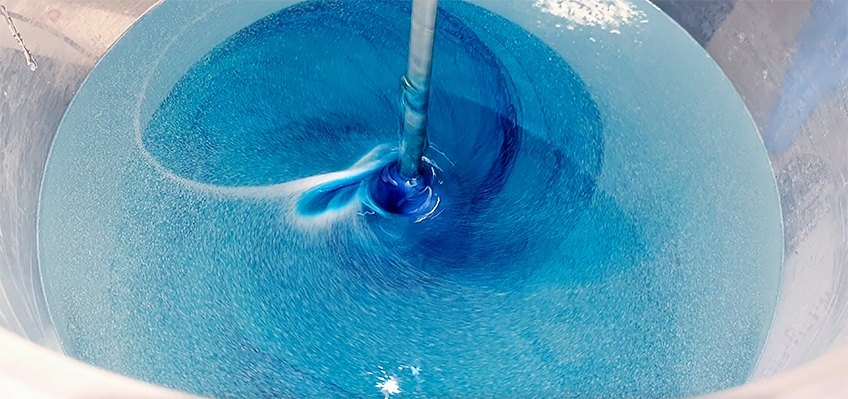
When you know how much you need, weigh your two components in the correct proportions. Mix them together thoroughly, decant them into another pot, and then stir them again. To color the resin, there are many different options available. Mix your chosen dye into the resin carefully. When you mix resin, small bubbles are created.
Once you have poured the resin into the mold, these bubbles will typically float up on their own, and then you can pop them after 30 minutes.
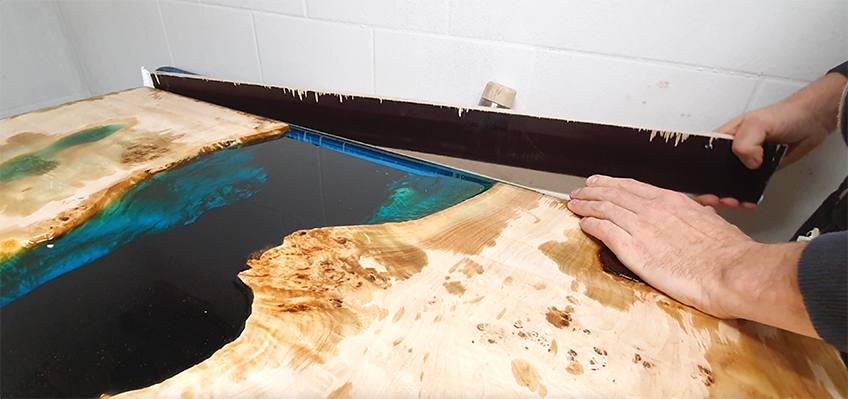
Step 6: Casting Your Resin and Wood Coffee Table
It has come time to add your resin to the mold with your wood. Carefully pour the resin into the mold, taking care not to aerate it too much, as this will increase the chance of bubbles in your resin. Wait 30 minutes after you have poured the resin in to let the bubbles rise to the surface. If you are struggling to get rid of the bubbles, then you can use a hairdryer on the lowest setting, and gently move it over the resin to encourage the bubbles to rise to the surface.
It may take up to 7 days for your resin to cure fully, always follow the instructions of the manufacturer.

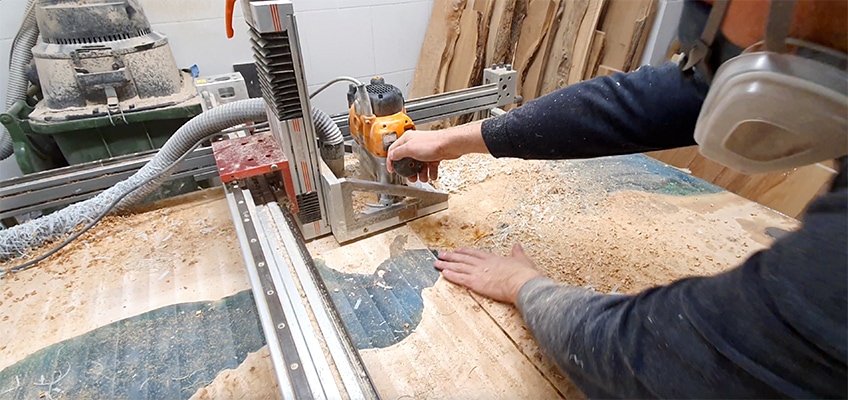
Step 7: Shaping, Milling, and Cutting Your Table
Once the rough board is fully cured, you can release it from the mold. Loosen all of the screws, and then use a rubber mallet to loosen the edges of the mold from the table. You will now be able to mill everything so that it is flat and smooth.
You can now saw and plane your live edge resin coffee table to the final size. Use a hand-held circular saw to shape your table. As always, wear a respirator and use the proper protection when working with cured epoxy, particularly when you are sawing or sanding it. If there are any branch holes or cracks in the wood, you can fill these before you move on to the next sanding step.
Finally, you can use a router to round off the edges of the table.
Step 8: Sand and Polish Your DIY Resin Coffee Table
To sand your resin and wood coffee table, you can use an orbital sander and a range of different sandpaper grits. Begin using grits 80, 100, 120, 150, 180, and 240. Between each sand, ensure that you have removed all traces of sand dust before moving on to use finer sandpaper.

Once you have sanded the top, you can move onto the sides. Use the same sander and the same progression of sandpaper grits to create a smooth and seamless edge. You want to make sure that there is no lip between the wood and the epoxy.

After you have sanded your resin and wood coffee table, you can then seal it with a thin layer of resin. Next, use grit sizes 360, 600, 1000, 2000, and 3000. This will help prepare your table for polishing. When grinding and polishing it is important to work thoroughly, each sanding to polishing is done at least five times, and always remove the sanding dust. 
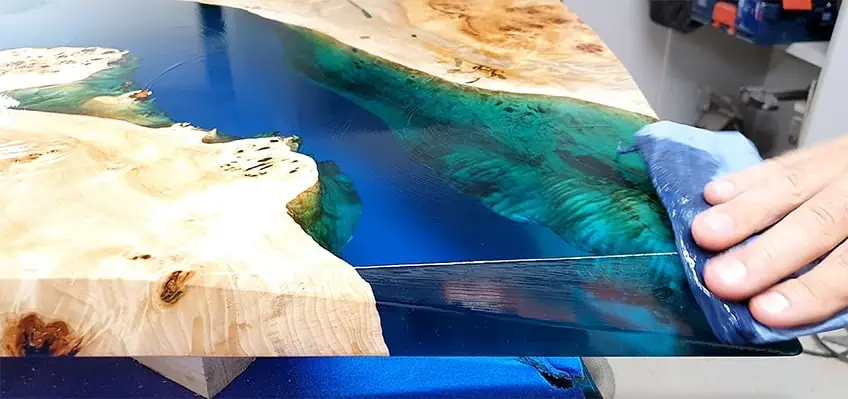
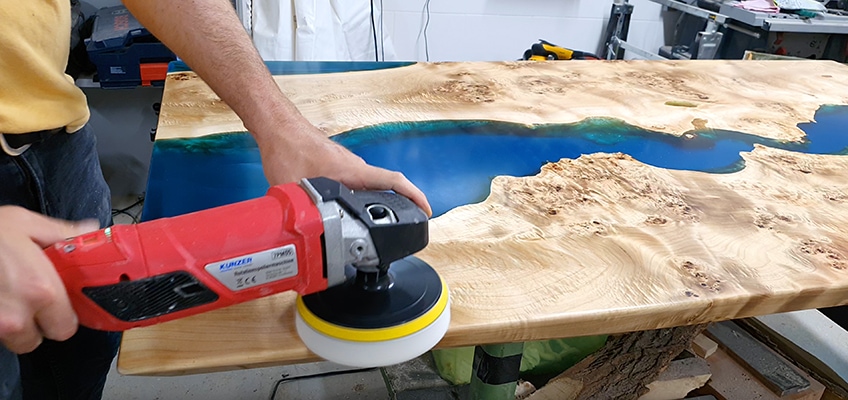
Step 9: Polishing the Tabletop
In this step, you are going to add a final luster to your table by polishing it. When polishing, be careful not to set the rotation speed too high, otherwise, the resin will get warm and unsightly spots may appear. More tips can be found in our article Polishing epoxy resin.
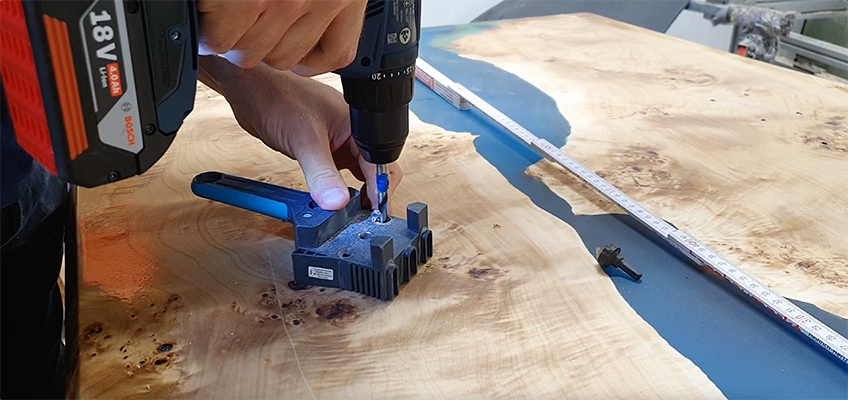
Step 10: Assembling the table legs
To finish your DIY resin coffee table, all you need to do is add the legs. We recommend that you use screw-in threaded sockets and screws to secure the legs to the tabletop. We have a helpful article on this topic: Drilling epoxy. When it comes to the types of legs and the way that you attach them, there are no limits to your imagination. There are a variety of beautiful table legs and systems you can choose from.
After all of this hard work, you now have time for a well-deserved coffee break. Your DIY resin coffee table is finished and you can stand back and admire all of your hard work.

Congratulations on taking on this large and impressive project. We wish you the best of luck with your own DIY table, and we really hope that you are happy with the results!
Frequently Asked Questions
Must You be a Professional to Know How to Make a Resin Coffee Table?
You definitely do not need to be a professional to take on a project like this, but ideally, you should have experience with woodworking and epoxy resin. The skills are quite demanding, and you need to be aware of all the necessary precautions when working with resin.
What Color Should I Make my DIY Resin Coffee Table?
The color that you choose for your resin is entirely up to you, but it will be informed by the color of the wood that you have chosen. Lighter woods tend to work well with darker colors, while darker resin will be overwhelming alongside redder wood species.

In 2005, Charlene completed her wellness degrees in therapeutic aromatherapy and reflexology at the International School of Reflexology and Meridian Therapy. She worked for a company offering corporate wellness programs for several years before opening her own therapy practice. In 2015, she was asked by a digital marketer friend to join her company as a content creator, and it was here that she discovered her enthusiasm for writing. Since entering the world of content creation, she has gained a lot of experience over the years writing about various topics such as beauty, health, wellness, travel, crafting, and much more. Due to various circumstances, she had to give up her therapy practice and now works as a freelance writer. Since she is a very creative person and as a balance to writing likes to be active in various areas of art and crafts, the activity at acrylgiessen.com is perfect for her to contribute their knowledge and experience in various creative topics.
Learn more about Charlene Lewis and about us.